 Magezon Blog Help Merchants Build Comprehensive eCommerce Websites


| * For more useful tutorials on Magento Page Builder Open Source, follow our series. |
Google Map is among the most important UI elements of a website. The same goes for any Magento website, that’s why there is the Magento Page Builder Map content type.
A map embed API gives customers more detailed information about your business (phone number, reviews, star ratings, etc.), helps them determine your physical location to plan their trip, and increases your brand awareness and credibility. As a result, it increases the conversion rate of your site and the revenue of your business.
If you now understand the importance of the Map in Magento Page Builder, then the next step is to create it. This article will guide you through all the essential steps and if you are in stage 2, this is made for you.
Table of contents
- Where is Map Content Type Located in Magento 2 Page Builder?
- Introduce Magento Page Builder Map Toolbox
- How to Configure Google Maps for Your Admin
- How to Add a Magento Page Builder Map in Full Bleed Row to the Stage
- How to Style Magento Page Builder Map
- Magezon Page Builder Extension for a Better Experience
- Final words
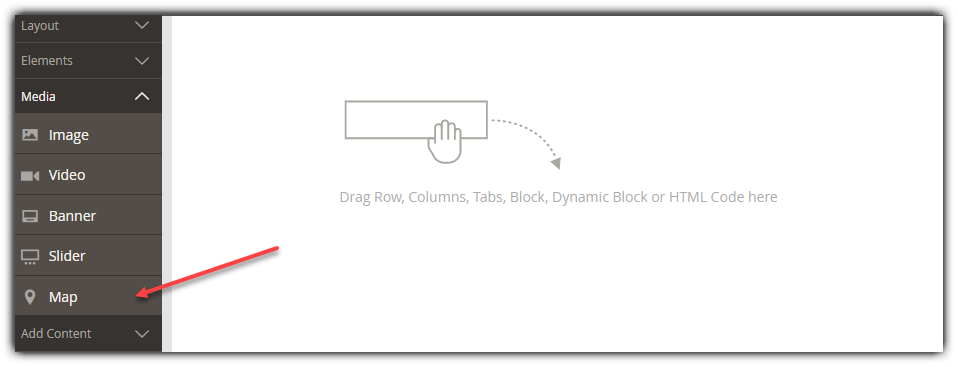
Where is Map Content Type Located in Magento 2 Page Builder?
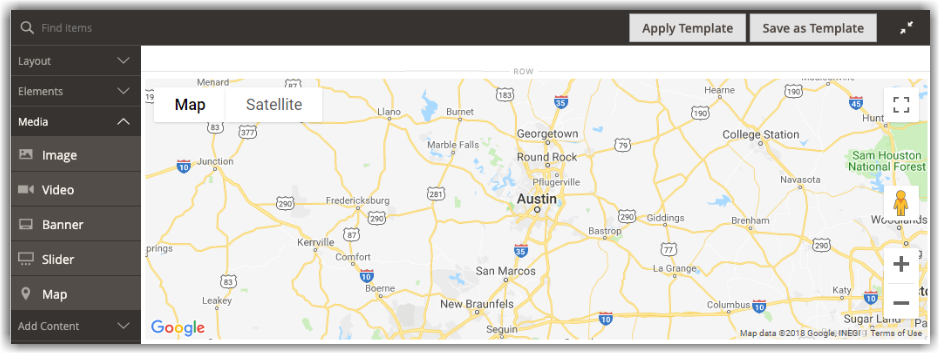
In the Magento Page Builder workspace, Map content type is on the left panel, under Media section.
Introduce Magento Page Builder Map Toolbox
There will be a map toolbox when you hover over the Map container.
| Tool | Icon | Description |
| Move | Moves the map to other positions on the stage. | |
| (label) | Map | Shows that the current container is a map container. |
| Settings | Opens the Edit Map editor to change the properties of the map and its container. | |
| Hide | Hides the current map. | |
| Show | Shows the hidden map. | |
| Duplicate | Makes a copy of the current map. | |
| Remove | Deletes the Map from the stage. |

Try FREE Magezon Page Builder demo today
Easily create beautiful, engaging Magento website in any style whenever you want without relying on developers or designers. Just by drag & drop.
How to Configure Google Maps for Your Admin
In this section we will go through 2 steps:
- Get your Google Maps API key
- Configure Google Maps in Commerce.
Before adding a map, if you don’t have a Google Maps Platform account for a free trial then you must create one. The free trial is for a year and comes with a $300 credit. Don’t worry if you use up your credit because Google will not bill your account without permission.
1. Step 1: Get API Key for Your Google Maps
Whether you already have a Google Maps key or not, you can follow one of these procedures below to get the API key required for your configuration.
You must be a site administrator who has the authority to enable billing for your account to set up a Google Maps key. If you aren’t ready to set up a Google Maps Platform account right now, you may skip this step and use the placeholder map instead.
- Go to the Google Cloud Platform Console.
- Create a new project,
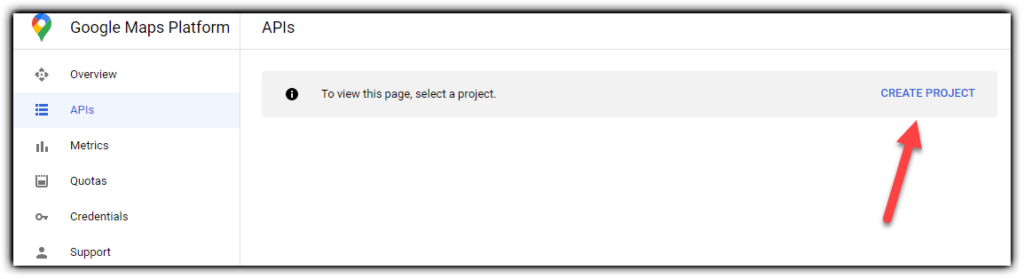
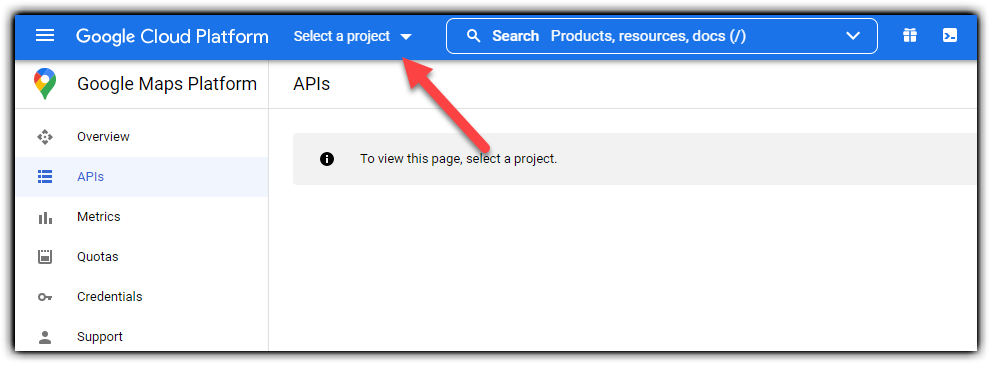
or select the project from the drop-down menu at the top of the website you want to add an API key.
- Follow the steps to set up your API credentials.
- Copy and paste your API Key into the clipboard.
2. Step 2: Configure Google Maps in Commerce
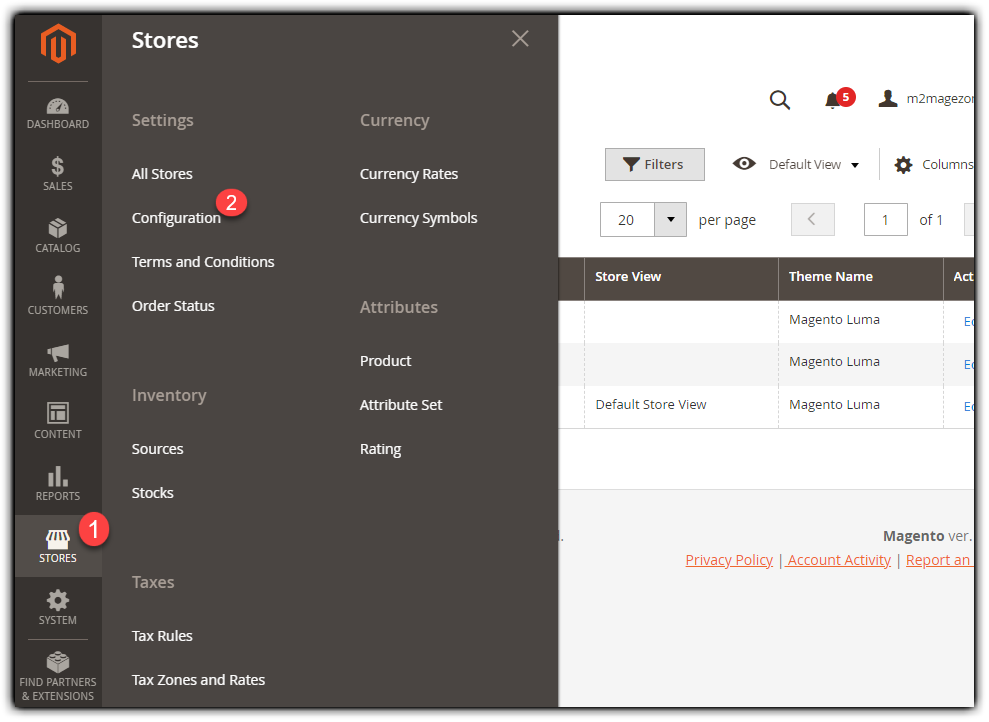
- Go to Stores > Settings > Configuration on the Admin sidebar.

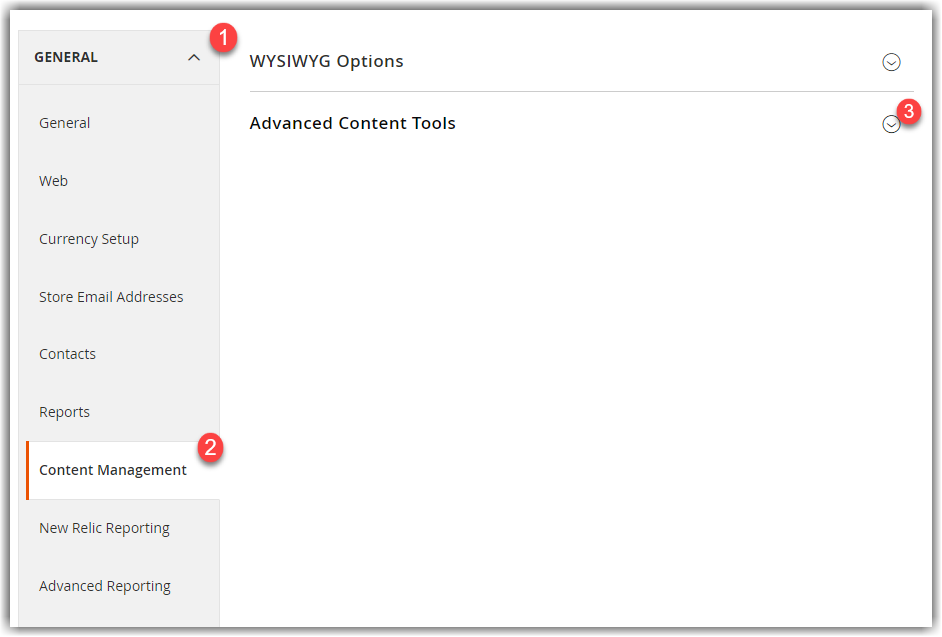
- Under General, in the left panel, click Content Management, then expand the Advanced Content Tools.


Advanced Content Toolbox
- You copied a key from step 1, now paste it to the Google Maps API Key.
- Click Test Key.
If you have a problem with your key, go back to the Google Maps Platform site to solve it. Then try that again.
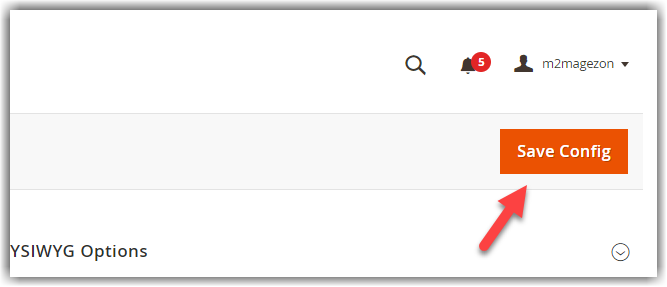
- After the system has verified your key, click Save Config button at the top.
How to Add a Magento Page Builder Map in Full Bleed Row to the Stage
In this section, I’ll show you how to add a Magento Page Builder Map to the stage in 2 cases, with configured Google Maps Platform and not-yet configured Google Maps Platform.
- Open the Page Builder workspace with the page, block, or dynamic block.
- Drag the Row content type to the stage, then under the Media section, drag the Map content type to the stage.
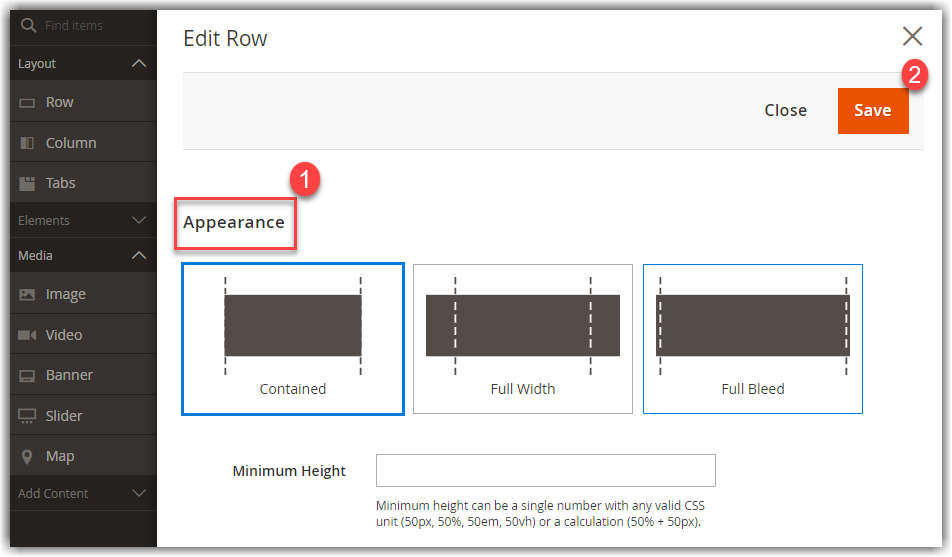
- Hover over to see the Row toolbox, click Settings (
 ) to appear Edit Row page.
 - Under Appearance, choose which layout fits your website then click the Save button at the top. I’ll choose Full Bleed as an example but for the purpose of your website, you can choose Contained or Full Width, as demonstrated below.
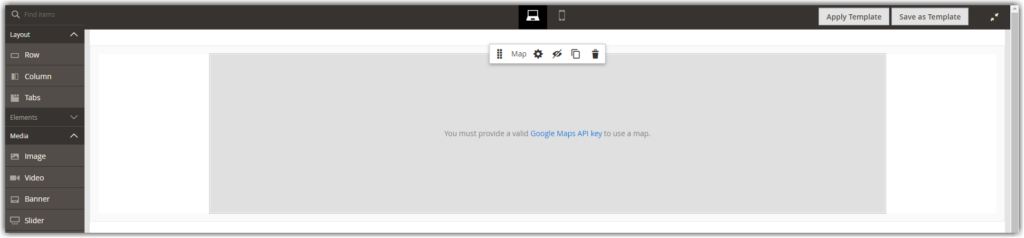
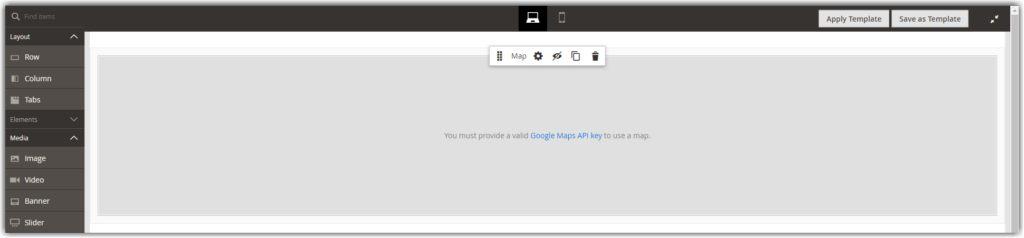
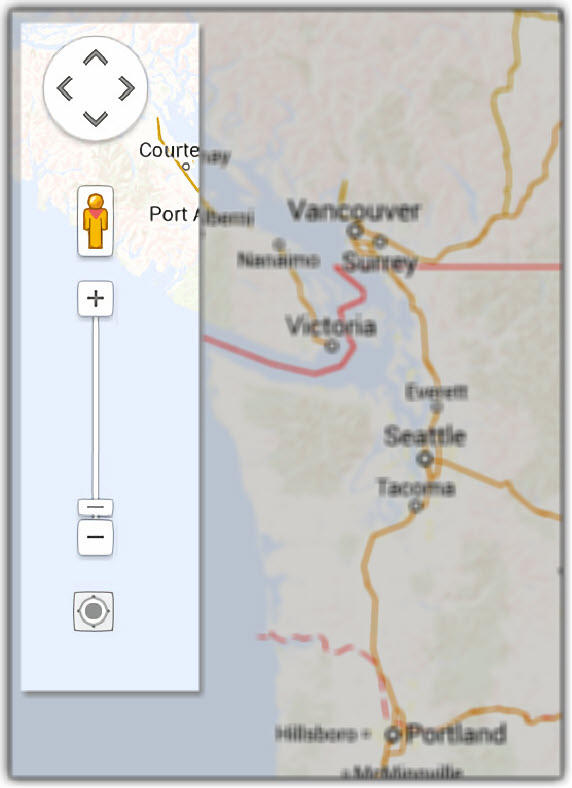
A map for your store location appears if Google Maps Platform is configured for your store.
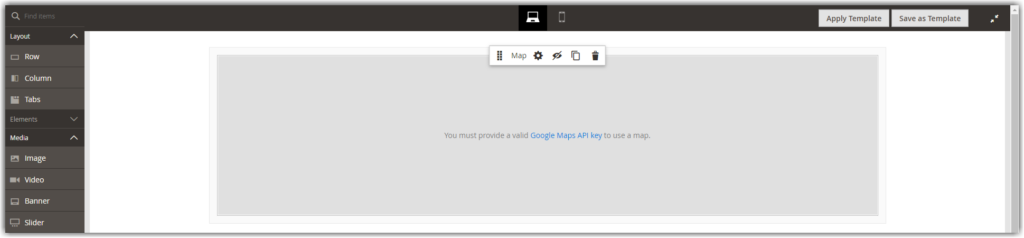
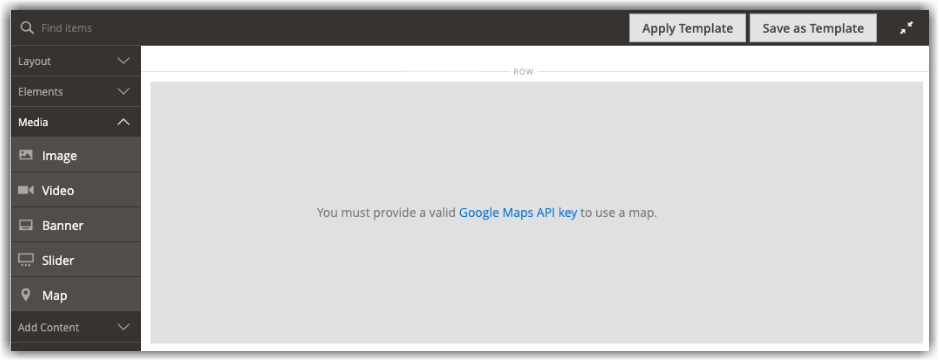
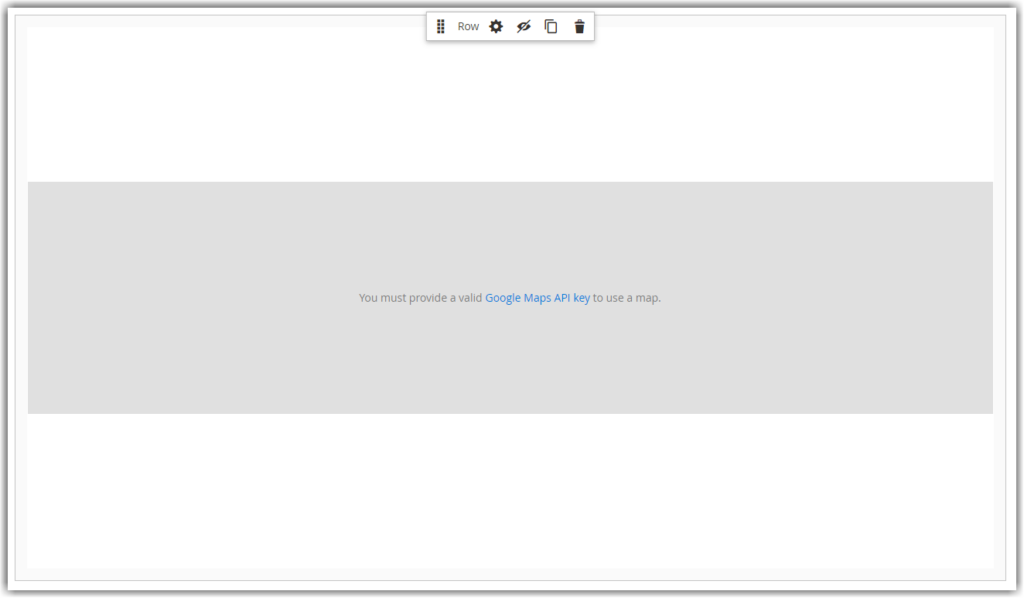
A placeholder map appears instead if your store’s Google Maps Platform has not yet been configured.
How to Add a Custom Map Location in Magento Page Builder
In this section, we’ll go through the steps to create a custom map location (with your specific information).
- To view the toolbox, hover over the map container. Then select Settings ().
- Click Add Location in the upper right corner of the Edit Map page.

There are 3 areas you need to pay attention to:
| Position | A map with a pin at your location |
| Location Name | The name you would like to appear on the map |
| Coordinates | GPS coordinates the latitude and longitude of the location |
- Enter the Location Name that the pin on the map associates with.
There are various methods for entering your location’s coordinates.
Method 1: Rely on the coordinates you already have.
Method 2: Drag the pin in the displayed map into the Position box, and the coordinates for your location will be automatically filled in.
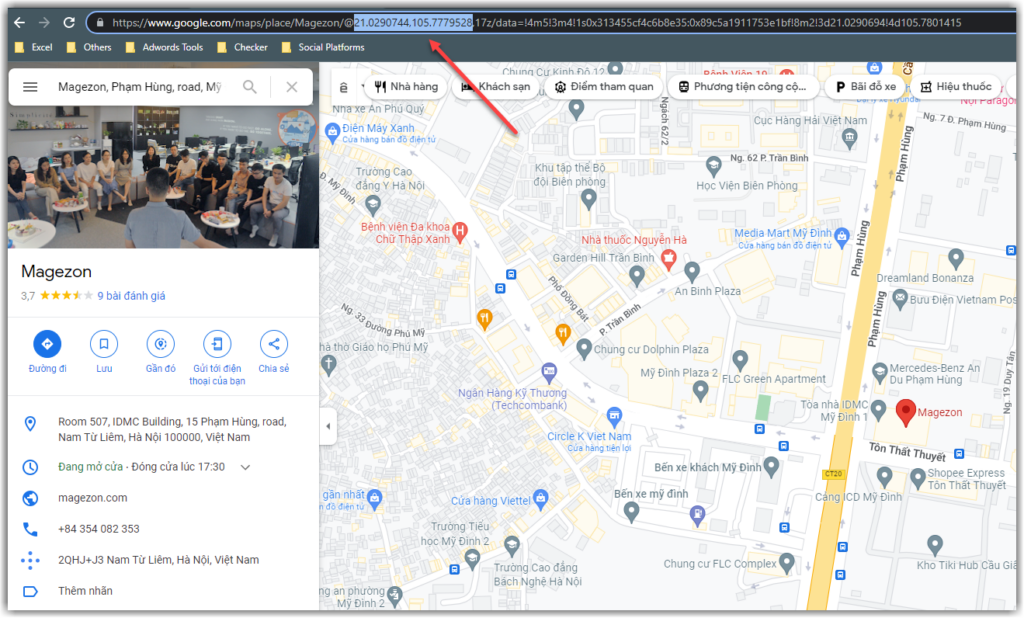
Method 3: Open a new browser window and go to Google Maps, then follow one of the methods below.
- Copy from URL
- Enter the address in the upper-left corner’s Search box and click the Search (
 ) icon.
 - Copy and paste the coordinates from the URL into a notepad.
- Enter the address in the upper-left corner’s Search box and click the Search (
- Copy from “What’s here?”
- Right-click the red pin on the map and select What’s here?.
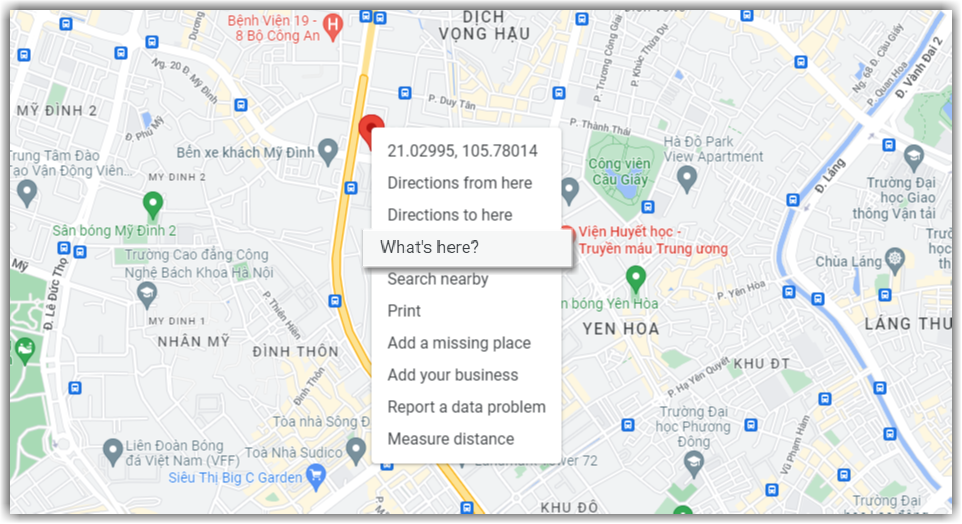
- A label will slide up with the coordinates, copy the text and paste it into a notepad.
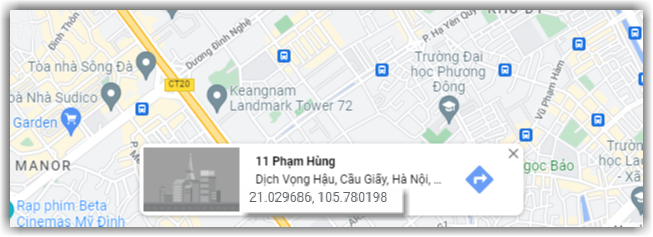
- Enter the numbers respectively in the Coordinates boxes, remember to delete the comma between the twos.
- The rest of the information depends on your needs.
| Phone Number | Your company’s telephone number |
| Street Address | The street’s address of the location |
| City | The city’s name of the location |
| Region/ State | The region or state’s name of the location |
| Zip/ Postal Code | The Zip or postal code of the location |
| Country | The country name of the location |
| Comment | Customers’ comments you want to include |
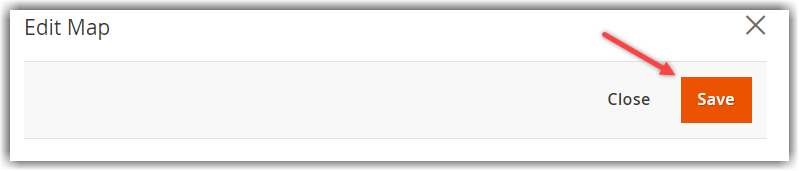
- Click Save to complete this stage.

How to Style Magento Page Builder Map
In this section, I’ll show you how to style the map as you want in Magento Page Builder. We’ll change the style, settings and grid size.
You can also create a JSON file or a link to the styled map using the map style properties.
1. Change the Map Style
- In the Admin sidebar, go to Store > Settings > Configuration.
- In the left panel under General, choose Content Management then expand Advanced Content Tools.

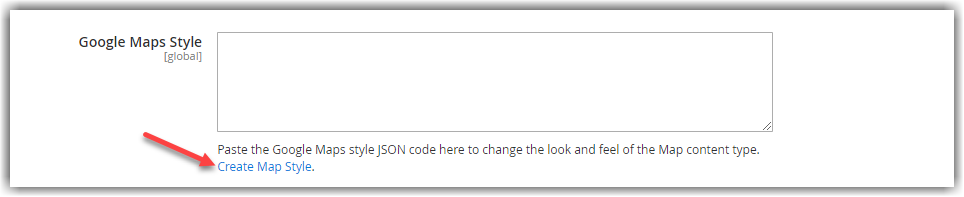
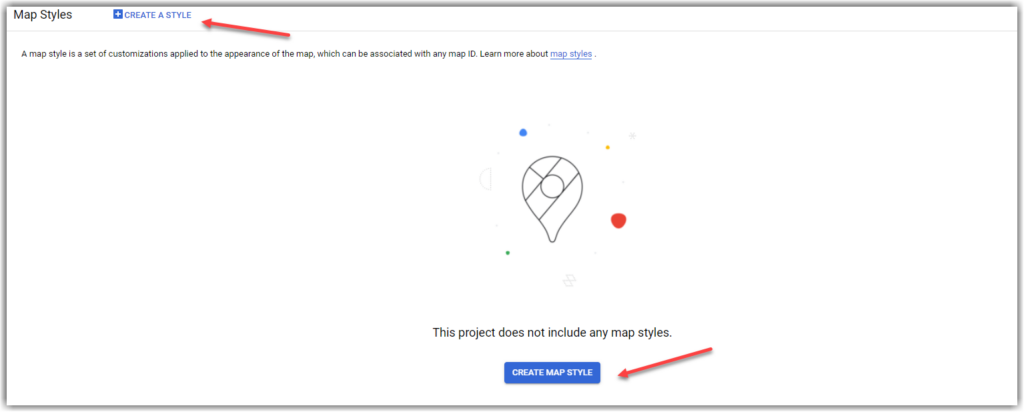
- Under the Google Maps Style text box, click Create Map Style
This link will lead you to the Google Maps Platform Styling Wizard page. Google is experimenting with the new version, you can choose to continue editing in the old version or try with the new one.
- The old version of Google Maps Platform – The Old Style Wizard
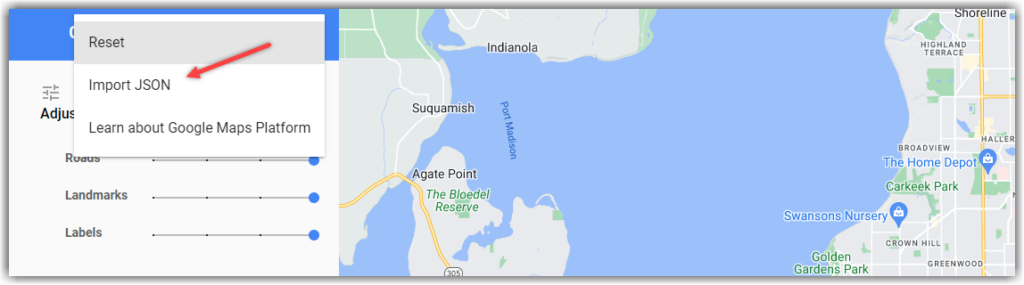
- Select the theme you want the map to display on your website among the 6 defined themes provided. Or import your own JSON code.
- Click Finish when complete.
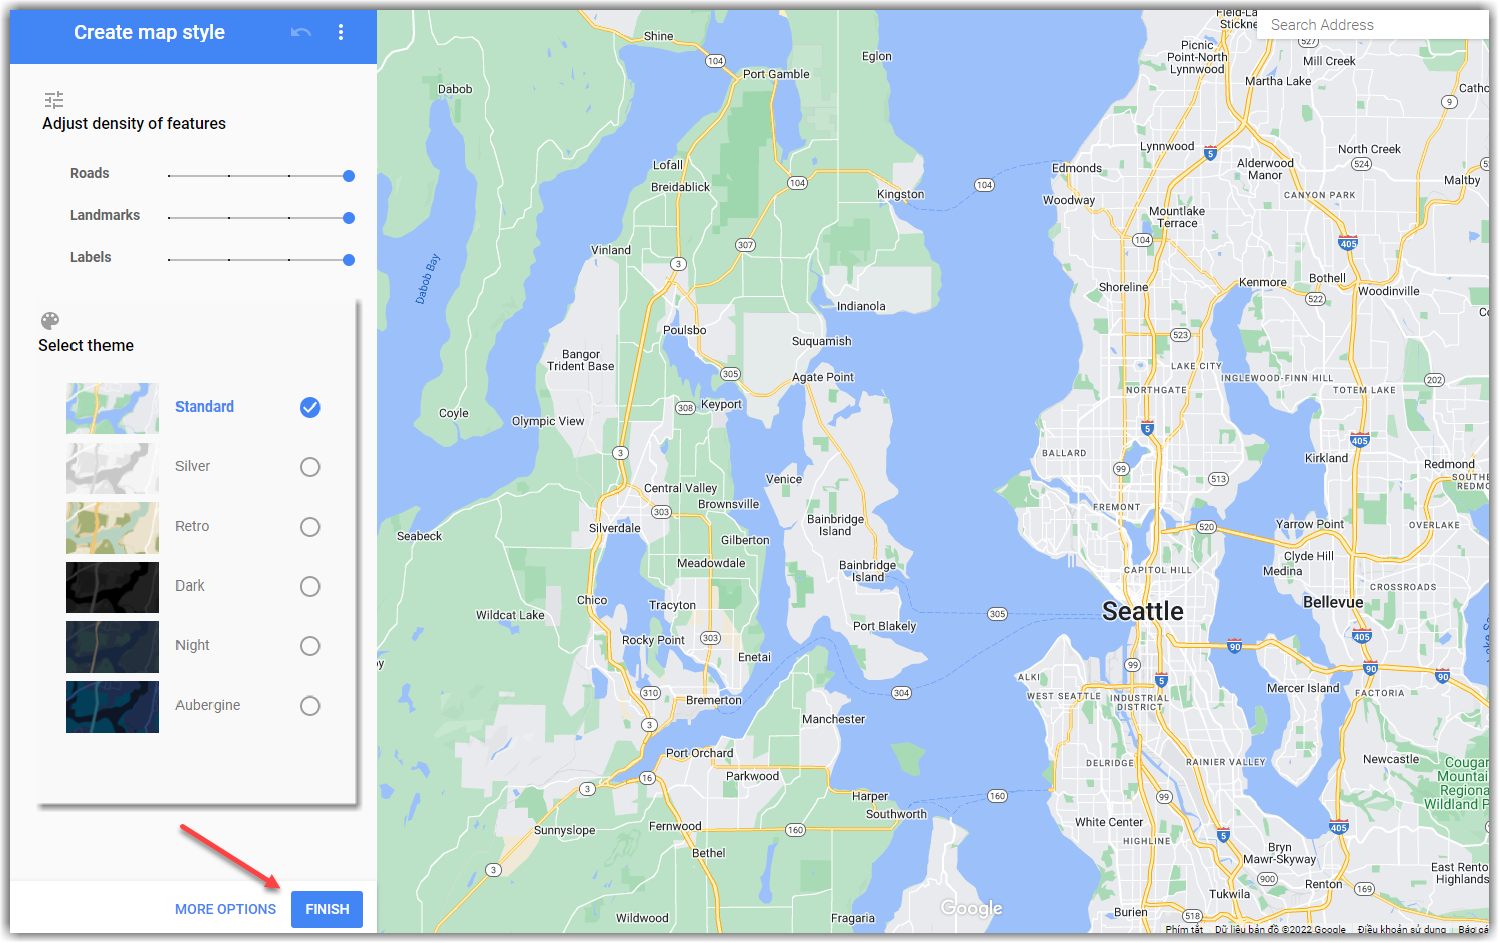
- You can add the completed style to the Magento settings by exporting it as JSON code or a URL.
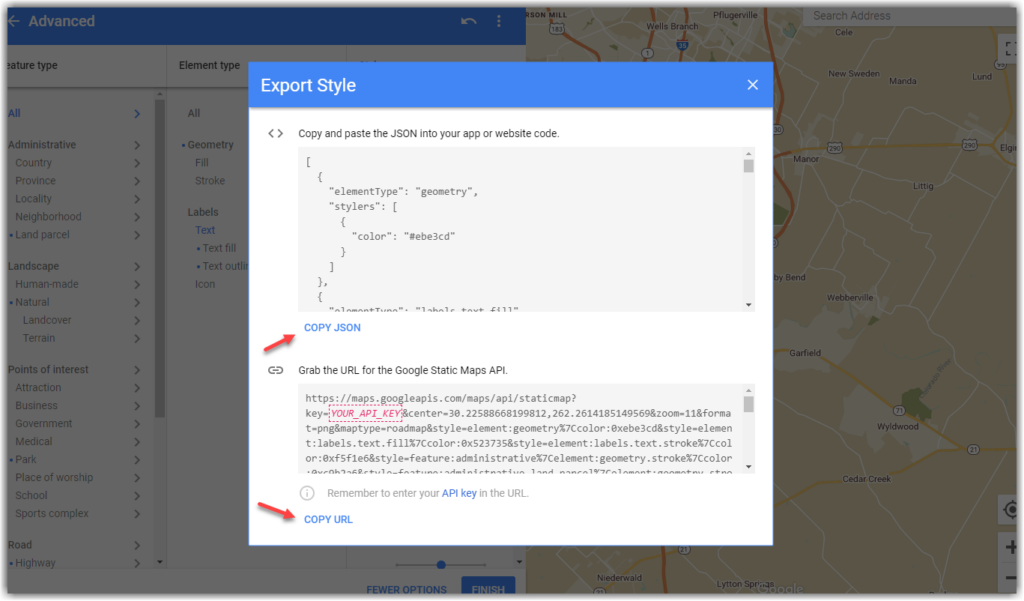
- Click Copy JSON to copy the generated JSON code.
- Click Copy URL to copy the generated URL.
- The new version of Google Maps Platform – Cloud-based Maps Styling
- Choose Create a style or Create Map Style to begin customizing your map style.
- There are 6 predefined themes in the Google Maps Platform Styling Wizard you can apply or create a new custom style with JSON.
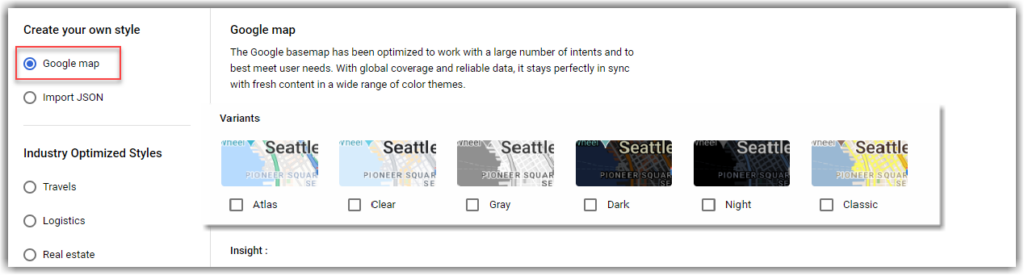
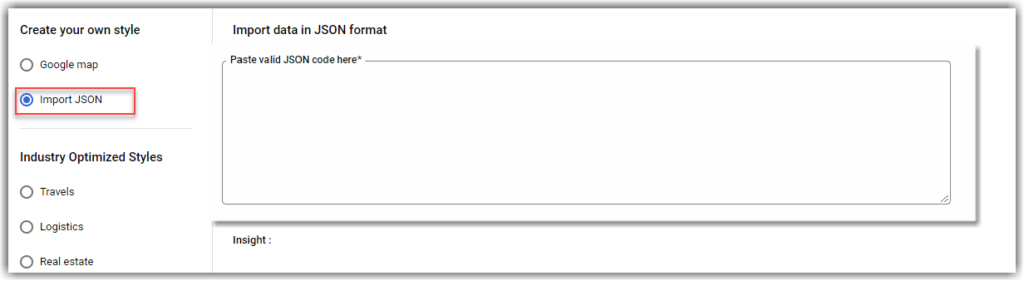
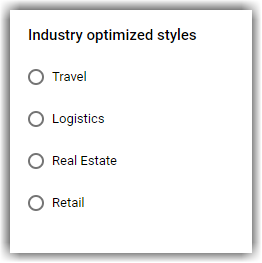
- In this version there will be one extra section, Industry Optimized Styles, to optimize the map according to your business needs.
4. Paste the generated code or URL into the Google Maps Style box in your Admin browser tab.
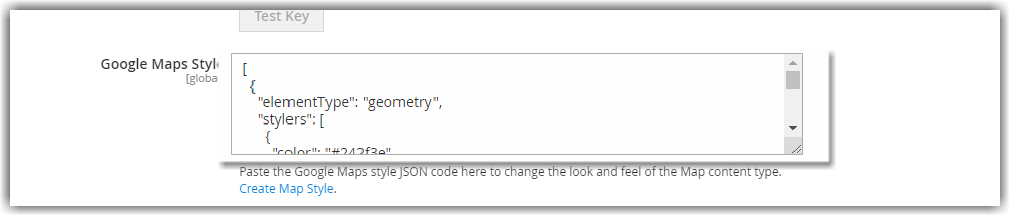
With URL, replace the Google Maps API key in the YOUR_API_KEY placeholder. This URL is a link to your styled Google Map.

5. Click Save Config in the upper-right corner.

Try FREE Magezon Page Builder demo today
Easily create beautiful, engaging Magento website in any style whenever you want without relying on developers or designers. Just by drag & drop.
2. Change the Map Settings
- To access the toolbox, hover over the map container and click the Settings (
 ) icon.
 - Change the basic settings as needed:

| Height | The height of the current map in pixel, change this after you change the Minimum Height of the Row. |
| Show Controls | Display the standard Google Map controls or not. |
- Modify the Advanced settings as needed:
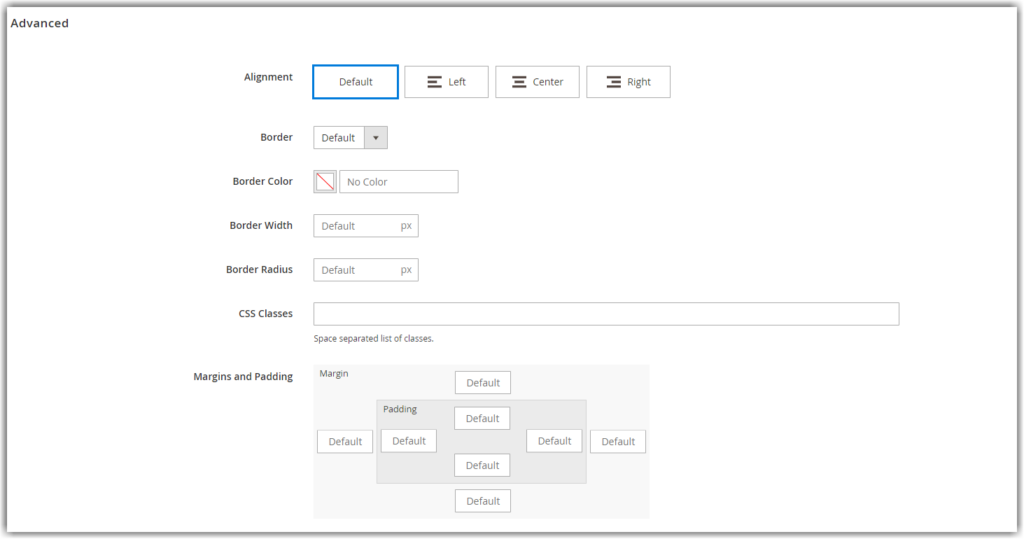
- To adjust the horizontal positioning of the map content that is added to the container, select an Alignment.
| Default | Applies the current theme’s default alignment. |
| Left | Aligns the content to the map container’s left edge, allowing for any defined padding. |
| Center | Aligns the content in the center of the map container, allowing for any defined padding. |
| Right | Aligns the content to the map container’s right edge, allowing for any defined padding. |
- Set the Border style for all four sides of the map container:
| Default | Applies the associated style sheet’s default border style. |
| None | The container borders are not visible. |
| Dotted | The container’s border is displayed as a dotted line. |
| Dashed | The container’s border is displayed as a dashed line. |
| Solid | The container’s border is displayed as a solid line. |
| Double | The container’s border is displayed as a double line. |
| Groove | The container’s border is displayed as a groove line. |
| Ridge | The container’s border is displayed as a ridgeline. |
| Inset | The container’s border is displayed as an inset line. |
| Outset | The container’s border is displayed as an outset line. |
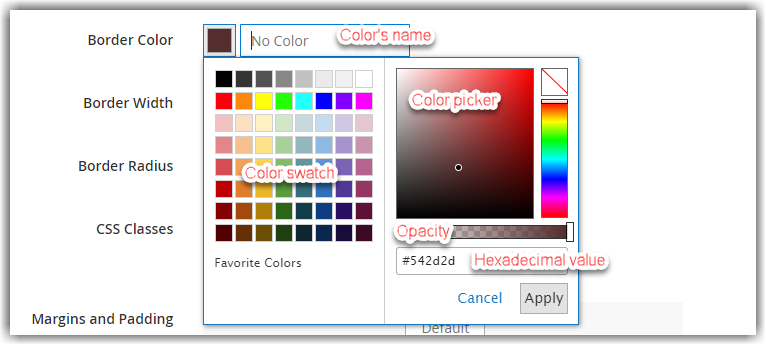
- Set the border display if your border is visible.
- Border Color – Choose a swatch, use the color picker, or type a valid color name or equivalent hexadecimal value to change the color. You can also change the border’s opacity.
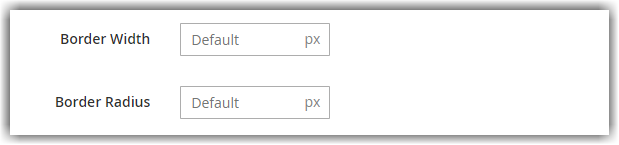
- Border Width – Enter the width of the borderline in pixels.
- Border Radius – Enter the number of pixels to define the round degree of the borderline.
- Enter the CSS classes from the current stylesheet to apply to the map container if needed. Use a space to separate multiple class names.
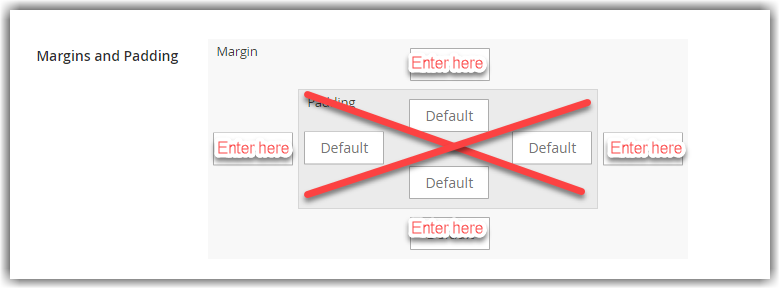
- Enter values for the Margins and Padding in pixels to specify the map container’s outer margins and inner padding.
Note that the Map content type in Magento Page Builder does not support padding.
- Click Save when complete to apply the settings and return to the Page Builder workspace.
3. Change the Grid Size
On the Page Builder stage, the grid size controls the size of the map associated with a column. The map is 12 columns wide by default, and up to 16 columns can be added.
- Go to Configuration in the Admin sidebar

- Then choose Content Management and expand Advanced Content Tools.
- Make changes to the grid options if you need. The Use system value is ticked by default, untick them to modify these settings.

- Click Save Config when complete.

Magezon Page Builder Extension for a Better Experience
Magento 2 Page Builder Map embed API includes all the basic configurations for the users.
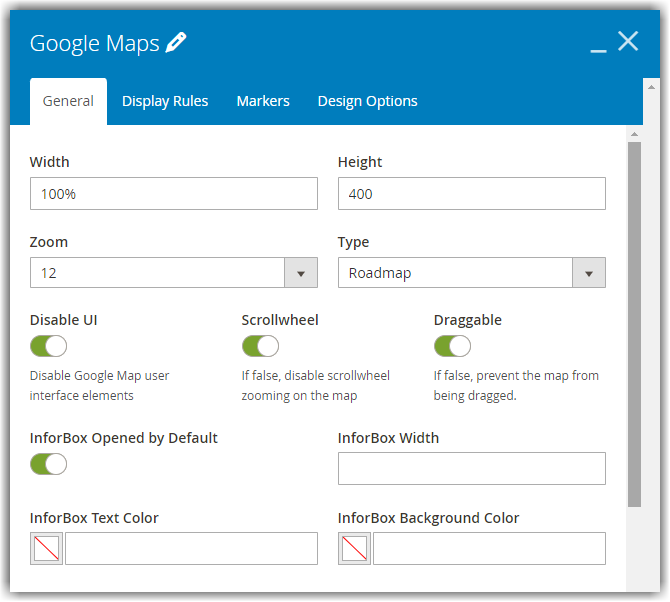
However, if you want to have more advanced display settings and an easier configuration then Magezon 2 Page Builder’s Google Map is worth considering.
Besides the basic settings like Width, Height, Paddings and Margins, our map allows you to change the map’s Type without using Google Map (such as roadmap, satellite, hybrid, or terrain), display InfoBox, Markers, Zoom the map and customize Elements settings, etc.

Map in Magezon Page Builder is also supported by the Magento 2 Store Locator extension. This plugin will help you create a more responsive map, multiple stores, and languages with optimizing SEO configuration, custom with more map styles, and create rich content store locations, etc.

Besides Map element with advanced features, Magezon Page Builder is also providing more than 50 powerful elements to help you build your website that increases the conversion rate.
Final words
Map content type is not too challenging for Magento users. If you only need an elementary map, Magento Page builder is enough but if you want to have a unique and eye-catching website then Magezon Page Builder may be the perfect solution.
Try FREE Magezon Page Builder demo today
Easily create beautiful, engaging Magento website in any style whenever you want without relying on developers or designers. Just by drag & drop.


