 Magezon Blog Help Merchants Build Comprehensive eCommerce Websites

Magento media folder or Magento 2 media storage is a great function of Magento Opensource that helps the user to manage their media files. But not everyone knows well about it, especially the Magento novice. But don’t worry. We’ll turn any novice into a master in a few minutes.
| It can’t be denying that the default Magento Media Storage is basic, easy, and straightforward. However, there exists quite a number of limits that fails to fulfill the demand of ambitious Magento store owners. It restricts the file formats that may be uploaded, has a limited image editing feature, and doesn’t offer much in workflow optimization. And we know it, so we’re working to improve it. Our Advanced Magento 2 File Manager, which is a perfect blend of Apple-esque and Microsoft Office, allows you to create, edit, preview, and organize all of your assets within the Magento backend. |
Table of contents
Let’s get started!
Overview of Magento Media Folder
Magento media folder or media storage is where you manage all the media files in your store. You can usually find it in the file system on the same server as the Magento program files. On the other hand, media files can be organized in a database, or located on a different server or content delivery network.
Each media file has its own location path defined by the Base URL. Through this, you can access media files, adding them to your CMS page or static block.
| You may also like: The Complete Guide to Magento 2 Media Gallery Magento CMS: An In-Depth Overview How to Create and Insert Magento 2 Block in CMS Page |
How to Add Files to Magento Media Folder
In this section, we will show you how to add files to Magento 2 media storage in simple steps.
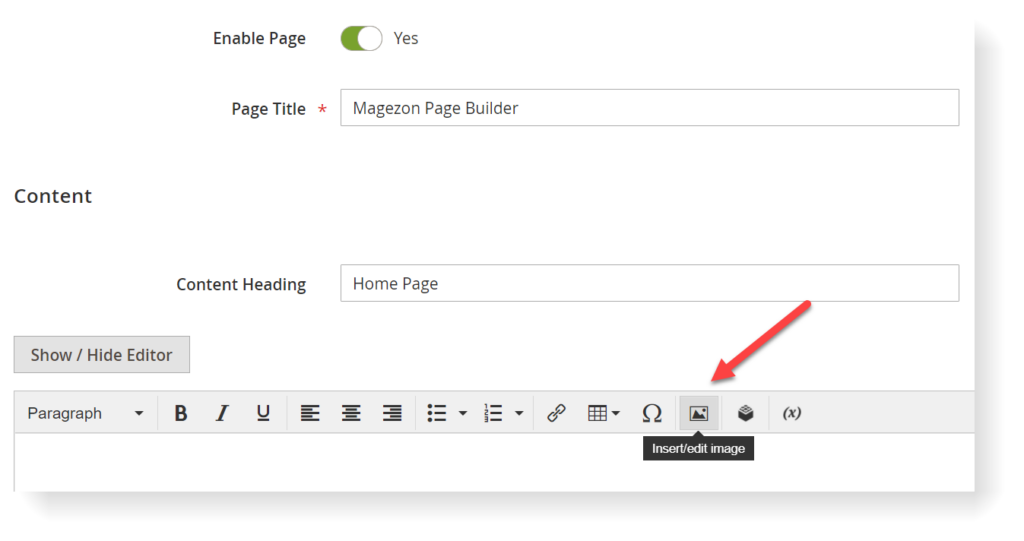
Step 1: Click the Insert Image icon in the editor toolbar.
Step 2: After the Insert Image popup appears, click the magnifying glass icon on the search box.
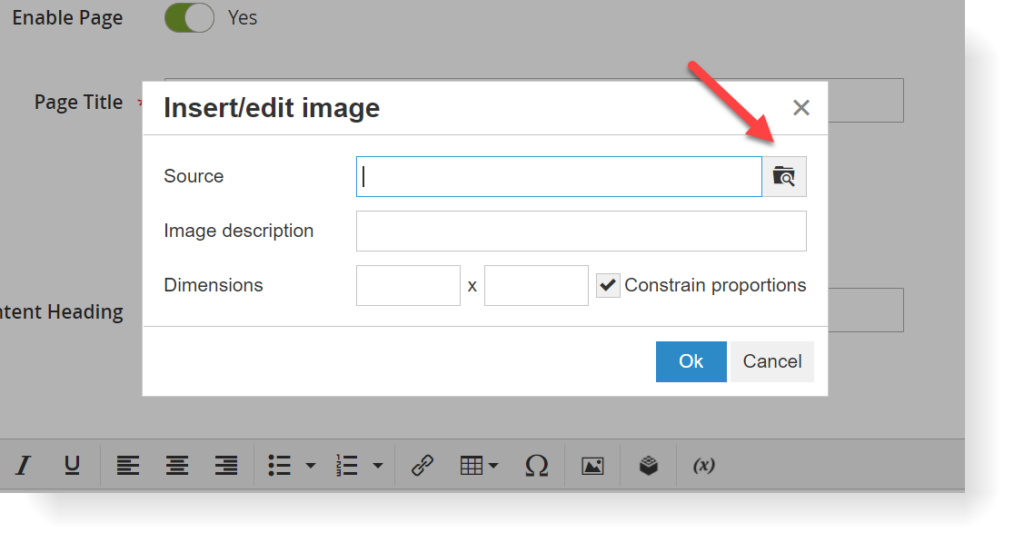
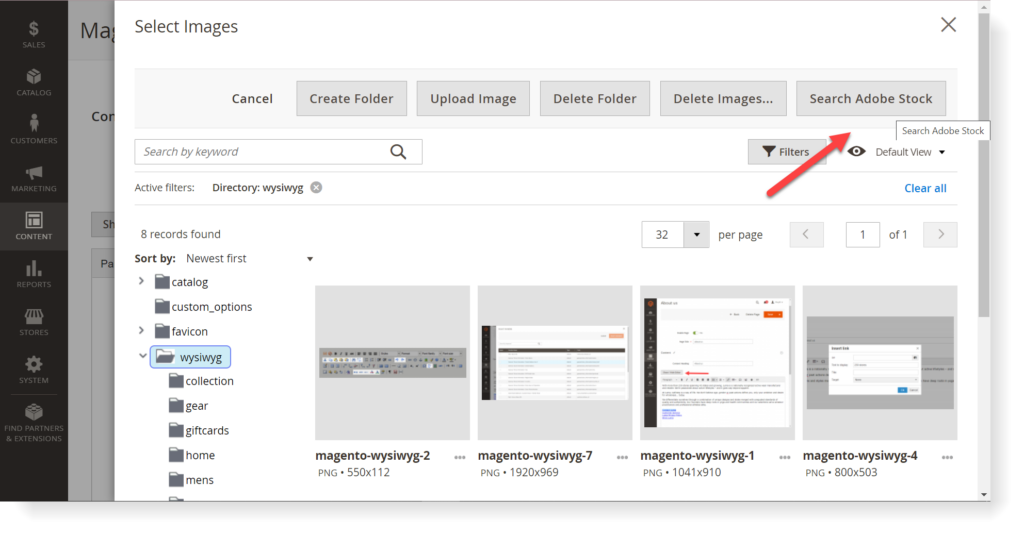
The Select Image window will appear.
Let us take you a tour in this window. You will see 3 main areas: The file tree on the left, the upper toolbar with several buttons, and the area of the images in the middle.
The file tree on the left shows you a folder hierarchy. Click Collapse All/Expand All to collapse/expand the folders.
On the upper toolbar:
- Cancel: click to cancel the window.
- Delete Folder: choose a folder and click Delete Folder to trash it.
- Create Folder: click to create a new folder.
- Search Adobe Stock: from Magento 2.3.4 version, Magento online store can be integrated with Adobe Stock. To see the Adobe Stock integration tutorial, scroll down to the next part.
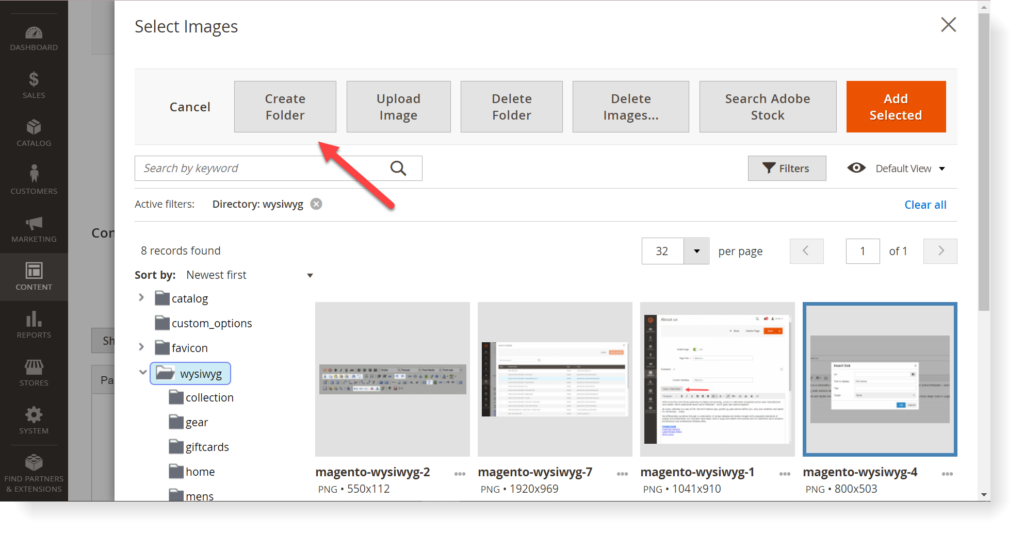
In the image area, you can see all the photos uploaded within a folder.
Click Choose Files to upload images from the computer.
Check out how to insert an image in Magento 2 here.
How to Integrate Adobe Stock into Magento Media Folder
If you use Magento 2.3.4 or the upper version, congratulations, now you can integrate your Magento 2 media storage with thousands of high-quality photos from Adobe Stock.
To integrate Adobe Stock in Magento media folder, first, you need to set up an Adobe integration. From there, you can start to configure it.
To set up Adobe integration, follow these steps.
Step 1: Go to Adobe Developer Console homepage and create an account.
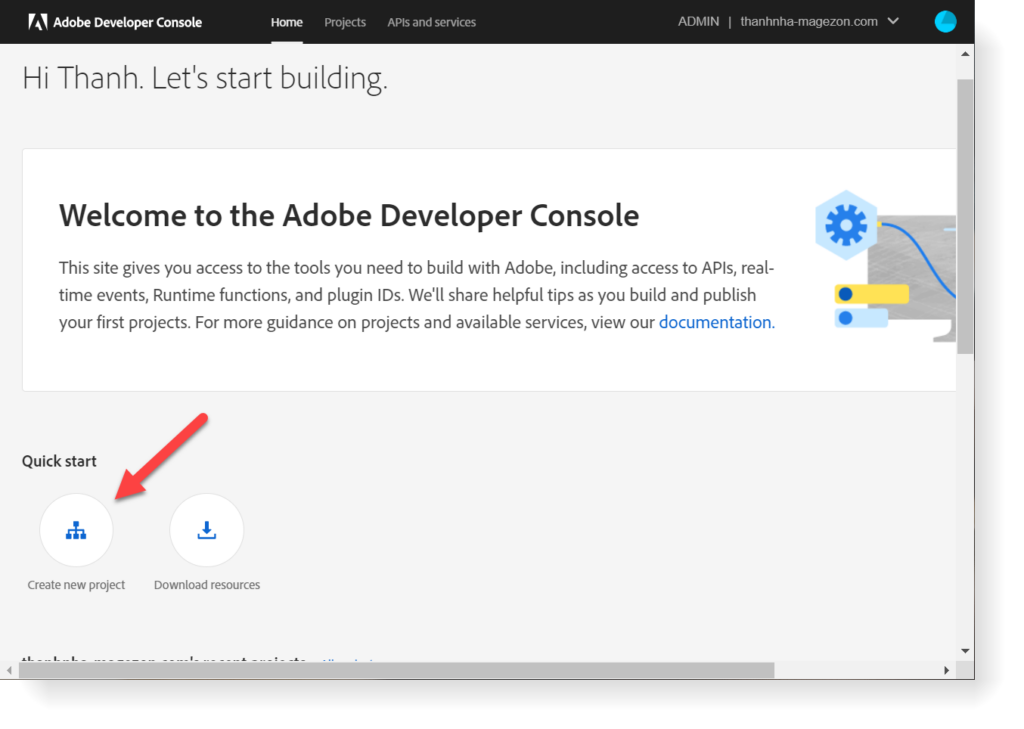
Step 2: After your registration, go to Quickstart > Create new project
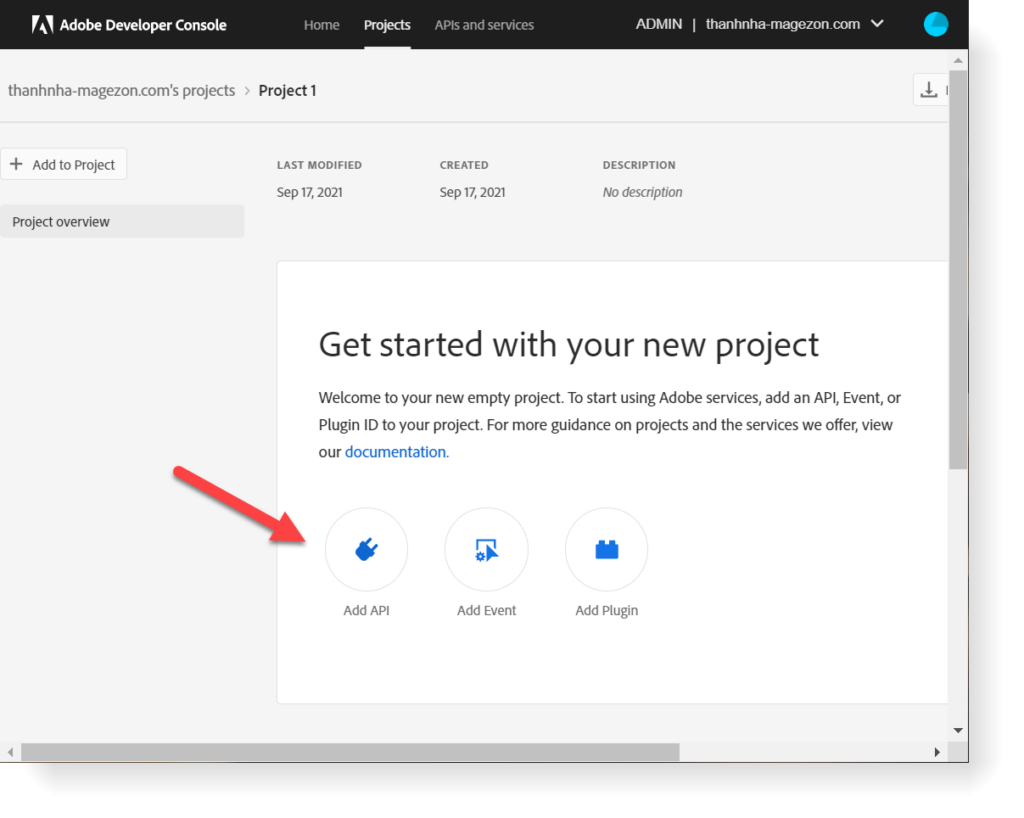
Step 3: Next, click Add API
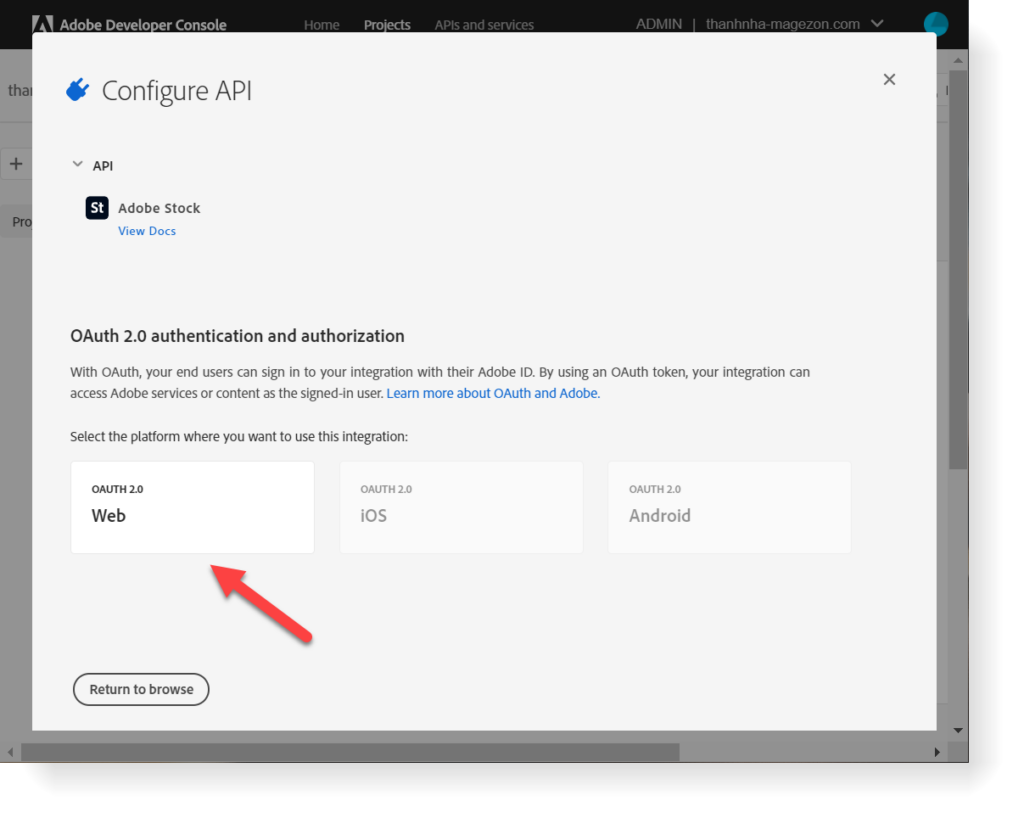
Step 4: Select Adobe Stock and click Next.
Step 5: Click OAUTH 2.0 Web
Step 6: Insert Default Redirect URI and Redirect URI pattern.
Default Redirect URI format: ${HOST}/${ADMIN_URI}/adobe_ims/oauth/callback/
Example: https://demo.magezon.com/m2tutorials/admin/adobe_ims/oauth/callback
Meanwhile, the Redirect URI pattern is Default Redirect URI with 2 differences:
- Add the double backlashed (\\) before any dot (.)
- Add .* to the end of URI
Example: https://demo\\.magezon\\.com/m2tutorials/admin/adobe_ims/oauth/callback/.*.
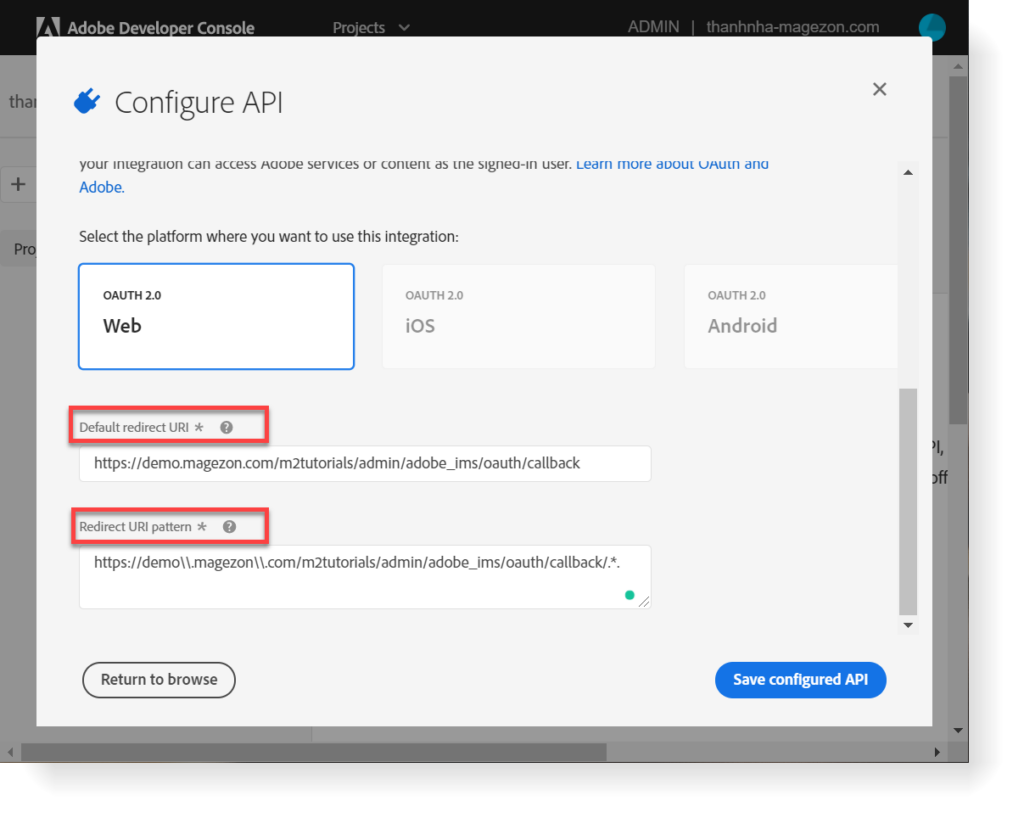
Then, click Save configured API.
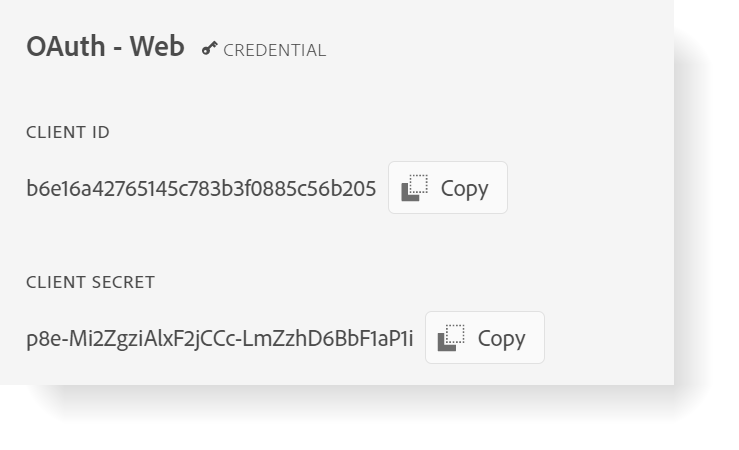
Step 7: Copy API key (Client ID) and Client Secret on the next page
You’ve finished how to create Adobe Stock integration. Next, let’s move on to how to configure it.
Here is how to configure Adobe Stock integration in several steps.
Step 1: Go to Stores > Settings > Configuration
Step 2: In the Advanced tab, choose System.
Step 3: Scroll down to start configure the Adobe Stock integration
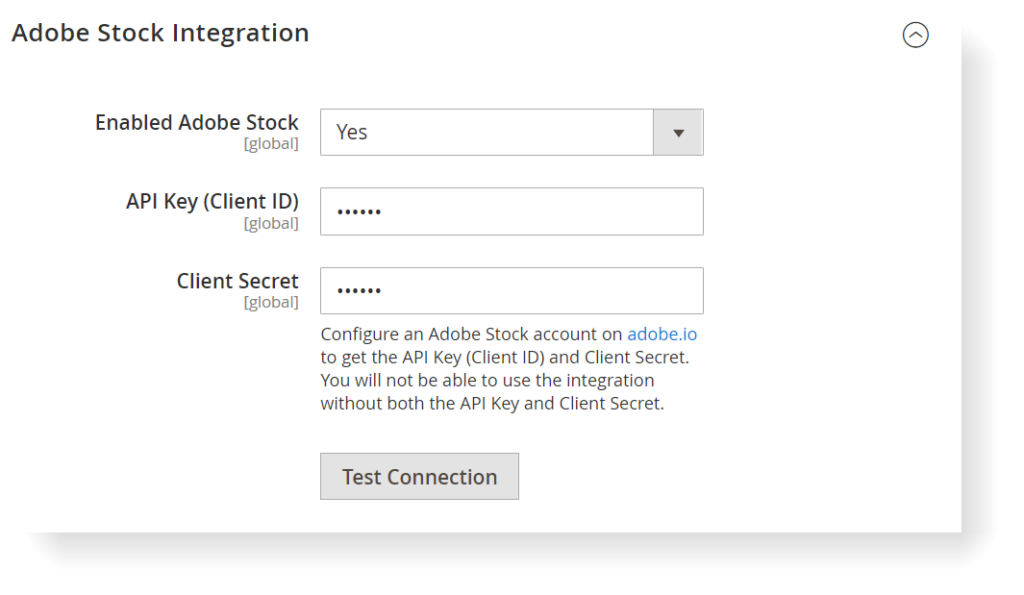
- In Enabled Adobe Stock, choose Yes
- Paste the API Key and Client Secret in those fields.
- Hit the Test Connection button.
When you see Connection Successful! notification, it’s done.
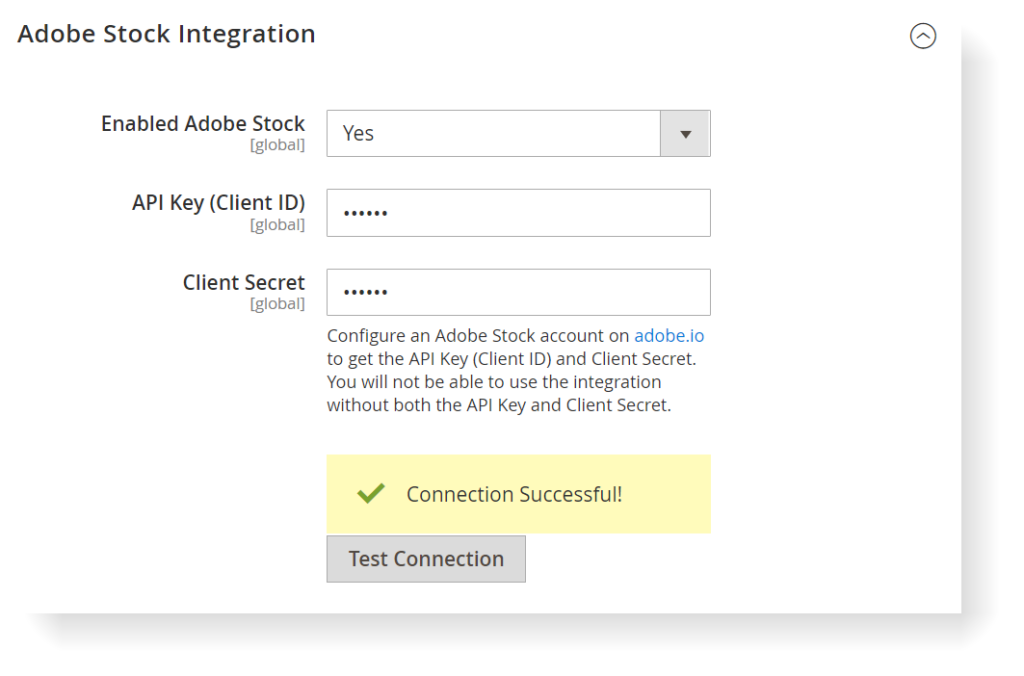
Step 4: Click Save Config.
Let’s see our final result.
We’ll try to add an image from Adobe Stock into a CMS page.
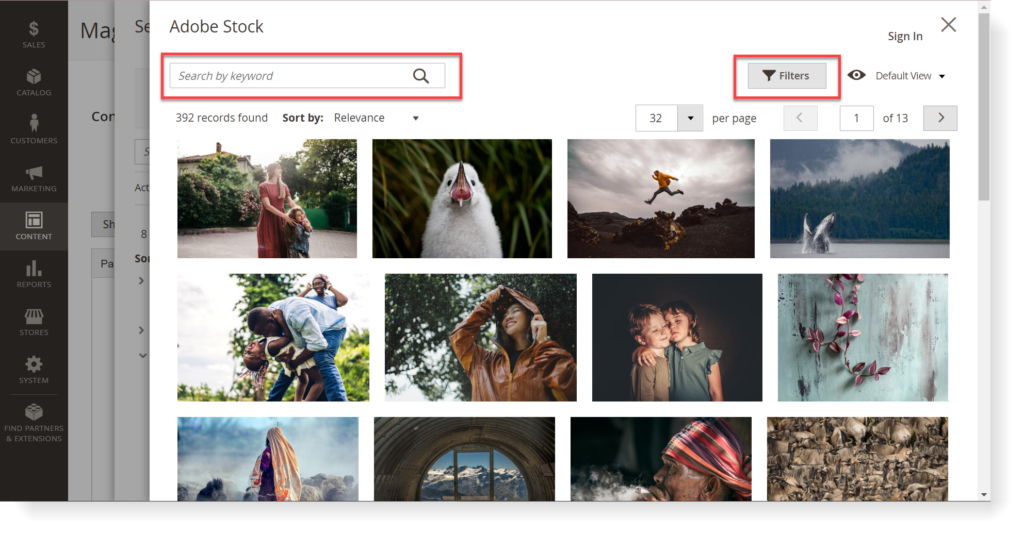
First, open a CMS page and click Insert image icon > Search icon > Search Adobe Stock.
Then, an Adobe Stock window will open, showing you multiple stock photos from Adobe.
You can search for a photo by using the Search box in the upper left corner of the window. Or, use Filter to filter the photo as you prefer.
Conclusion
That’s our beginner’s guide to Magento media folder. Do you have any questions? Feel free to comment down below and let us know. We’ll be so glad to help you. Find more tutorials here in our Magento Tutorial series.

