 Magezon Blog Help Merchants Build Comprehensive eCommerce Websites

CMS block is a practical feature in Magento 2. This article will explain to you how to create and insert a Magento 2 block in CMS page. Scroll down to discover now!
Table of contents
What is a Magento 2 Block?
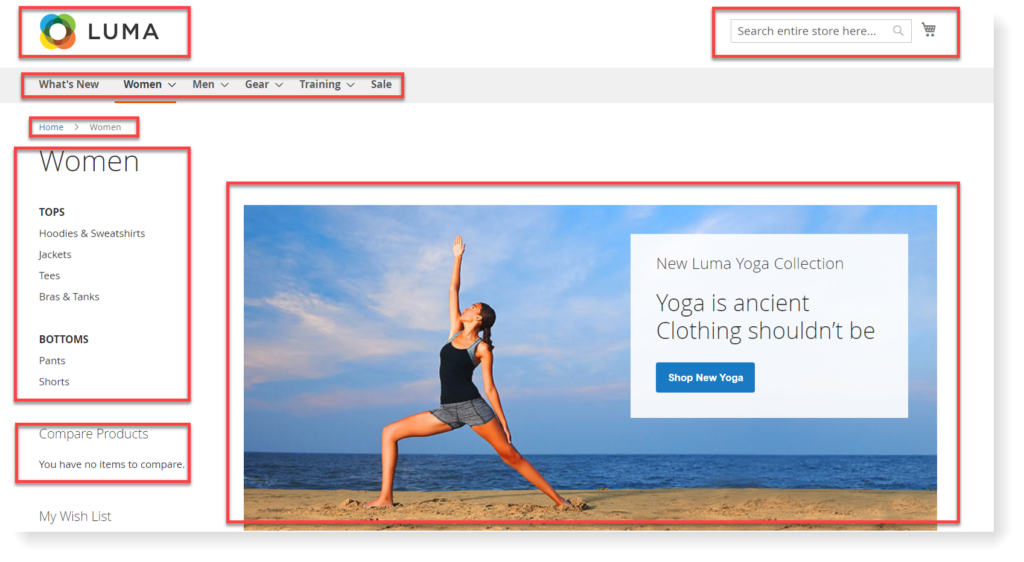
Magento 2 block, CMS block, or static block is a unit of content that works as a page module. A block can represent multiple content types. The most common type is static information such as text, image, and video. Besides, a block can also display dynamic content.
Magento allows you to create a new Magento 2 CMS block and add it to a page without using code. Read on to find out how to do both.
5 Steps to Create a Magento 2 Block
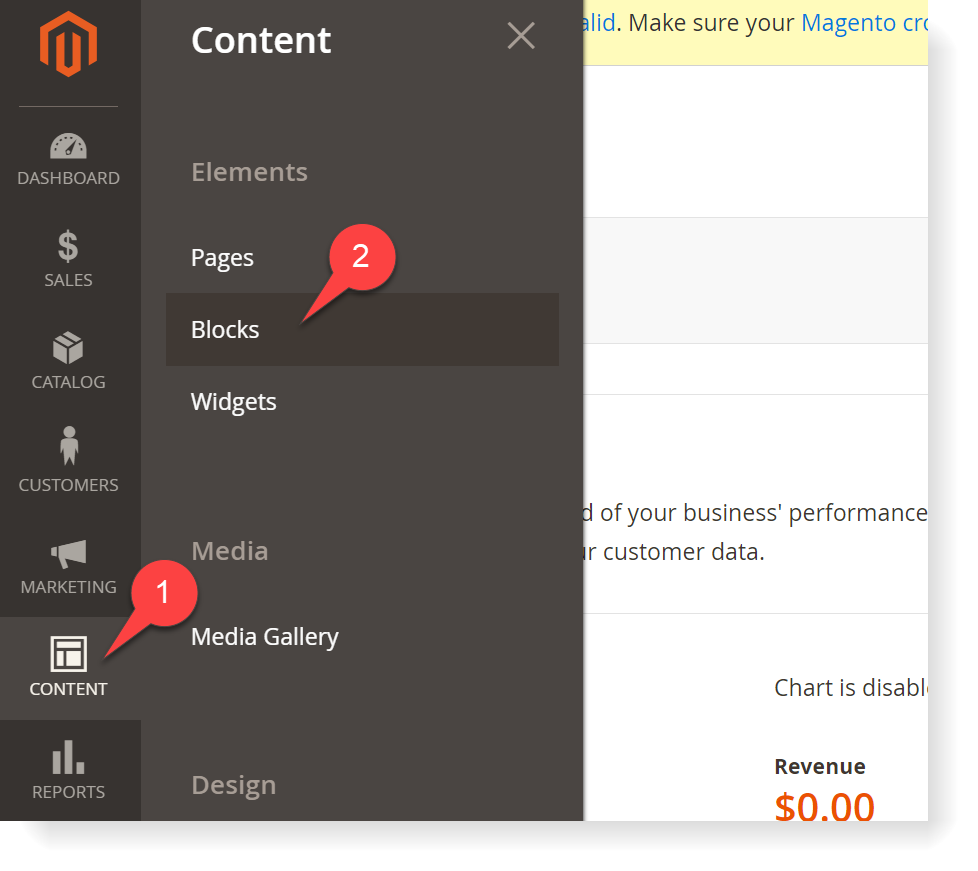
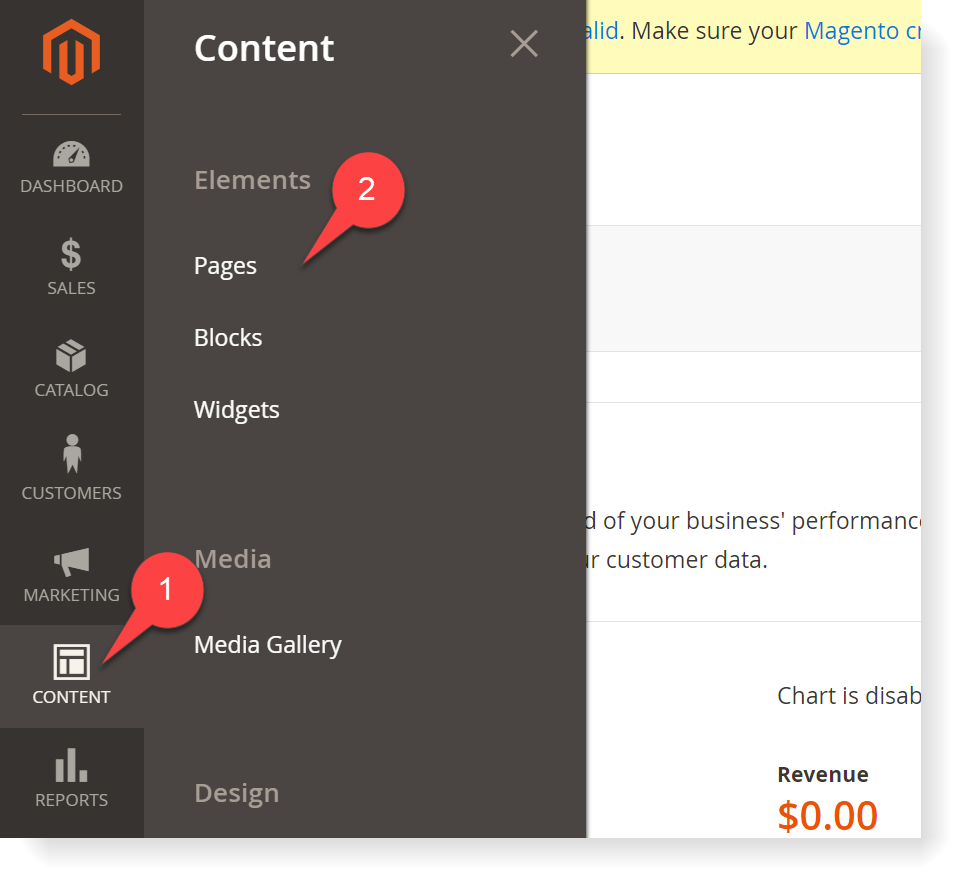
Step 1: Content > Elements > Blocks
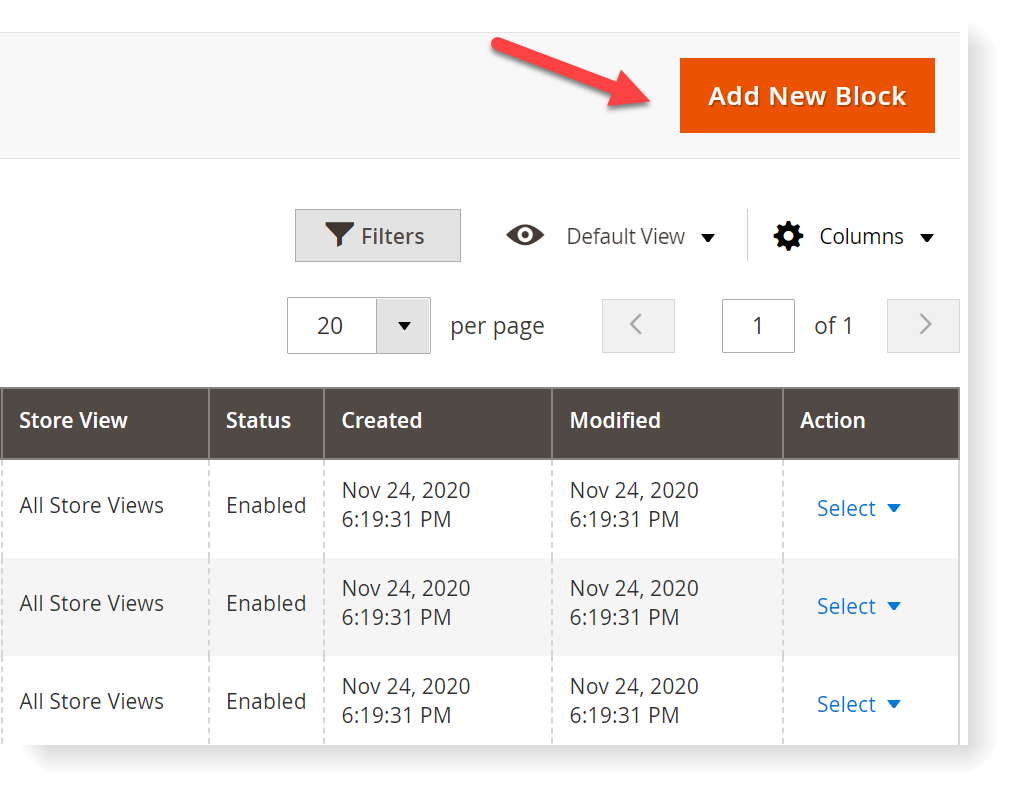
Step 2: Click Add New Block
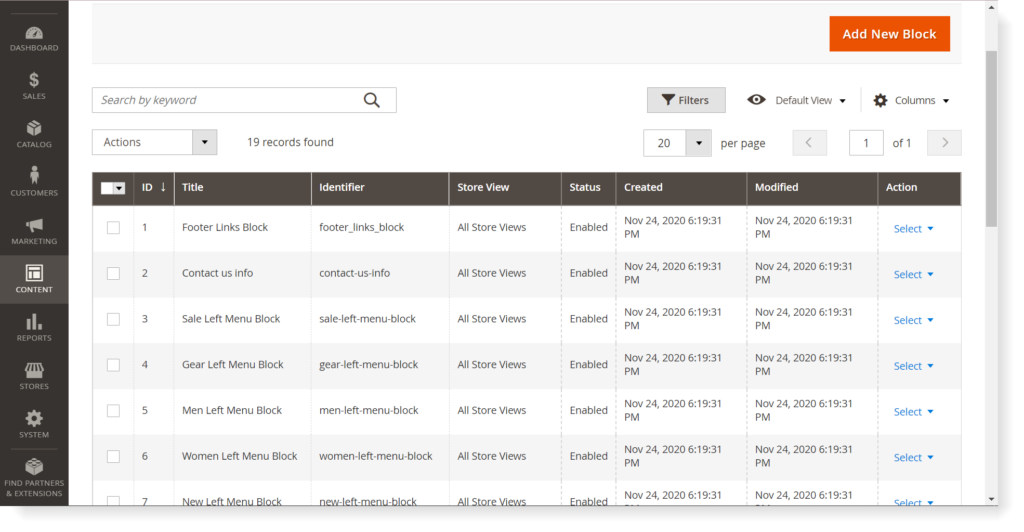
After step 1, you’ll see the Block page appears, showing you a grid of block names and other information. This page shows several block templates that Magento already provides you. Before creating a new block, check out the list to make sure you know which template is available.
To start creating a new block, click Add New Block.

Try FREE CMS Page Builder demo today
Easily create beautiful, engaging Magento website the way you want without relying on developers or designers. Just by drag & drop.
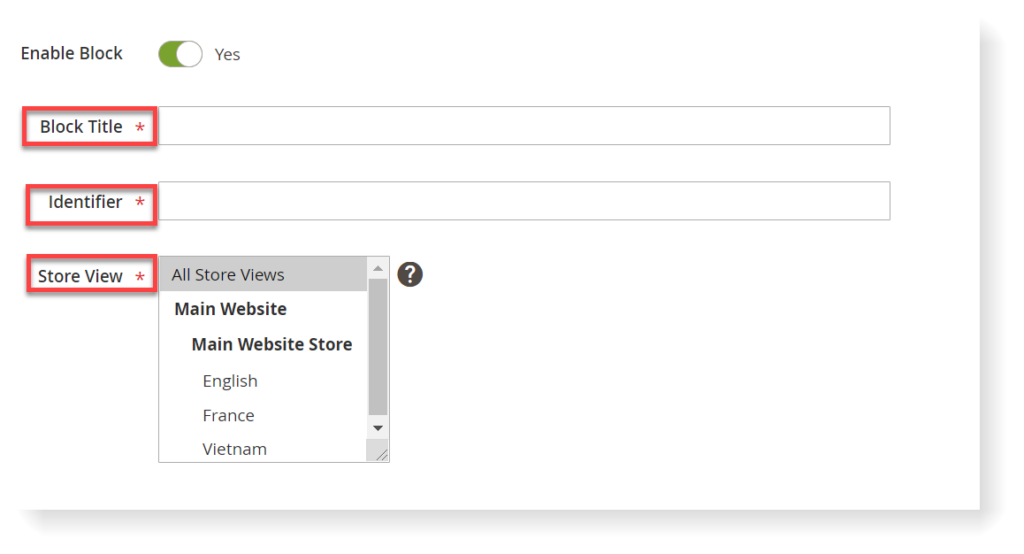
Step 3: Choose Block Title, Identifier, and Store View
In the New Block window, you’ll see the Enable Block is automatically toggled to Yes. Continue filling other fields below.
- Block Title: insert the title you want to. To create these titles like a pro, check out some tips we have found for you.
- Identifier: use a hyphen or underscore between each word to create an identifier.
- Store view: Choose the store view for the block
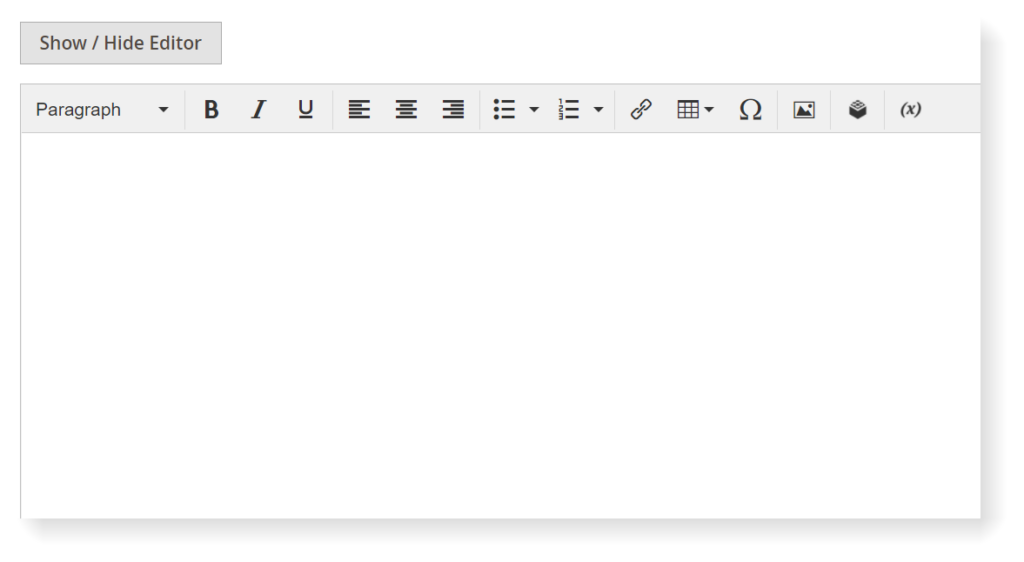
Step 4: Create Block Content
You can create content for a block using a Magento 2 WYSIWYG editor.
Step 5: Click Save to Save Block
After you click Save, the new block will appear in the Block grid.
6 Steps to Insert a Magento 2 Block in CMS Page
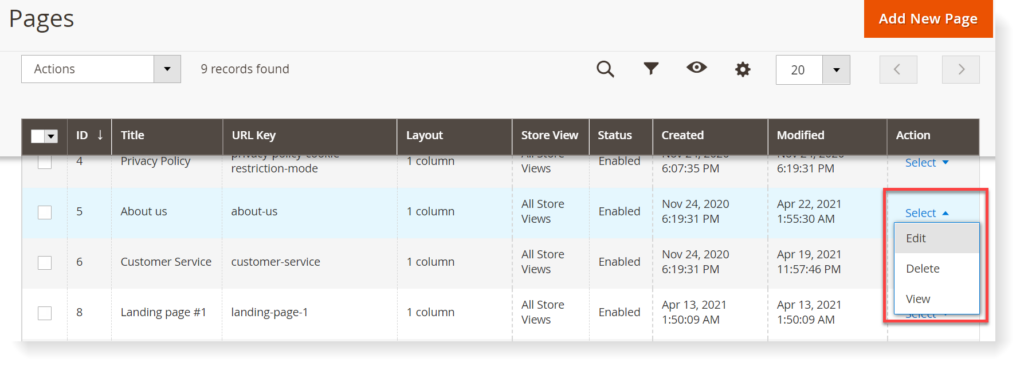
Step 1: Go to Content > Elements > Pages
Step 2: Choose the Page to Insert a Block
In the Action column, hit Select > Edit
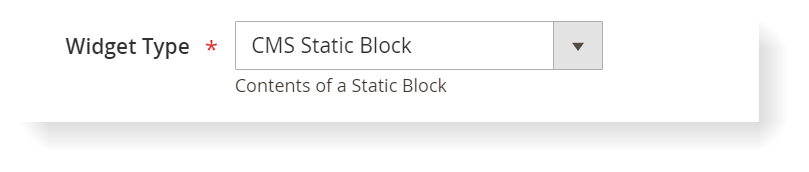
Step 3: In the Content section, place the cursor to where you want to add a block.
Click Insert Widget icon.

Step 4: Choose CMS Static Block as Widget Type
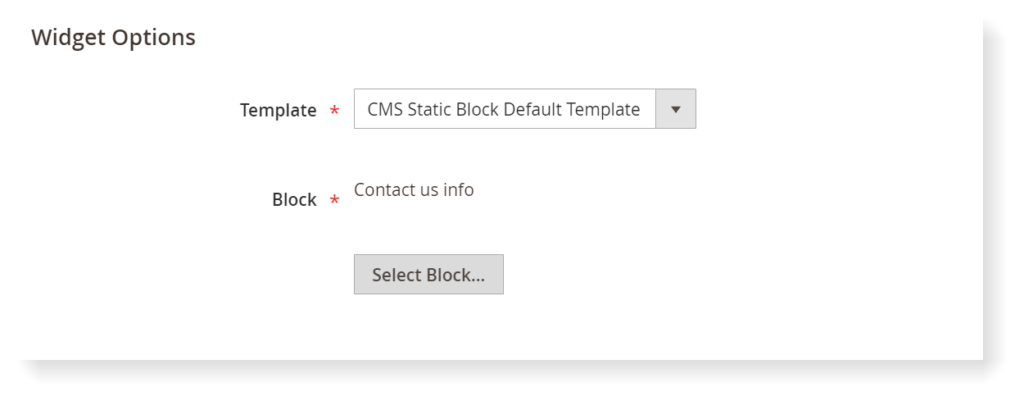
Step 5: Choose Template and Select Block
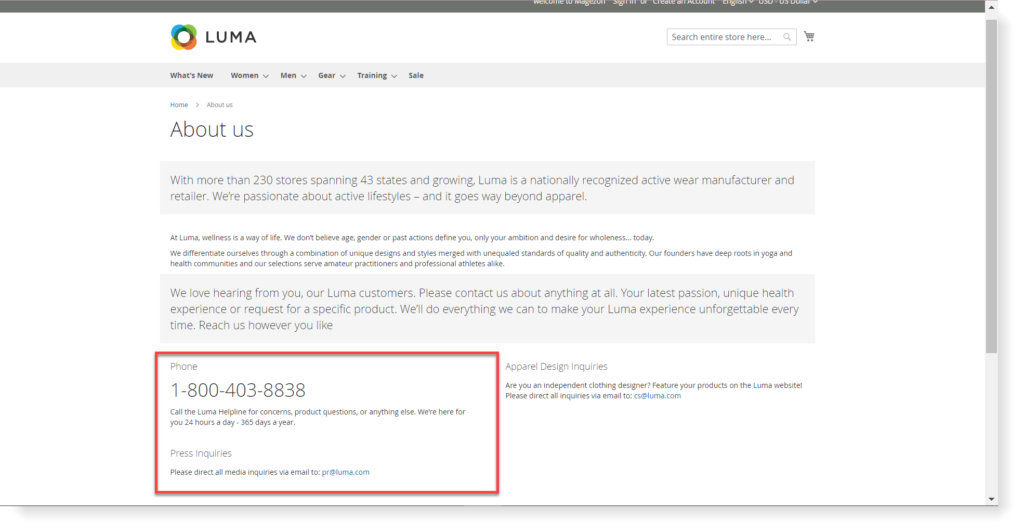
In this example, we choose the Template as CMS Static BLock Default Template. The block we use is Contact us info – a Magento 2 default block.
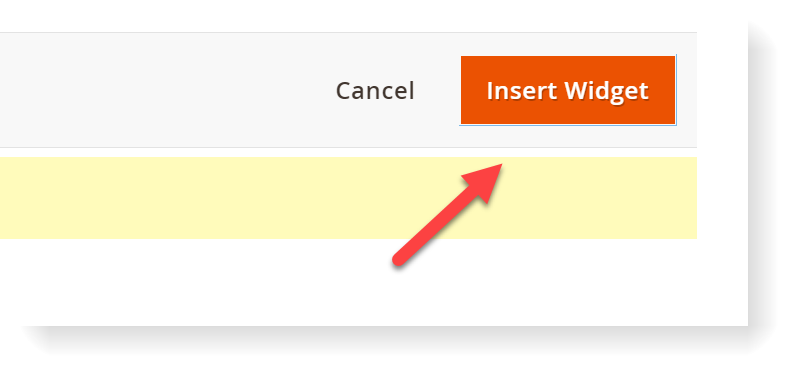
Step 6: Hit Insert Widget and Save
After you hit Insert Widget, the block will be added to the CMS page like this in the editor:
This is how the About us page looks like in the front-end. As you can see, the Contact-us-info block is added.
Conclusion
This is a basic guideline for Magento 2 CMS block first-time users. I hope you have found what you were looking for in this tutorial. If you have any questions, feel free to comment down below.
Lastly, if you’re trying to optimize your sales for your Magento store, consider Magezon extensions.
Try FREE CMS Page Builder demo today
Easily create beautiful, engaging Magento website the way you want without relying on developers or designers. Just by drag & drop.


