 Magezon Blog Help Merchants Build Comprehensive eCommerce Websites

| * To get more useful tutorials on Magento Page Builder, follow our series. |
Magento Page Builder Slider is an effective tool for creating visually appealing slideshows that feature images, videos, or content. Like banners, sliders are often found on the home page to capture visitors’ attention and prompt them to take your desired action. In this article, you’ll discover how to create an interactive slider for your Magento site. Okay, let’s get started.
Table of contents
- Where to Find Slider Content Type in Magento Page Builder
- Explain Toolboxes in Magento Page Builder Slider
- How to Add and Customize an Individual Slide
- How to Add Multiple Slides
- How to Edit Slider Settings
- Let’s See How Our Slider Looks
- Level up Your Slider With Magezon Page Builder for Magento 2
- It’s Time to Roll up Your Sleeves
Where to Find Slider Content Type in Magento Page Builder
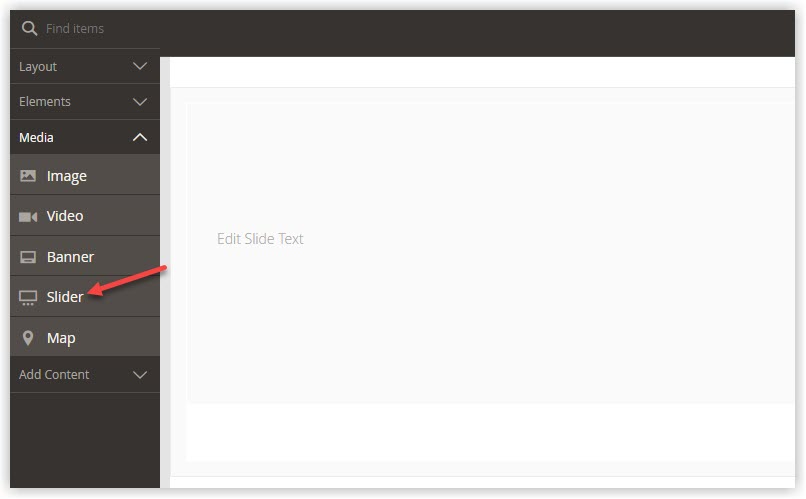
- To begin, open the Magento Page Builder workspace of the page, block, or dynamic block where you want to place the slider.
- In the left panel, expand Media to show the Slider content type.
| Master Media content types in Magento Page Builder: How to Add Video With Magento Page Builder How to Create Banner With Magento Page Builder Magento Page Builder: All About the Map Content Type Magento Page Builder: All About the Image Content Type |
Explain Toolboxes in Magento Page Builder Slider
In Magento Page Builder Slider, there are two separate toolboxes, each with its own set of controls. One is used for the entire slider and displayed in the upper center of the slider on hover. One is used for an individual slide and is visible at the bottom of this slide. Below are the detailed descriptions for each toolbox.
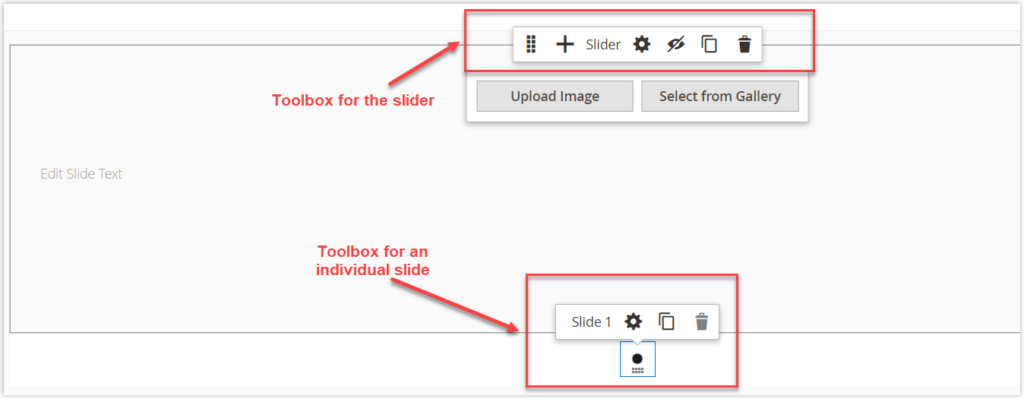
1. Individual slide toolbox
| Controls | Icon | Description |
| Label | Slide 1 | Indicate the order number of the current slide. If you move Slide 1 to the place of Slide 2, then its name will turn into Slide 2. |
| Settings | Open the Edit Slide page to change the slide settings. | |
| Duplicate | Duplicate the current slide. | |
| Remove | Delete the current slide. | |
| Move | Change the position of the individual slide in the slider by clicking and dragging the Move icon. |
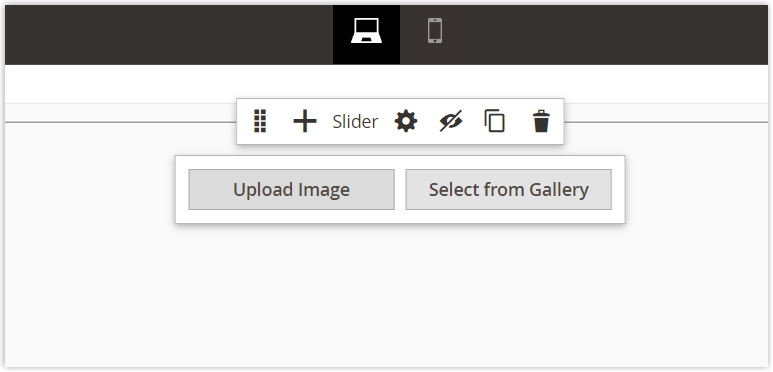
2. Slider toolbox
| Controls | Icon | Description |
| Move | Move the slider to any position on the stage. | |
| Add | Add a new slide to the slider. | |
| Label | Slider | Indicate the current container name, which is Slider. |
| Settings | Open the Edit Slide page to edit the slider and its container. | |
| Show | Show the slider that was previously hidden. | |
| Hide | Hide the slider that is currently visible. | |
| Duplicate | Duplicate the current slider. | |
| Remove | Remove the current slider. |

Try FREE Magezon Page Builder demo today
Easily create beautiful, engaging Magento website in any style whenever you want without relying on developers or designers. Just by drag & drop.
How to Add and Customize an Individual Slide
- From the left panel under Media, drag a Slider placeholder to a full-bleed row on the stage. Of course, you can choose another Layout content type like Column or Tabs.
- This newly-added slider now includes a single slide. This slide has its own editor allowing you to add and format the slide content directly from the stage. To show the text editor, click anywhere in the slider container. This is particularly useful when you need to make quick changes to any content in the editor.
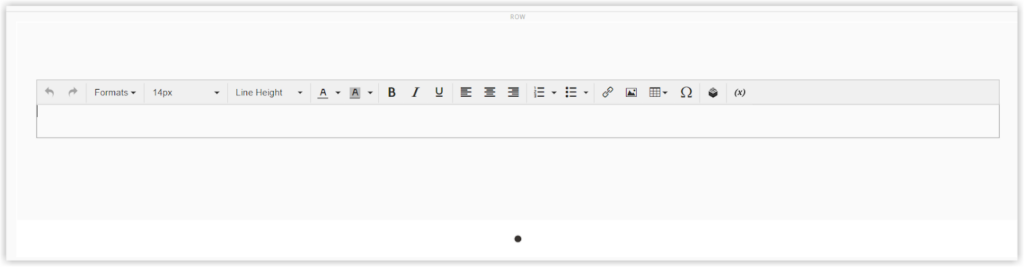
However, if you want to change other slide content settings like buttons or overlays, open its Setting page which covers all slide settings.
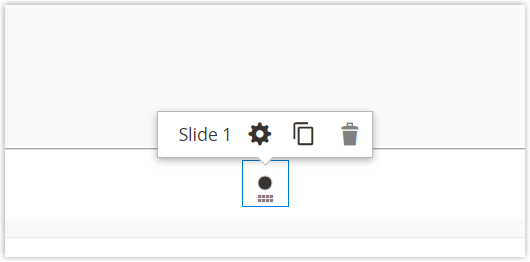
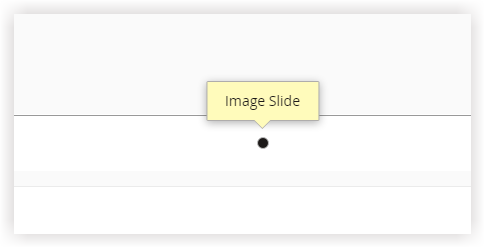
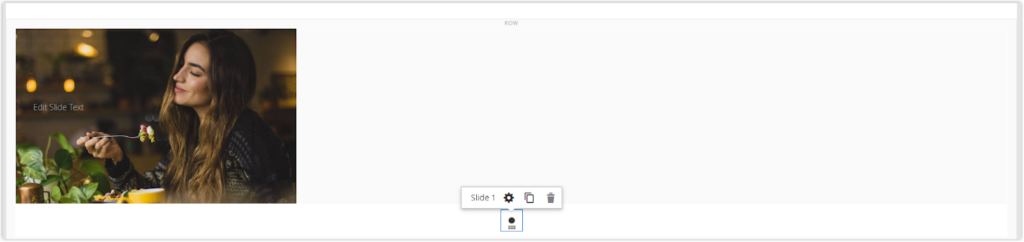
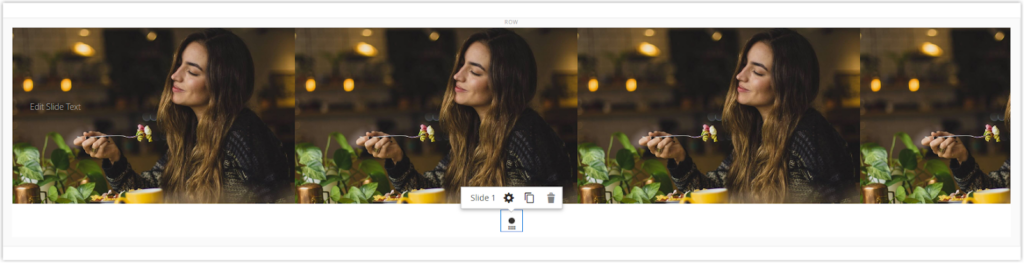
- We’ll change the content settings as well as other settings in Appearance, Background, and Advanced. To begin, click the dot navigation right below the slide. Then the individual slide’s toolbox appears. Click the Setting icon on the toolbox to access the Edit Slide page.
- You are landing on the Edit Slide page with 4 sections to be dealt with:
+ Appearance
+ Background
+ Content
+ Advanced
Let’s start with the Appearance section.
1. Appearance
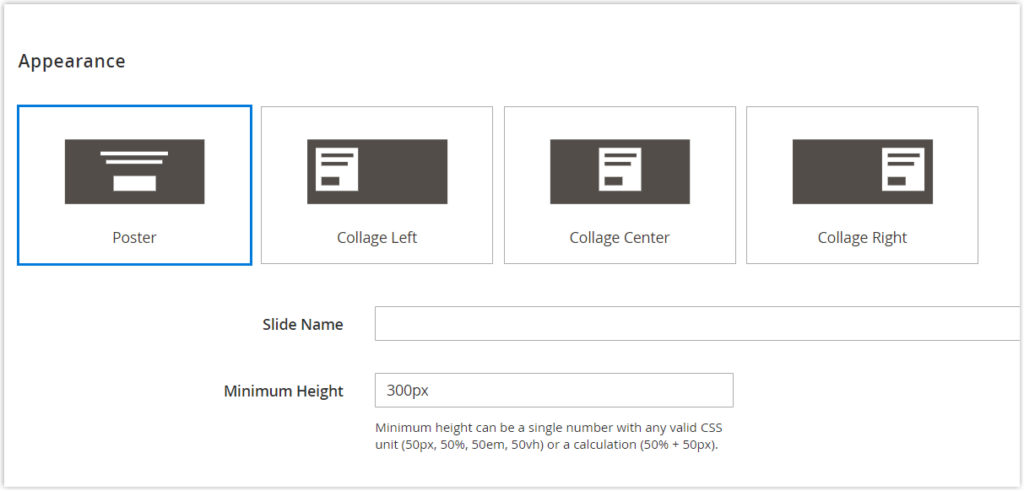
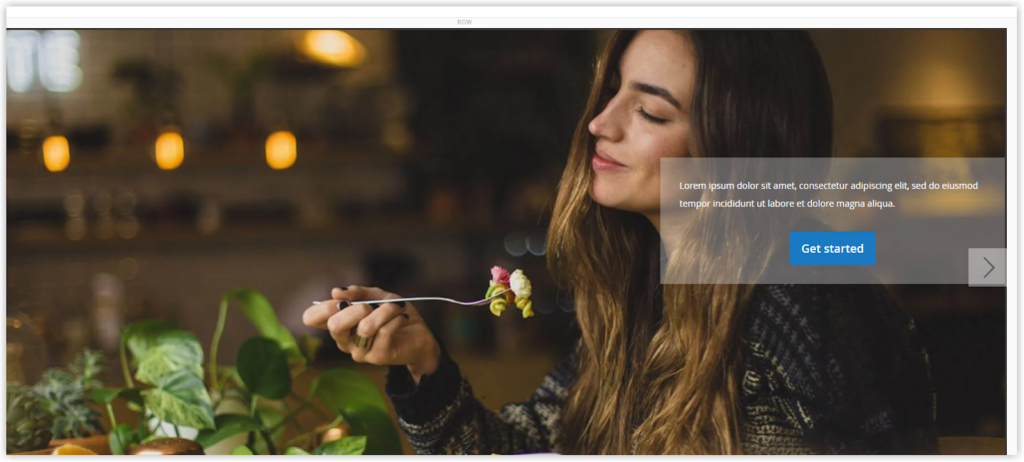
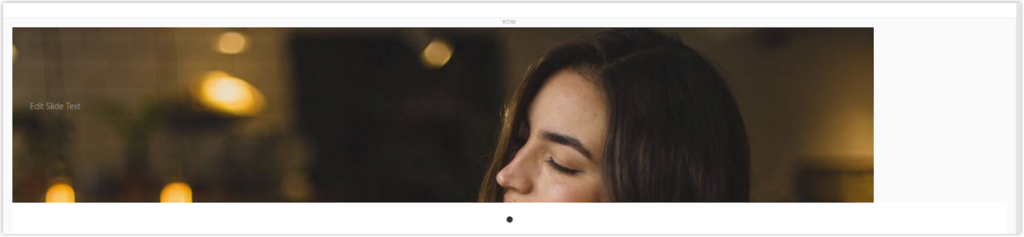
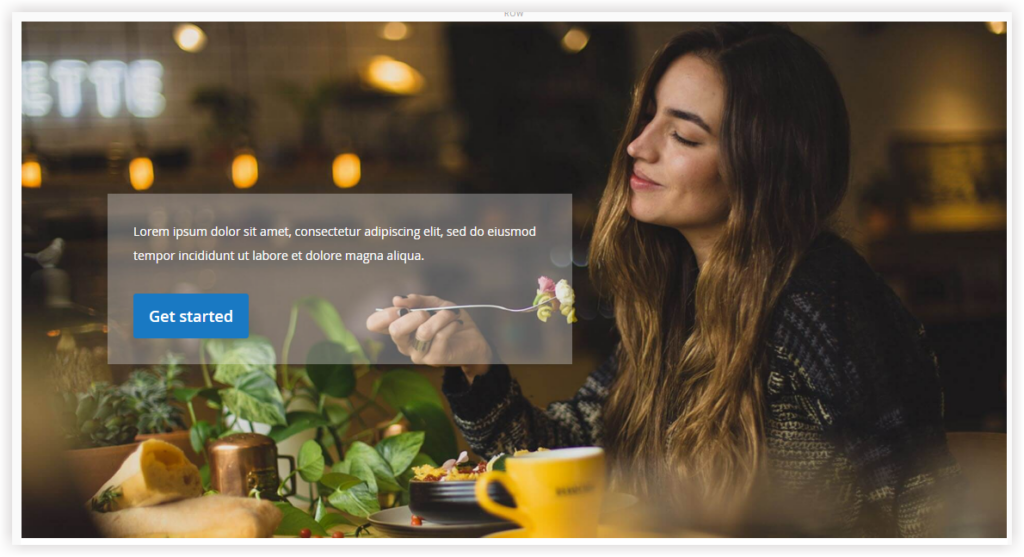
- Select an option to place the content container on the slide. Note that the content container is the defined area that includes the text and button. We have applied a transparent overlay so that you’ll see the content container more clearly.
+ Poster: Vertically center the content on the slide. If you apply an overlay to this slide, it’ll take up 100% of the slide width.

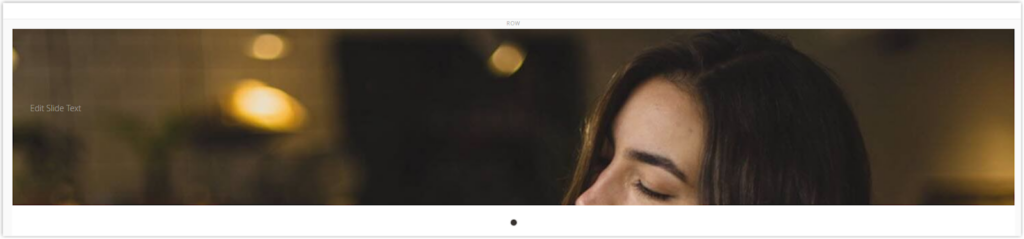
+ Collage Left: Horizontally align the content container to the left side of this slide. When you apply an overlay to the slide, it’ll cover this area only.

+ Collage Center: Horizontally center the content container on the slide. When you apply an overlay to the slide, it’ll cover this area only.
+ Collage Right: Horizontally align the content container to the right side of the slide. When you apply an overlay to the slide, it’ll cover this area only.
- Slide Name: Give the slide a name. The slide name appears as a tooltip when you hover over the navigation dot right below this slide. However, it is not visible on the storefront.
- Minimum Height: Set the minimum height for the slide. You must enter a number followed by a valid CSS unit (e.g., 100px, 100%, 100em, 100vh) or calculation (e.g.,100vh – 100px).
By default, Minimum Height is set to 300px. You can adjust it to show the full height of the background image or background video for a visually stunning look.
| Note: If the slide’s height is greater than the parent slider’s height, the parent slider will expand to fit the slide’s height. The value previously entered in the Minimum Height field remains unchanged, though. |
2. Background
There are various background types for a slide, including Background Color/Image/Video. Also, you are offered a handful of advanced effects to make the background more lively.
Let’s start with the Background Color.
- Background Color
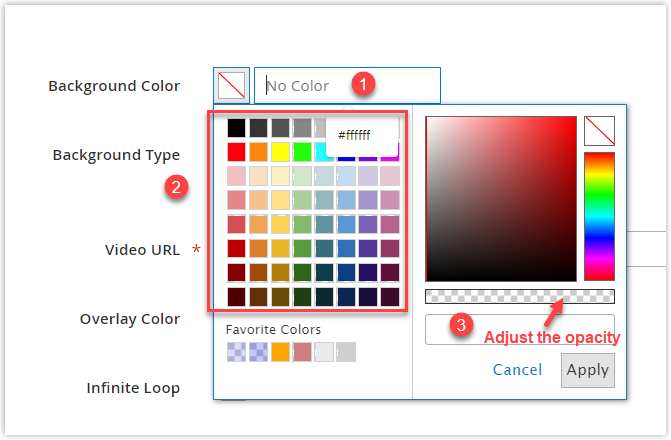
Pick a color for the slide background using one of the methods below:
- Selecting a swatch from the color panel
- Picking your favorite color using the color picker
- Directly entering a color name or a valid hex color value
You may also adjust the opacity of the colors by dragging the slider beneath the color picker.
- Background Type
There are two more background types: Image and Video. Because Background Type is set to Image by default, the image settings are on display. If you select to use Video as the background, all image settings are replaced with video settings.
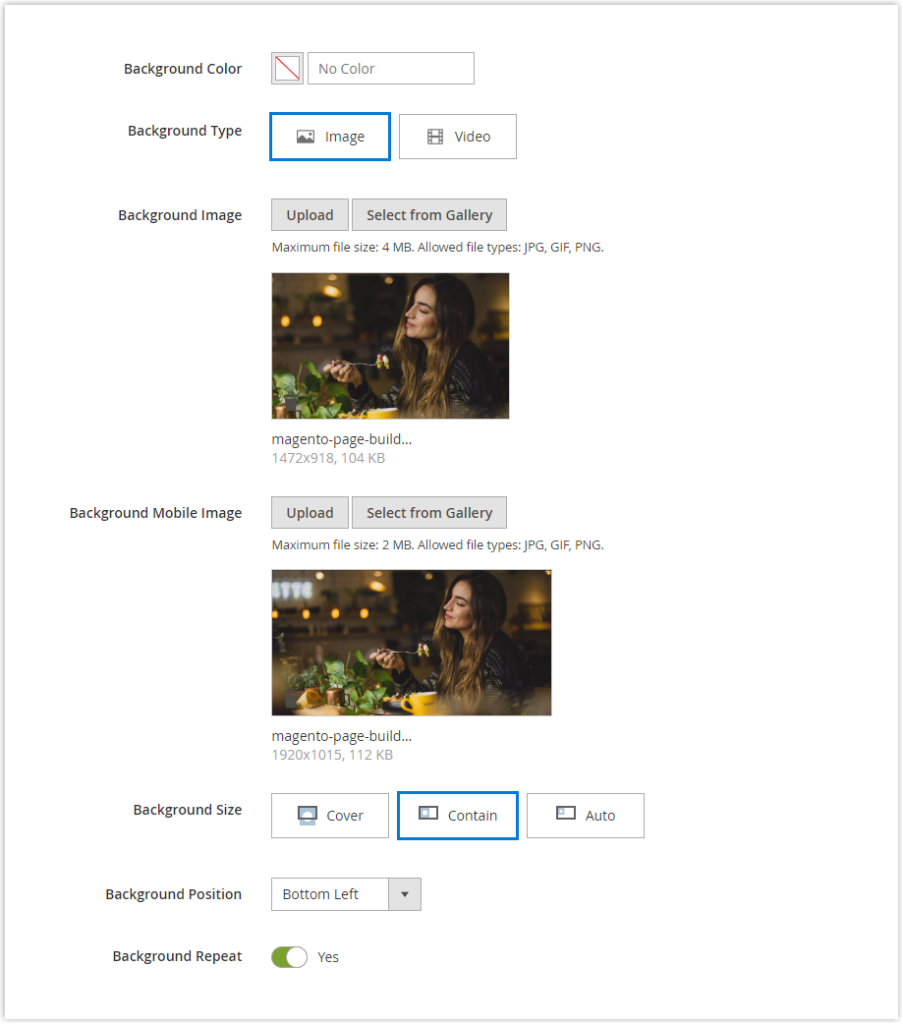
Image Background
Let’s start with the Image Background.
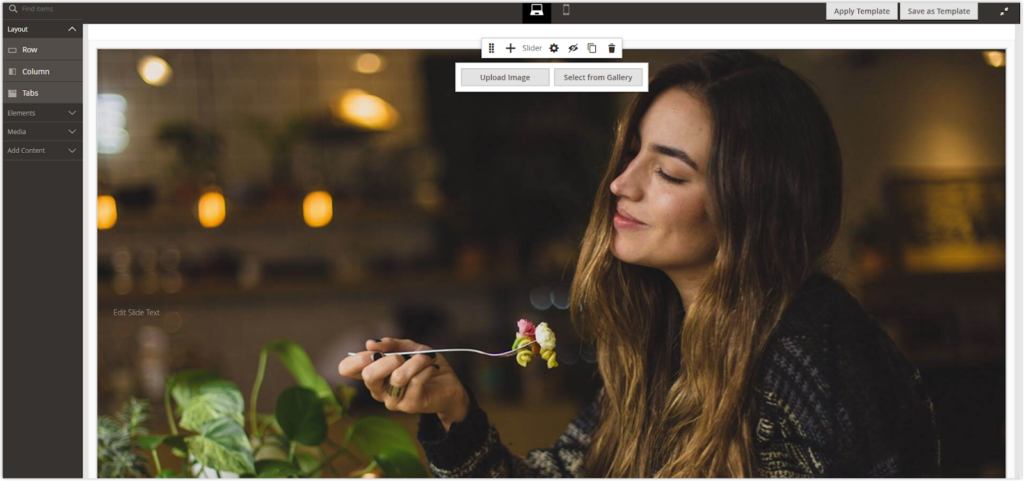
Stock Source: Pablo Merchán Montes
- Background Image: Select the background image for the slide by:
| Upload | uploading an image file from your device. |
| Select from Gallery | selecting the image from your media library if you have previously uploaded it. |
| dragging the image you want to the camera icon or browse for it from your local file system. |
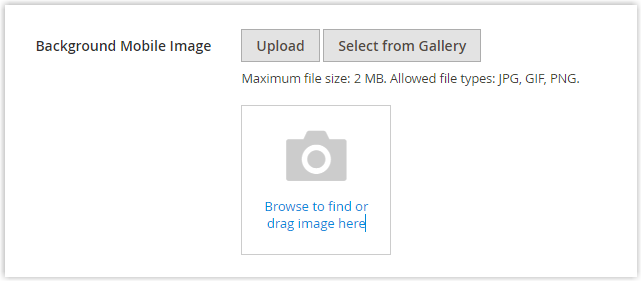
- Background Mobile Image: Select a responsive background image for mobile devices. Use the same methods as the background image.
- Background Size: Adjust the scales of the background image in relation to the slide width. You have three options to choose from.
+ Cover: When you choose Cover, the background image occupies 100% of the slide width.
+ Contain: When you choose Contain, the background image is limited to the slide width.
+ Auto: The background image is determined by the current theme’s stylesheet. Because we’re applying the Luma theme, the image dimensions stay the same.
- Background Position: Select the initial horizontal position for the background image. There are nine options available to choose from.
| Top | Center | Bottom |
| Left, Center, Right | Left, Center, Right | Left, Center, Right |
This setting is commonly used when you want the main object in the image to be the focus of attention.
Here are two specific examples of the background image set to Top Left and Bottom Left.
+ Top Left
+ Bottom Left

- Background Repeat: Toggle Yes to repeat the background image so that it’ll fill the slide’s space, especially used when Background Size is set to Contain.
Video type settings
When you choose Video as the slide background, all video settings are displayed in place of image settings.
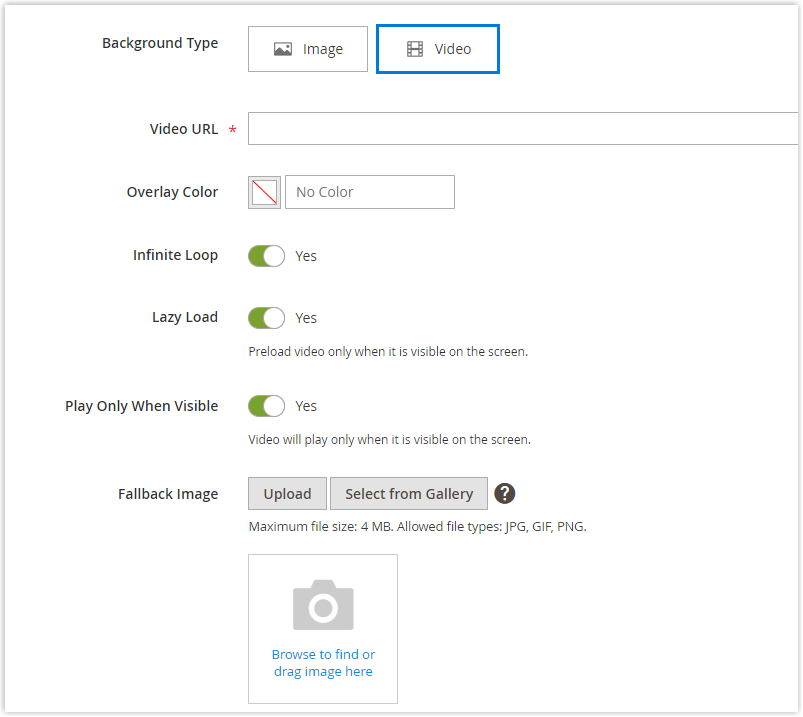
- Video URL: Enter a video URL from Youtube, Vimeo, or linking valid video files with valid video extensions (.mp4 is recommended).
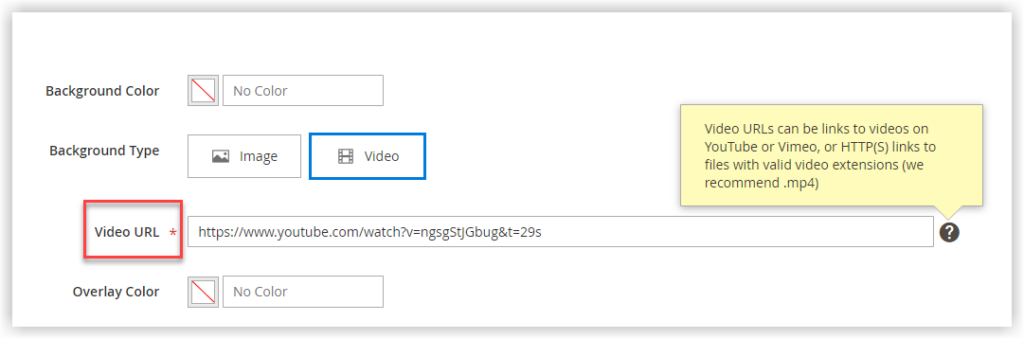
- Overlay Color: Choose a color as a transparent overlay over the video.
- Infinite Loop: Choose No to make the video play once. Choose Yes to repeat the video endlessly.
- Lazy Load: Choose Yes to make the video load only when it’s visible. Choose No to make the video load with the page even when it’s not visible on the screen.
- Play Only When Visible: Choose Yes if you want the video to play only when it’s visible on the screen. Choose No if you want the video to begin playing as soon as it loads.
- Fallback Image: Apply an image to cover the video before this video loads. This case, the image is called a fallback image, and it serves as a perfect replacement for the video that isn’t loading.
You can either upload the fallback image from your devices or choose an existing image from your media gallery. Another option is to browse for the image or drag it to the camera icon.
Okay, let’s move on to the Content section.
3. Content
On the Settings page, you change not only the content in the text editor but other settings like slide link, button, or overlay.
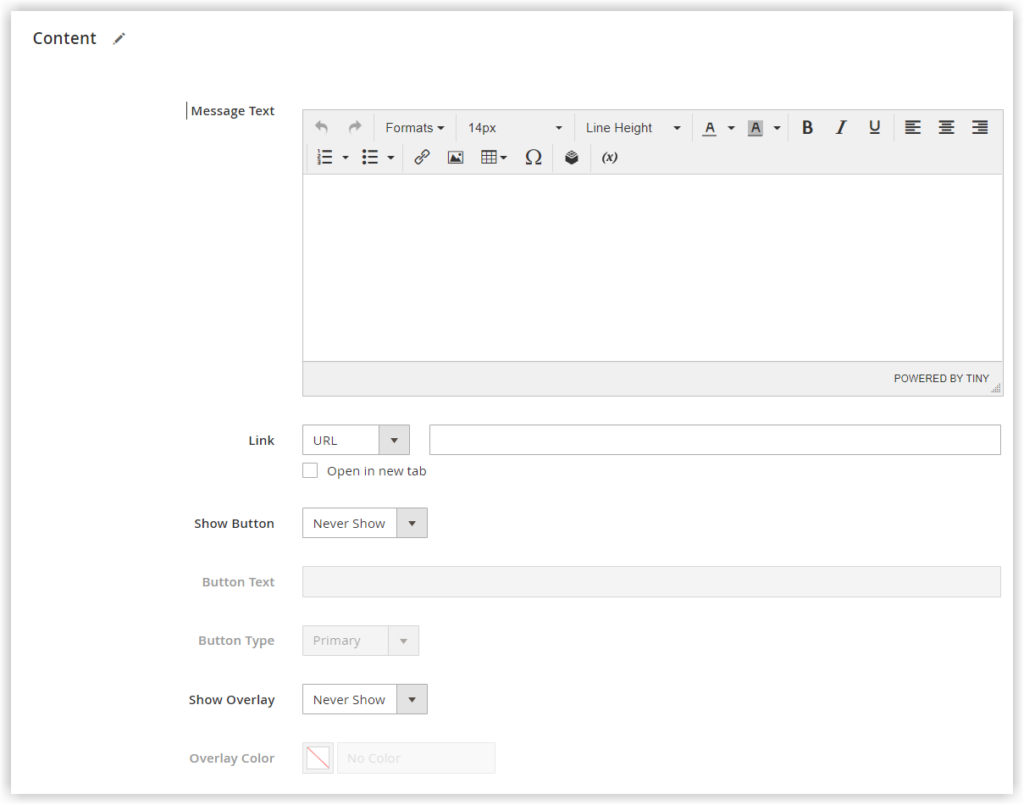
- Message Text: Enter the text that appears on the slide.
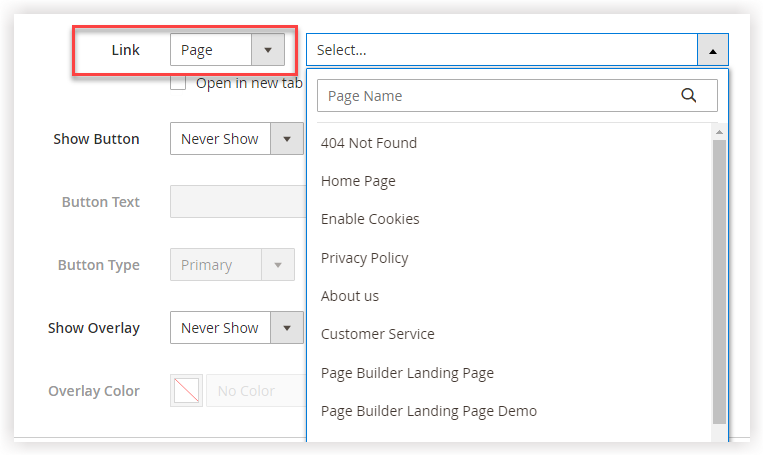
- Link: Select the destination page to which customers are taken when they click anywhere in the slide. There are four different link types to choose from.
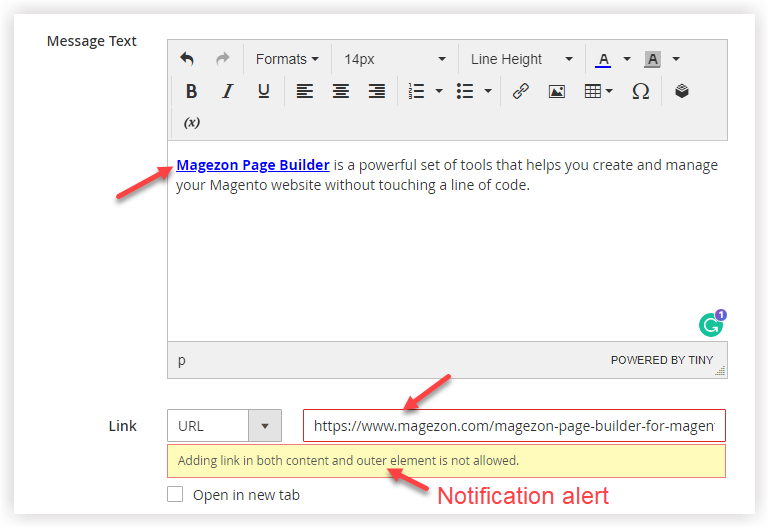
- URL: Enter any URL attached to the slide. You can enter a relative link (that only has the path) or a fully-qualified link (that includes a protocol (e.g.https), the optional subdomain (e.g., www), domain (magezon.com), and path (which has the directory and slug, e.g.,/magezon-page-builder-for-magento-2).
| A fully-qualified URL | https://www.magezon.com/magezon-page-builder-for-magento-2.html |
| A relative URL | /magezon-page-builder-for-magento-2.html |
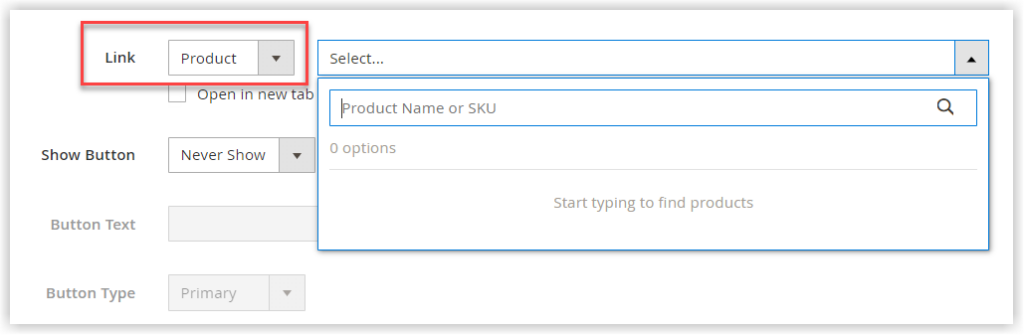
+ Product: Choose a product page as the destination page using the product name or SKU. Type either a full name or a part of your wanted product on the search bar to find the product quickly. Then choose it from the result list.
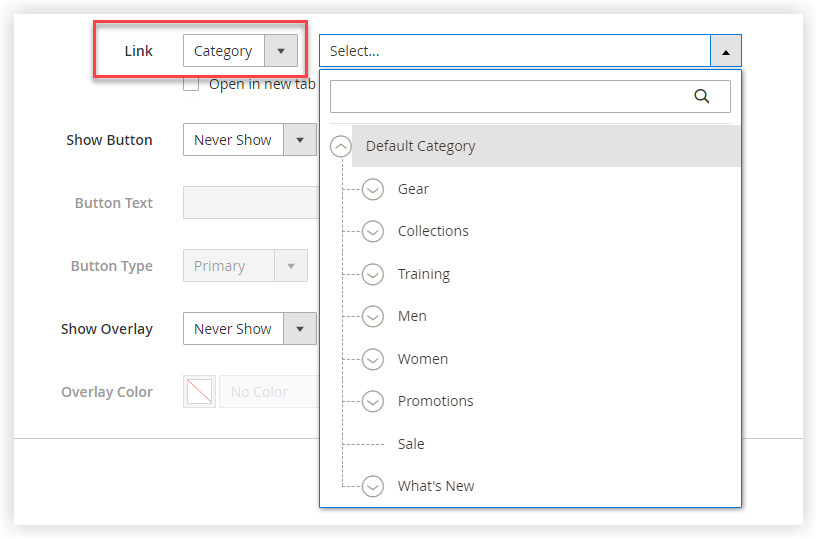
+ Category: Choose a category or subcategory page as the destination. You can expand the section in the category tree to take the category or subcategory. To quickly locate the category or subcategory, you can type either a full name or a part of your wanted category or subcategory on the search bar.
+ Page: Choose a content page as the destination page. To find the page quickly, type either full name or a partial, then select your desired page from the search results.
| Magento doesn’t allow attaching links in Message Text and in the slide simultaneously since the 2.4.1 release due to display issues on the storefront. Simply put, if you add a link to the slide, you can’t do so in Message Text. |
Tick the Open in new tab checkbox to avoid visitors leaving your page.
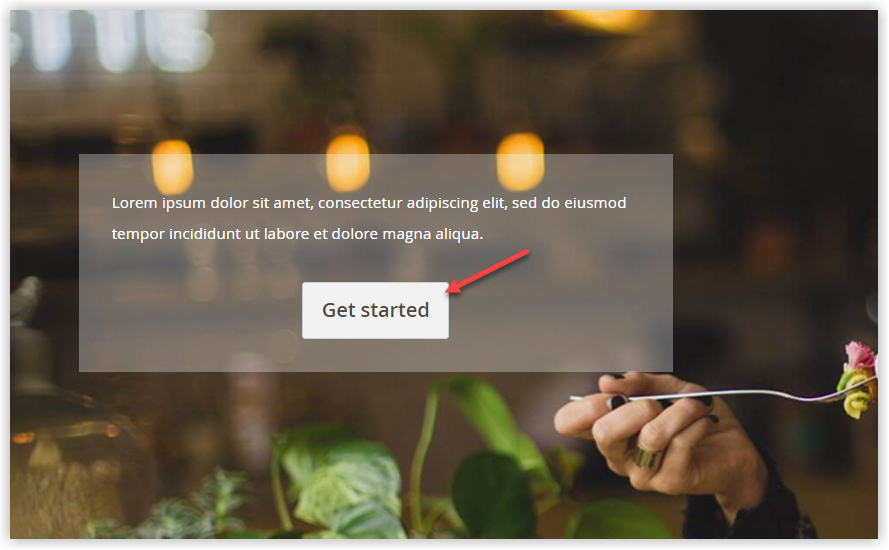
- Show button: Choose one of the options below to display the button on the slide.
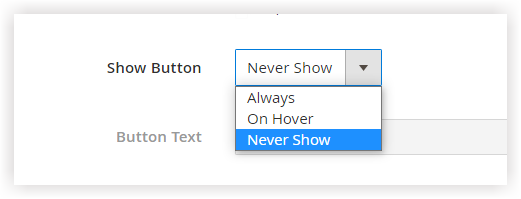
+ Always: When you select this, the button appears on the slide all the time.
+ On Hover: When you select this, the button only appears on the slide when you hover over it.
+ Never show: The button doesn’t show up on the slide when you select this. As a result, the two fields, Button Text and Button Type, will be disabled.
- Button Text: Add text that is displayed over the button.
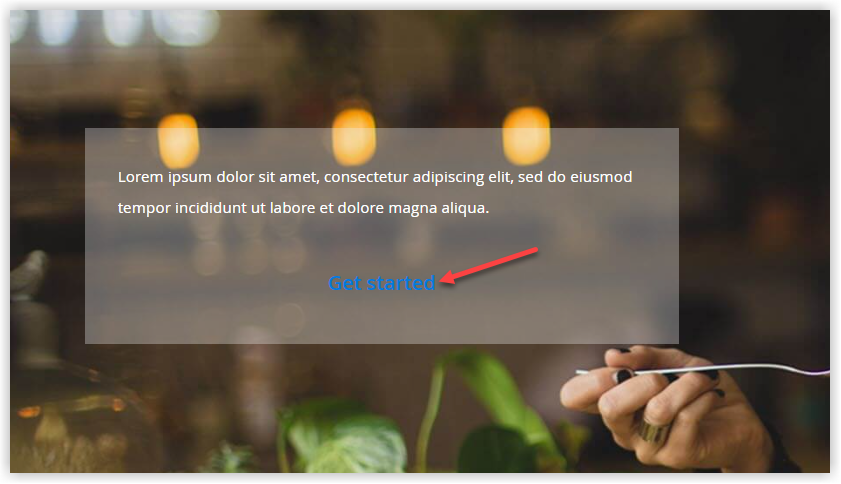
- Button Type: Choose the style for the slide button. You have three styles determined by the current theme (Luma)
+ Primary: Your button appears with a blue background and white text.
+ Secondary: Your button appears with white background and dark gray text.
+ Link: Instead of a button, a link shows on the slide.
→ Read more: How to Add Buttons in Magento Page Builder
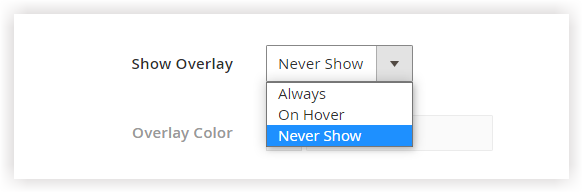
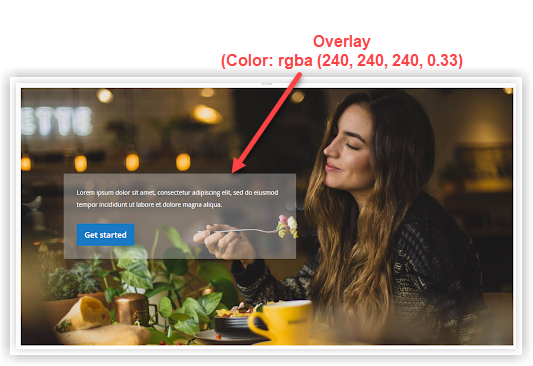
- Show Overlay: Apply an overlay to the content container.
+ Always: The overlay always appears over the content container.
+ Hover: The overlay appears over the content container only when you hover over it.
+ Never Show: The overlay doesn’t appear over the content area.
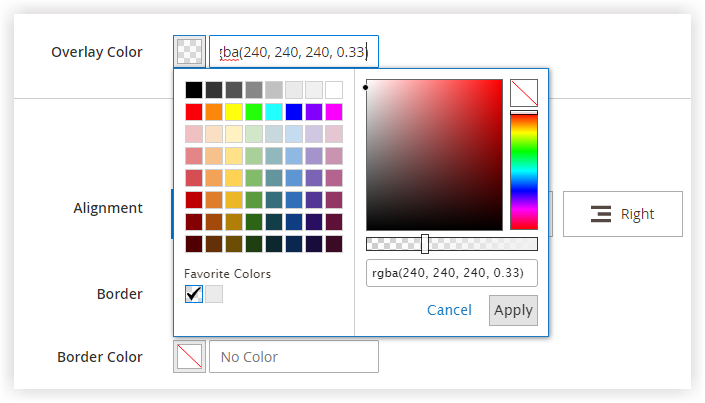
- Overlay Color: Select a color for the overlay over the content container.
4. Advanced
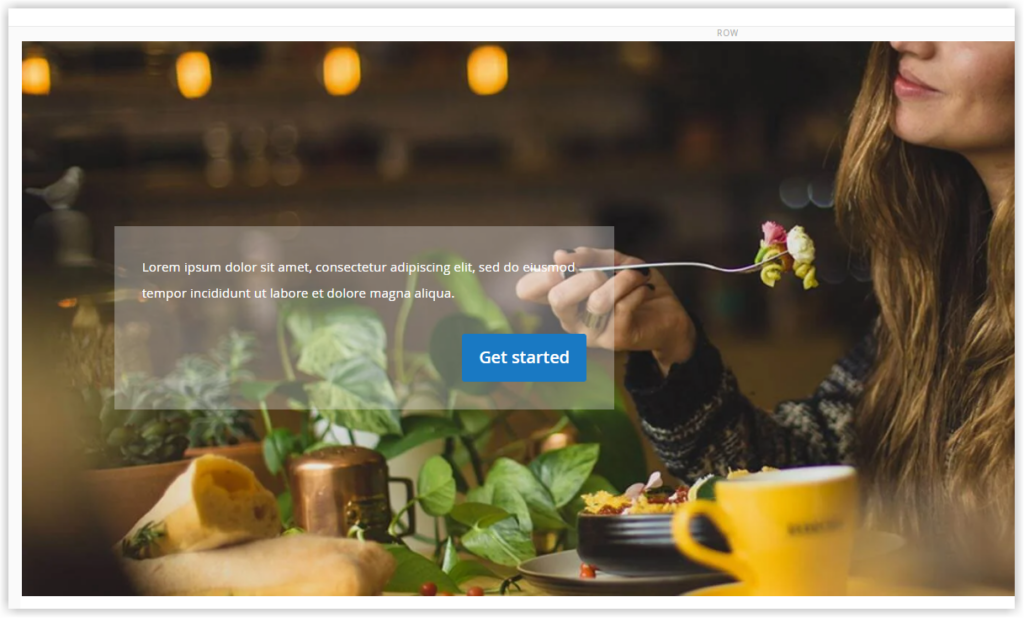
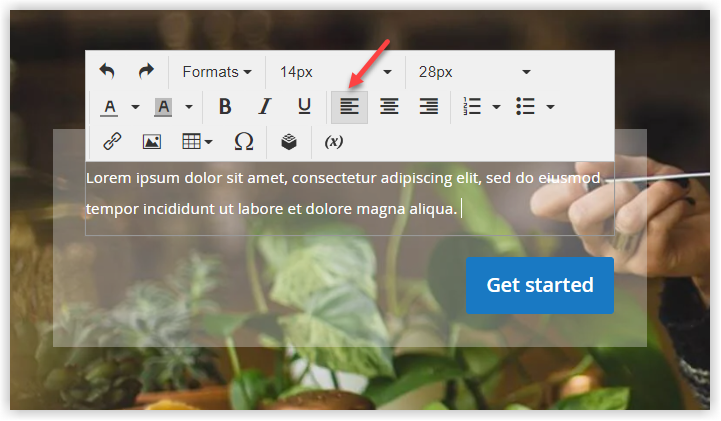
- Alignment: Select an option to align both the text and the button in relation to the content container horizontally: Default, Left, Center, Right.
+ Default: Use the default alignment setting that is specified by the style sheet of the current theme.

+ Left: Align the text and the button to the left side of the content container.
+ Center: Center- align the text and the button side on the content container.
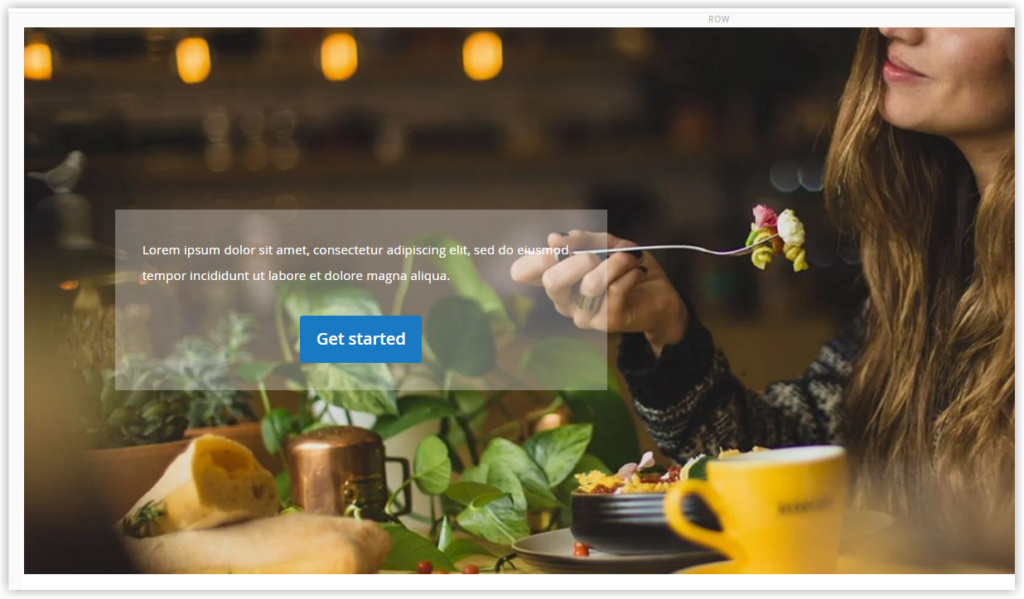
+ Right: Align the text and the button to the right side of the content container.
You’re probably confused about why the text is not aligned to the right side of the slide like the button. It’s because the text’s alignment setting in Message Text overrides the one in Advanced. Specifically, we previously aligned the text to the left side of its container in the Message Text editor so the text is always on the left side.
- Border: Apply one of the following styles to all slide sides.
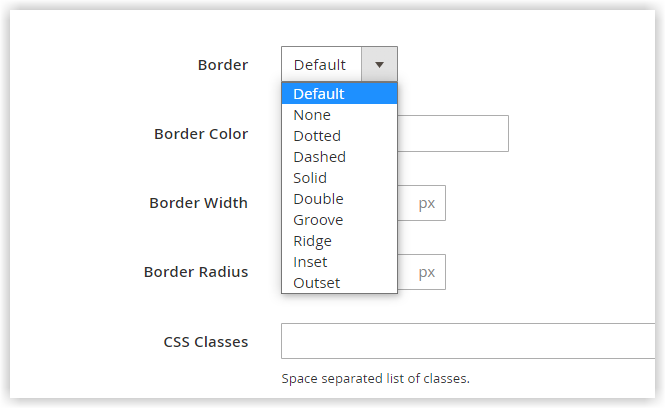
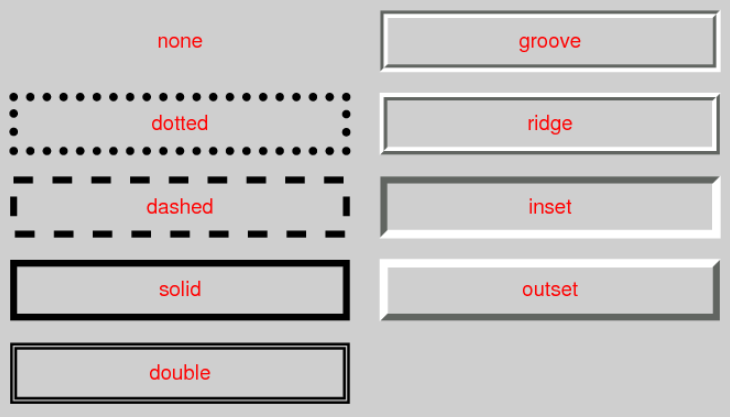
If you select any options apart from None then you can customize the border color and width.
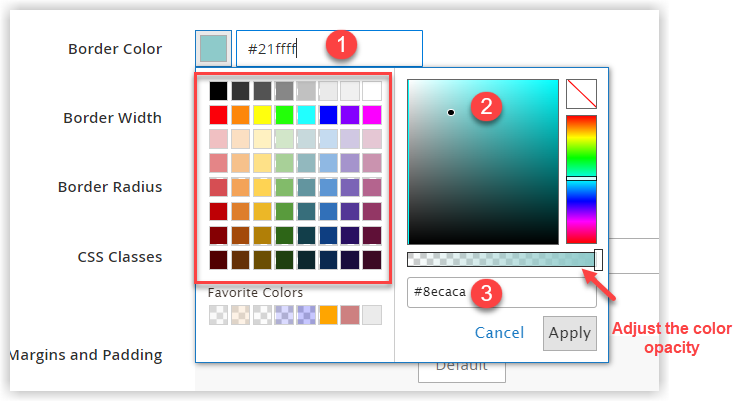
- Border Color: Set a color for the slide borderline. Use one of the methods below:
+ Pick a swatch in the color panel.
+ Click and drag the cursor inside the color picker.
+ Type a color number or valid hex value.
You can adjust the color opacity of the slide border.
- Border Width: Set the thickness for the slide border. (Unit: px)
- Border Radius: Set the round degree for the slide border’s corner. (Unit: px)
- CSS Classes: Enter the names of CSS classes that you want to apply to the slide. To separate many class names, use a space. This is optional.
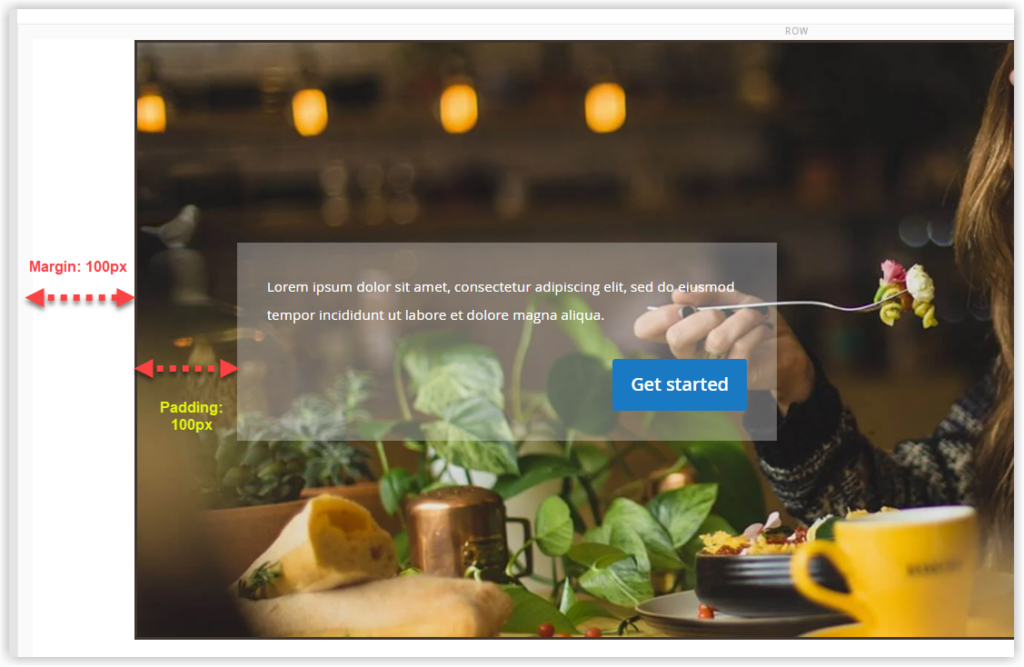
- Margins and Padding: Set the slide’s outer margins and inner padding.
+ Margin: It’s the blank space outside the border of the slide.
+ Padding: It’s the blank space between the slide’s border and its content container’s border.
Okay, we’re done. I’m pretty sure you’ve gained a good understanding of adding and customizing an individual slide. But that’s just the beginning. When you’re going to use the Slider element, you are more likely to create a slider with multiple slides, not just an individual one. So, let’s continue!
Try FREE Magezon Page Builder demo today
Easily create beautiful, engaging Magento website in any style whenever you want without relying on developers or designers. Just by drag & drop.
How to Add Multiple Slides
To create multiple slides, use one of the following approach:
Method 1: Duplicate the slide I’ve created before.
This method saves you time because you just need to duplicate the existing slide that you have already configured. So, here are steps:
- Click on the navigation dot right below the slide, then a toolbox with Duplicate control appears. Select the Duplicate icon on the toolbox handle.
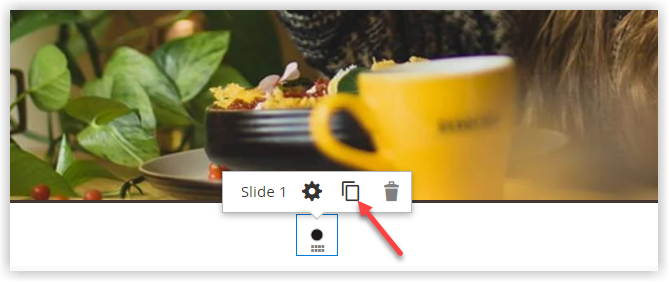
- To edit the slide, click on the navigation dot below the new slide to show its toolbox. Select the Settings icon. Then, change the individual settings as guided above.
- Click Save when you’re finished. You can create more slides using the above method.
Method 2: Create a New Slide
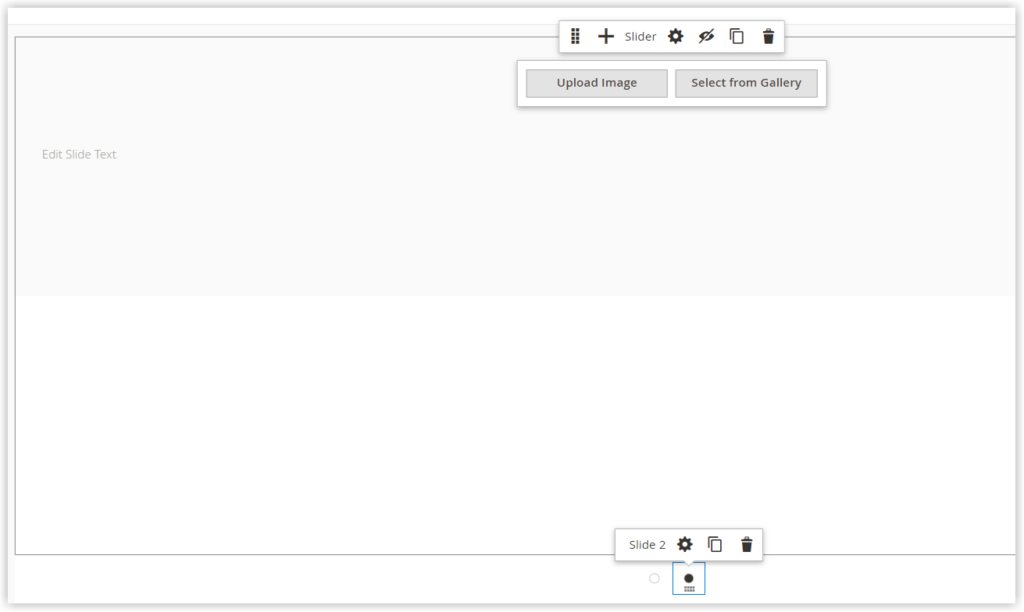
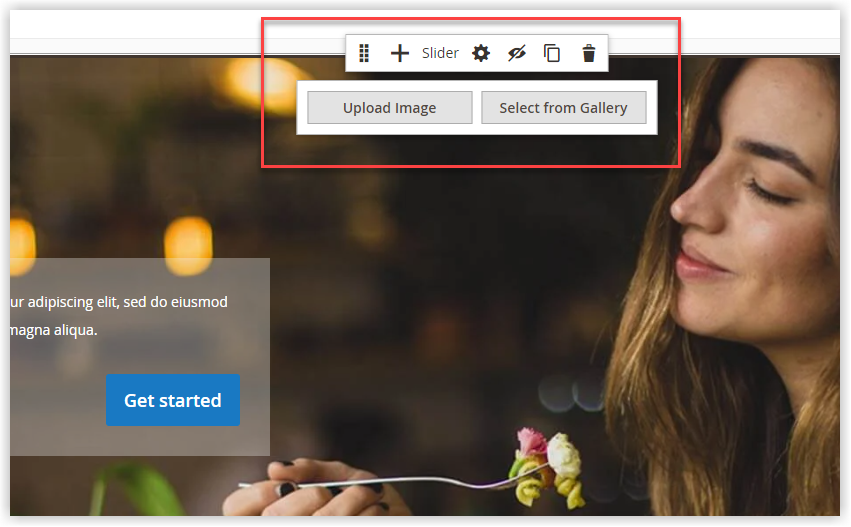
- Mouse over the slide container in the middle top to show its toolbox. Click the Add icon.
- After that, the slider has one more individual slide with its own toolbox and navigation dot. This new slide is completely blank.
- To modify the slide settings, you apply the same approach shown above.
- When you’re done, click Save to apply the settings.
How to Edit Slider Settings
The Edit Slider page is divided into 2 main sections: Slider Settings and Advanced.
- Slider Settings
- Mouse over the slider container to display its toolbox. Then click on the Settings icon on the toolbox handle.
- Minimum Height: Set the minimum height for the slider. You need to enter a number followed with a valid CSS unit (e.g. 50px, 50%, 100em, 100vh), or a calculation (e.g., 100vh – 100px). Otherwise, a yellow notification will show up.

- Autoplay: When you choose Yes, the slider will automatically play once the page loads. When you choose No, the slider won’t automatically play; therefore, customers have to click on the navigation dots or arrows to see the next slide.
- Auto Speed: If you set Autoplay for your slider, you can adjust the auto speed which is the delay in a number of milliseconds between slides. By default, the time-out is 4000ms (4s).
Note: Setting the time-out too long may cause the page to load slowly. Also, don’t set it too short, as it may negatively affect the user experience.
- Fade: Toggle Fade to Yes to make the transition between slides smoother. The fade keeps the slides in place while the content transitions smoothly from one slide to the next.
If you don’t use the fade effect between slides, you’ll see a horizontal movement when transitioning them.
- Infinite Loop: To make the slider repeat endlessly, toggle this field to Yes.
- Show Arrows: Choose Yes to show Next and Previous arrows to the left and right side of each slide. These arrows act as the navigation control for the slider.

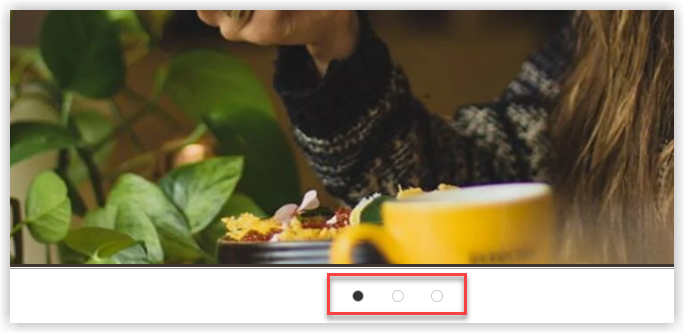
- Show Dots: Choose Yes to show a small series of navigation dots that appears right below the slider. Each represents an individual slide of the slider.
When finished, click Save to save the changes. Let’s proceed to the last section, Advanced.
- Advanced
All Advanced settings of a slider are quite the same as the ones of an individual slide. The difference here is Alignment.
In the Advanced section of a slider, it’s the alignment of the content and button within the content container. Meanwhile, in the individual slide’s one, it’s the alignment of the content container in relation to the slide.
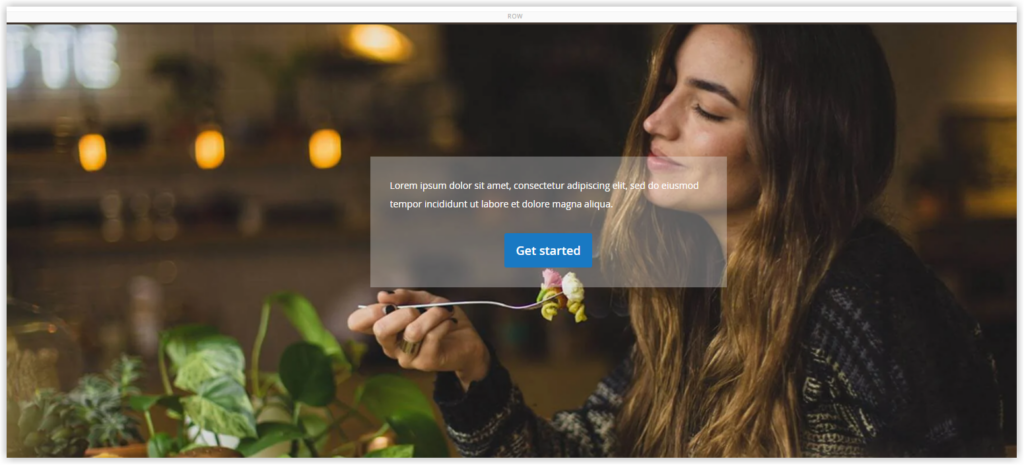
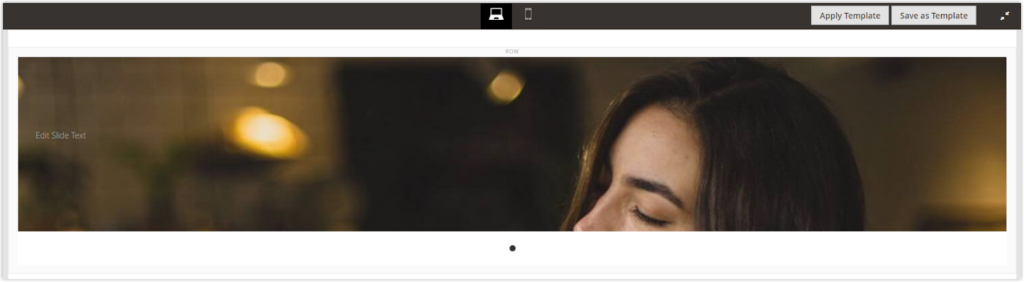
Let’s See How Our Slider Looks
After explaining all settings in the Slider content type of Magento Page Builder, we want to show you a slider that we’ve created. Take a look at the video below.
Looks quite good, right? If you want to practice creating this slider from scratch, here are all settings used to build the slider. Hope it helps you a lot.
| Parent Row | |
| Row display type | Full-bleed |
| Slide | |
| 1. Slider settings | |
| Autoplay | Yes |
| Autospeed | 3000ms (3s) |
| Fade | Yes |
| Infinite Loop | Yes |
| Show Dots | Yes |
| 2. Slide 1 & Slide 2 settings: Image as the slide background | |
| Appearance | Collage Left |
| Minimum Height | 750px |
| Background Type | Image for slide 1 (Source: Pablo Merchán Montes). Image for slide 2 (Source: Loija Nguyen) The image size is larger so use Tinypng to reduce the file size. As a result, your page loads faster. |
| Background Size | Cover |
| Background Position | Center |
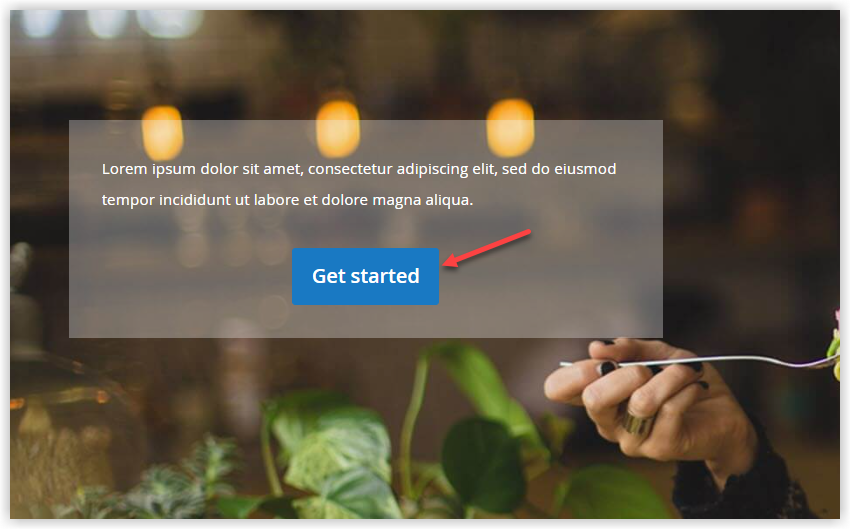
| Message Text | Text– Lorem ipsum dolor sit amet, consectetur adipiscing elit, sed do eiusmod tempor incididunt ut labore et dolore magna aliqua.Format Text– Font size: 14px- Line height: 28px- Font color: White- Alignment: Center |
| Link | URL https://www.magezon.com/magezon-page-builder-for-magento-2.html |
| Open in new tab | Tick the checkbox |
| Show button | Always |
| Button Text | Get started |
| Button Type | Primary |
| Show Overlay | Always |
| Overlay Color | rgba(240, 240, 240, 0.33) |
| Alignment | Left |
| Top-padding | 200px |
| Left-padding | 100px |
| 3. Slide 3 settings: Video as the slide background | |
| Minimum Height | 750px |
| Background Type | Video (Source: https://www.youtube.com/embed/PZ4pctQMdg4) |
| Infinite Loop | Yes |
| Lazy Load | Yes |
| Play Only When Visible | Yes |
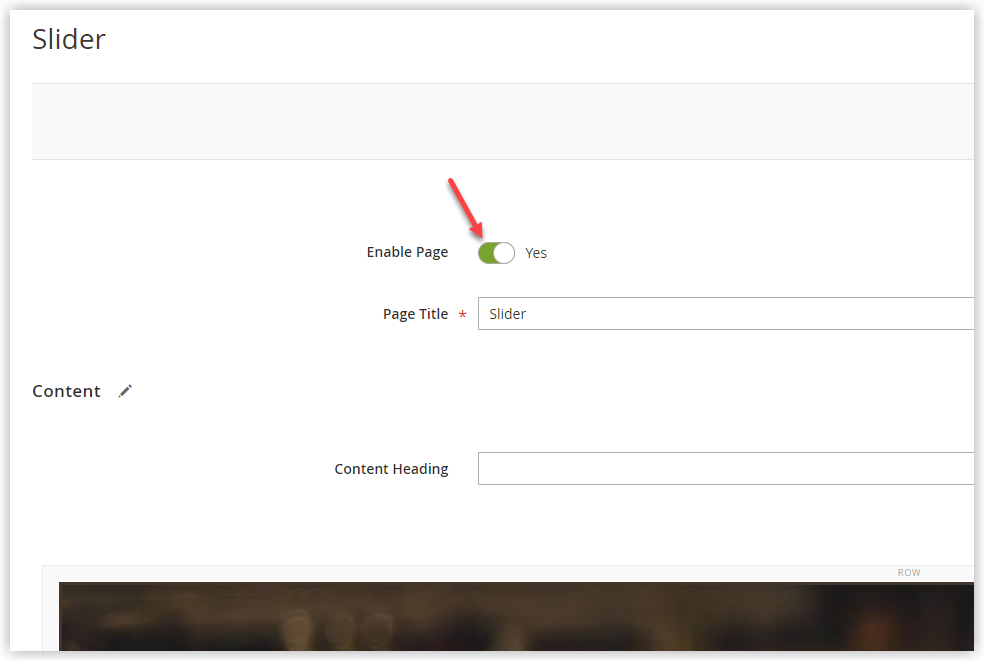
- Make sure you enable the page that includes this slider.
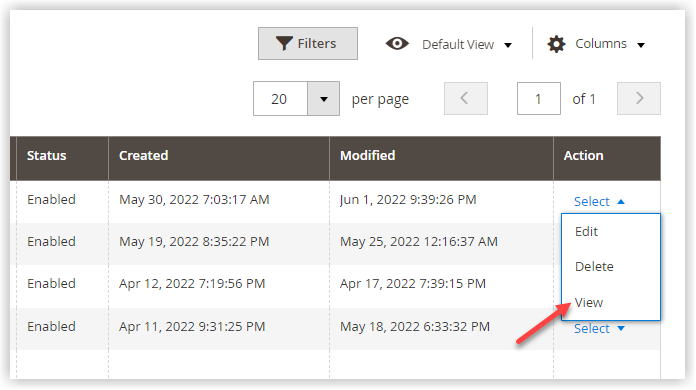
- In the Pages grid, select this page. Click the Select dropdown in the Action column, then choose View.
That concludes our discussion of Magento Page Builder Slider. If you’ve got a good handle on it, then it’s time to roll up your sleeves and get to work.
In the next part, we would like to promote the Slider element from our Magezon Page Builder, especially useful for those looking for an advanced alternative.
Level up Your Slider With Magezon Page Builder for Magento 2
It can’t be denied that Magento Page Builder Slider has a plethora of features that allow you to create engaging sliders for your website. So why should you consider using the Slider element of our Magezon Page Builder? You might be wondering. Let me tell you why.
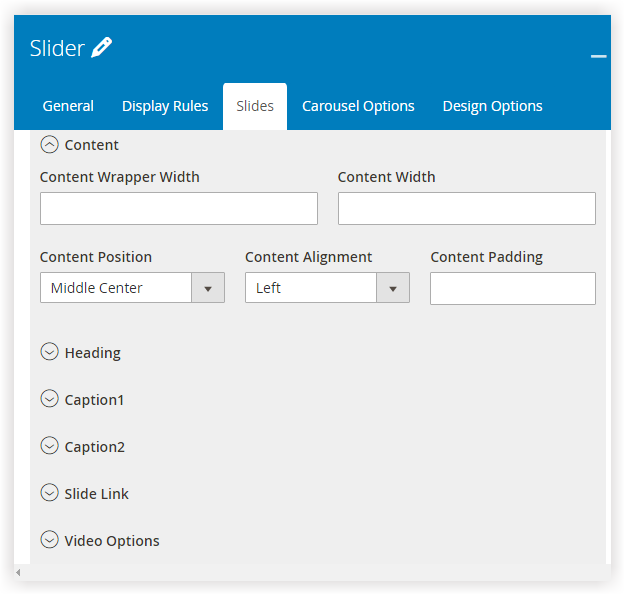
- When you use Magento page Builder Slider to customize multiple slides, you must open each individual slide to change its settings. This takes a lot of time and effort. And the Slider of Magezon Page Builder can save you tons of time. Because the settings of all slides in our builder are gathered in one place (tab Slider), you can customize many slides without switching back and forth.
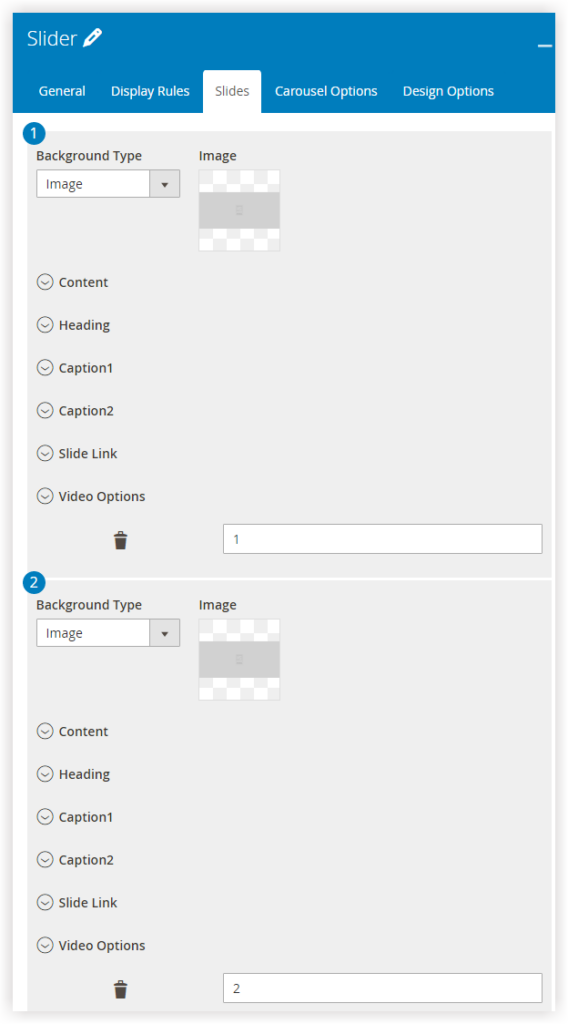
- When it comes to the content settings, Magento Page Builder Slider only offers a few customization options for content and buttons. Meanwhile, using Slider or Magezon Page Builder, you can customize heading, content, caption, button, and video, and each of which has its own set of handy features that are well-organized. As a result, you can quickly modify any settings you desire.
- What distinguishes Slider of Magezon Page Builder from Magento Page Builder is a much greater number of carousel options, such as Navigation Position, Navigation Size, Dot Inside, Dot Speed, Margin, Stage Padding, Animation Effects, and so on.

- The sliders built with Magezon Page Builder are 100% responsive. It means they can automatically adjust their background image, background video, and content to look good in any screen size.
- Other features
We highly recommend trying the demo of Magezon Page Builder to explore what Slider can do for you.
Furthermore, if you want to improve other aspects of your web pages, not just sliders, Magezon Page Builder with more than 50 elements can help you out.
It’s Time to Roll up Your Sleeves
With a bunch of settings that Magento Page Builder Slider provides, you can absolutely create striking slideshows to attract and engage your site visitors. Now it’s time to get this thing started. Don’t worry if you run into snags because we’re here to help you. When your work is done, please share it with us.
Try FREE Magezon Page Builder demo today
Easily create beautiful, engaging Magento website in any style whenever you want without relying on developers or designers. Just by drag & drop.


