 Magezon Blog Help Merchants Build Comprehensive eCommerce Websites

| * To get more tutorials on Magento Page Builder, visit here |
In the previous article, we’ve given you an overview of the Row content type, which is the root element of Magento Page Builder. In this article, we’ll go over Magento Page Builder Column, another critical structure content type you should know before building your own pages.
You’ll know where the Column content type is in Magento Page Builder and learn how to add, resize, duplicate, remove, and customize a column the way you wish.
So, buck up and dive deeper into it.
Table of contents
- Where Is the Column Content Type?
- How to Add a Magento Page Builder Column
- How to Resize a Magento Page Builder Column
- How to Duplicate a Magento Page Builder Column
- How to Delete Magento Page Builder Column
- How to Customize Magento Page Builder Column
- An Alternative for Magento Page Builder
- So, What’s Next?
Where Is the Column Content Type?
When you access Page Builder workspace, you can see the Column content type in the left panel under Layout.
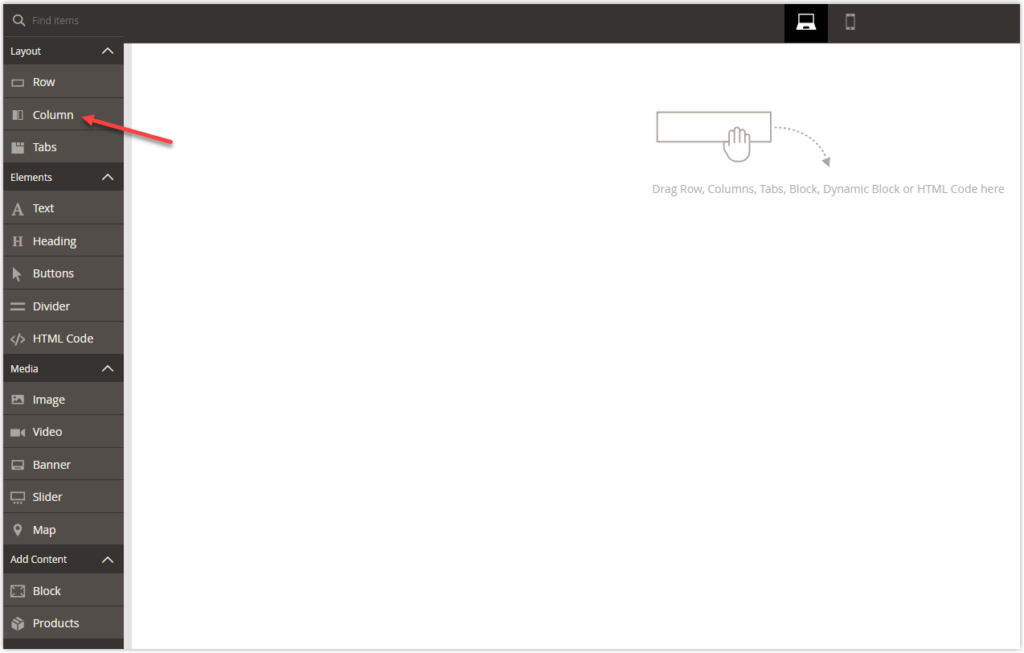
Next, we’ll add the column to the stage, which is the empty workspace on the right.
How to Add a Magento Page Builder Column
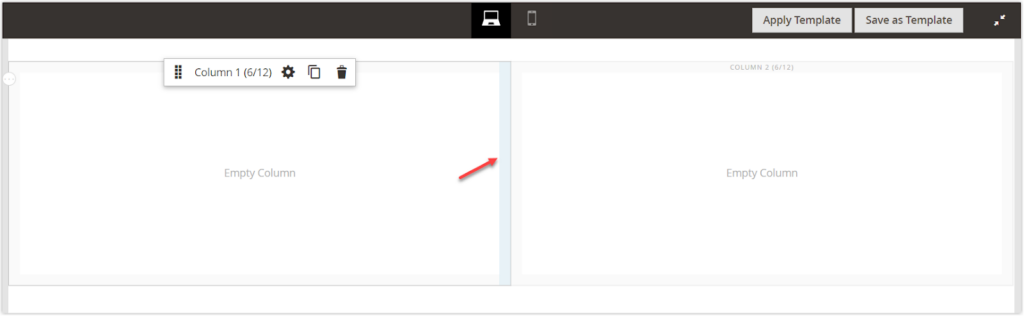
- Drag the Column from the left panel to the position below the red guideline.
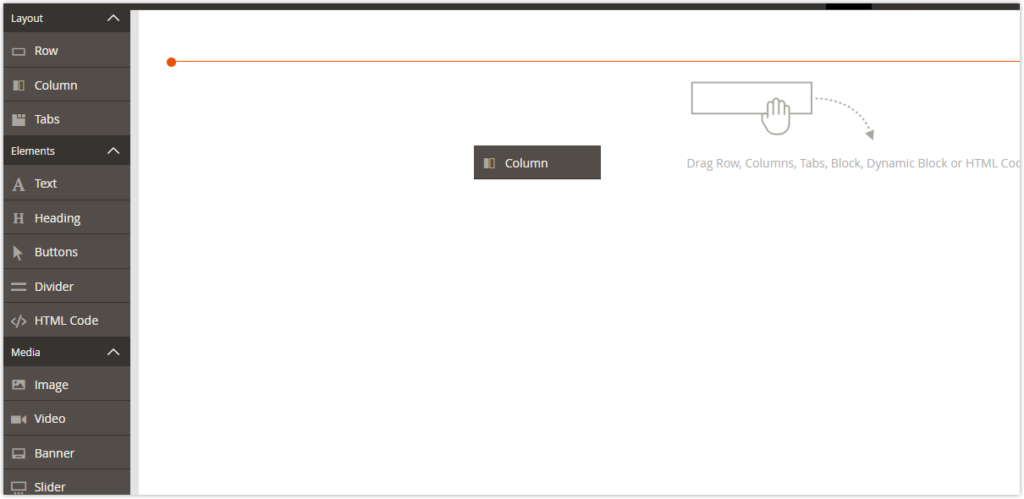
- Once this content type has been placed on the stage, there appear two columns of equal width (6/12). Each column acts as a separate container for adding content. As a result, each has its own toolbox, as shown in the image below.
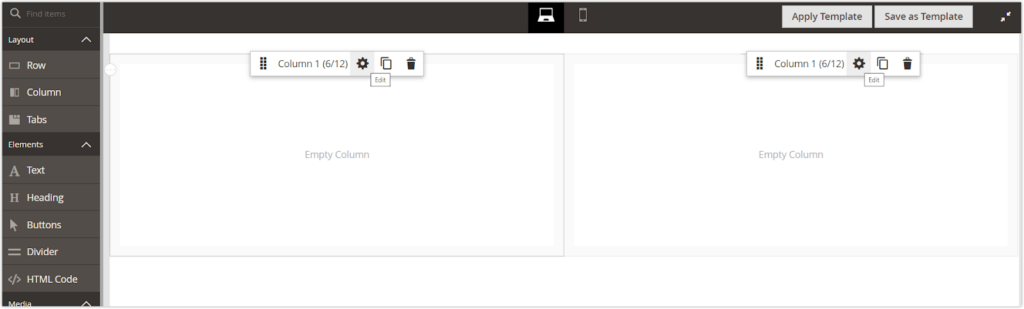
And this is a toolbox with its options.
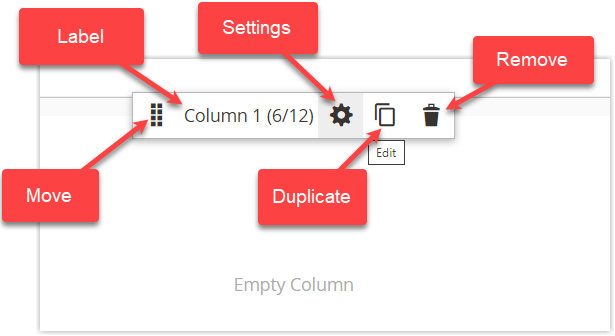
| Tool | Description |
| Move | Change the position of the Magento Page Builder column and its content in relation to other columns (By clicking and holding down the left mouse button and moving to the wanted position). |
| (Label) | Determine the current container as a column. You can simply hover over the container to make its toolbox visible. |
| Settings | Open the Edit Column page to change the column’s settings. |
| Duplicate | Create a duplicate of the current column in Magento Page Builder. |
| Remove | Delete the current column and its content as well. |

Try FREE Magezon Page Builder demo today.
Easily create beautiful, engaging Magento websites in any style without relying on developers or designers. Just by drag & drop.
How to Resize a Magento Page Builder Column
By default, the column group is divided into two equal-width columns. However, there are times when you want to change their width. If you adjust the width of any column, the other one will also change.
Follow the steps below, and you can find the answer.
Note: These steps can be applied to the layout with more than two columns (e.g., 3, 4 columns).
- Hover over the border between these two columns. Then, the border is highlighted in light blue. Simultaneously, the toolbox of the selected column in Magento Page Builder shows up.
To adjust the width of the column, do the following steps:
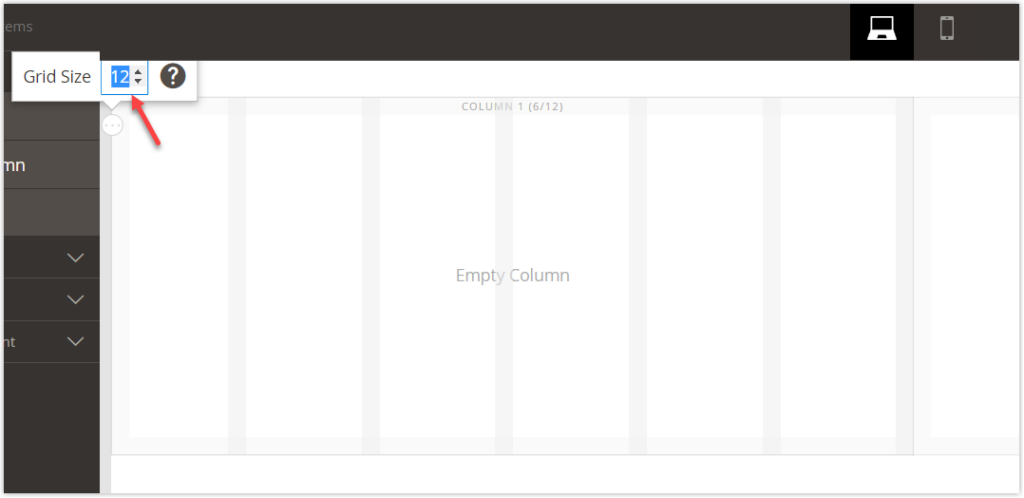
- Hold down the right mouse button to display the grid.
- Then, drag the border to the desired potion on this grid.
In my example, I want the left column to be larger than the right, specifically the left of 8 divisions labeled “Column 1 (8/12)” and the right of 4 divisions labeled “Column 2 (4/12).
Note: The number of columns in the grid is set to 12 by default. You can change it to any number you want if it is greater than 1 and less than the maximum column grid size you’ve set.
Read more: How to configure Magento Page Builder
How to Duplicate a Magento Page Builder Column
Sometimes, you’d want a layout with more than 2 columns. For example, let’s say we want to show three main benefits of our extension, then we’ll need three columns for each one. However, the native Magento Page Builder only provides a group with two equal columns. This is the time to use duplicate functionality. Here are the steps you need to take:
- Assume we dragged the Magento Page Builder Column content type to the stage earlier. Then we’d hover over the container of any column to show its options on the column handle. On this handle, the duplicate icon can be found to the left of the trash bin icon.
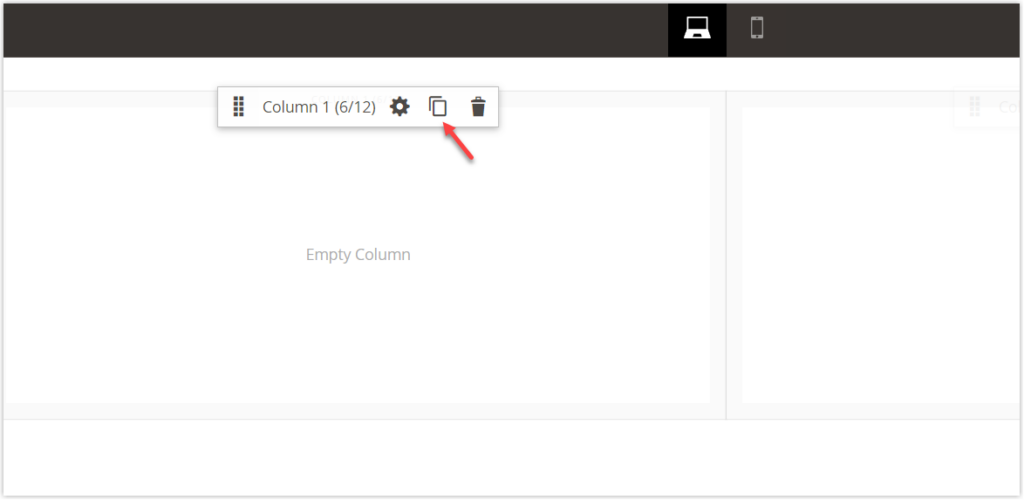
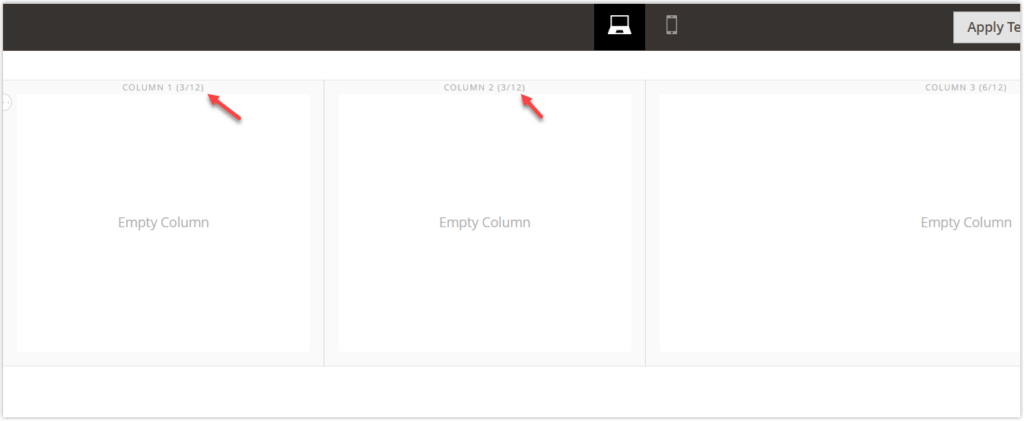
- When you click on this icon, the duplicate column appears. This new column’s width is half that of the initial column, equalling 3 out of 12 divisions. To make these three columns the same width, simply resize them by dragging.
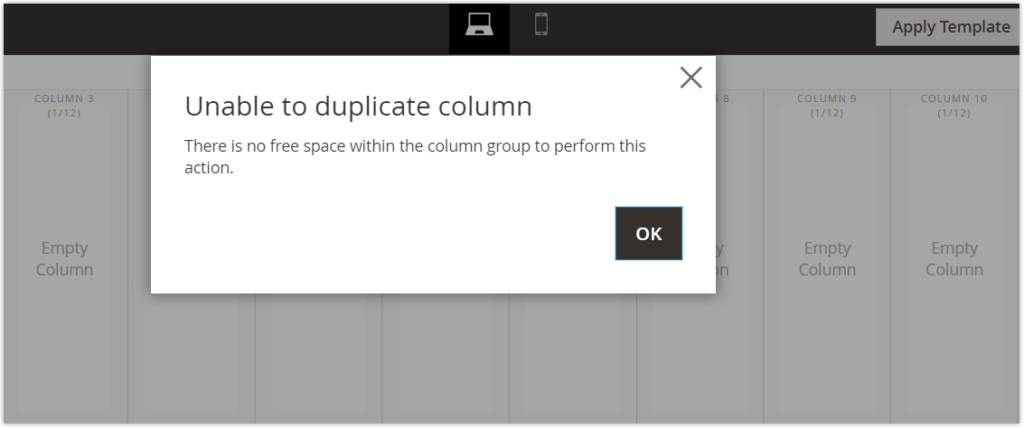
- It’s worth noting if the column is labeled with 1/12, you can’t duplicate a column. Simultaneously, the alert “Unable to duplicate column” shows up, indicating that there is no available space within the column to duplicate.
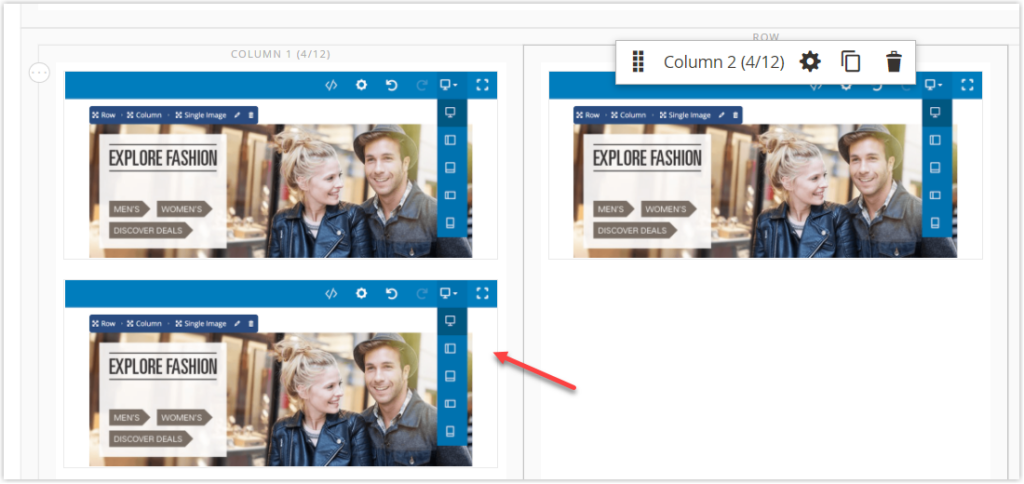
- If the column is empty, you can use the method described above. If your column has content inside, the duplicate columns will be placed BELOW in the original column rather than NEXT TO. Here is an example:
How to Delete Magento Page Builder Column
To remove the existing column, hover over that column. Then, click the trash bin icon on the column handle.
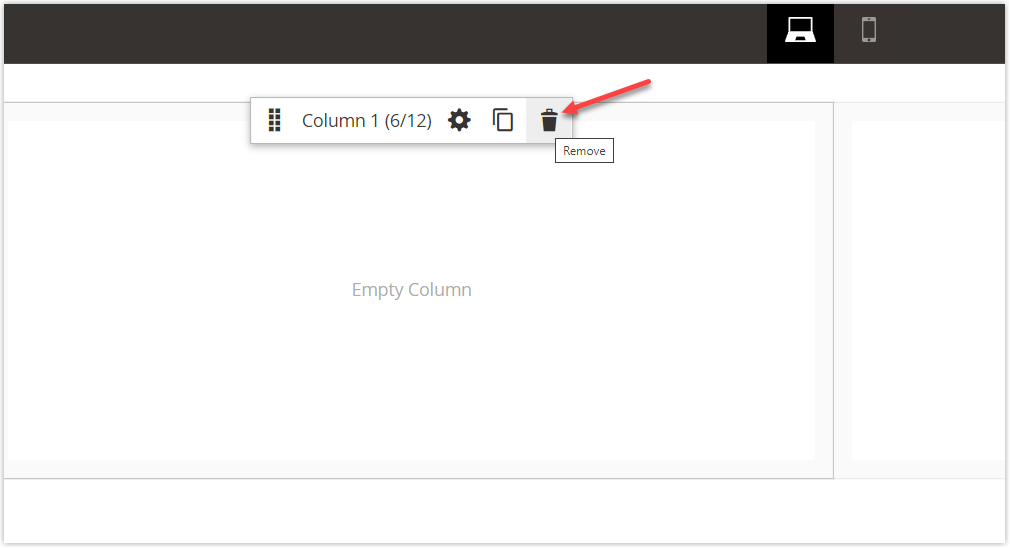
If the column is empty of content, simply click the removing icon. If, however, the column has content inside, such as text, you must click OK to confirm that you want to delete this column.
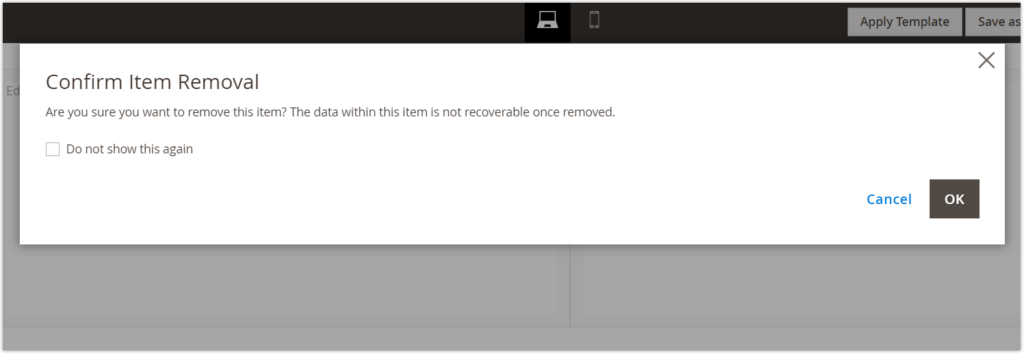
To accelerate the process in the future, mark the Do not show this again checkbox to skip the confirmation step.
| You may also like: How to Add Text With Magento Page Builder How to Add an Image Using Magento Page Builder How to Create an Appealing Landing Page With Magento Page Builder |
How to Customize Magento Page Builder Column
If you are unsatisfied with any current columns in your page layout or block, you can customize them the way you prefer.
To edit the column, click the gear icon on the column handle. Then you will be navigated to the Edit column page. The page includes three sections for customizing the column in Magento Page Builder:
- Appearance
- Background
- Advanced
Let’s start with the first section, Appearance.
1. Appearance
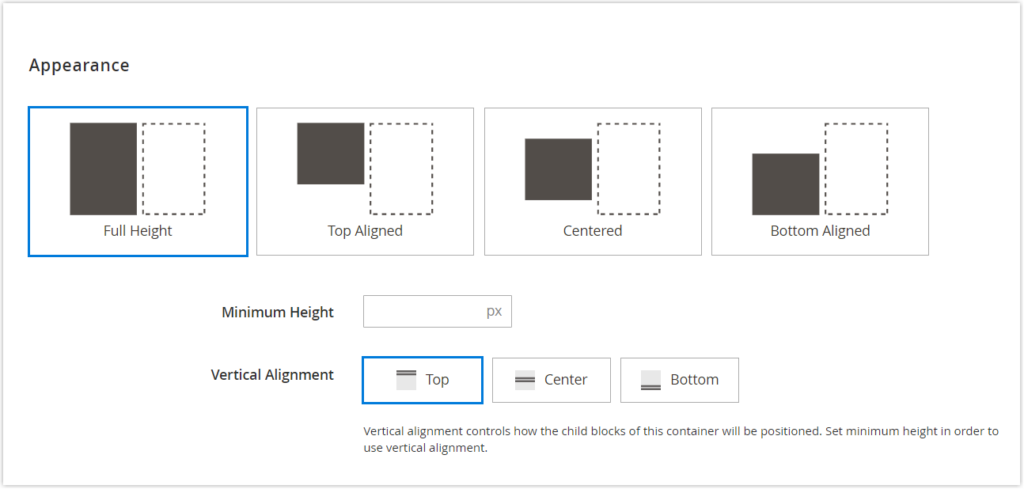
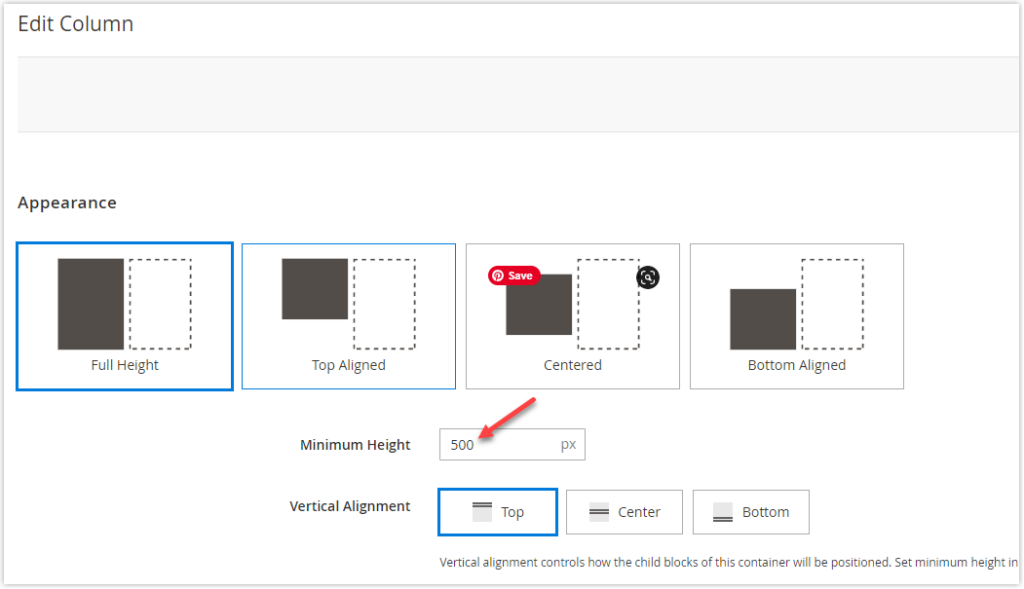
- To align the column in its container, select your desired alignment setting. Four options are available: Full Height, Top Aligned, Centered, and Bottom Aligned.
+ Full Height: This option allows the column to take up the whole height of its container.
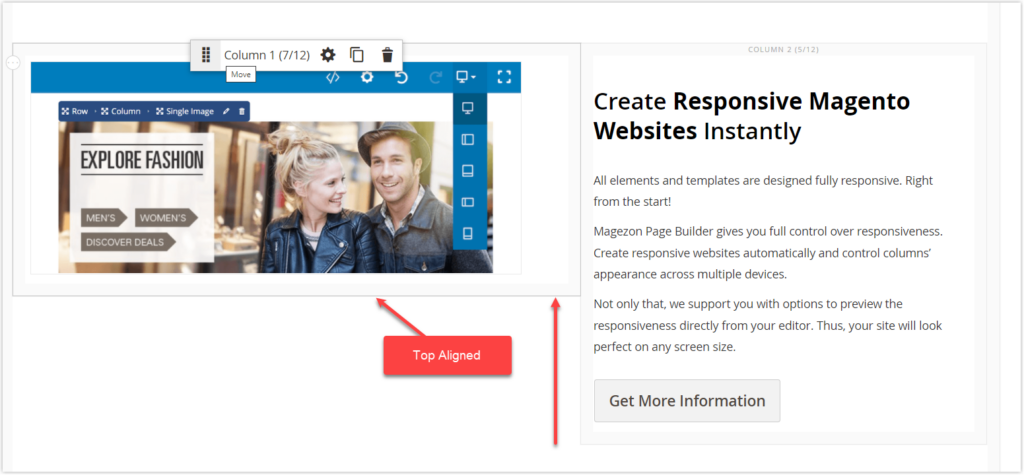
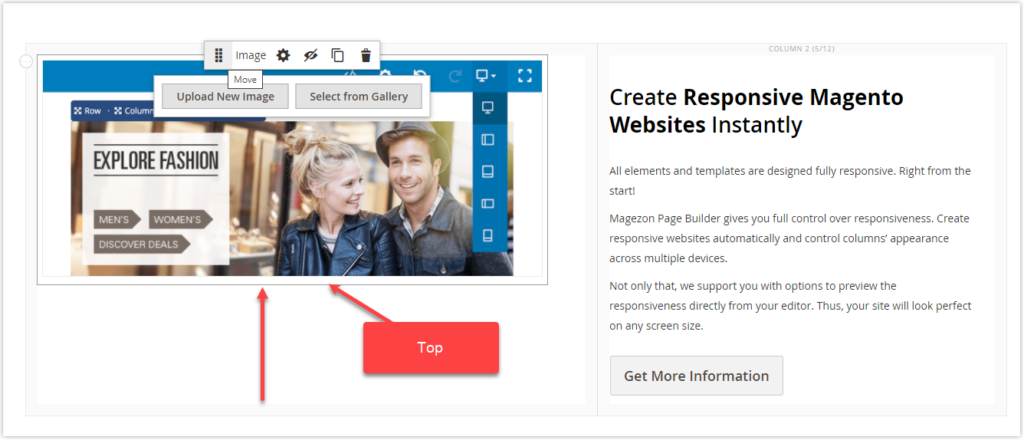
+ Top Aligned: This option aligns the column at the top of its container.
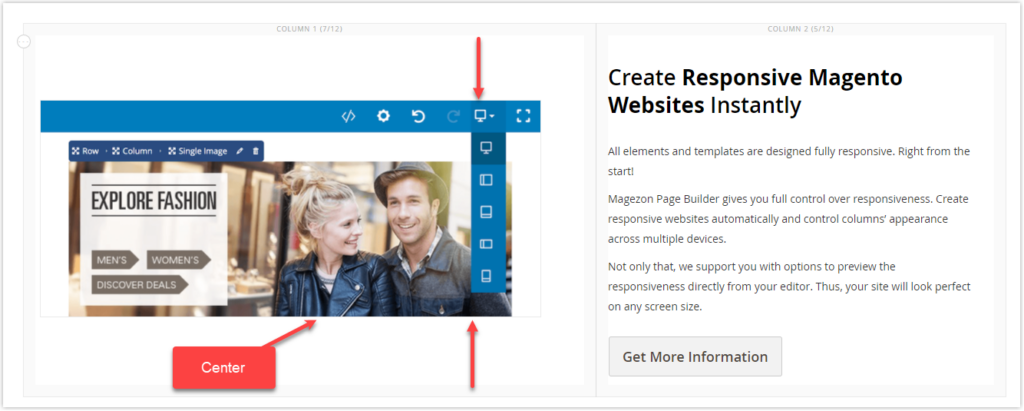
+ Centered: This option enables centering the column within its container.
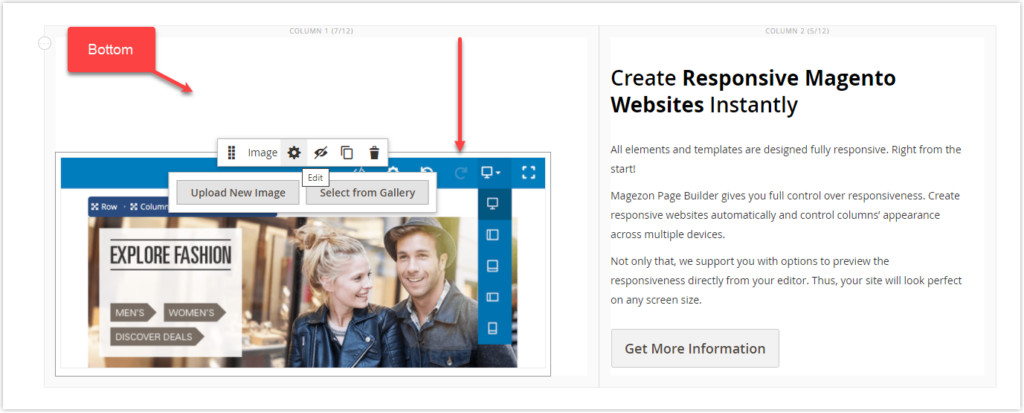
+ Bottom Aligned: This option allows aligning the column at the bottom of its container.
- Minimum Height: Set the minimum height for the column in Magento Page Builder. This is especially useful when the content inside the column exceeds the column’s height. Therefore, we need to increase the column height so the content will be at its full height.
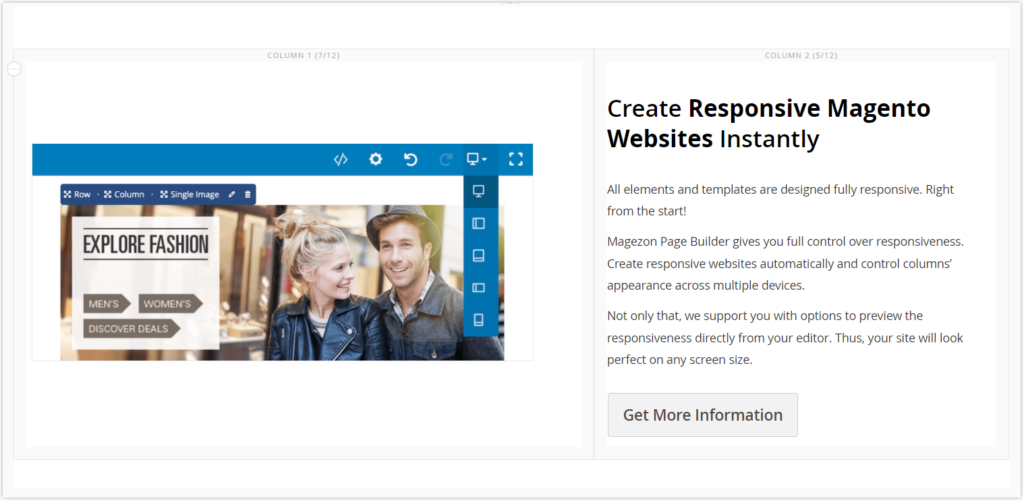
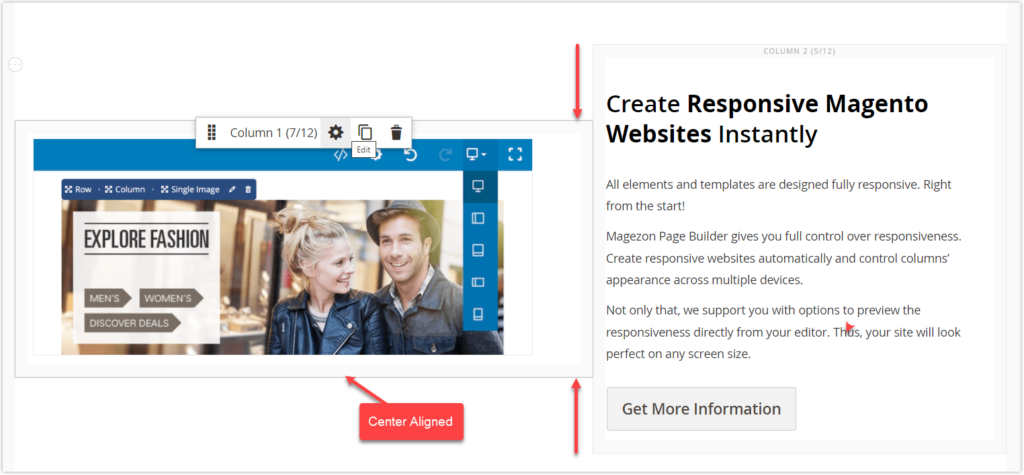
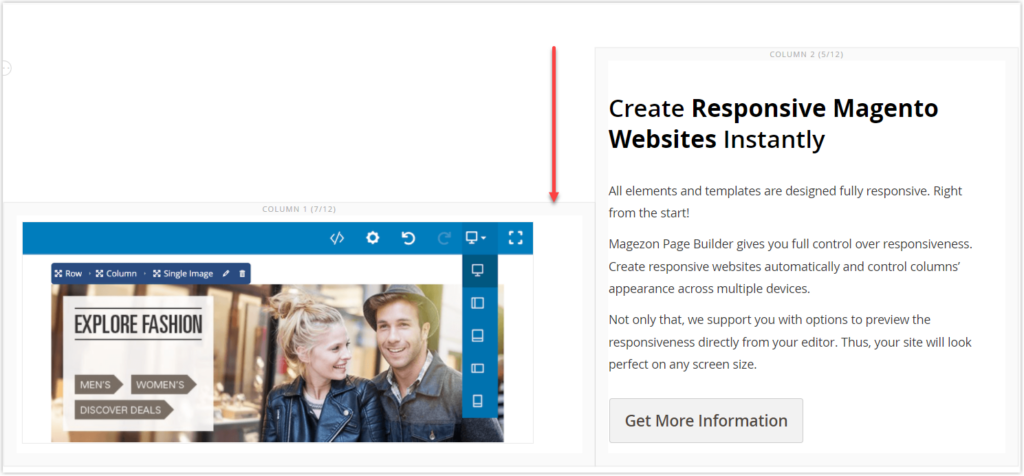
For instance, we have two columns. One has long text, while the other includes an image. Because the texts are so lengthy that they overflow the column (Image 1). To resolve this issue, you had better increase the height of this column, specifically 500px for Minimum Height (Image 2).
Now, let’s see the result:
If you set the minimum height, you can set the Vertical Alignment to control the position of content containers within the Magento Page Builder column (Top, Center, or Bottom).
- Vertical Alignment: When you use the minimum height, choose a vertical alignment option to decide the position of the CONTENT CONTAINER in relation to the column. You have three options to choose from Top, Center, and Bottom.
+ Top
+ Center
+ Bottom
Okay. That’s all for the first section. Let’s move on to the second section, Background.
2. Background
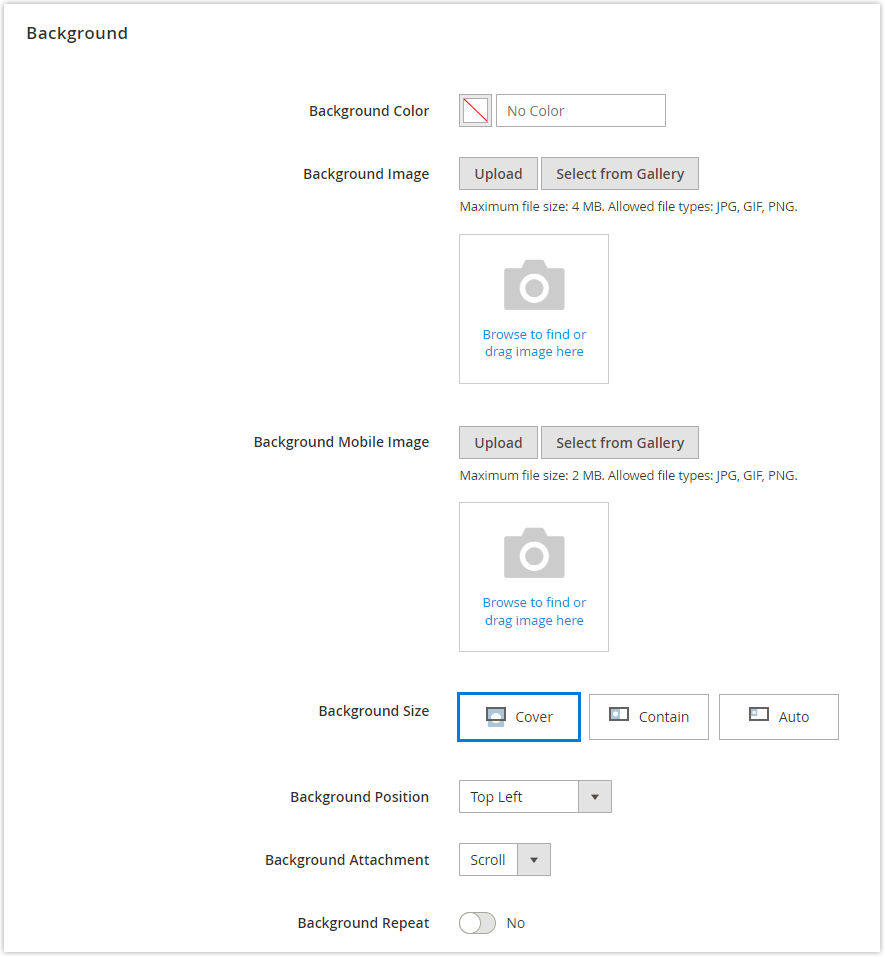
- Background Color: Specify the color by choosing a swatch, using the color picker, or entering a valid color name or equivalent hexadecimal value. This determines the column’s background color.
Determine the color of the column’s background using one of the following ways:
- Choosing a swatch (1)
- Using the color picker (2)
- Setting a valid color name or hexadecimal value (3)

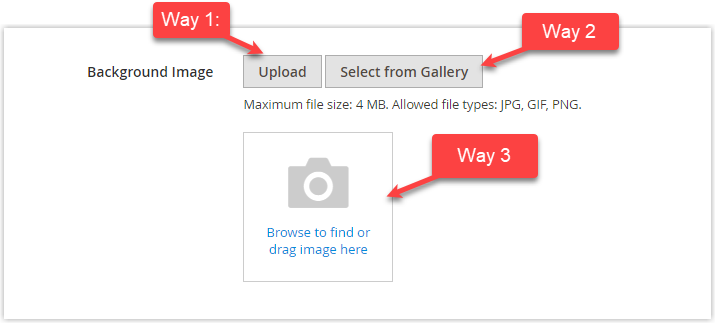
- Background Image: If the Background Color field allows you to apply the color to the column background, this field lets you use an image for the column background.
You can upload or drag the image from your device into the camera icon. If you have already created a gallery of your desired images, you can choose the image from your gallery.
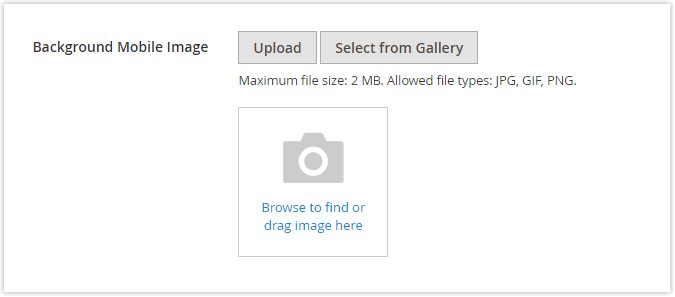
- Background Mobile Image: Use the same approach to select the background image that will look good on mobile devices.
Note: The image’s maximum size is 2 MB. You cannot upload an image more significant than this size. Also, you can upload images that must be one of the following file types: JPG, GIF, or PNG.
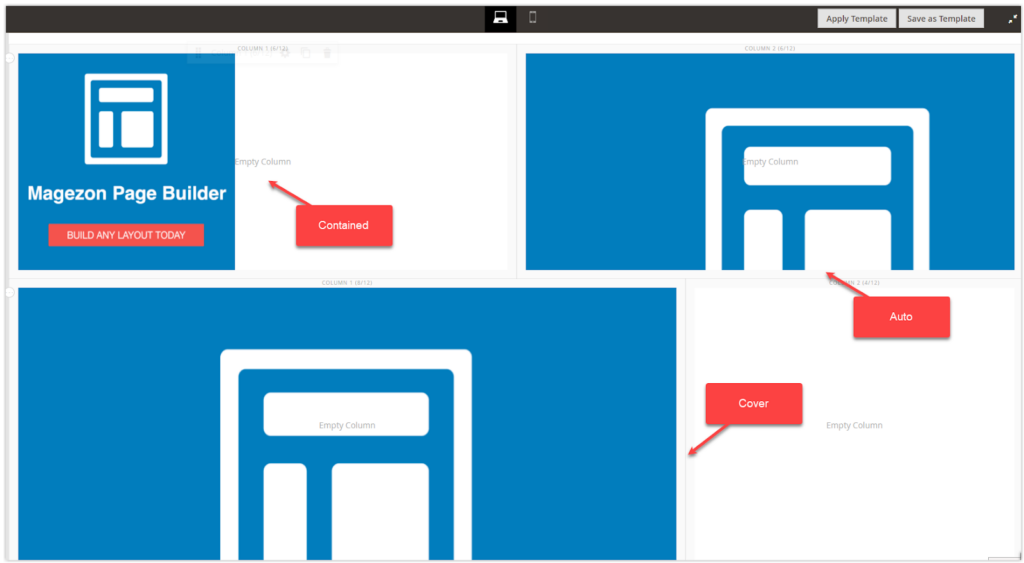
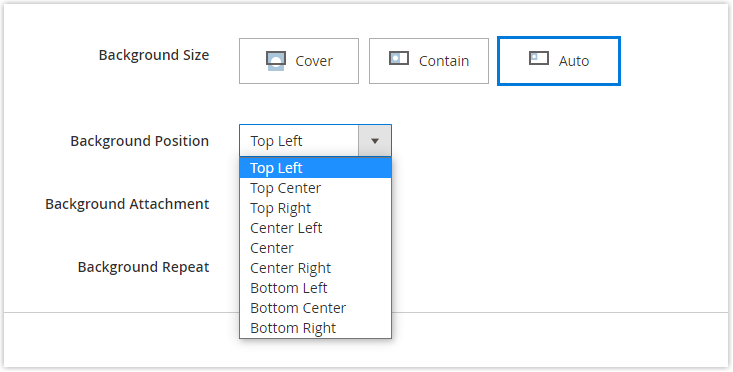
- Background Size: This setting allows you to specify how the background image is scaled in relation to the column width.
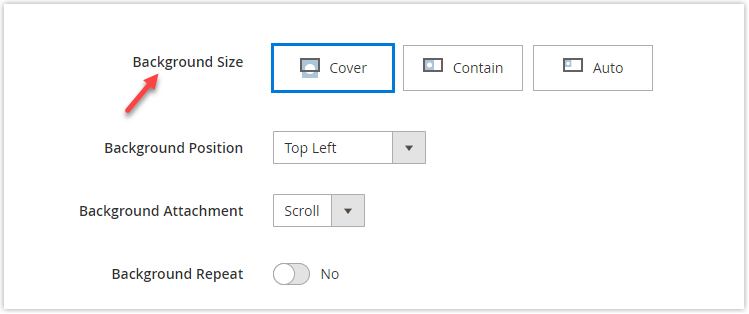
- Cover: When you take this option, your image will be scaled as large as possible to fill the entire column (width and height). If the proportion of the image doesn’t match the column, it will be cropped horizontally or vertically to occupy the whole column.
- Contain: Without stretching or cropping, your image will be scaled as large as possible within its container when you select this option. As a result, the entire image will appear in the same proportion but in a smaller dimension.
- Auto: This background size option enables you to apply the default background size determined in the current theme’s style sheet. In other words, if you choose this option, the image dimensions will be maintained.
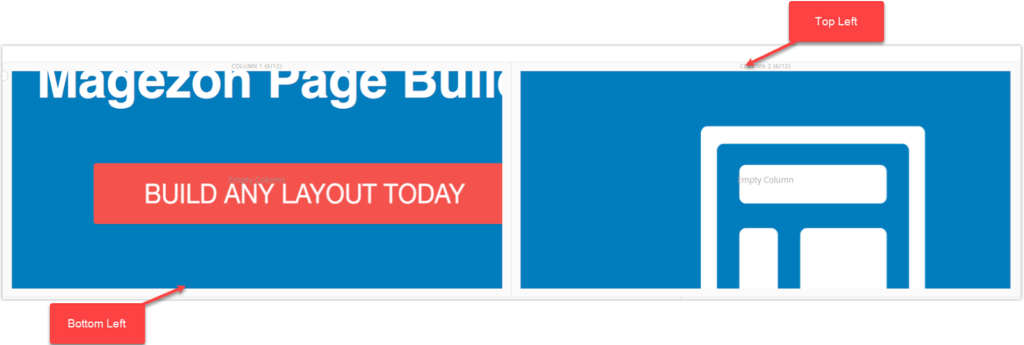
- Background Position: This option allows you to specify the anchor point of the background image relative to the column. These positions are:
Look at the background images on the top and bottom left of the column below.
- Background Attachment: This option defines how the background image moves relative to the scrolling page.
+ Scroll: As the page scrolls, the background image moves down with this page (Default).
+ Fixed: While the container scrolls over the image, the background image does not scroll with the page. Make sure to include the content in the column. If you don’t, the column will become blank. Keep in mind this setting doesn’t support mobile devices.
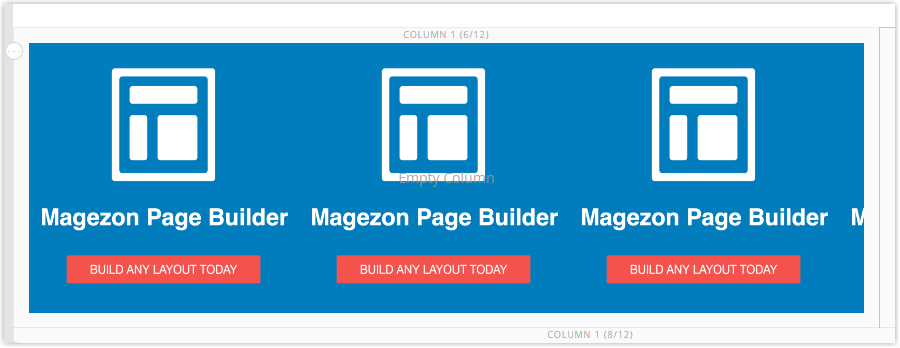
- Background Repeat: Set Background Repeat to Yes if you want the background image to fill the space. This field is commonly used when the image background is Contained (mostly) or Auto.
We’ve finished all of the Background settings. Let’s move forward to the last section, Advanced.
3. Advanced
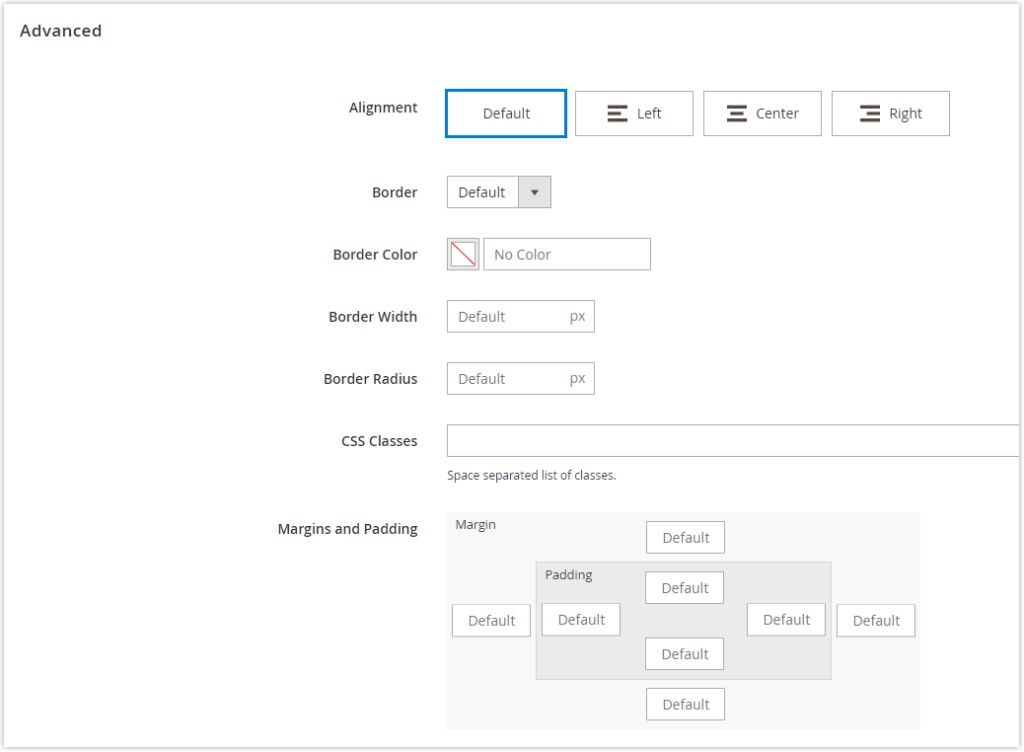
- Alignment: Align the column’s content containers with the column itself.
+ Default: This default alignment setting is defined by the style sheet of the current theme. The current theme aligns the content containers to the left border of the column container. (1)
+ Left: This enables you to align the content container to the left border of the column container. (2)
+ Center: This allows you to center the content contained in the column container. (3)
+ Right: If you select this option, the content container will be aligned to the right border of the column container. (4)

- Border: Choose the border style that you want to apply to all four sides of the column container.
| Border Style | Description |
| Default | This default border style is defined by the associated style sheet. |
| None | Container borders are not visible. |
| Dotted | Dotted lines appear as the container borders. |
| Dashed | Dashed lines appear as the container borders. |
| Solid | Solid lines appear as the container borders. |
| Double | Double lines act as container borders. |
| Groove | Grooved lines act as container borders. |
| Ridge | Ridged lines act as container borders. |
| Inset | Inset lines act as container borders. |
| Outset | Outset lines act as container borders. |
If you select a border style other than None, continue these following settings:
- Border Color: Select the color for all four borders using one of the options below:
+ Selecting a swatch
+ Using the color picker
+ Set a valid color name or hexadecimal value

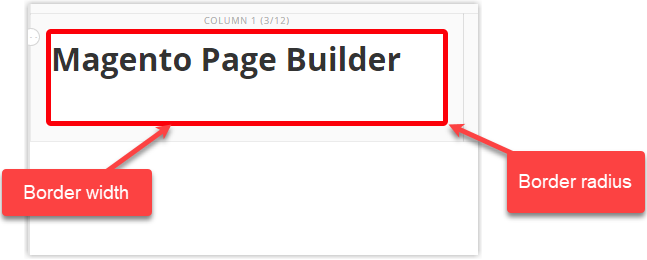
- Border Width: Set the border thickness of all four column sides. (Unit: px)
- Border Radius: Set the size of the border radius used to round the corner of the column border.
- CSS Class: If you want to apply CSS to the column container, enter the CSS class name into this field. In case there are many class names, separate them with a space.
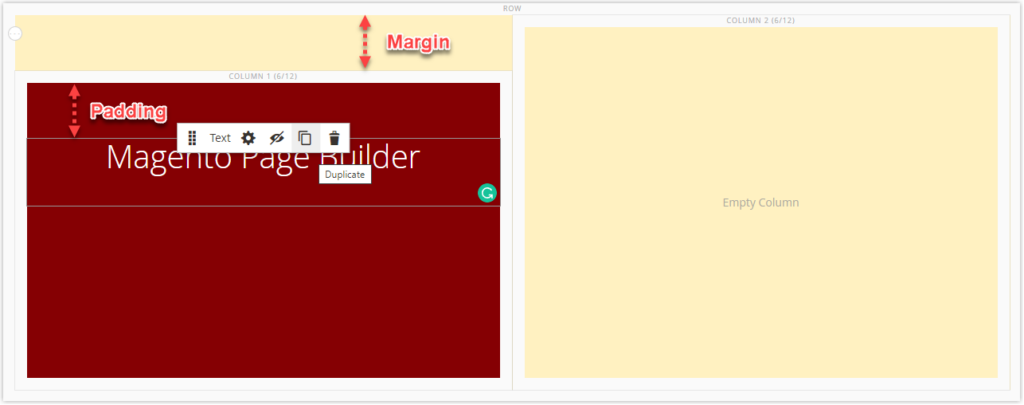
- Margins and Padding: This enables you to adjust the column’s outer margins and inner padding. (Unit: px).
+ Margin: The amount of blank space you can add to the OUTSIDE edge of all four sides of the column container. You have 4 options: Top, Right, Bottom, and Left.
+ Padding: The amount of blank space you can add to the INSIDE edge of all four sides of the column container. You have 4 options: Top, Right, Bottom, and Left.
Look at the image below to have a firm grasp on margins and padding. I set the column’s top margin to 70px, which is the amount of space outside the top edge of the column container. Meanwhile, the top padding – the amount of space inside the top edge of the column container is set to 70px.
An Alternative for Magento Page Builder
Magento Page Builder is good enough for new store owners on a tight budget who only need simple pages. However, if you find creating content takes a lot of time and patience after using it, it’s time to look for a more practical alternative with more advanced features.
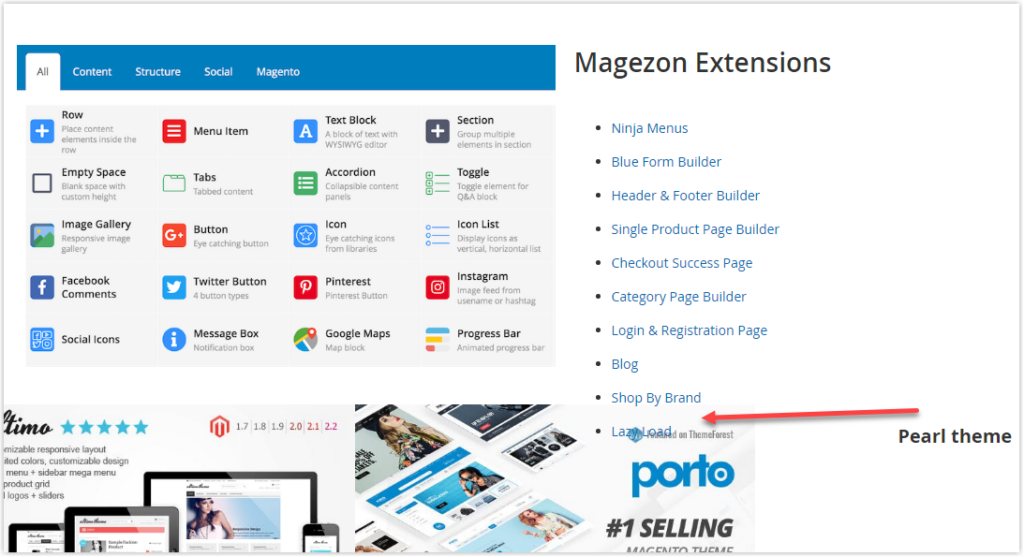
Magezon Page Builder for Magento is a perfect solution that addresses all of Magento Page Builder’s shortcomings. Using this extension, you can quickly create visually appealing pages without touching any line of code. Take a tour of Magezon Page Builder to learn more about its features.
| Early this year, Magezon will have released a new version of Magezon Page Builder, written in JavaScript. Considered an enormous leap that promises to take your website to the next level, this version boasts abundant outstanding features relating to Builder, Design Options, and Workflow. Interested in this new version? If so, here is the must-read checklist. |
So, What’s Next?
You’ve learned about the Magento Page Builder Column, one of the most essential structural content types for building websites. What you must do next is unquestionably get this thing done without holding back. Trust me, the sooner you begin, the better you understand and master this Magento Page Builder Column content type. Let me know if you run into any snags. I’m willing to help you out.
Try FREE Magezon Page Builder demo today.
Easily create beautiful, engaging Magento websites in any style without relying on developers or designers. Just by drag & drop.


