 Magezon Blog Help Merchants Build Comprehensive eCommerce Websites
| * For more useful tutorials on Magento Page Builder, visit here. |
Magento Page Builder Text is a content type in the Elements section, to which you can get access from the Magento Page Builder working panel. Just like other Elements content types such as Headings, Buttons, Dividers, and HTML Code, you can add text to any layout container on the Page Builder stage. After that, you can adjust settings by using the text toolbox.
But how do you use Text in Magento Page Builder? And what can you do with it? This blog offers an in-depth answer to these questions.
Let’s get going.
Table of contents
How to Add Text
First of all, you need to enable Magento Page Builder. Make sure you’ve updated Magento EE to 2.3.1 or newer version and Magento CE to 2.4.3 or newer version.
When you’ve done, open the Magento Page Builder workspace.
To add text to the stage and make any change, do as follow:
#Step 1: Before adding text, you need to add a layout content type first, it can be Row, Column or Tabs.
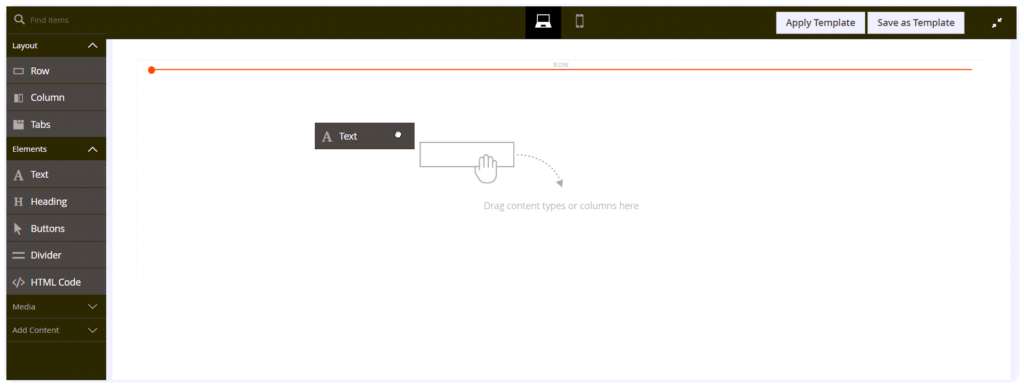
Then, in the Page Builder panel, navigate to the Elements section and click the drop down menu. Drag a Text placeholder (the black square) to a row, column, or tab set on the stage.
In this case, I added a row first.
#Step 2: A red line appears, indicating the location of the Text placeholder.
#Step 3: Drop the Text placeholder. Now, a text editor shows up.
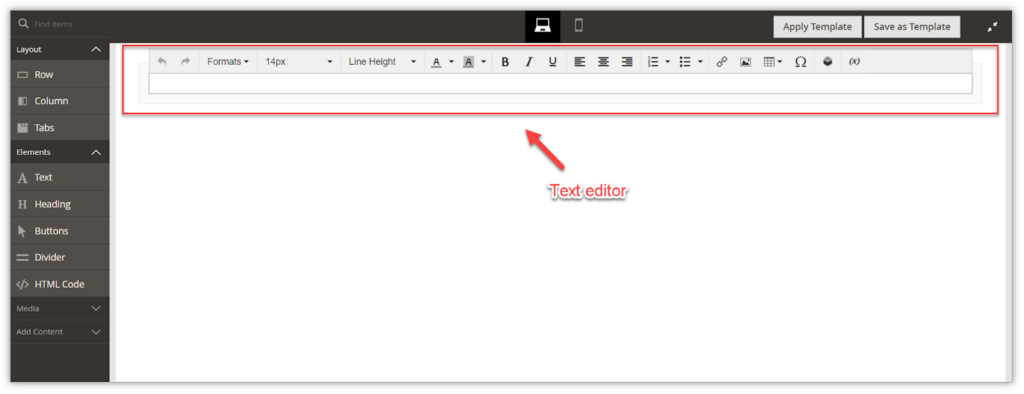
#Step 4: Click somewhere outside the Text container and the editor toolbar disappears. Hover over the Text container, and its toolbox shows up.
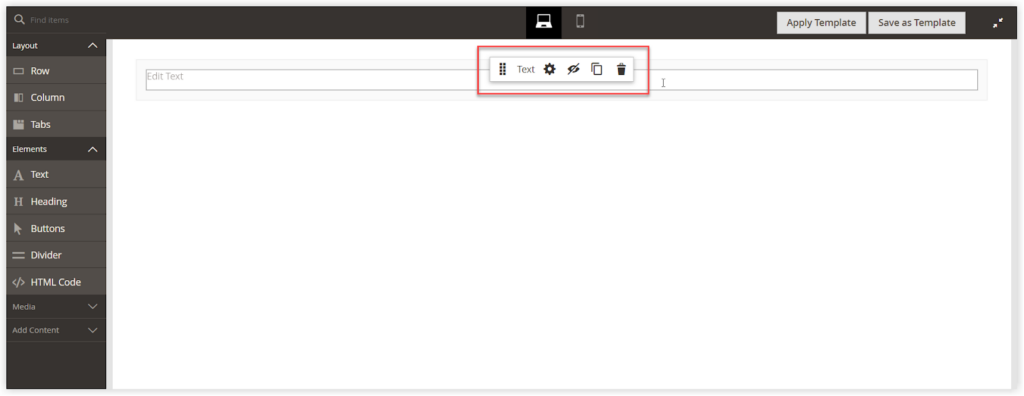
Now, you might be a bit confused about the text editor and the text toolbox – there are so many icons, and you may not know what to use and how they work. Don’t worry, I’ll explain these two right now.

Try FREE Magezon Page Builder demo today
Easily create your engaging Magento pages in any style whenever you want without relying on developers or designers. Just by drag & drop.
How to Edit Text
Basically, you can edit text (in many aspects) with the text editor and the text toolbox. But there are some differences between these two, in terms of how you access them and what parts of the text you edit using them. Specifically:
- There are two ways to access the editor toolbar. One is directly access to it on the stage (because it automatically shows up when we drop the Text placeholder on the stage). And the other is to navigate to the Text toolbox > Settings > Text editor.
You access the text toolbox directly on the stage, too. However, to change the settings using the text toolbox, you need to open the Edit Text page by clicking the Settings icon, which means you can’t edit it directly on the stage.
- The text editor toolbar is used to change the format of the text itself: format, size, line height, text color, etc. The text toolbox can be used to change the text format, too. Besides, you can also use it to adjust the text container: position, duplicating/ removing, border, etc.; and adjust the text block: margins and padding.
You can choose to use one of the above, based on your need. In this section, I’ll show you how to use both the text editor toolbar and the text toolbox (in detail).
1. How to Edit Text With the Text Editor Toolbar
a. Explain the Text Editor
If you’re a frequent user of Microsoft Word or Google Docs, you are undoubtedly familiar with these icons. Here, I’ll explain them briefly and give an example for illustration at the end.

| Name | Icon | Description |
| Undo |  | Reverses the last action. |
| Redo | Reverses the action of the last Undo command. | |
| Formats | Defines format of the text. Click to see the dropdown menu. The formats available include: Paragraph, Heading 1, Heading 2, Heading 3, Heading 4, Heading 5, Heading 6, Important, and Preformatted. | |
| Font Sizes | Define the size of the selected text.The sizes available are from 10px to 72px, all of which are multiples of 2. | |
| Line Height | Defines the distance between lines of text.The sizes available are from 10px to 72px, all of which are multiples of 2. | |
| Text Color | Formats the selected text with the color you choose. | |
| Background Color | Formats the background of the selected text with the color you choose. | |
| Bold | Applies or removes bold formatting to or fromselected text. | |
| Italic | Applies or removes italic formatting to or fromselected text. | |
| Underline | Applies or removes underline formatting to or fromselected text. | |
| Align left | Aligns the selected text to the left. | |
| Align center | Aligns the selected text to the center. | |
| Align right | Aligns the selected text to the right. | |
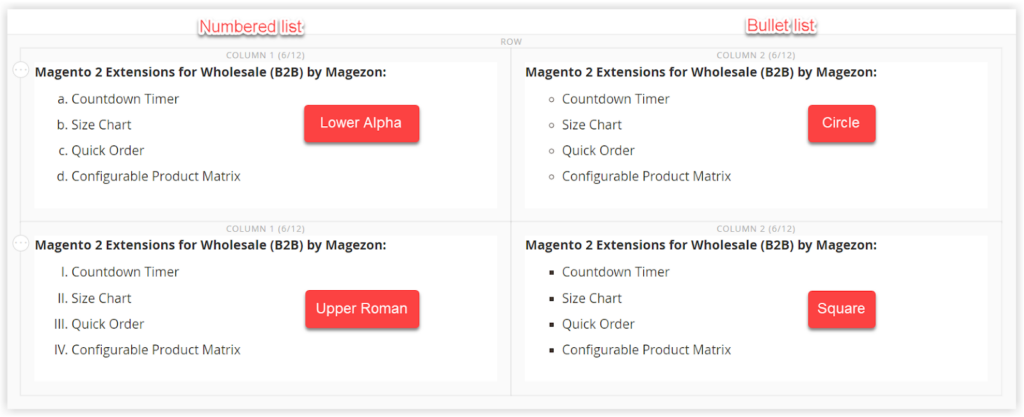
| Numbered list | Marks each line of a selected paragraph with numbers.Click the dropdown arrow on the right to choose the wanted number type. The number types include: Lower Alpha, Lower Greek, Lower Roman, Upper Alpha, Upper Roman.(See Image 1) | |
| Bullet list | Marks each line of a selected paragraph with bullets.Click the dropdown arrow on the right to choose the wanted bullet type. The bullet types include: Default, Circle, Disc, Square.(See Image 1) | |
| Insert/edit link | Create/edit a link in the text container. | |
| Insert/edit image | Inserts images to the text container and edits them. | |
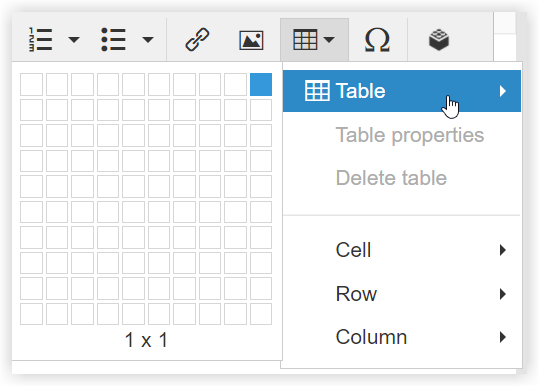
| Table | Adds table to the text container.Click the dropdown arrow to select customized tables, cells, rows or columns.(See Image 2) | |
| Special characters | Adds special characters to the text container.See Image 3 to know what special characters are. | |
| Insert Widgets | Insert Widget to the text container. Choose the type of widgets first. | |
| Insert variables | Insert variables to the text container. You are enabled to select a variable from a table. |
Some illustrations:
That’s the basics about the text editor. Though I said the text editor is almost similar to the toolbar of common text software, they are not completely the same. Specifically, the way we add links and images to the Magento Page Builder text container is a bit distinct.
For that reason, we’ll be learning how to work with these two features right now.
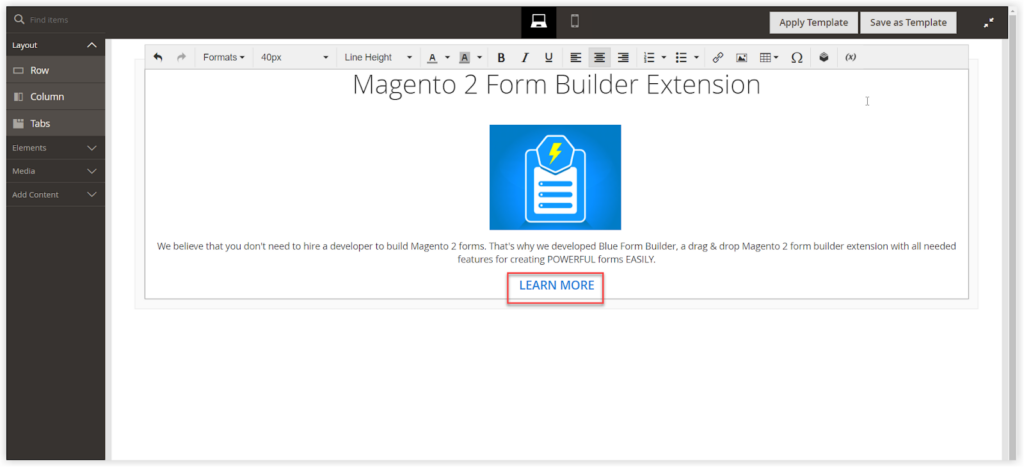
b. How to Insert an Image to Magento Page Builder Text
You can add an image from the Magento Page Builder media gallery or from your computer to the text container. Specifically, follow these steps:
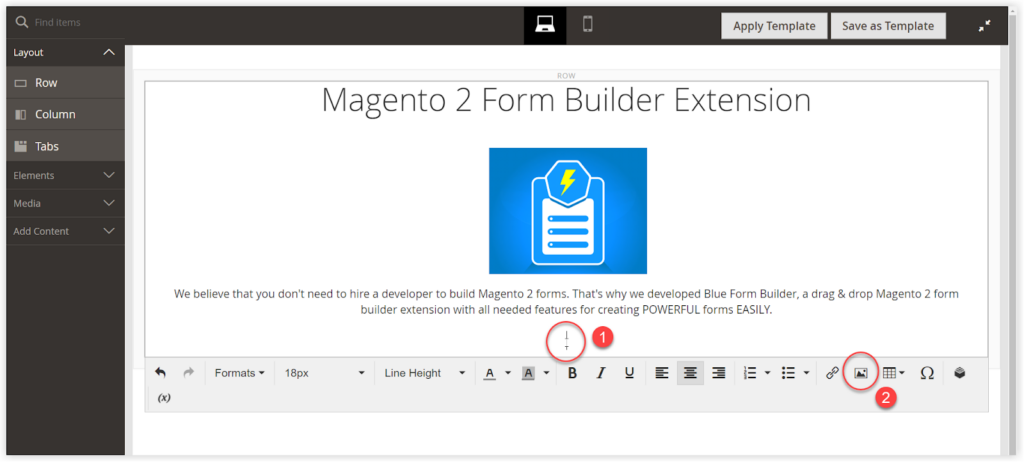
#Step 1: Put the cursor where you want to add the image to.
#Step 2: Click the Insert/edit image icon on the text editor toolbar.

#Step 3: An Insert/edit image toolbox shows up.
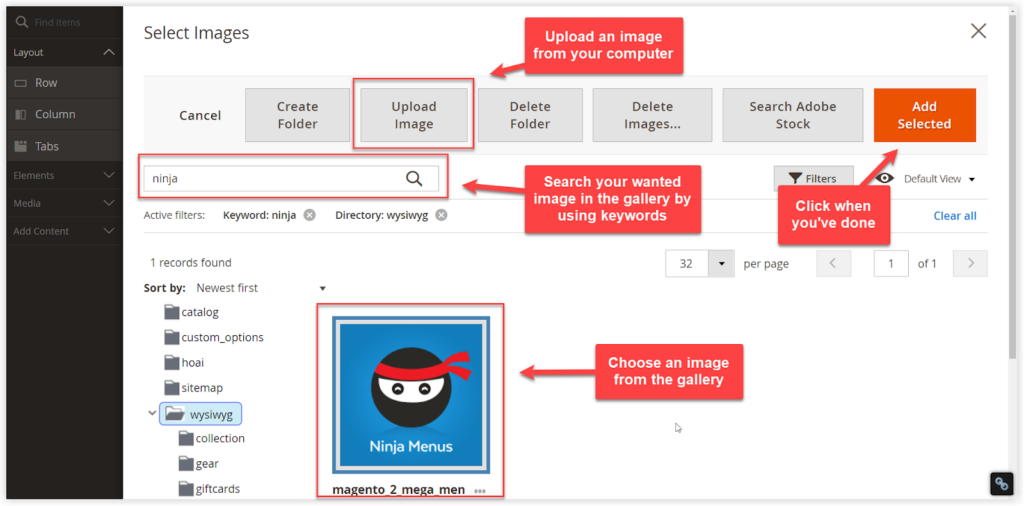
#Step 4: For Source, click the search icon to open the media gallery in Magento Page Builder.
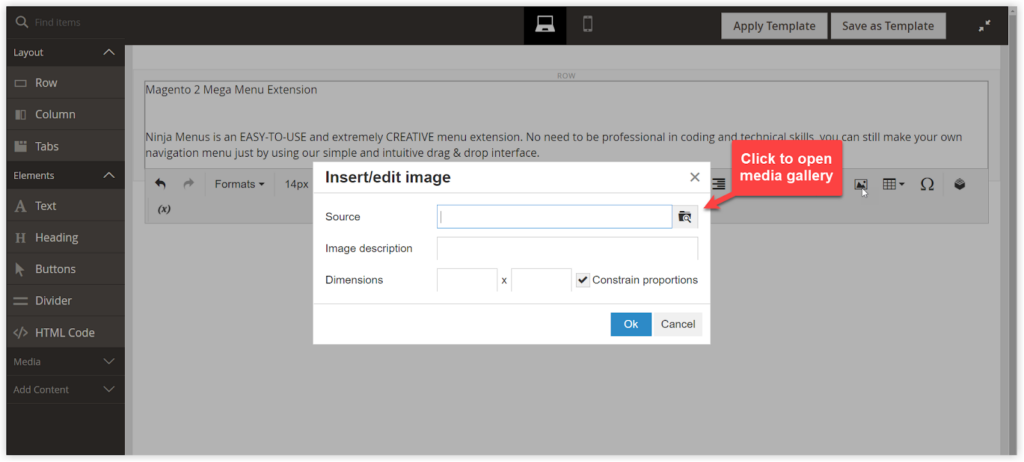
Here, you can locate and select an image. If your wanted image is not here, you can click the Upload Image button to upload an image from your computer files onto the media gallery and select it.
Click the orange Add Selected button on the upper right corner when you’ve done.
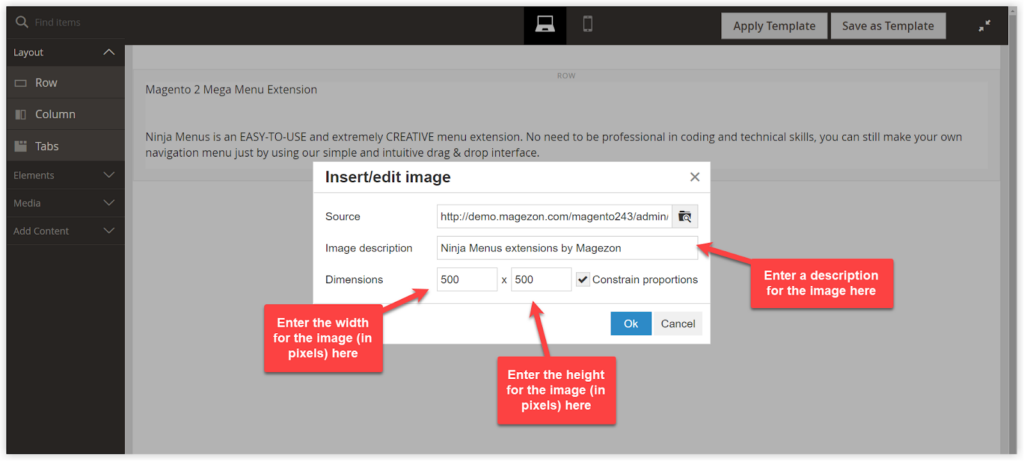
An Insert/edit image box shows up. (see image below)
#Step 5: Insert a description for the image in the Image description field.
#Step 6: For Dimensions, enter the image’s width and height (unit: px) to render the image. If you want to maintain the aspect ratio for the image automatically, tick Constrain proportions.
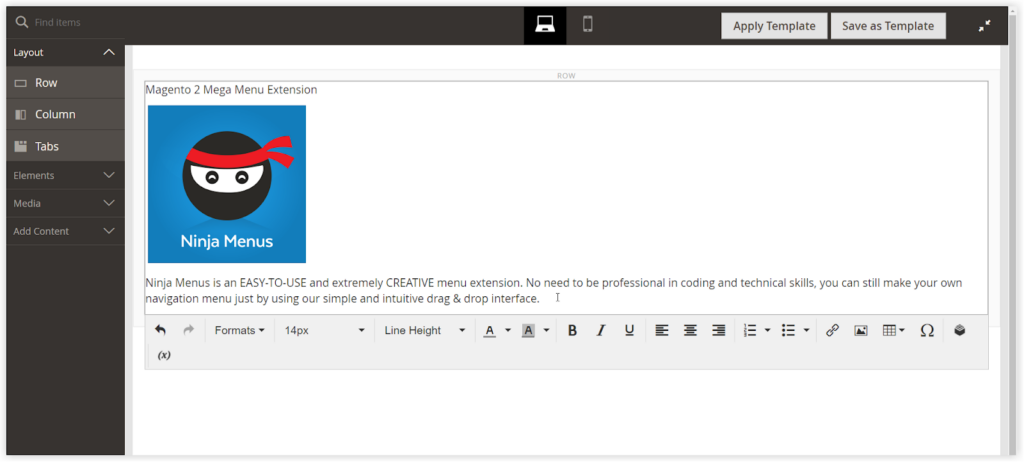
#Step 7: Click OK to add the image to the text container. If you want to edit any image, click it and click the Insert/edit image icon.
c. How to Create a Link in Magento Page Builder Text
Apart from inserting a link to selected text, you can create a new anchor text with a link attached with Magento Page Builder text. Here’s how:
#Step 1: In the frontend, go to the page whose link you want to get and copy the link information.
You can use either the full URL or a relative URL (the part without the reference to your website domain):
| URL | https://www.magezon.com/magento-2-form-builder.html |
| Relative URL | ../magento-2-form-builder.html |
#Step 2: Attach a link to selected text or create a new anchor text with a link attached to it.
- To attach a link to selected text, choose the text you want to add a link to in the text container. Then, click the Insert/edit link icon on the editor toolbar.
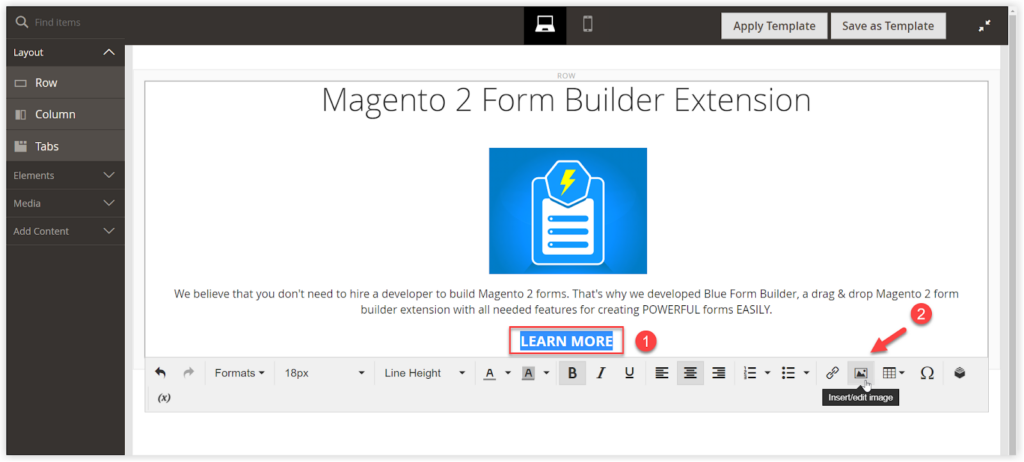
- To create a new anchor text with a link attached, put the cursor in the position where you want to add the anchor. Then click the Insert/edit link icon on the editor toolbar.
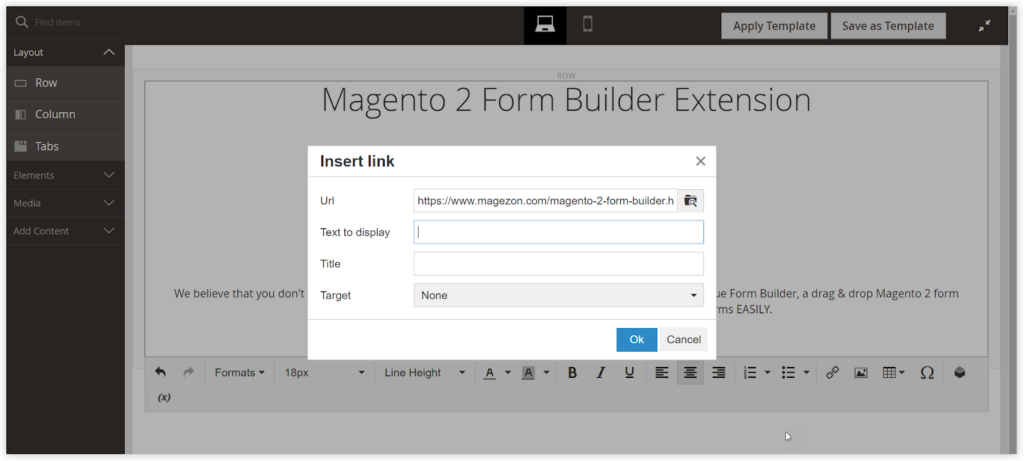
Then, an Insert/edit link box shows up. (See image below)
#Step 3: For Url, enter the relative URL.
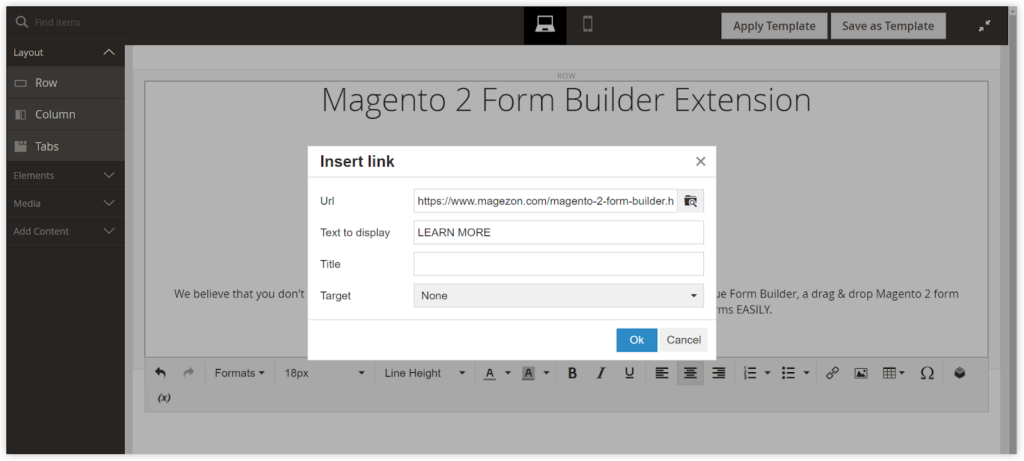
#Step 4: Enter anchor text to Text to display if you create a new anchor text with a link attached to it.
If you selected text to attach a link to, this field is automatically filled with your selected anchor text.
#Step 5: For Title, enter the title of the link. The Title link attribute is used by some browsers as a tooltip.
#Step 6: Set Target to None. This means the page is opened in the same browser window, instead of in a new tab.
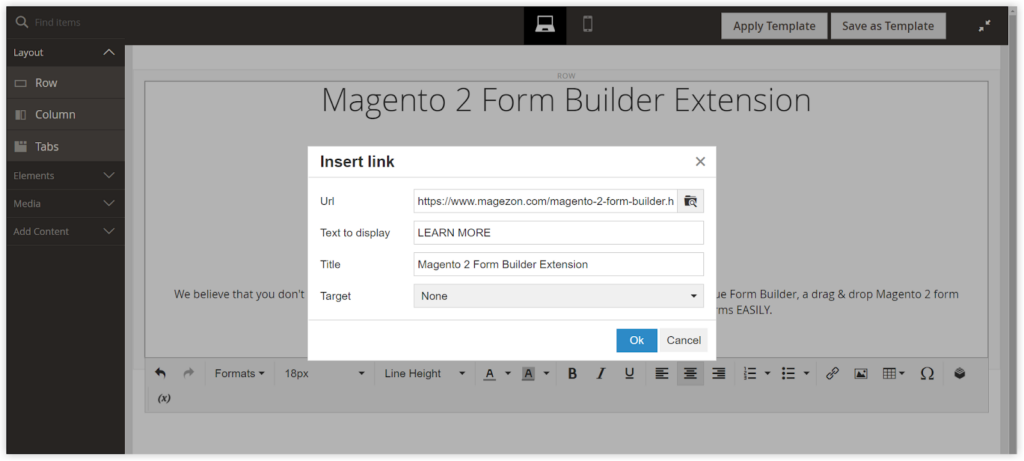
#Step 7: When you’ve done, click OK. The anchor text turns into blue, meaning that there’s a link attached to it.
2. How to Edit Text With the Text Toolbox
a. Explain the Text Toolbox
The text toolbox is what appears when you hover over the text container. It enables users to change location, hide, duplicate, edit, or delete the text container.
Look at this table to see what a text toolbox is comprised of.
Note: A text container is an element that contains text and other content.
| Tool | Icon | Description |
| Move | Changes the row’s location (Click and hold down the mouse and move anywhere). | |
| (label) | Text | Indicates that the current container is a text element. |
| Settings | Opens the Edit Text page, where you can adjust the properties of the text container. | |
| Hide | Hide the selected text container. | |
| Show | Show the hidden text container. | |
| Duplicate | Duplicates the selected text container. | |
| Delete | Removes the text container and its content from the stage. |

Try FREE Magezon Page Builder demo today
Easily create beautiful, engaging Magento website in any style whenever you want without relying on developers or designers. Just by drag & drop.
b. How to Work With Settings (Edit Text)
Settings in the text toolbox is nearly the most-used feature. So let’s dig deeper into it.
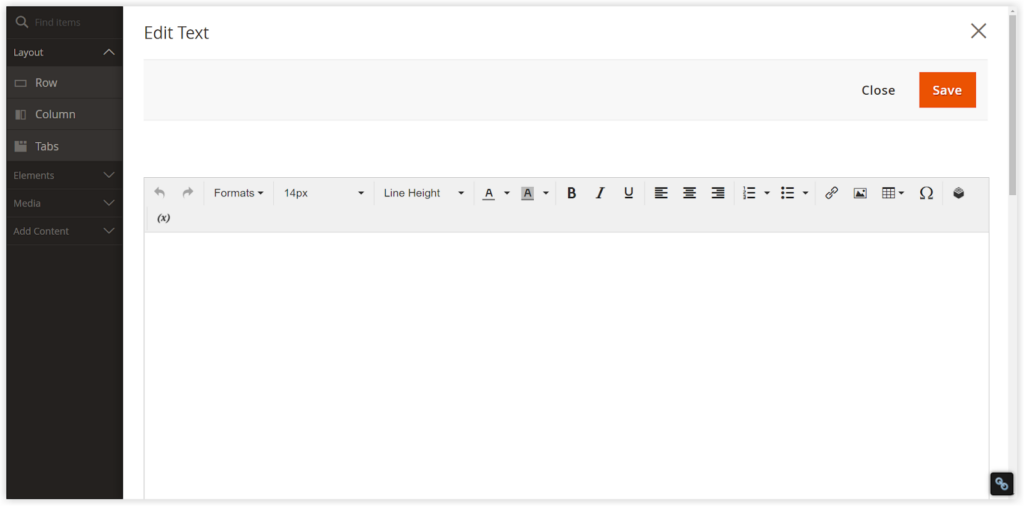
First, hover over the text container and click the Settings icon on the text handle. Then, an Edit Text page emerges.
Note: As the text container is tightly nested inside another container, make sure that you choose the correct toolbox. To do it, hover in the text container area until a toolbox with label ‘Text’.
- The Text Editor
As mentioned earlier in How to Edit Text, there are two ways to go to the text editor: to access it on the stage or via the text toolbox/Settings. This way is the latter. Once you access it, you can edit the text using the text editor as instructed above.
- Advanced
In this section, you can update any advanced settings if you want.
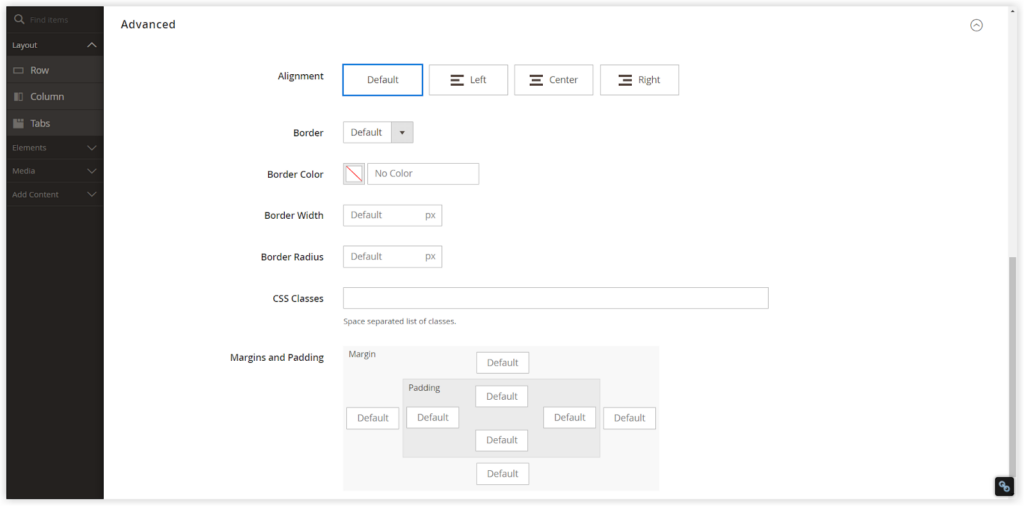
- Alignment: Select the type of alignment to define the positioning of text within the parent container.
| Alignment | Description |
| Default | Applies the alignment default setting that is specified in the style sheet of the active theme. |
| Left | The list is aligned along the left border of the parent container, allowing for any padding that is specified. |
| Center | The list is aligned in the center of the parent container, allowing for any padding that is specified. |
| Right | The list is aligned along the right border of the parent container, allowing for any padding that is specified. |
- Select the Border style so that it applies to four sides of the text container. Click the dropdown to see all the styles like this:
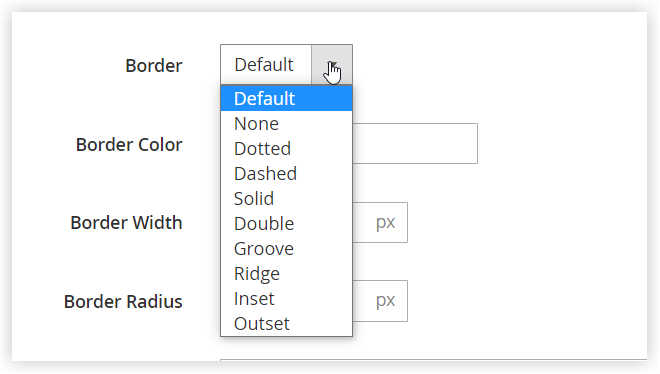
If you select None, Magento Page Builder provides no visible indication of the container borders. If you select other styles, you can change border display settings as follow:
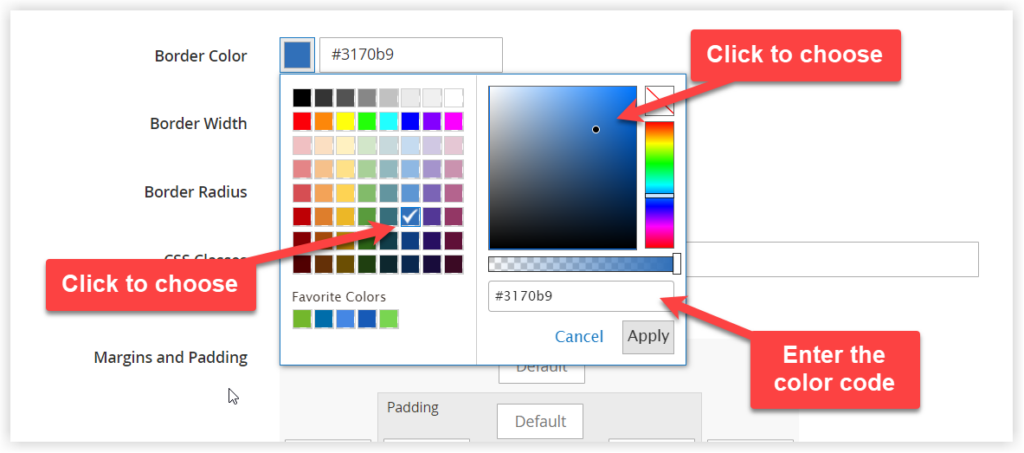
– Border Color: The default is no color. To define the border color, you can choose a swatch, click the color picker or enter a valid color name or hexadecimal code.
For example, if you want to choose blue as the border color, you can do one of these:
– Border Width: Insert the number of pixels for the border line width.
– Border Radius: This field defines how round each corner of the border. Insert the number of pixels to determine the size of the radius.
– CSS Classes: If you want to apply any CSS class to the text container, insert the CSS class name to the field.

For example, if I want to set the dotted style for the border, and have a CSS class .magezon {border-style: dotted}, I’ll enter “magezon” to the field.
In case of many class names, separate them with a space.
– In Margins and Padding, insert values in pixels to define the outer margins and inner padding of the text container.
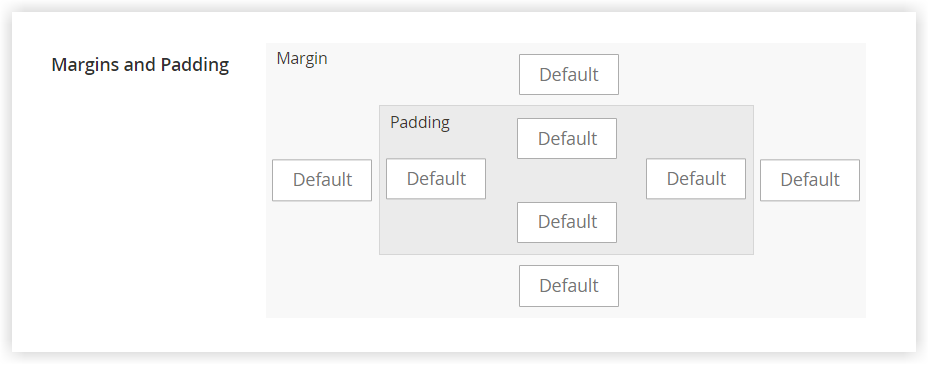
Margins define the amount of blank space applied to the outside edge of all sides of the text container. Four options include Top, Bottom, Right, and Left.
Padding defines the amount of blank space applied to the inside edge of all sides of the text container. Four options include Top, Bottom, Right, and Left.
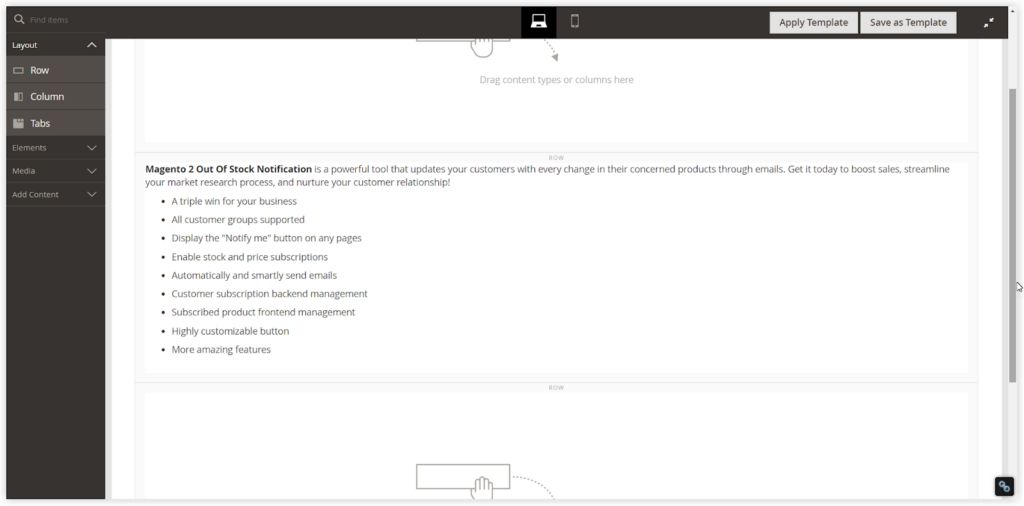
Have a look at this example for margins and padding.
I created a text container and updated the content. The margins and padding of the container are default.
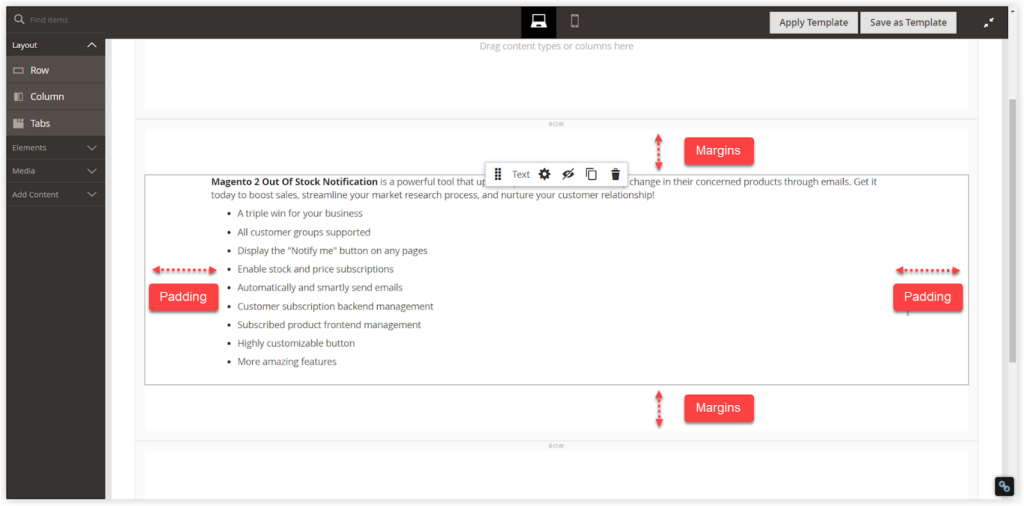
Now, I set the for the top and bottom margins to 70px and set the right and left padding to 100px. As you can see, the content indentation is defined by padding and the text container indentation is defined by margins.
Hope you understand margins and padding better through this example!
If there are any questions about this, please leave a comment below.
An Alternative Page Builder With Better Text Functionality
That’s all about text in Magento Page Builder. Basic, easy, and straightforward, right? However, if you want to create an advanced and customized design for your pages, I’m afraid it’s not enough.
In that case, Magezon Page Builder is worth your consideration, trust me.
Magezon Page Builder is a powerful page builder extension, with more than 50 elements, many pre-made templates, and outstanding built-in plugins.
Regarding text editing, Magezon Page Builder boasts various advanced features, which cannot be found in the page builder of Magento, such as:
- Fonts: Magezon Page Builder offers users a host of fonts for their text.
- Background Image, Video & Color: Choosing an image or or a video or a color to be the background of the text block.
- Parallax Type: It’s unbelievable that you can set the parallax effect for a text block! And you can choose a style of parallax, too. This effect is applied to the background image and background video of the text block.
And many more.
This spring, Magezon is going to release the latest version of its Page Builder. Refer to New Page Builder Sneak Peeks to see how powerful and diverse new features are.
That’s All About Text in Magento Page Builder
Hope this blog is the best you can find about Magento Page Builder Text. For more blogs and tutorials about Magento, visit Magento 2 Tutorials by Magezon.
Try FREE Magezon Page Builder demo today
Easily create your engaging Magento pages in any style whenever you want without relying on developers or designers. Just by drag & drop.


