| * For more useful tutorials on Magento Page Builder, follow this series. |
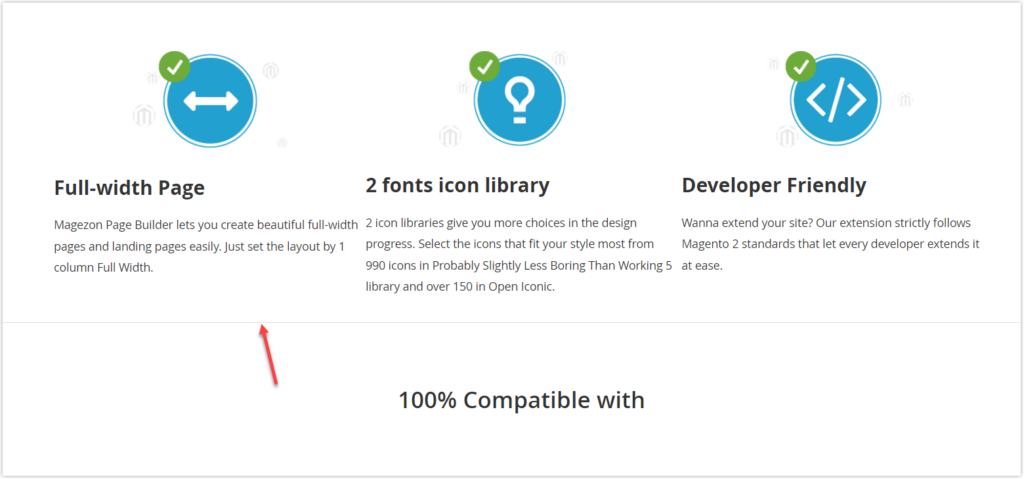
Magento Page Builder Divider is the content type that allows you to add tailored horizontal lines that separate your content. Sometimes, you can use it as a great way to reduce the extra white space, as I did on this simple page created by Magento Page Builder. Still, few people are concerned with it because they think it’s just a minor page factor. But, in reality, a divider can make a big difference on your page if you know how to use it well.
You’re probably interested in Magento Page Builder Divider if you are here. So… Yeap! You have come to the right place. Through the article, you’ll learn how to add and edit a Magento Page Builder Divider in the most detailed way. Okay, let’s get to it.
Easily create aesthetic separators in no time with Magezon Shape Divider plugin.
Table of contents
Where Is Magento Page Builder Divider Located?
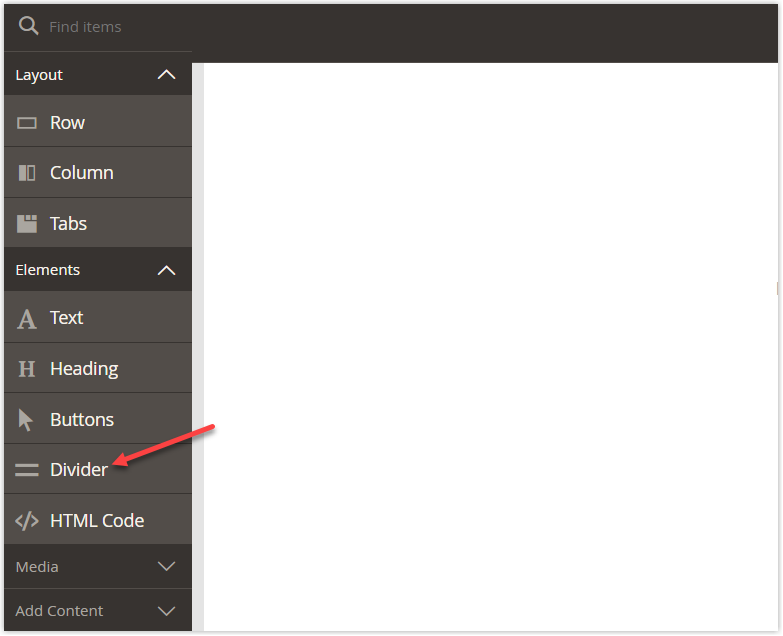
When you access the Magento Page Builder workspace, expand Elements on the left panel. Then you’ll see the Divider element under this section.
Now we’ll add Magento Page Builder Divider to the stage, which is the primary workspace.
| Learn Elements content types in Magento Page Builder: How to Customize Elements Using HTML Code Content Type How to Create Buttons With Magento Page Builder How to Add Text in Magento Page Builder |
How to Add a Divider in Magento Page Builder
Like other Elements content types, you can’t directly drag a Divider placeholder to the right stage without first adding a Layout content type. These content types include Magento Page Builder Row, Column, and Tabs.
So, here are specific steps to follow:
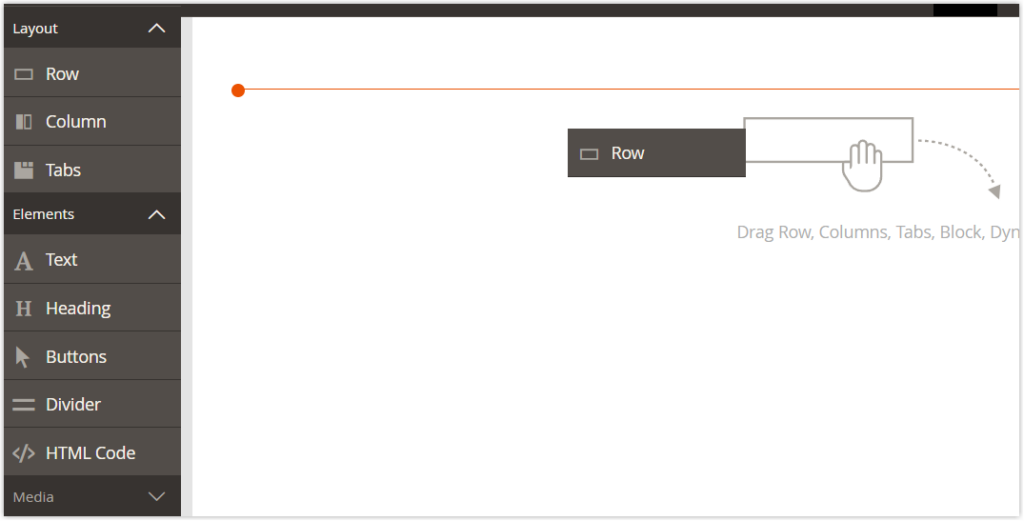
#Step 1: From the left panel under Layout, drag Row to the blank stage. Drop the row when the red guideline shows up.
#Step 2: Span the Elements section on the left panel. Then click its drop-down list to show Magento Page Builder Divider. Drag the Divider element to the row and drop it below the red guideline.
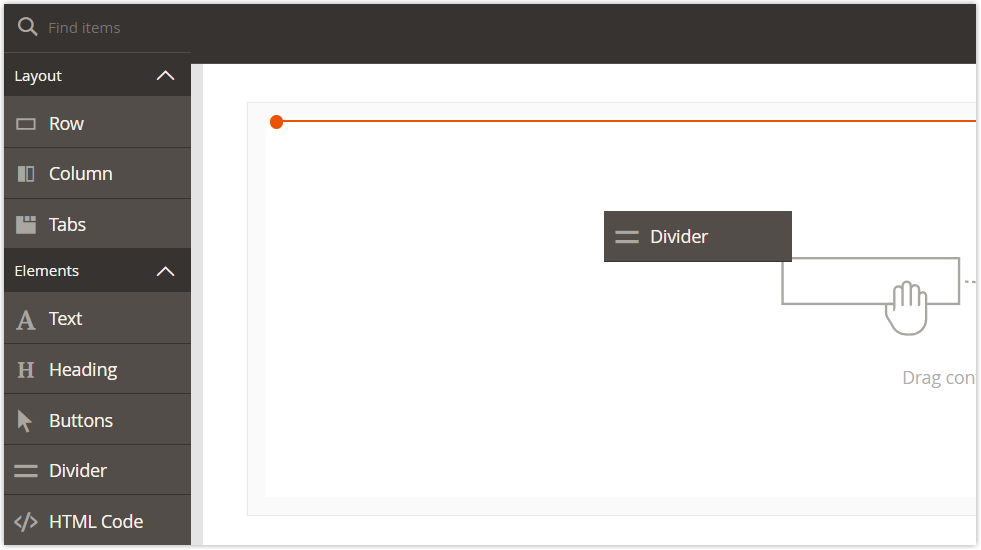
#Step 3: This is how the divider looks in Magento Page Builder.

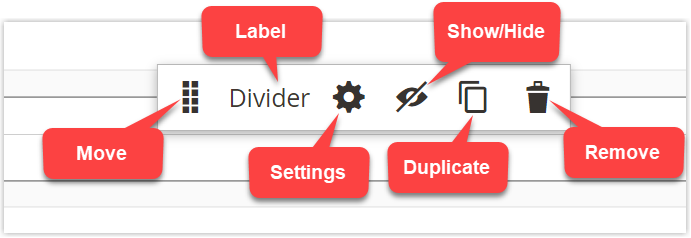
In fact, it’s quite a thin line. You must work with its settings if you want it to be thicker or have a more outstanding color. To begin, I’ll explain its toolbox, which allows you to open the Edit Divider page. To display the toolbox, hover over the Divider container. Below are the labeled components on the toolbox.
| Tool | Description |
| Move | This allows you to move the Divider container to any valid location on the page. To do so, hold the left mouse button down and move the container to that location. |
| Label | “Label” specifies the current container’s name, Divider. |
| Settings | This allows you to customize the Magento Page Builder divider on the Edit Divider page after clicking the settings icon. |
| Hide/Show | “Show/ Hide” allows you to show or hide the Magento Page Builder Divider container. |
| Duplicate | “Duplicate” allows you to duplicate the Magento Page Builder Divider container. |
| Remove | “Remove” allows you to remove the Magento Page Builder Divider container. |
Now you know where to edit the divider. So, let’s look at how to customize Magento Page Builder Divider in detail.

Try FREE Magezon Page Builder demo today.
Easily create beautiful, engaging Magento websites in any style without relying on developers or designers. Just by drag & drop.
How to Customize Magento Page Builder Divider
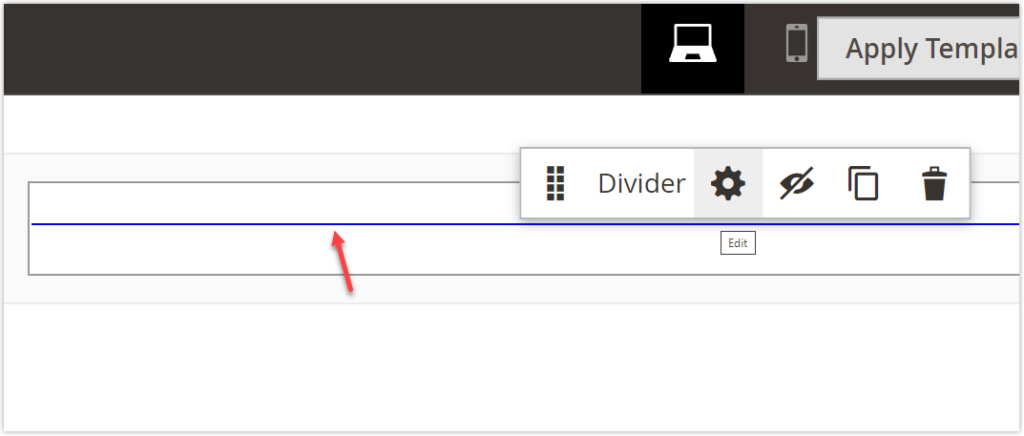
#Step 1: Hover over the Divider container to show its toolbox. Then click the gear icon to access the Divider settings.
#Step 2: You are now landing on the Edit Divider page, which contains all these settings.
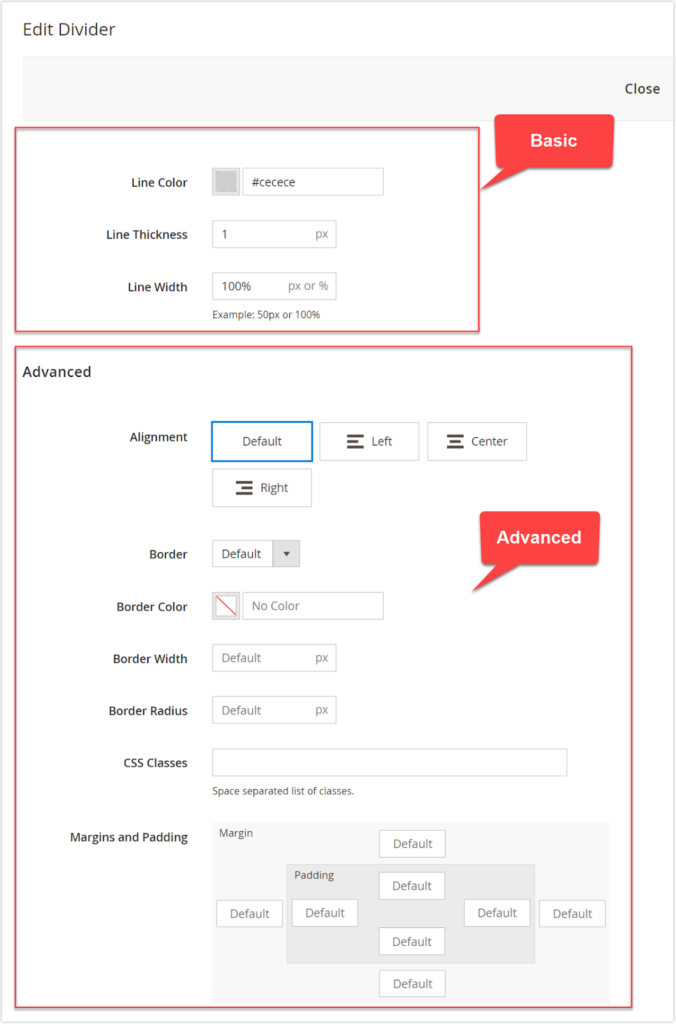
As you can see above, the Divider settings are divided into two sections.
- Basic settings: enables you to stylize the divider itself.
- Advanced settings: enables you to customize the Divider container.
So, let’s begin with the basic settings.
1. Basic Settings
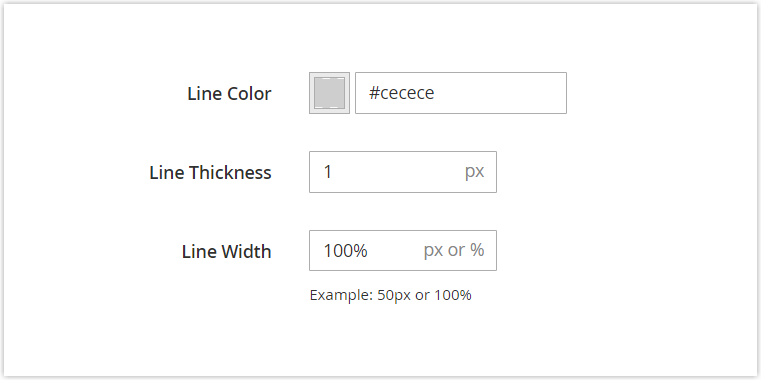
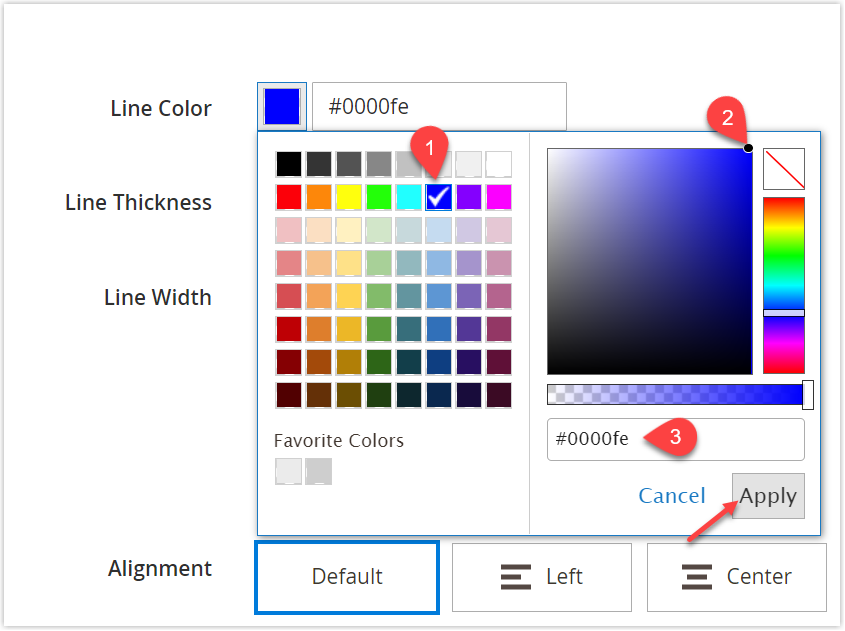
- Line Color: Select your desired color for the divider line. You can do this job in one of the following ways:
+ Select your desired swatch (1)
+ Directly select the color using the color picker (2)
+ Set a valid hexadecimal code or color name (3)
And don’t forget to click Apply to confirm your choice.
Here’s how the line color on my divider looks.
- Line Thickness: Enter the thickness of the divider line (Unit: px). By default, the thickness is set to 1px.
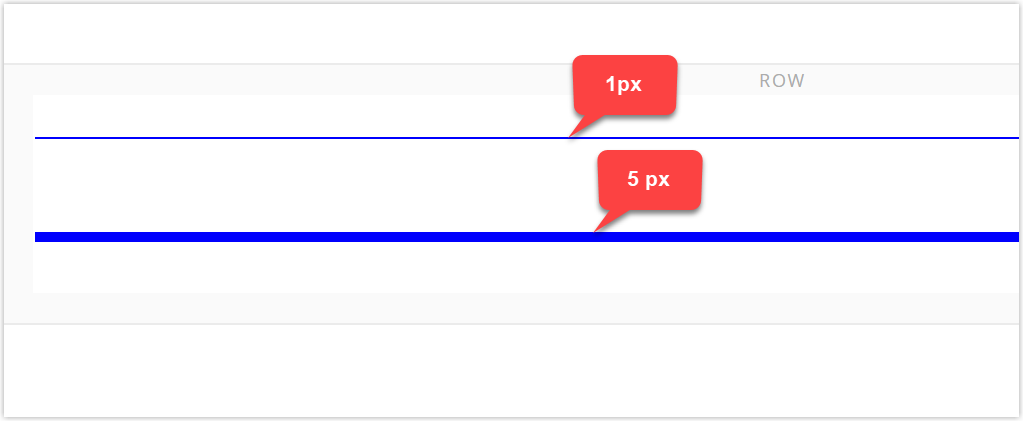
- Line Width: Set the line width by entering a number followed by either px or %.

Now we’re finished. Let’s move on to the next section, Advanced.
2. Advanced Settings
If you’ve already learned Magento Page Builder Row, Column, Heading, or Text, you will definitely be familiar with this Advanced section, right? If so, you can skip it. Otherwise, let’s just keep going.
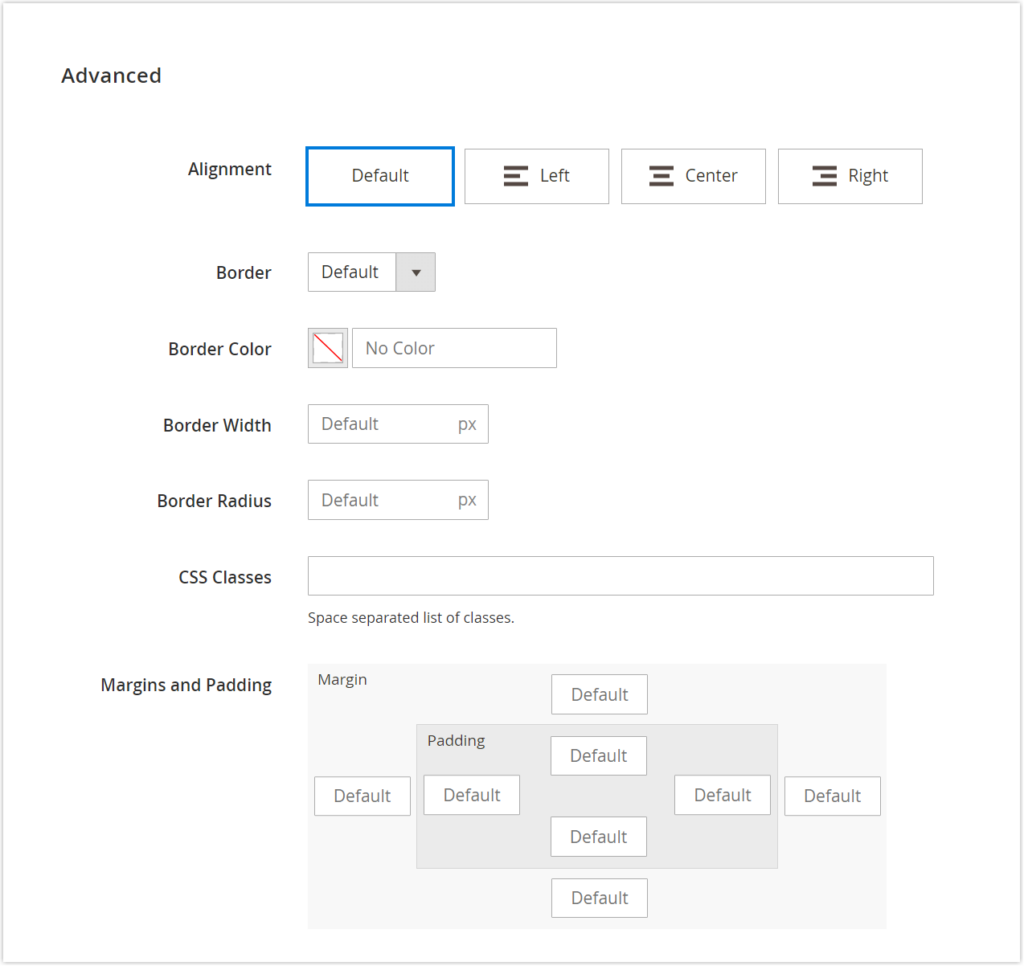
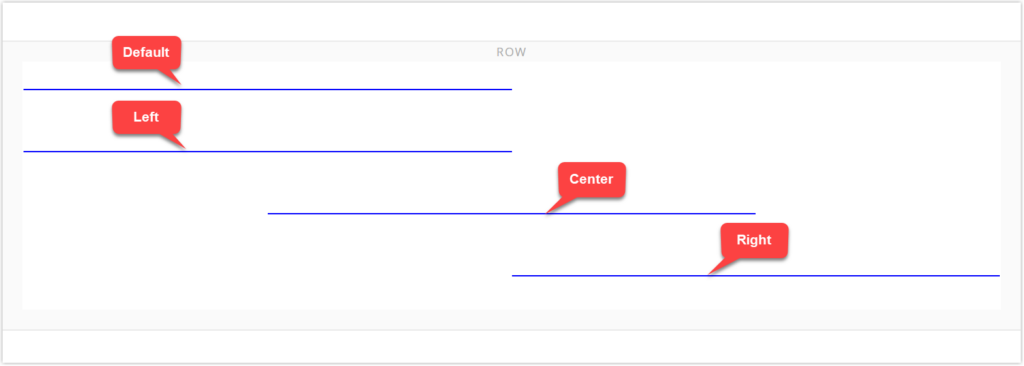
- Alignment: Determine how the divider lines up within the parent container. In all the examples of the article, the parent container is the row container.
| Alignment Option | Description |
| Default | Use the default alignment setting determined in the current theme’s style sheet. The default alignment in the current theme (Luma) is Left. |
| Left | Align the divider along the left side of the row container. |
| Center | Align the divider to the middle of the row container. |
| Right | Align the divider along the right side of the row container. |
To better show how the divider line is aligned, I reduced the line width to 50%.
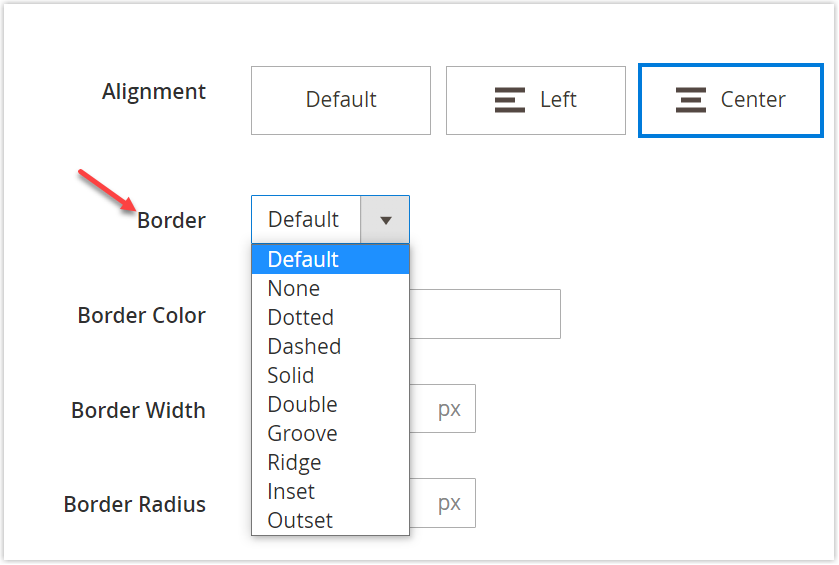
- Border: Select the border style for four sides of the Divider container.
And here is an illustration that shows how these borderlines appear. (Source: W3)
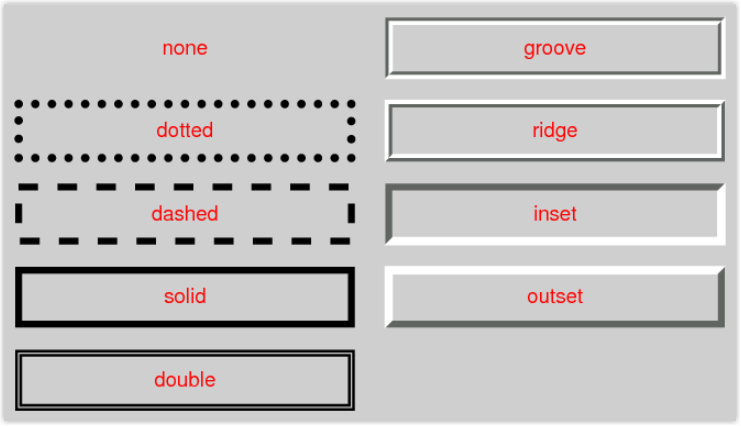
All options are clearly shown in the image above. Moreover, you can refer to Magento Page Builder Heading where we’ve provided specific examples for each. So I won’t explain further.
If you set None for Border, you won’t be able to change the border color and width. If you take other options, then you can do so.
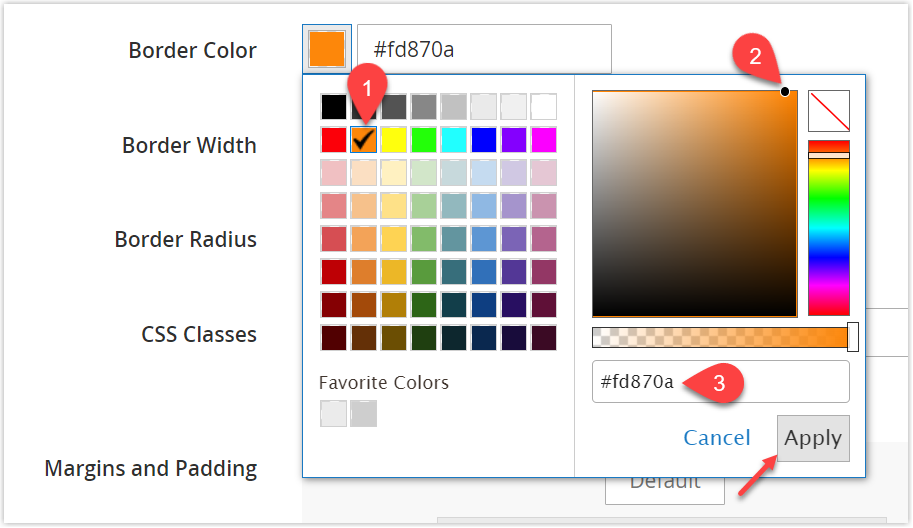
- Border Color: Choose the color for the Divider container’s borders using one of the methods below:
+ Choosing your desired swatch (1)
+ Using the color picker (2)
+ Entering the valid color value (3)
And click Apply.
- Border Width: Set the border thickness. If you leave this field blank, the border won’t appear, even if you’ve already set the color. (Unit: px)
- Border Radius: Set the border radius to round the corners of the Divider container’s border. (Unit: px)
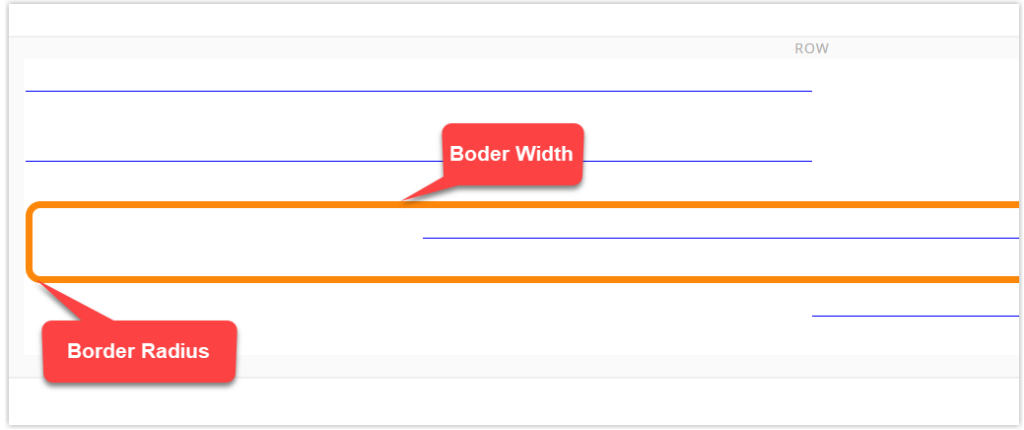
- CSS Class: Enter the names of CSS classes to apply to the Divider container. In the case of several class names, use a space to separate them.
- Margins and Padding: Apply the blank space to the outside and the inside edges of the Divider container’s sides.
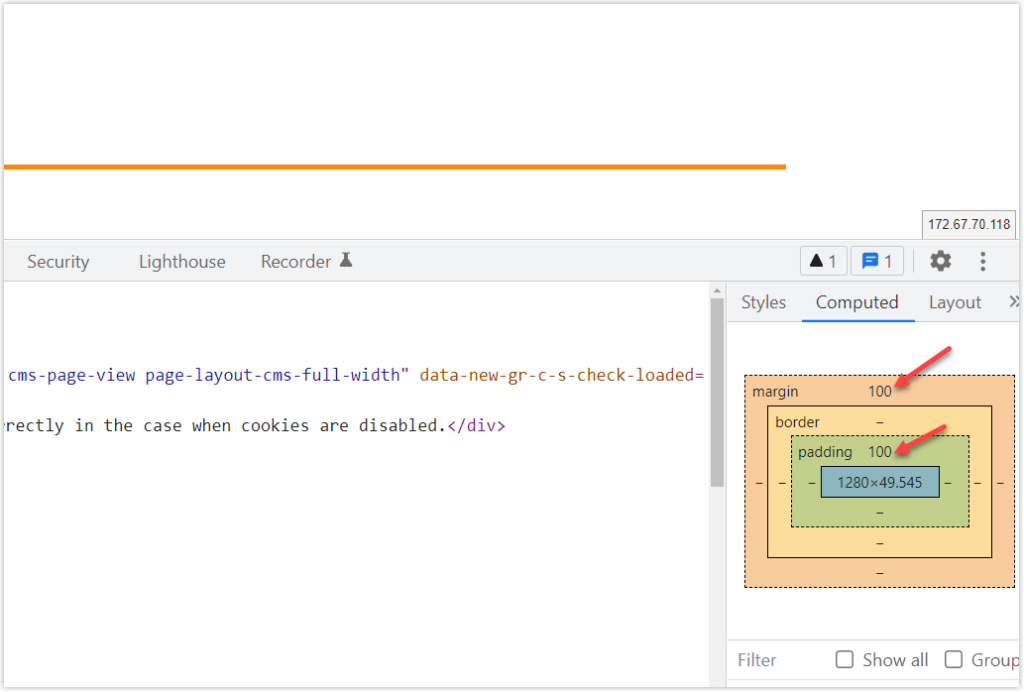
To demonstrate, I set the divider’s top padding and top margin to 100px. However, the top margin (the amount of blank space outside the Divider container’s border) does not show up. Instead, the top padding has now increased to 200px, which should be 100px.
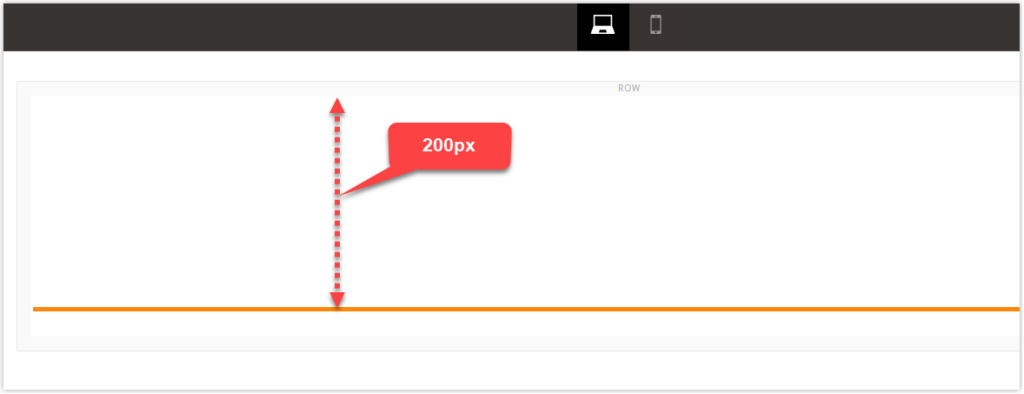
The margin was still displayed when I checked it in the front end. You can see it in the image below.
Advanced Divider From Magezon Page Builder
Magento Page Builder Divider is enough if you only need a simple separator to divide the content section. But if you want more than that, like stylizing the separator, adding a title, an icon, or even an eye-catching animation effect to the separator line, try Magezon Page Builder Divider, known as Separator. Another Magezon option that can help wow your customers is Shape Divider plugin.
First, I’ll present Separator.
- Magezon Page Builder Separator gives you complete control over how it looks and feels. You can freely customize its line style, weight, width, and color to align perfectly with your overall design. Easy to insert the styled text and icons in the separator, which increases the chances of your design being noticed by anyone.
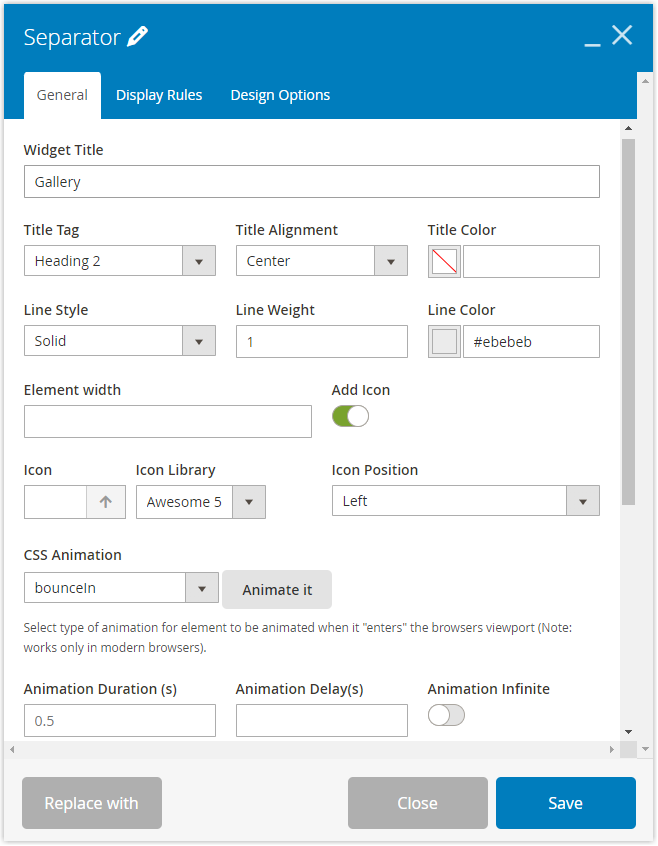
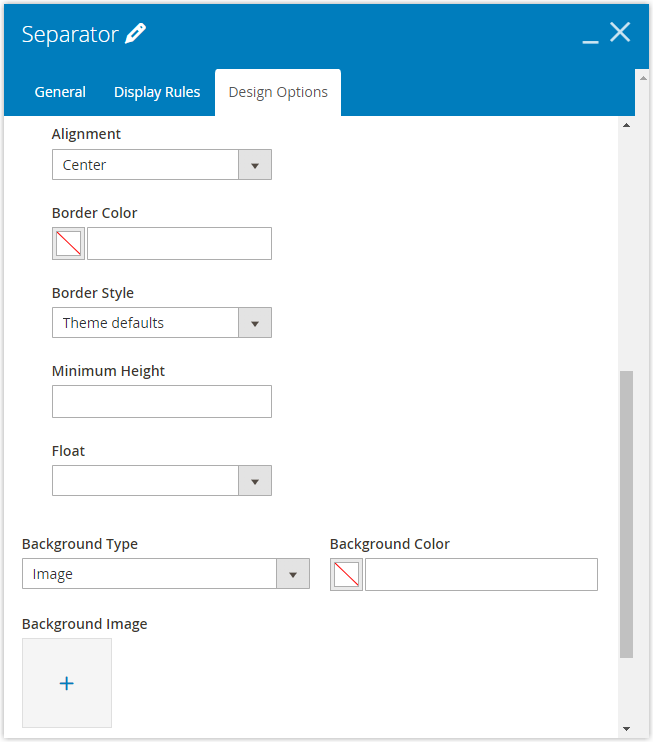
- The Separator of Magezon Page Builder offers you access to more Advanced settings, apart from all the same settings as Magento Page Builder. Add a background image, video, and color to make the separator become unique. Use one of five available parallax effects for the background image or color for a vivid and lively design.
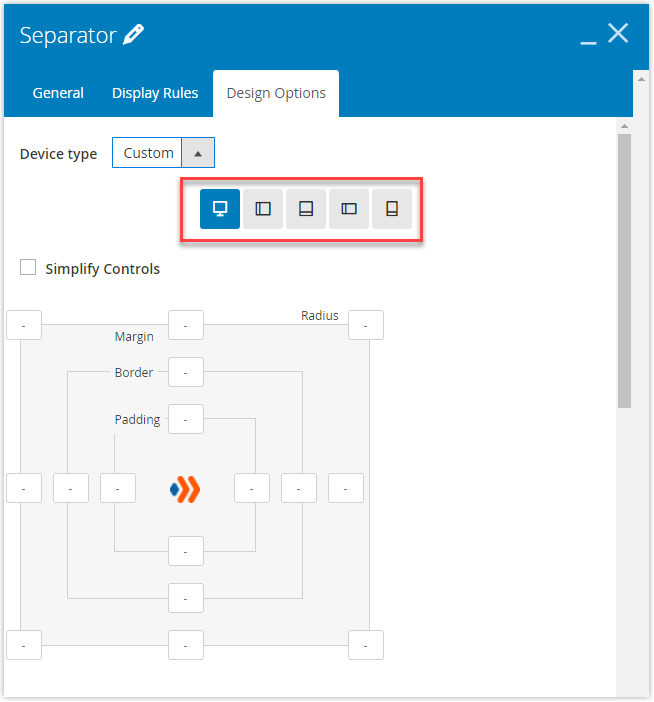
- With Magezon Page Builder, you can decide whether to show or hide the divider on different devices. Plus, quickly adjust to make all Design Options aspects, such as margins, paddings, alignment, border styles, or a complex one like parallax, etc., look and work properly on 5 different screen sizes.
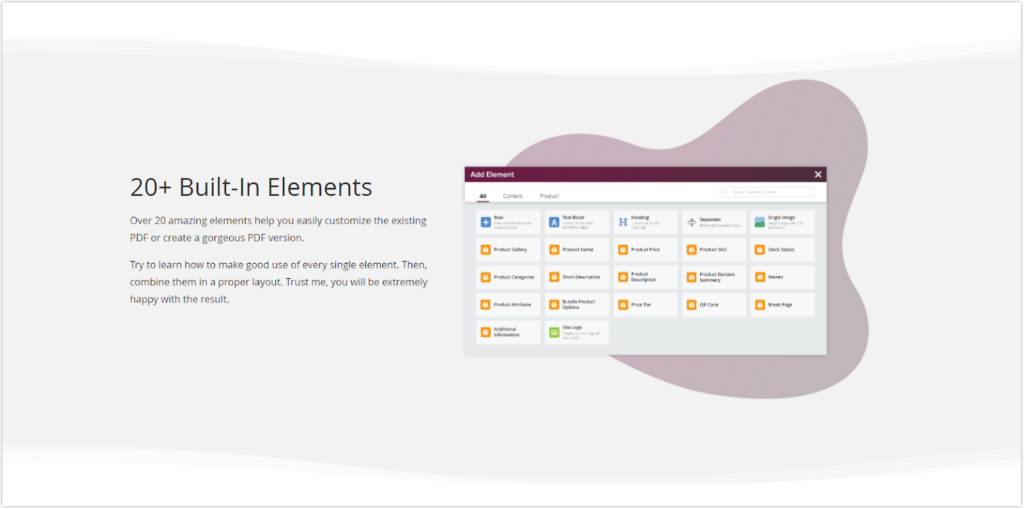
But that’s not all. We have offered Shape Builder, a small but efficient plugin of the Magezon Page Builder extension. With this tool, users can create visually aesthetic separators between sections. Let’s see the smooth wave lines designed with the Shape Builder plugin to prove what I have just boasted about our product.
Good news: In 2023, we will roll out a completely new version of Magezon Page Builder. This version promises to increase your work efficiency while bringing about a remarkable transformation for your website. Check out New Page Builder Sneak Peeks to see how powerful diverse new features are. |
Wrap It Up
Magento Page Builder Divider is not complex to learn. Spend some time using it while browsing existing websites for inspiration to tie your separator and overall look together. Comment below if you have any ideas to discuss.

Try FREE Magezon Page Builder demo today.
Easily create beautiful, engaging Magento websites in any style without relying on developers or designers. Just by drag & drop.
 Magezon Blog Help Merchants Build Comprehensive eCommerce Websites


