 Magezon Blog Help Merchants Build Comprehensive eCommerce Websites

| * For more useful tutorials on Magento Page Builder, visit our series. |
Eye-catching and interactive banners are among the most effective ways to capture visitors’ attention to your promotional campaigns, new collections or featured products, and ultimately convert them into paying customers. As a Magento-based store owner, you must be a lot concerned with building captivating banners for your website using the Banner content type provided by Magento itself. So, you’ve come to the right place because this tutorial is designed to do the job.

Table of contents
Where to Find Banner Content Type in Magento Page Builder?
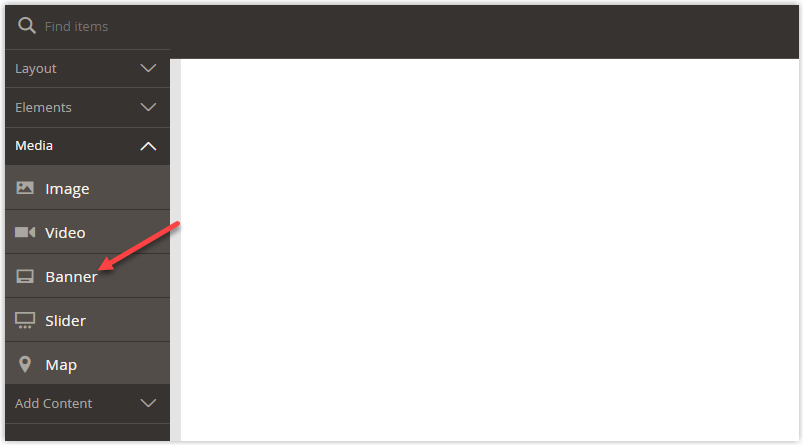
To find Banner, open the Magento Page Builder workspace. Expand Media in the left panel and you’ll find this content type.
| Master Media content types in Magento Page Builder: Magento Page Builder: All About the Video Content Type Magento Page Builder: All About the Slider Content Type Magento Page Builder: All About the Map Content Type |
Explain Banner Toolbox

| Action | Icon | Description |
| Move | Move the banner to your desired position on the stage. | |
| (Label) | Banner | Indicate the current container name (Banner). |
| Settings | Change the settings of the banner and its container. | |
| Hide | Hide the banner. | |
| Show | Show the banner. | |
| Duplicate | Duplicate the banner. | |
| Remove | Delete the banner from the stage. |

Try FREE Magezon Page Builder demo today
Easily create beautiful, engaging Magento website in any style whenever you want without relying on developers or designers. Just by drag & drop.
How to Add a Banner in Magento Page Builder
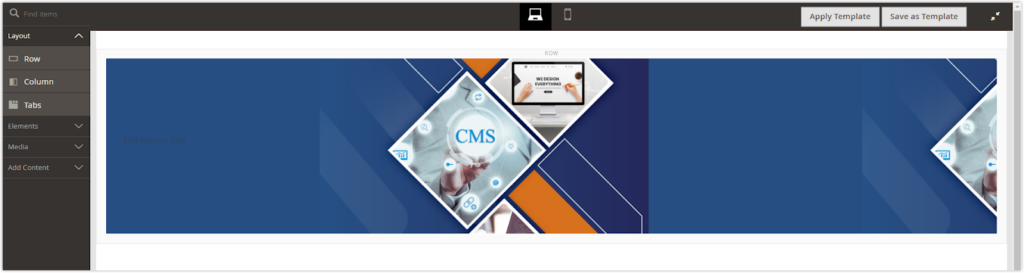
To add a Banner content type, you must include one of the Layout content types on the stage first. In my case, I choose Row content type.
You can now add Magento Page Builder Banner to the row by dragging and dropping it into the row until the red guideline appears.
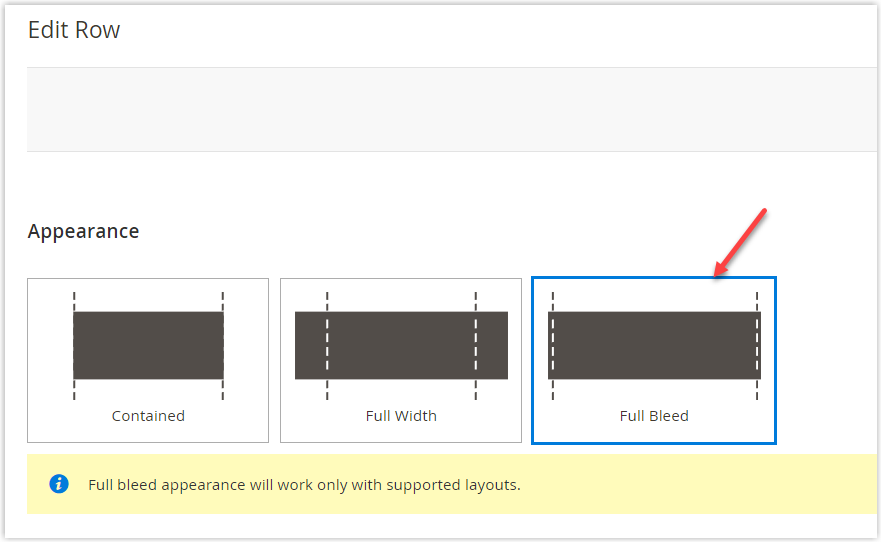
One thing to remember is that you should use the full-bleed for this row so that its content, which is the banner inside, will take up the entire full-screen width. You are sure to agree with me that a banner like this looks more visually appealing.
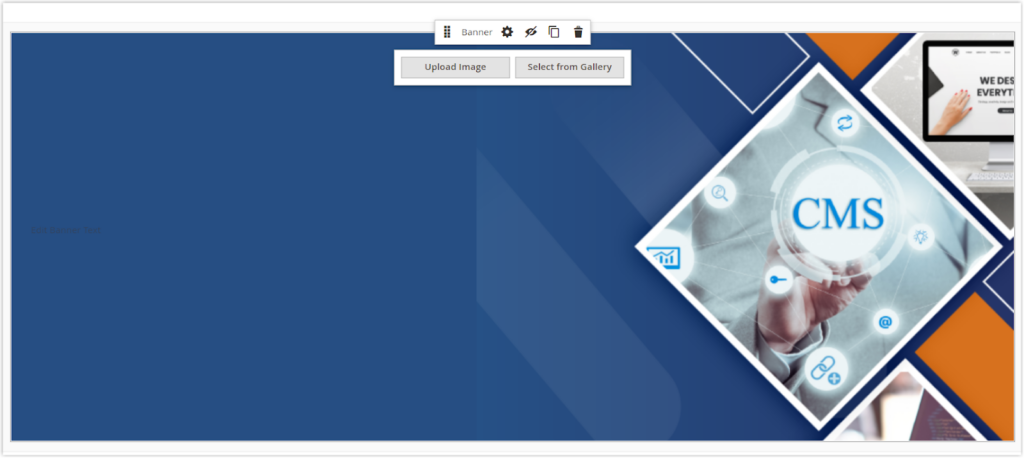
Okay, get back to the banner. Below is the banner with its toolbox, along with the 2 options for uploading the image.
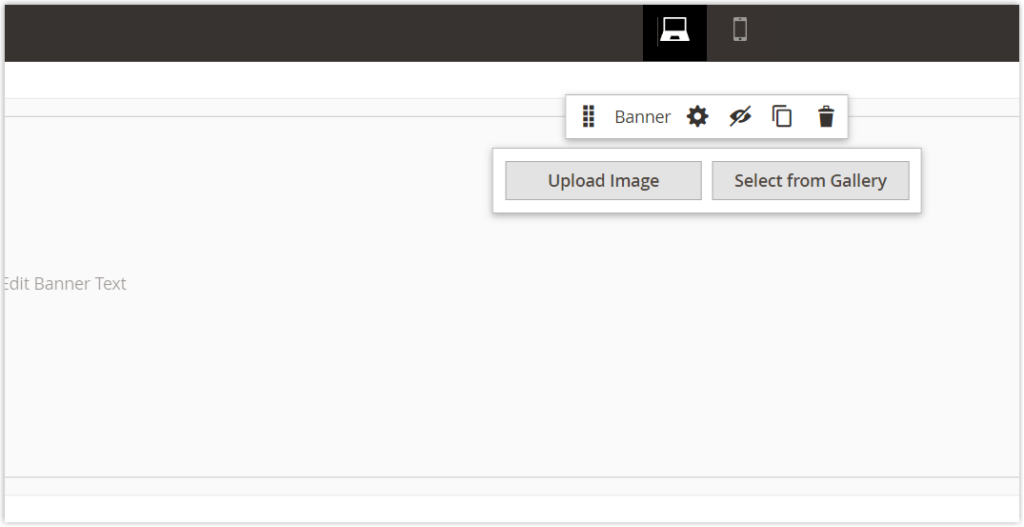
You can either upload the banner from your computer or select the image from the gallery if you have previously uploaded it.
To change its content, you have 2 options:
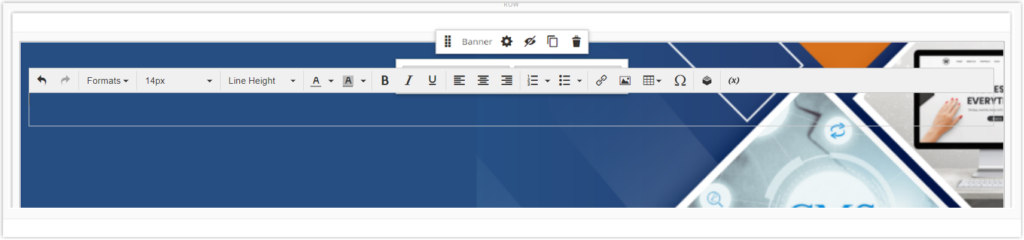
- Make quick adjustments to the banner’s content right from the stage. To do so, click on the banner placeholder, and the text editor will show up. You can now add content such as text, images or links, etc. to this editor.
- Or change the content by opening the Edit Banner page. This is particularly useful if you need to change more complex banner container settings.
Option 1 is quite easy and straightforward, therefore, I won’t go into detail about it. Option 2 is more complex with more settings, which requires detailed explanations. Therefore, I’ll cover in-depth how to customize the banner.
How to Customize the Banner in Magento Page Builder
To begin, open the Edit Banner page by clicking the Settings icon in the Magento Page Builder Banner toolbox. You’ll be taken to the page divided into three sections:
- Appearance
- Background
- Advanced
Let’s begin with section 1, Appearance.
1. Appearance
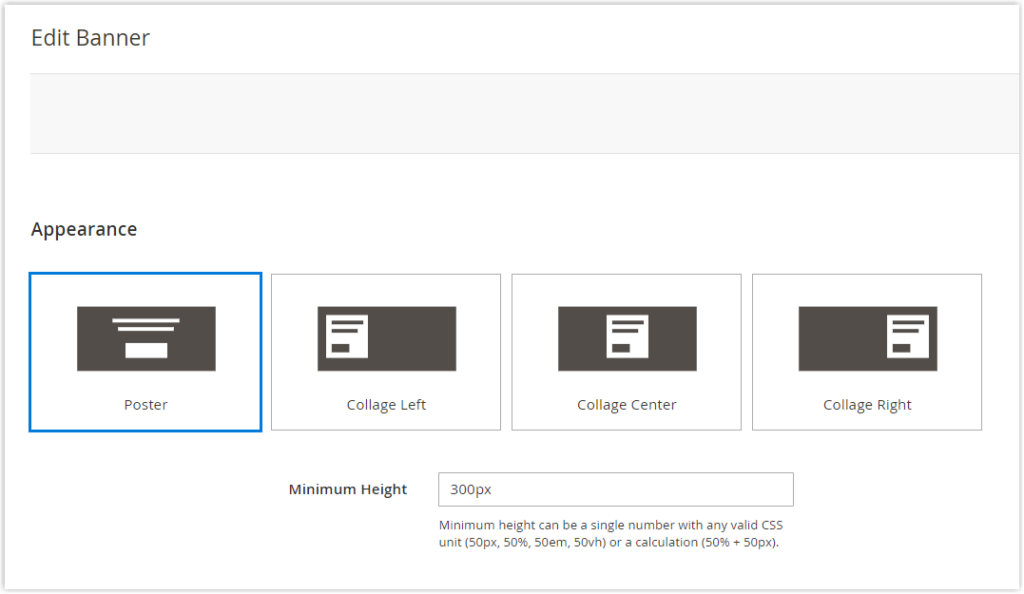
- Select one of the banner placement types as below:
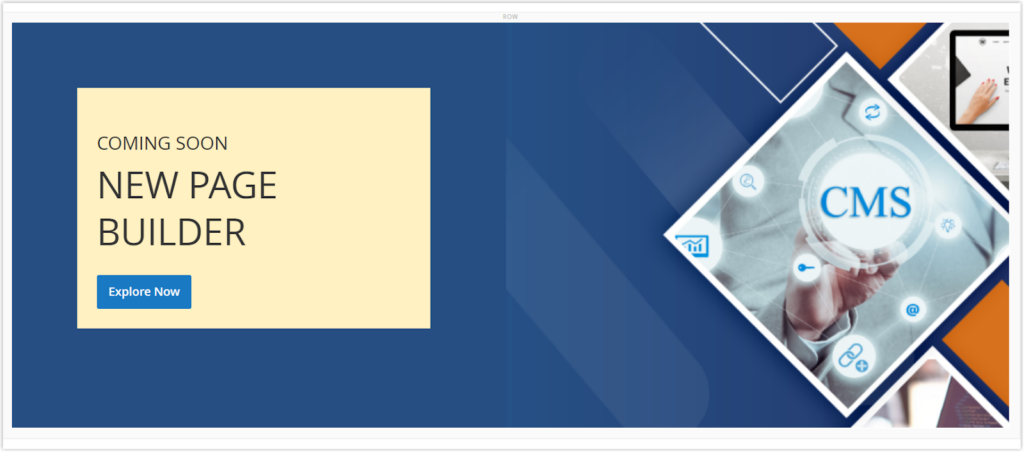
+ Poster: Center the content and button within the banner. If you apply the overlay to the banner, the overlay will extend to the banner’s full width.
+ Collage Left: Align the defined area of the content and button to the left side of the banner. If you apply the overlay to the banner, it’ll cover this area only.
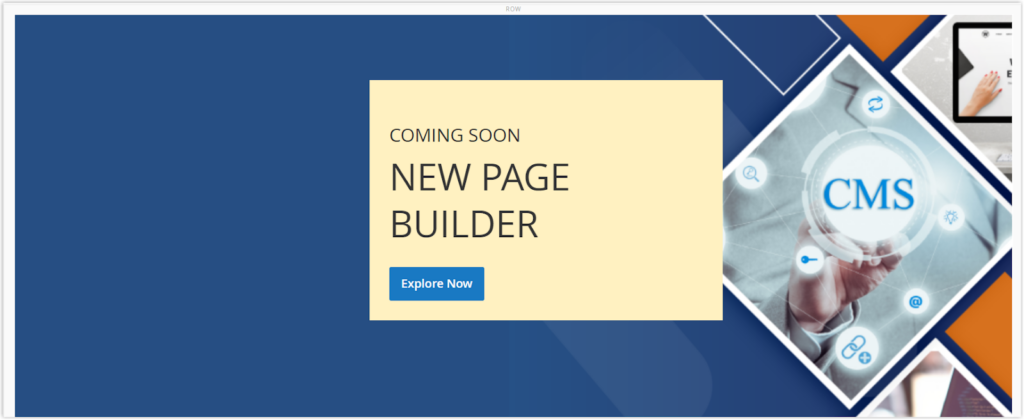
+ Collage Center: Center the defined area of the content and button on the banner. If you apply the overlay to the banner, it’ll cover this area only.
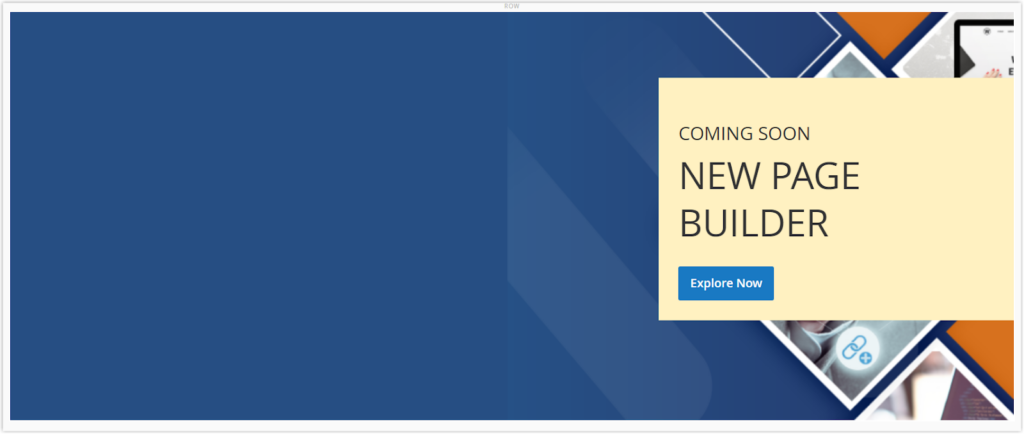
+ Collage Right: Align the defined area of the content and the button to the right of the banner. If you apply the overlay to the banner, it’ll cover this area only.
- Minimum Height: Enter the banner’s minimum height, especially useful when the banner image doesn’t show the full height. You can enter a number with a valid CSS (e.g., 50px, 50%, 50vh, 50em) or a calculation (e.g., 100vh – 250px).
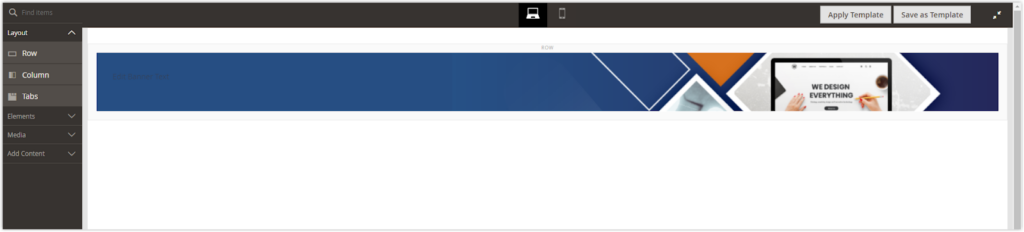
For example, the image below doesn’t show its entire height. The default minimum height is 300px, however, the actual banner height is 620px.

Now I’ll increase its height to 620px. Look at this. Isn’t it better?

When you’re done with section Appearance, exit full-screen mode and save the changes. Next, let’s move on to the next section, Background.
Try FREE Magezon Page Builder demo today
Easily create beautiful, engaging Magento website in any style whenever you want without relying on developers or designers. Just by drag & drop.
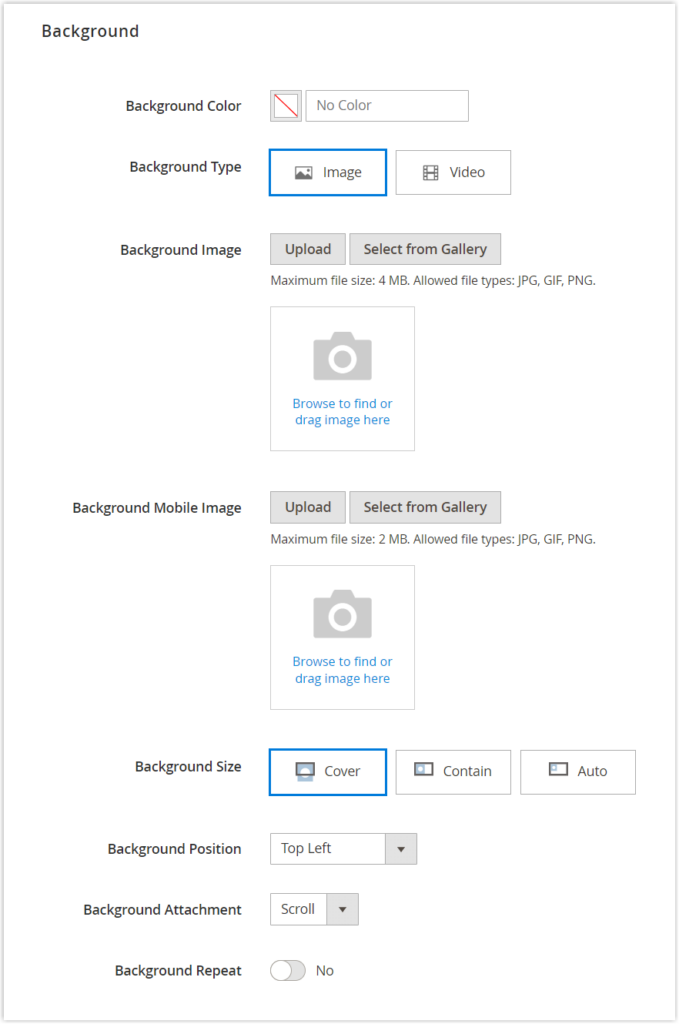
2. Background
You have several options to display a banner’s background. Also, there are quite a variety of complex customizations to apply to the background.
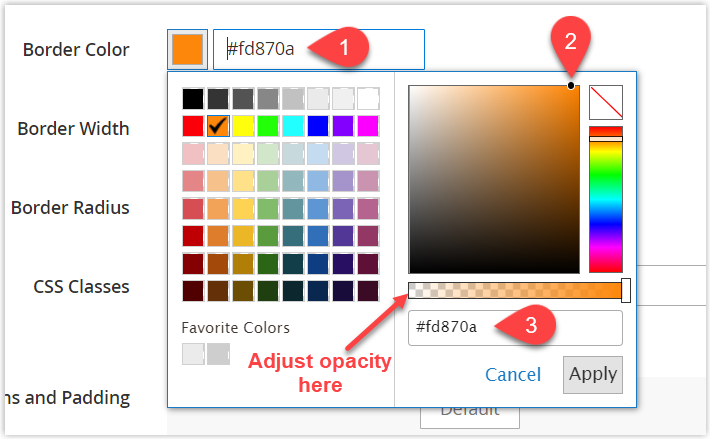
- Background Color: Pick any color for the background from the options below:
+ Selecting a swatch from the color panel.
+ Clicking and dragging your cursor inside the picker area.
+ Entering a custom hexadecimal value or color name in the custom color field.
You may also adjust the color opacity with the slider beneath the color picker.
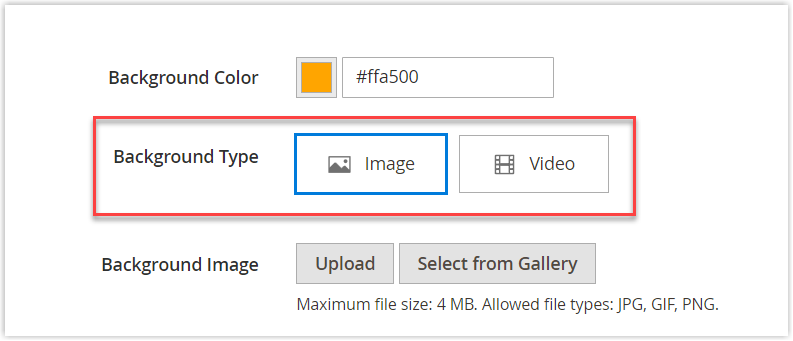
- Background Type: There are two background types that are Image and Video. By default, the background type is set as Image with its numerous settings. When you choose Video, Page Builder replaces the image settings with the video ones. We’ll explain in-depth these two background type settings.
2.1. Image Settings
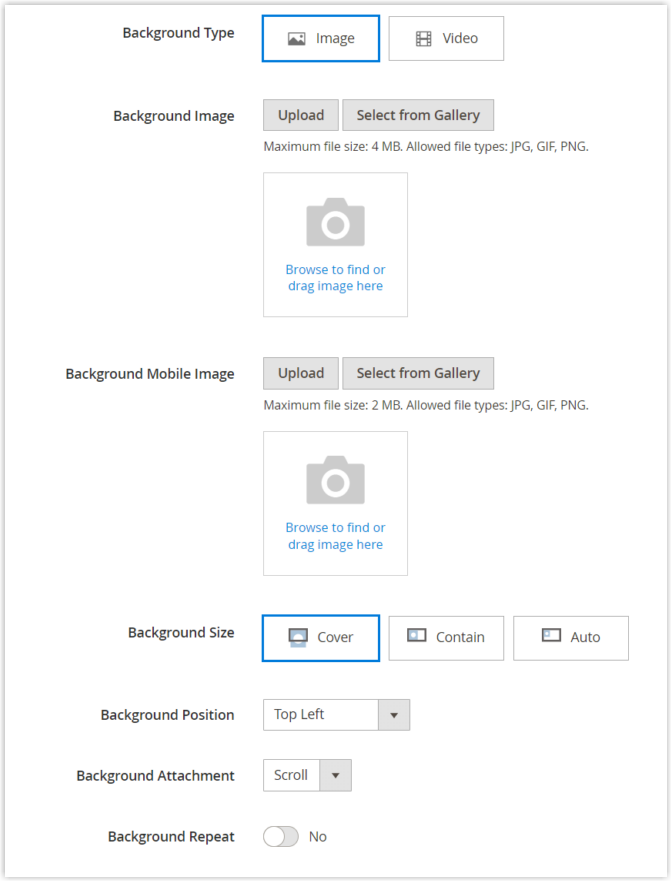
- Background Image: Choose a background image for the banner. It can be done in three different ways.
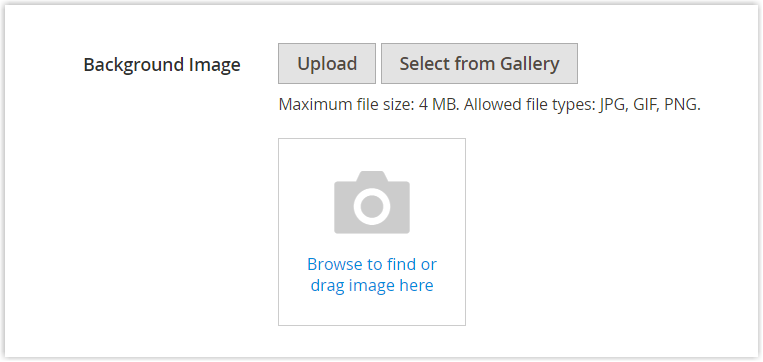
| Upload | Upload an image file from your device. |
| Select from Gallery | Select an existing image from the gallery. |
| Either drag the image file and drop it into the camera title or browse to find the image on your local file system. |
Make sure your image file does not exceed the upload size limit (4 MB). Aside from that, JPG, GIF, and PNJ are supported.
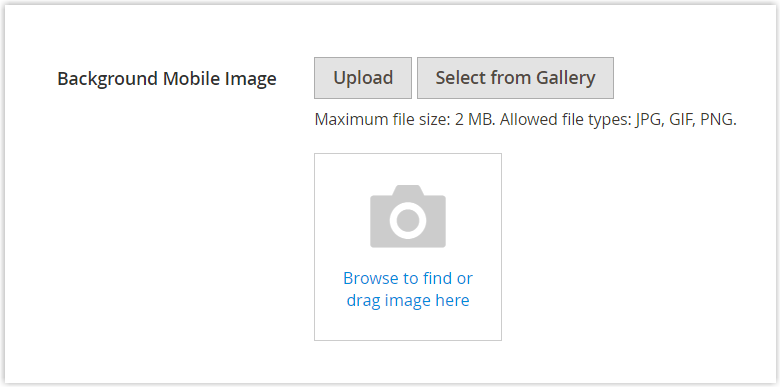
- Background Mobile Image: Use the same method to select a different background image for mobile devices on display if necessary.
- Background Size: Select the option to specify how the background image is scaled in relation to the banner’s width. There are three background size types to select: Cover, Contain, and Auto. Let me explain each one in detail.
+ Cover: If you choose Cover as the background size, your image will be scaled to fit the entire width of the banner container. If the image and the banner container have different proportions, the image will be cropped vertically or horizontally to fill the container.
+ Contain: As its name says, this option allows your image to be scaled within its container without stretching or cropping. Therefore, this image is displayed in the same proportion but with a smaller dimension.

+ Auto: When you select Auto, the background-size is determined by the style sheet of the current theme (Luma). This case, the actual image dimensions will remain unchanged.

Background Position: Set the starting horizontal position for your background image. You have nine options to choose from.
| Top | Center | Bottom |
| Left/Center/Right | Left/Center/Right | Left/Center/Right |
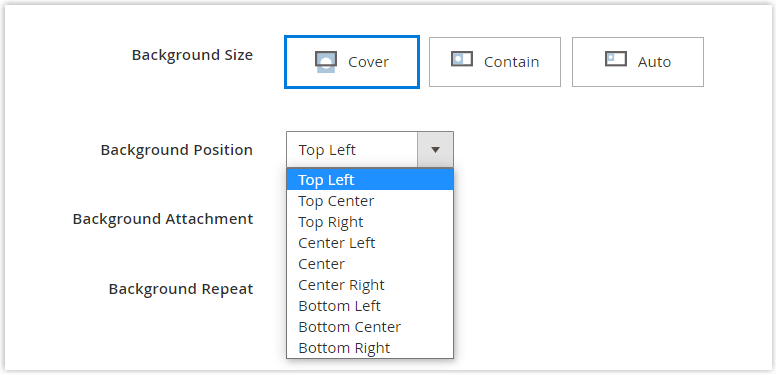
To make the Background Position clear to you, let me give you an illustration with the image background set to Top Left and Bottom Left.
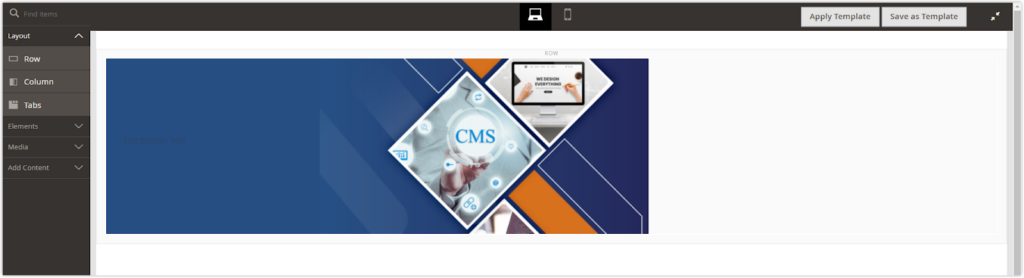
This is the initial background image.

Background Position is set to Top Left.

Background Position is set to Bottom Left.

- Background Attachment: This lets you decide if the background image scrolls or stands still in relation to the rest of the page. By default, Background Attachment is set to Scroll, which is what you have seen ever since. So I’ll only show you the other setting, Fixed, in the below video.
+ Scroll: As you scroll the page, the attached background image moves down with this page.
+ Fixed: While the container scrolls over the background image, it stands stills at the given background position. Keep in mind Fixed is not supported on mobile devices.
- Background Repeat – Set this to Yes if you want to repeat the background image to fill the container. This is especially useful when the image background is set to Contain.
When the background size is set to Contain:
And here is it looks when I enable the Background Repeat setting.
2.2. Video Type Settings
If the background type is Video, use the following settings to define the background image display.
When I choose Video as the Background Type, all image settings are replaced with the video settings.
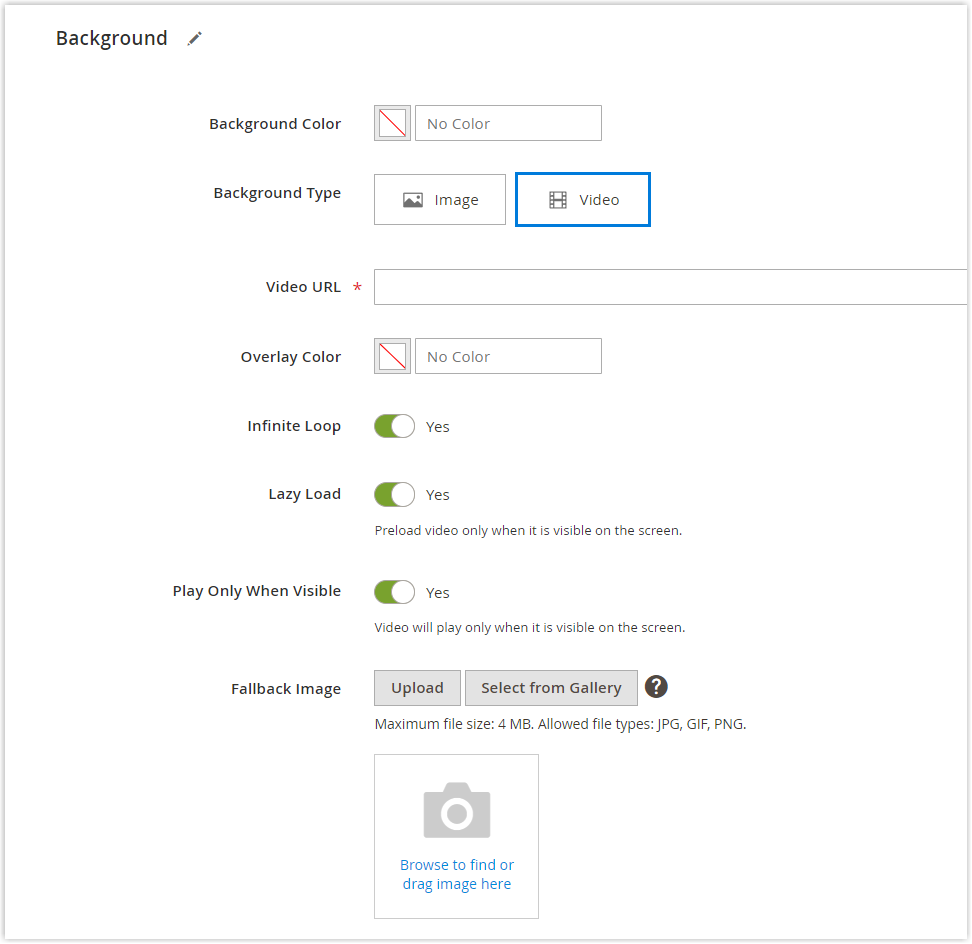
- Video URL: Insert a valid video URL. This video must be hosted by Youtube, Vimeo, or link to a valid video file with allowed video extensions (e.g. https://myvideos.com/magezon.mp4)

- Overlay Color: Select a color to apply a transparent overlay to the video.
- Infinite Loop: Set this to Yes so that the video will repeat with endless replays.
- Lazy Load: Set this to No so that the video will load with the page, even when it’s not in your sight. Set this to Yes if you want the video to load from the source only when it’s visible on the screen.
- Play Only When Visible: Set Yes for this setting if his video will begin playing only when it’s visible. When you set No for this setting, whether the video is visible or not, it will automatically start playing as soon as it loads.
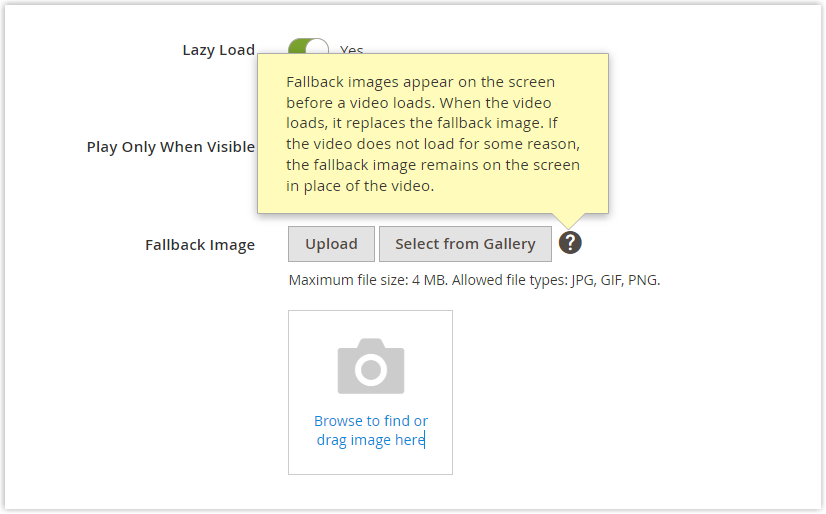
- Fallback Image: Select an image to display on the screen before a video loads. This is commonly used when the video fails to load and a fallback image serves as a perfect solution to replace the video.
To upload the image, you can either upload it from your device or select it from your media gallery. Besides, there’s a viable alternative: Browsing to find the image, or dragging the image into the camera icon.
3. Content
To add or edit the banner content, you can perform directly on the stage or access the banner’s settings. The second option tends to be used when you want to change the complex content settings like banner links, buttons, and overlays.
Remember to align the defined area of the content and the button to the wanted side of the banner, which I demonstrate detailedly in the Appearance section. In my case, I chose Collage Left.
3.1. Add and Change the Simple Content Settings Right on the Stage
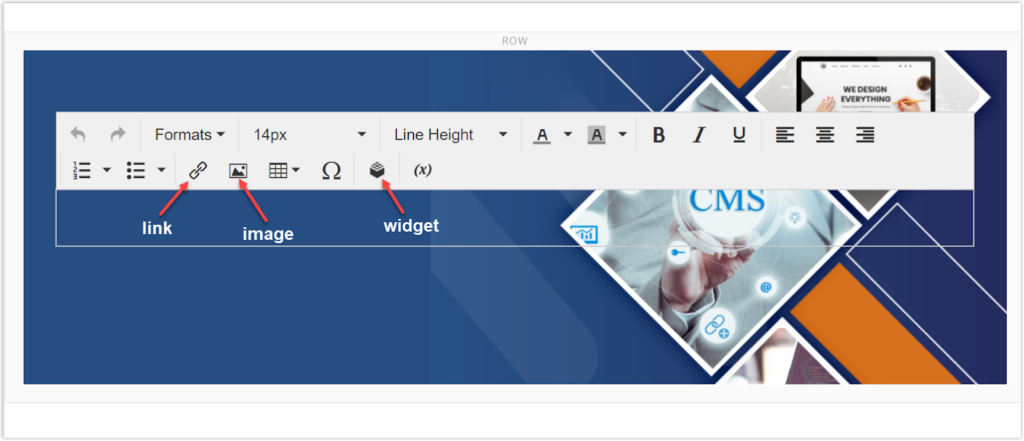
- To display the placeholder text, click anywhere on the banner container. The text editor with its toolbar shows up afterward.
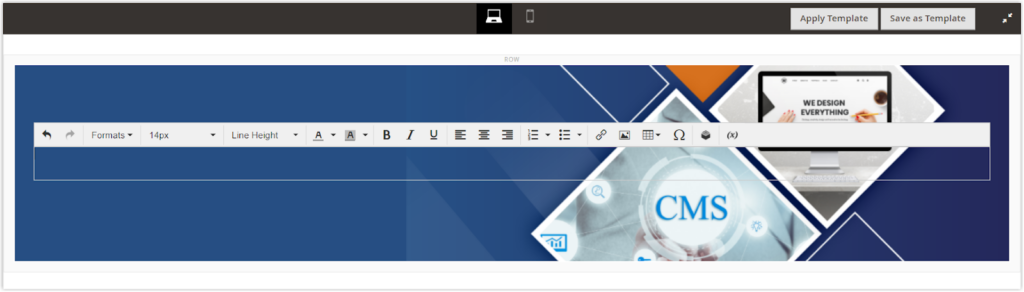
- Then enter your desired text that will appear on your banner. Format the text the way you want. Besides, you can add other elements, such as images, links, or widgets.
3.2. Add and Change Complex Content in the Settings
- To change the complex content settings, open the Banner Edit page by clicking on the Setting icon on the toolbox.
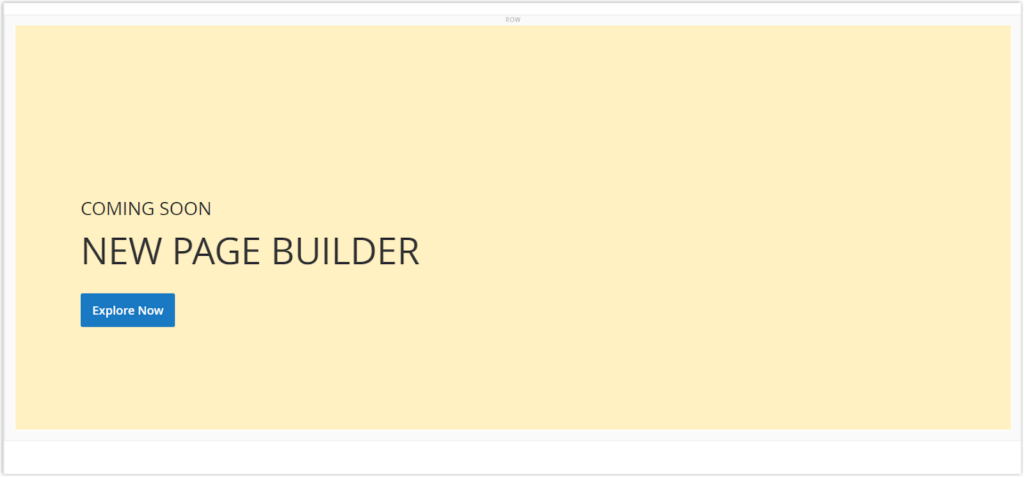
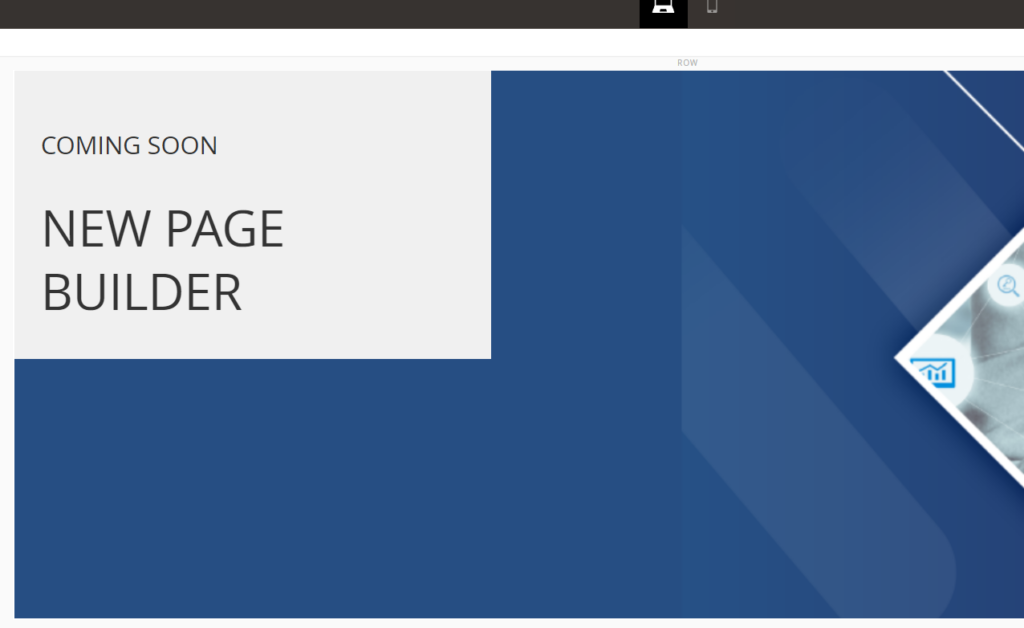
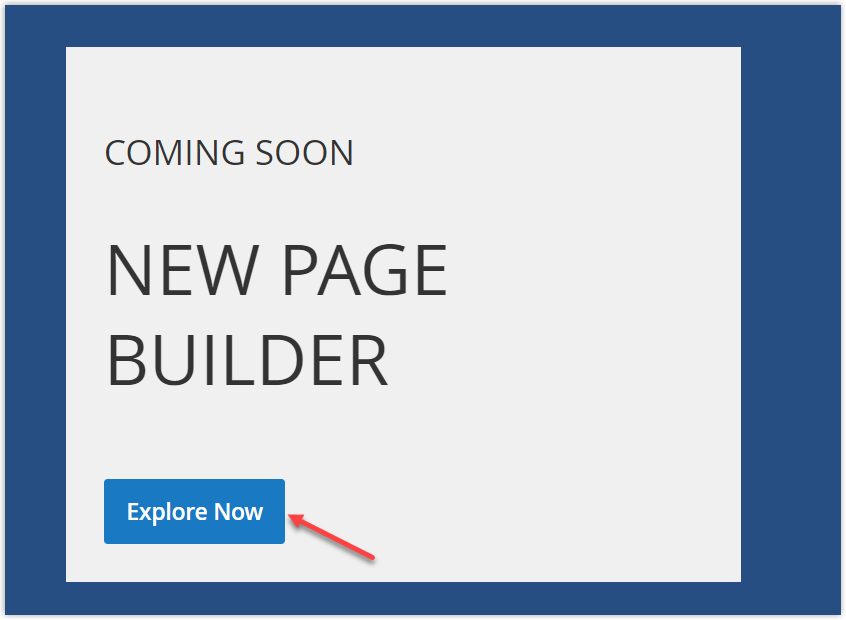
Scroll down to the Content section and you’ll see the Message Text editor. You can practice along with us by entering the following text with two lines:
+ Line 1: COMING SOON
+ Line 2: NEW PAGE BUILDER
Format the text of line 1 as below:
+ Font size: 28px
+ Line Height: 36px
Format the text of line 2 as below:
+ Font size: 56px
+ Line Height: 72px
And here’s what we have.
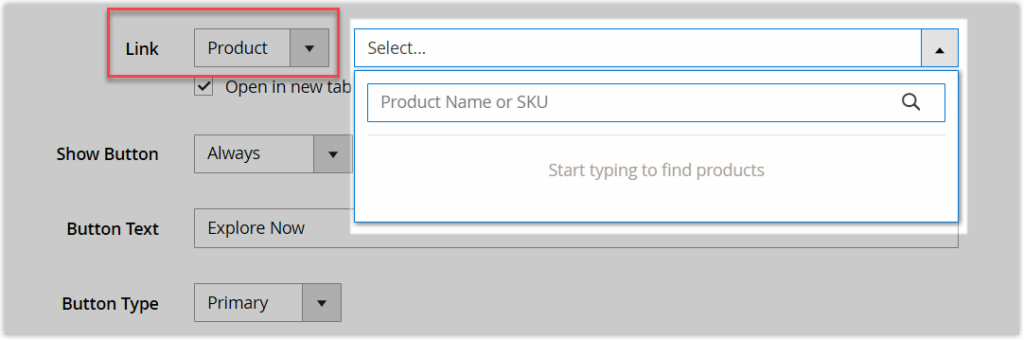
- You can add a link to the banner if wanted. When customers click on this button or any location in the banner, they will be taken to the destination page. There are four link types to select from. They are URL, Product, Category, and Page.
+ URL: Enter the valid destination URL which is either fully qualified or relative
| Fully-qualified URL example | https://www.magezon.com/magezon-page-builder-for-magento-2.html |
| Relative URL example | /magezon-page-builder-for-magento-2.html |
+ Product: Select the destination page by using the product name or SKU. Type a partial or full product name in the search bar, then select your desired product from the search results.
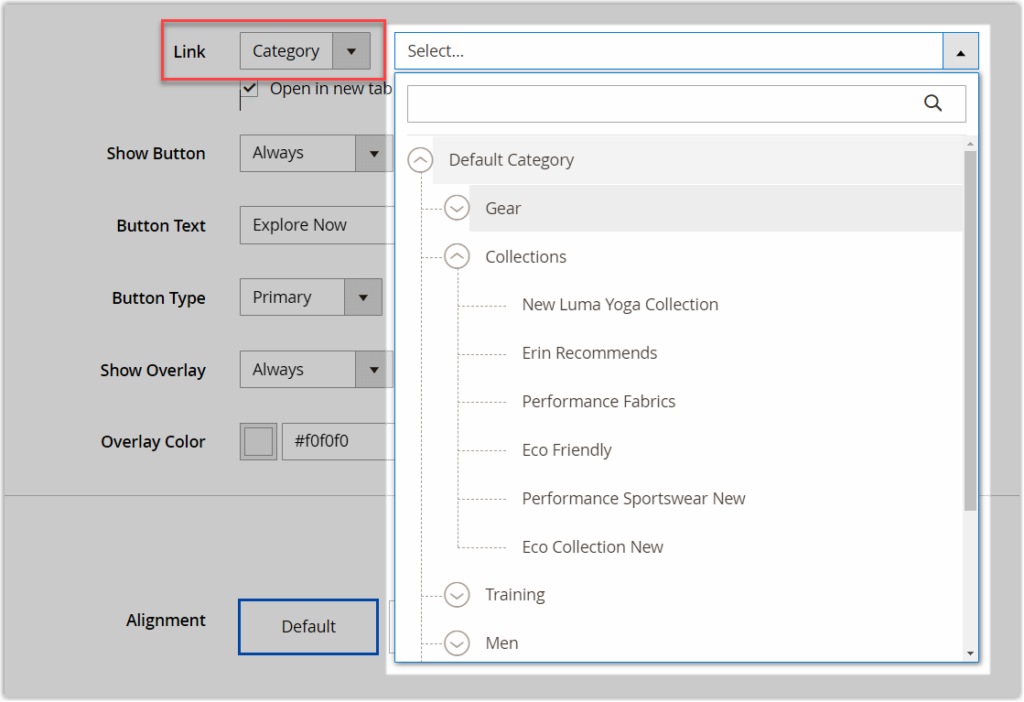
+ Category: Select a category or subcategory as the destination page from the category tree. Type the partial or full category name on the search bar, then choose the desired category from the collapsed section in the category tree.
+ Page: Select a content page as the destination page. You can select the page from the list, or type its partial or full name and select the desired page from the search results.
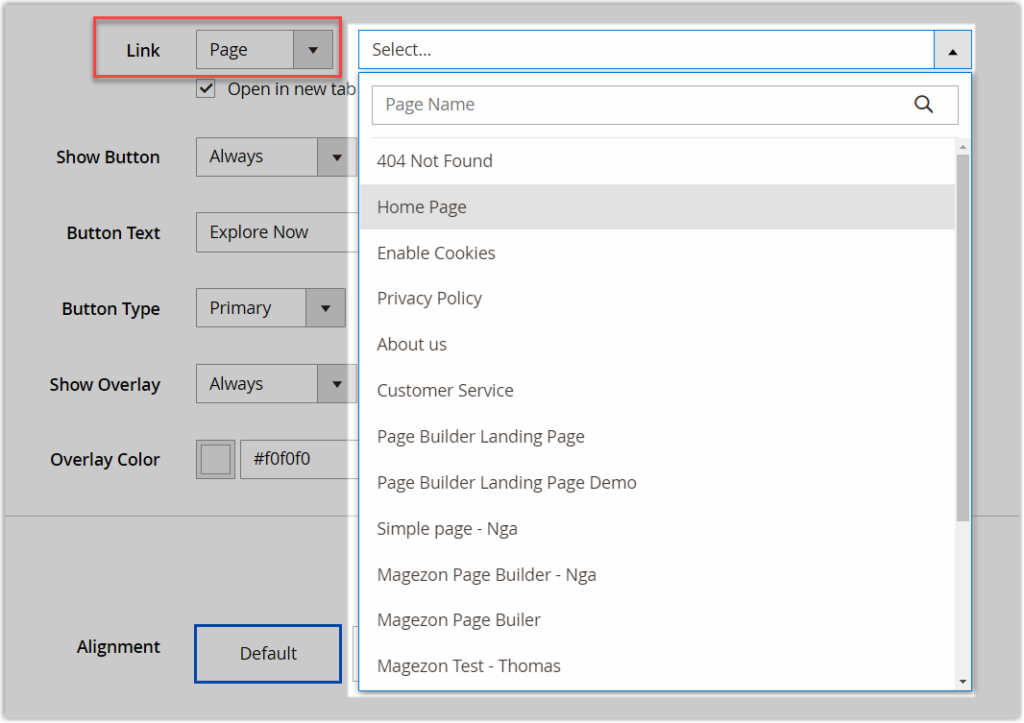
Make sure the Open in new tab checkbox is marked so that visitors are less likely to navigate away from your website.
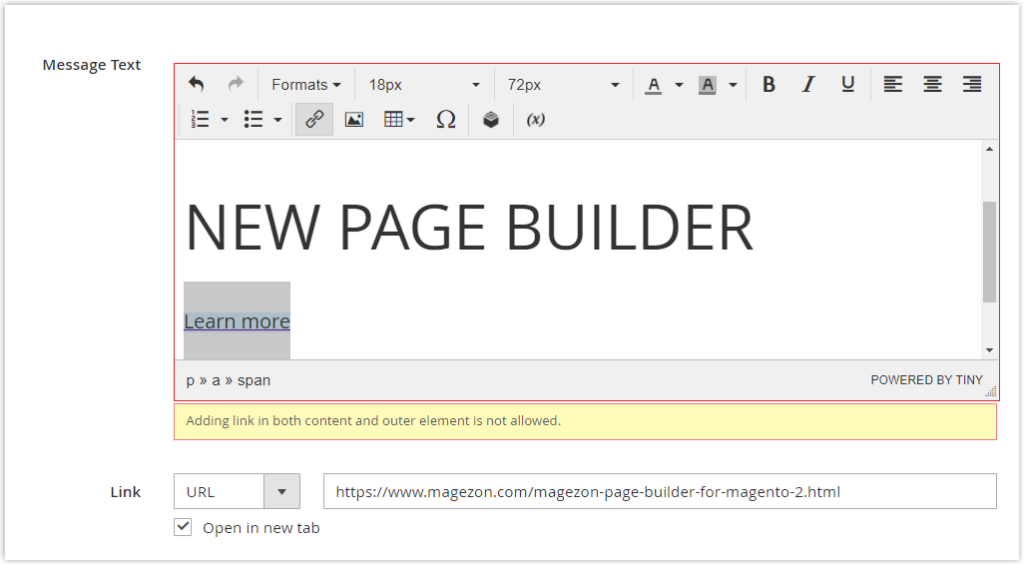
| Since the 2.4.1 release, Magento Page Builder doesn’t allow linking the banner and attaching links in the Message Text at the same time, due to display issues on the storefront. Simply put, if you’re attaching a link to the banner, you can’t add any link to the text editor and vice versa. A notification alert will show up when you use links for both these places. Look at the image below to understand what I meant. |
- Show Button: Decide how to show the button.
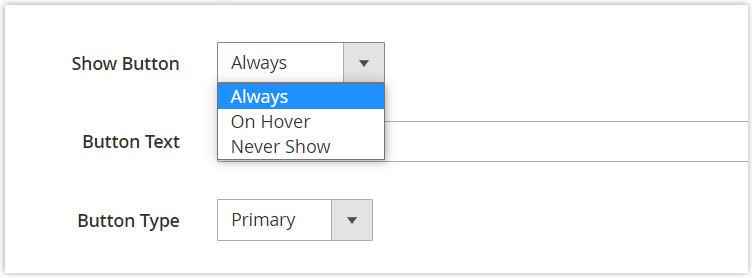
+ Always: This option enables a button to appear on the banner all the time.
+ On Hover: This option enables a button to appear on the banner only when you hover over it.
+ Never Show: This option doesn’t allow a button to appear on the banner.
- Button Text: Enter the text that is displayed on the button.
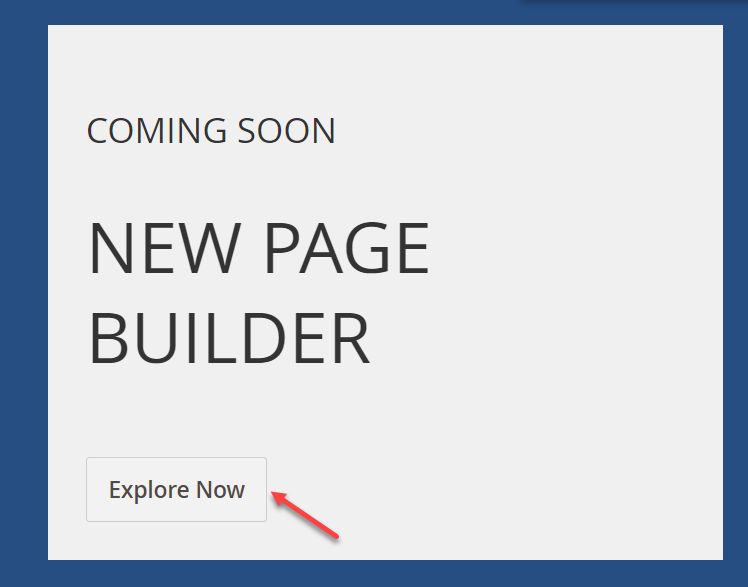
- Button Type: Select one of the following button types: primary, secondary, link. Besides, it’s worth noting that each of these button types is determined by the current theme.
+ Primary: When you take this option, your button stands out with the blue background and white text.
+ Secondary: When you select this option, your button has a white background and dark gray text, which is not as prominent as the primary button.
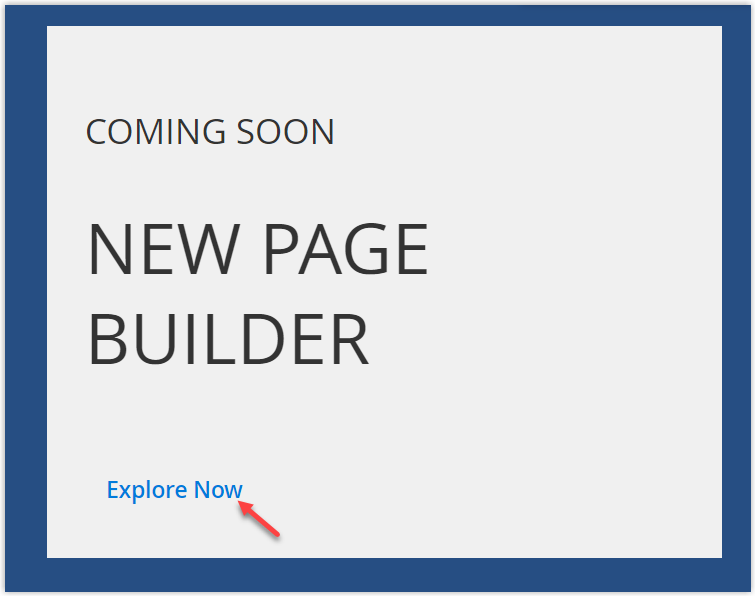
+ Link: Instead of a button, you can create a basic hyperlink.
If you want to change the button background color, you’ll have to use an HTML content type that requires you to know how to use HTML. To learn more about this Magento Page Builder content type, please check this blog.
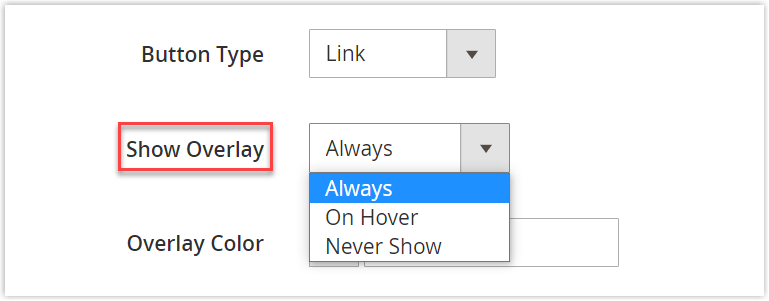
- Show Overlay: You can use this setting to apply a colored overlay to the background of the content area mentioned in the Appearance section.
Set Show Overlay to one of three options below:
+ Always: If you select Always, the overlay always appears over the banner.
+ On Hover: If you select On Hover, the overlay appears only when you hover over the banner.
+ Never Show: If you select Never Show, the overlay doesn’t appear over the banner.
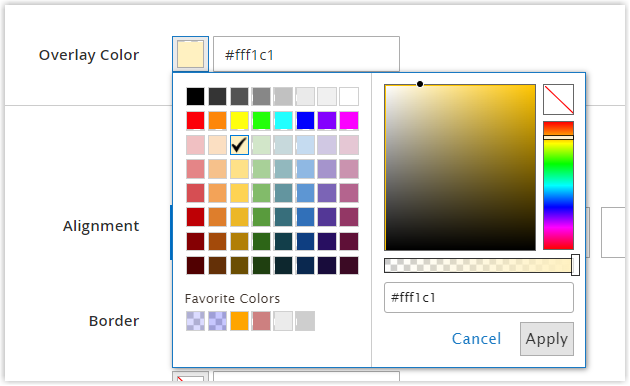
- Overlay Color: Choose a color for the overlay over the content area by dragging the cursor in the color picker, picking a swatch from the color panel, or entering a hexadecimal value or a valid color name.

When you’re done, save these settings. Exit the full-screen mode, then click the Save button in the upper-right corner to apply all the settings.
Okay, we have completed 3 sections that are all about the banner itself. In the last section, Advanced, we’ll show you how to customize the banner container.
Try FREE Magezon Page Builder demo today
Easily create beautiful, engaging Magento website in any style whenever you want without relying on developers or designers. Just by drag & drop.
4. Advanced
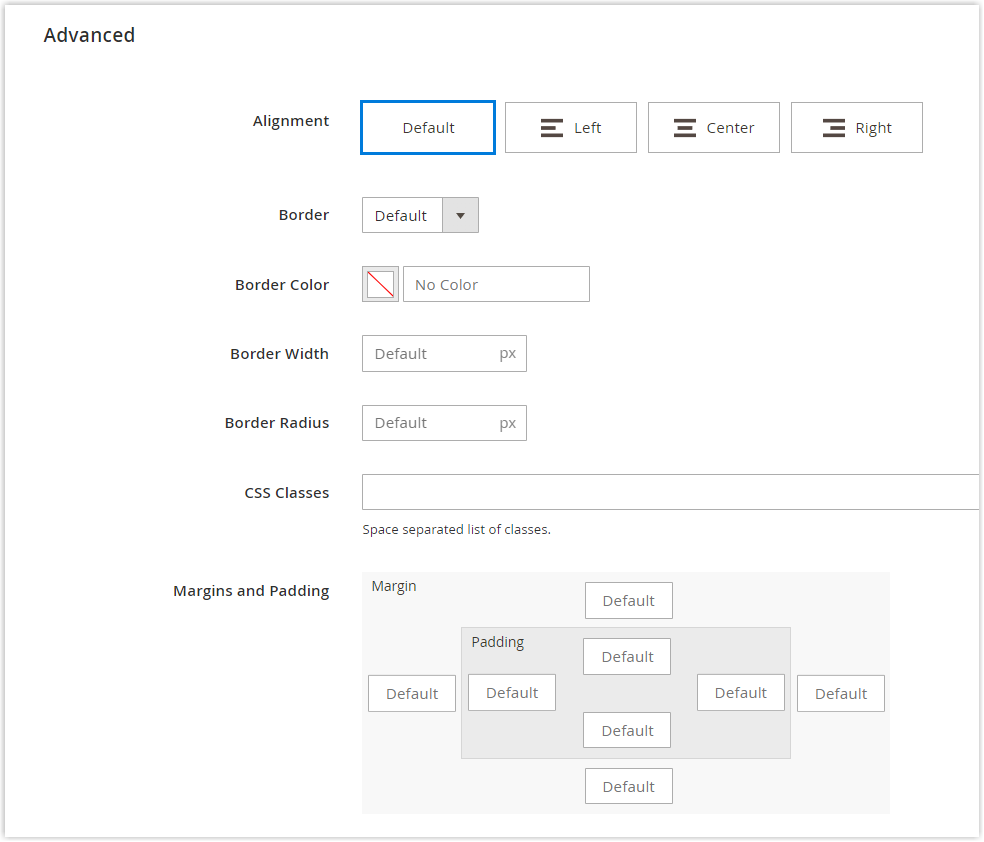
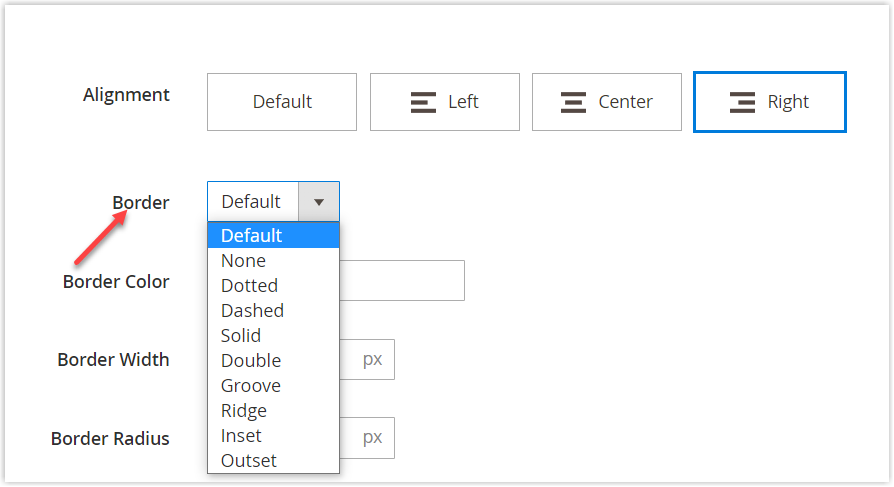
- Alignment: Determine the horizontal position of the content and the button within their defined area.
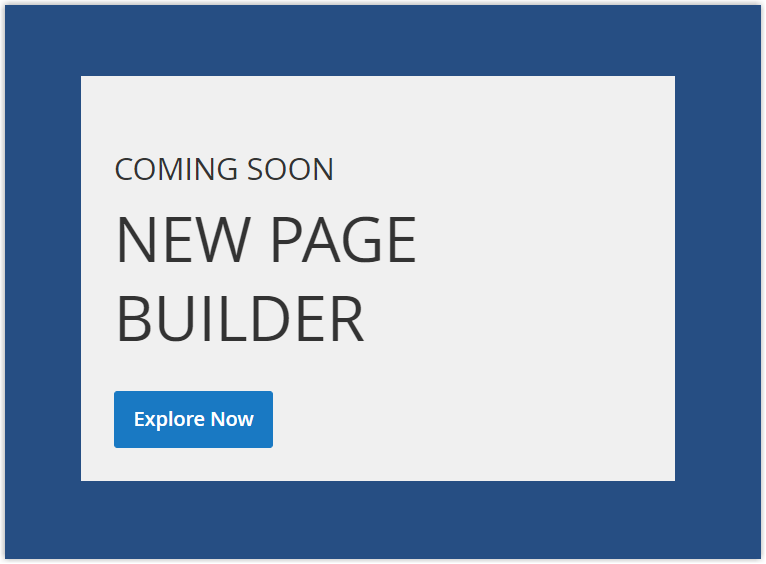
+ Default: Use the default alignment setting that is defined by the current theme (Luma). When we choose Default, the content and button will be positioned to the left side of their defined area because we’re using the Luma theme.

+ Left: Align the content and the button to the left side of their defined area.
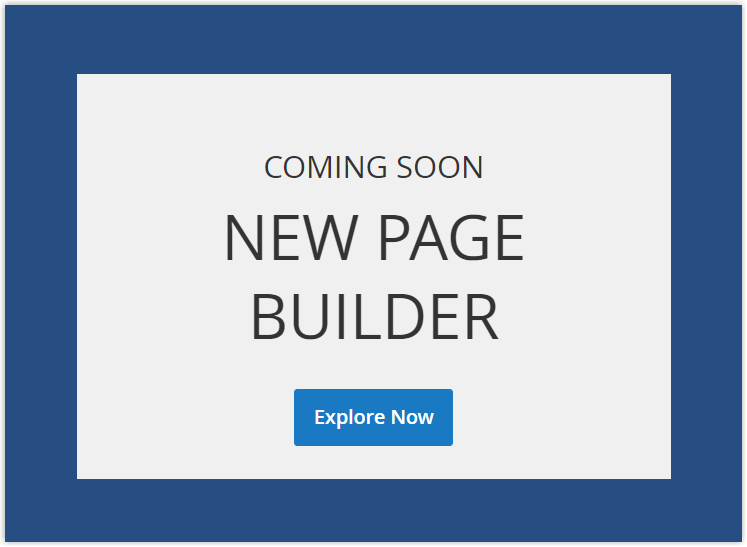
+ Center: Center-align the content and the button within their defined area.
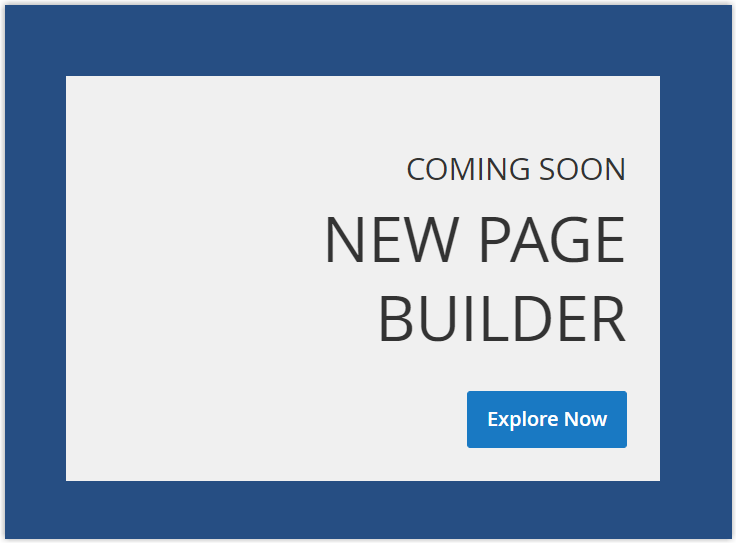
+ Right: Align the content and the button to the right side of their defined area.
- Border: Choose the style for the border of the banner container.
The image below illustrates each border style:
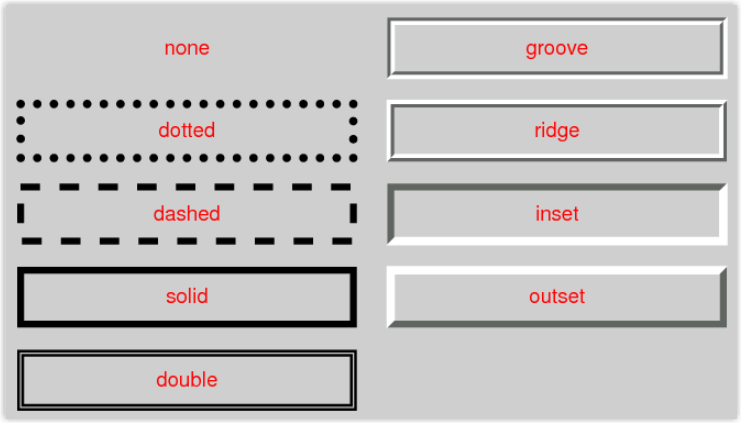
When you choose any option except None, you’re able to customize Border Color and Border Width.
- Border Color: Pick a color for the banner container by:
+ selecting a swatch from the Color panel
+ clicking and dragging the cursor in the picker area
+ entering a color name or hexadecimal value
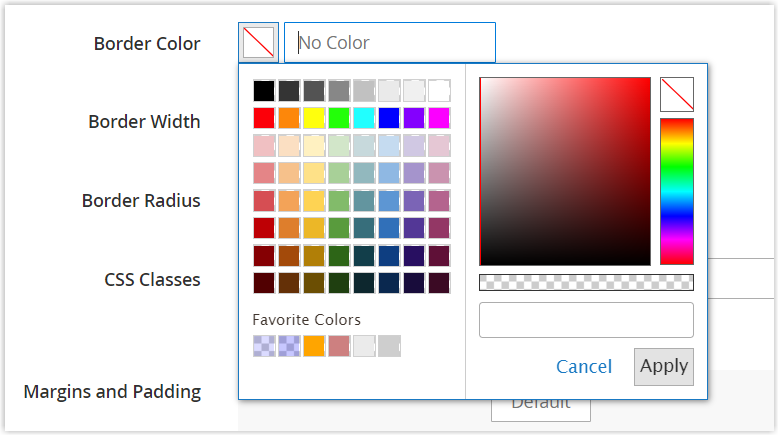
- Border Width: Set the width of the banner’s borders. (Unit: pixel)
- Border Radius: Set the radius of the banner’s corners. (Unit: pixel)
- CSS Classes: Enter the names of CSS classes that are applied to the banner container. In case of multiple class names, separate them with a space.
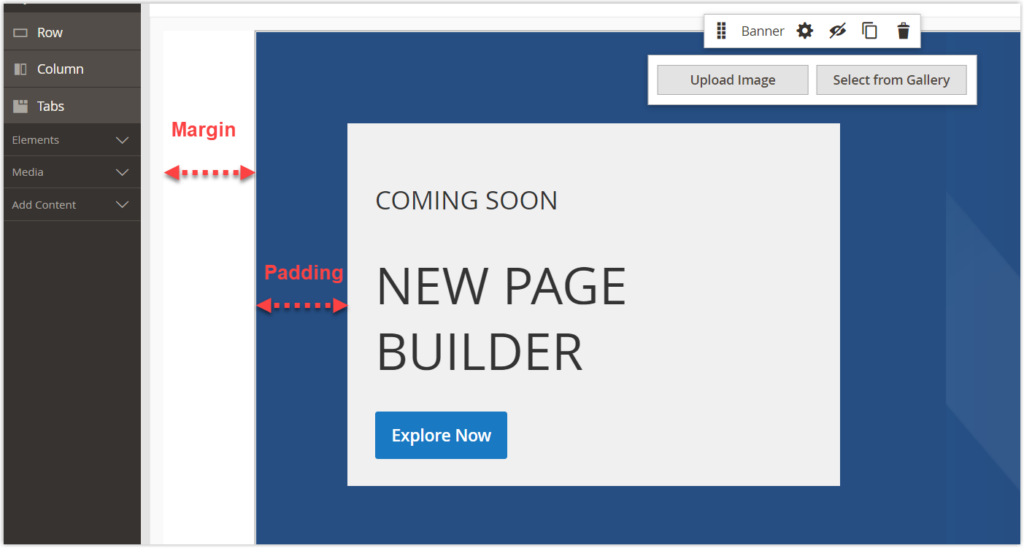
- Margins and Padding: Add the amount of the outer space (margins) and inner space (padding) to the banner container.
+ Margin: the space outside the banner container’s border
+ Padding: the space between the banner container’s border and its content container’s border
Below is an illustration of margins and padding with 100px.
I’m sure you now have got a firm grasp on Banner content type in Magento Page Builder. But there’s one more thing you should consider: optimizing images for search. So how do we do?
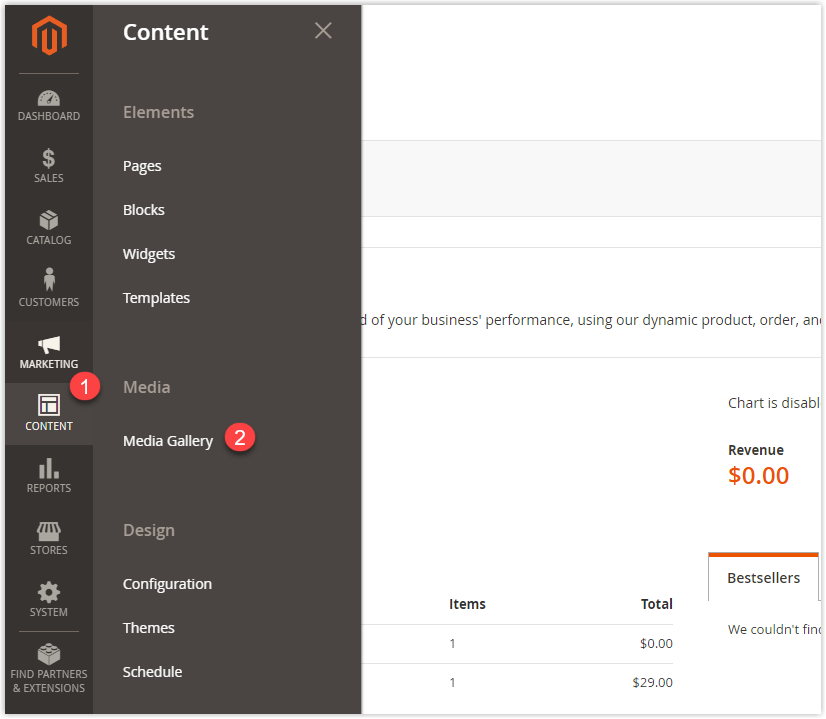
#Step 1: Access your Magento media storage, also known as the Magento media gallery. (Go to Content → Media → Media Gallery).
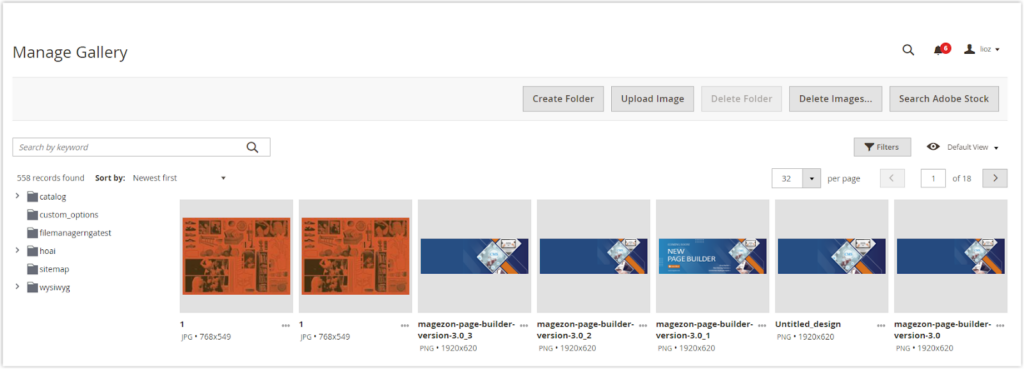
#Step 2: You’ll be taken to the Manage Gallery page where you can improve the SEO of the images.
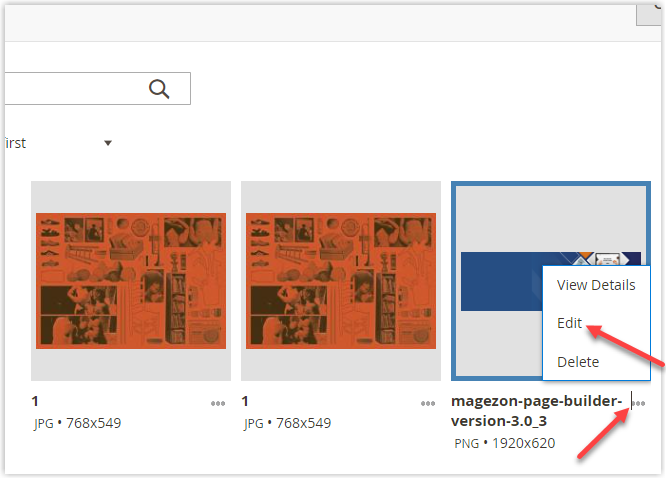
#Step 3: Select your wanted image and click on the ellipsis right below. Then choose Edit.
#Step 4: A window modal with some settings shows up.
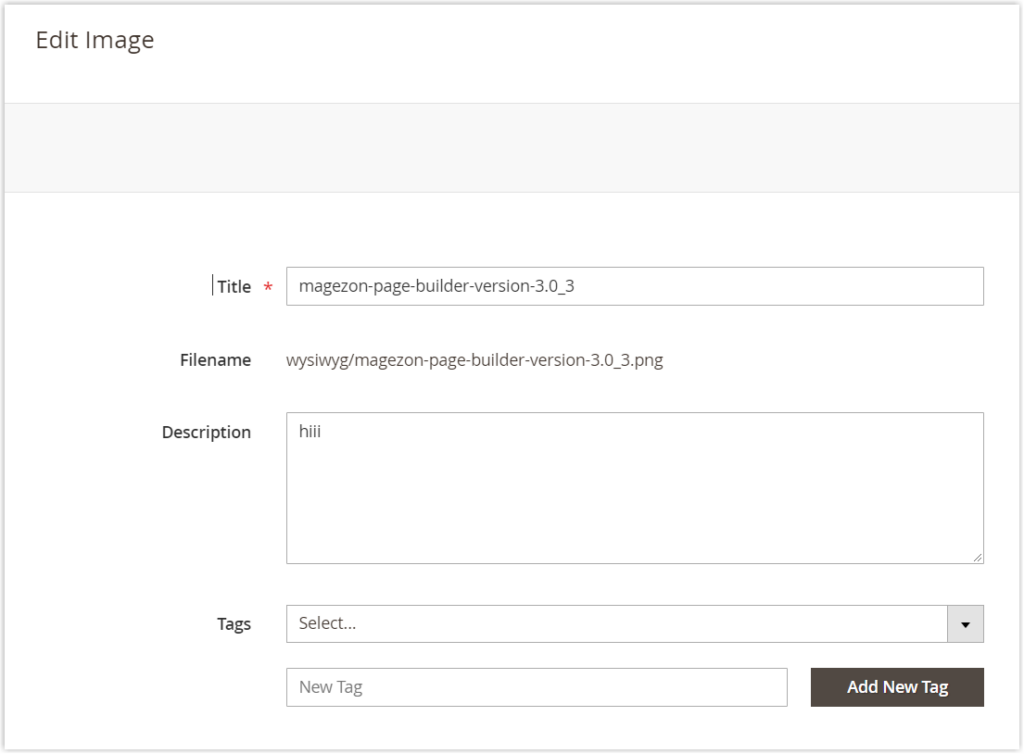
- Title: A title appears as a tooltip when you hover over the image. By default, the Title field is automatically filled out based on the image file name. You can change the title as you want.
- Filename: An image filename helps Google understand the subject matter of this image. Before uploading the image to your server, make sure its filename is SEO-friendly. Specifically, the filename needs to tick all these checkboxes below:
+ It should be descriptive and contains relevant keywords
+ Hyphens are used instead of spaces to separate words.
+ Lowercase letters are a must.
A good filename for an image should be magezon-page-builder-version-3.0, rather than something like YDMG0079.PNG.
- Description: Known as alt text, this is used to describe an image. For some reason, the image doesn’t load and users can’t see it. In this case, alt text will appear in place of the image so that users can understand what it’s about. Furthermore, alt text gives Google clues about the image’s subject. So, what makes an effective alt text?
+ It should be descriptive.
+ It includes the relevant keywords. Avoid stuffing your alt text with a bunch of keywords, because this leaves a negative impact on the user experience.
+ It uses spaces to separate words.
For example, magezon page builder 3.0 features is better than page builder.
- Tags: A image tag is like a category. It’s where you’ll find all of the images on the same subject. You can add tags as labels to these related images so that it’s easier to find them later.
After you’re finished, click Save to apply the settings. And that’s all about Magento Page Builder Banner content type. If you have any inquiries about it, comment down below to let us know.
In the next part, you’ll be introduced to an alternative to Magento Page Builder Banner that can help you create highly-converting banners. So, keep going!
Boost Your Website to the Next Level With Magezon Page Builder Extension
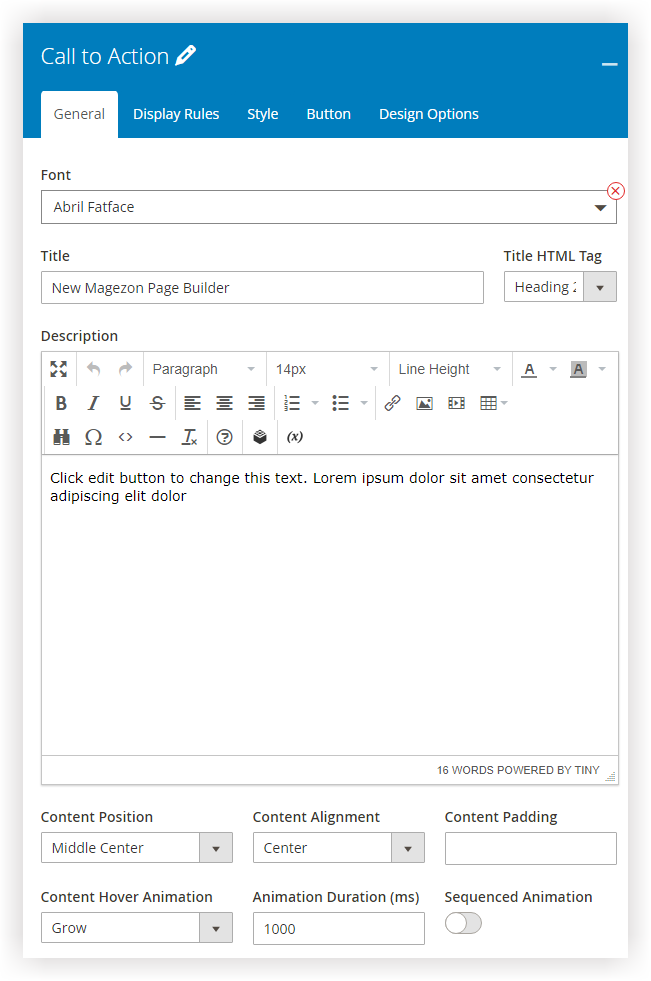
To create an attractive banner on your Magento store, Magento Page Builder Banner will surely be enough, I think. However, if your desire is to have not only good-looking but also high-performing banners that skyrocket your website conversions and ultimately your revenue, then Call-to-Action element of Magezon Page Builder is the way to go.
The name Call-to-Action seemingly is not remotely relevant to banners, however, it serves the same purpose. What sets the Call-to-Action of Magezon Page Builder apart from Banner is that you have a vast range of customization options to create any banner you wish.
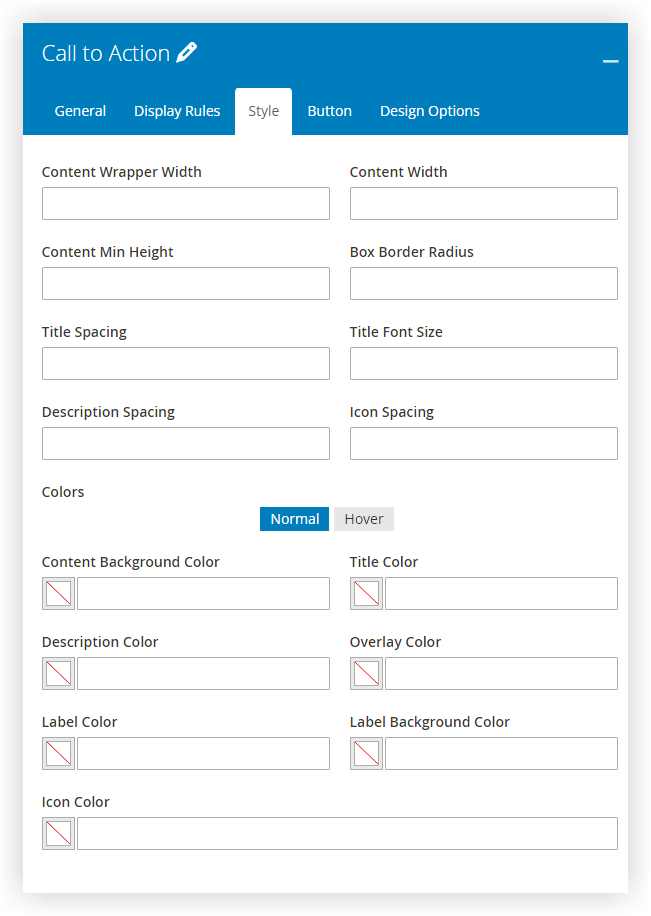
Content customization options
Button Control
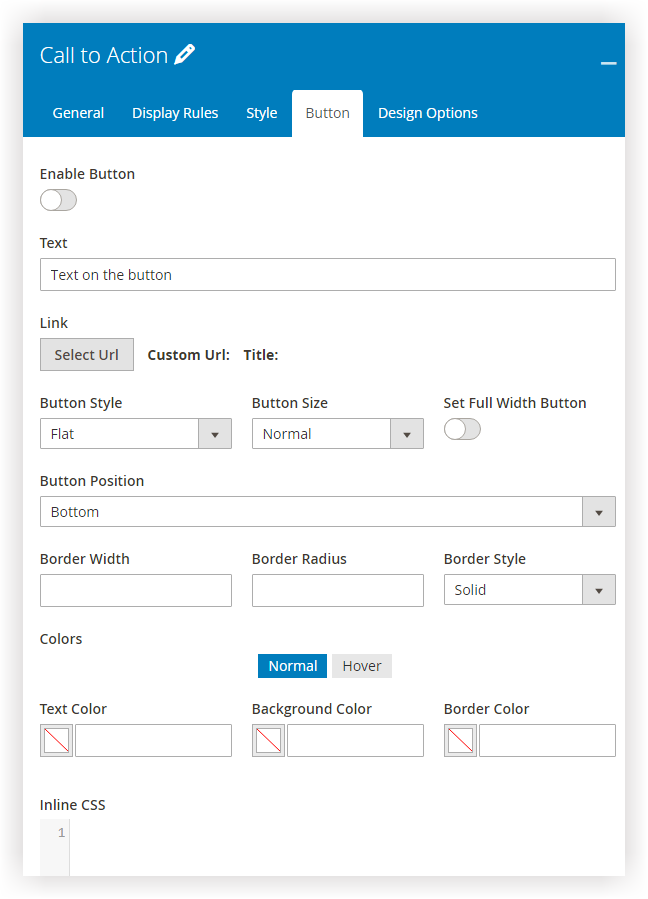
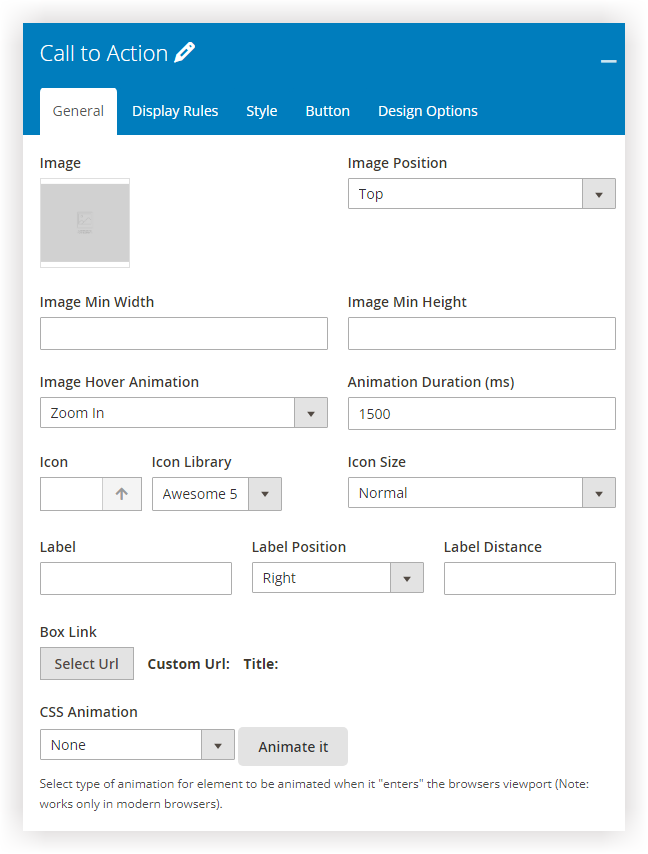
Image Customizations
In fact, there are many advanced features that I haven’t yet mentioned. So, try the demo to explore what our Magezon Page Builder Call-to-Action can do for you.
Besides Call-to-Action element for creating banners, you can utilize Slider element that gives you the ability to add an visually appealing slideshow that can combine images, video and content.
We have developed and offered other out-of-box extensions that can boost your Magento website to the next level.
Wrap it up
We hope you’ve gained a better grasp of Magento Page Builder Banner after this how-to article. With plenty of customization settings, this content type can undoubtedly assist you in creating appealing banners. However, in case your demand goes beyond what this content type can offer, give Magezon Page Builder Slider a try.
Try FREE Magezon Page Builder demo today
Easily create beautiful, engaging Magento website in any style whenever you want without relying on developers or designers. Just by drag & drop.


