After walking you through the Row, and Column content type in Layout, I’m going to introduce another one: Tabs content type in Magento Page Builder.
Being part of the Magento Page Builder series, this article will explain everything about Tabs content type and guide you on creating and customizing it. This is an excellent chance for you to practice using this builder. Now, let’s get started.
Table of contents
- What Is Tabs Content Type in Magento 2?
- Where Is Tabs Content Type Located in Magento 2?
- Introduce Tab Toolboxes
- How to Add Tabs in Magento Page Builder?
- How to add content to Tabs in Magento Page Builder?
- How to Customize Individual Tab Settings?
- How to Customize Tabs Container Settings?
- An Alternative to Magento Page Builder
- Final Words
What Is Tabs Content Type in Magento 2?
Firstly, I want to make clear what the tab is. A tab is an area that shows content when you click, and others are hidden. It works as the categories and allows you to switch between options in content without any navigation. Magento Page Builder Tabs content type allows you to create these tabs with dragging, dropping, and many configuration options.
The currently-selected tab is usually highlighted differently than the other tabs.
Where Is Tabs Content Type Located in Magento 2?
Like Row and Column, Tabs content type belongs to the Layout section. To find Tabs, expand the Layout in the left panel.
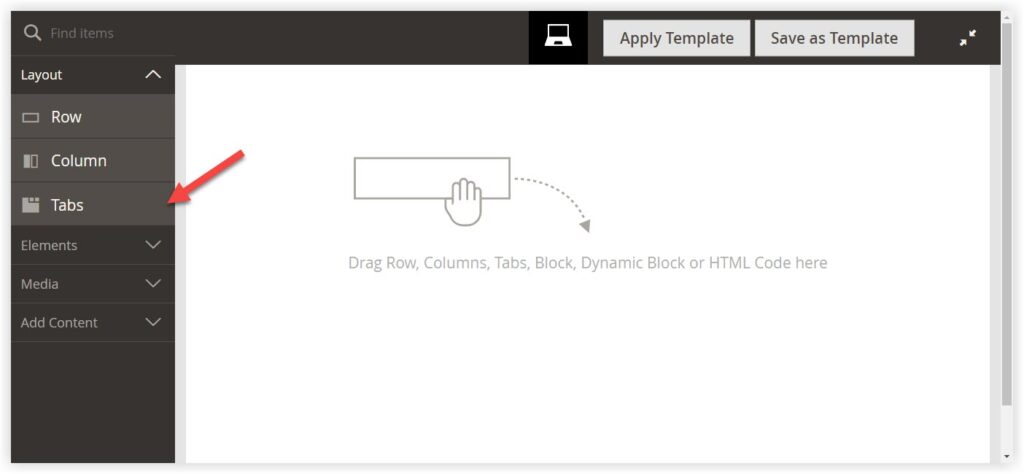
On the stage of the workspace, you’ll see a line “Drag Rows, Columns, Tabs, Block, Dynamic Block or HTML code here”.
| Read more: Magento Page Builder Open Source Overview Take a tour of Magento 2 Page Builder Workspace |
Introduce Tab Toolboxes
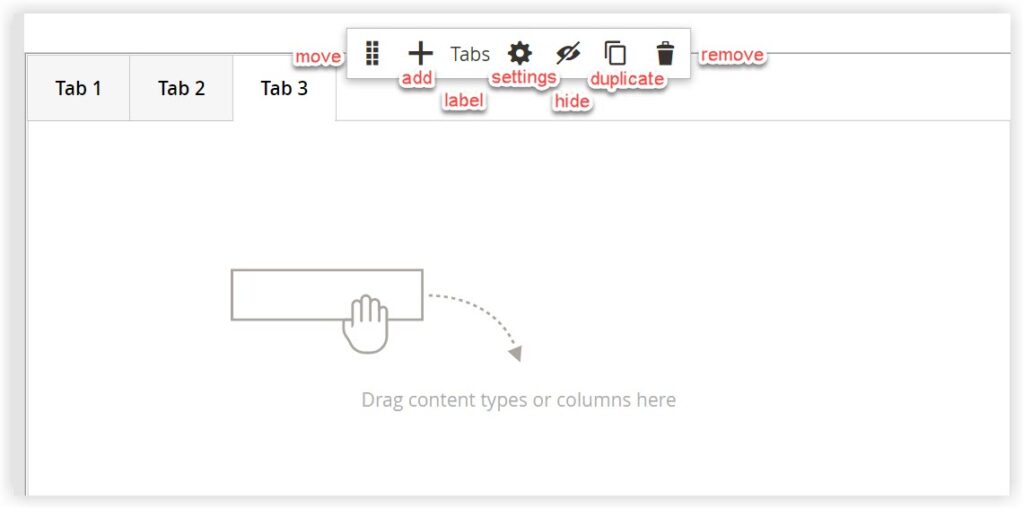
Toolbox is where you can get many actions to customize Tabs content type, such as move, add, delete, and so on. There are two types of the toolbox when you create tabs: Tabs container toolbox and individual tab toolbox.
Tabs container toolbox appears when you hover over the tabs container.
Tabs container toolbox includes:
- Move: Move the tabs container to other positions in the stage.
- Add: Add a new tab to the tabs container.
- Tabs(label): To distinguish Tabs from other content types.
- Settings: Where you can edit the properties of the tabs container.
- Hide: Hide the tabs container.
- Show: Show the tabs container.
- Duplicate: Make a copy of the tabs container.
- Remove: Delete the current container from the stage.
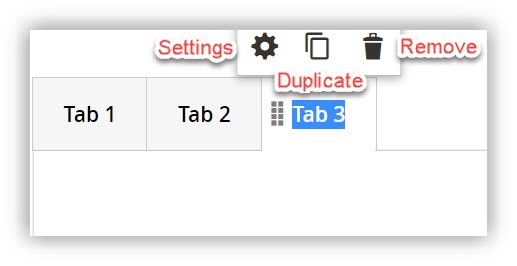
Individual tab toolbox includes:
- Settings: Where you can change the properties of specific tabs.
- Duplicate: Make a copy of the tabs.
- Remove: Delete the specific tabs from the tab container.

Try FREE Magezon Page Builder demo today.
Easily create beautiful, engaging Magento websites in any style without relying on developers or designers. Just by drag & drop.
How to Add Tabs in Magento Page Builder?
To add a tab or a set of tabs, follow these steps:
Add an individual Tab
Adding a tab to the stage is quite simple:
- In the Admin Panel, under Layout, drag the Tabs placeholder directly to the stage.
- Or you can add a tab after creating a row or a column.
Add a set of Tabs
In case you want to create a set of tabs, follow these steps below:
- Add an individual tab (as in the steps above).
- Hover over the tabs container to display its toolbox.
- Click the Add icon to add as many tabs as you want.
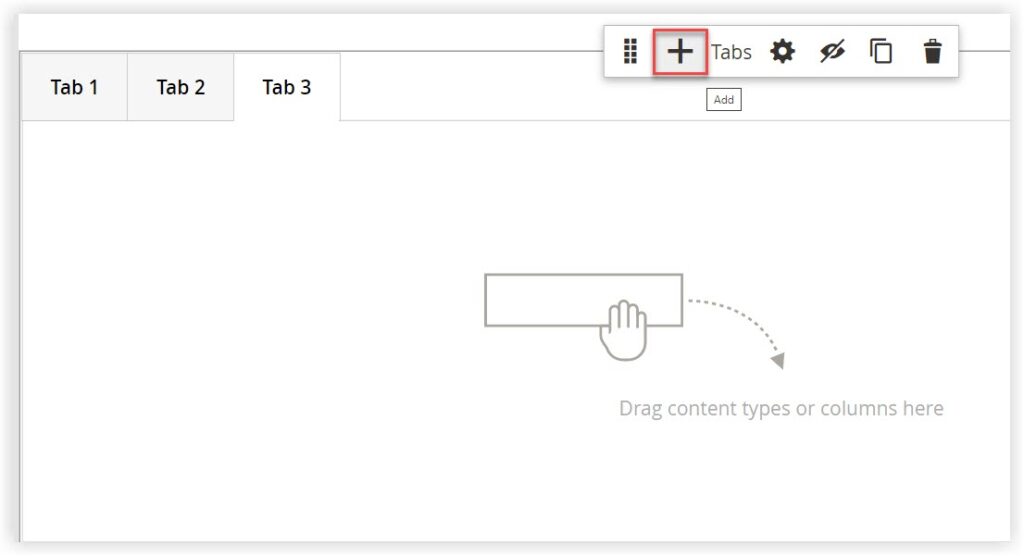
- Or click on the label of specific tabs to display the individual tab toolbox and choose the Duplicate icon.
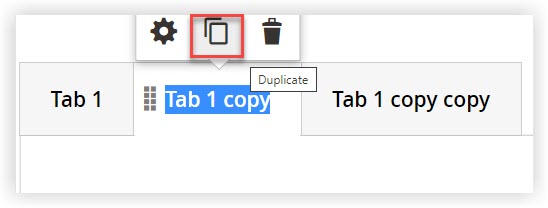
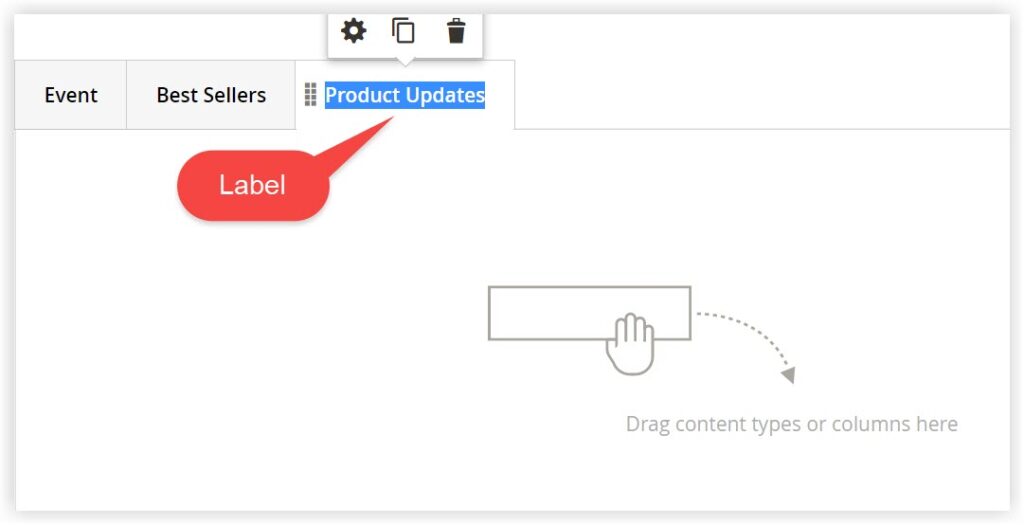
- Finally, click on the label and change the name.
How to add content to Tabs in Magento Page Builder?
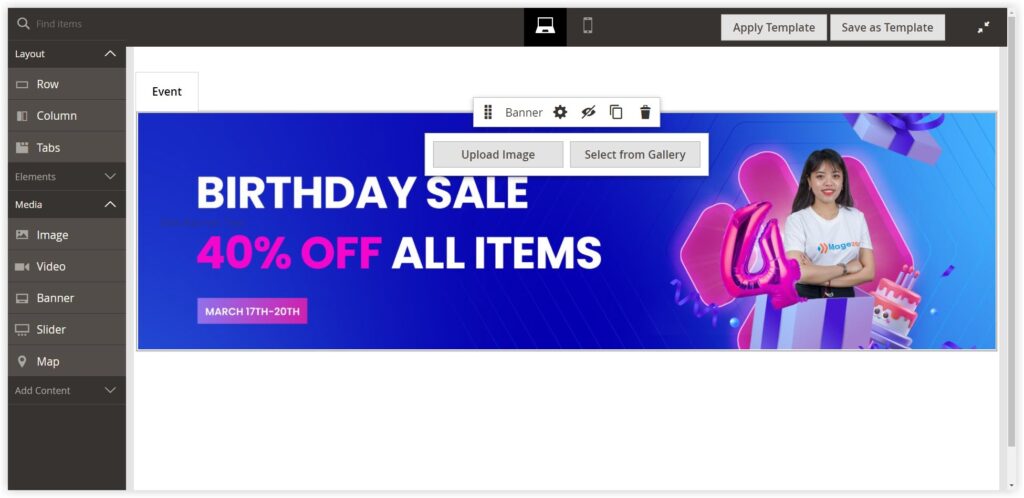
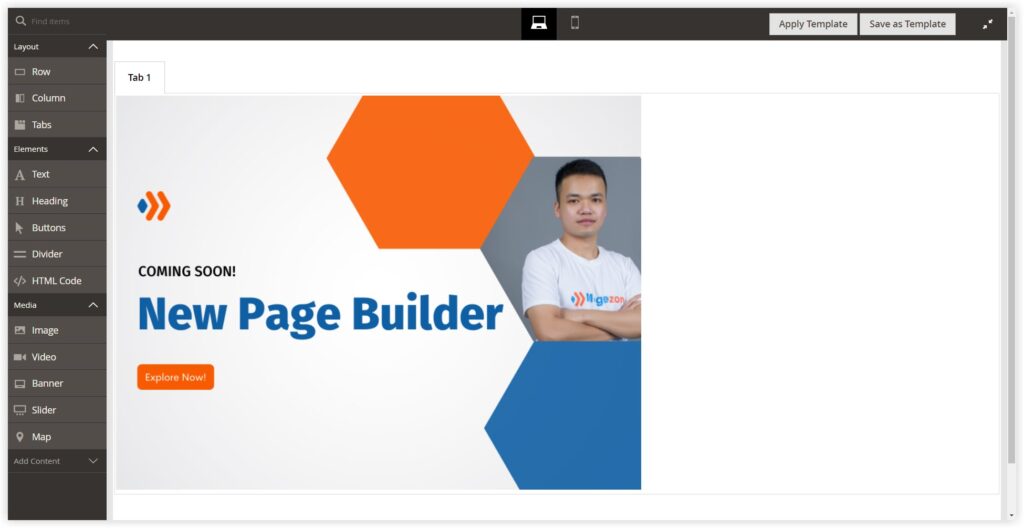
You can add any content type to a tab as you can to a row. To illustrate, I will take Banners in Media as an example.
- Choose the tab you want to add content to.
- Expand Media and drag and drop a Banner placeholder in the admin panel to the tab.
- Upload an image from your computer or select one(s) from your gallery.
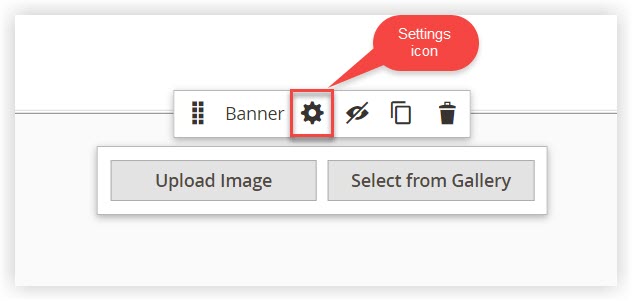
- Use the Settings icon on the banner toolbox to format the banner as needed.
- The picture below is an example of Banner content added to a tab.
How to Customize Individual Tab Settings?
To edit an individual tab, click on the specific tab to display its toolbox and choose the Settings icon to open the Edit Tab page. There are three sections on the setting page: Basic Settings, Background Settings, and Advanced Settings. Let’s start with Basic Settings.
Basic Settings
Change any of these settings of the tab:
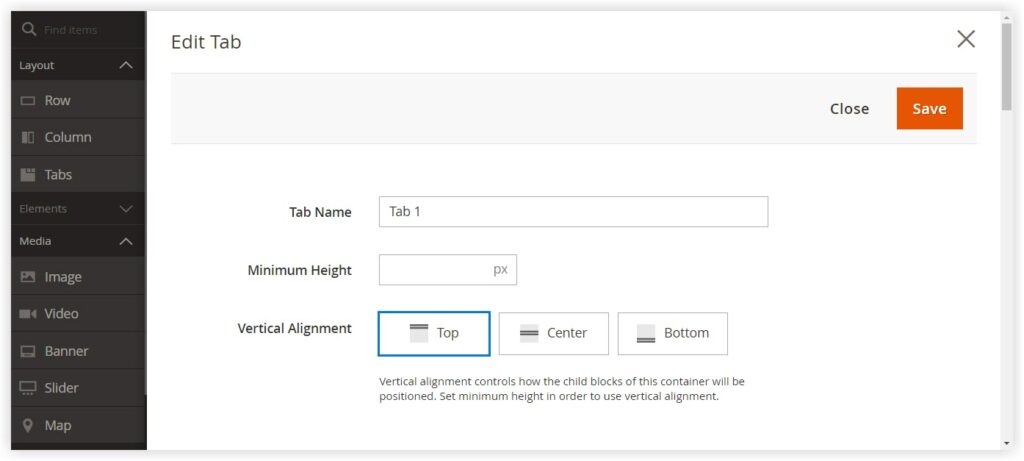
- Tab Name: Enter the tab’s name and the tab label.
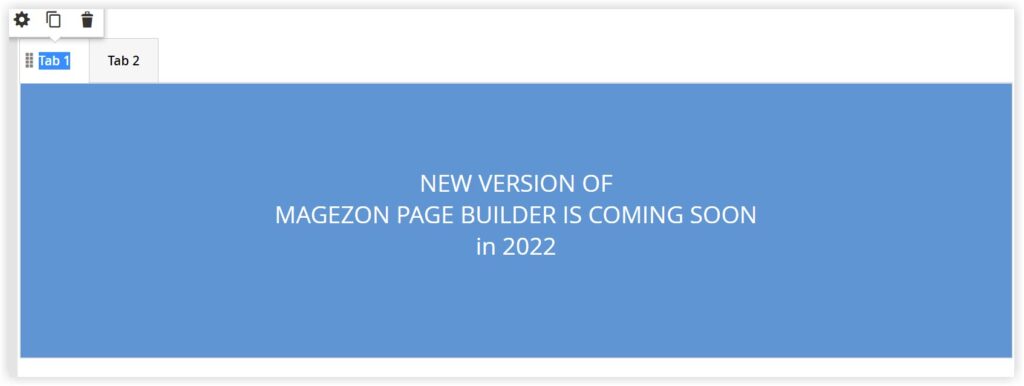
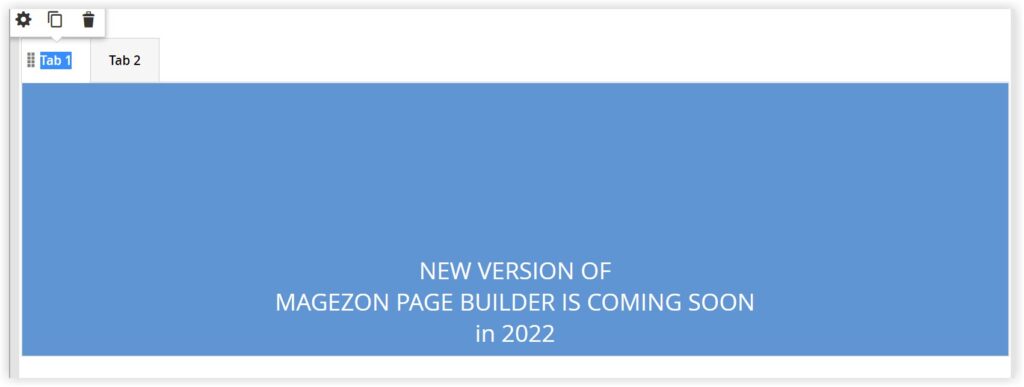
- Minimum Height: Enter the number as pixels to set the height of specific tabs.

Here is the result of an example of using a Text element with a Minimum Height of 100px.
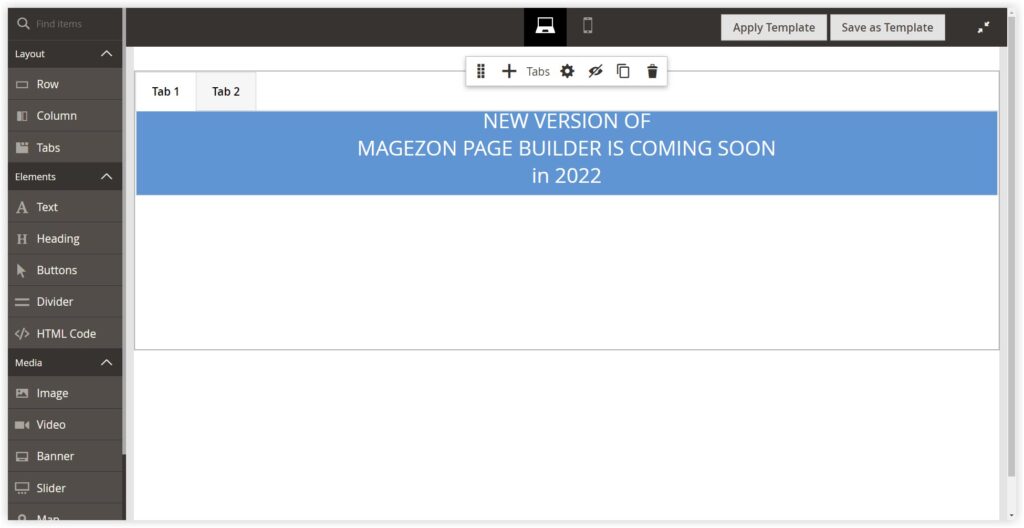
Recommend: You should set the minimum height of the individual tab to match the height of the tab container (300px at least).
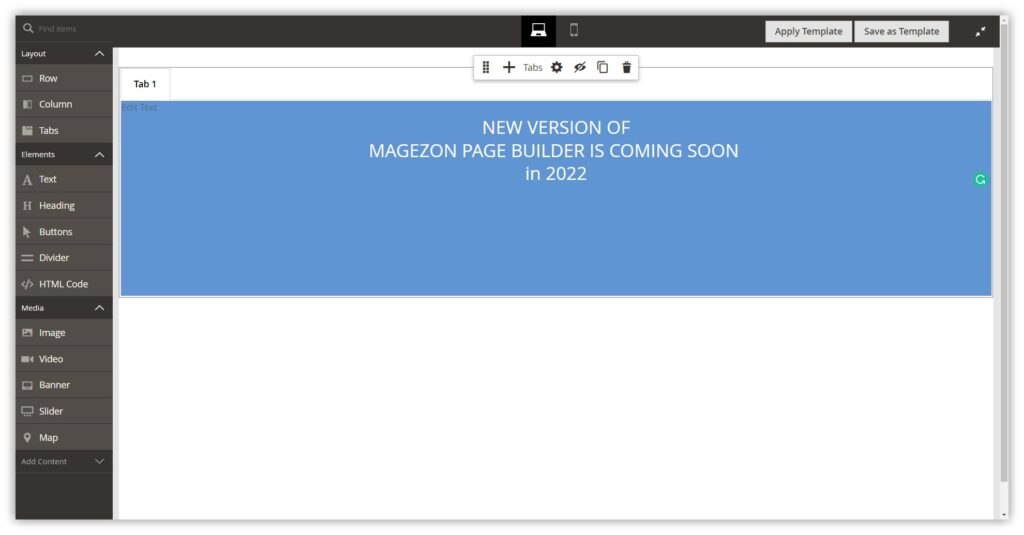
- Vertical Alignment: Choose the type of alignment for the content within the tab.
Background Settings
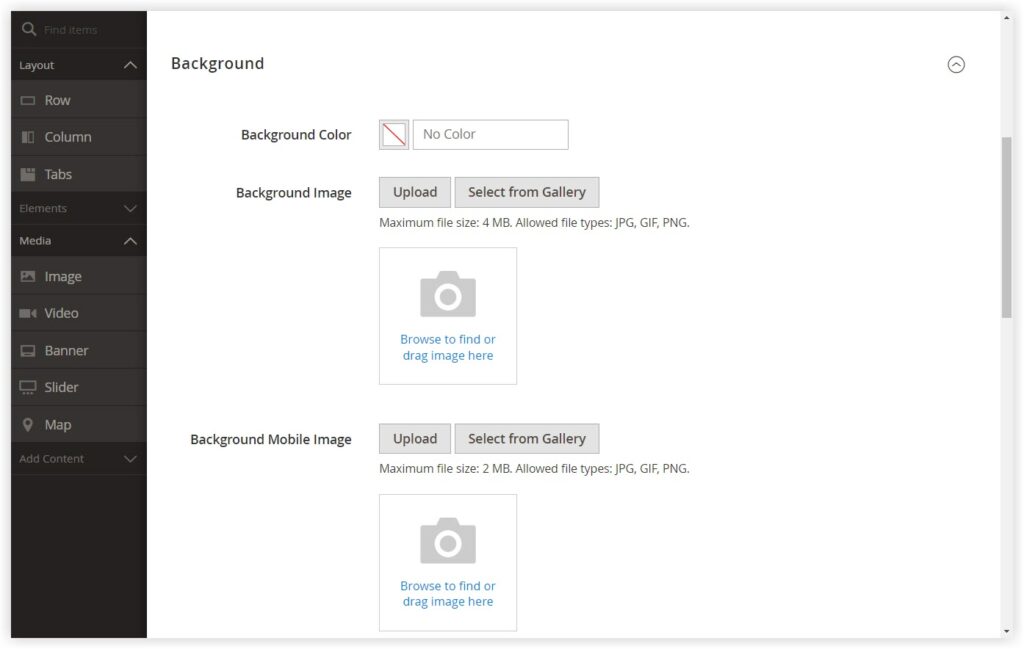
Below Basic Settings is the Background Settings section.


Try FREE Magezon Page Builder demo today.
Easily create beautiful, engaging Magento websites in any style without relying on developers or designers. Just by drag & drop.
Background Color
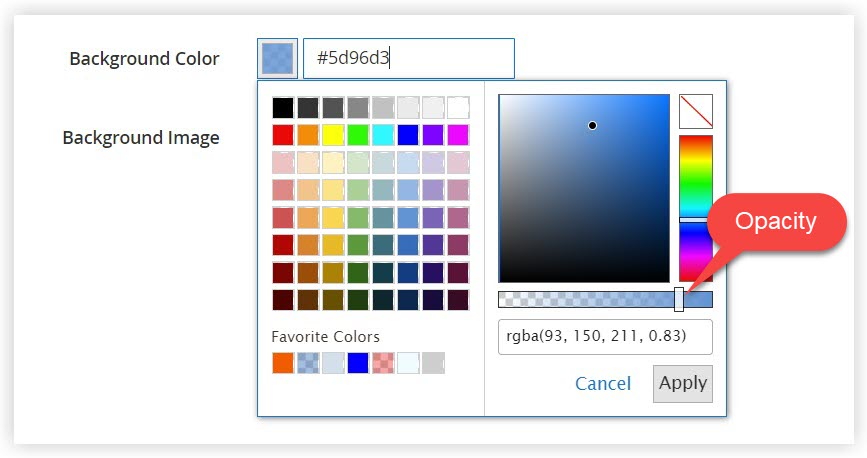
Besides, the background color feature is useful if you want to fill an individual tab container’s background with a color. If you have worked with any design aspect, you know it is crucial to be accurate with color codes. However, it is quite difficult for beginners to select the exact color. In this case, Swatch and Color Picker will help.
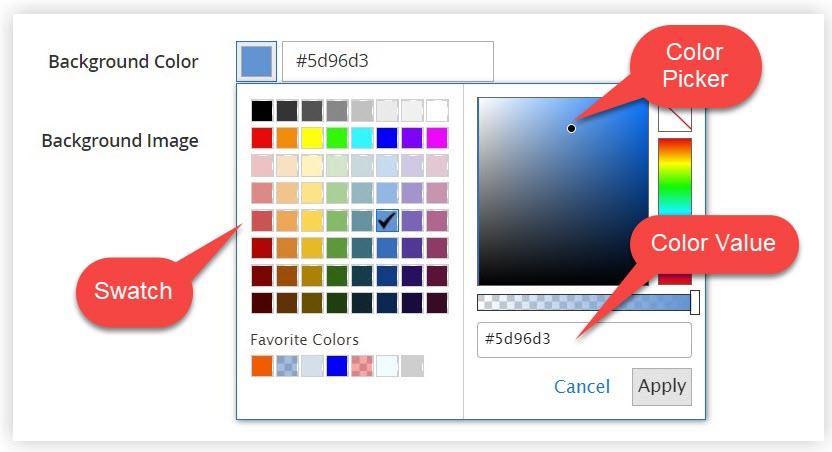
You can also insert a color value in three ways:
- Color Name, such as White
- Color Code, such as #ffffff
- rgba value, such as rgba(255, 255, 255, 0.75)
Moreover, you can customize the opacity by using the slider in the color box.
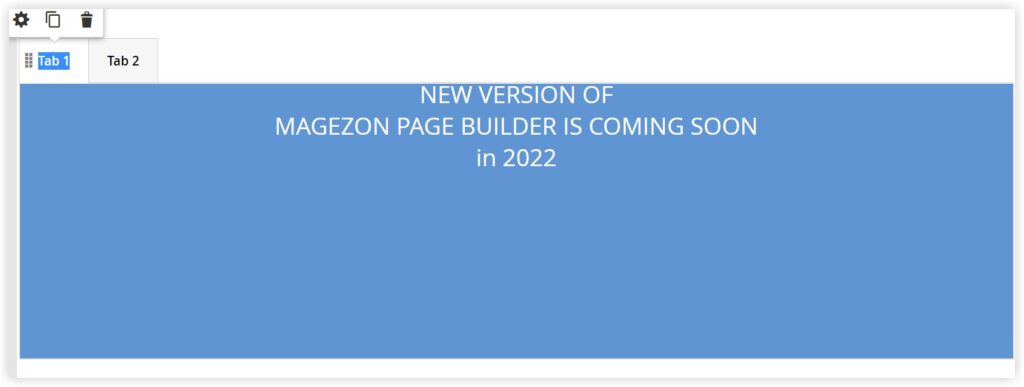
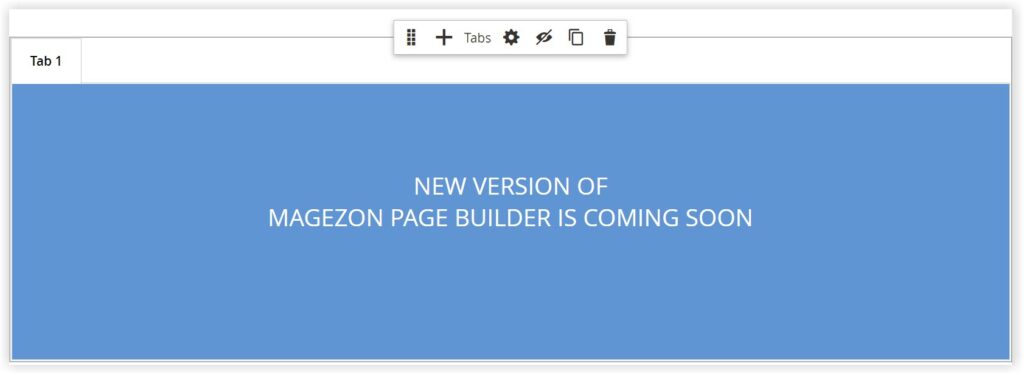
Here is the result for #5d96d3 background color.
Background Image
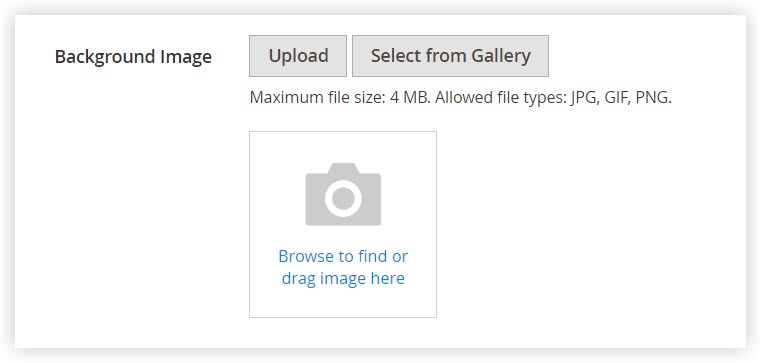
If needed, you can also upload an image for your background to make the tabs more dynamic. There are three ways to upload background images:
- Choose Upload to upload an image file from your devices.
- Choose Select from Gallery to pick a file from your gallery.
- Click to drag a file or upload it from your devices.
Background Mobile Image
The background image won’t be shown on mobile devices with its exact size. Thus, this feature allows you to choose a different background image to be displayed on mobile devices.
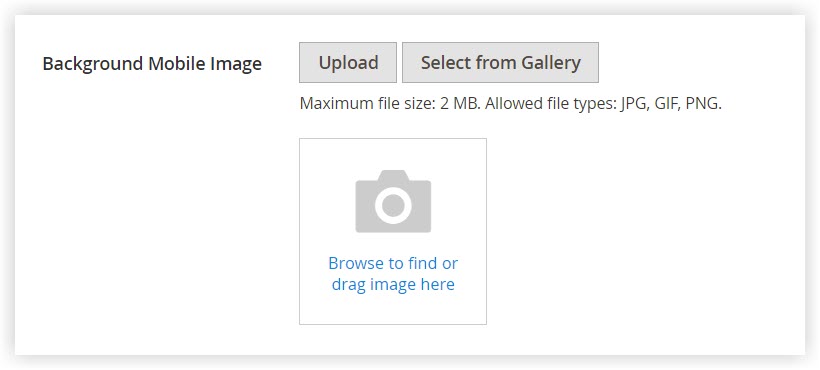
To select a background image for mobile devices, you can apply the same methods as the Background Image.
Background Size
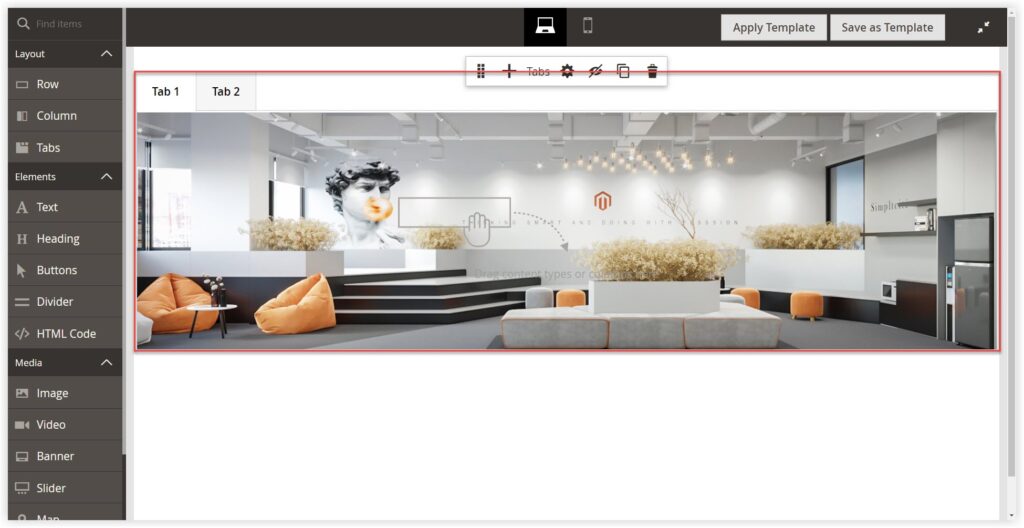
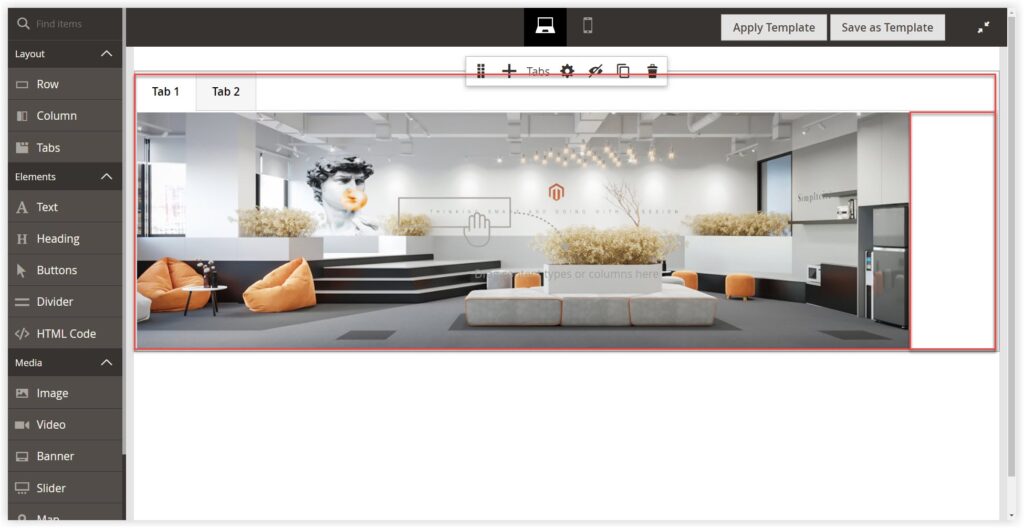
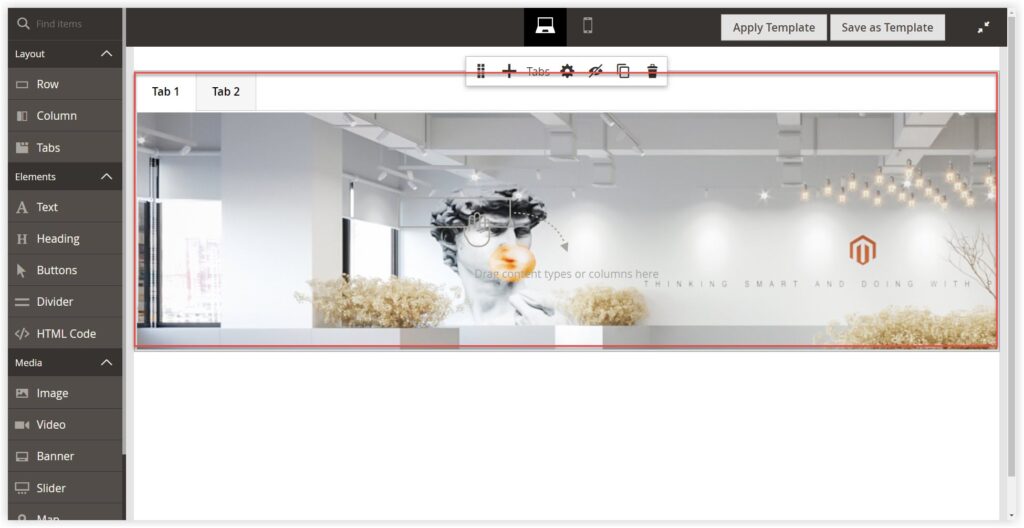
This option determines how the background image is scaled in the width of the tab.

- Choose Cover when you want the background image to cover the full width of the tab.
- Choose Contain when you want the background image to be limited to the width of the tab.
- Choose Auto when you want to apply the size from the current sheet.
Background Position
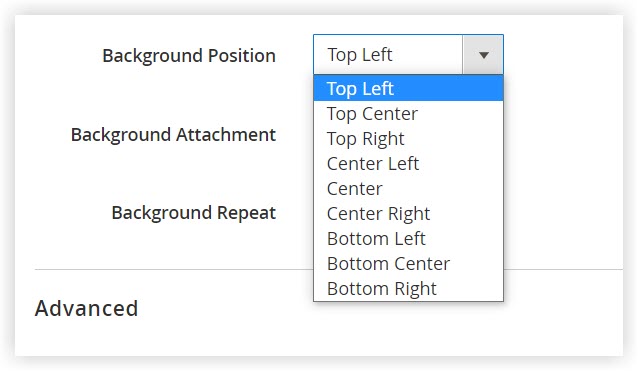
Customize the Background Position to place the background image in the specified position of tab area, such as Top Left / Top Center / Top Right / Center Left / Center / Center Right / Bottom Left / Bottom Center / Bottom Right.
Background Attachment
This feature determines how the background image moves on the page:
- Scroll: When you choose this option, the attached background image will be synchronized to move down as the page scrolls.
- Fixed (Not supported in mobile): When you choose this option, the background image will be fixed and not move as the container scrolls over the image.

Background Repeat
Turn on this option to fill the empty tab area with background images.
Advanced settings
The advanced settings allow you to configure alignment, border, margin, and padding.
Alignment: Position the tab’s content, such as Default, Left, Center, and Right.

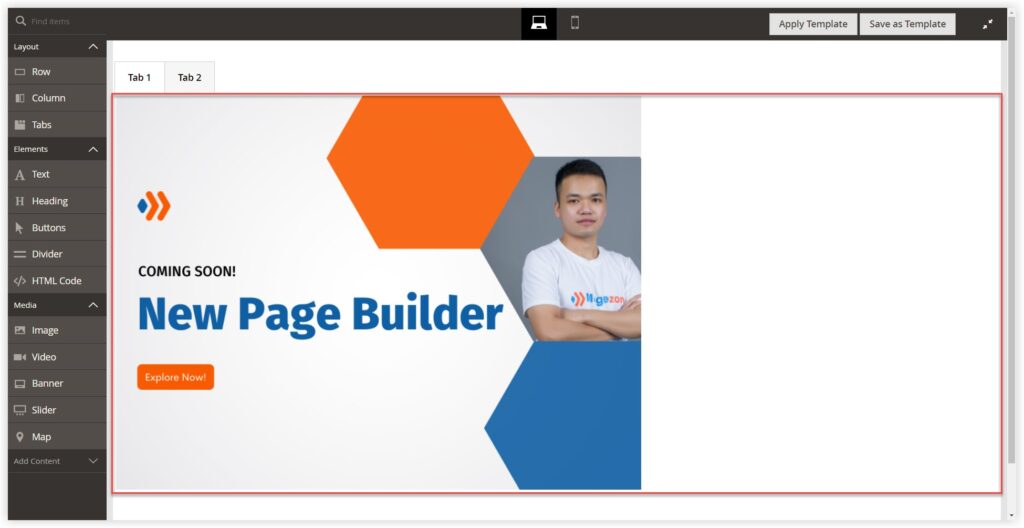
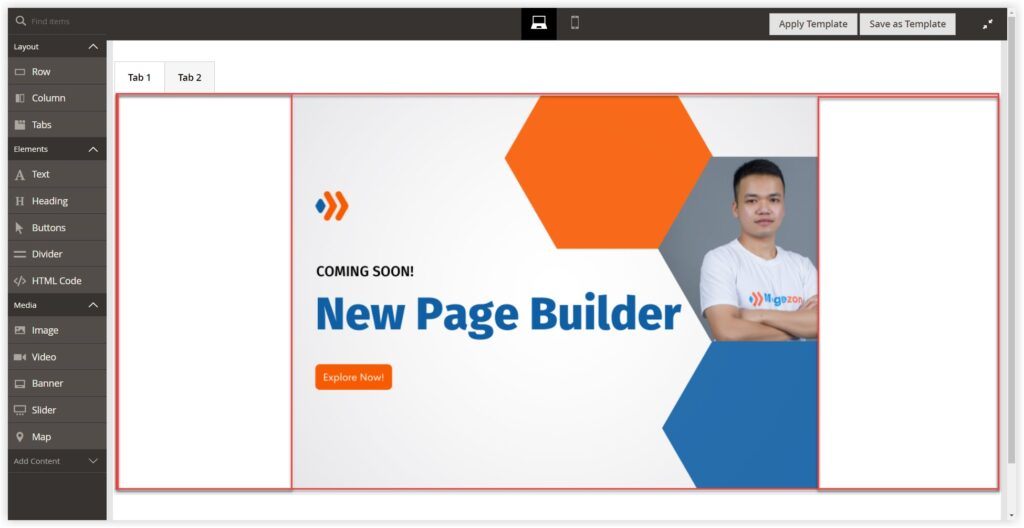
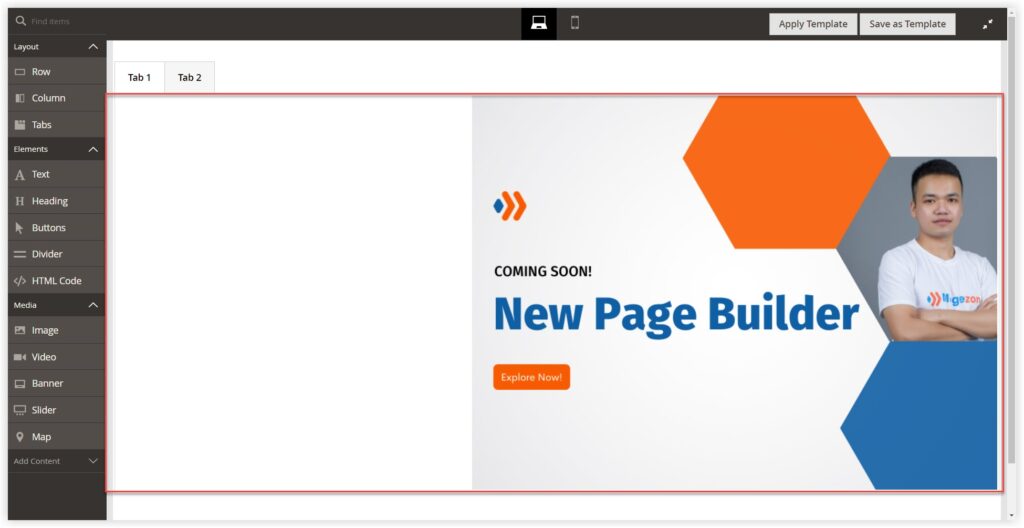
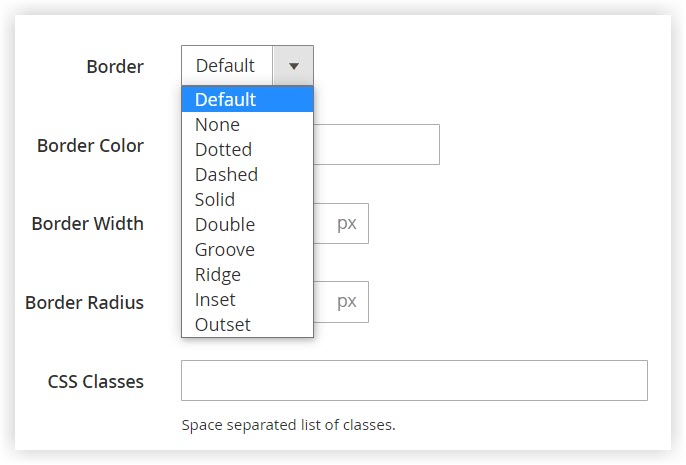
Border: Customize the Border style for the individual tab with the following options, such as Default, None, Dotted, Dashed, Solid, Double, Groove, Ridge, Inset, and Outset.
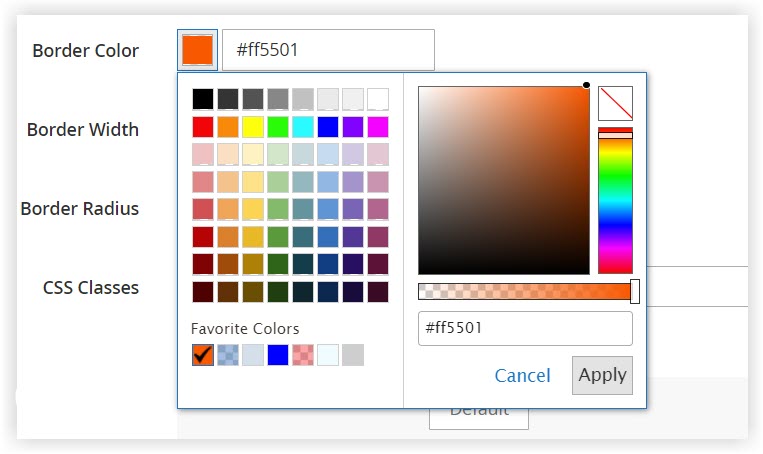
Border Color: Select the color you want for the individual tab container by choosing a swatch, using the color picker, or entering the color values.
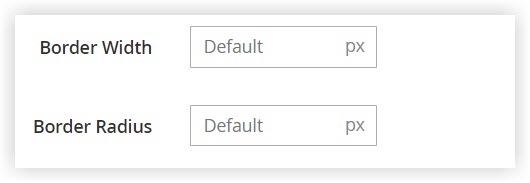
Border Width: Enter the number of pixels for the border line width.
Border Radius: Enter the number of pixels to round the corners of the tab container border.
CSS Classes: Use CSS classes to style the tab container as you wish.

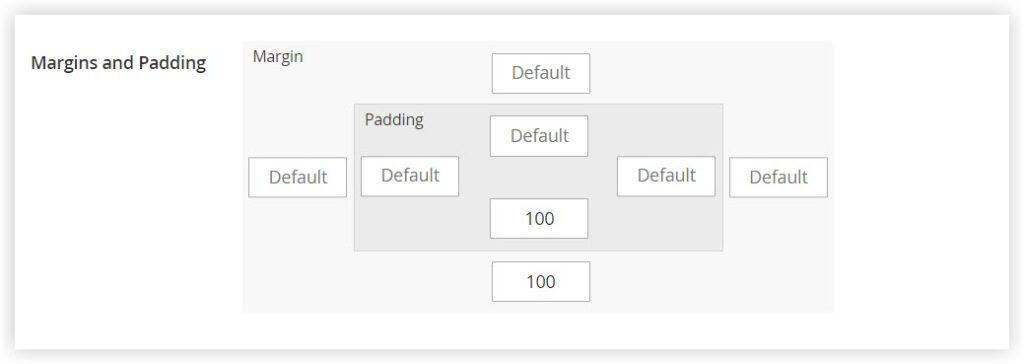
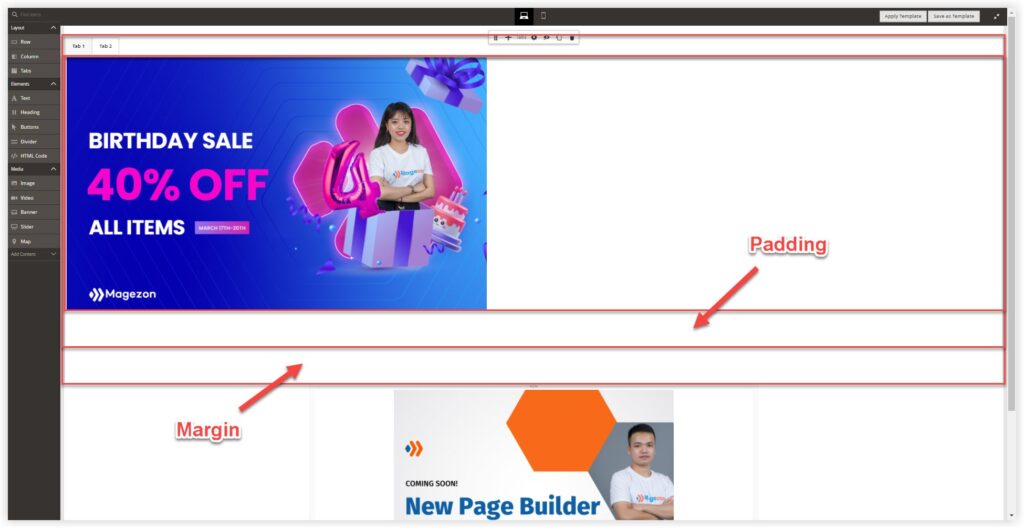
Margins and Padding: Enter the values for Margins and Padding to determine the container’s blank space inside and outside edges.
Finally, click Save to finish customizing the tabs. The result, for example, is below.
How to Customize Tabs Container Settings?
To edit the Tabs container, hover over the tabs area to display the toolbox and choose the settings icon. To open the Edit Tabs page, there are two sections on this setting: Basic settings and Advanced settings.
Basic Settings
Configure these settings to get the configuration you wish.

- Default Active Tab: Choose the tab you want to show first.
- Minimum Height: 300px is the default height of the tabs area. You can change this setting if needed.
- Tab Navigation Alignment: This setting allows you to place the tab label in the left, center, or right side of the label of the tab set.


Advanced Settings
In general, advanced settings in the Tabs container are the same as the ones in individual tabs. The difference is that you can configure a set of tabs in the Tabs container instead of a specific tab.
An Alternative to Magento Page Builder
As you can see, the Magento Page Builder Tabs element has customization limitations. Therefore, satisfying tough store owners who want to craft a groundbreaking page is challenging. In this case, Magezon has released a high-end page builder named Magezon Page Builder editor.
Magezon Page Builder is a powerful builder extension with more than 50 elements and many advanced and outstanding features.
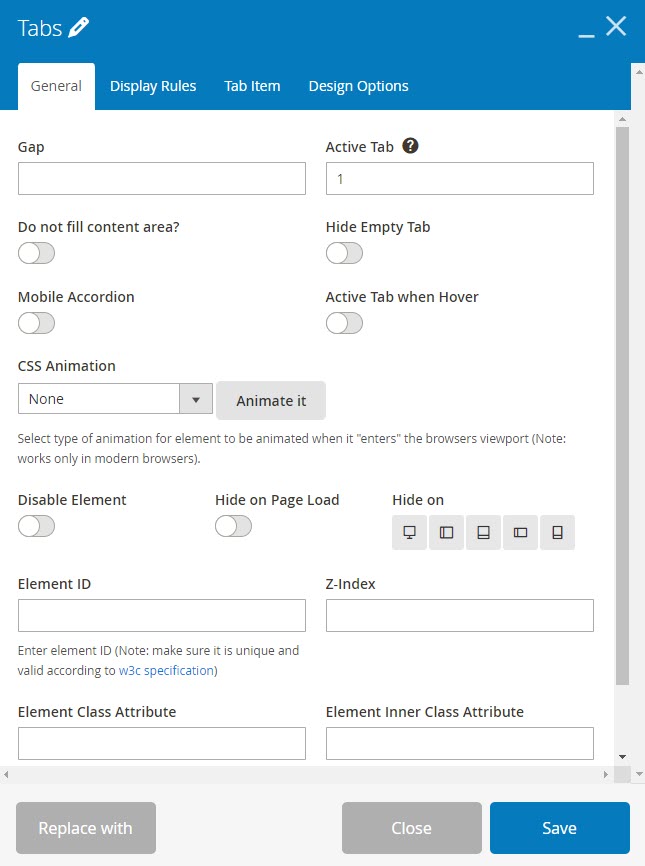
Regarding the Tabs element, Magezon Page Builder supports diverse options, which cannot be found in Magento Page Builder by Adobe, such as Gap, Active Tab, Fill Content Area, Hide Empty Tab, Mobile Accordion, Active Tab when Hover,…
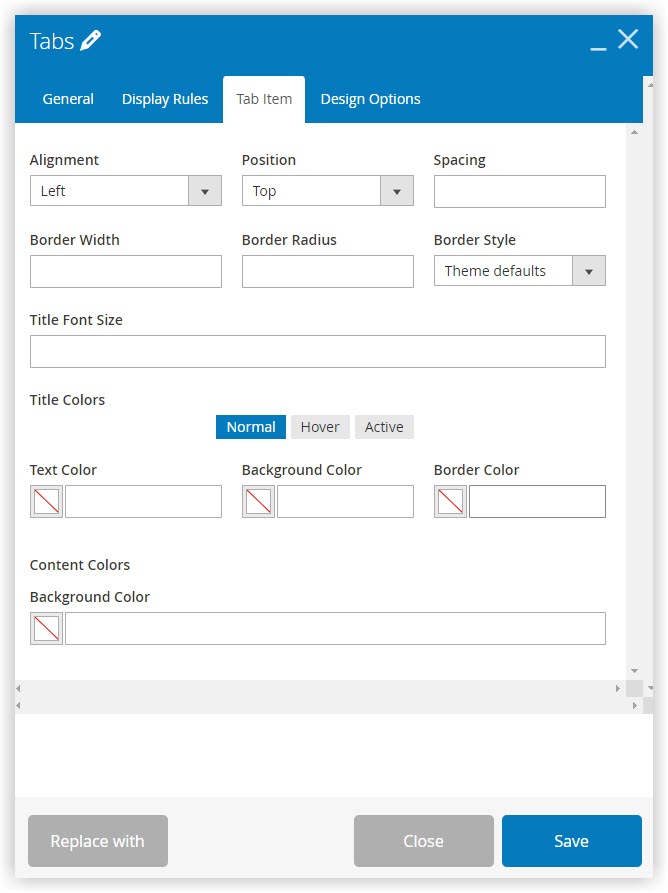
In Tab Item of Magezon Page Builder, you can configure alignment, position, and border like in Magento Page Builder. Moreover, several developed options exist, such as Title Font Size and Title Colors with hover mode.
| Good news: In 2023, Magezon will roll out a new version of Magezon Page Builder, which is innovated with a high-level drag-and-drop editor and more controls and styles in elements. |
Final Words
That’s all about Tabs content type in Magento Page Builder. You need to know. After using Magento Page Builder, you should try and compare the alternative I introduced. Then, you will surely know which one suits you.

Try FREE Magezon Page Builder demo today.
Easily create a beautiful, engaging Magento website in any style whenever you want without relying on developers or designers. Just by drag & drop.
 Magezon Blog Help Merchants Build Comprehensive eCommerce Websites

