 Magezon Blog Help Merchants Build Comprehensive eCommerce Websites


Magento 2 Layered Navigation is a filter in an eCommerce website. This feature can improve user experience, leading to a time on site increase and returning customers.
To maximize its efficiency, administrators need to understand it comprehensively. This post will help you know how to enable or disable, show or remove category filter, and custom Layered Navigation filter.
Table of contents
What is Magento 2 Layered Navigation
Magento 2 Layered Navigation is a sitemap and filter that allows users to search products easier based on category, price range, or any available product attributes. Store admins can set it up in the left column or in the bar above the page.
Because of layered navigation, users can search for suitable products in a time-saving way. For example, when a customer visits your website to look for shoes, he can use the filter with product attributes such as brand name, specific style, color, price.
| You may be interested in: How to Regenerate URL Rewrites in Magento 2 Magento 2 Related Products, Cross Sell and Upsells. All About Magento 2 XML Sitemap You Should Know |
How to Configure Layered Navigation in Magento 2
By default, Layered Navigation is enabled on the frontend. Thus, you don’t have to enable it, but you can show category filter in layered navigation. Let’s get started!
- Firstly, go to Admin panel. Navigate to Store > Configuration > Catalog, choose Catalog.
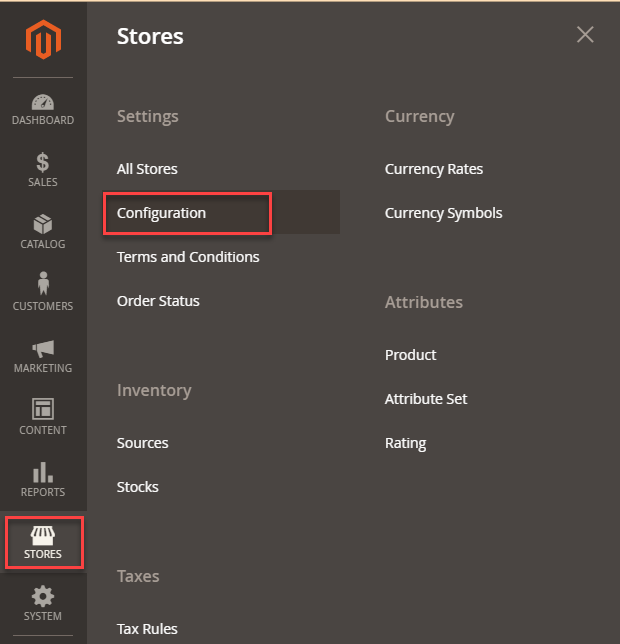
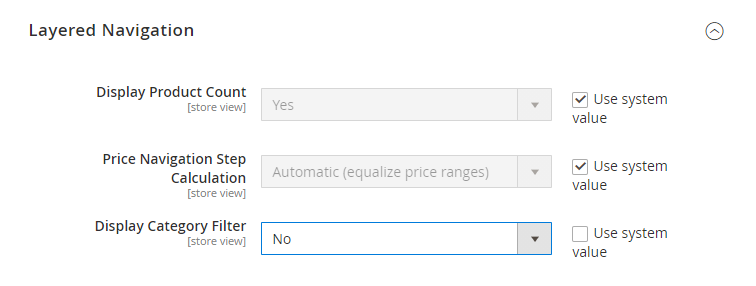
- Expand Layered Navigation. Set Yes to Display Category Filter to display the number of products found for each attribute.
- Set Price Navigation Step Calculation to one of the following:
+ Option 1: Automatic(Price ranges)
+ Option 2: Automatic (Product counts)
+ Option 3: Manual
- Set Display Category Filter to Yes to show the category filter on the layered navigation. To remove it from the navigation, choose No.
Finally, tap Save Config.
How to Disable Layered Navigation in Magento 2
Layered Navigation is by default enabled. If you want to disable it, there are 2 methods.
1. Method 1
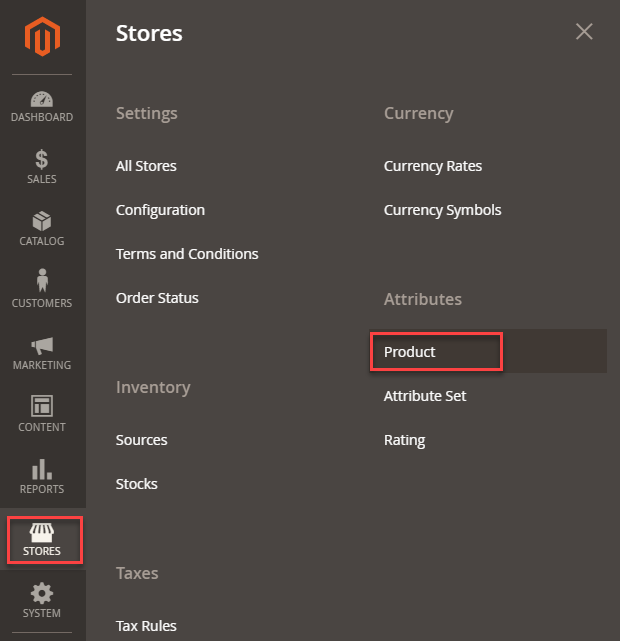
To hide product attributes in Layered Navigation, you can edit all attributes to non-filterable. To do this, go to Admin panel, then go to Store > Attributes > Product. You will see a list of all attributes. Your mission is to disable the one you do not want to display on the Layered Navigation with basic steps.
- Click on the attributes you want to remove.
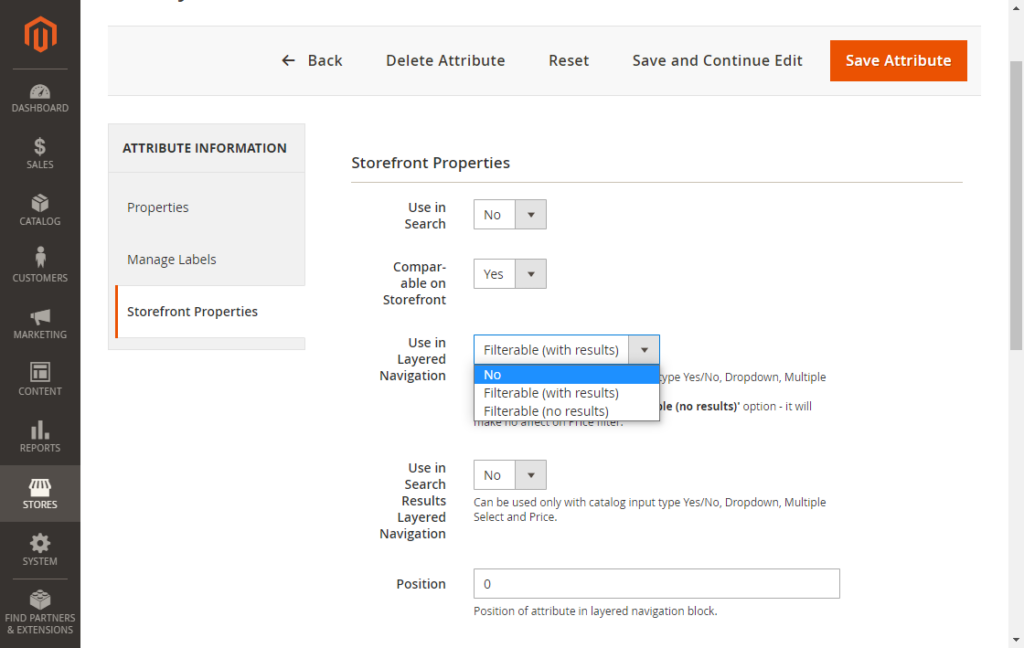
- On the left, choose Storefront Properties. The Storefront Properties appear.
- Look for Use in Layered Navigation, then switch it to No.
However, the subcategories will still be displayed in the layered navigation menu on the front end even though you disable all attributes with this solution. So, for example, if you have a category Clothes with subcategories Tops and Bottoms, on the frontend, the layered navigation block will display links to the subcategories within the category and cannot disappear completely.
2. Method 2
To disable Layered Navigation entirely, you have no choice but to edit the code of the catalog.xml
Step 1: The path on your hosting account to the file that you need to modify is public_html/app/design/frontend/base/default/layout/catalog.xml. In this file, find the code
<reference name="left">
<block type="catalog/layer_view" name="catalog.leftnav"
after="currency" template="catalog/layer/view.phtml"/>
</reference>
Step 2: Change to
<!--<reference name="left">
<block type="catalog/layer_view" name="catalog.leftnav"
after="currency" template="catalog/layer/view.phtml"/>
</reference>-->
Step 3: After you make the change, flush the Magento cache and refresh the frontend to see the result.

Optimize Your Magento Store With Powerful Extensions
Looking for fast, efficient and well-coded extensions to build or optimize your Magento stores for sales boosting? Then visit Magezon website and grab necessary add-ons for yours today!
How to Customize Layered Navigation Filter In Magento 2
1. How to Customize Magento 2 Layered Navigation Filter with Filterable Attributes
You can customize each attribute with the following settings below
Step 1: Use In Layered Navigation (required) must be set with either Filterable (with results) or Filterable (no results).
- Filterable (with results): This layered navigation includes only filters with matching products that can be found. Attribute values with a count of zero product matched will not be shown.
- Filterable (no results): This layered navigation includes all available attribute values and their product counts, including zero value. If the attribute is a swatch, the filter will display with a cross out.
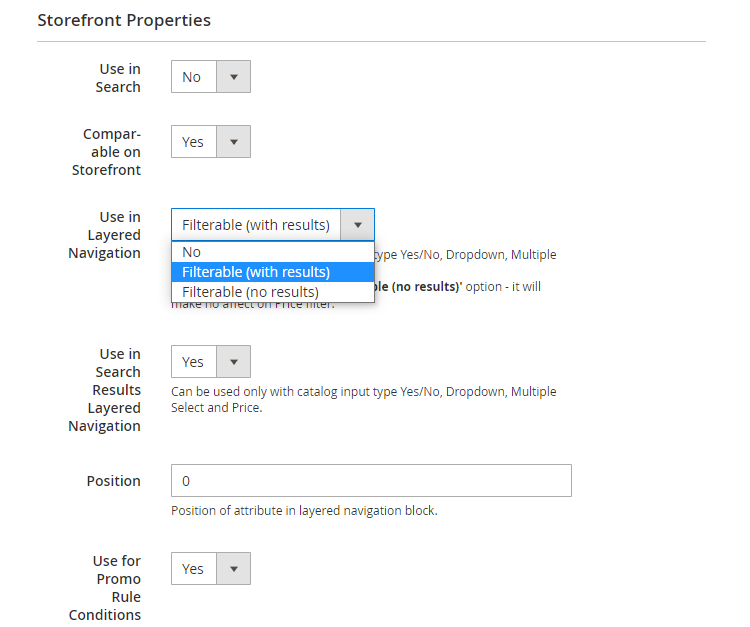
Step 2: Use in Search Results Layered Navigation (optional setting) must be set to Yes.
Step 3: Repeat these steps with the attribute you want to show in layered navigation.
2. How to Display Magento 2 Layered Navigation in a Specific Category
To custom the Layered Navigation with Category as you want, do the following steps.
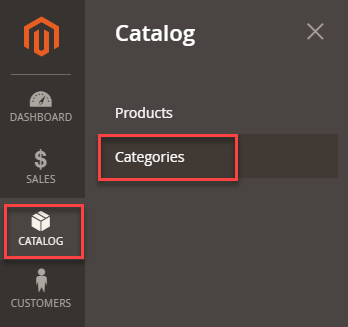
Step 1: On the Admin panel, go to Catalog > Categories.
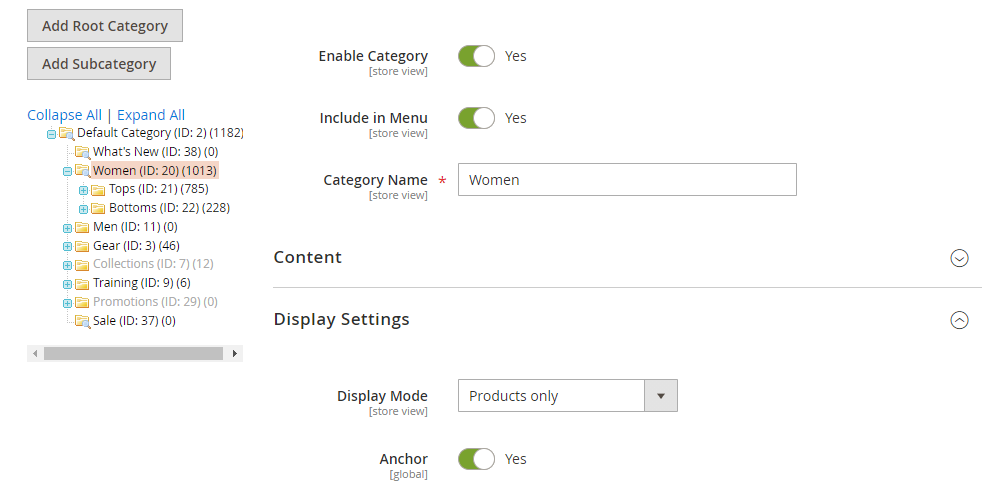
Step 2: In the categories tree on the left, choose the category you want to display in the layered navigation.
Step 3: Expand Display Settings section, switch Anchor to Yes.
Step 4: Click Save button.
Custom Magento 2 Layered Navigation with Codes
It is possible to add any custom layered navigation. To do this, you need to create a layout file inside your module:
app/code/MODULE_NAMESPACE/MODULE_NAME/view/frontend/layout/catalog_category_view.xml
<?xml version="1.0" encoding="UTF-8"?>
<page xmlns:xsi="http://www.w3.org/2001/XMLSchema-instance"  layout="2columns-left" xsi:noNamespaceSchemaLocation="urn:magento:framework:View/Layout/etc/page_configuration.xsd">
      <body>
     <referenceContainer name="sidebar.additional">
   <block class="MODULE_NAMESPACE\MODULE_NAME\Block\YOUR_BLOCKNAME" name="MODULE_NAME.BLOCK" after ="-" template="MODULENAMESPACE_MODULENAME::YOURPHTMLFILE.phtml"/>
        </referenceContainer>
    </body>
</page>
Then, you must create phtml file inside the module
app/code/MODULE_NAMESPACE/MODULE_NAME/view/frontend/templates/YOURPHTMLFILE.phtml and Block file app/code/MODULE_NAMESPACE/MODULE_NAME/Block/YOUR_BLOCKNAME.php inside with your custom code.
To show your custom layered navigation, rewrite Block Magento\Catalog\Block\Product\ListProduct
You can do it as below: app/code/MODULE_NAMESPACE/MODULE_NAME/etc/di.xml
<config xmlns:xsi="http://www.w3.org/2001/XMLSchema-instance" xsi:noNamespaceSchemaLocation="urn:magento:framework:ObjectManager/etc/config.xsd">
 <preference for="Magento\Catalog\Block\Product\ListProduct" type="MODULE_NAMESPACE\MODULE_NAME\Product\ListProduct" />
</config>


namespace MODULE_NAMESPACE\MODULE_NAME\Block\Product;
class ListProduct extends Magento\Catalog\Block\Product\ListProduct
{
  protected function _getProductCollection()
    {

        /*
      *  customize the default code
      */
    }

}
Bottom line
That’s a complete guide with Magento 2 Layered Navigation. We hope you can find the information you are looking for in this post and put it into practice. If you have any confusion, please contact us at [email protected], or leave comments below.
At Magezon, we also provide you with many fast, well-coded yet affordable extensions for your store optimization. Visit our website to opt for necessary ones!
Optimize Your Magento Store With Powerful Extensions
Looking for fast, efficient and well-coded extensions to build or optimize your Magento stores for sales boosting? Then visit Magezon website and grab necessary add-ons for yours today!
