 Magezon Blog Help Merchants Build Comprehensive eCommerce Websites


We all know that Magento is a powerful and customized platform. It provides users with all basic needed features to build an e-commerce store, but it doesn’t mean that Magento doesn’t have any disadvantages, one of which is the default gallery.
Considering this case, we’ve developed a flexible and smart tool named Magento 2 Image Gallery to help users upgrade it better. In this article, let us introduce a detailed instruction on how to create a photo gallery online using this tool.
Table of contents
I. Why do you need a photo gallery online?
What is a photo gallery? A photo gallery includes various albums with different subjects. It means that a gallery is created when you have one or more albums.
So, which benefits can you get from it?
In fact, the visual element, especially the image is one of the most vital aspects for the success of a store online presence. Having an eye-catching and professional product images gallery is the first step to boost sales for your store as customers can know exactly which kind of products you are selling and visualize the details of products.
Besides, a photo gallery is a useful way to help store owners easily manage tons of product images by logic structure layout.
Not only for admins, galleries also bring lots of benefits to your customers. First, it allows them to see several product images clearly at once without accessing each product page. Furthermore, your customers will have a better shopping experience because of the fully responsive photo gallery online. It works well with any kind of screen.
II. How to create a photo gallery online by Magento 2 Image Gallery
The default gallery in Magento only allows store owners to display product images in separate product pages and categories without any effect. This may make customers find bored and be limited when searching certain product images.
With Magento 2 Image Gallery, you are able to add unlimited product images and display them in the gallery with some attractive effects supported.
The gallery created by Magento 2 Image Gallery will look like this:
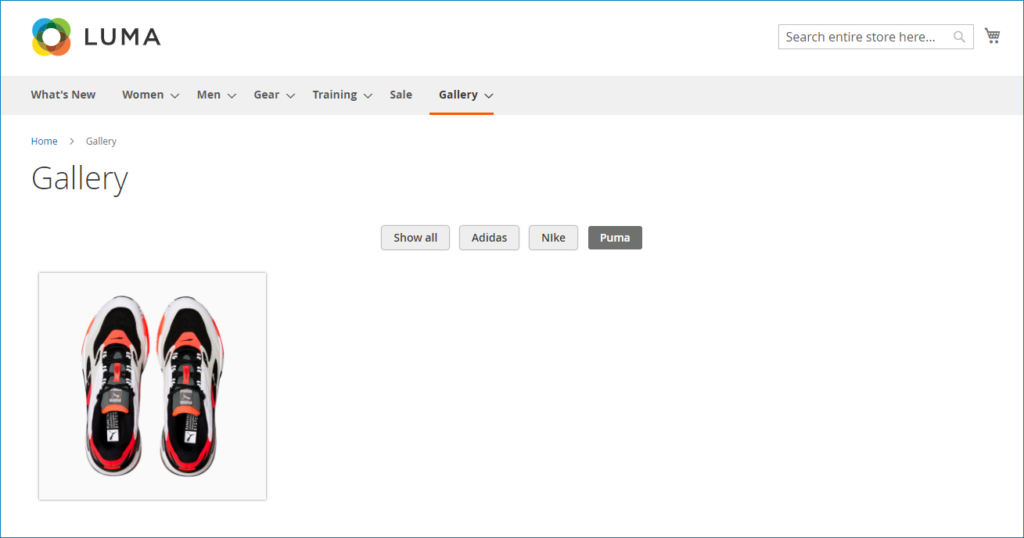
This gallery contains multiple albums with different topics such as Adidas, Nike, and Puma. We’ll show you how to create a Puma album in this post.
No more waiting, let’s see how it works!
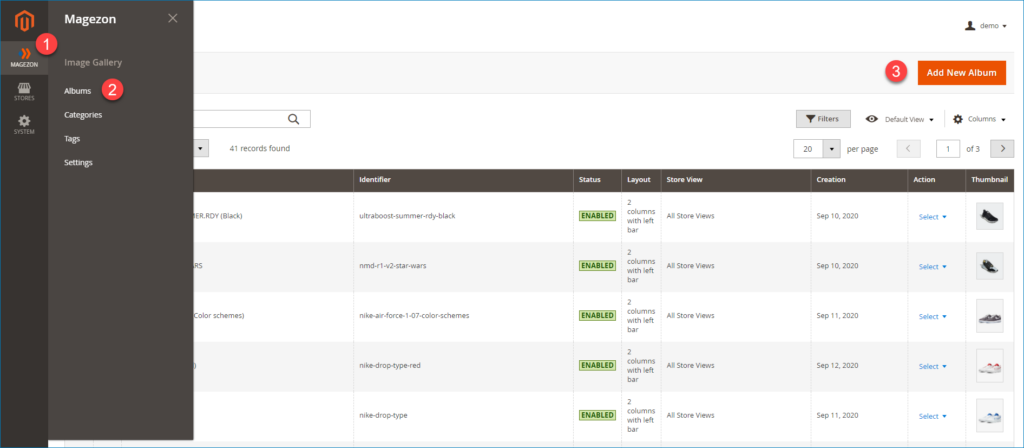
Step 1: Create a new album
From the Magento dashboard, navigate to Magezon >> Albums. Then click on Add New Album button.
Step 2: Configure new album information
1. Configure general information
After completing the step 1, first, configure general information for the new album.
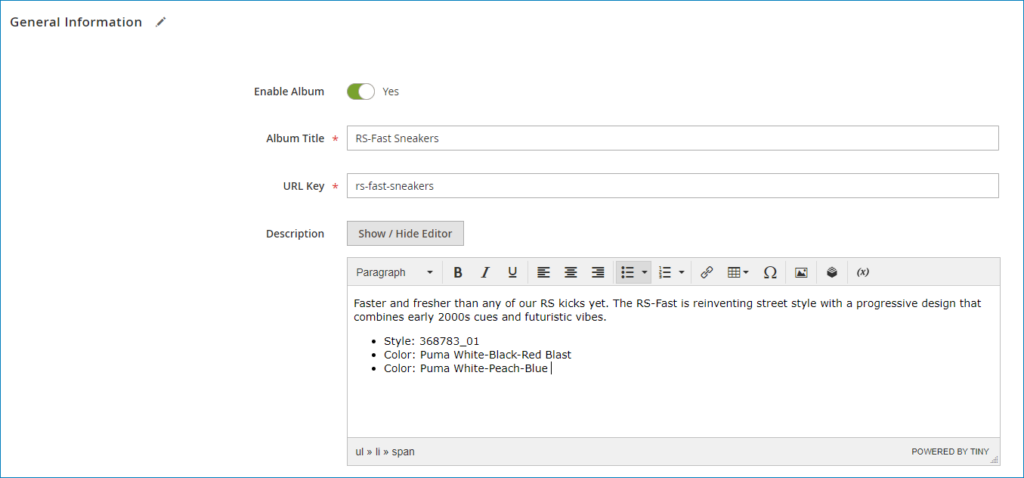
The general information of album includes:
- Enable Album: Turn on button to enable the photo album.
- Album Title: Enter a name for the album.
- URL Key: Specify URL for the album page.
- Description: Write a specific description for the album. It can be about features of product, colors, materials, or design.
2. Group the album by suitable category and tag
Next, group the album by relevant category and tag to easily manage it when you own plenty of albums in the future.
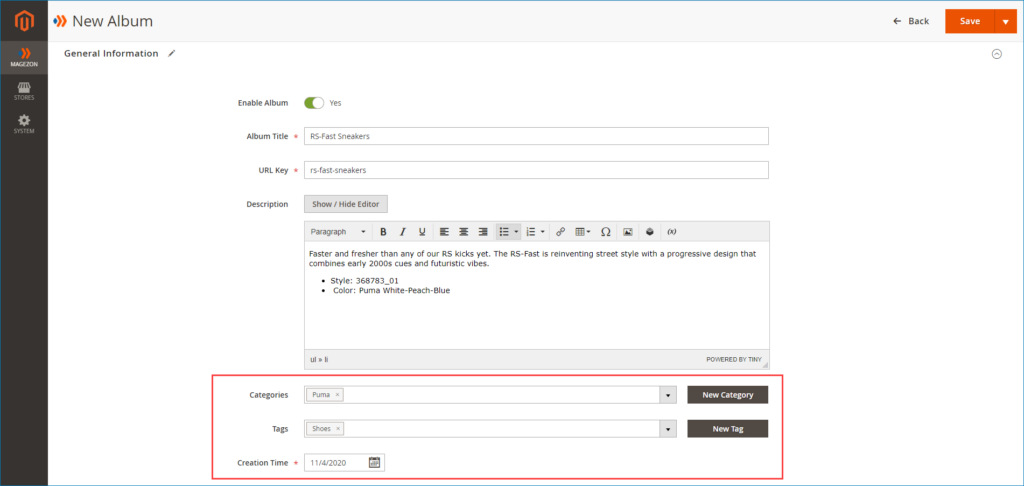
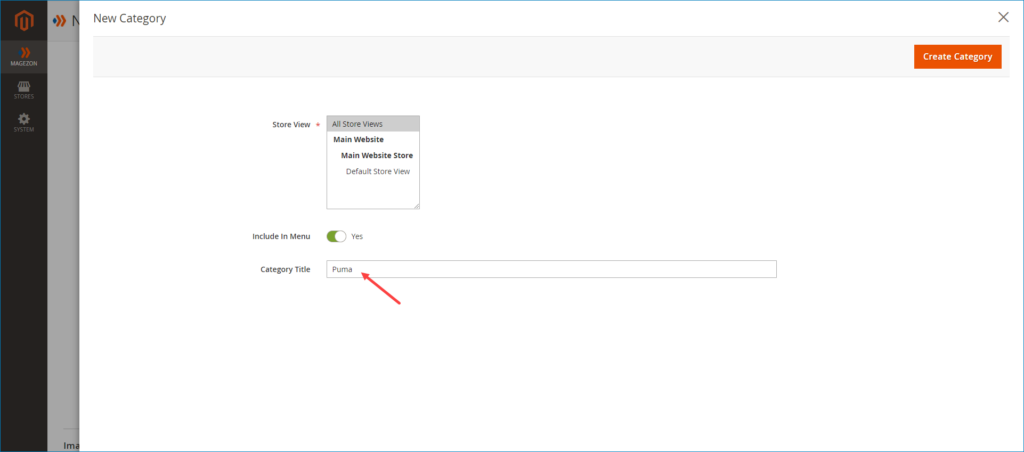
In case you can’t find your desired category and tag, click on the New Category or New Tag button to create new ones.
In this example, we’ll go to create a new category because we can’t find the one we want. If you also want to do, follow the image below:
Here is the result on the frontend:

Step 3: Upload images
Span the Images And Videos section and upload your product images into the album
Magento 2 Image Gallery provides users with 3 ways to apply when adding images:
- Browse to find and add images from computer.
- Drag and drop images from computer directly.
- Select images from the gallery that you have created.
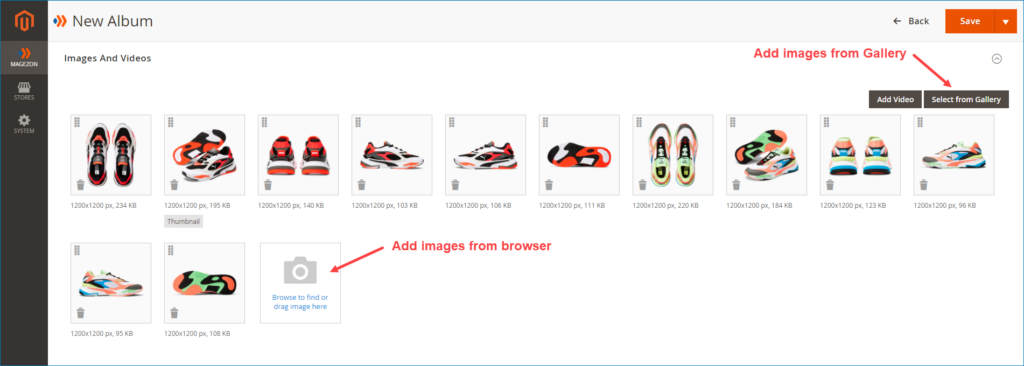
What’s more, this extension is very flexible, it allows you to upload multiple images at once without time-consuming.
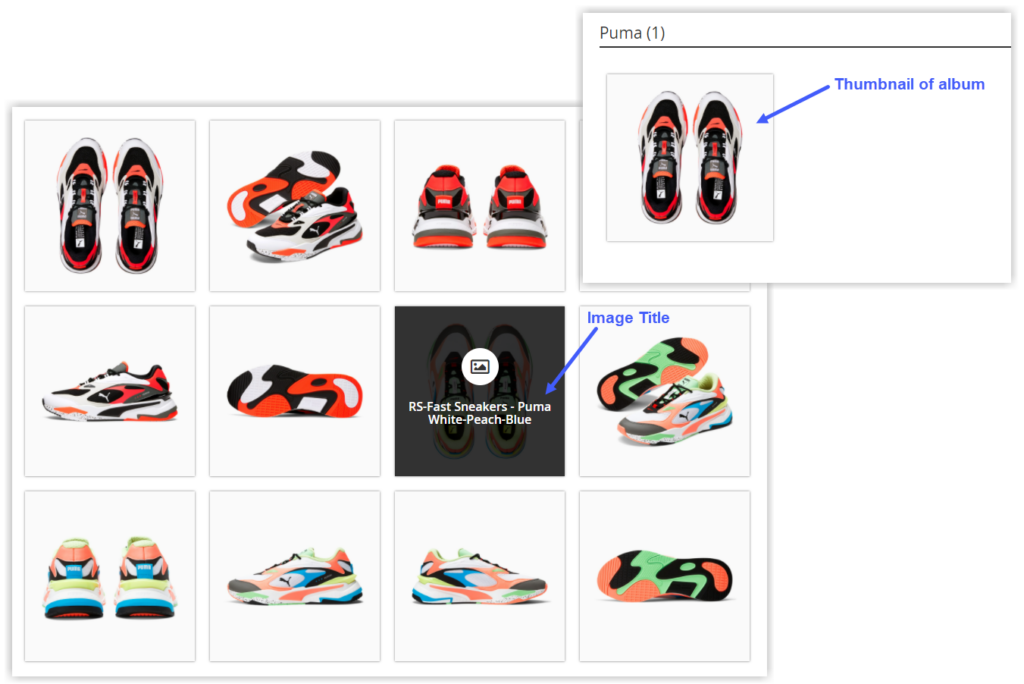
Once you have finished this task, click on each image to edit its information in detail as the example below:

The Image Details section contains the following fields:
- Image Size
- Image Solution
- Title: Set a title for the image.
- Role: Hit this option to set the image as the thumbnail of the album.
- Hide from Album Page: Tick it if you don’t want to show the image on the album page.
And here is the result we get:
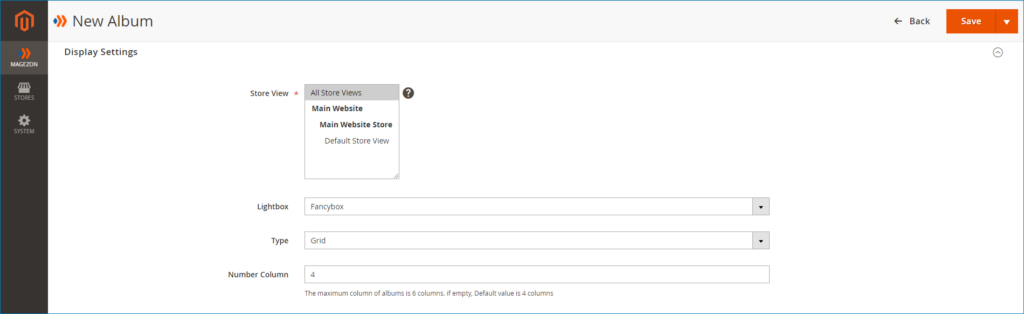
Step 4: Configure Display Settings
Scroll down and open the Display Settings section. It plays an important role in making your photo gallery more attractive and lively.
This section includes the following fields:
- Store View: Choose a specific store view to display the album.
- Lightbox: Choose fancybox effect, light effect, or magnific popup effect to display each image on the frontend.
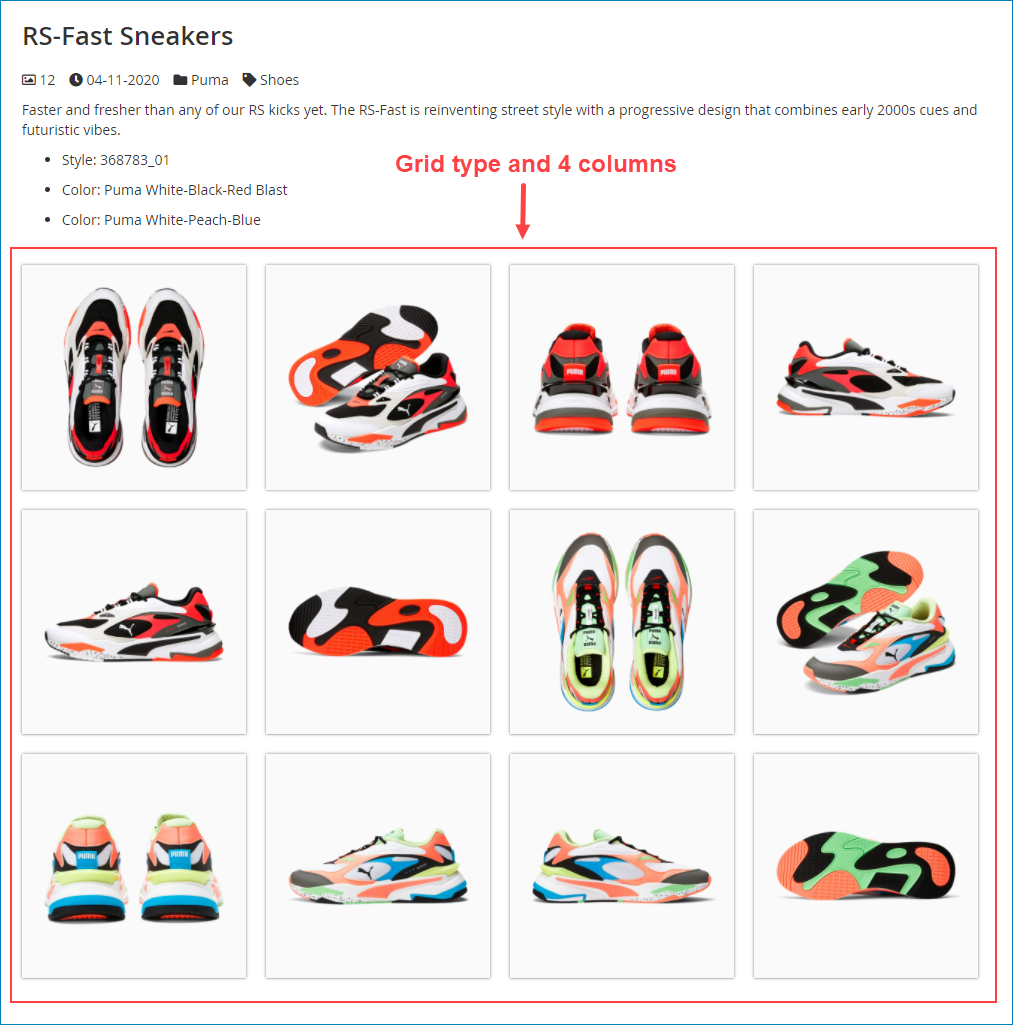
- Type: Set display type of image in the album to Grid type or Masonry type.
- Number Column: Set maximum number of columns in each page of the album page. The value ranges from 1 to 6. If you leave it bank, the value will be set as 4 columns.
Let’s see the result:
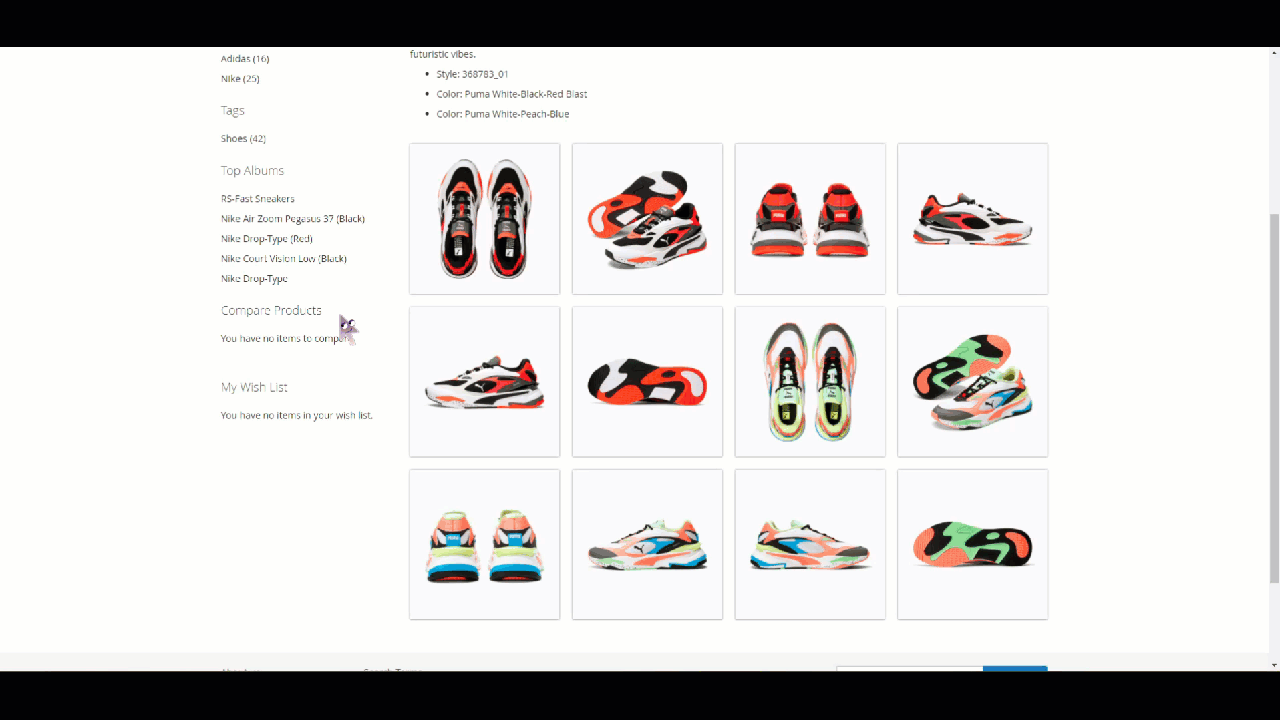
Fancybox effect:
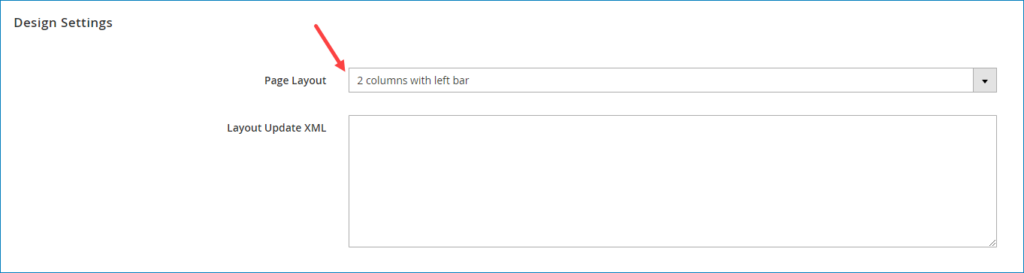
Step 5: Set page layout for album page
Next, set page layout for the album page in the Design Settings section. The Page Layout field includes 4 options, select the your most suitable one:
- Empty
- 1 column
- 2 columns with left bar
- 2 columns with right bar
- 3 columns
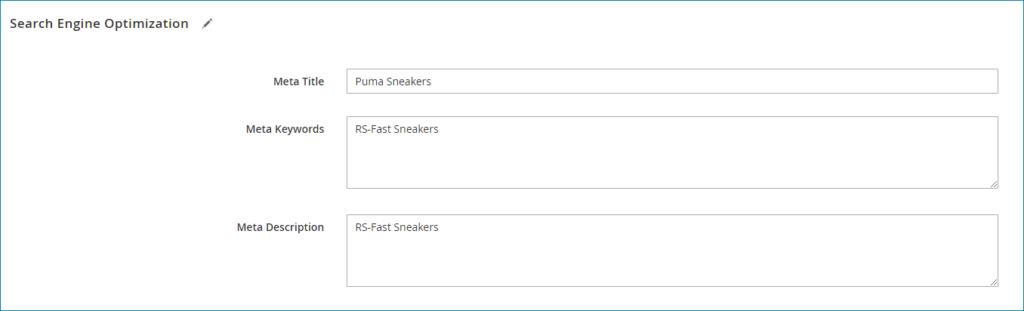
Step 6: Optimize SEO
Magento 2 Image Gallery also allows you to optimize SEO for your website. In the Search Engine Optimization section, specify meta tags for the album page to make SEO work effectively.
Step 7: Place album on relevant product page
This step is not required when creating an album. Its main function is to place albums on the relevant product pages. If you see your album related to any product in the store, you can set conditions to show it on the relevant product page.
In this example, we want to show the album on the training product pages, so we set a condition as the image below:
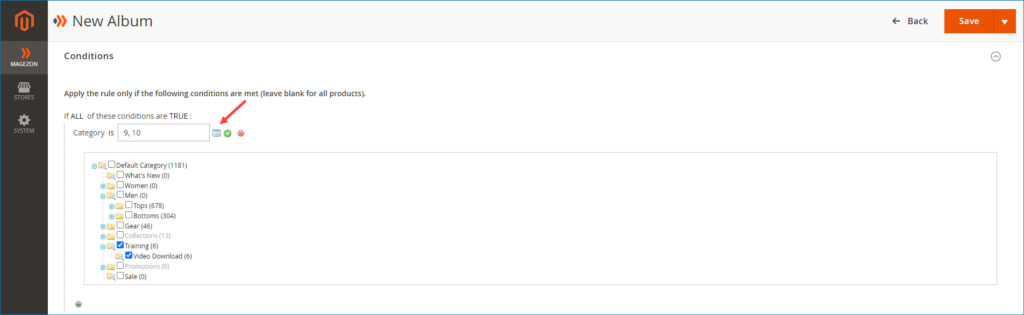
After setting the conditions, press the Preview Products button to view the product you have chosen above.
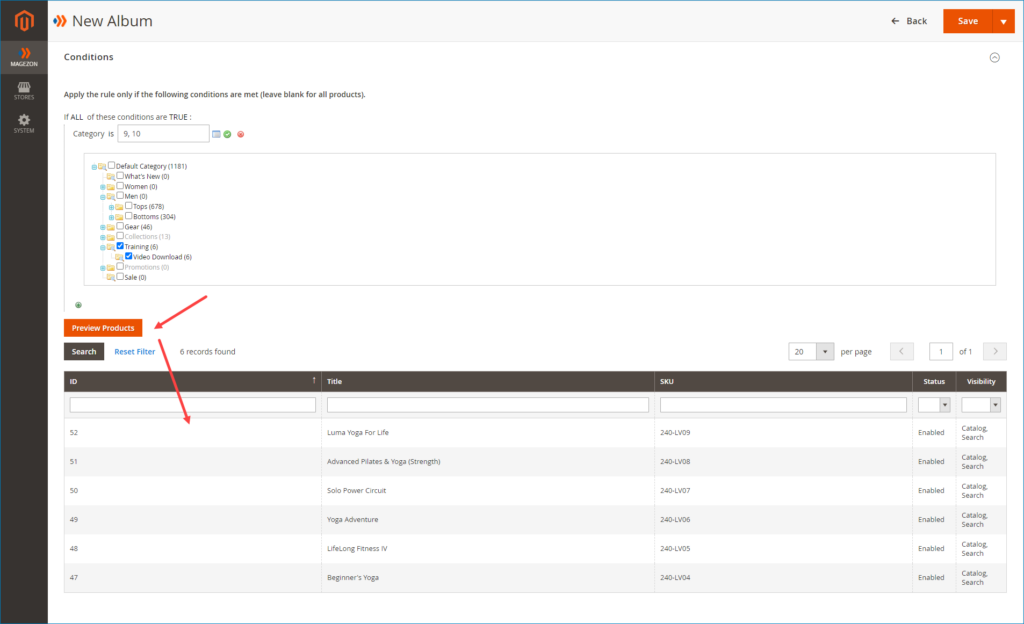
We’ll get this result:
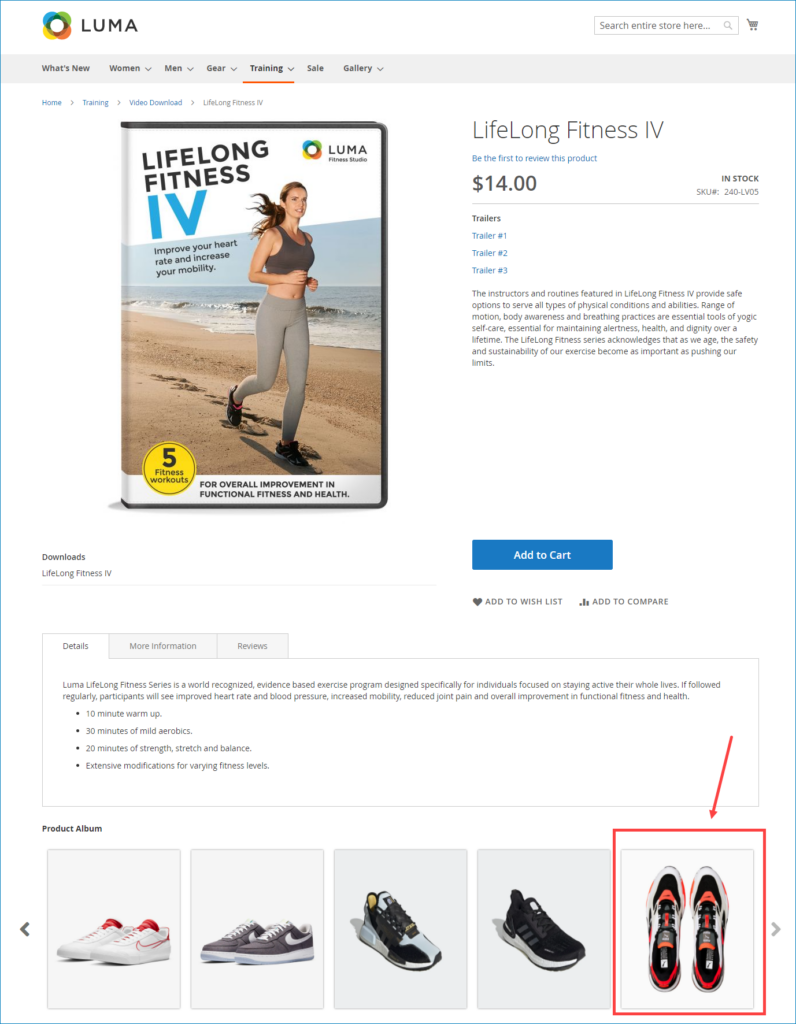
It’s done!
Once you’ve completed creating the album, it will be automatically displayed in the gallery.
Conclusion
We’ve walked through a step-by-step guide on how to create a photo gallery online with Magento 2 Image Gallery. It is a must-have tool to make your store online more aesthetic and visually appealing. This extension also allows you to create product video album.
Hope this tutorial is helpful for you! Contact us if you face any problem when creating a gallery.

Optimize Your Magento Store With Powerful Extensions
Looking for fast, efficient and well-coded extensions to build or optimize your Magento stores for sales boosting? Then visit Magezon website and grab necessary add-ons for yours today!

