 Magezon Blog Help Merchants Build Comprehensive eCommerce Websites
If you’re finding an easy way to display your blog post list on store’s pages, you’ve come to the right place. This article will provide you with an optimal solution for it. With Magento 2 Blog extension as our solution, you’re able to insert your blog post list to any Magento pages you want via the Magento 2 widget without any line of code. Scroll down to explore the instructions now!
Table of contents
1. What is a Magento 2 Widget?
Magento 2 widget is a reusable component that allows the admin to insert dynamic or static content to any pages or blocks on their Magento store frontend. It comes with various powerful functions to help users easily place different content (images, text, product list, or static block) in different places without having too much knowledge about programming.
By default, Magento 2 doesn’t allow the admin to display a blog post list on CMS pages, so the admin must create a custom widget that requires some coding skills. In contrast, with our Magento 2 Blog extension, all you have to do is choose the available Blog Post List widget then insert the list anywhere in the Magento store as you want.
2. Display a blog post list on pages via Magento 2 widget
In this part, we’ll walk through step-by-step instructions on displaying a blog post list on store’s pages by Magento 2 Blog extension. No time wasted. Let’s get started!
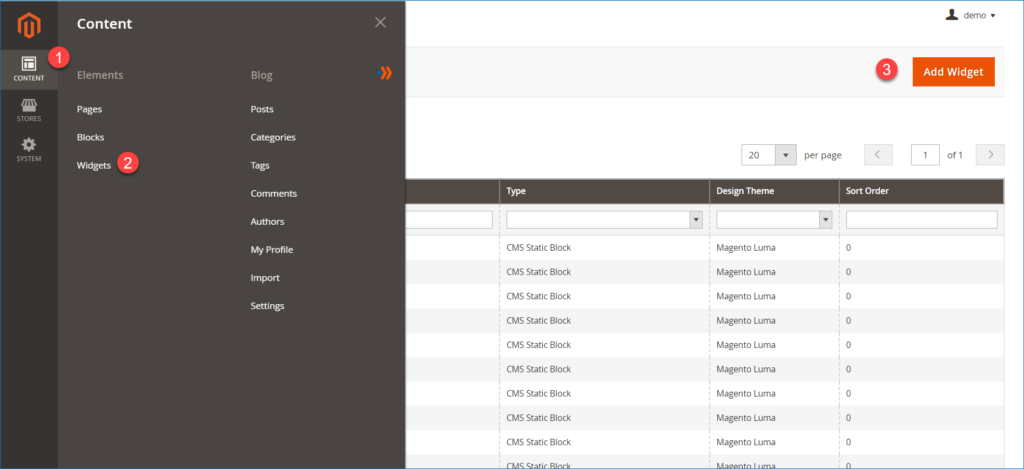
Step 1: Add a new widget
In the admin panel, navigate to the Content → Elements → Widgets → Add Widget.
Step 2: Go to configure Widget Settings
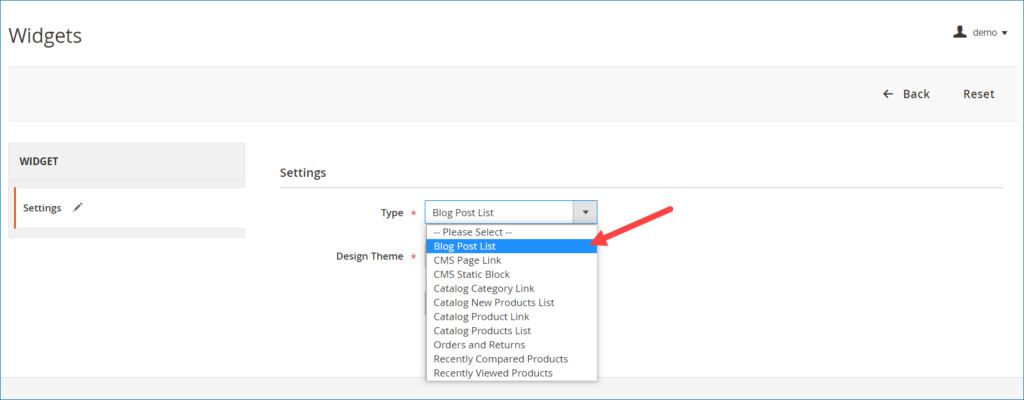
Type: Choose the Blog Post List option in this field.
Besides, the Magento 2 widget has 9 default types. If you want to learn more about them, you can refer to Magento 2 Widget Types user guide.
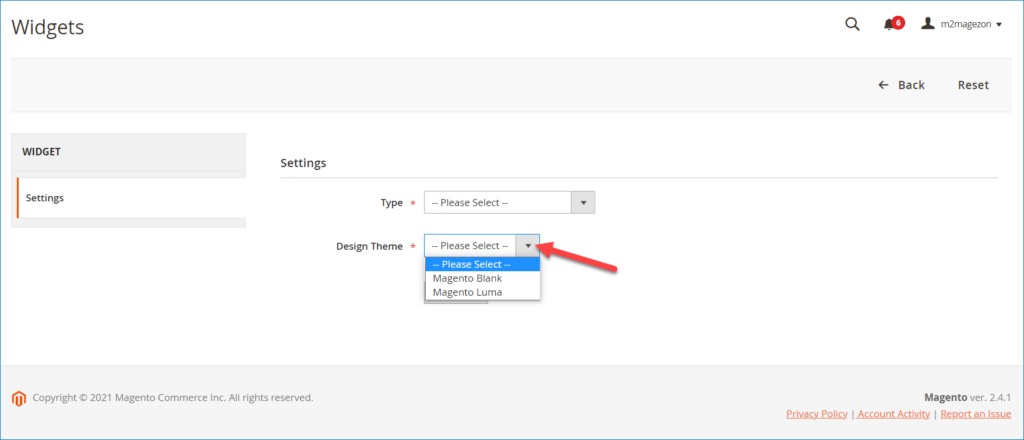
Design theme: Choose a theme that you want to use for the widget.
Once you’ve finished configuring the widget settings, click on the Continue button to keep editing other sections of the widgets, namely Storefront Properties and Widget Options.
Step 3: Move to the Storefront Properties section
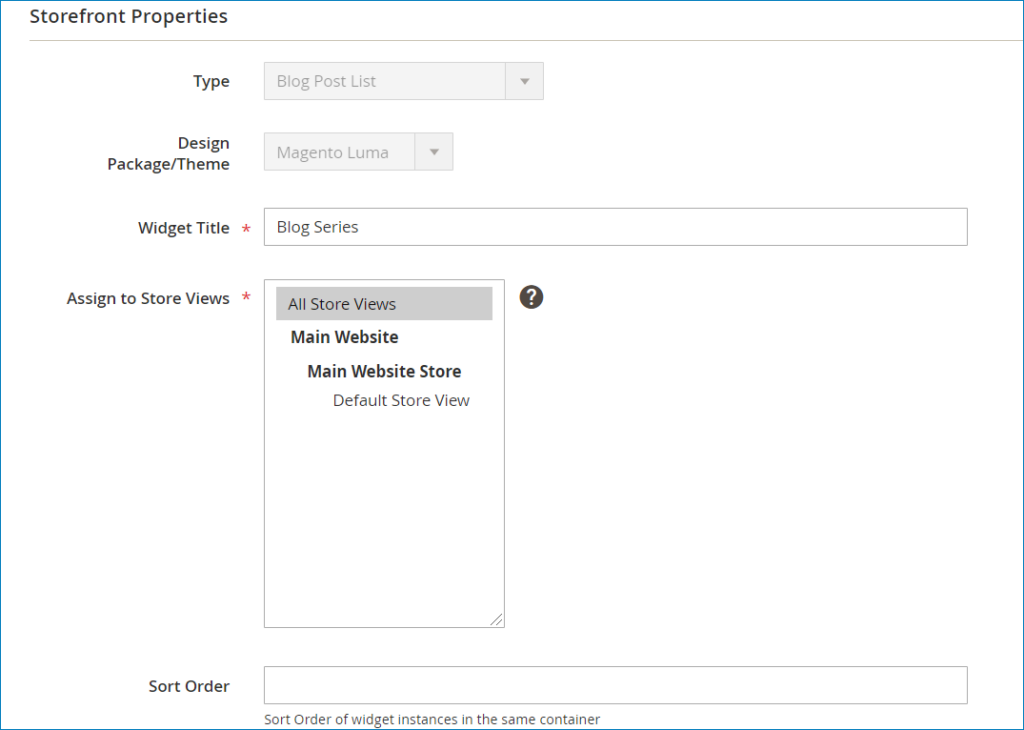
- Widget Title: Enter a short description for the widget (this title is available in the backend only).
- Assign to Store Views: Choose specific store views or All store views that you want to display the widget.
- Sort Order: This is an optional field to define the order of this widget with other widgets in the same part of the page. Enter a number you want in this field (it starts from 0), and a widget with a smaller number will appear first.
Scroll down to configure the Layout Updates section.
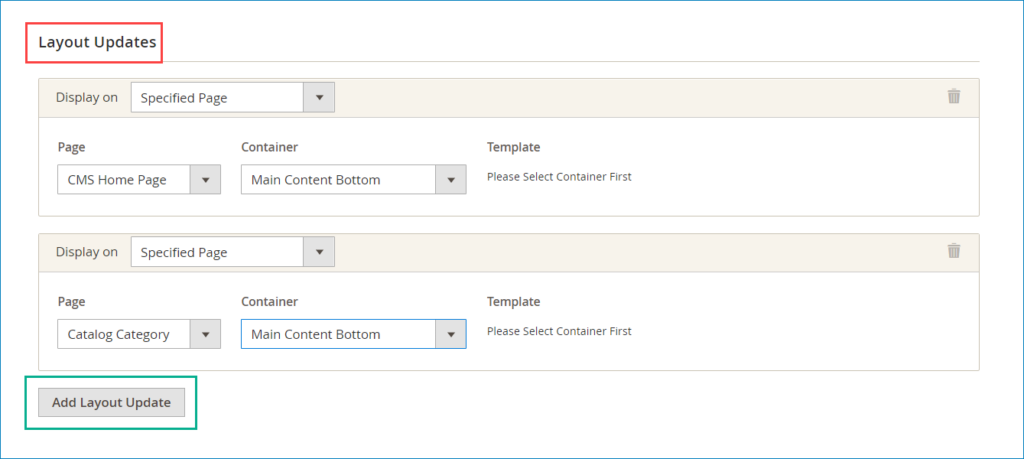
- Click on the Add Layout Update button to set Layout Updates. Be noted that you can add as many layout updates as you want.
- Display On: Choose the type of page where the widget will be displayed. In this guide, we’ll choose the Specified Page to display the widget.
- Page: Select a page that the widget will display. In this example, the widget will show on the CMS homepage and the Catalog category pages.
- Container: This field lists all areas of the page layout that you can select an area you want to place the widget. We choose the Main Content Bottom area to place the widget on a page.
Step 4: Go to the Widget Options
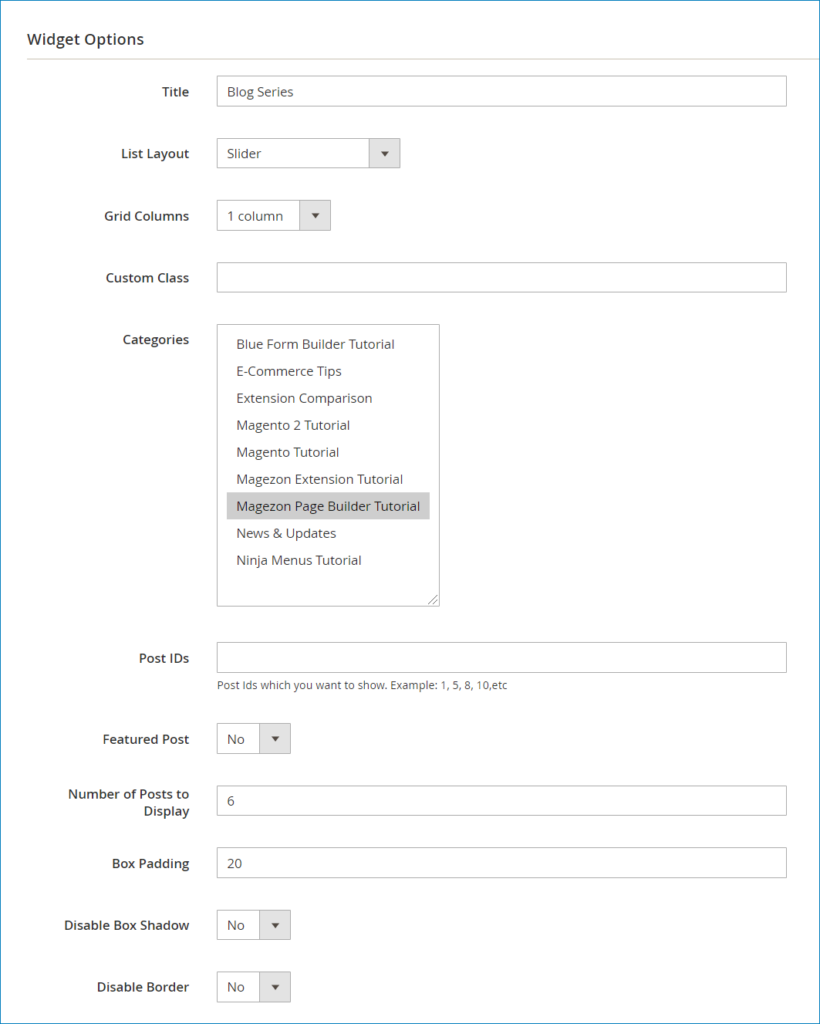
- Title: Enter a short description for the widget (this title is available on the frontend only).
List Layout: Choose your desired list layout to display the widget on the frontend. We choose the Slider layout. Besides, you can select one of the following options:
- List – Fixed Thumbnail
- List – Full Thumbnail
- Grid
- Masonry
- Grid Columns: This field is applied for the Grid and Masonry layouts only. Choose the number of columns for the widget block. The maximum number of columns is 6.
- Categories: Select categories that you want to call blog posts from them. We choose to display blog posts of the Magezon Page Builder Tutorial category.
- Post IDs: Enter the ID number of posts that you want to show. Commas separate numbers.
- Featured Post: Select No. Featured posts are posts that you set as Featured when creating blog posts by Magento 2 Blog extension.
- Number of Post to Display: Set maximum the number of blog posts that will show on the frontend. We set it to 6.
- Box Padding: Set padding for the widget block. It is the distance between the widget block border and the content.
- Disable Box Shadow: Choose Yes/No to disable/enable box shadow of widget block.
- Disable Border: Choose Yes/No to disable/enable the border of the widget block.
Next, move to edit the Post Settings.
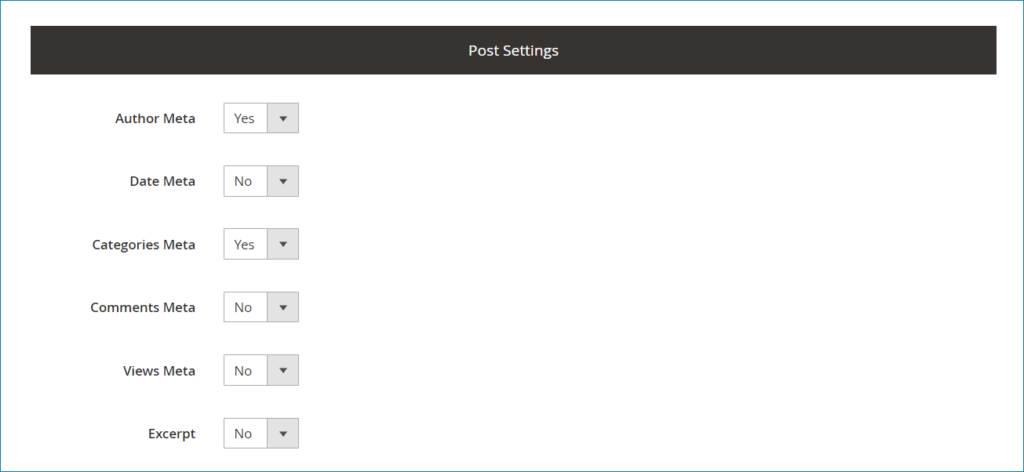
- Author Meta: Choose Yes/No to show/hide author name.
- Date Meta: Choose Yes/No to show/hide the published date.
- Categories Meta: Choose Yes/No to show/hide blog post’s categories.
- Comments Meta: Choose Yes/No to show/hide comments.
- Views Meta: Choose Yes/No to show/hide the number of post views.
- Excerpt: Choose Yes/No to show/hide the post’s short description and Read More button.
Go to edit the OwlCarousel Settings.
The OwlCarousel Settings is only activated when your selected List Layout is Slider.
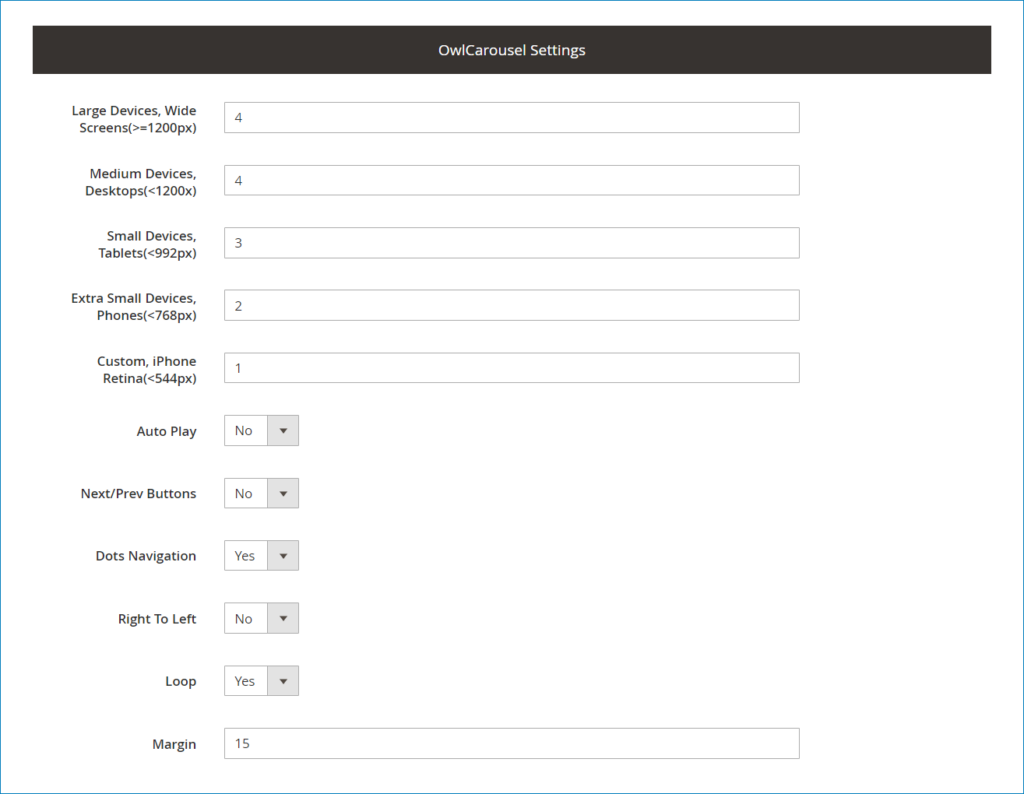
- Set the maximum number of posts that will display in each slider for each type of device.
- Auto Play: Choose Yes to make the slider automatically play.
- Next/Prev Buttons: Choose Yes/No to show/hide the next and previous buttons.
- Dots Navigation: Choose Yes/No to show/hide the dots navigation.
- Right To Left: Choose Yes if you want to show post information such as author name, published date, and categories from right to left.
- Loop: Choose Yes if you want to repeat a sequence of the slider continually.
- Margin: Set margin for owl carousel.
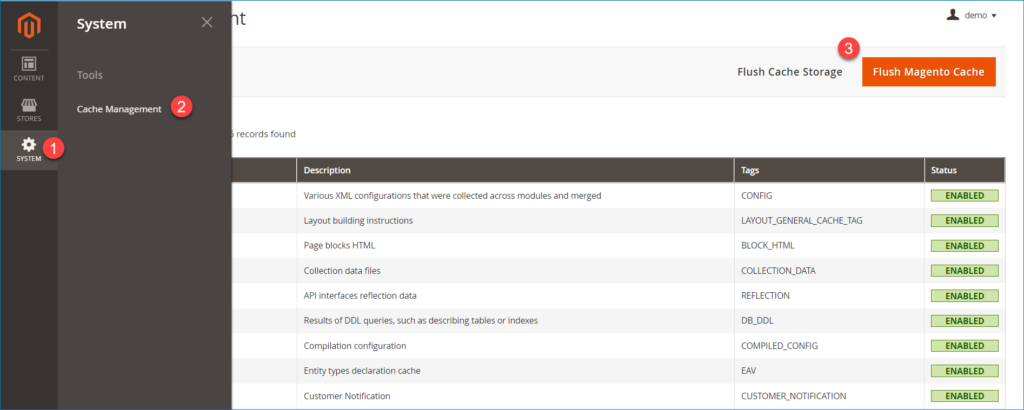
Step 5: Hit the Save button and Refresh the cache
You can follow this path to refresh the cache: System → Cache Management → Flush Magento Cache.
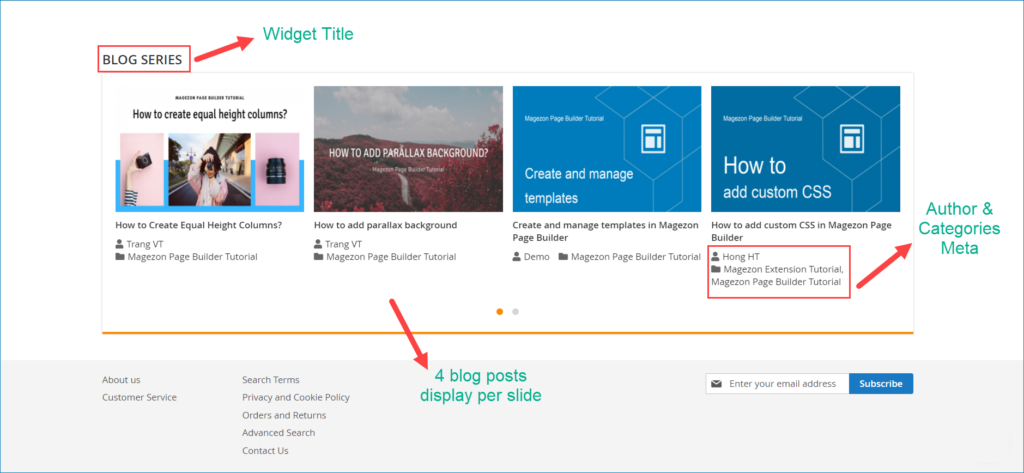
After pressing the Save button and Refresh the cache, go to check the result on the Homepage and Catalog Category page.
The blog post list on the homepage:
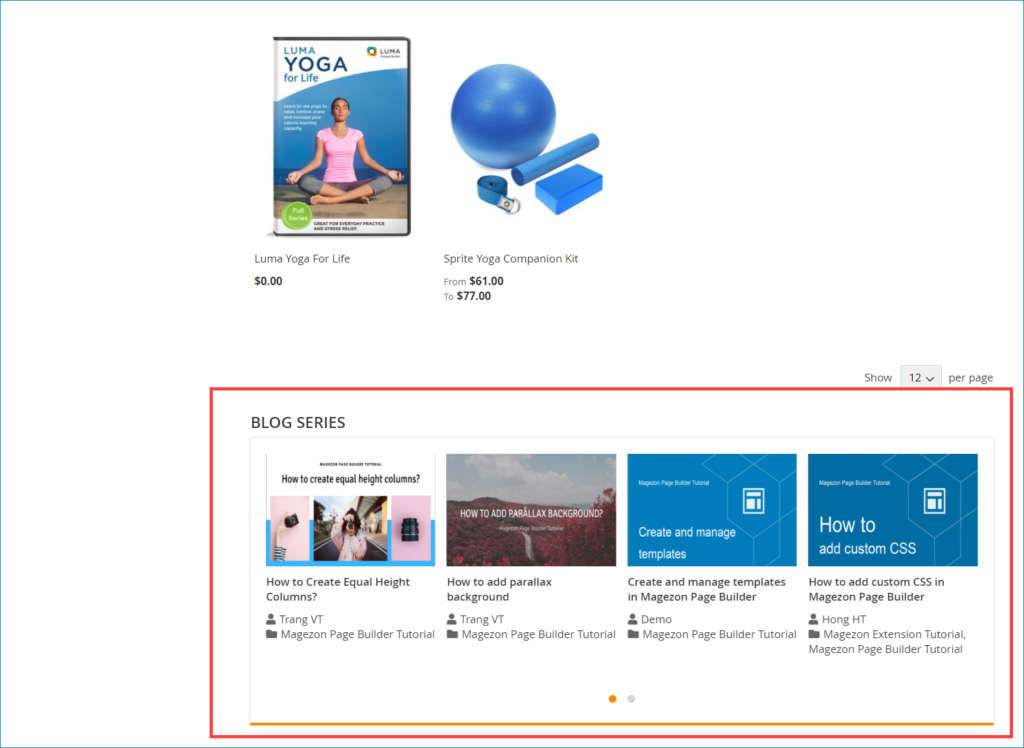
The blog post list on the catalog category page such as the Video Download category page:
| You may also like: How to add FAQ Question List widget to a page by Magento 2 FAQ Extension? How To Display Products On Homepage In Magento 2 How to create and insert Magento 2 block in CMS page |
Wrap Up
Above is the detailed instruction for displaying a blog post list on store’s pages via Magento 2 widgets. We hope it’s helpful for you and this solution is what you are looking for. Contact us via email or leave comments below if you have any confusion, we’d be happy to discuss with you.

Optimize Your Magento Store With Powerful Extensions
Looking for fast, efficient and well-coded extensions to build or optimize your Magento stores for sales boosting? Then visit Magezon website and grab necessary add-ons for yours today!


