 Magezon Blog Help Merchants Build Comprehensive eCommerce Websites


Sometimes, the default Magento 2 login and registration page doesn’t satisfy all your needs. You want to customize them so that, for example, they better match your overall website or offer a better user experience.
Magezon Login & Registration Page Builder will be a smart solution for this. With a simple drag & drop interface, you can quickly build layouts for the login and registration page. No coding knowledge is required.
In this post, let me walk you through the ultimate guide to using this extension. So keep reading!
Table of contents
Step 1: Build Layouts for Login/Registration Page
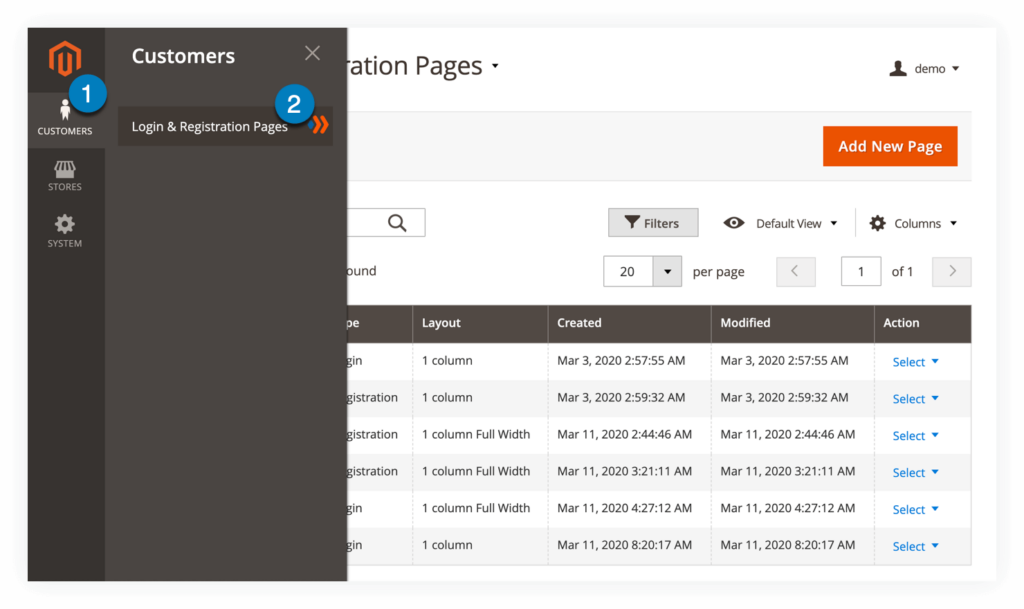
After install Login & Registration Page Builder on your site, navigate to Customers > Login & Registration Pages from the admin panel:
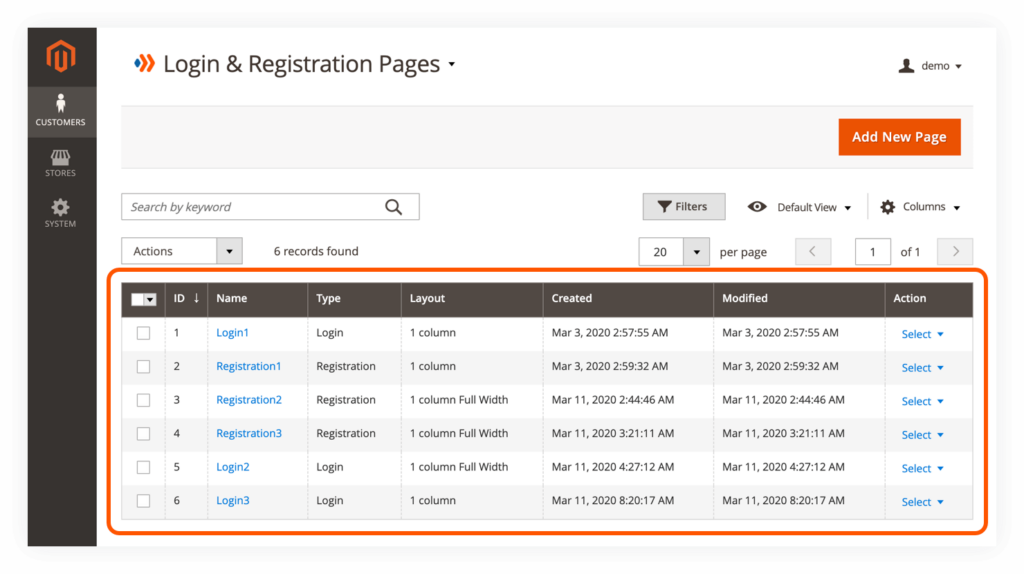
You will access a grid containing all created layouts:
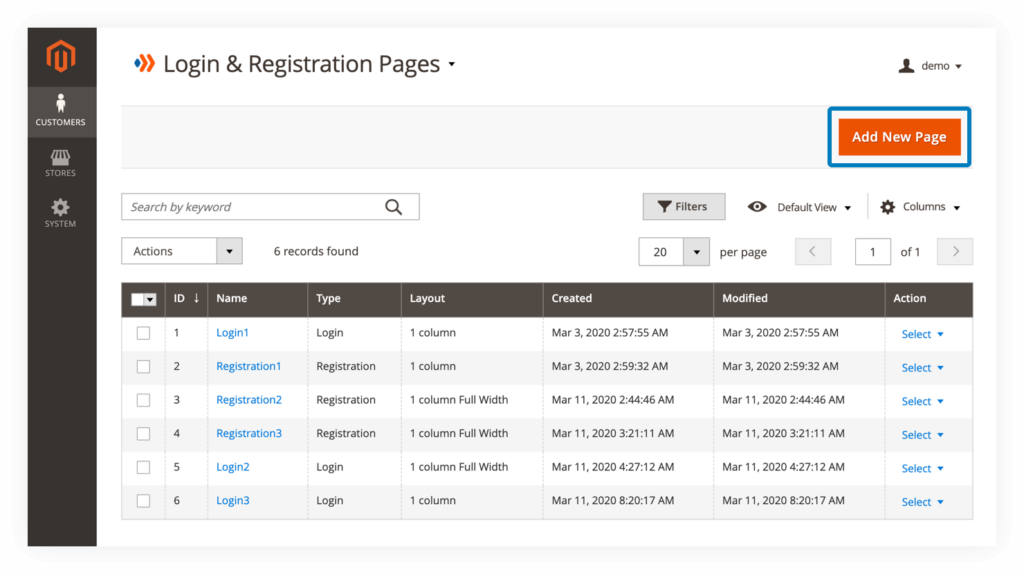
To create a new layout, click on Add New Page button on the top right corner:
The edit page of the new layout will be opened:
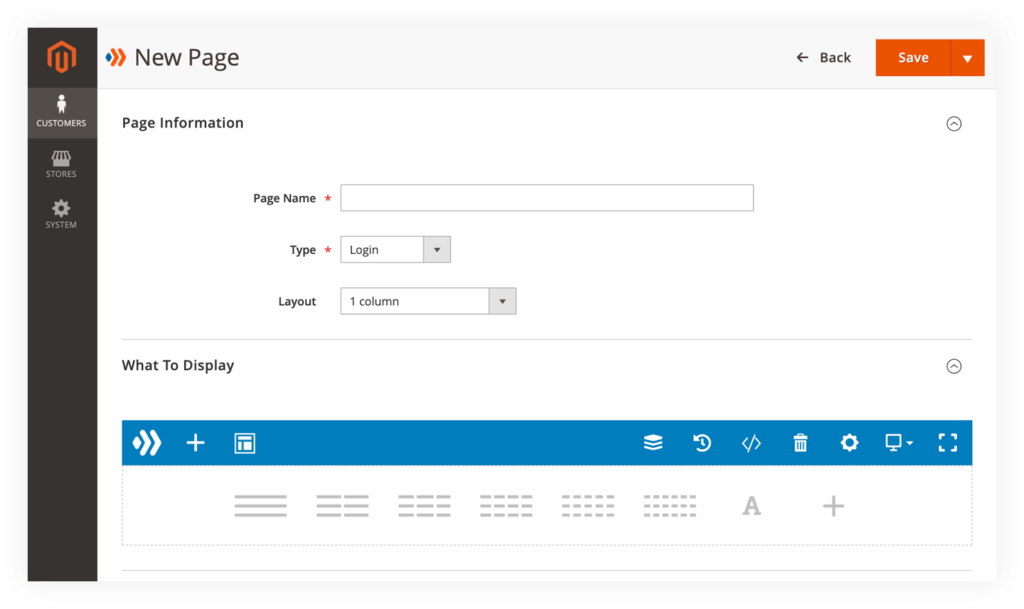
1. Page Information
In this section, you need to customize general information of the layout:
– Page Name: specify the name of the layout.
– Type: set the type to Login or Registration.
– Layout: choose layout type from 6 options:
- Empty
- 1 column
- 2 columns with left bar
- 2 columns with right bar
- 3 columns
- 1 column Full Width (used to create full width content).
2. What To Display
This section is where you create a custom layout for the login/registration page.
2.1 Use Templates
If you don’t know where to start, simply begin with our pre-made templates.
First, click on the template icon on the top bar:

A popup window will appear and give you access to all templates. Currently, there is one template for the login page and one template for the registration page:
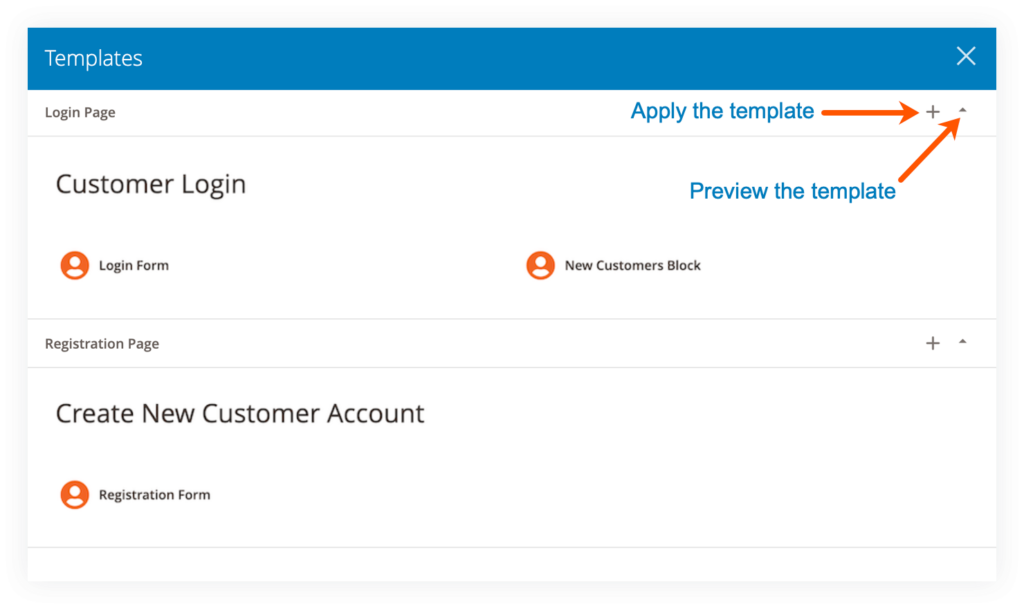
The chosen template will be imported to the builder section. And you can customize it the way you want.
2.2 Build From Scratch
If none of the templates are what you need, simply start to build the layout from scratch.
2.2.1 Add elements
To add an element to the builder section, click the plus icon on the top bar:
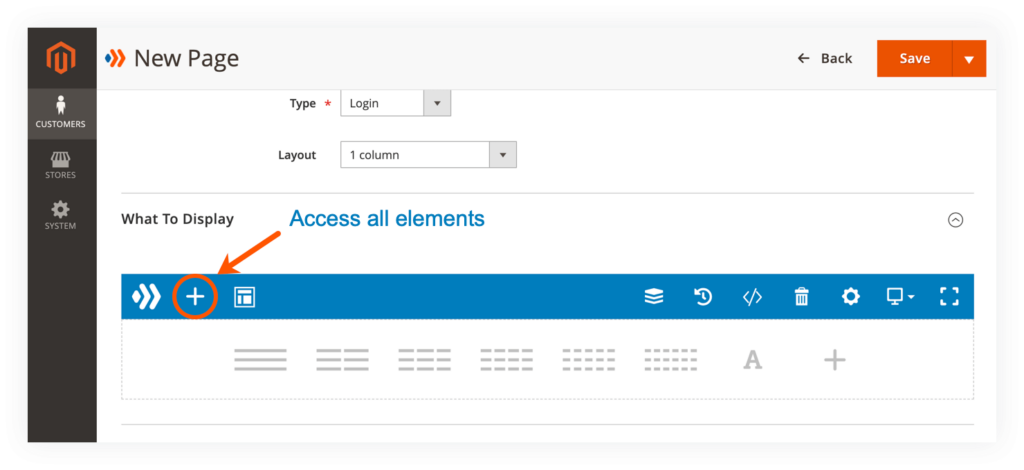
Choose an element from the popup window:
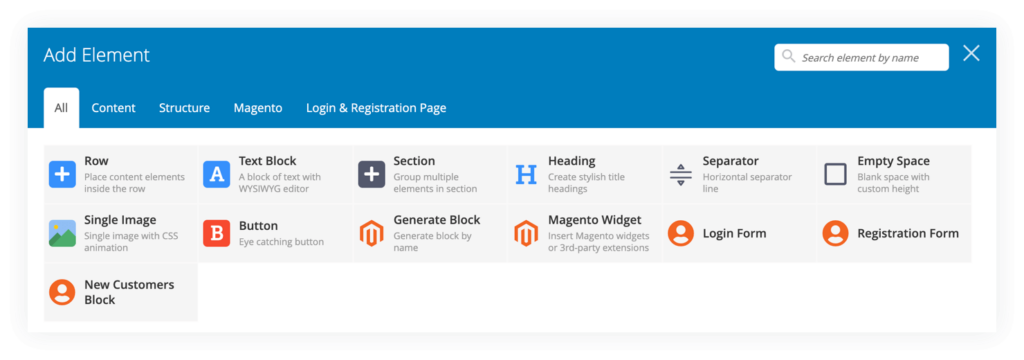
There are 2 types of elements:
– Core elements: belong to Magezon’s Core Builder library. And you can find these elements in every builder extension.
- Row
- Text Block
- Section
- Heading
- Separator
- Empty Space
- Generate Block
- Magento Widget
– Login & Registration Page elements: belong to Login & Registration Page extension only.
- Single Image: used to add image.
- Button: used to add button.
- Login Form: used to display Magento 2 default login form.
- Registration Form: used to display Magento 2 default registration form.
- New Customers Block: used to display New Customers block.
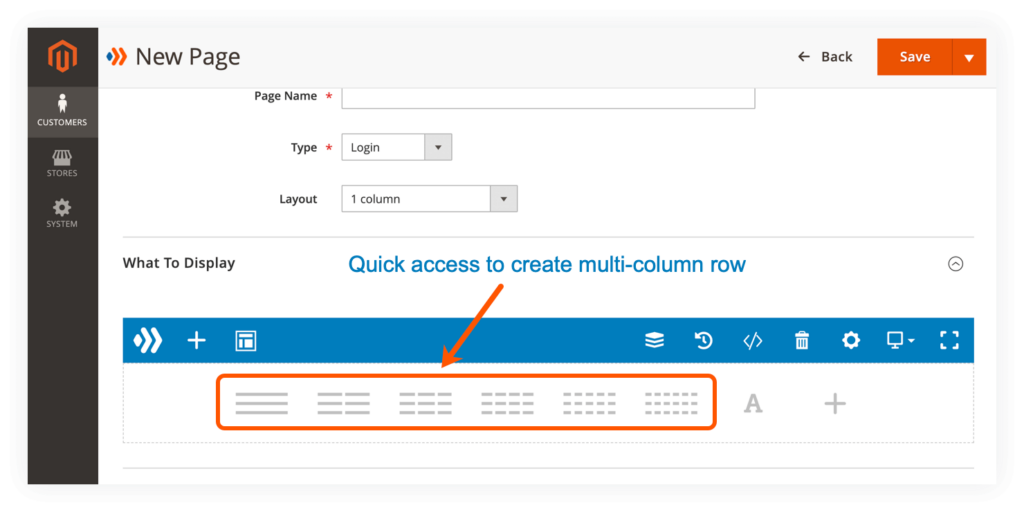
2.2.2 Create multiple columns
To quickly add multiple columns, you can find quick access at the bottom of the builder section:
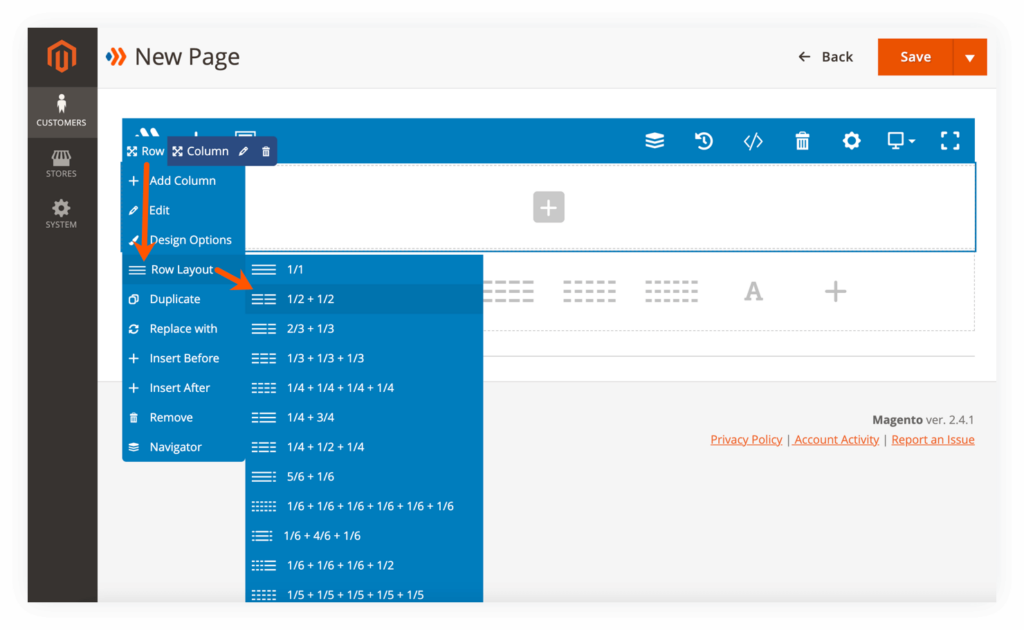
For more options, first add a Row element to the builder section. Then hover over the row: Row > Row Layout and choose your desired layout:
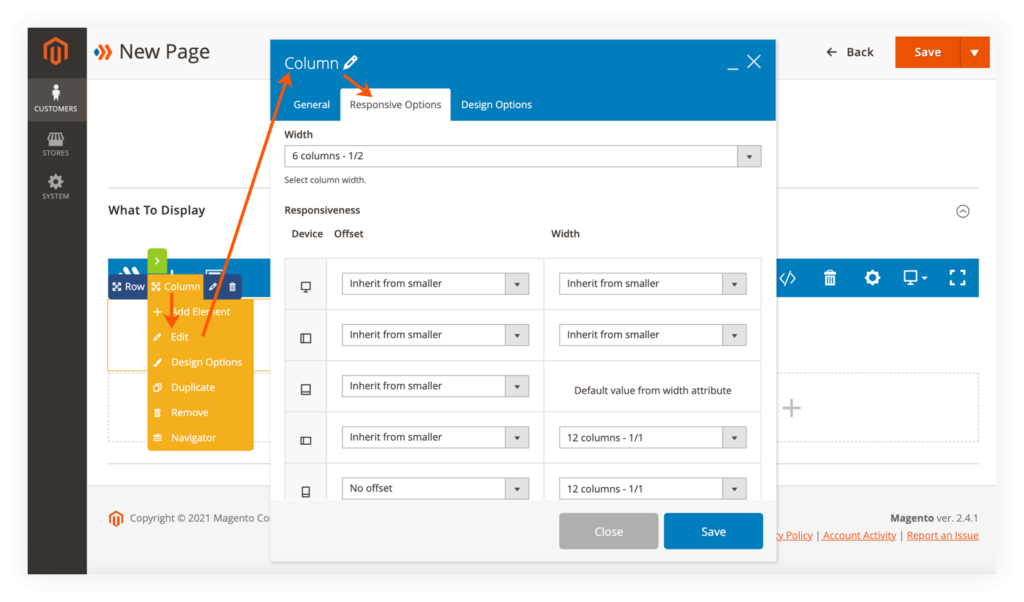
You can hover over Column and click Edit to open the column settings. In the Responsive Options, you can edit column width for different screen sizes. For more details, please visit here.
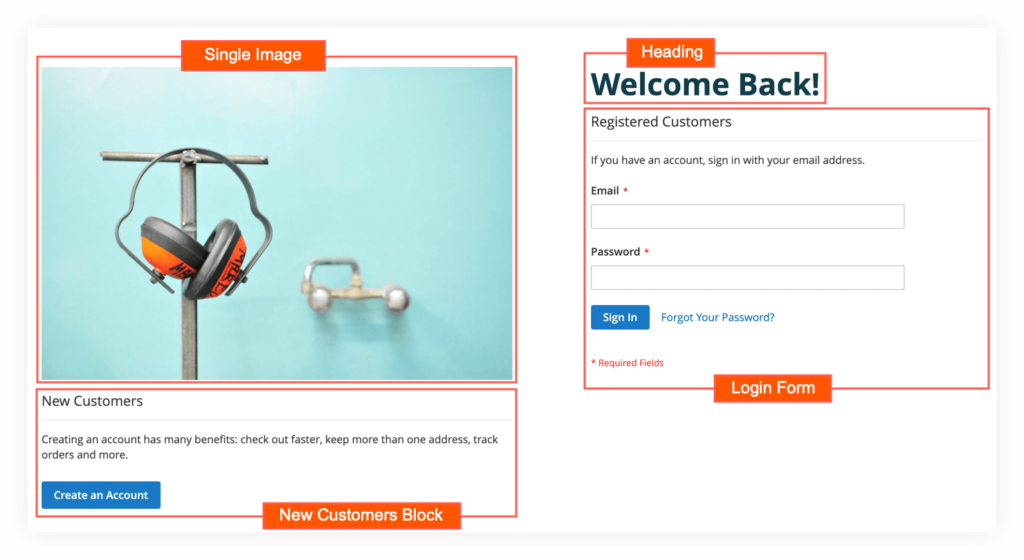
Below is an example layout of login page:

– We set Type to Login and choose 1 column Layout.
– The layout consists of one row with 2 columns:
- The first column contains Single Image and New Customers Block elements.
- The second column contains Heading and Login Form elements.
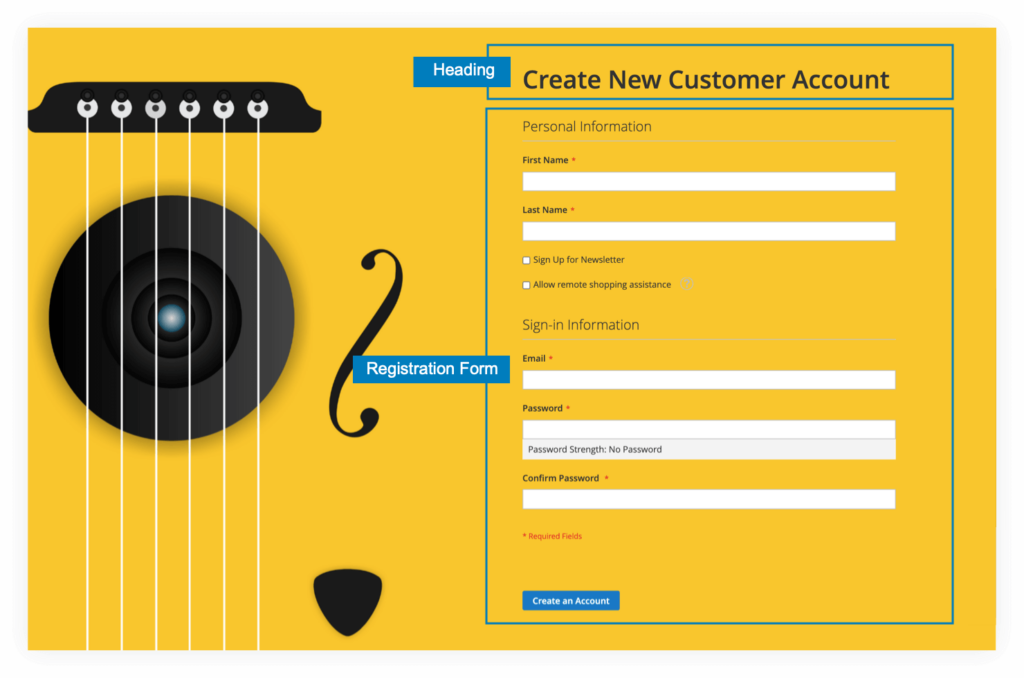
Below is an example layout of registration page:
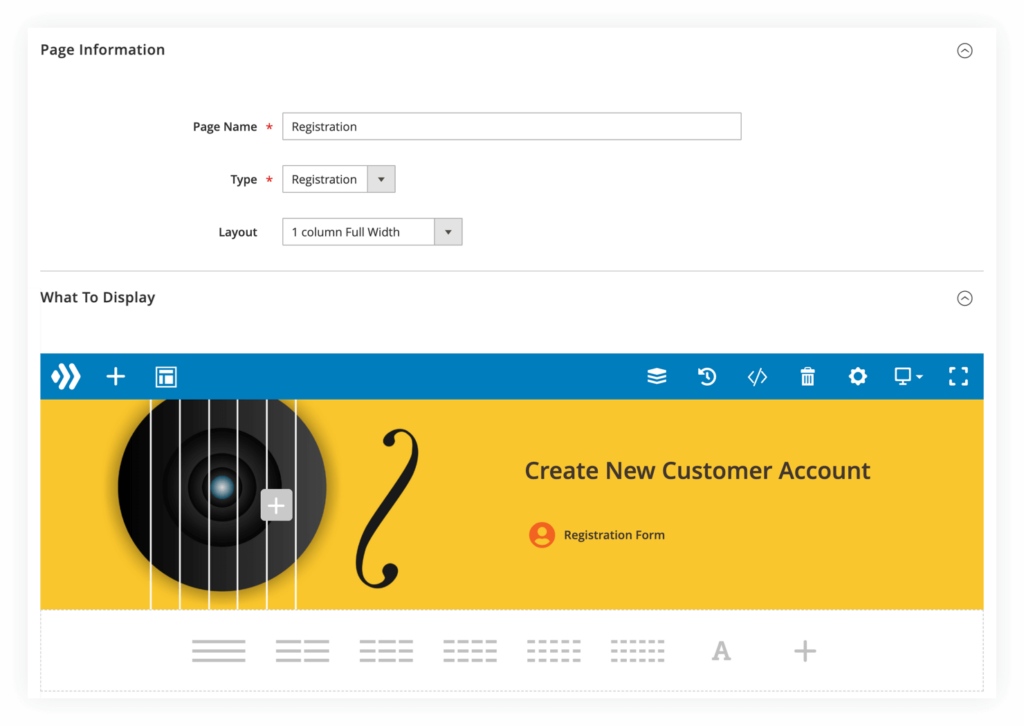
With the registration page, we choose Registration Type and 1 column Full Width Layout.
The layout consists of one row with 2 columns:
– The first column contains nothing. The second column contains Heading and Registration Form elements.
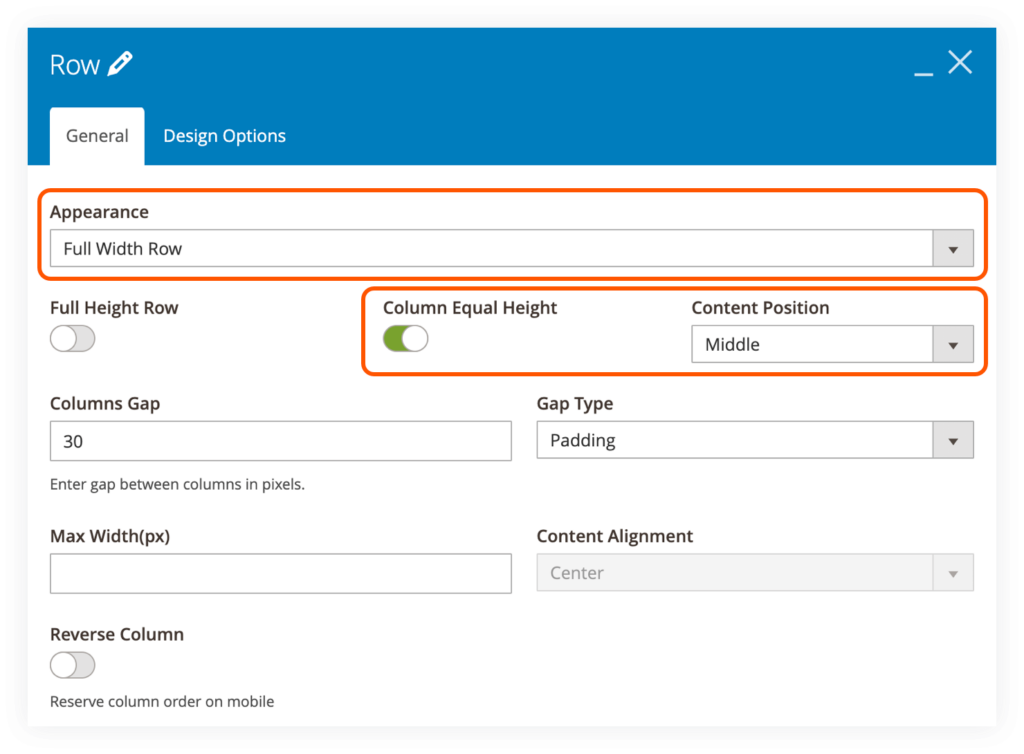
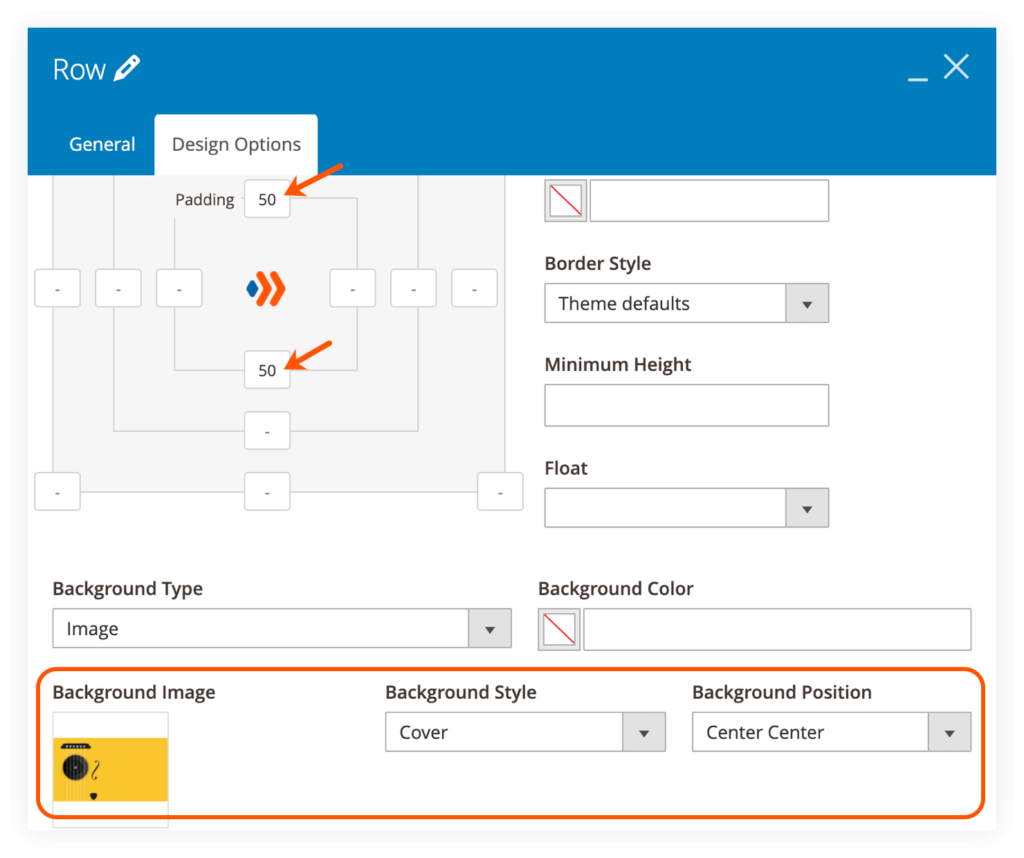
– With the row, we customize the following settings:
- In the General tab, we set Appearance to Full Width Row (Please note that only when combined with 1 column Full Width Layout will your content be full width). The Column Equal Height is turned on so that 2 columns have the equal height. And Content Position is set to Middle so that the content in the second column is centered vertically.
- In the Design Options, we set the top and bottom padding to 50px. We also set the Background Image, Background Style and Background Position.
Step 2: Assign Layout to Login/Registration Page
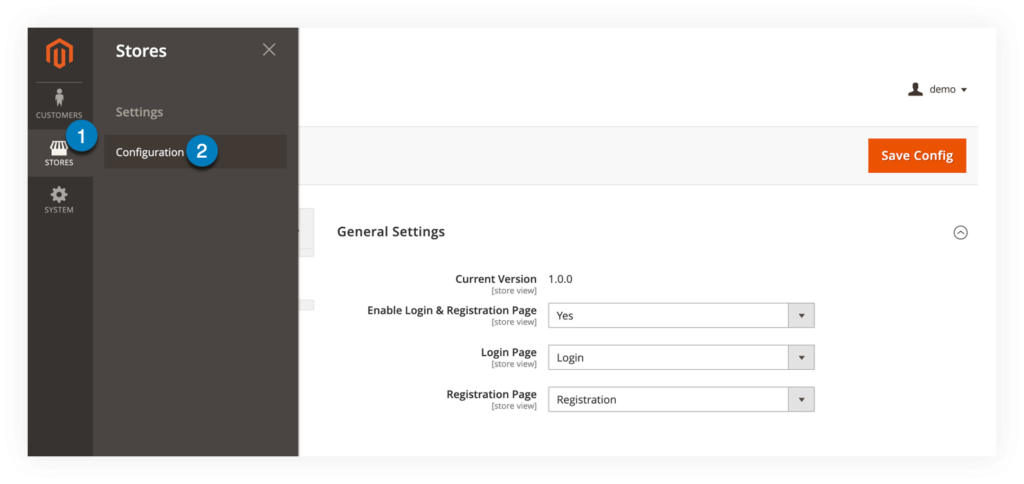
The next step is to apply a specific layout to your login and registration page. To do this, please go to Stores > Settings > Configuration:
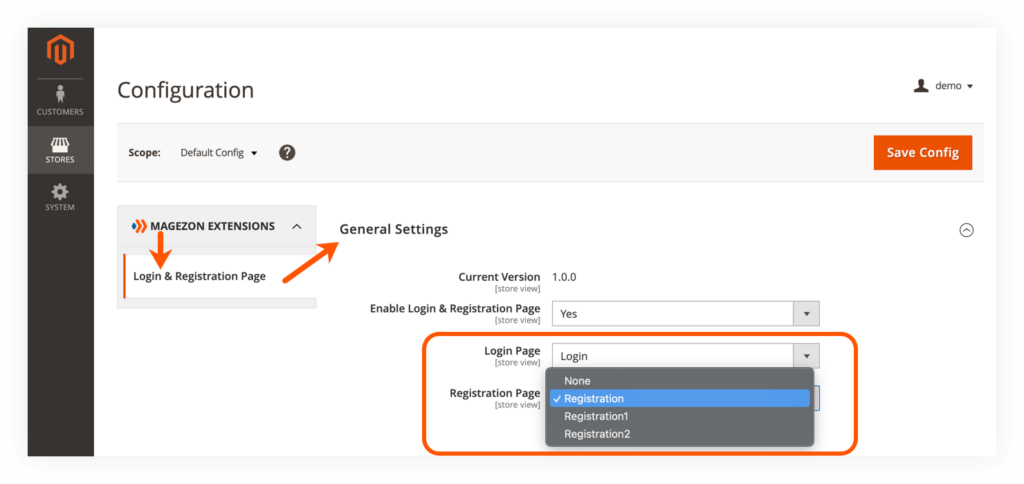
In the left panel, expand MAGEZON EXTENSIONS and click on Login & Registration Page.
After that, select a specific option for Login Page & Registration Page from a drop-down. (All created layouts will be listed in the dropdown of each page type).
In this case, we set the Login Page to Login layout and Registration Page to Registration layout. And here are the 2 pages on the frontend:
- Login Page:
- Registration Page:
| You may also be interested in: 1. The Ultimate Guide to Magezon Page Builder 2. How to Use Magento 2 Category Page Builder 4. How to Create FAQs with Magezon Magento 2 FAQ Extension |
To Sum Up
This post is a step-by-step guide on how to use Magezon Login & Registration Page Builder. If you have any further questions or need any assistance, please feel free to leave us a comment below.

Optimize Your Magento Store With Powerful Extensions
Looking for fast, efficient and well-coded extensions to build or optimize your Magento stores for sales boosting? Then visit Magezon website and grab necessary add-ons for yours today!

