 Magezon Blog Help Merchants Build Comprehensive eCommerce Websites

Updating Magento store information becomes an ever more important aspect. In fact, the store details are the basic information about your business a customer can find. For example, they will know by certain your phone number, your ZIP/Postal code, and when the store is open. This piece of information appears in your transactional document and other ways of communication.
So in today’s blog, we’ll guide you through how to set up Magento store information, locale options, state options, and country options.
Honestly, you might feel complicated at first with so many customizations from the admin panel. So let’s do it step by step!
Table of Contents
I. Set up Magento Store Information
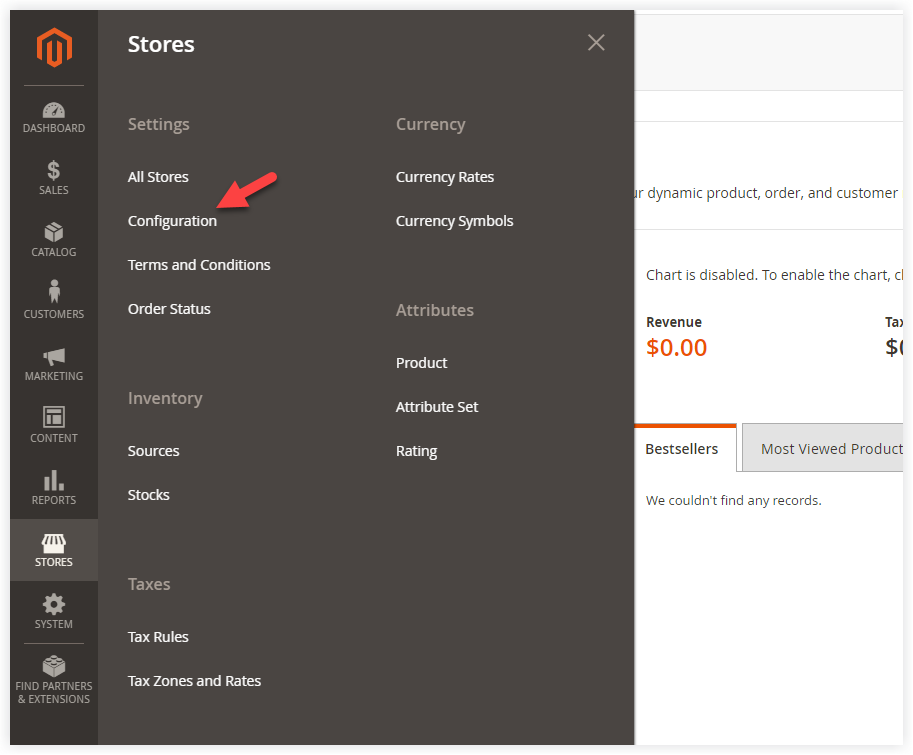
1. Navigate to Store > Settings > Configuration

2. Span General > General
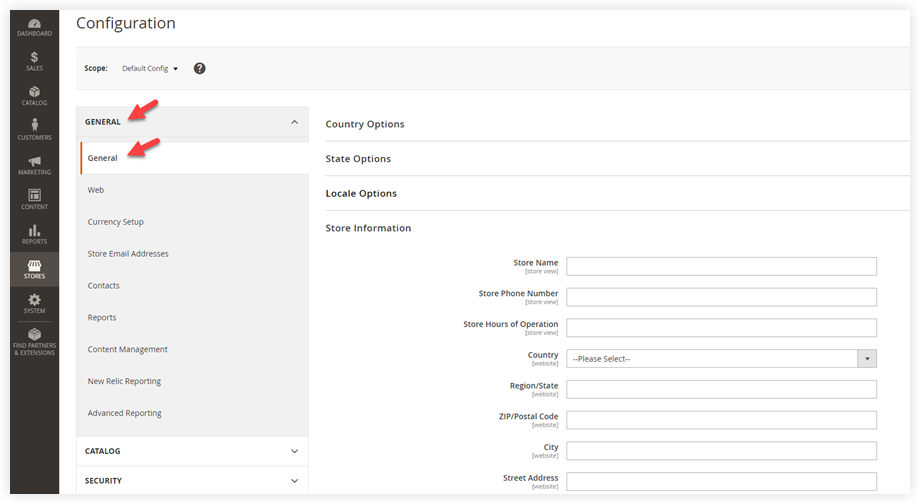
3. Update Your Magento Store Information
After that, span section Store Information and fill in the fields as below instructions:
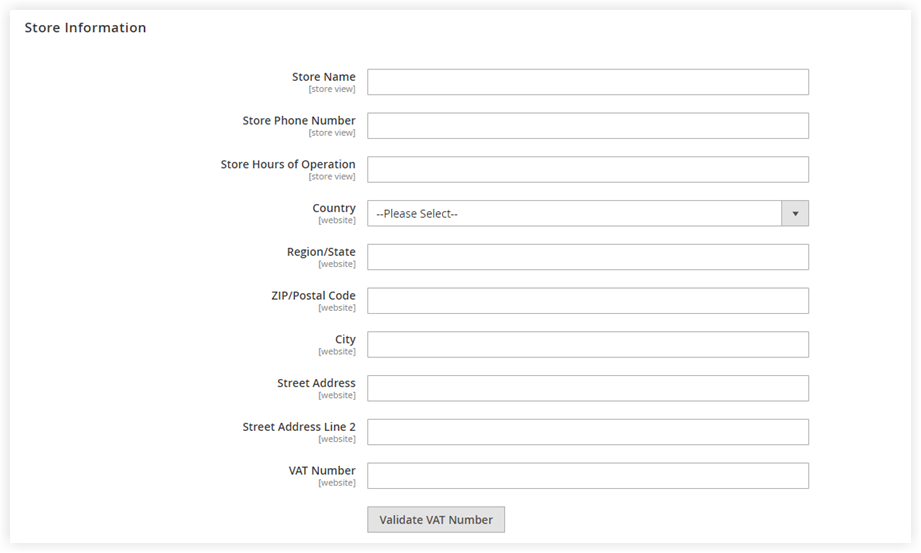
- Store Name: Enter your store name in the given field. This name will appear in your transactional documents, for example, invoices, shipments, and credit memos.
- Store Phone Number: Enter your store phone number. Formatting is not obligatory. You can also fill in multiple phone numbers as well.
- Store Hours of Operation: This field is to provide the visitor information about the hours of operation. For example, Mon – Fri 8-5, Sat 8-4 GMT +7.
- Country: You are selling online. But it’s even better if you have your brick-and-mortar store. Therefore this field is to inform the customers where your store is located. So, browse the list of countries and choose one.
- Region/State: Enter the region/state of your store’s country.
- ZIP/Postal Code: Enter the Zip/Postal code.
- Street Address: Enter your store’s street address.
- Street Address Line 2: If your store’s street address is too long, you can continue filling the address in this field.
- VAT Number: Finally, enter your value-added tax number. You can validate the VAT number from the Magento admin panel.
You’re done! Do not forget to click Save Config.
II. Set up Magento Locale Options
Because Magento is a widely used platform, people today do not just manage and develop Magento stores in the English language but hundreds of others. And the options like Timezone, Weight Unit, and First Day of Week also need custom settings. So this part, we’ll learn to set up the Magento locale options.
1. Navigate to Store > Settings > Configuration

2. Span General > General
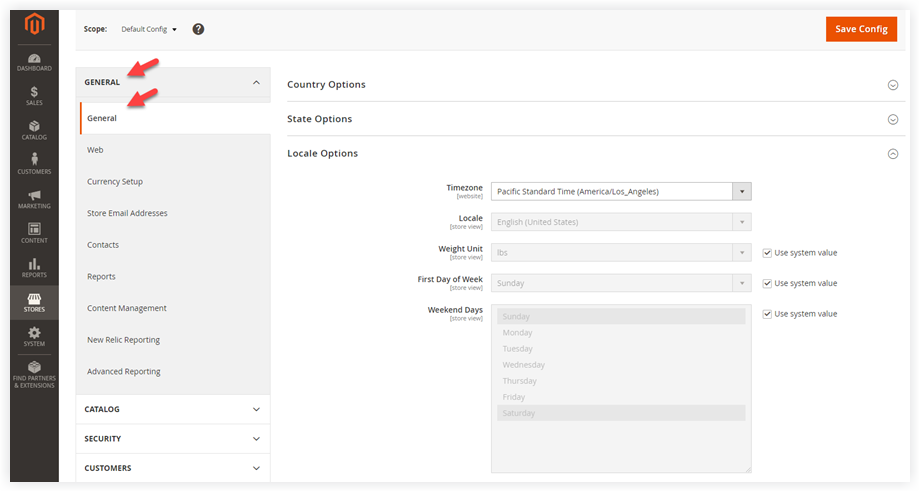
3. Set up the Magento Locale Options
After that, span section Locale Options and fill in the fields as below instructions:

Please untick the checkmark Use system value before making changes.
- Timezone: Pick up an appropriate timezone for your store.
- Locale: Choose your store’s locale.
| Note: If your website is in production mode, the Locale field will be disabled. You have to switch to default or developer mode to continue configuring. To do that, please follow the steps: – Run the command line: php bin/magento deploy:mode:set default to switch to default mode. Or Run the command line: php bin/magento deploy:mode:set developer to switch to developer mode. – You are now in default/developer mode. Go to Store >> Settings >> Configuration. Then span General >> General >> Locale Options. The locale field is enabled, and you can pick multiple locales. Finally, you can find and choose the locale for your store. – After that, do not forget to click Save Config. – To switch to the production mode: run: bin/magento deploy:mode:set production |
- Weight Unit: The system value provides you with two options: pounds and kilograms. That is to say, this weight unit will be applied throughout the store and in any shipping-related details.
- First Day of Week: Pick up the first working day of the week for your store.
- Weekend Days: Finally, pick up the weekend days of your store.
After that, click Save Config.

Optimize Your Magento Store With Powerful Extensions
Looking for fast, efficient and well-coded extensions to build or optimize your Magento stores for sales boosting? Then visit Magezon website and grab necessary add-ons for yours today!
III. Set up Magento State Options
Updating state information serves your store shipping and billing purposes. And this process is optional. In some countries, states may not be applicable, so you can safely ignore this section.
1. Go to Store > Settings > Configuration
2. Span General > General
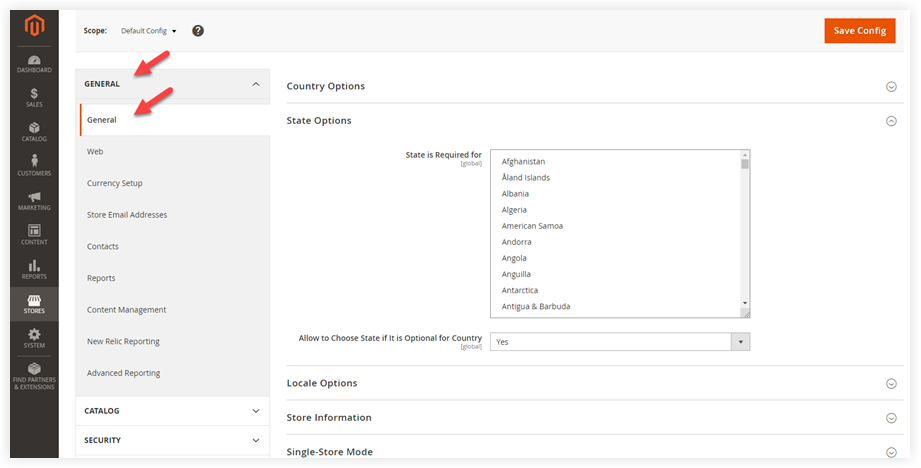
3. Set up Magento State Options
After that, span section State Options and fill in the fields as below instructions:
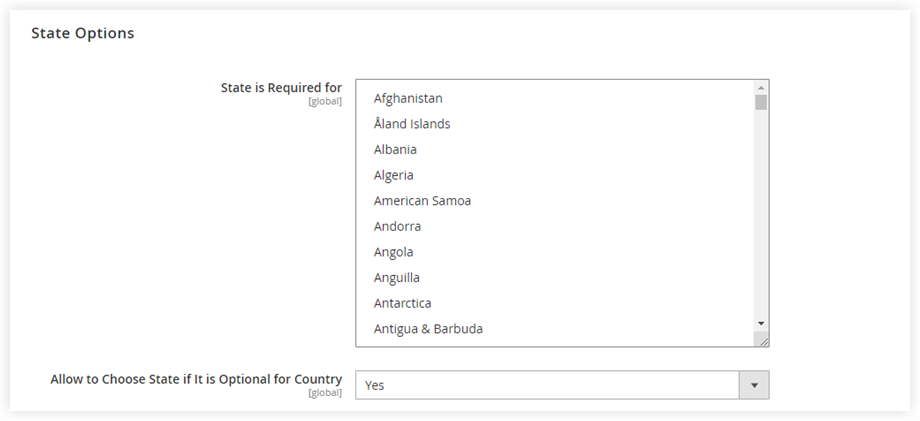
- State is Require for: Select countries in which the state option is required.
- Allow to Choose State if it is Optional for Country: If you choose Yes, in countries where the state field is not obligatory, the system will include the state field as an optional entry. On the other hand, if the option is No, the system will omit the state field in countries where the state field is not obligatory.
IV. Set up Magento Country Options
We’ll move to the last part: set up Magento country options. These settings allow you to define the country where your store is located and where you accept payments.
1. Go to Store > Settings > Configuration

2. Span General > General
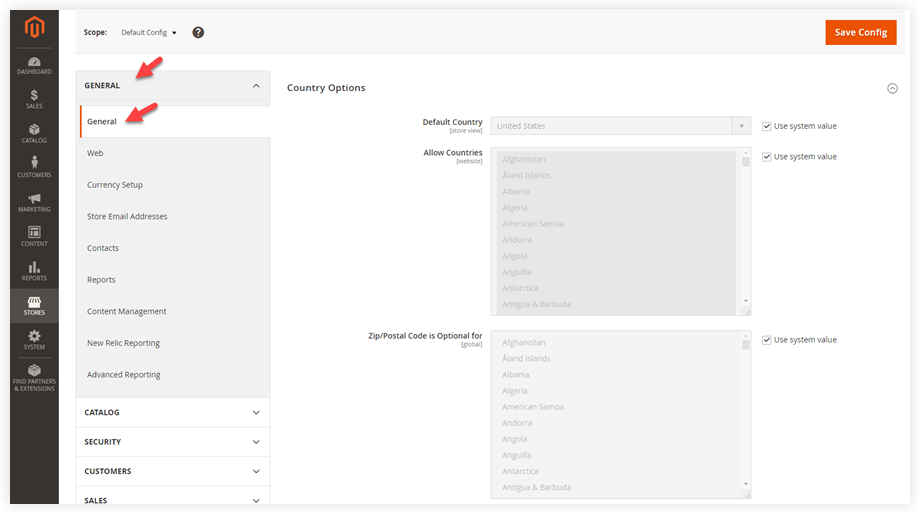
3. Set up Magento Country Options
After that, span section Country Options and fill in the fields as below instructions:
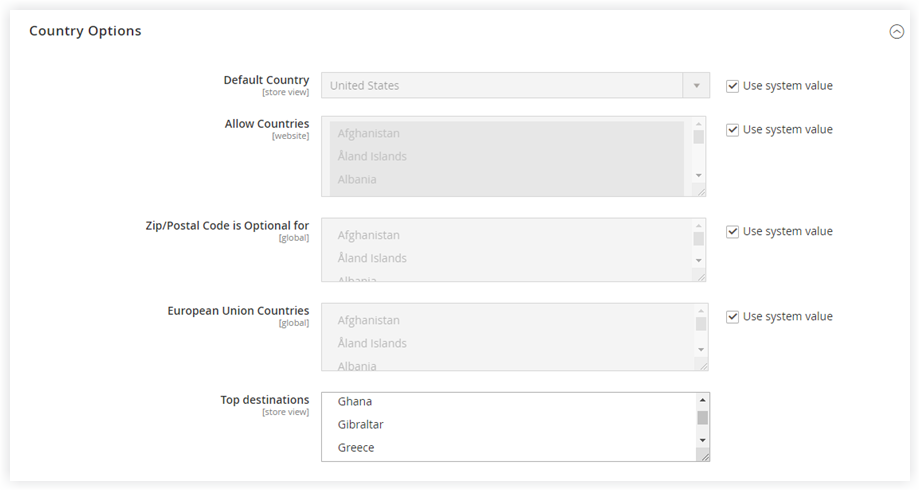
Please untick the checkmark Use system value before making any changes.
- Default Country: This field is to identify the country where your store is located.
- Allow Countries: Select countries you accept orders. If you do nothing, the default system will choose all countries in the list.
- ZIP/Postal Code is Optional for: Choose countries where ZIP/postal code is not required.
- European Union Countries: If you conduct your business in European Union, choose your countries in this list. By default, the system will select all countries.
- Top destination: Finally, pick up the countries where you target for sales.
Make Your Business Take Flight With Magento 2 Extensions From Magezon
To sum up, I hope you took a firm grasp of how to set up store information in Magento 2. In addition to this, there are still many other areas of improvement a Magento 2 store owner should consider. Besides, do not forget to leave some questions in the comment field below or contact us via [email protected].
Visit our website to see the affordable and best-in-class Magento 2 extensions. Check it below!
Optimize Your Magento Store With Powerful Extensions
Looking for fast, efficient and well-coded extensions to build or optimize your Magento stores for sales boosting? Then visit Magezon website and grab necessary add-ons for yours today!
