 Magezon Blog Help Merchants Build Comprehensive eCommerce Websites

It may take a day to talk about all the predominant features of Magento, making the platform a leading competitor among thousands of eCommerce websites. And it would be such a big mistake if we do not mention the Magento 2 multiple websites, stores, and store views feature that helps store owners set up and manage their online businesses. For example, for those who are running worldwide stores, it’s kind of a tricky balancing act if their websites do not support multiple store views to customize a few aspects (the language, currencies, etc.) for local visitors.
This blog will explore how to create store views in Magento 2 from the admin panel. So keep reading, and we’ll walk through the steps right below!
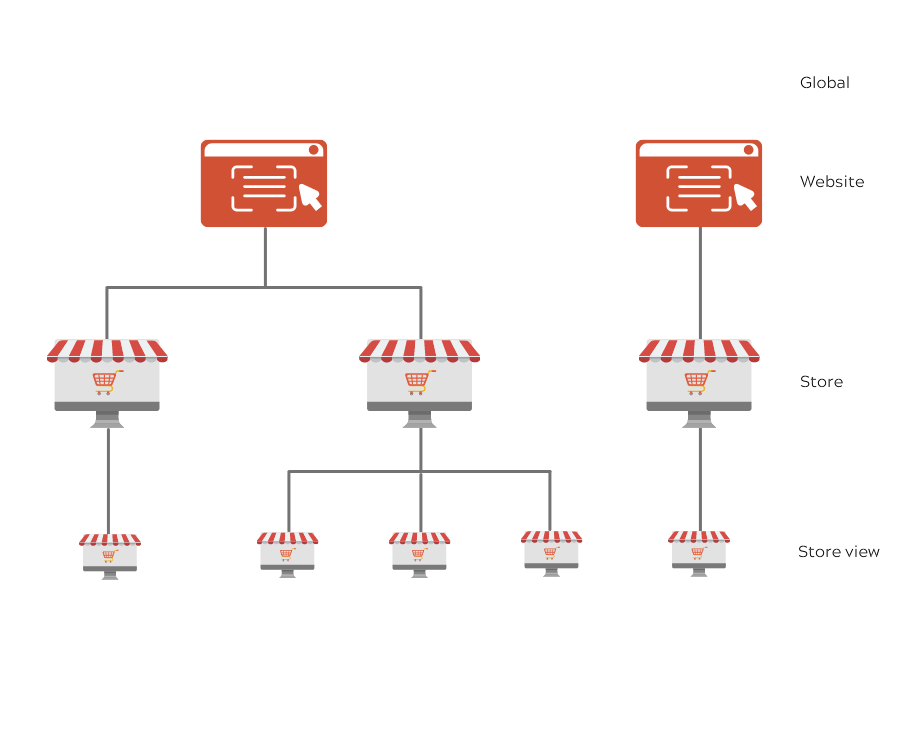
Table of contents
How to Create Store Views in Magento 2
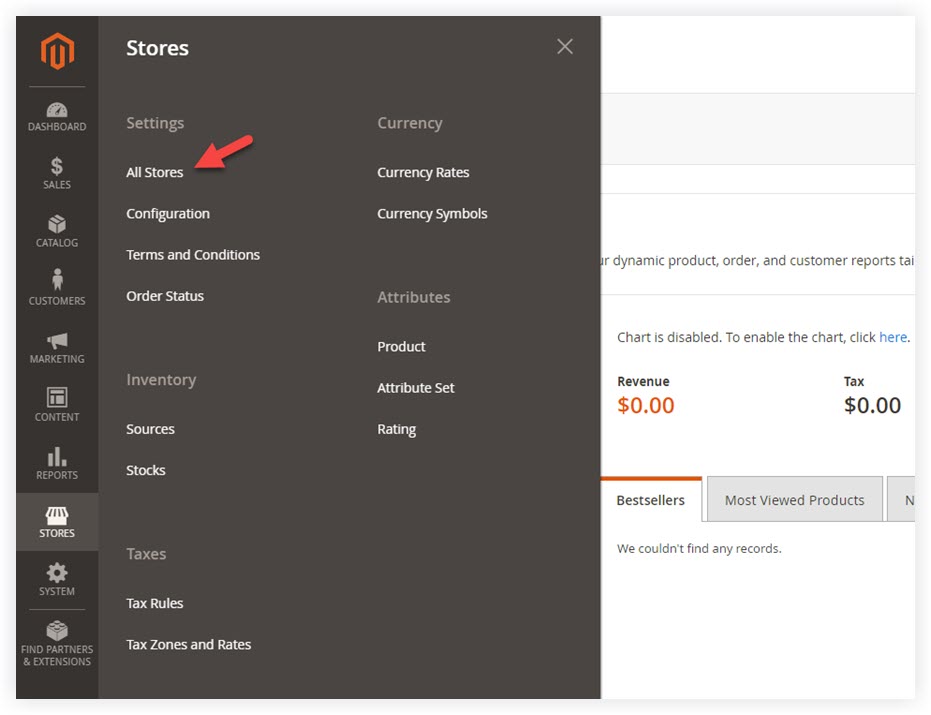
Step 1: Navigate to Store > Settings > All Stores
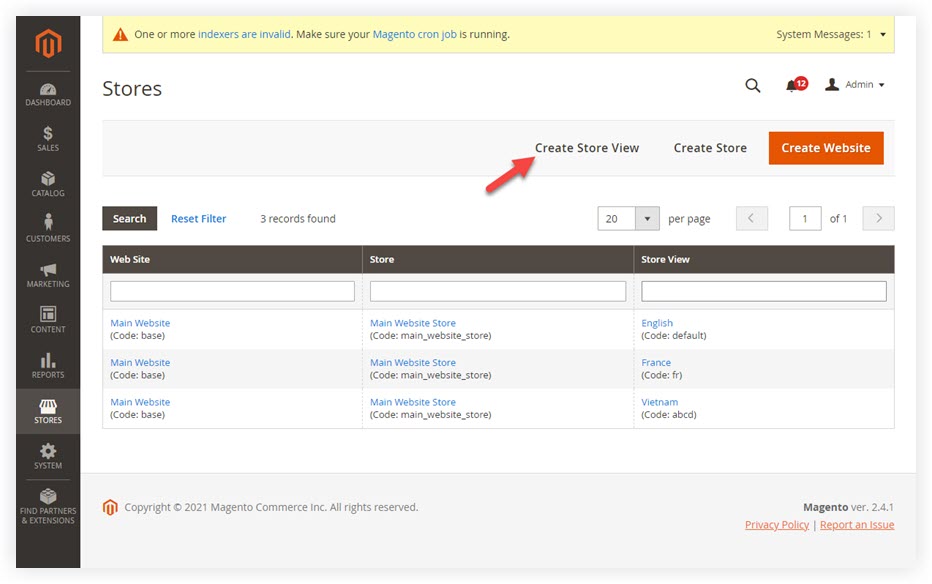
Step 2: Create a Store View
You’ll be redirected to the store settings page. Click Create Store View to add a new store view:
Step 3: Update the New Store View Information
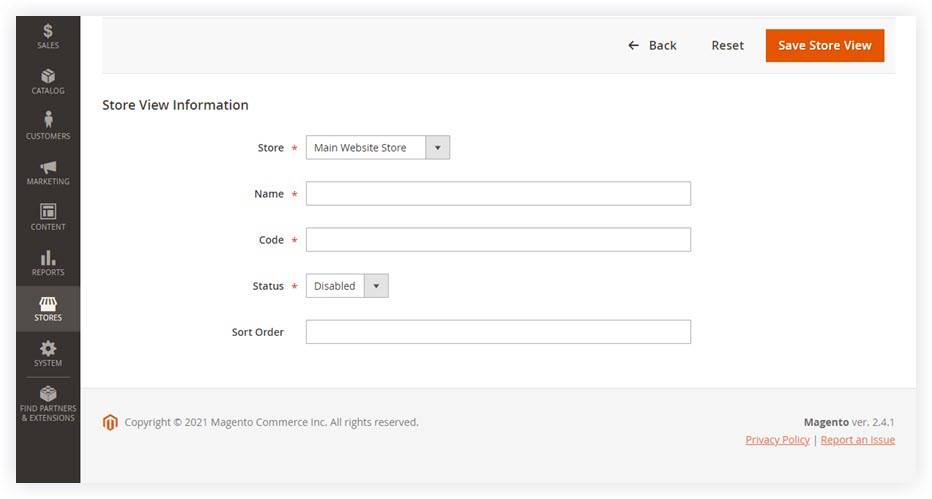
- Store: Choose the parent store of your new store view.
- Name: Enter the name of your new store view. The name will be displayed in the language switcher located in the header of your store.
- Code: This section is to help you distinguish the store view from the others. You should enter the code in the lowercase character. For example, my new store view is English. So I’ll enter English in this field.
- Status: Set the status of your store view, either enabled or disabled.
- Sort Order: This field is not obligatory. The purpose is to rule the order number of your store view when listed with other store views.
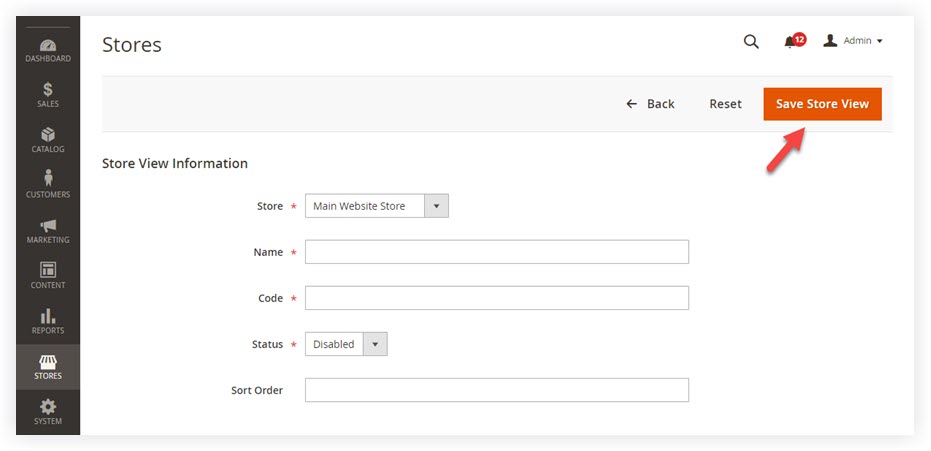
Step 4: Save Store View
After that, click Save Store View to save your current settings:
| Related articles: How to Change Default Store View in Magento How to Set up Magento 2 Single Store Mode Magento 2 Scope Config: A Complete Guide Magento 2 Demo Store Notice: A Detailed Guide |
Final Words
Just in a minute, you can now create a new store view for your website yourself with ease. Still, confused about Magento 2 store? Take a look at other blogs, and you may find something helpful. Other than that, you can visit our Magento 2 tutorial series to grasp basic knowledge about setting up and managing your online business without the help of coders.
Looking for fast, efficient, yet affordable extensions to optimize your Magento store? Then, visit the Magezon extension website to pick your desired one!

Optimize Your Magento Store With Powerful Extensions!
Looking for fast, efficient, and well-coded extensions to build or optimize your Magento stores for sales-boosting? Then visit the Magezon website and grab the necessary add-ons for yours today!

