 Magezon Blog Help Merchants Build Comprehensive eCommerce Websites

In the Popup Builder Tutorial series, you’ve learned the way to build some kind of popup such as countdown popup, newsletter form popup, etc…. So, for this article, we’ll show you a detailed instruction on building another popup called Exit intent with Magezon Popup Builder. Are you ready to see how to create an exit intent popup? Let’s get started.
Table of contents
I. What is Exit Intent Popup?
Exit intent popup displays when visitor’s cursors move outside the page boundary. In other words, it is usually used to grab customers’ attention with your final message.
II. Benefits of Exit Intent Popup?
- First, it’s a great way to reduce shopping cart abandonment rate. According to different studies, the average abandonment rate is over 68%. To recover this issue, showing exit intent popup with an interesting offer such as a discount or free shipping may be a great idea. Because it reminds customers that they can buy products with affordable prices or get other great deals.
- Second, this popup also helps to increase customer email lists. Almost all popups require customers to sign in to get a discount or coupon. Therefore, it’s easy to collect their emails and build loyal customer lists.
III. How to Create Exit Intent Popup Using Magezon Popup Builder
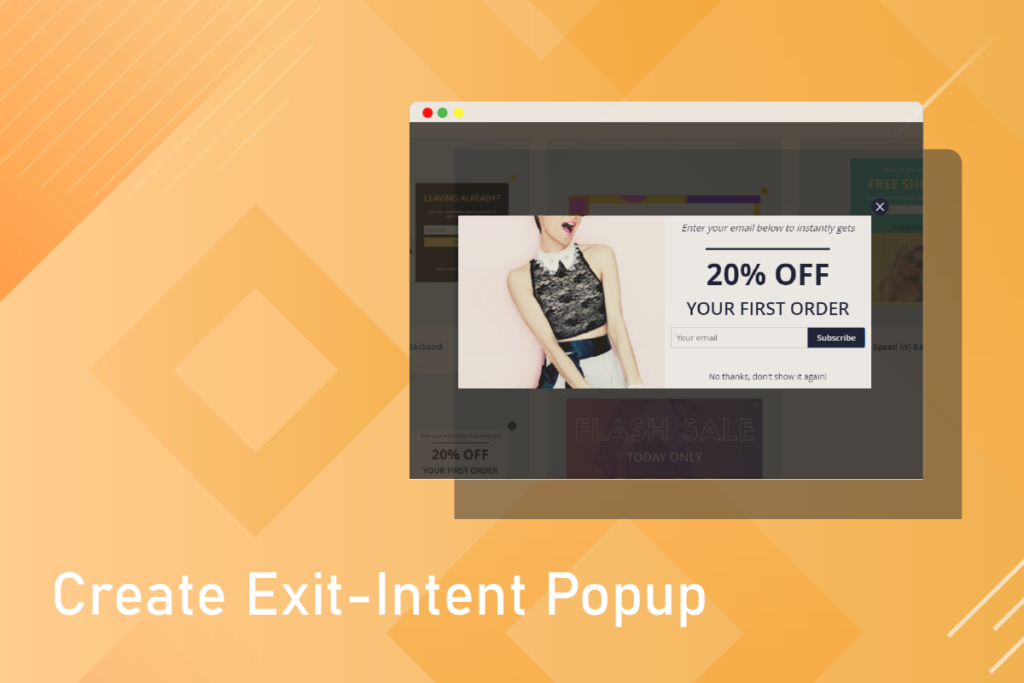
This is the exit intent popup we’ll build in this tutorial:
And here’s how to do it!
1. Create exit intent popup from scratch
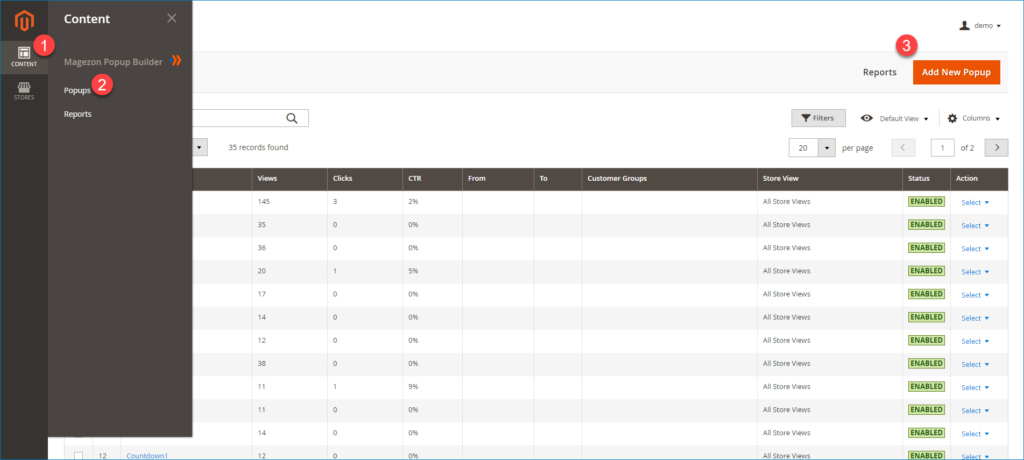
Step 1: First, navigate to Content >> Popups >> Add New Popup
Step 2: Go to configure general information for new popup
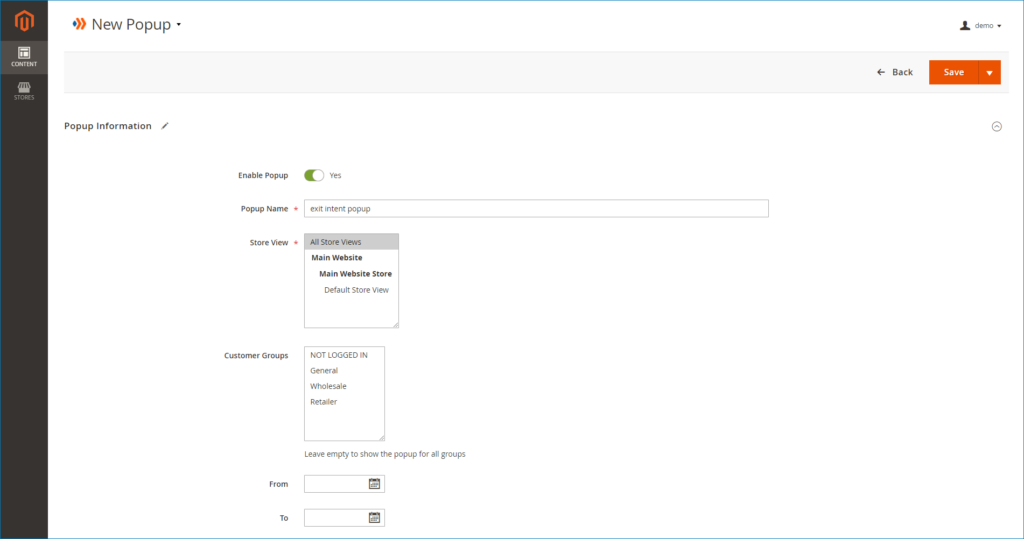
- Enable Popup: Turn on button to enable the popup
- Popup Name: Enter a relevant name for the popup
- Store View: Choose a specific store view to display the popup
- Customer Groups: Select certain customer groups who can see the popup
- From – To: Set active time for the popup
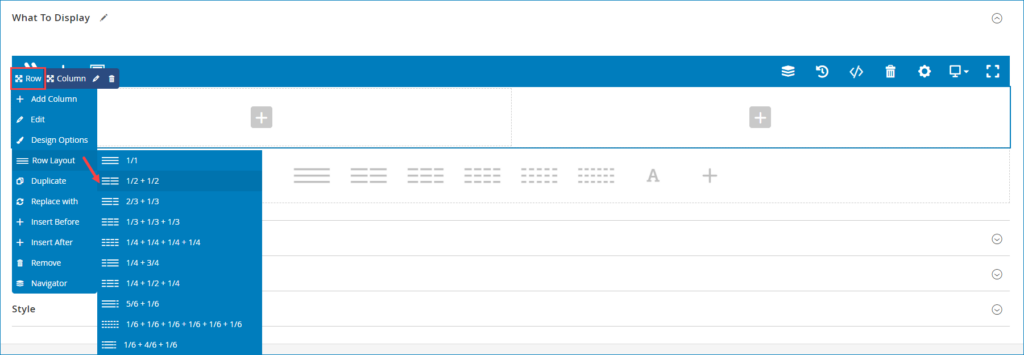
Step 3: Move to expand the What To Display section to start creating popup.
First, add a Row then divide it into 2 Columns like this:
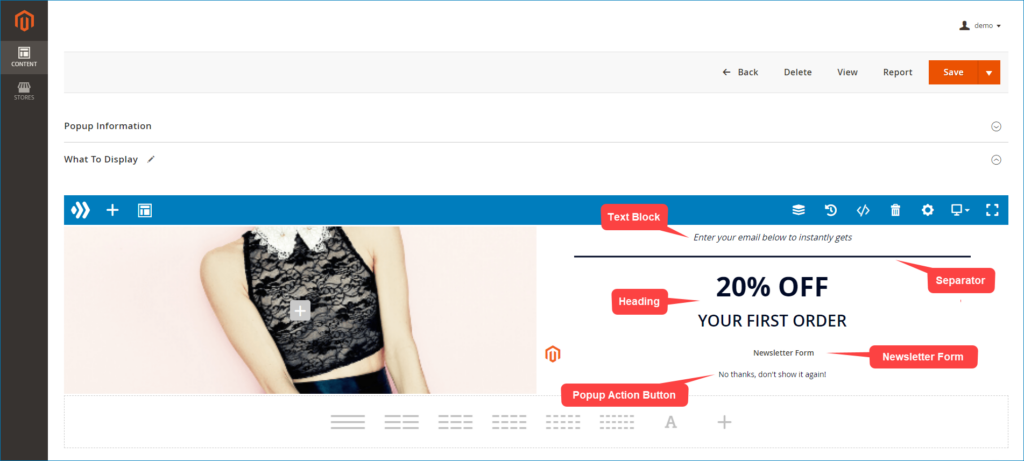
Next, edit the left column. Open the Design Options tab and add a background image for this column.
Set Background Style and Background Position as the image below :
NOTE: There’re lots of other options for you to choose in case you don’t want to set like this example.

Now, we move to edit the right column. In this column, add and edit the Text Block, Heading, Newsletter Form, Separator, and Popup Action Button element to create popup’s message as the following image.
The main color of popup’s message we use in this example is #010a26
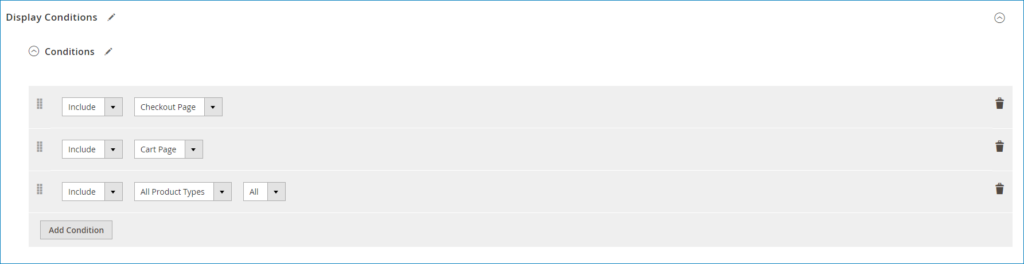
Step 4: Going to set Display Conditions for the popup
There are 3 main conditions to set:
- Conditions: Determine where the popup will display. You can add Include or Exclude condition to Show or Hide popup on specific page. Further, Magezon Popup Builder allows you to set multiple conditions at once.
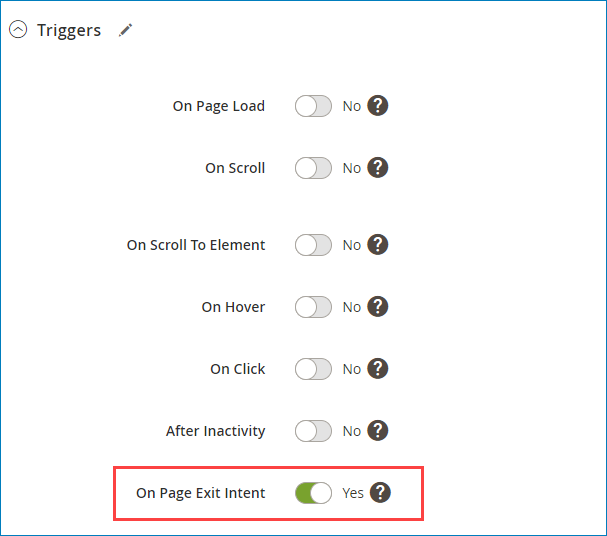
- Triggers: This is the most important thing you need to do when creating exit intent popup. In this section, turn on the On Page Exit Intent option. It means that when visitor’s cursors tend to leave your site, this exit intent will display on the pages you’ve chosen above.
- For example, in the Conditions section, you select the Cart Page where the popup will display. When a customer adds items to their cart but they don’t go to the checkout step and tends to leave your site. This exit intent popup will display and show them your interesting offer to motivate them making the purchase.
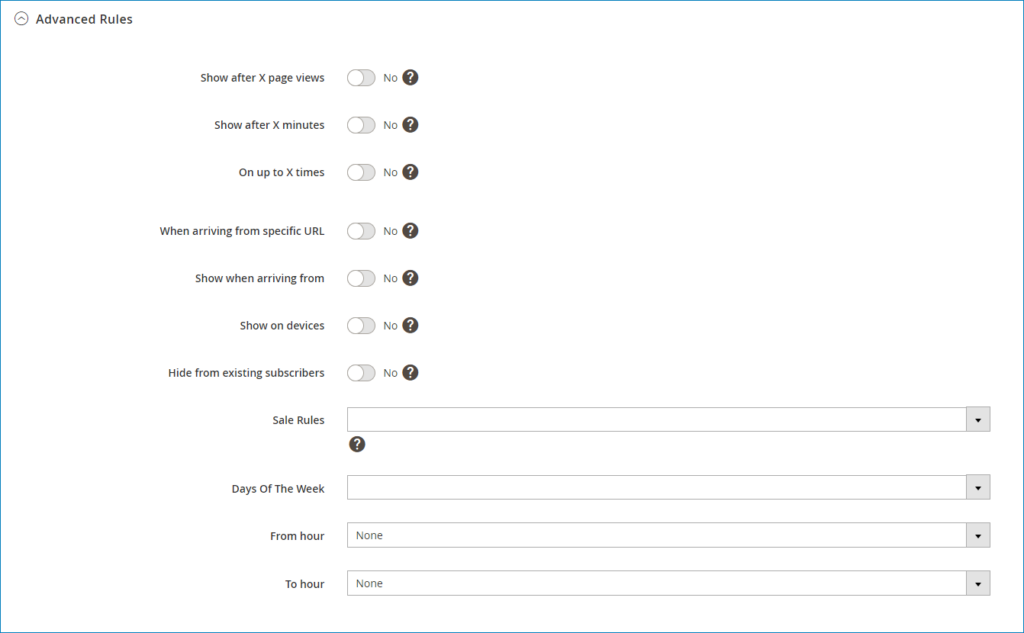
- Advanced Rules: This section includes other requirements that must be met to display the popup. For this example, we’ll not configure this section. If you want to use it, you can read the User Guide to know how it works.
Step 5: Move to expand the Advanced section and configure other custom options for the popup.
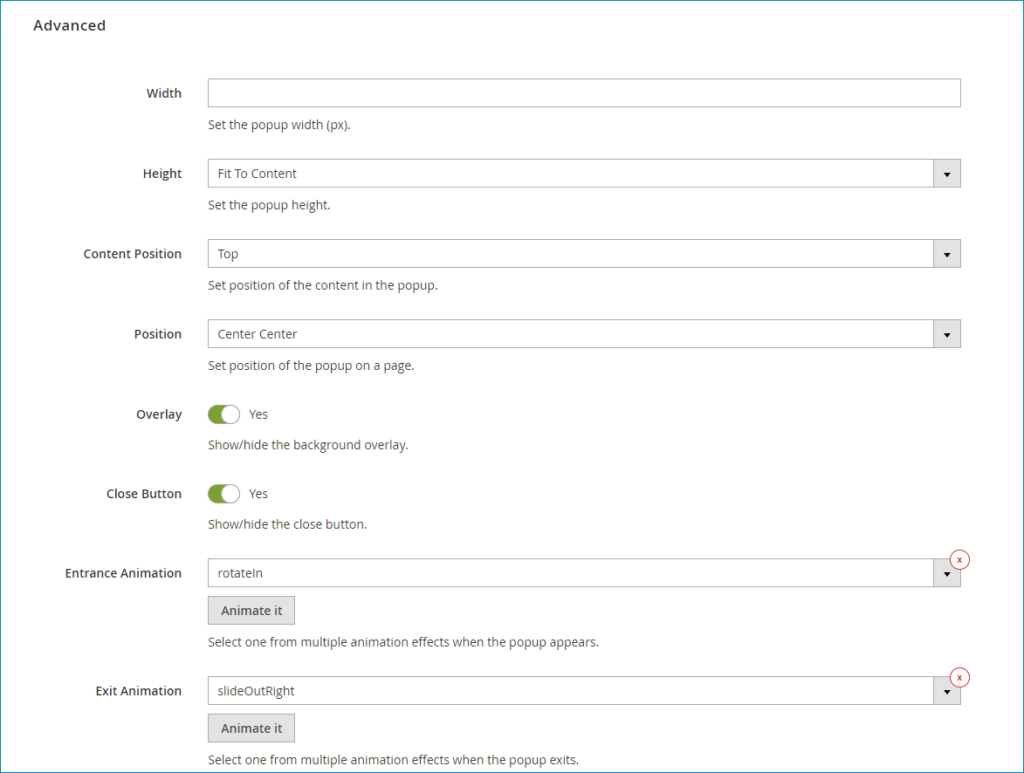
- Width: Set the width for popup. In this example, we’ll not set it.
- Height: Set the height of popup as Fit To Content
- Content Position: Set position of the content in the popup as Top
- Position: Set position of popup on the page. In this example, we choose the Center Center position.
- Overlay: Turn on this button to display the overlay background of the popup.
- Close Button: Enable this option to show popup’s close button.
- Animation: You can choose your desired Entrance Animation and Exit Animation for popup to make it more attractive when displayed.
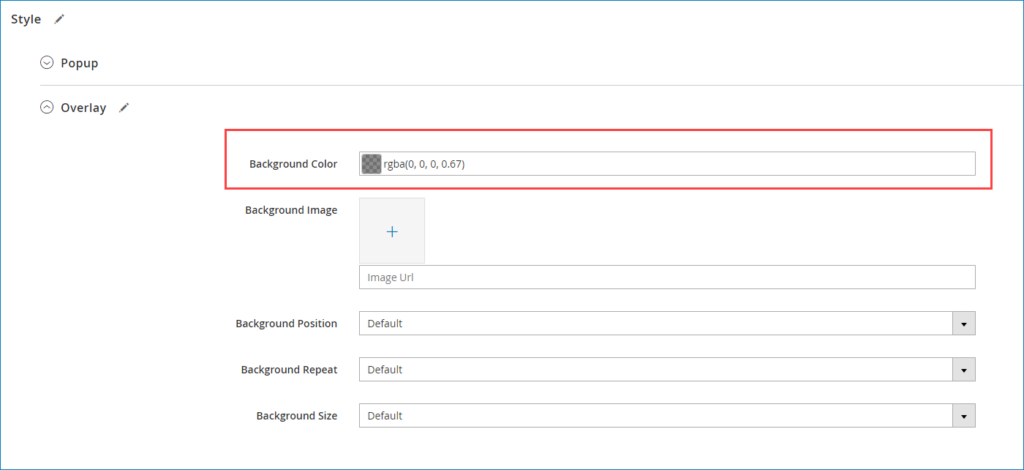
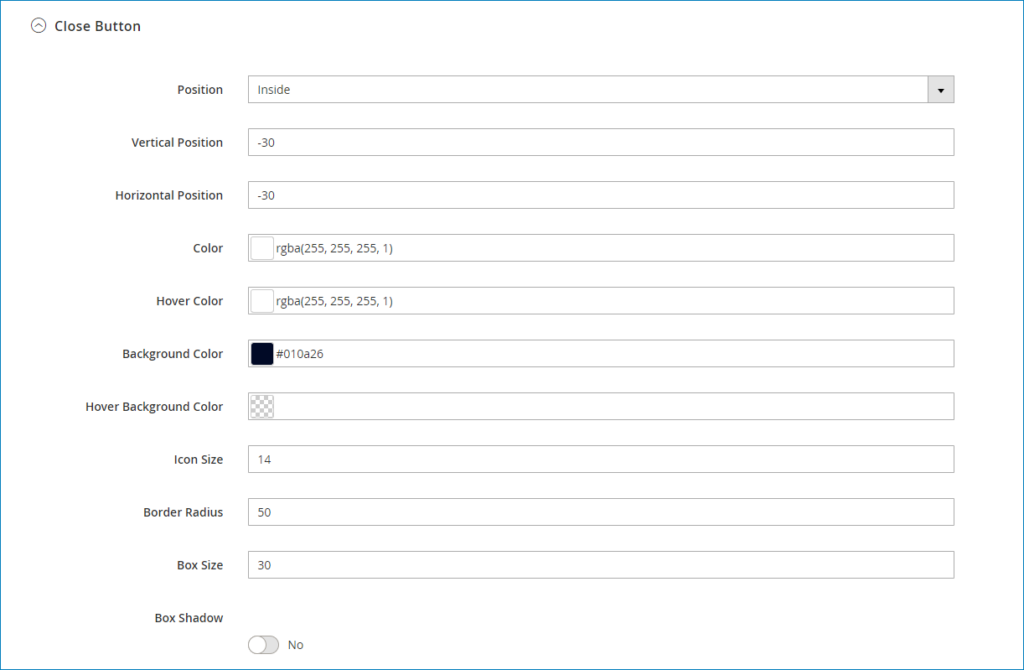
Step 6: Go to customize Overlay Background and Close Button of popup in the Style section.
- Overlay: Set color for overlay background
- Close Button: Customize popup’s close button as the below image:
Then go to Save the popup.
That’s all for creating exit intent popup with Magezon Popup Builder.
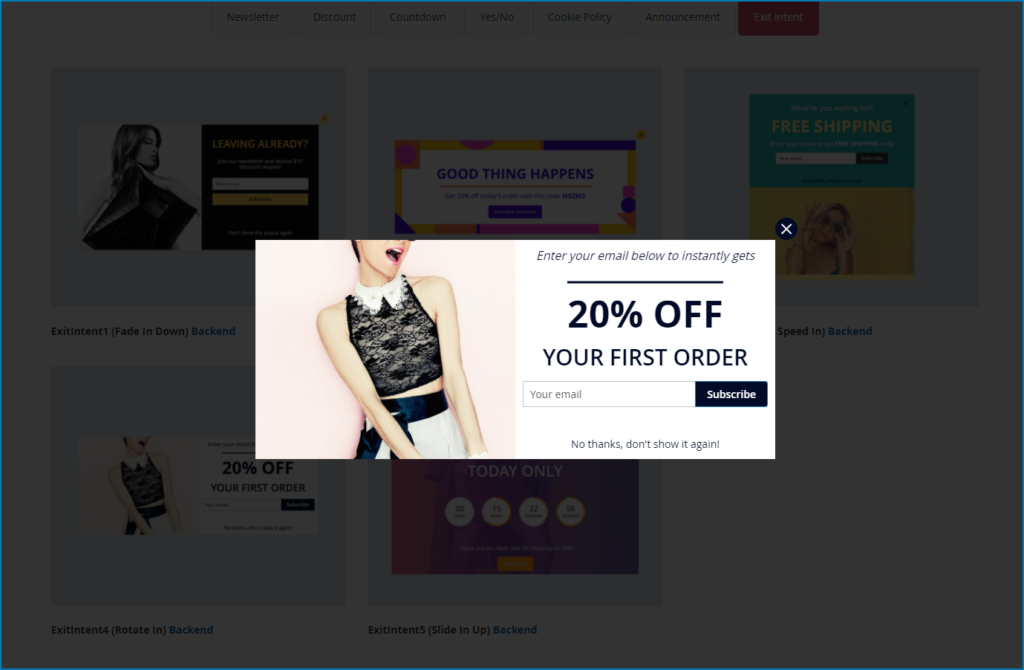
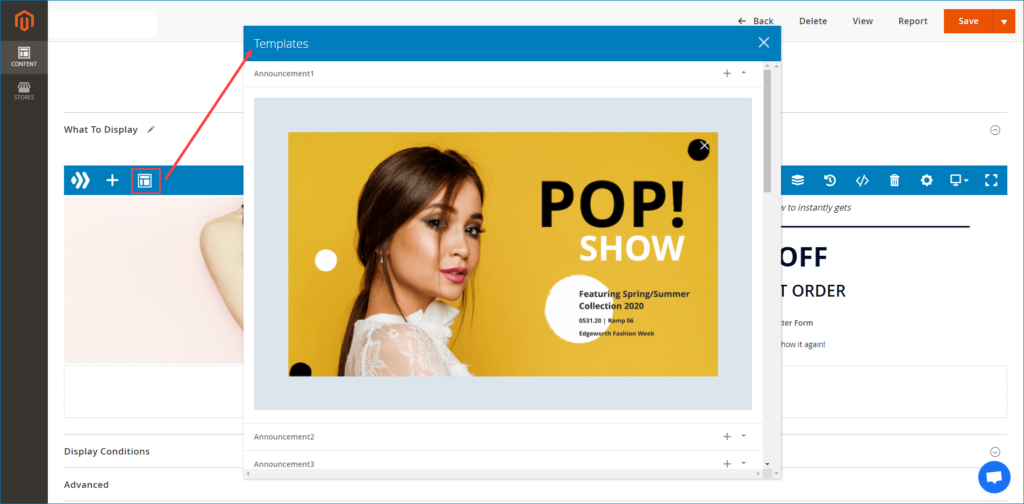
2. Use incredible popup templates
Creating popup from scratch waste too much time? Don’t worry! Magezon Popup Builder provides users with a lot of attractive popup templates. All you need to do is choose your desired one and edit it as you want.
Conclusion
We’ve walked through all steps on how to create exit intent popup by Magezon Popup Builder. We hope that this tutorial is helpful for you, and from now on, you can totally create your attractive exit intent popup. Please contact us if you have any questions when using this extension.

Optimize Your Magento Store With Powerful Extensions
Looking for fast, efficient and well-coded extensions to build or optimize your Magento stores for sales boosting? Then visit Magezon website and grab necessary add-ons for yours today!

