 Magezon Blog Help Merchants Build Comprehensive eCommerce Websites

To optimize the customers’ journey from account creation to after-sales service, Magento 2 provides store owners with various enhanced options, including customer account configuration. No matter how many customers you have, this functionality assists you in managing them the way you wish.
If you are searching for a guide to configuring a customer account configuration in Magento 2, this blog will do the trick.
Table of contents
Where to Find Magento Customer Account Configuration
- Go to the admin panel. Choose Store → Settings → Configurations.
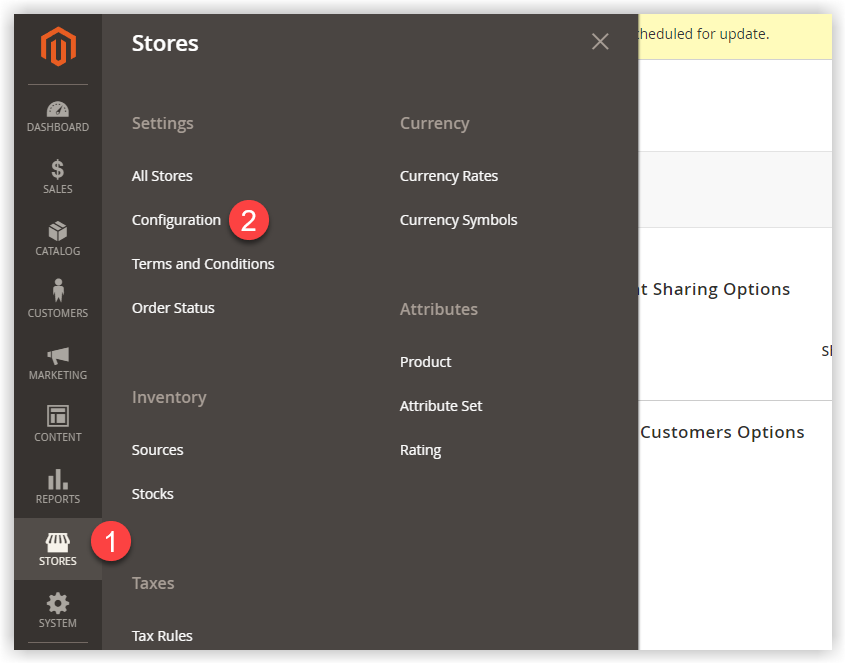
- From the left panel of the Configuration page, expand Customers. Then, select Customer Configuration.

And here is the page where to configure the customer account. Eight sections need to be dealt with.
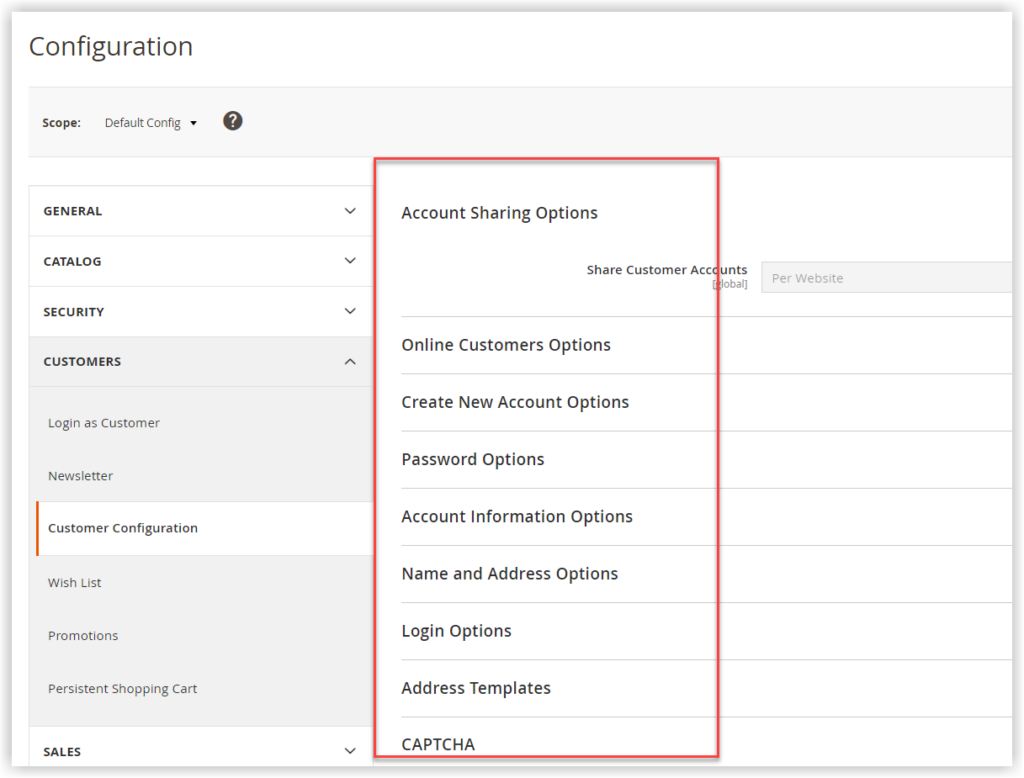
Configure Customer Account in Magento 2
1. Account Sharing Options
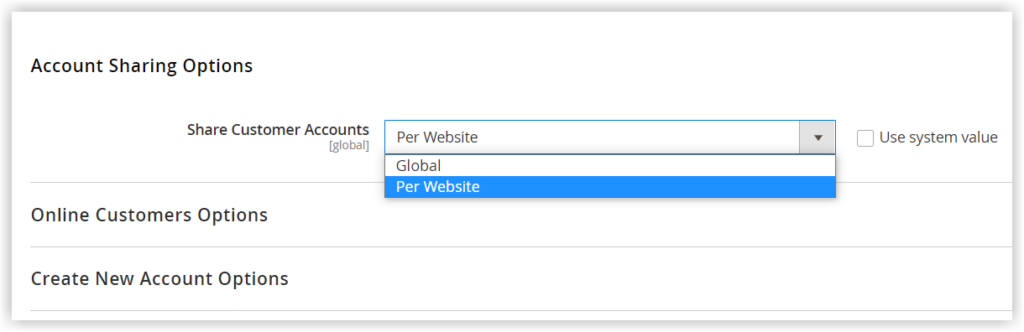
The Share Customer Accounts field enables you to decide where in the store hierarchy customer accounts are available.
There are two options for you to select:
- Per Website: The customer account information only appears on the website where it is created.
- Global: Customer account information is found on all of your websites and stores. With one registered account only, customers can access every scope in the hierarchy.
2. Online Customers Options
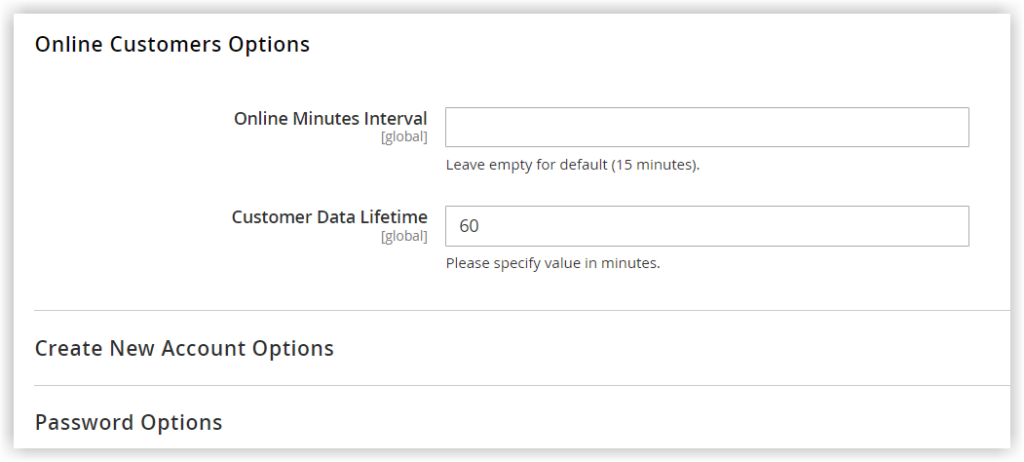
- Online Minutes Interval: Enter the number of minutes for each session on your site. This period, called Online Minutes Interval, starts from the time customers log in to their account. Beyond this interval, customers need to log back in if they want to continue shopping on your website.
By default, the interval is set to 15 minutes per session. However, it should be noted that setting too short an interval may cause customers inconvenience, resulting in cart abandonment. Another recommendation is that you should use the Persistent Cart to save the carts of logged-out shoppers.
- Customer Data Lifetime: After a set number of minutes, unsaved data becomes invalid. Customers, therefore, have to enter the previous information again. By default, after 60 minutes, the unsaved data is no longer valid.
3. Create New Account Options
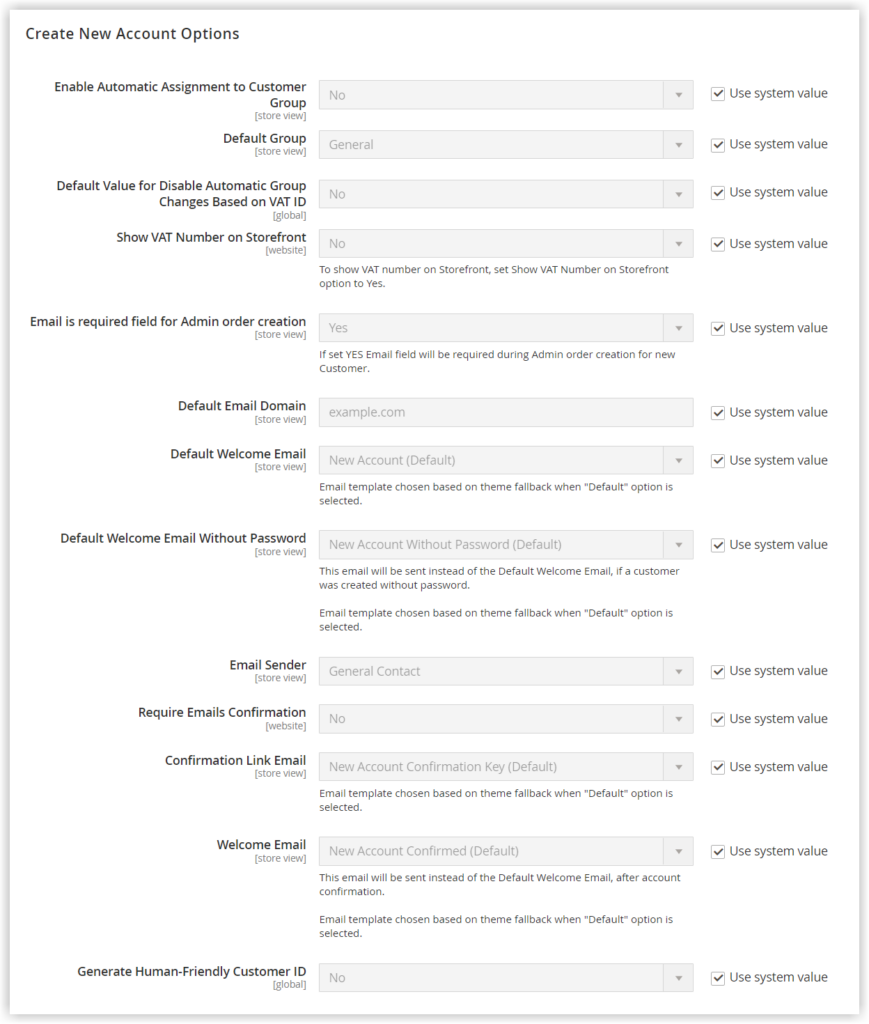
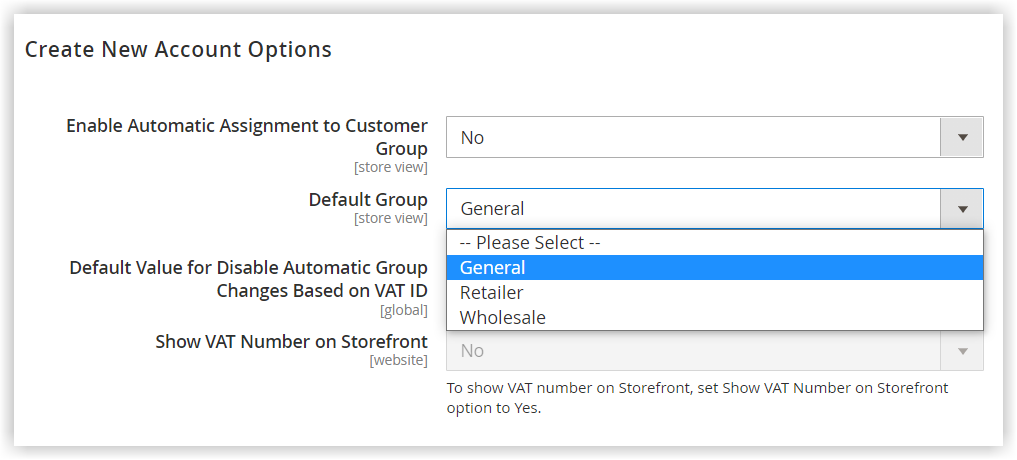
- Enable Automatic Assignment to Customer Group: Select Yes if you want customers to be automatically assigned to a particular customer group.
- Default Group: Select the default customer group that is assigned to the new accounts. Take an instance with General as the default group. When a visitor creates a new account, his account will be allocated to the General customer group.
- Default Value for Disable Automatic Group Changes Based on VAT ID: Customers who provide a VAT ID have their customer group automatically changed if you enable this field. Customers are allocated to the Default Group if the option is disabled, and administrators can later reassign them.
- Show VAT Number on Storefront: If you want customers to see the VAT number in the storefront, particularly in the Address Book from My Account, choose Yes. Or then, select No.
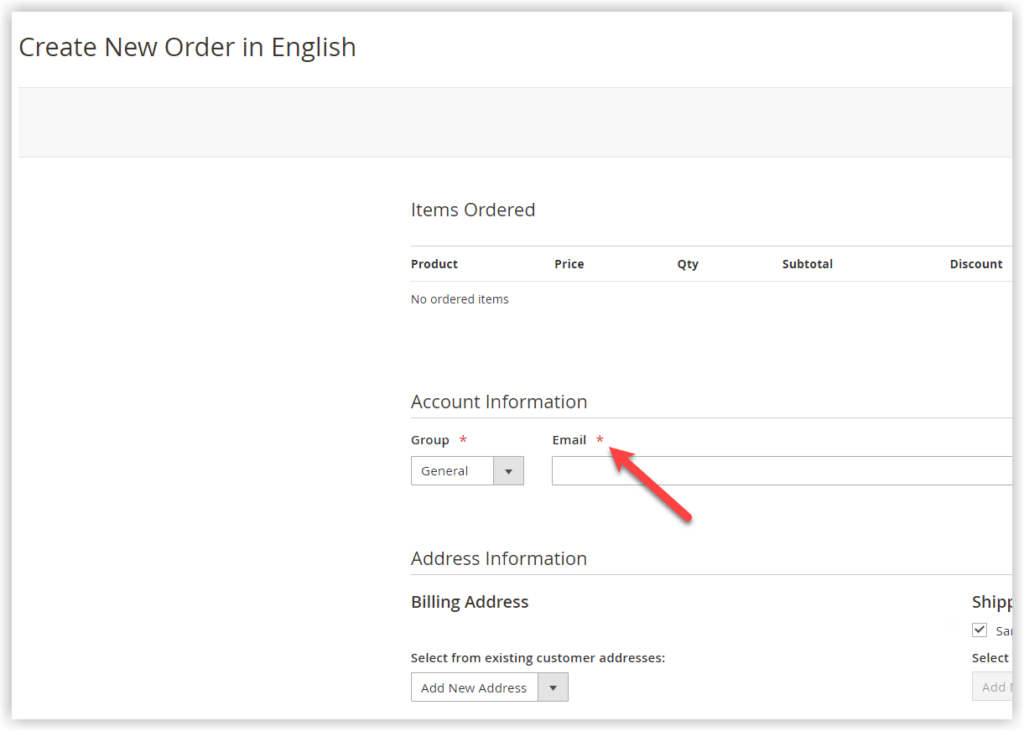
- Email is a required field for Admin order creation: This field with the No option may be helpful when a customer who doesn’t have an email address places an order over the phone. At that time, the admin helping this customer create an order will not be required to enter an email address.
- Default Email Domain: Enter the default email domain. By default, the default email domain is example.com.
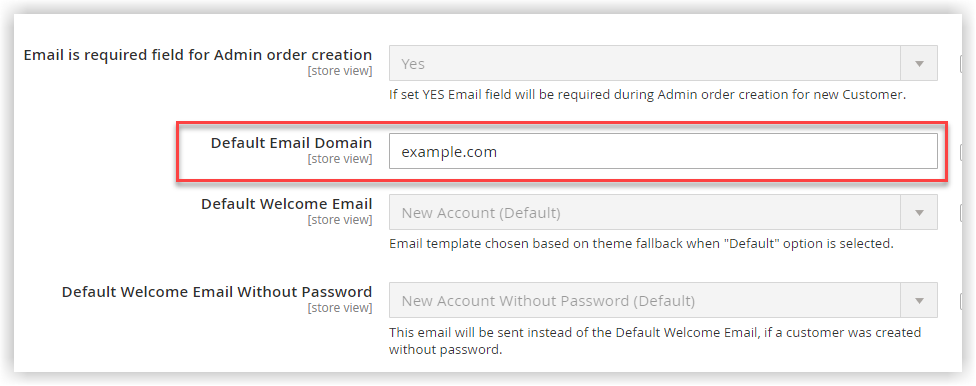
Note: The email domain is the component of an email address that follows the @ symbol. Default Welcome Email: Set the template for the default Welcome email.
- Default Welcome Email Without Password: When new accounts are created by the administrator but not assigned a password, this email template will be sent instead of the default welcome email.
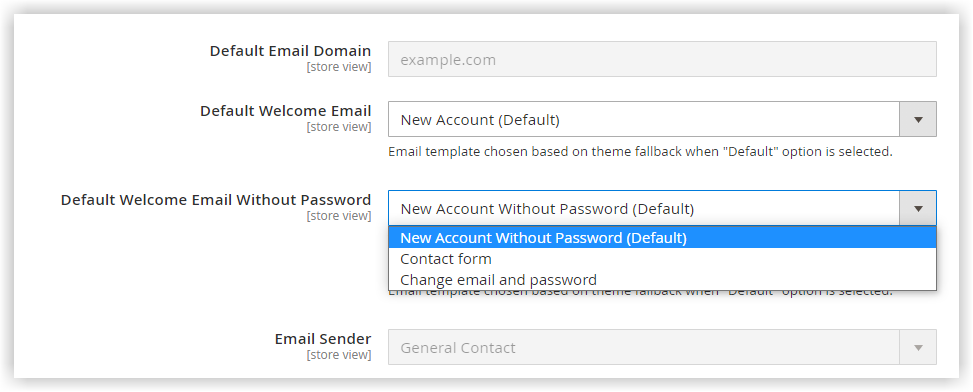
- Email Sender: Pick the email sender of the welcome email.
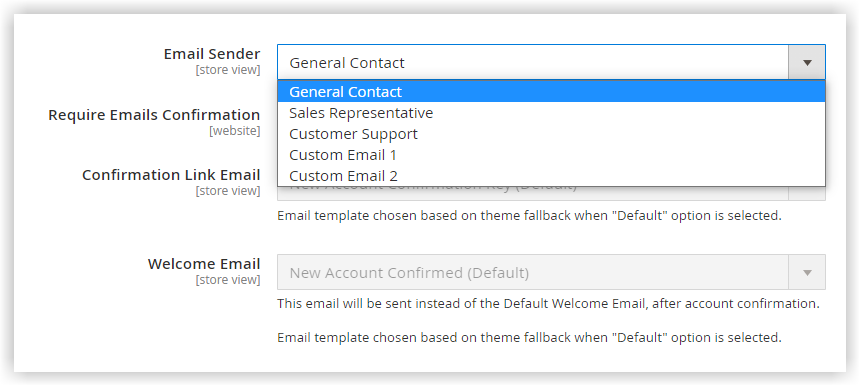
- Require Emails Confirmation: If you want to send an account confirmation email on new customers’ registration, choose Yes. This useful method helps ensure that your store has no fake registrations.
- Confirmation Link Email: Select the template for the confirmation email. This mail has a verification link inside.
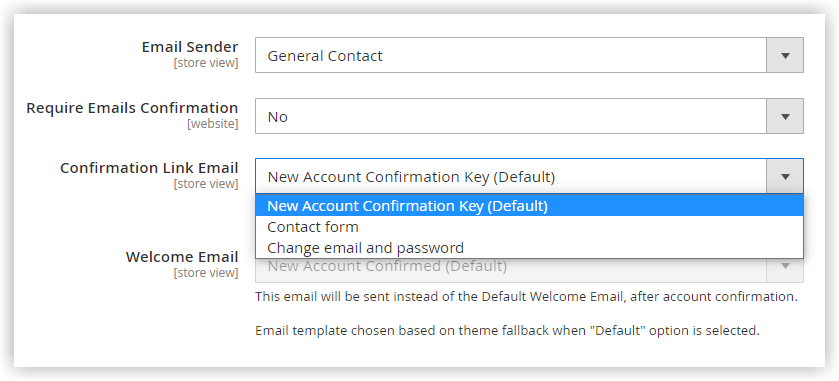
- Welcome Email: Select the email template for the welcome email. The user will receive this email once he has confirmed his account.
- Generate Human-Friendly Customer ID: In fact, each customer record has its own ID. You can use these IDs to communicate with your customers. The IDs randomly generated by Magento are quite complicated, however. That’s why you need to create more user-friendly customer IDs. Choose Yes to do this task.
4. Password Options
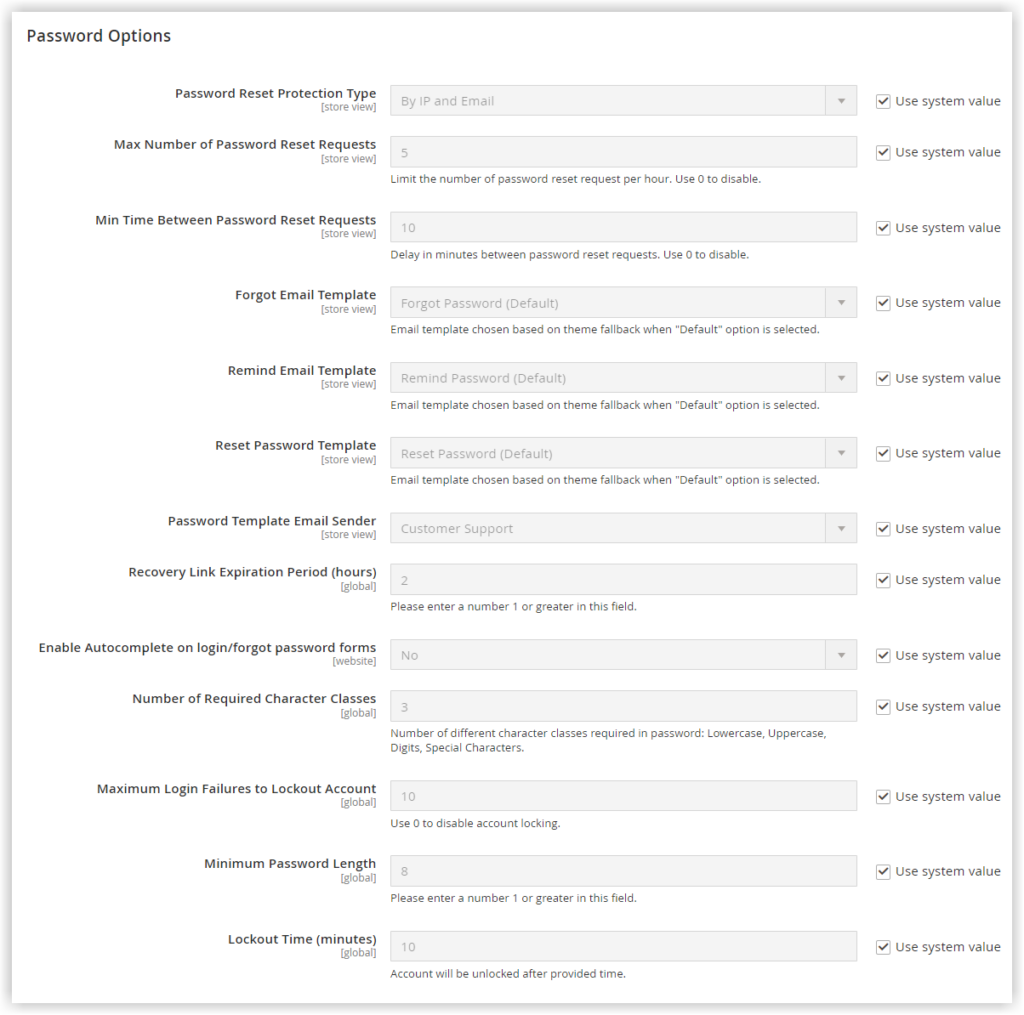
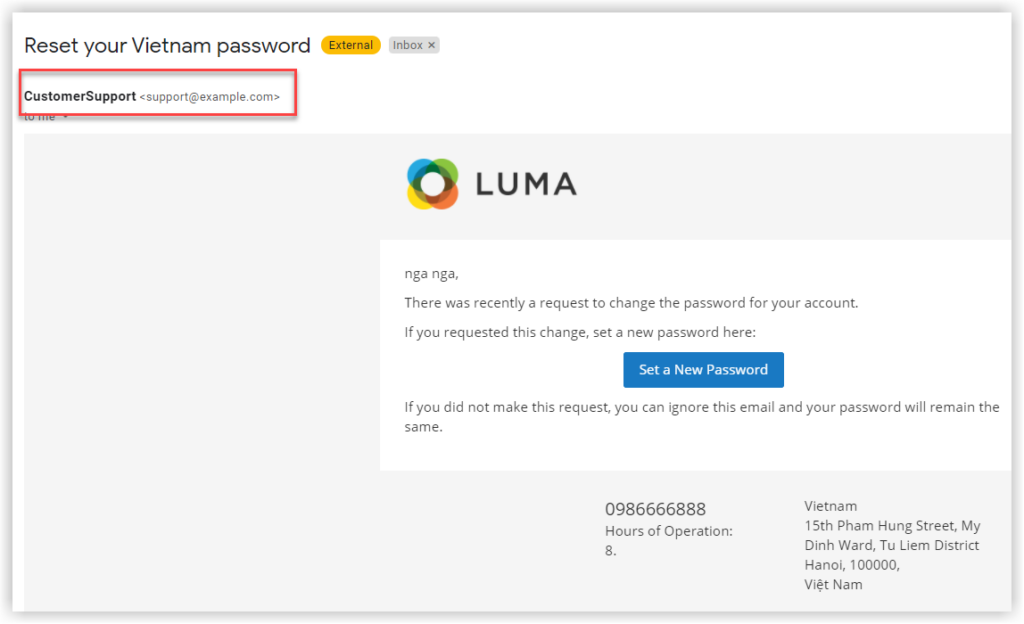
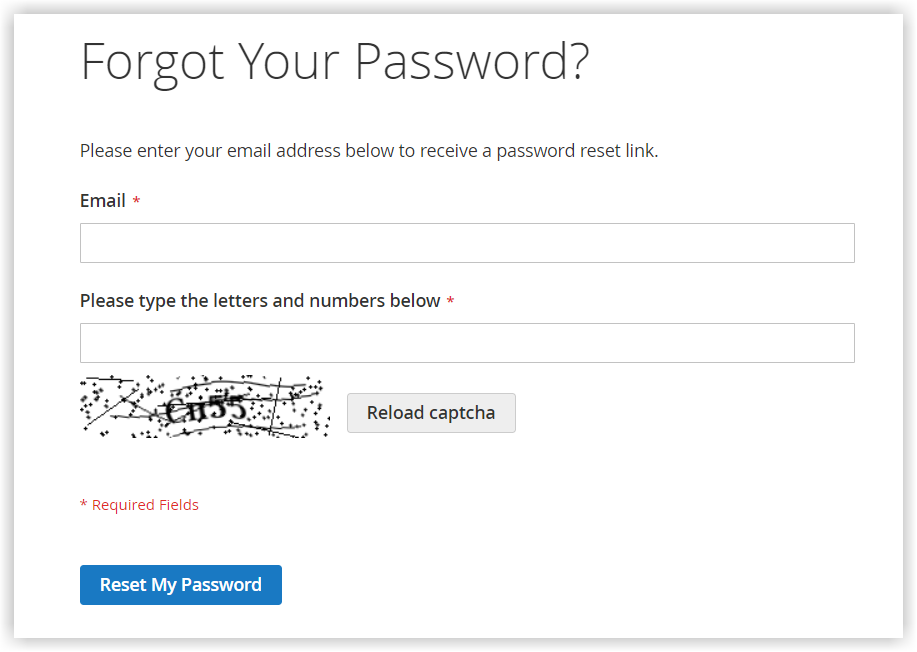
When a customer revisits your website for a time, they often forget their password. Therefore, Magento offers a solution that allows customers to reset their passwords. Instead of giving a crop of seemingly ridiculous questions (like “What is your dog’s name?”), Magento simply sends customers an email with a link to change their passwords. Customers then need to access the email address they used to register. And they just click the link to recover their password.
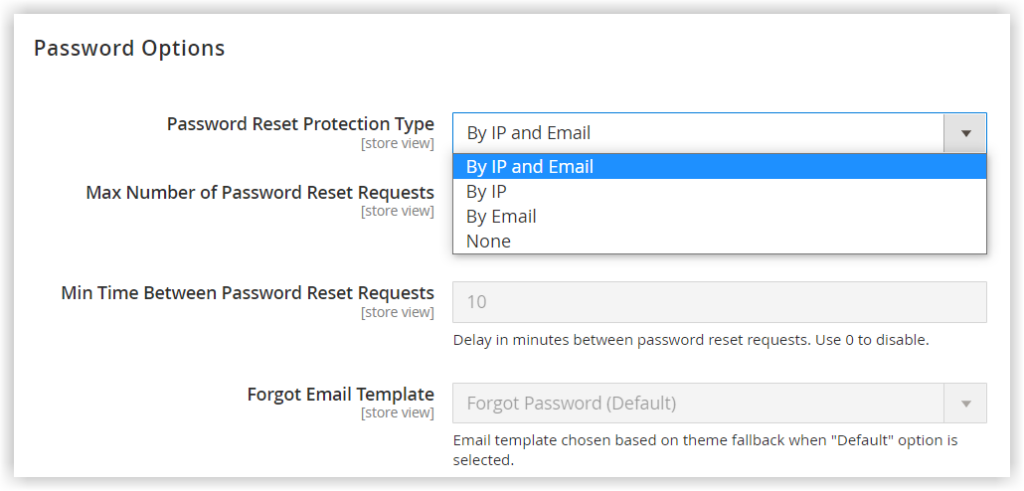
- Password Reset Protection Type: Select the type of password reset protection from 4 following types:
- Max Number of Password Reset Requests: Restrict the number of password reset requests in an hour. Enter 0 so that customers can make an unlimited number of requests.
- Min Time Between Password Reset Requests: Set the minimum number of minutes between requests for a password reset. Enter 0 if you don’t want to set a wait time between them.
- Forgot Email Template: Select the template to send to customers who have forgotten their password. The Forgot email contains a link to set a new password.
- Remind email template: Choose the email template that will be sent to customers when they receive a password reminder.
- Reset Password Template: The chosen email confirms that customers’ passwords have been reset.
- Password Template Email Sender: Select the store contact from whom password-related emails will be sent.
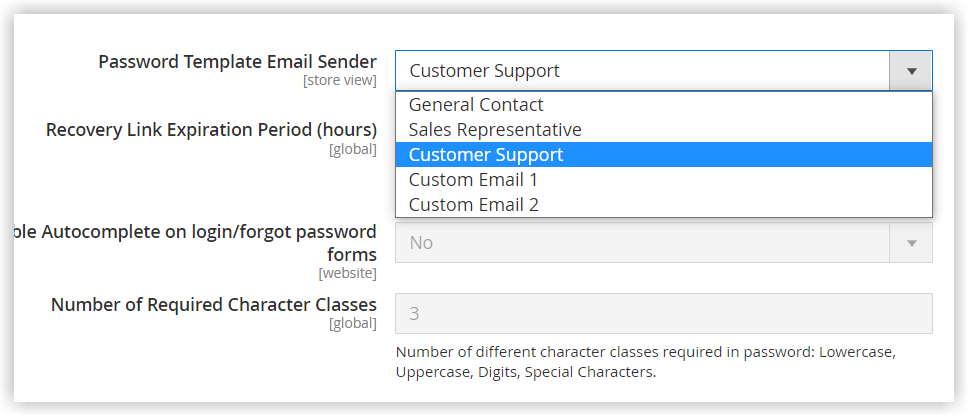
Here is the Customer Support option.
Here is the General Contact option.

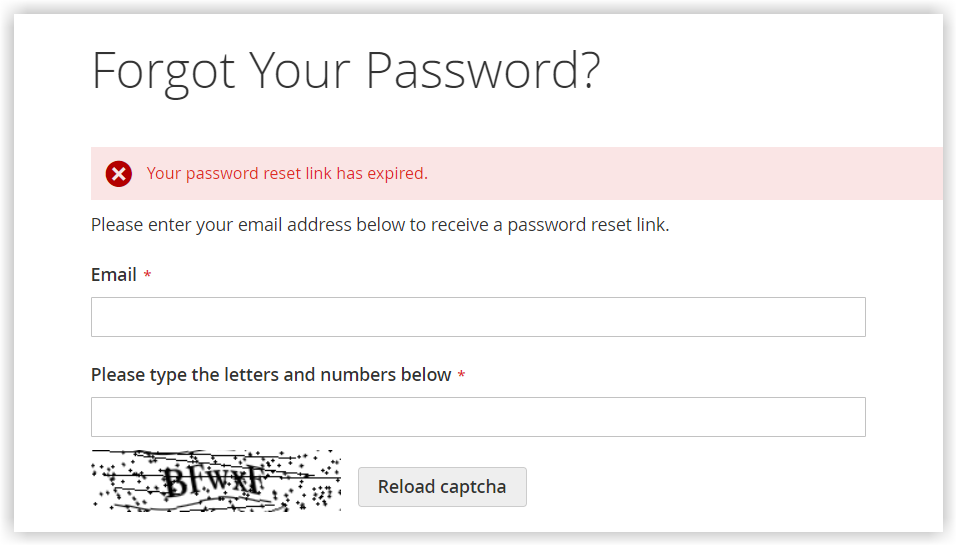
- Recovery Link Expiration Period (hours): Set the number of hours before a password recovery link becomes invalid to make it more difficult for attackers to get the value. At this time, the notification “ Your password reset link has expired” will show up.
- Enable Autocomplete on login/forgot password forms enable the fields in the customer login and forgot password forms to be automatically filled using the values from previous entries.
- For Number of Required Character Classes: Enter the number of different character classes which customers must include in their passwords. Below are four character classes:
- Lowercase
2. Uppercase
3. Numeric
4. Special Characters
It means when you enter “3” in this field, customers are required to enter the passwords that take in at least three character classes above. Below is our specific example.
The system doesn’t accept the value which has two character classes.

But it’s absolutely okay with more than three character classes in the field value.

- Maximum Login Failures to Lockout Account: This field enables you to limit the number of successive unsuccessful login attempts. Exceeding the given number, customers’ accounts will be locked. If you don’t want to restrict the number of failed login attempts, enter 0.
- Minimum Password Length requires customers to enter the minimum number of characters in their password. It must be a number larger than zero.
- Lockout Time (minutes): This Lockout Time field allows you to set the number of minutes customers must wait due to too many unsuccessful attempts until they can log in again.
5. Account Information Options
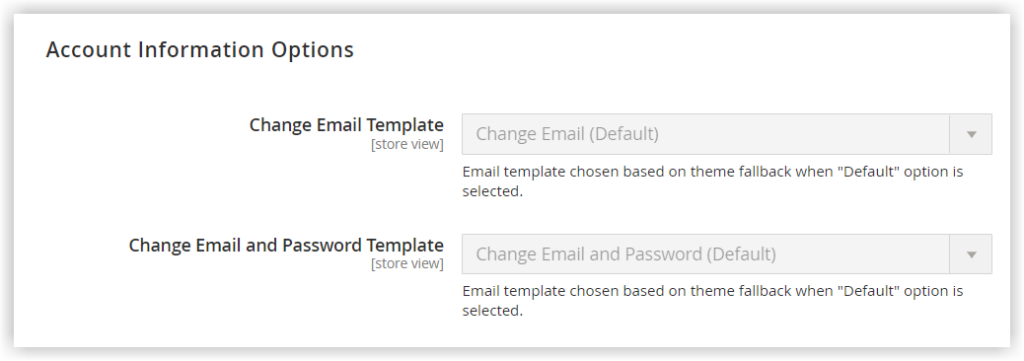
- Change Email Template: Choose an email template to send after a customer has changed their email address.
- Change Email and Password Template: Select an email template to email them after they have changed their email address and password.
Note: If you are trying to find an extension that helps you effortlessly create any email templates that are consistent with your web design and theme, have a try with our Magento 2 Email Builder. |
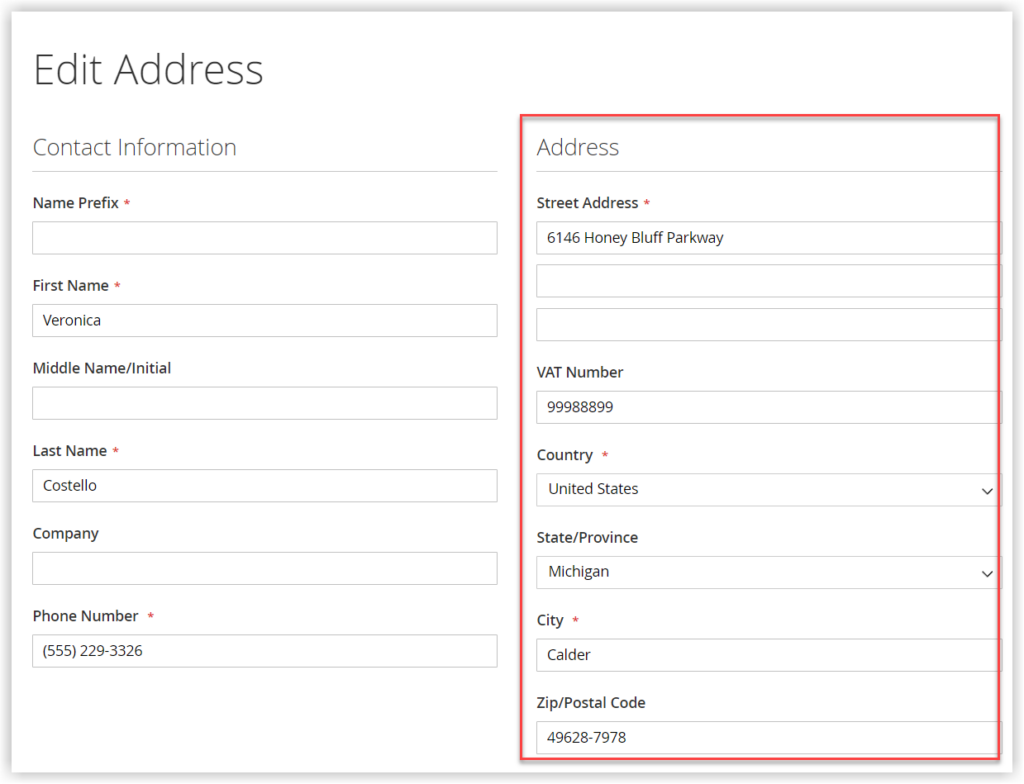
6. Name and Address Options
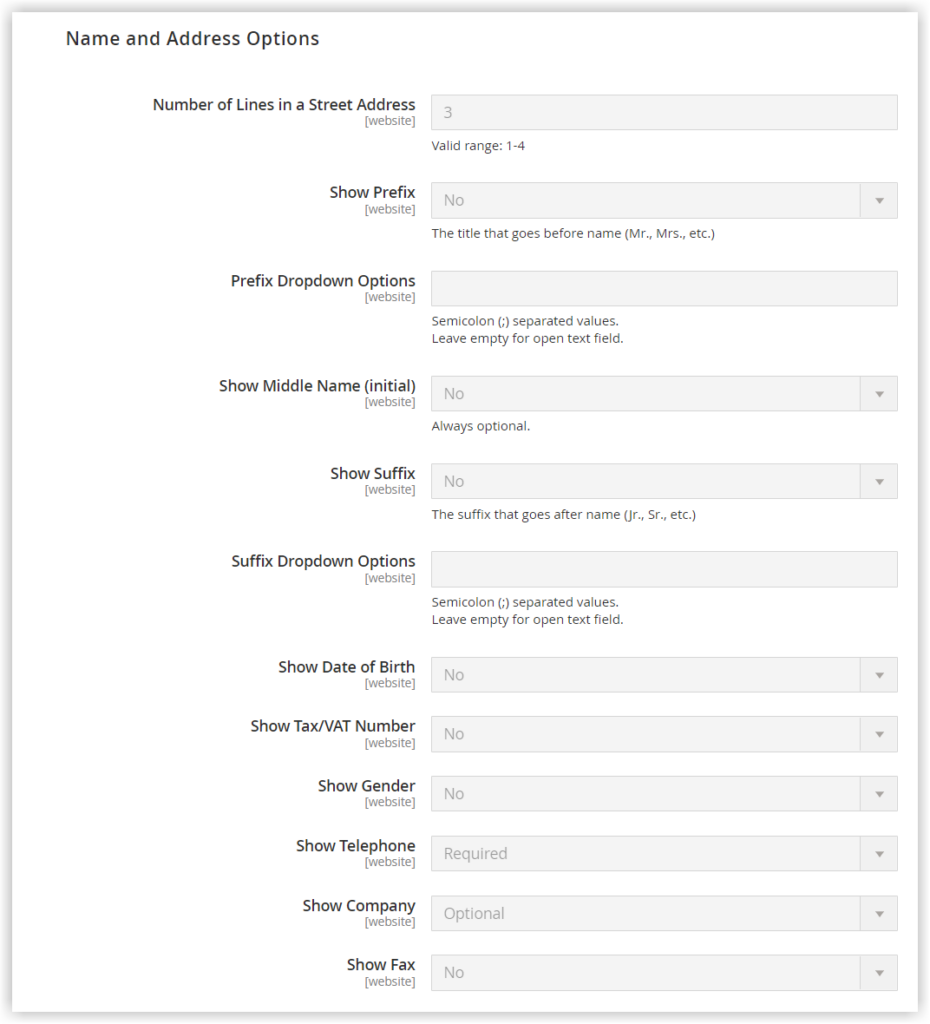
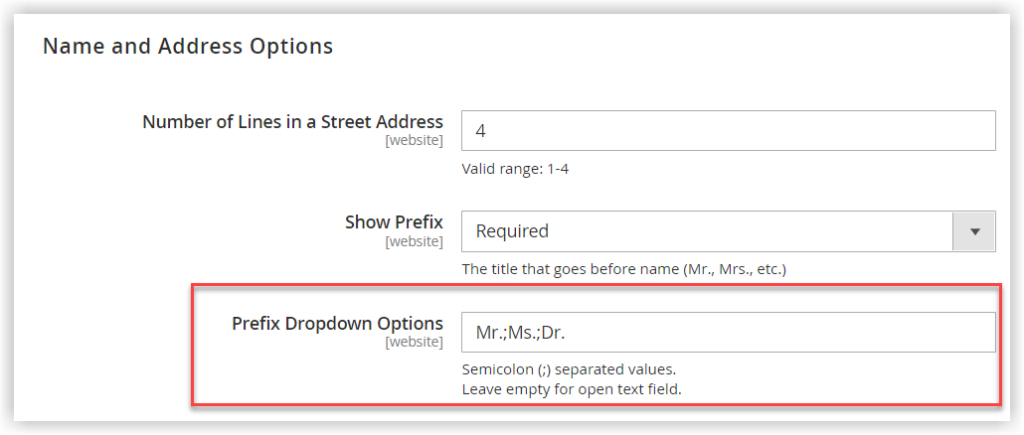
- Number of Lines in a Street Address: Enter the number of lines for the street address in the front end. You can enter the number ranging from 1 to 4 only. By default, the street address has 3 lines.
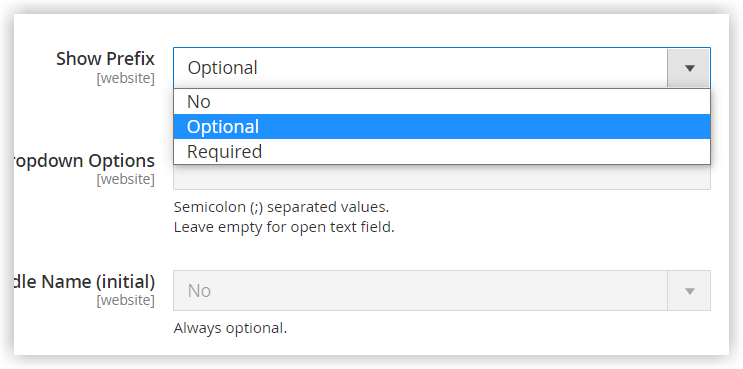
- Show Prefix: This field allows you to add name prefixes, such as Ms., Mr., or Dr. You are given three options to select: No, Optional, and Required. In our example, we requested that customers enter their name prefixes.
- Prefix Dropdown Options: When you allow showing prefixes, you can provide a list of prefix options in the dropdown menu. To do it, list prefixes separated by semicolon in the Prefix Dropdown Options field.
Let’s see how it looks in the storefront:
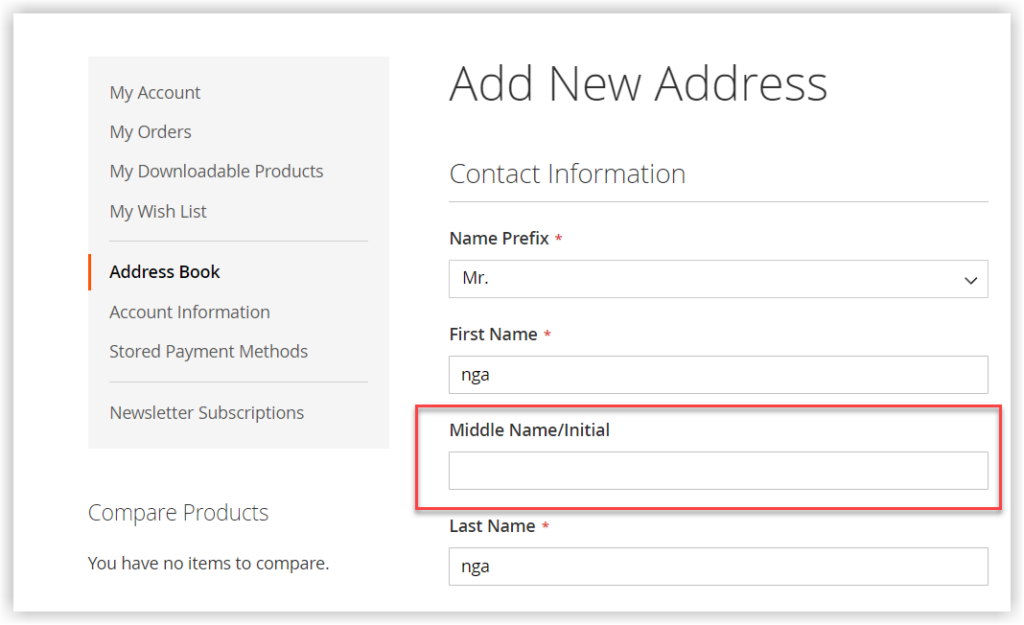
- Show Middle Name (initial): Enable the field if you want to show the field for the initial of their middle name. This field is always optional.
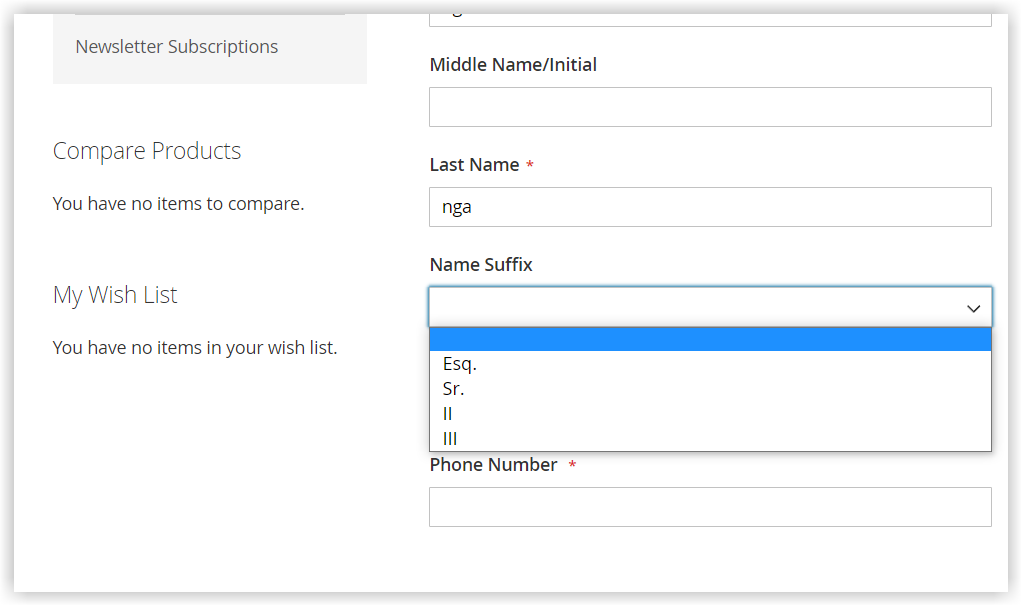
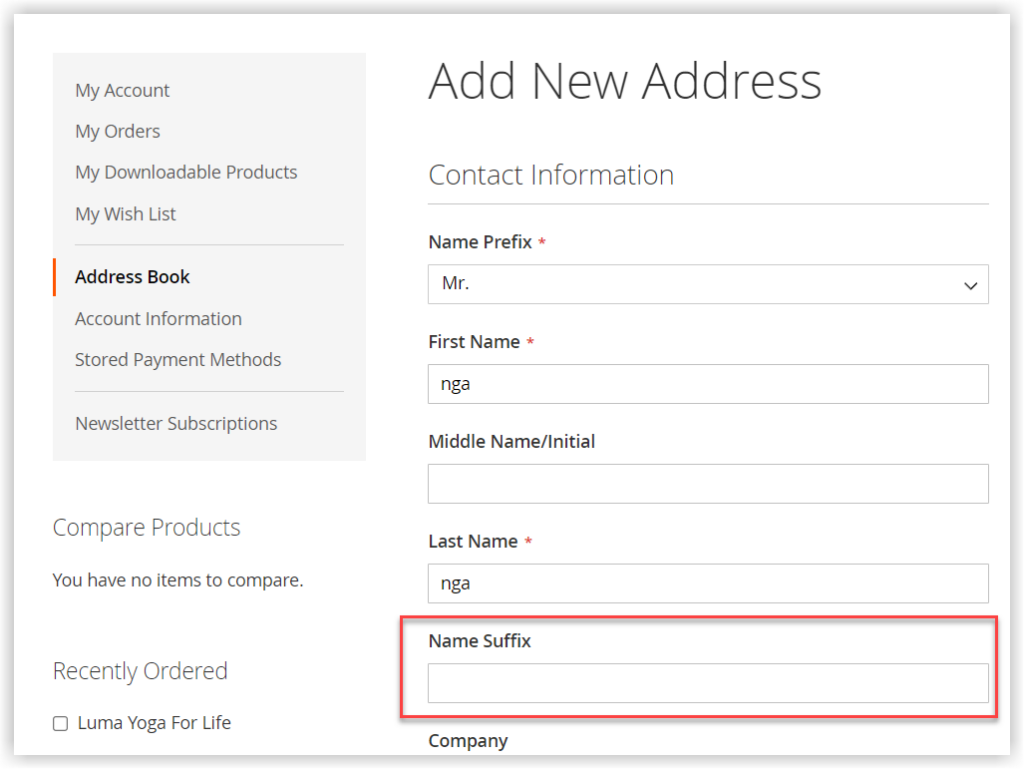
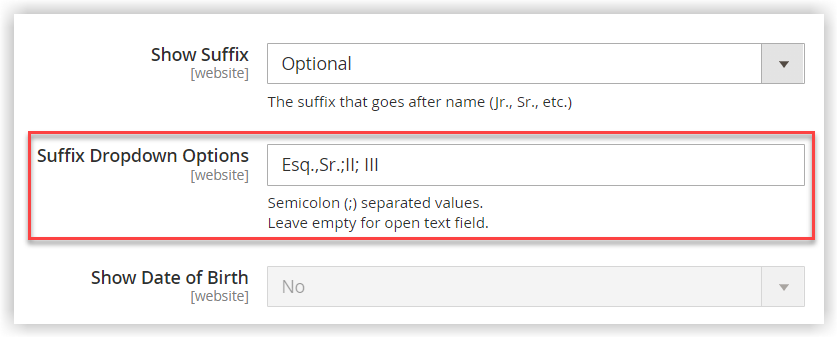
- Show Suffix: If you choose Yes, customers will be given a field to enter their name suffixes. For example, Esq. (often used in the United Kingdom).
- Suffix Dropdown Options: Like the Prefix Dropdown Options field, enter suffixes visible in the drop-down menu. Be sure to use a semicolon as a separator between suffixes. You can leave this field blank so that customers are not restricted to what they have been given.
The front end is:

- Show Date of Birth: Enable this field if you want to use it for marketing or others.
Note: Due to the potential privacy legal, and security risks, Magento recommends using customers’ year of birth as an alternative to their date of birth.
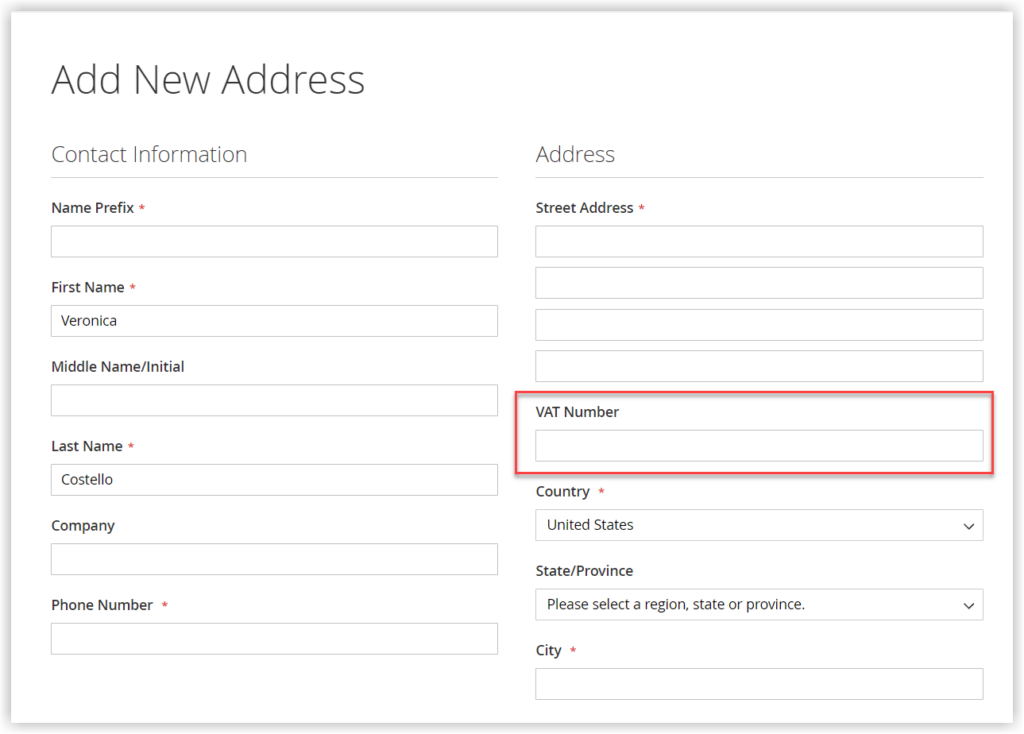
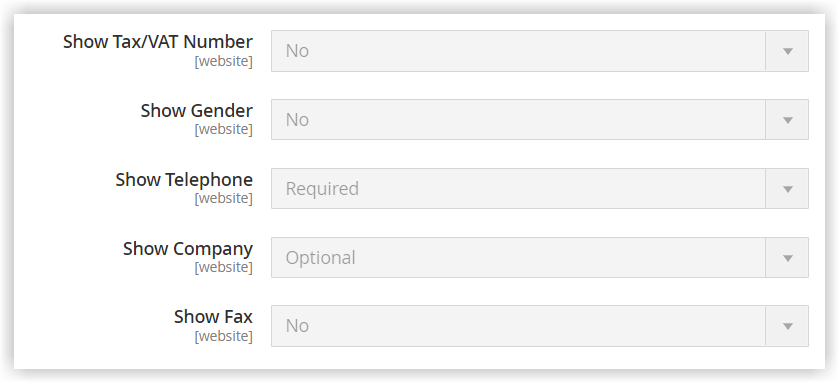
- Show Tax/VAT Number: If you want customers to enter their VAT ID, set the field to Yes. This field may be beneficial, especially when you create new group rules using VAT.
- Show Gender, Show Telephone, Show Company, Show Fax: Enable these fields if you want to get the customer information related to gender, telephone, company, and fax.
7. Login Options
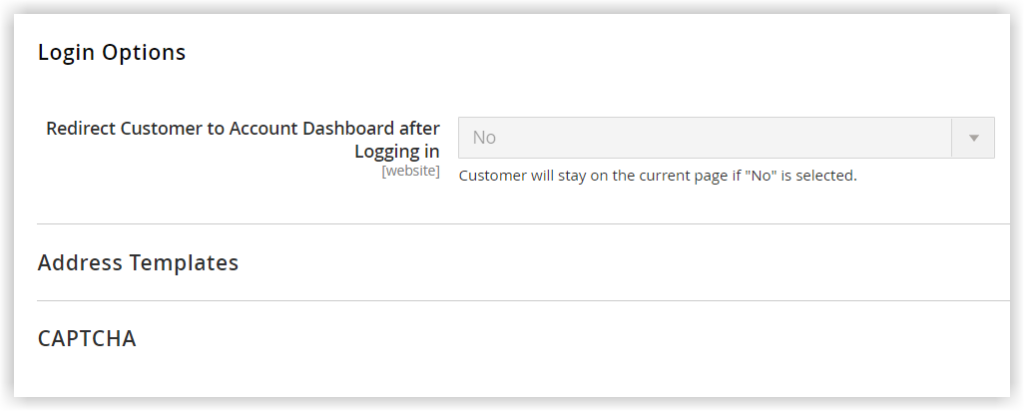
- Redirect Customer to Account Dashboard after Logging in: This field enables directing the customers to their account dashboard after they’ve logged in. If this chosen option for this field is No, they will stay on the current page.
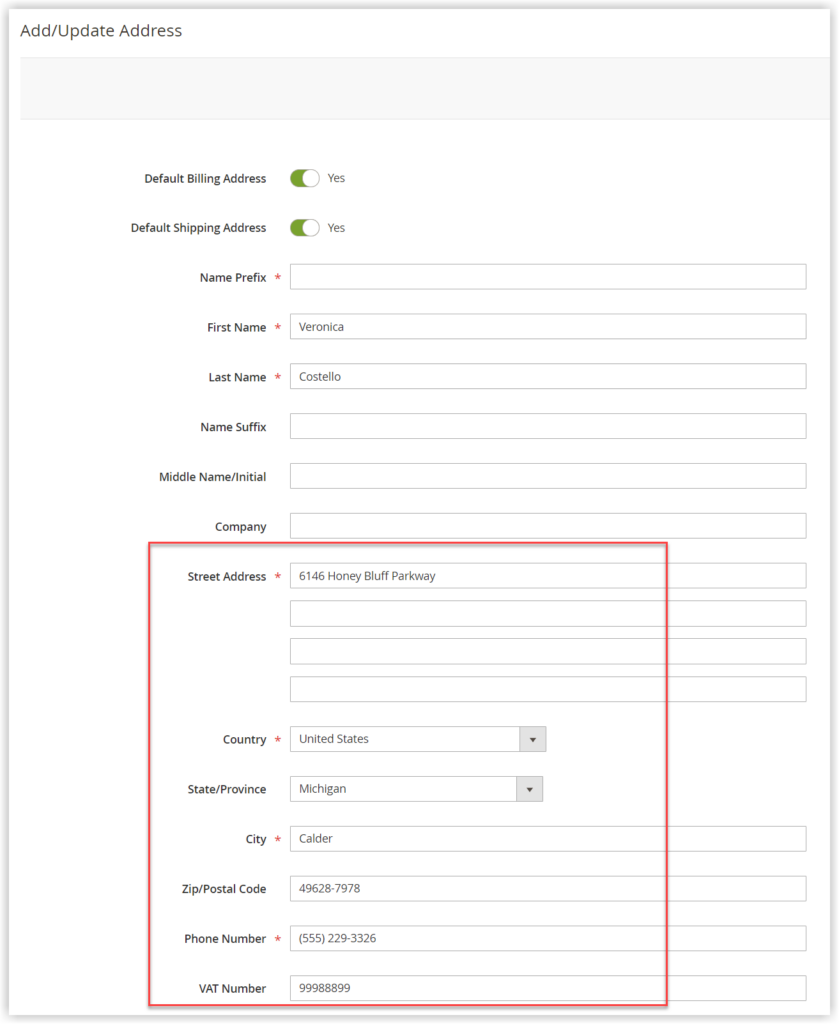
8. Address Templates
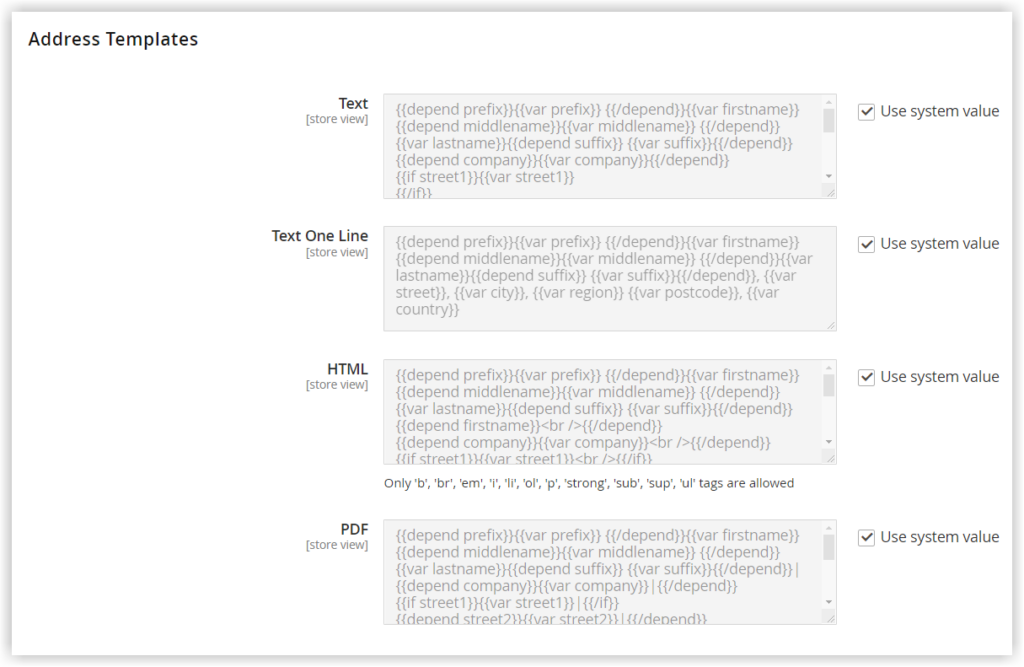
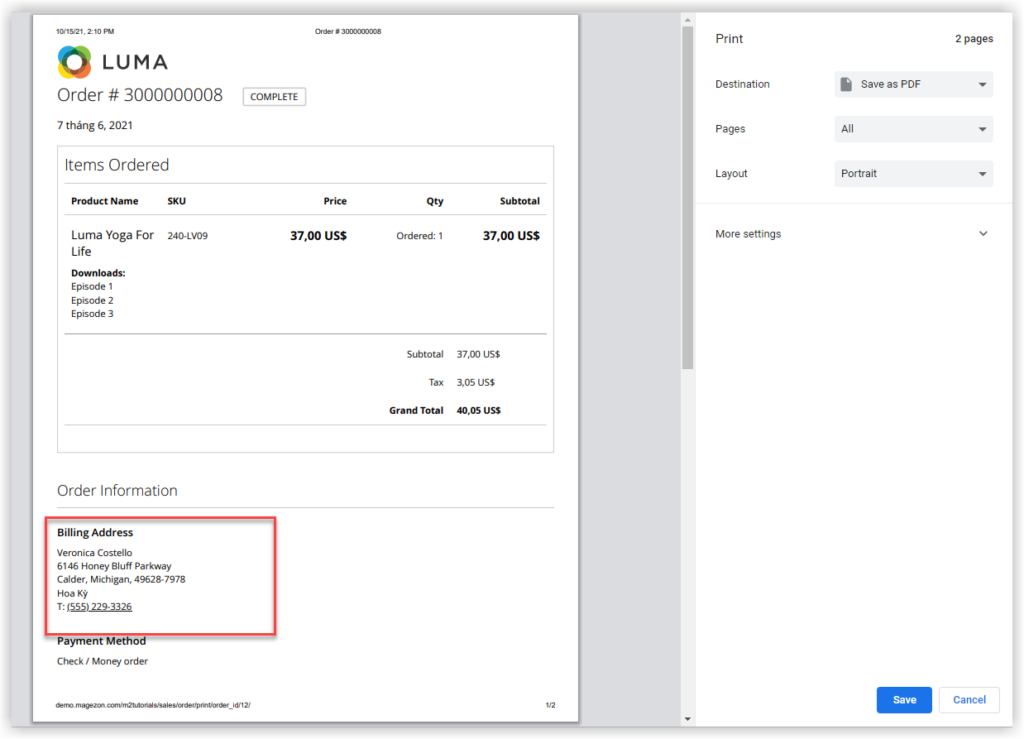
- Text: The template is used for all addresses that are printed.
- Text One Line: This template specifies the order of the address fields in the customer’s shopping cart address book list.
- HTML: The template decides the order of the address fields in the Add/Update Address form in the backend and on the Add New Address page in the front.
| Note: Magento 2 Customer Attributes extension from Magezon allows you to add customer address attributes to these two forms effortlessly. Also, with the help of this extension, you can sort the order of address attribute fields as you wish. |
- PDF: This template determines how billing and shipping addresses are displayed in the printed PDF of invoices, credit memos, and shipments.
If you have the slightest idea about coding, breaking your layouts is advisable. However, if you can ask for help from a developer, it’s perfect.
| Note: Magento 2 PDF Customizer gives you the ability to create & customize stunning PDF transaction documents such as invoices, shipments, and credit memos, and order visuals drag & drop interface using an intuitive drag-and-drop interface. |
9. Captcha
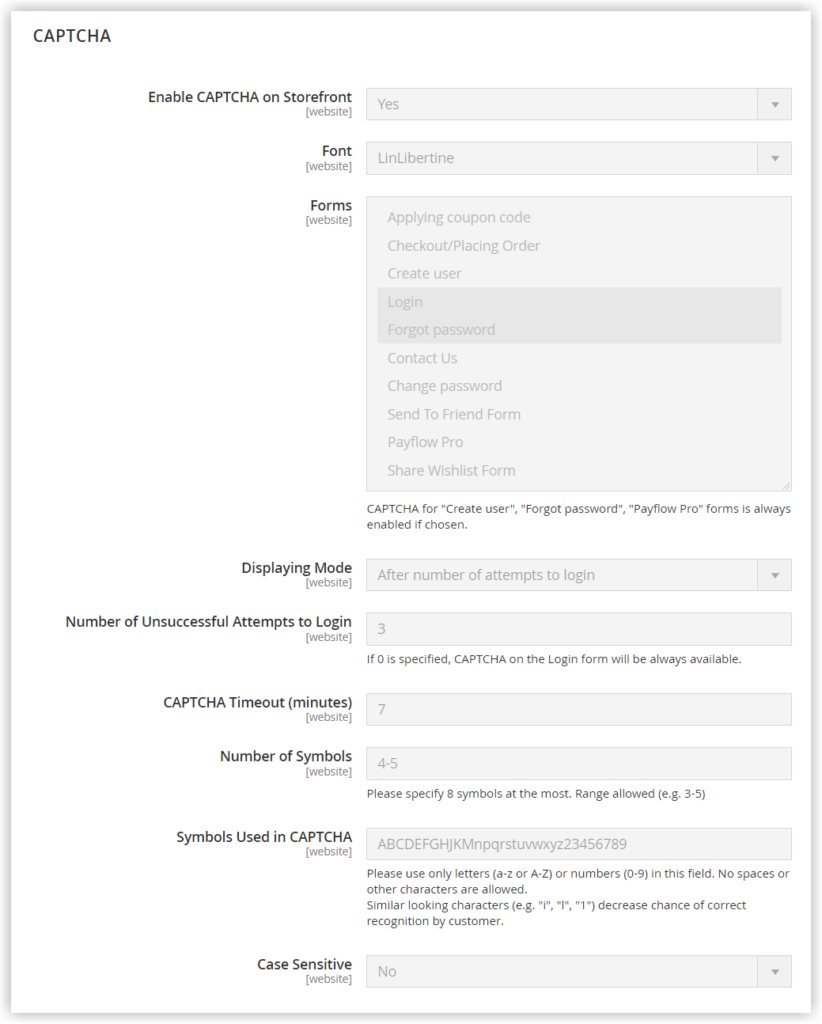
A CAPTCHA is a way to ensure that a human is interacting with your site, not a robot. Captcha is not totally a goof-proof solution; however, it helps hinder spam and robot attacks to a large extent.
If CAPTCHAs are enabled on the storefront, there will be several fields you need to configure.
- Font: Select the font that you will use to display the CAPTCHA. There is only one font, namely Linlibertine.
To add the Font you wish, insert the font file into the same directory as your Commerce installation. Then, include the declaration in the config.xml file at app/code/Magento/Captcha/etc.
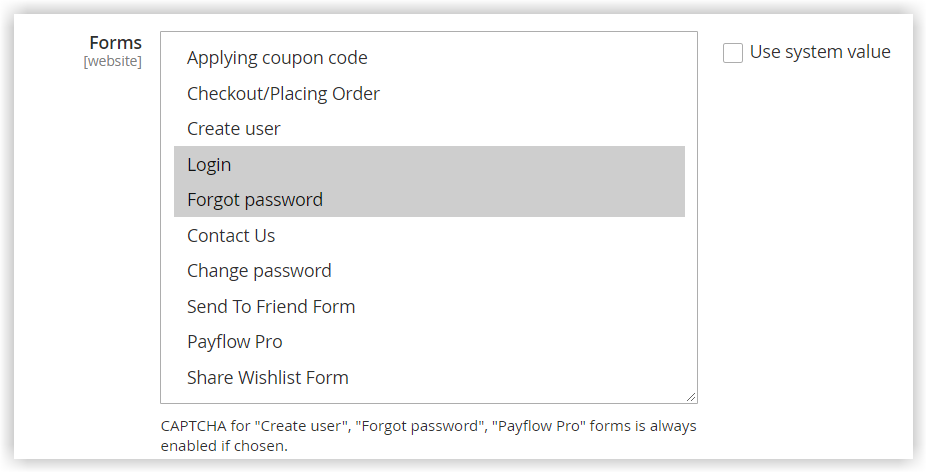
- Forms: Select the form where the CAPTCHA appears. We usually enable CAPTCHAs on the Create User Login, Forgot Password, Contact Us Forms, and Apply coupon codes.
| You may also like: The default Magento 2 multi source inventory: An ultimate guide How to create a new category in Magento 2 |
- Displaying Mode: Specify when the CAPTCHA displays. For example, you can set the CAPTCHA to appear always or when users enter the wrong username and password after too many attempts.
- Number of Unsuccessful Attempts to Login: After a certain number of unsuccessful login attempts, a CAPTCHA will be triggered. Enter that number in the field.
- CAPTCHA Timeout (minutes): Set the lifetime of a CAPTCHA for security purposes. When the CAPTCHA is no longer valid, users must reload the webpage.
- Number of Symbols: Set the number of symbols that are included in the CAPTCHA. The maximum number of symbols is 8. Furthermore, you can enter a range, for instance, 4-8.
- Symbols used in CAPTCHA: Set the symbols that are used in the CAPTCHA. Only letters (a-z and A-Z) and numbers (0-9) are allowed. Spaces or other characters are not accepted. Hard-to-distinguish symbols, such as i and 1, are excluded from the set of CAPTCHA symbols.
- Case Sensitive: Enable this field if you want users to type letter characters in the same case (uppercase or lowercase). If customers type in the correct letter, you still accept either.
Wrap It up
That’s all about how to set up Magento customer configuration step by step. If you have any questions, comment down below. We’re willing to help you. . Visit our Magezon website below to find efficient yet affordable extensions for your stores.

Optimize Your Magento Store With Powerful Extensions!
Looking for fast, efficient, and well-coded extensions to build or optimize your Magento stores for sales-boosting? Then visit the Magezon website and grab the necessary add-ons for yours today!

