Countdown popups are often used to stimulate purchases. In this post, we’ll give you an example by covering step-by-step how to use Magento 2 Popup Builder to create a countdown popup.
Here’s an example we’ll build in this tutorial!
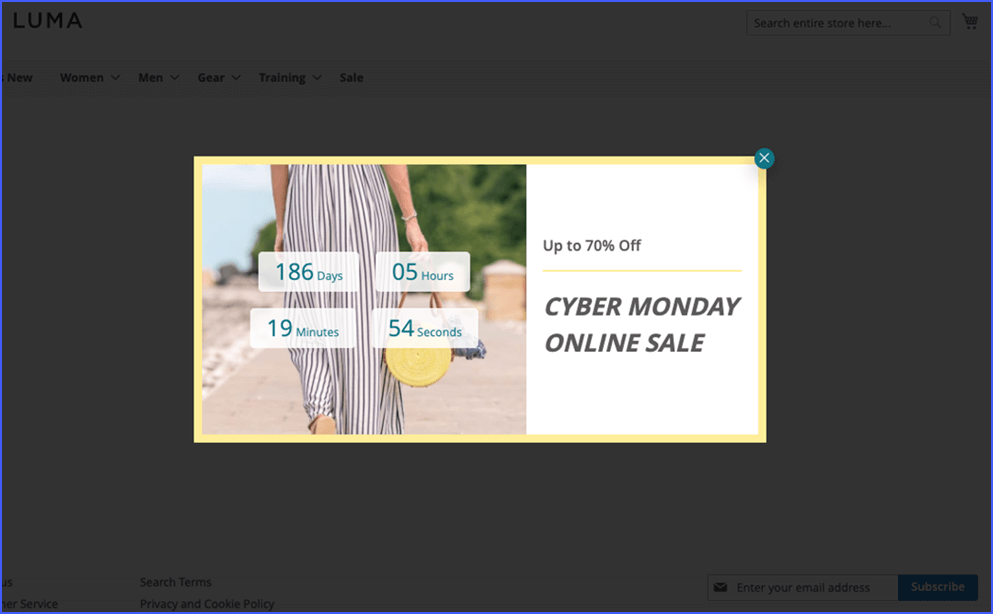
Table of contents
Let’s get started
Step 1: Add new popup
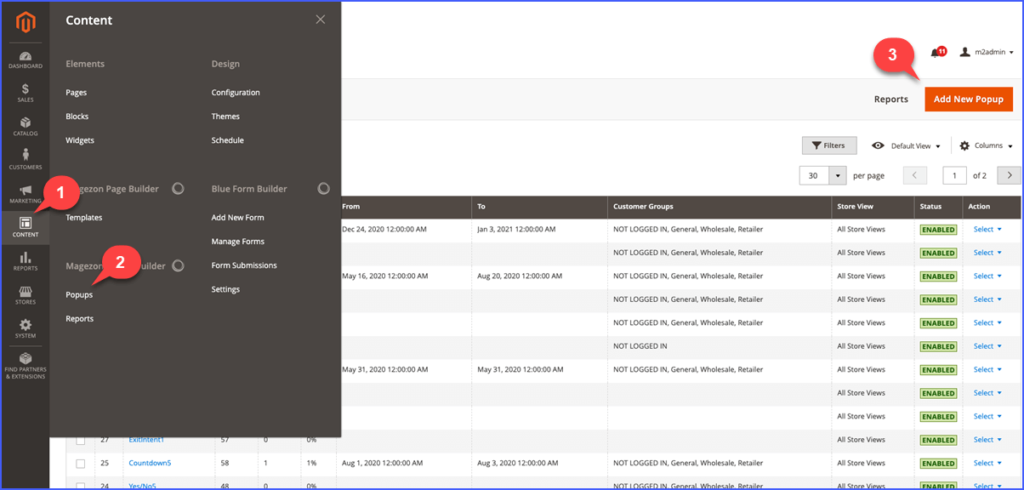
To get started, from the backend, you navigate to Content → Popups → Add New Popup
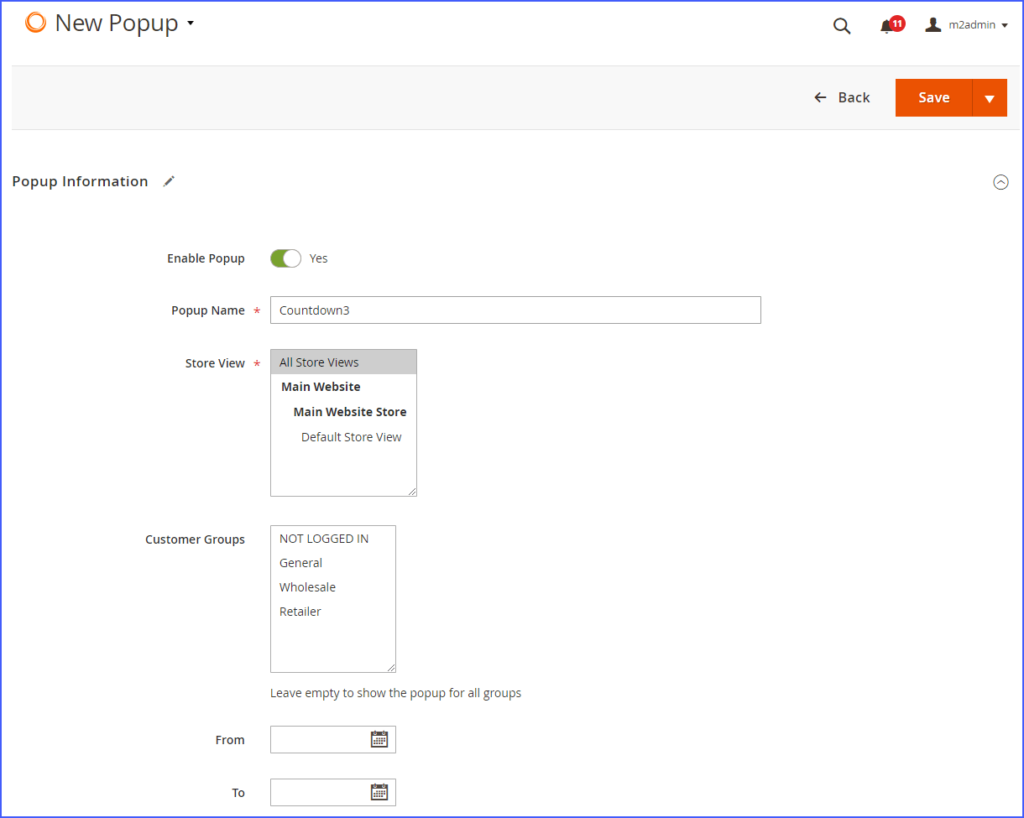
Then set its information in Information tab:
- Give a name for your popup and choose the Store views where pop up displays.
- Select the customer groups that can view the popup and set a date range to show popup according to your purpose (optional).
Step 2: Create your countdown popup
2.1: Create the popup from scratch
First, add a row and you can design the layout with multiple columns as you want.
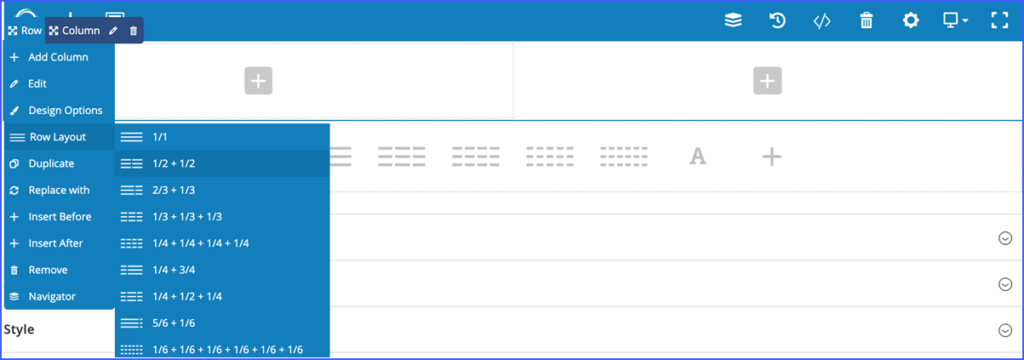
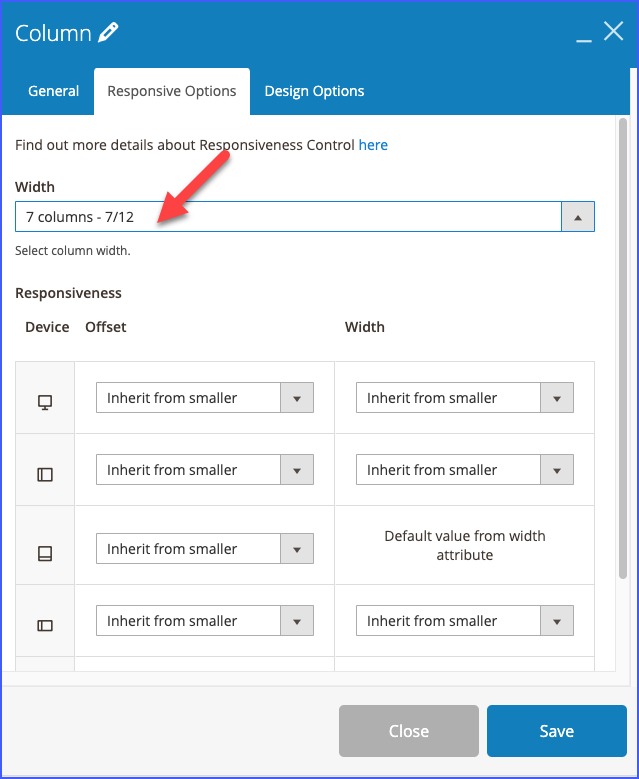
In this tutorial, we’ll add the section with 2 columns. In responsive options, set width with 7/12 for the left column, and 5/12 for the rest column.
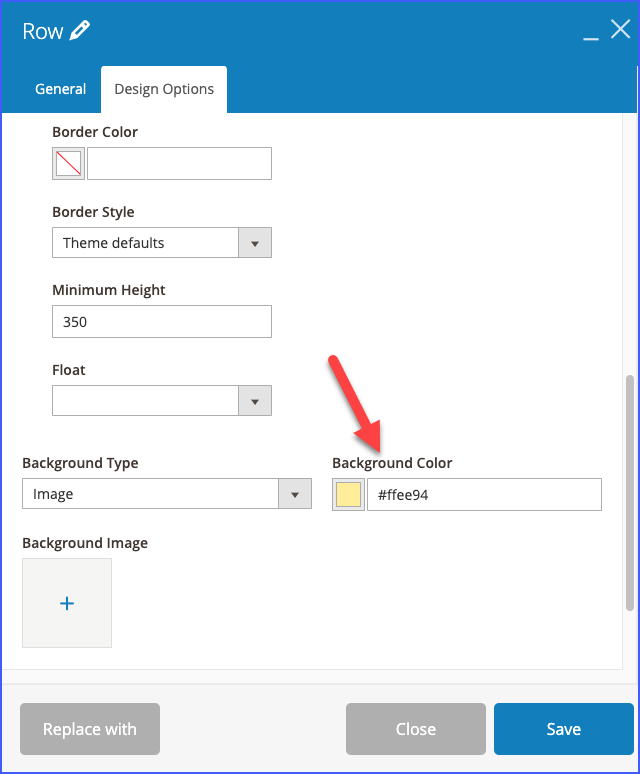
Then add background color for the row in design options like the image below (you can also add background image instead of background color).
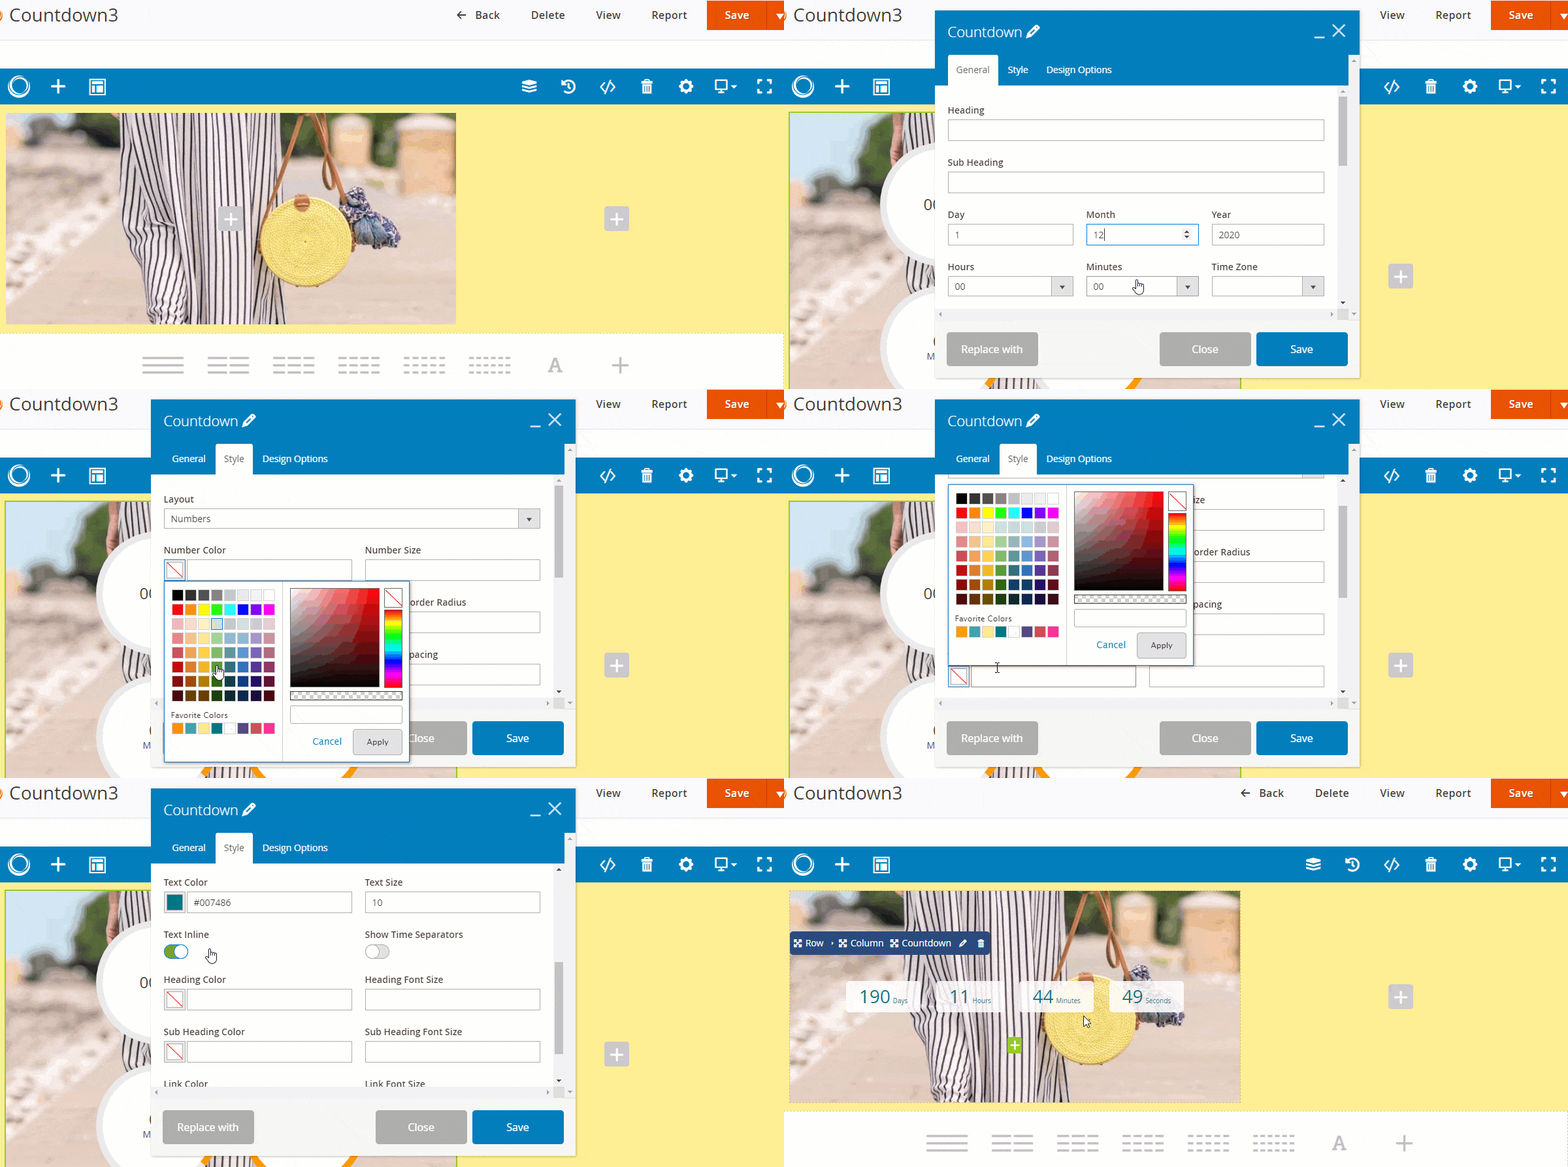
After setting the row, we’ll design the left column by adding column background image in the Design options.

Next, add element “Countdown” to create the countdown popup. In the general tab, set the timer duration for countdown popup. In this example, we’ll choose Numbers layout. You can choose the countdown layout you want in the Style tab and adjust its color and size as needed.
Moreover, we support 2 options that are “Text Inline” and “Show time separators” in Style tab:
- We’ll choose the option Text Inline. When you turn on the “Text Inline” option, the numbers and texts will display in the same line. In contrast, if you turn off it, the texts will display below the numbers.
- In addition, you can enable the “Show time separators” option and set the type to “Colon”. The separator is used to divide the distance between days, hours, minutes, and seconds and can be either a Colon or Line. You can also customize the size and color of the separator.
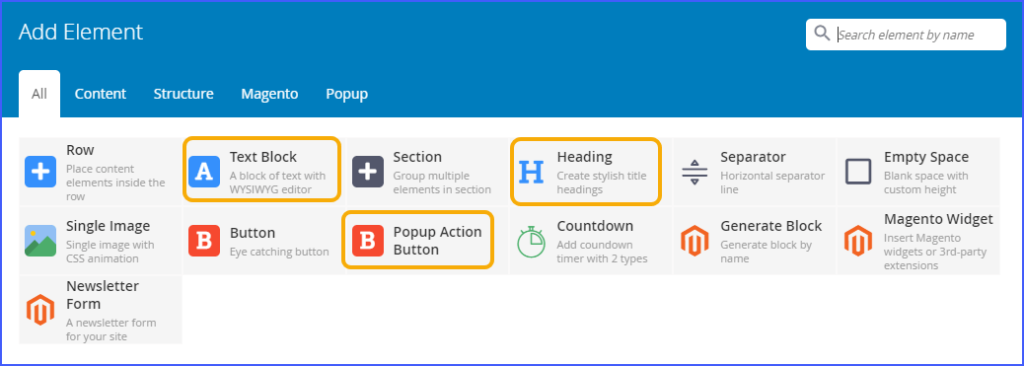
In the right hand column, create the content by adding elements heading, text block, popup action button, etc.

2.2: Use pre-designed templates
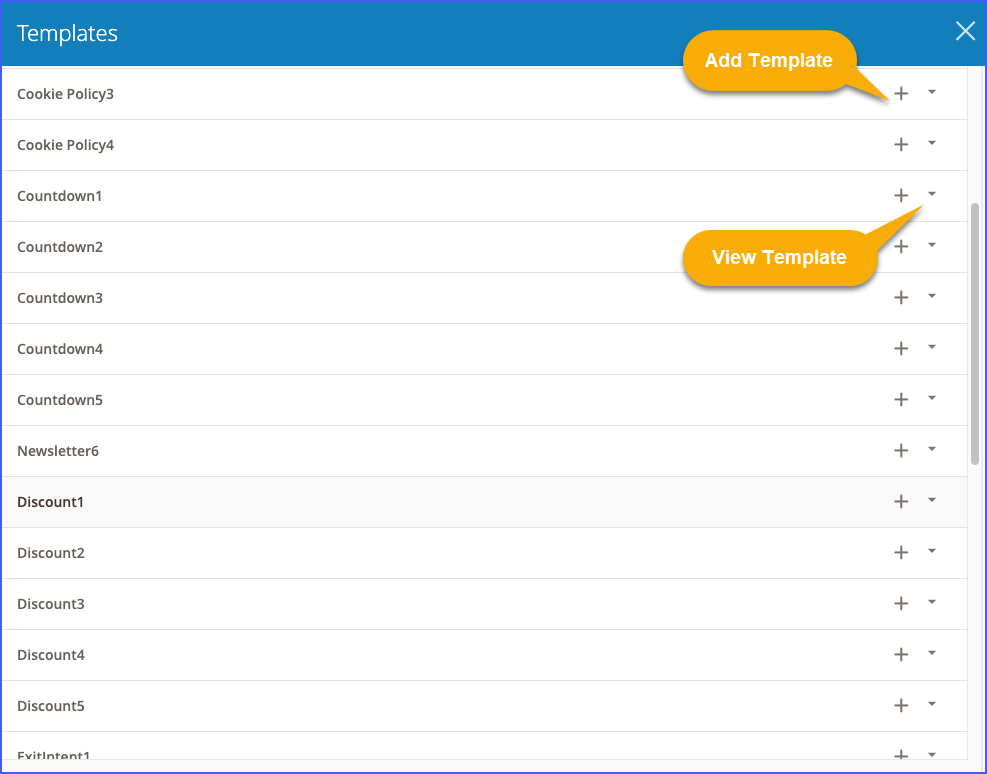
If you don’t want to waste your time in creating popup, available countdown templates are the best choice for you. All you need to do is just select your desired one.
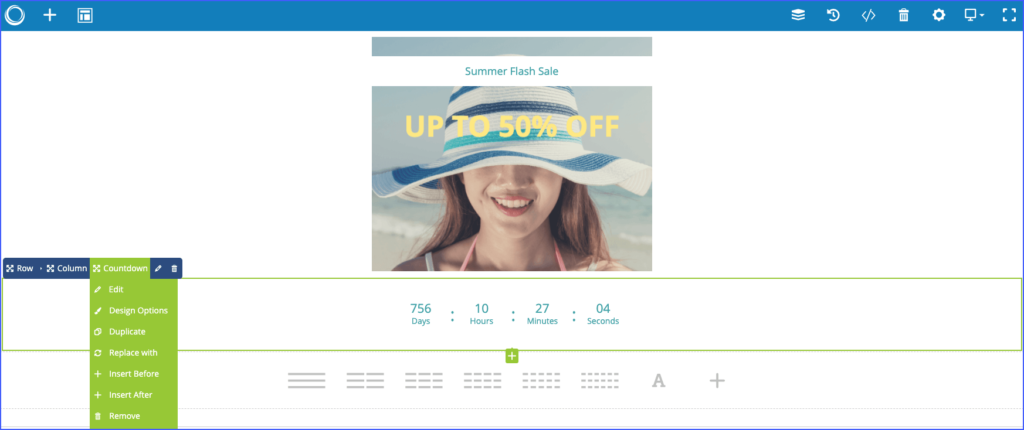
After selecting the template, feel free to edit it until you get something that you like.
NOTE:
- Configure and style the popup with the color palette supported. Set the popup width, height, position, and animation effects in the Advanced tab. You can also customize the customize padding, margin, and border on the Design Options tab.
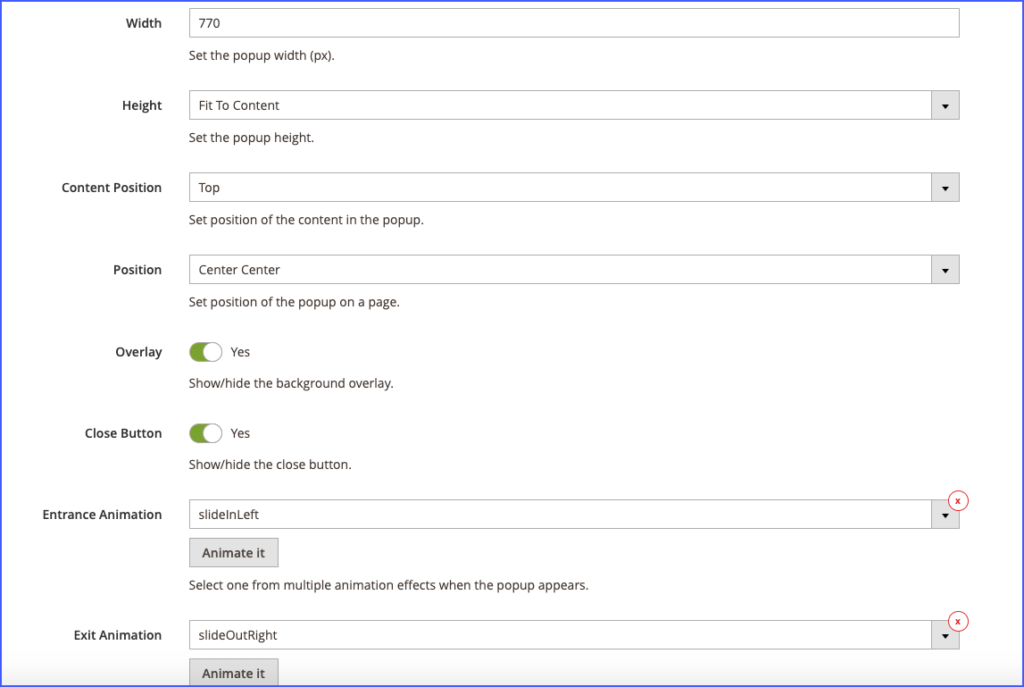
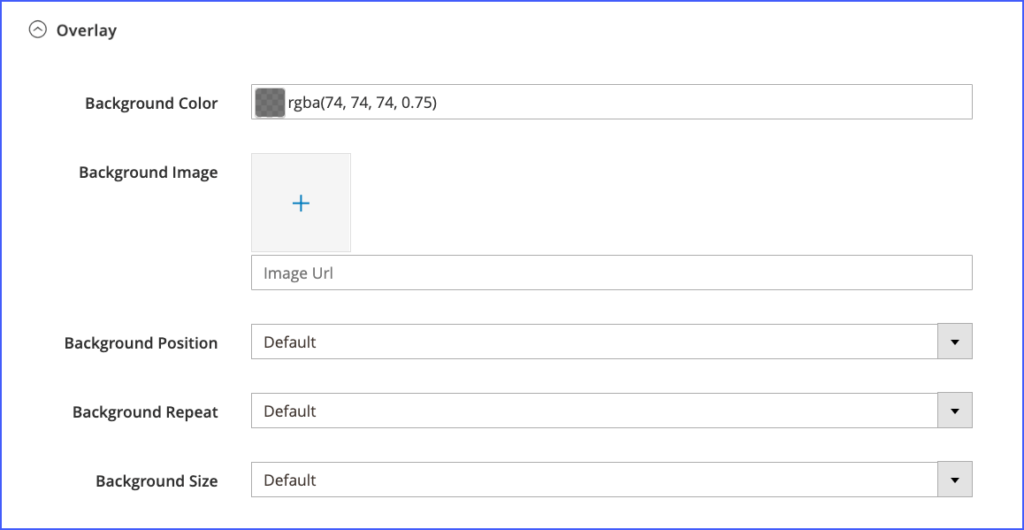
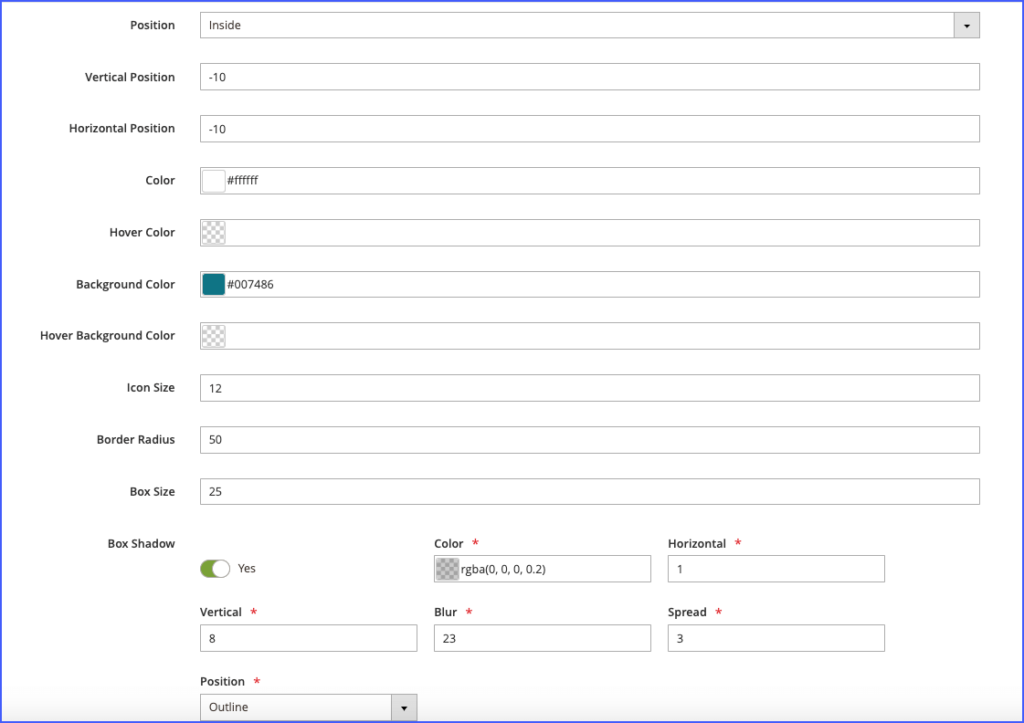
- You can also edit the overlay background and close button in the Style tab.
Step 3: Set display conditions for your countdown popup
1. Conditions
Go to the Conditions tab to target the site that the popup will display.

2. Triggers
We’ll turn on the “On scroll” option for this example. When visitors scroll down about 30%, the countdown popup will appear.
With many triggers supported, you can choose the one that is suitable for your purpose.

3. Advanced rules
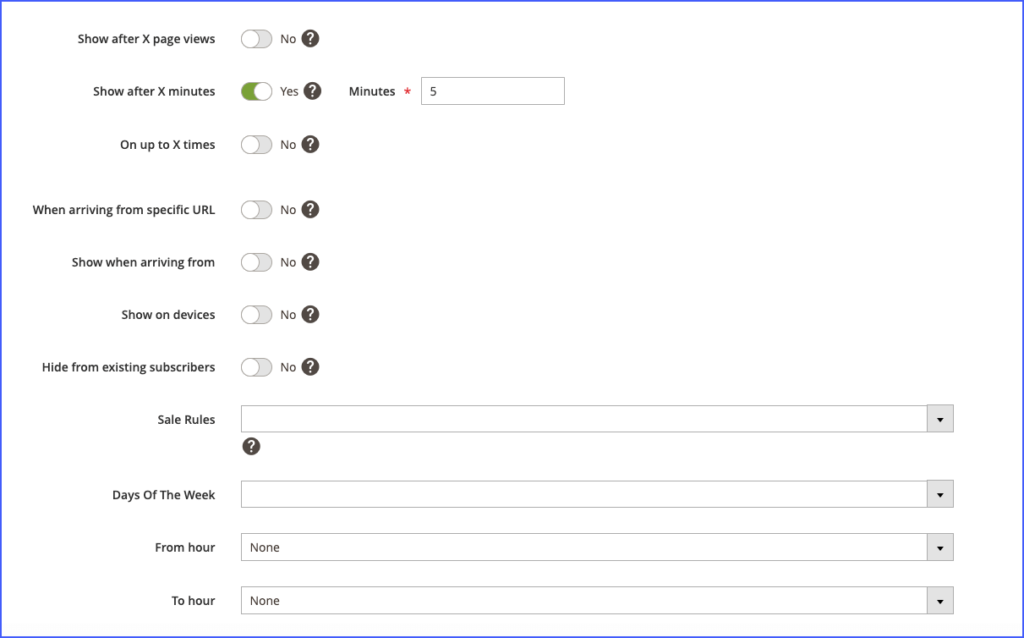
Finally, turn on the option Show after X minutes from Advanced Rules tab. Then set 5 minutes, it means that the popup will show again after 5 minutes if it meets the trigger you’ve set.
If this option doesn’t match your intent, you could select the other ones.
Once you’ve done all of these steps, click to save and view the countdown popup in the frontend!
Conclusion
We’ve walked you through the process of building a countdown popup in minutes with Magento 2 Popup Builder. We hope that this tutorial will help you have a better understanding of creating this kind of popup. Please don’t hesitate to contact us or leave a comment below.

Optimize Your Magento Store With Powerful Extensions
Looking for fast, efficient and well-coded extensions to build or optimize your Magento stores for sales boosting? Then visit Magezon website and grab necessary add-ons for yours today!
 Magezon Blog Help Merchants Build Comprehensive eCommerce Websites

