 Magezon Blog Help Merchants Build Comprehensive eCommerce Websites

In modern lives nowadays, people are much more familiar with shopping online. When they browse your website and filter a bunch of their favorite items, they have to add bookmarks to tons of product pages. But it will not be convenient to view when your customers are offline. Being an online shop owner, you need to find a way that helps your customers find shopping on your website easily, which will enhance your customer shopping experience. Realizing the problems that most digital business owners are encountering, we released Magento 2 Product Page PDF Builder.
This extension is really a powerful tool that allows you to build the PDF version of your single product page. Then, your customer can download it just with a single click on the download button right on the page. So convenient to download, print and save for reference even when offline.
This blog is all about the key factor to create a PDF version of the product page – 20+ amazing elements. Our advice here is, you should first learn how to make use of every single element and then arrange them appropriately.
Table of contents
Get Started
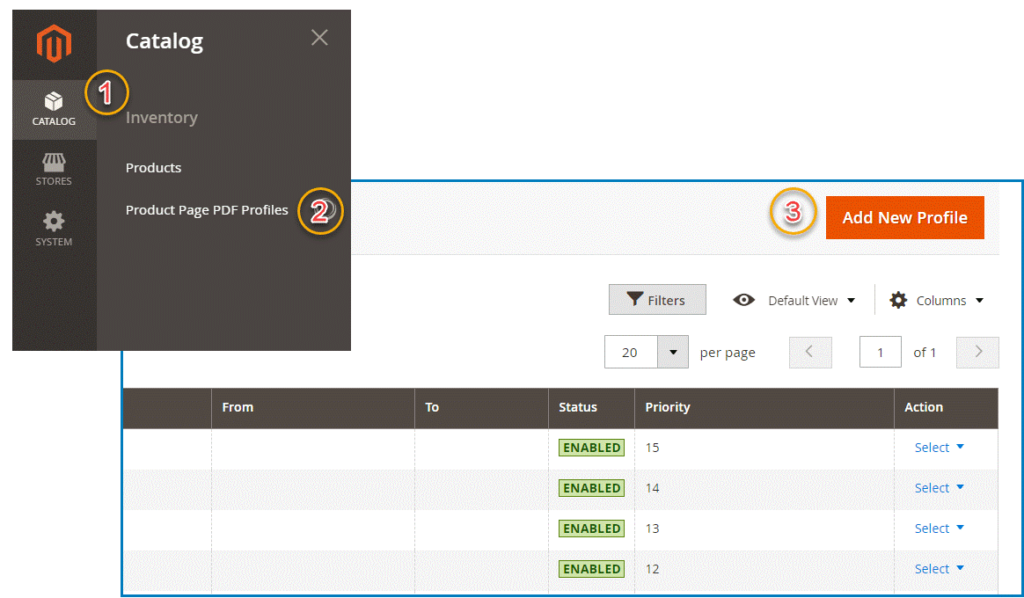
To get started, log in the backend after installing. Please refer to its installation guide for details. Then, go to Catalog > Product Page PDF Profiles.
To create a new profile, click Add New Profile orange tab on the upper right corner. After applying the profile to a product, these elements will be replaced with the relevant data of that product in the front-end.
Add Elements To The Pdf Builder Section
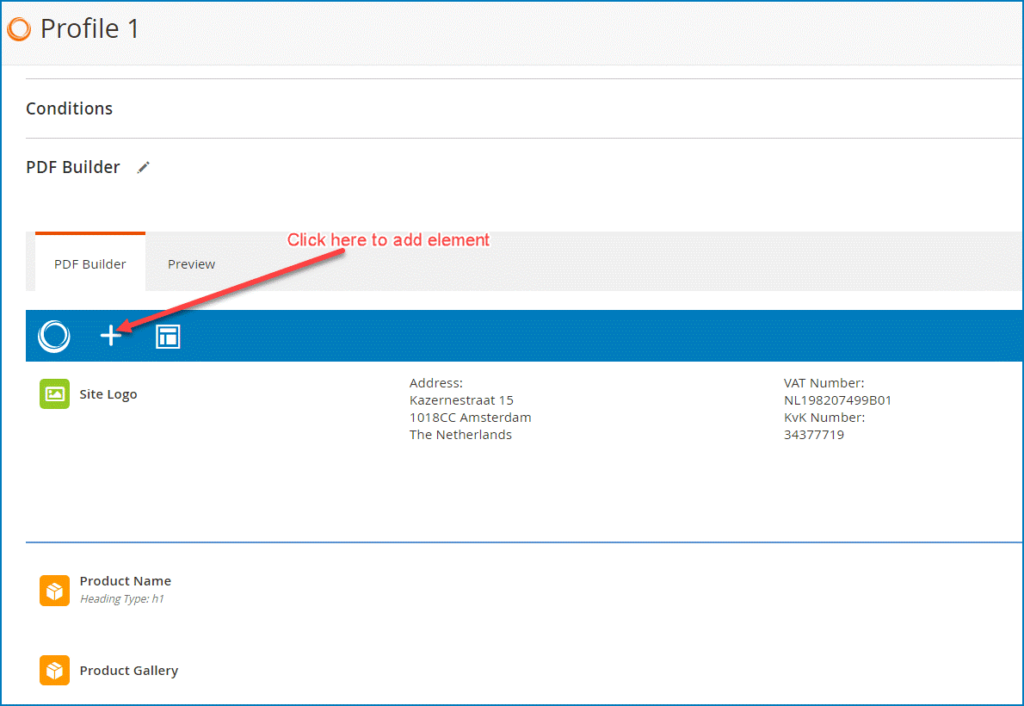
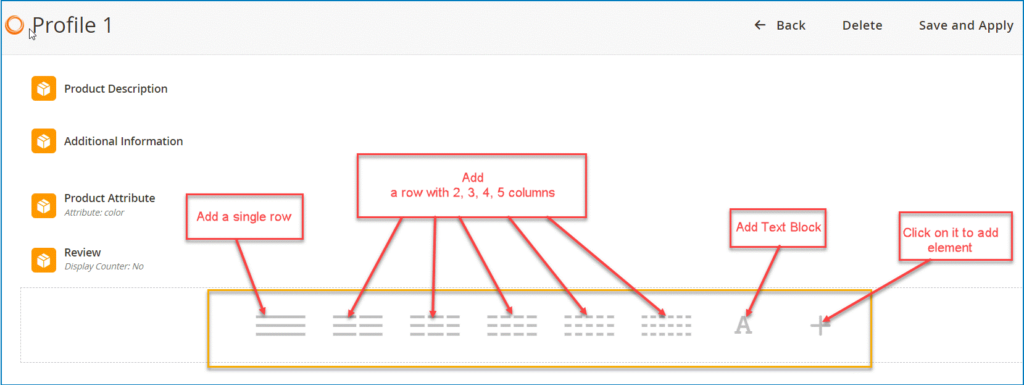
On the upper left corner of the PDF Builder section, click the plus icon to add elements.
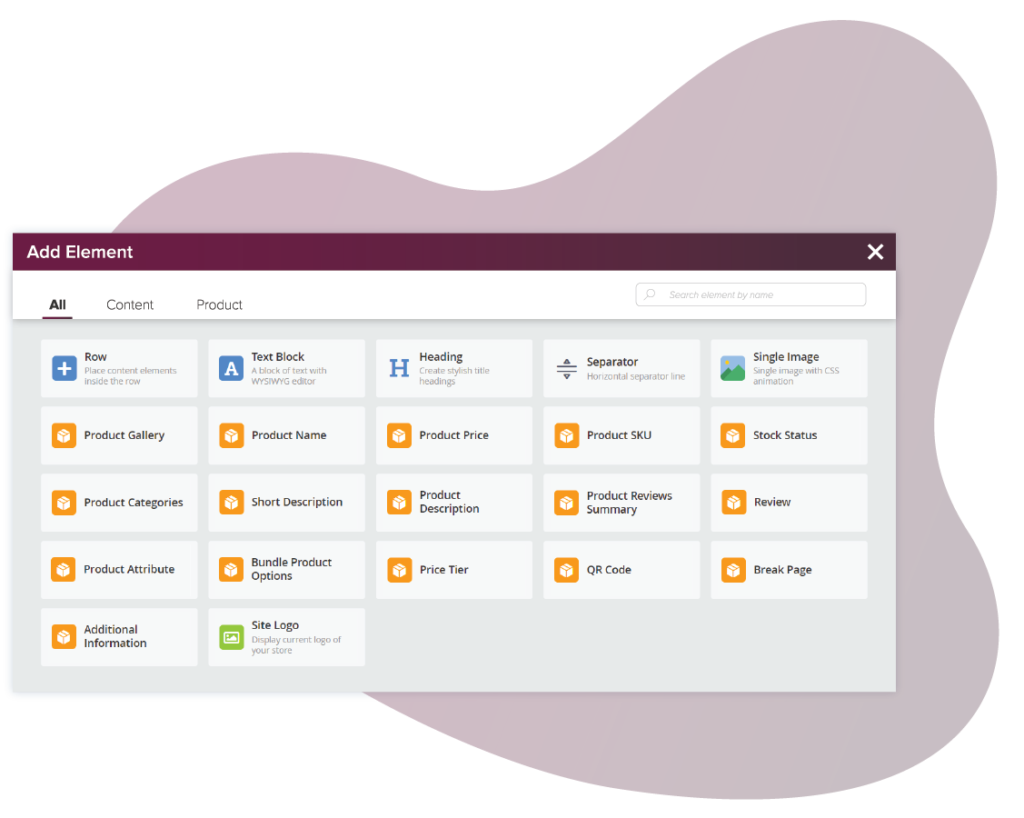
Then, a popup with 20+ elements will appear.
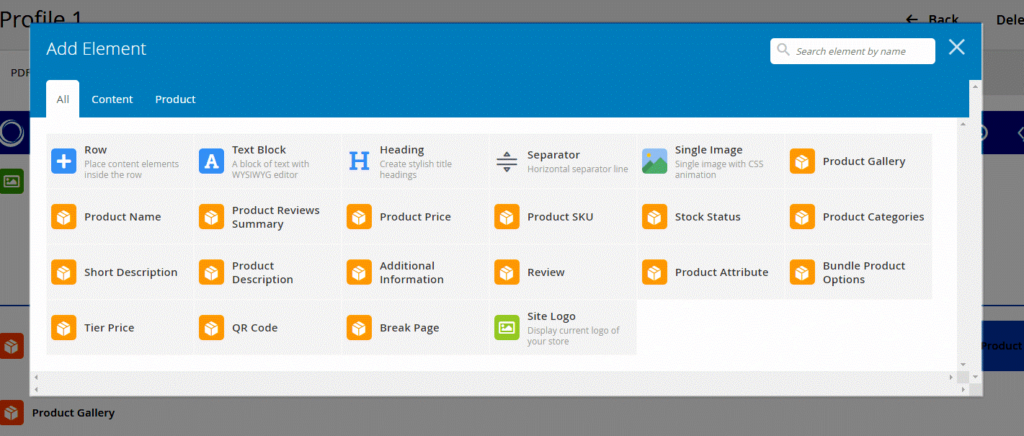
At the top right corner, you can quickly search the element by entering on the search box.
When hovering over an element, you can click a green plus icon right on the bottom of that element to add another element.
*Note: When you apply this way to add an element, that element and the one above will be on the same row.
Customize Elements
After adding an element, a popup of the element setting will appear. General tab and Design Options are two setting tabs that appear in most elements. If you want to change the style, you can customize these two tabs.

*Note: Below is our suggestions to make your PDF look eye-catching and professional:
- Change the font (size, color, weight-thin/bold)
- Add a background image, background color for an eye-catching visual look
- Add padding and margin to create “breathing room” between the block or section
- Plus, make use of radius and border to make its look better
Control Elements For Easy Workflow
When you hover over an element, a bar with 3 following tabs will appear, including Row, Column, Element.
- Row: The row that can consist of single or multiple columns and elements.
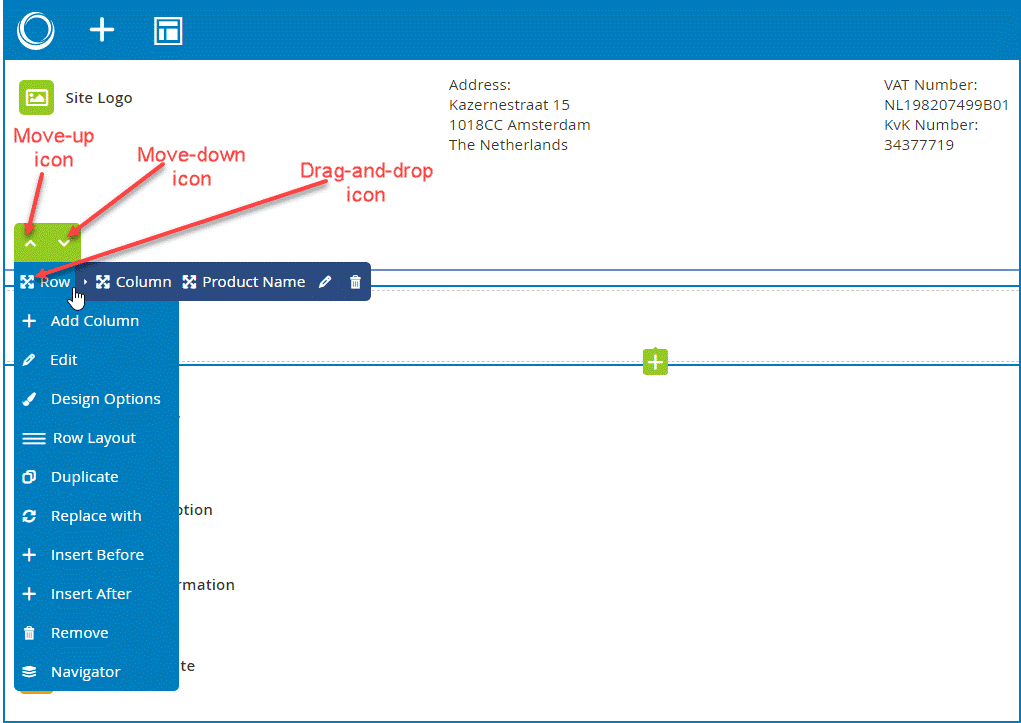
To move the row up, click on the move-up icon. Click on the move-down icon to move the row down.
To change the position of the row, click the drag-and-drop icon.
Hover over the Row tab to see its different options:
- Add Column: Add one or more column to the row
- Edit: Click Edit to open the row settings
- Design Options: Click Design Options to quickly go to the Design Options tab
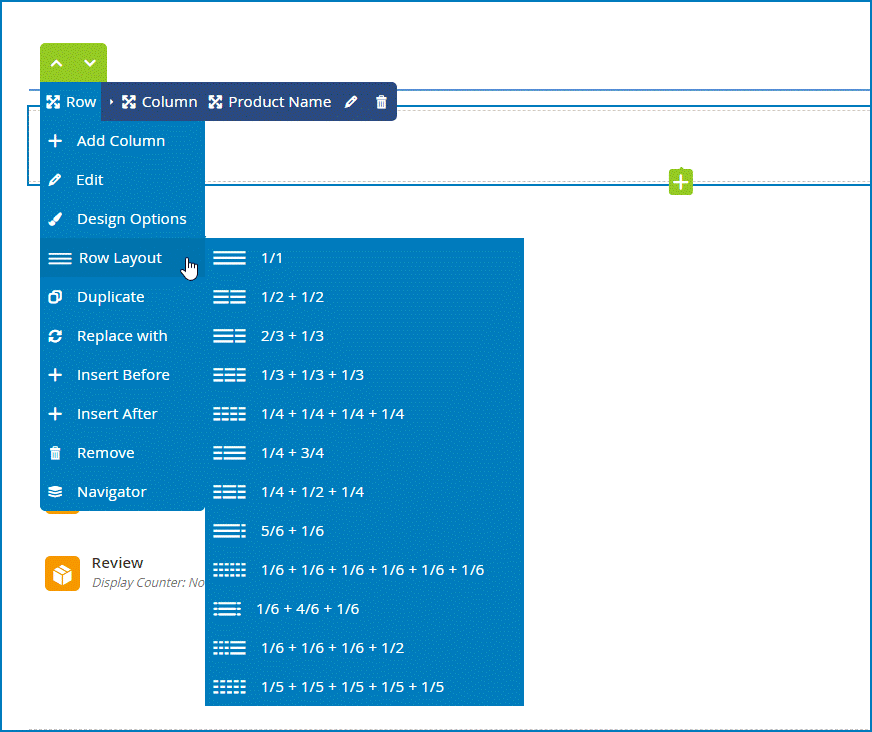
- Row Layout: Row is divided into multiple columns:
- Duplicate: Duplicate a copy of the row right below it
- Copy: Copy and paste the row into another position
- Remove: Delete the row
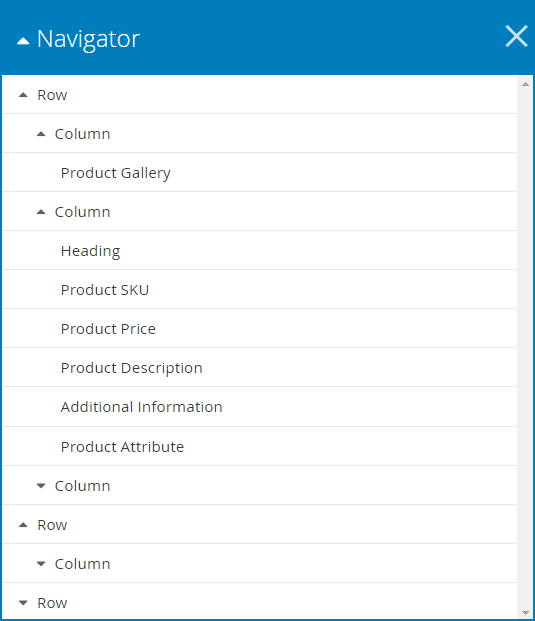
- Navigator: It’s the profile layout in a drop-down list including parent rows, child rows, columns, and elements.
Besides, you can quickly create a row with multiple columns:
2. Column: The column is in the row and contains the elements.
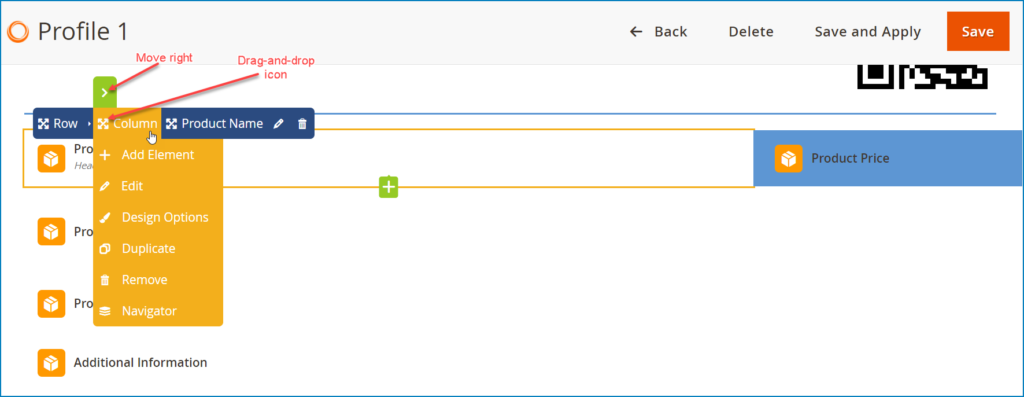
Due to 2 elements in a row, the move-right icon appears, so you can move the Product Name element to the right and Product Price will be on the left of the row.
*Note: In case there is one element in a row, there will not be a move-up, move-down, move-right, or move-left icon. Such icons appear only when there are at least 2 elements in a row.
To move the column, click the drag-and-drop icon. When hovering over the Column tab, you will see the following options:
- Add element: Add one or more elements to the column
- Edit: Click on Edit to make changes on the settings of the column
- Design Options: Click on it to quickly access to Design Options tab
- Duplicate: Duplicate the column
- Remove: Delete the column
- Navigator: It’s the profile layout in a drop-down list including parent rows, child rows, columns and elements.
3. [Element name]: The element lies in the column and row
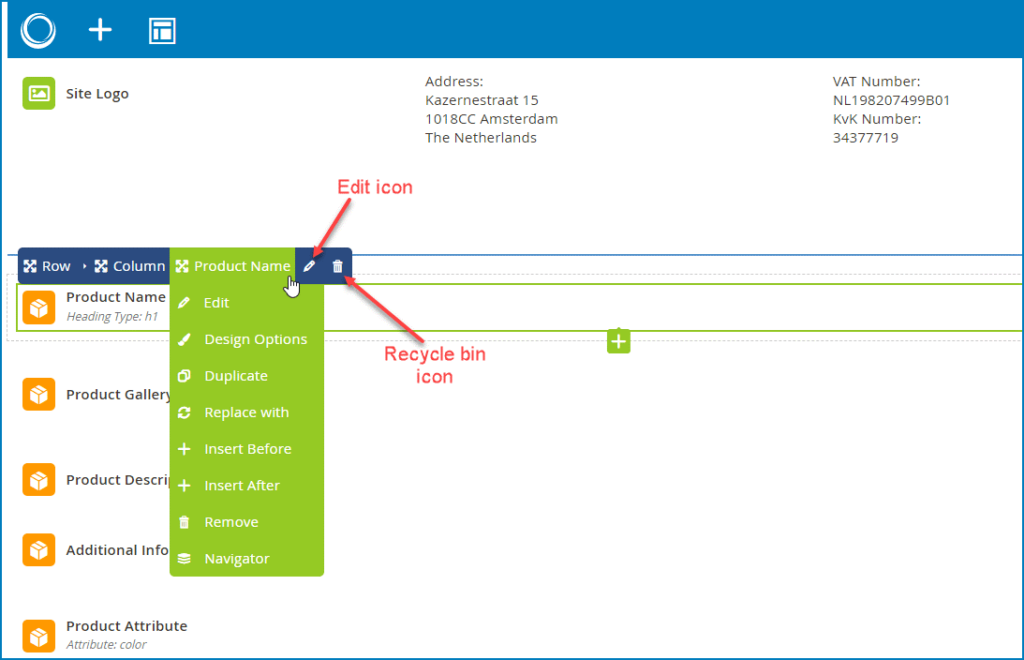
To move the element, click and drag and drop the same icon. When hovering over the Element tab, you will see the following options:
- Edit: Click on Edit to make changes to the settings of the element
- Design Options: Click on it to quickly access to Design Options tab
- Duplicate: Duplicate the element. This copy lies on the same row
- Replace With: Replace the existing element with another one
- Insert Before: Insert one more element right above the current element
- Insert After: Insert one more element right below the current element
- Remove: Delete the element
- Navigator: It’s the profile layout in a drop-down list including parent rows, child rows, elements
- Edit icon: Edit element settings
- Recycle bin icon: Delete the element
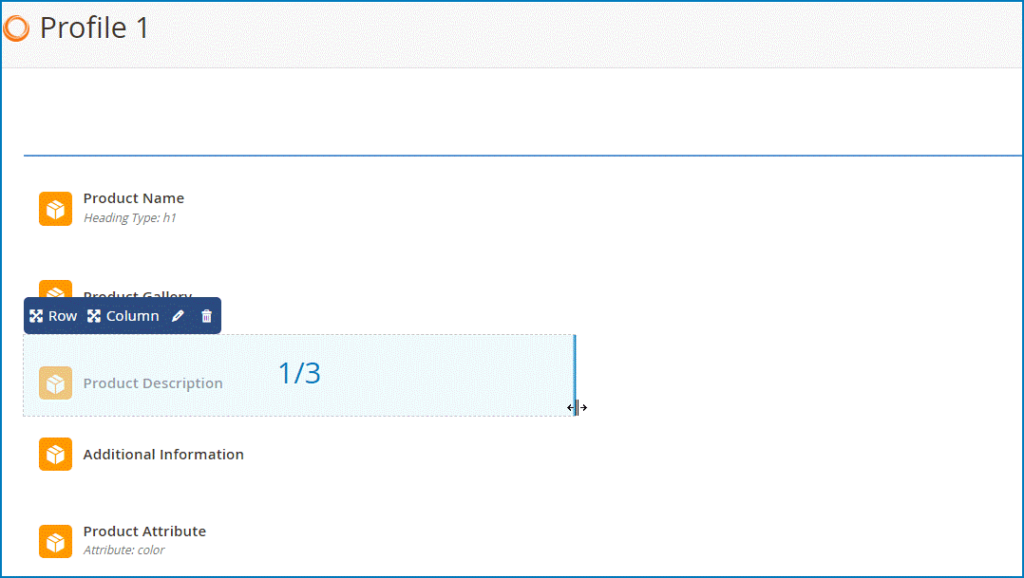
Besides, it’s easy to resize elements like below:
To Wrap Up
That’s the comprehensive guide to the 20+ amazing elements in Magento 2 Product Page PDF Builder. We hope you took a firm grasp of it and quickly make use of these elements for your product page PDF version.

Optimize Your Magento Store With Powerful Extensions
Looking for fast, efficient and well-coded extensions to build or optimize your Magento stores for sales boosting? Then visit Magezon website and grab necessary add-ons for yours today!

