 Magezon Blog Help Merchants Build Comprehensive eCommerce Websites

In the previous blog, we have a profound understanding of the Magento 2 website, store, store view. And you know this parent-child relationship is called the Magento hierarchy. Based on this hierarchy, you can set up the context (also known as the scope) of the configuration settings to flexibly manage your store. So in this blog, we’ll talk about Magento 2 scope config. Let’s get started right away!
Table of contents
What is Magento 2 Scope?
Before we go any further, it’s necessary to make clear what Magento 2 scope is. Magento 2 scope is a built-in feature that allows you to apply the configuration settings to a specific website, store, or store view. Still not clear? Look at the following explanation to better understand all Magento scopes.
First is the global scope. It means that the settings for this scope will be applied to every aspect of the system. For example, we use the same value of postal code throughout our website.
The second is the website scope. This scope restricts your settings to the current website, including its child store and store view.
Next is the store scope. This scope restricts your current settings to the current store, including its child store views.
And the last one is the store view scope. You can use this scope to apply settings to your different store views. For instance, the common use of the store view scope is to set languages for different store views.
As you have some clues about the Magento 2 scope, you know by certain that this feature is beneficial for businesses that own multiple websites, stores, and store views. However, if you are running a single store, this feature is unnecessary.
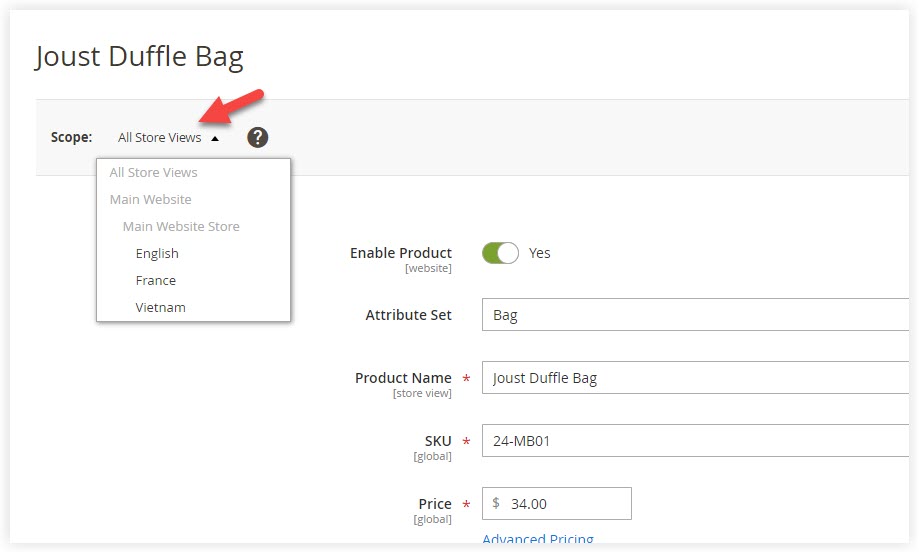
To see the current scope of your current settings, just look at the store view option in the top-left corner of the admin dashboard.
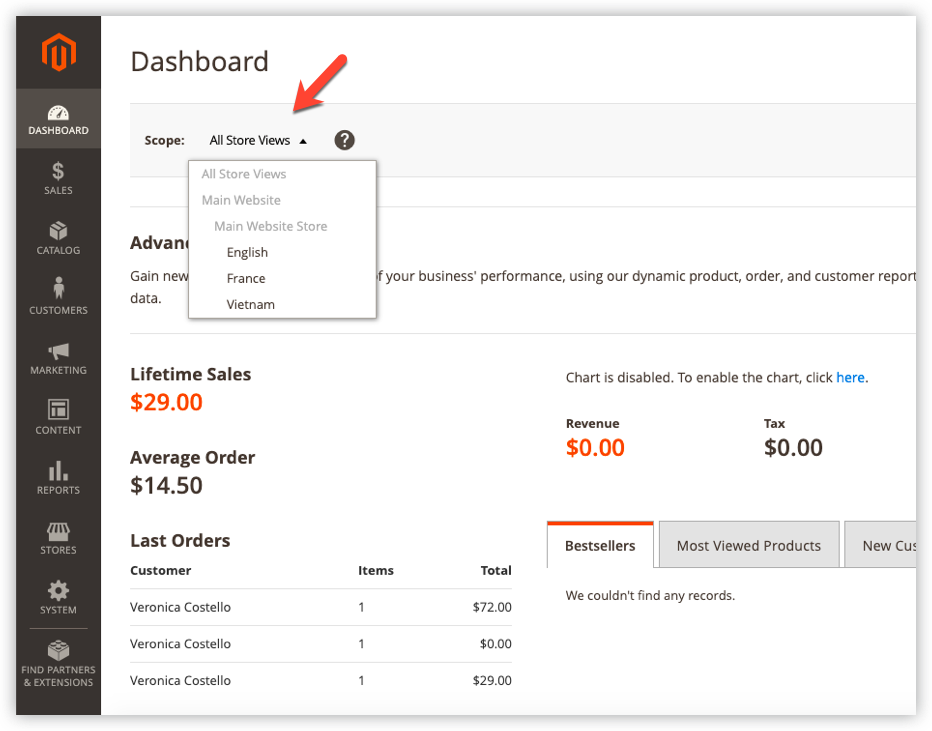
By default, the system will set your scope to “All store view.” You can find the scope indicator below each field label:

So whenever you want to configure anything, it’s essential to choose the store view scope to which your current settings apply.
Magento 2 Scope Config
1. How to Change Magento 2 Scope
As a root administrator, you can set the access levels for other lower admins.
Read more: How to set up Magento admin users with various access levels.
These restricted admins can only see the scope of store views they have permission to access.
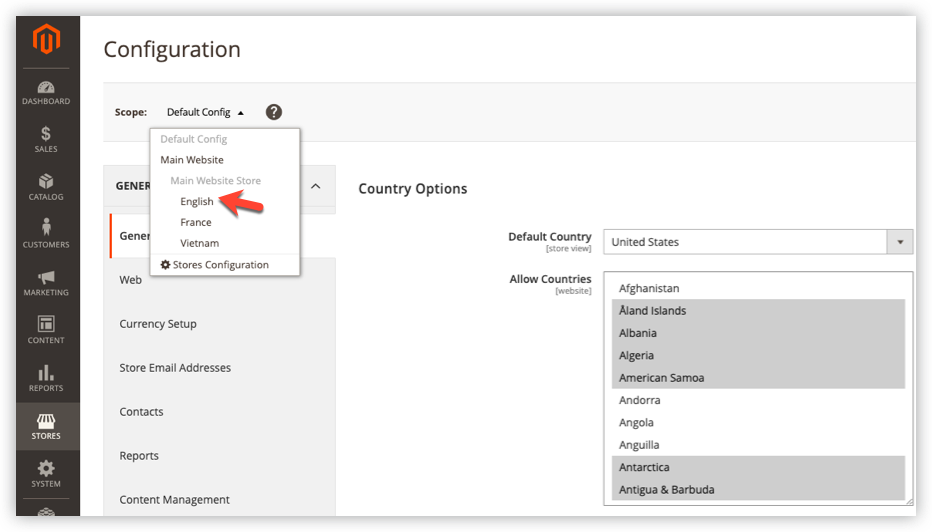
Step 1: Navigate to Store > Settings > Configuration (for design-related settings go to: Content > Design > Configuration):

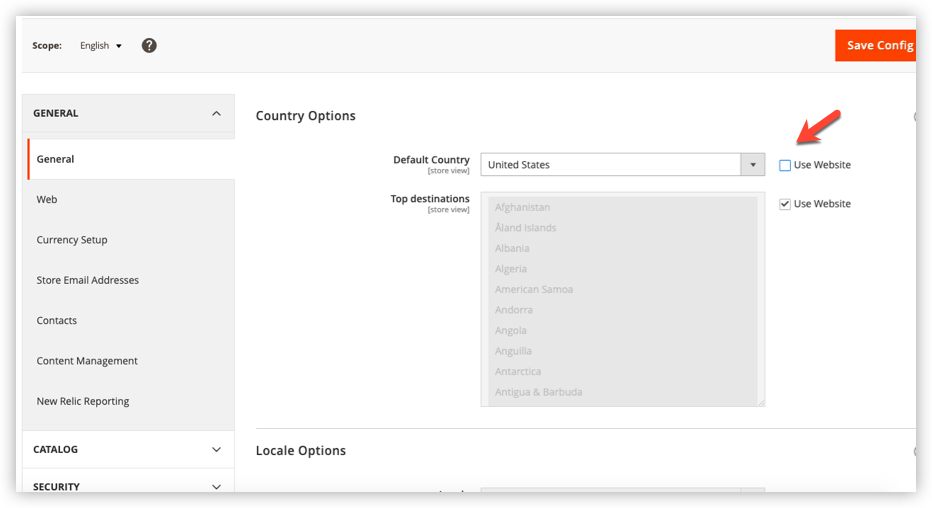
Step 2: Go to any configuration section (depend on your specific purpose). Then, look at the upper-left corner, select a store view you want the configuration to apply. In my example, I’ll set up the Country Options of the store. And I’ll choose the scope of this configuration as the English store view, like this:
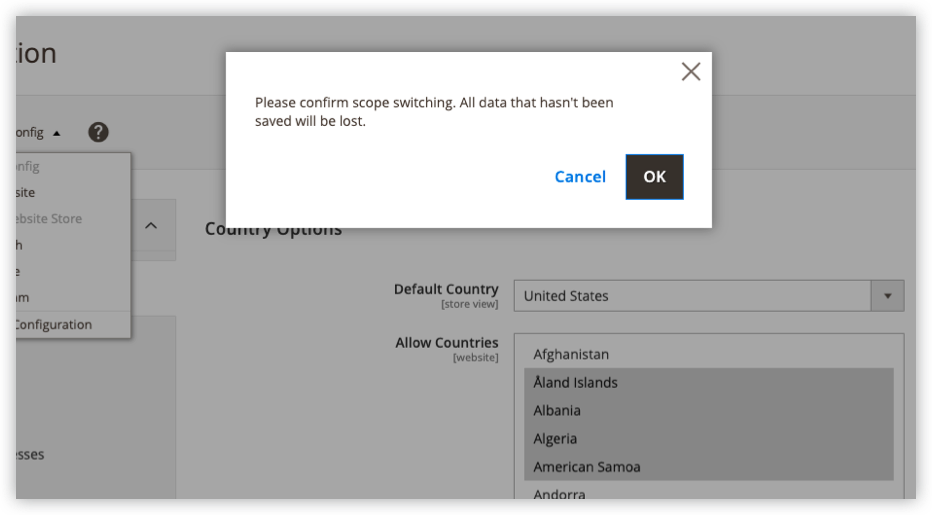
When prompted to confirm the scope changing, click Ok:
Now all you need to do is untick the checkmark Use system value and enter your numbers.
Step 3: Click Save Config after configuring. Then do not forget to refresh the Cache.

Optimize Your Magento Store With Powerful Extensions
Looking for fast, efficient and well-coded extensions to build or optimize your Magento stores for sales boosting? Then visit Magezon website and grab necessary add-ons for yours today!
2. Catalog Scope
In the Magento system, the term “Catalog” means all the product databases of your store, whether they are available for sale or not. Accessing the catalog database requires multiple factors like the scope settings, the catalog configuration, and the root category assigned to the store.
For both store owners and customers to manage and find products quickly, the Magento backend allows users to classify their products in the top navigation (also known as the main menu). Each store view has a different main menu based on the same root category. To clarify, below is the product catalog in the store hierarchy:

3. Product Scope
By default, your store’s products will be available in the default website, store, and store view. The product scope allows you to decide which store views your products are available for sale. The restricted admin can only edit and assign products for the store views they have permission for.
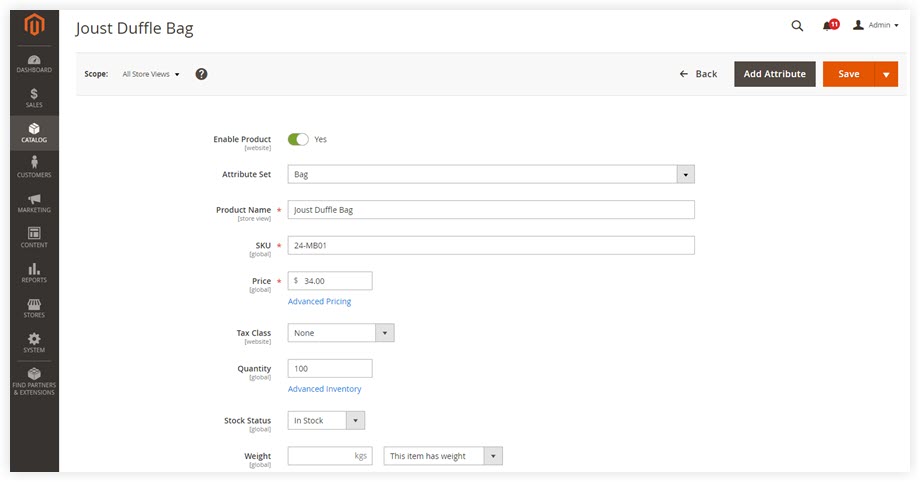
First, go to the editing page of any product in your store:
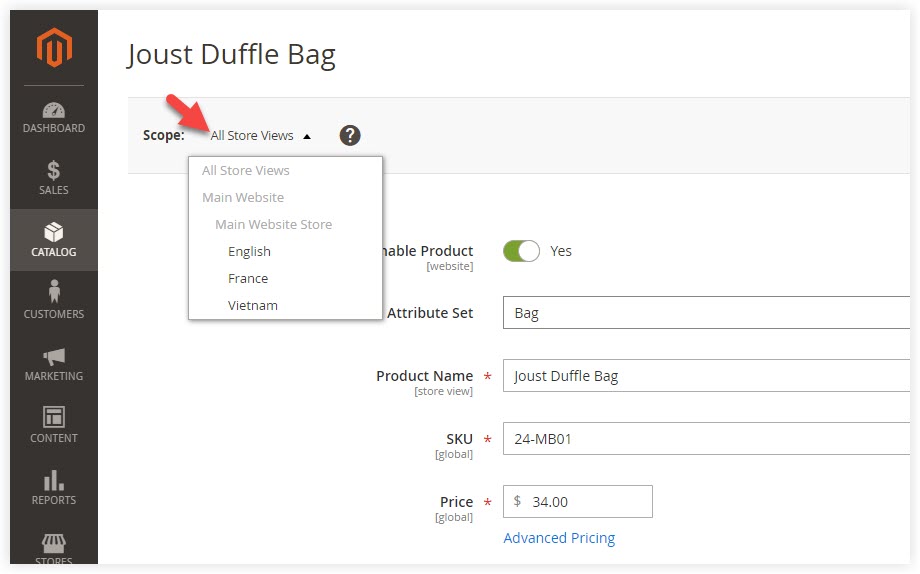
In the upper-left corner, choose a store view you want to apply the settings:
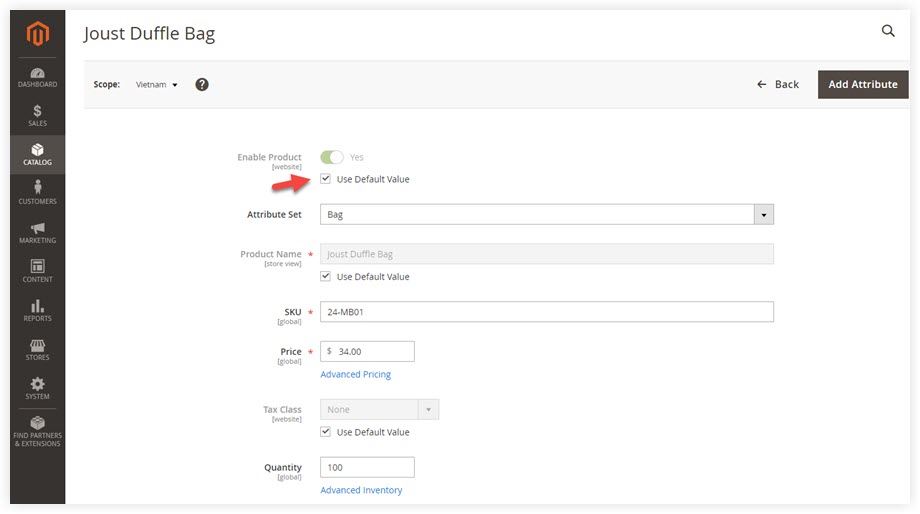
Then, the check box “Use system value” will appear under each field. Untick them and enter your desire value.
After configuring, click Save.
Back to the upper-left corner, set the store view as the default option:
Next, you can see the changes you’ve made:
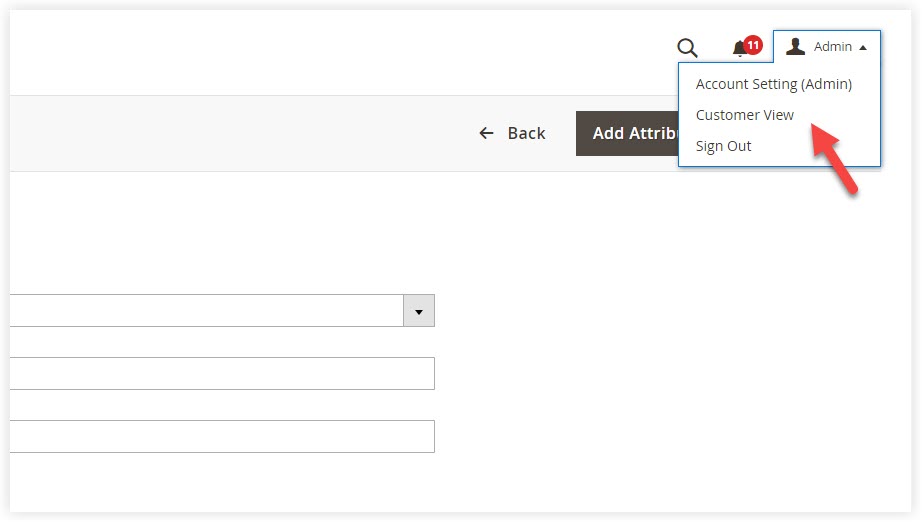
- In the top right corner, span Admin, choose Customer view:
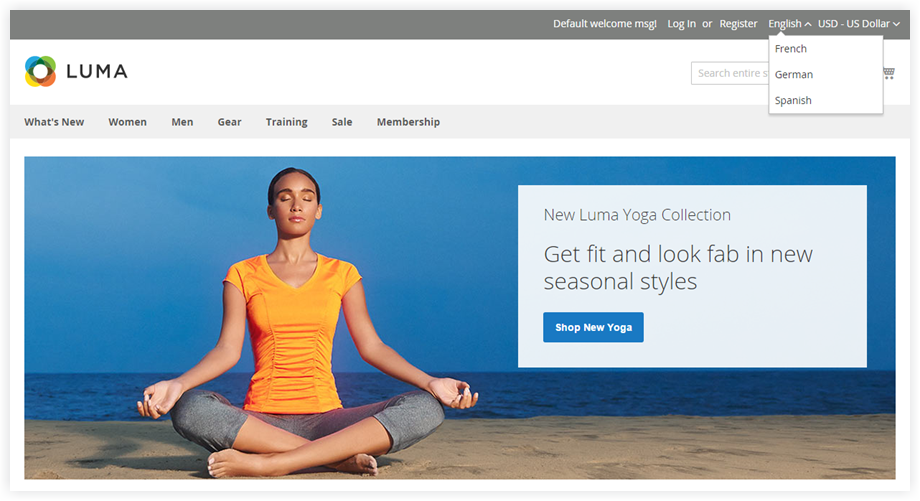
- Select the store view that you’ve made changes in the language chooser:
4. Price Scope
Magento price scope refers to the scope of the base currency that you assign to either the global or website level. If you set the price scope to the global level, the whole store hierarchy will use the same price. However, if you set the price scope to the website level, the price may vary depending on the different stores. Below are the steps to configure Magento 2 price scope.
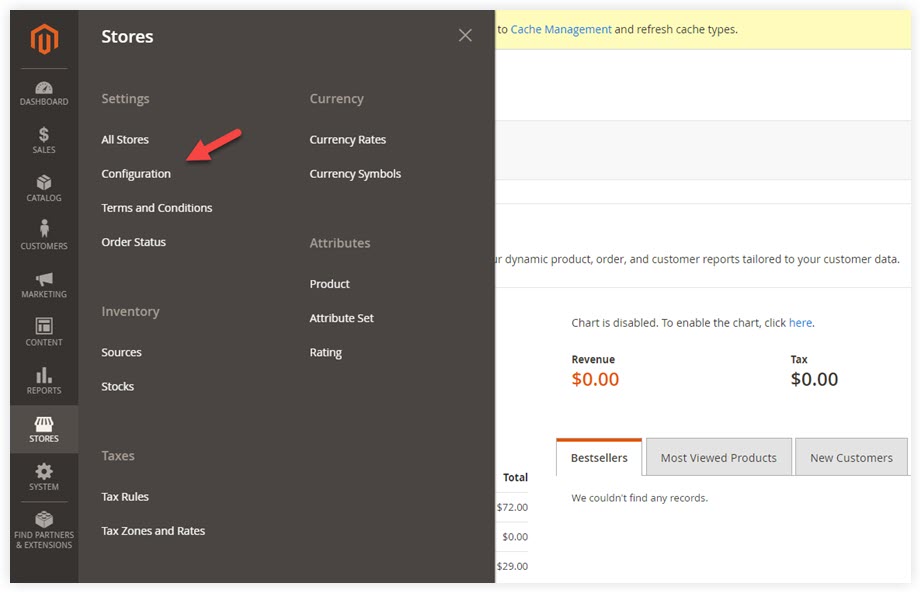
First, Go to Store > Settings > Configuration:

Then, span Catalog > Catalog:
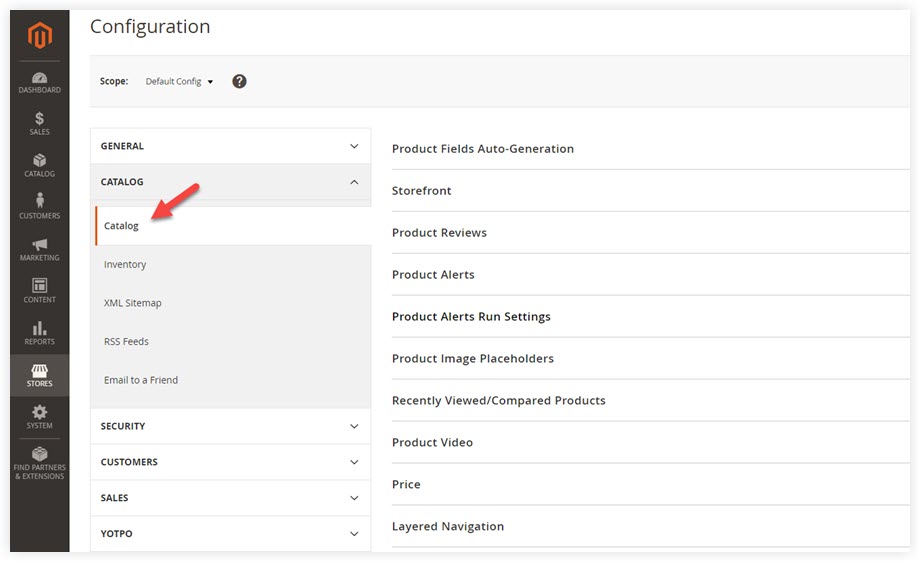
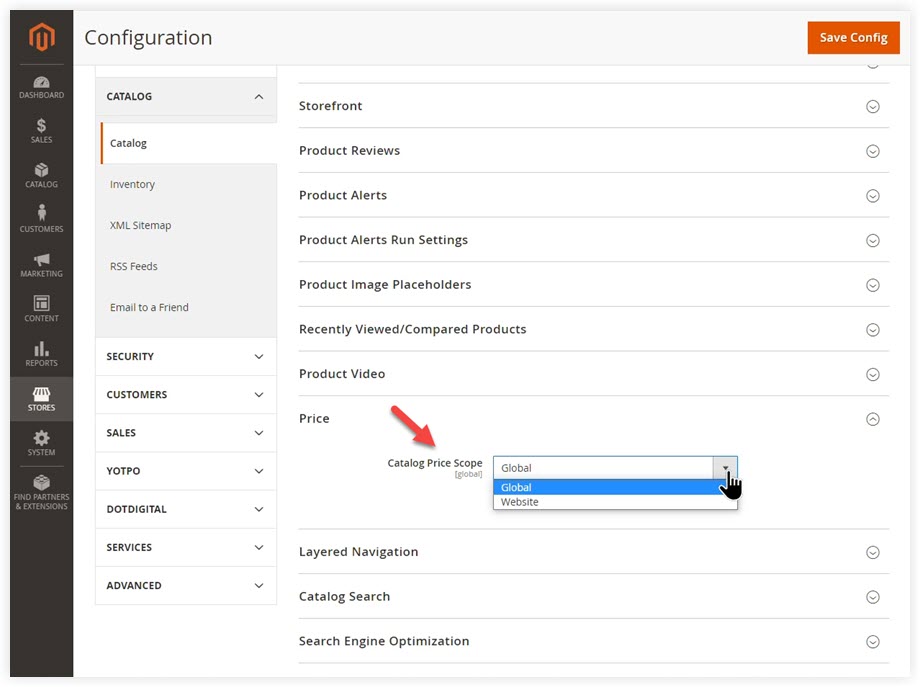
Next, span Price, then set the Catalog Price Scope to either Global or Website:
After that, click Save Config. Then do not forget to refresh the Cache.
5. Customer Account Scope
The customer account scope in Magento 2 allows admins to either share customer account information throughout the store hierarchy or restrict the information to the website where the account was created. Look at the step below to see how to configure the Magento 2 customer account scope from the admin panel.
First, navigate to Store > Settings > Configuration:
Then, span Customers > Customer Configuration:

Next, span Account Sharing Options. Untick the “Use system value” check box. Then, choose the scope as Per Website or Global:

Global: share customer account information throughout the store hierarchy.
Per Website: restrict the information to the website where the account was created.
After configuring, click Save Config. Then do not forget to refresh the Cache.
Final Words
We hope that after reading this blog, you will better understand the Magento 2 scope config. Find it helpful? Visit our Magento tutorial series not to be confused about Magento anymore. If you have any questions, please feel free to leave us a comment down below.
At Magezon, we also provide you with many fast, well-coded yet affordable extensions for your store optimization. Visit our website to opt for necessary ones!
Optimize Your Magento Store With Powerful Extensions
Looking for fast, efficient and well-coded extensions to build or optimize your Magento stores for sales boosting? Then visit Magezon website and grab necessary add-ons for yours today!
