 Magezon Blog Help Merchants Build Comprehensive eCommerce Websites

With Magento 2 WYSIWYG editor, uploading images is a breeze. This tutorial will show you How to upload photos in Magento 2 in 9 steps.
As a perfect blend of Apple-esque and Microsoft Office, our Magento 2 File Manager gives you the ability to build, edit, preview, and organize all of your assets within the Magento backend. Not sure yet? So, check it out where you’ll end up.
9 Steps to Upload Image in Magento 2
- Step 1: Open a CMS Page, Block, or Dynamic Block Where You Want to Insert an Image.
- Step 2: Expand the Content section.
- Step 3: Move the cursor to where you want to add the image.
- Step 4: Hit the Insert image icon in the editor toolbar.
- Step 5: Hit the magnifying glass icon to start adding images.
- Step 6: Choose a file in the left column of the window.
- Step 7: Click Upload Image to select an image from the computer.
- Step 8: Click Add selected to add the image.
- Step 9: (Optional) Add Image description and Dimensions to the image as your preference.
Step 1: Open a CMS Page, Block, or Dynamic Block Where You Want to Insert an Image.
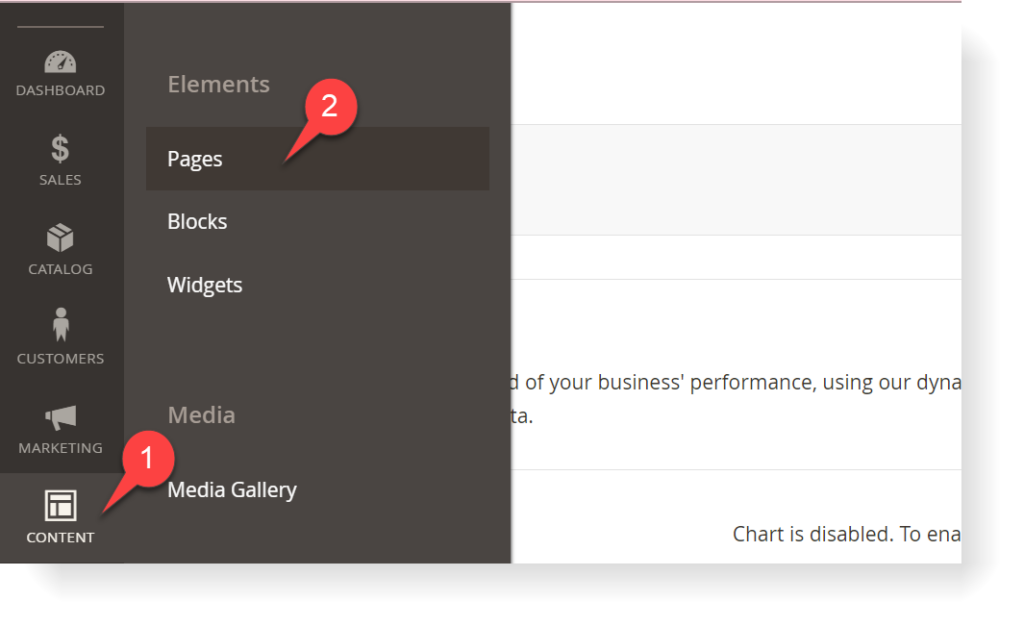
Choose a page in Magento 2 where you want to add image
Step 2: Expand the Content section.
You will see an editor toolbar with various options.
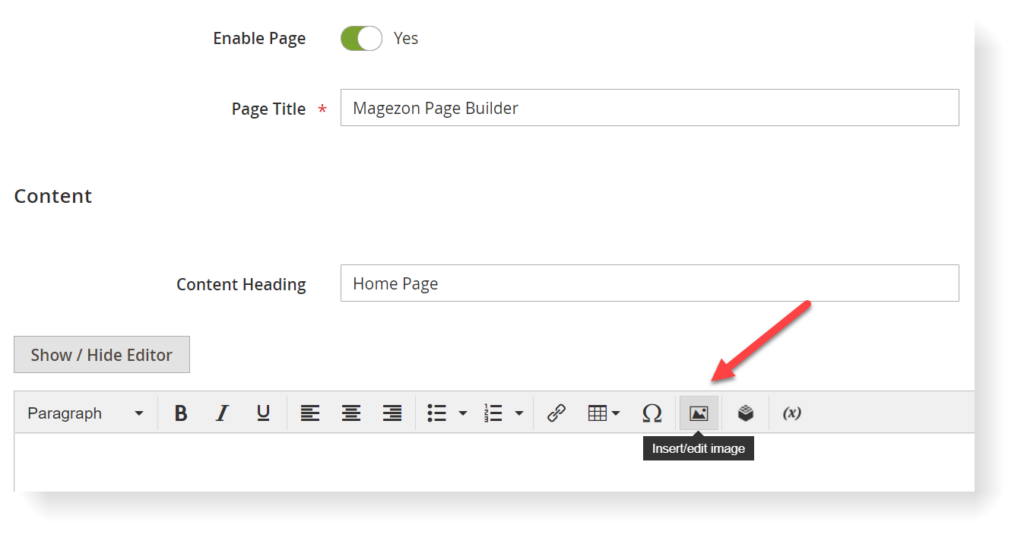
Step 3: Move the cursor to where you want to add the image.
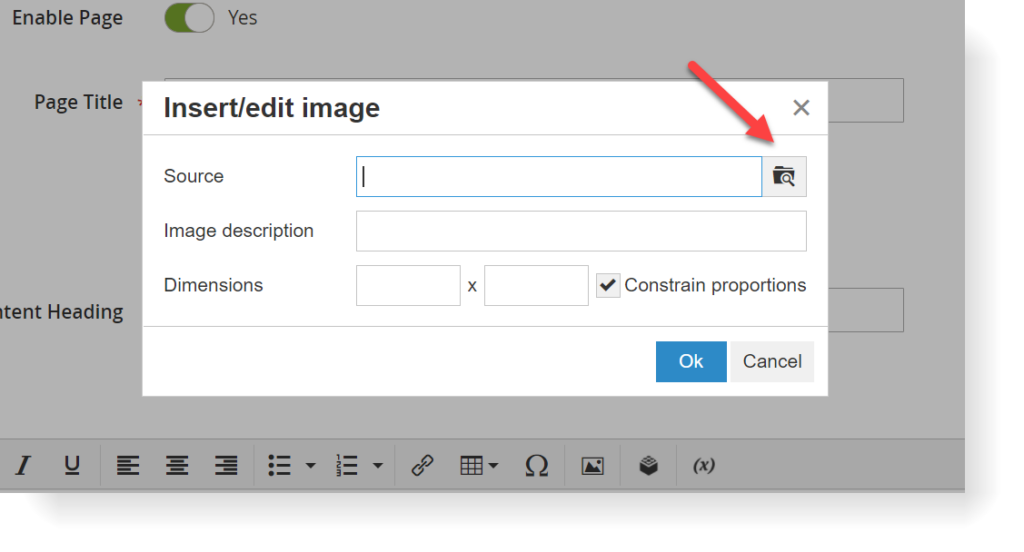
Step 4: Hit the Insert image icon in the editor toolbar.
You will see the Insert/edit image popup appear with three fields: Source, Image description, and Dimensions.
Step 5: Hit the magnifying glass icon to start adding images.
From here, a Select Images window will open, allowing you to upload an image using its URL.
To do so, choose an existing image or upload a new image from the computer.
You can also paste an image URL from the Internet to upload that image directly to your page.
Step 6: Choose a file in the left column of the window.
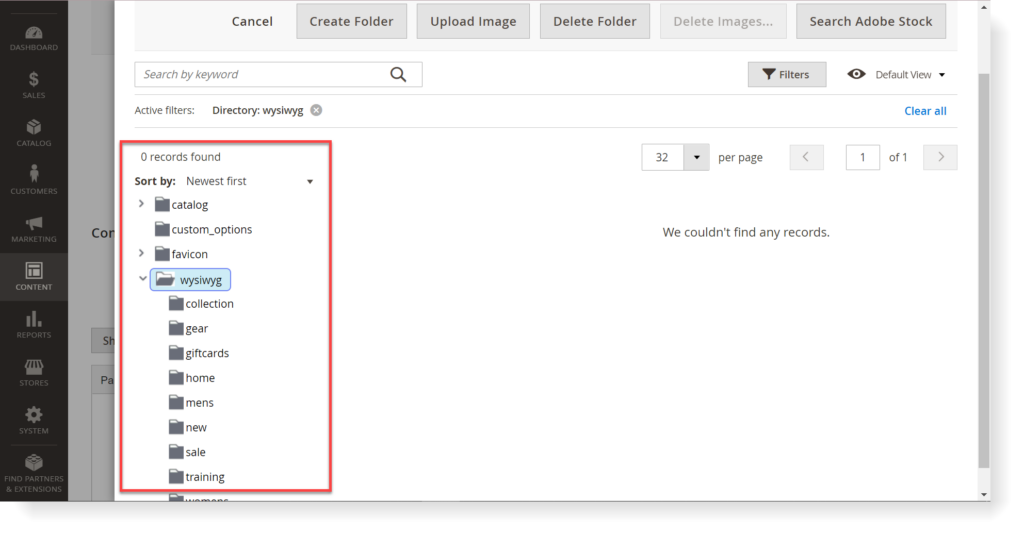
Step 7: Click Upload Image to select an image from the computer.
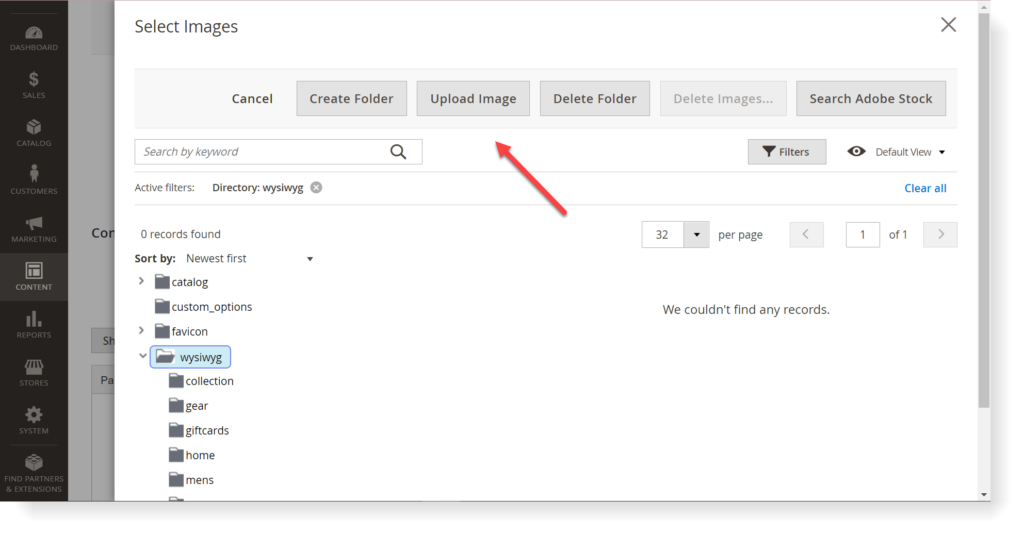
You can choose one or more images from the computer by pressing Shift.
To search images using Adobe Stock, go to Magento Userguide to find out.
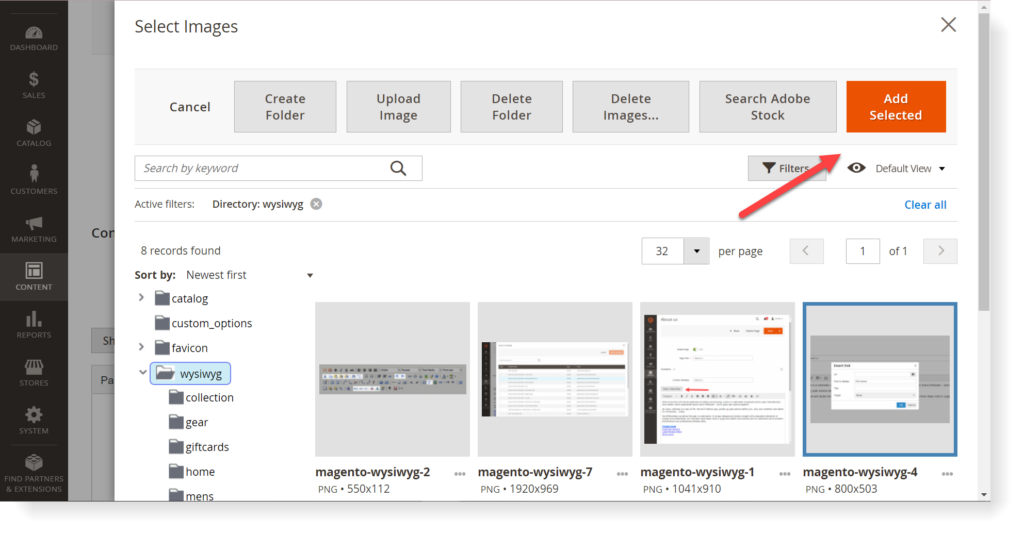
Step 8: Click Add selected to add the image.
| Related content: The Complete Guide to Magento 2 Media Gallery Beginner‘s Guide to Magento Media Folder How to Add Top Link in Magento 2 Magento CMS: A Comprehensive Overview |
Step 9: (Optional) Add Image description and Dimensions to the image as your preference.

Optimize Your Magento Store With Powerful Extensions
Looking for fast, efficient and well-coded extensions to build or optimize your Magento stores for sales boosting? Then visit Magezon website and grab necessary add-ons for yours today!


