
On the road to being the go-to in a market share, email communication is always an essential aspect storeowner should take into account. The email represents your image and message with your defined set of customers, deciding whether your brand looks professional or not. So in today’s topic of the Store Settings category, we will start with setting up Magento 2 store email addresses. Let’s dive straight into it!
Table of contents
3 Steps to Setup Store Email Addresses in Magento 2
By default, Magento allows you to have five store email addresses associated with multiple business purposes. If you look at the backend, there are three predefined email identities:
- General contact
- Sales representatives
- Customer support
Each of them serves a specific purpose with an auto-message. You can set up to display the email identities as the senders of all emails sent from your store. Besides, Magento provides you with two other custom email identities to match your store’s distinct function and department.
Step 1: Set up the Email Address for Your Domain
Before making any changes, we recommend that you have an email address on your custom domain name. I mean, the email address should look something more optimal than any other free email account you may create. For example, instead of using [email protected], we use [email protected]. This slight difference brings us a professional vibe. Consequently, your business can build credibility and trust in the customer’s eyes.
You can either read your web hosting provider’s instructions or contact them to create an email address for your domain name.
Step 2: Configure the Email Address for Your Store
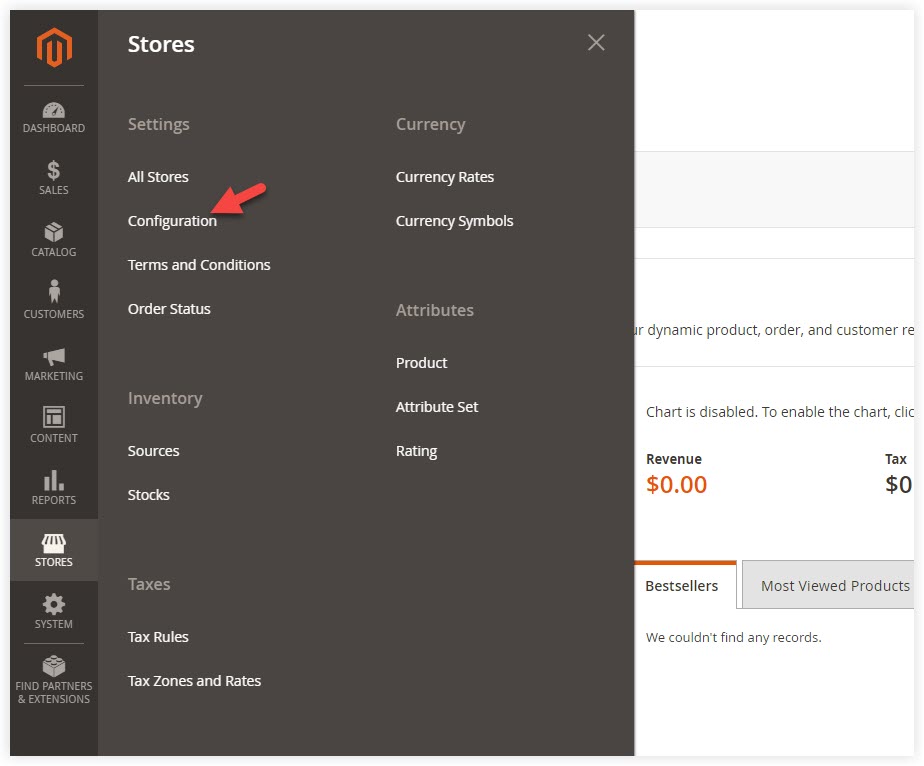
From the admin panel, go to Stores > Settings > Configuration:
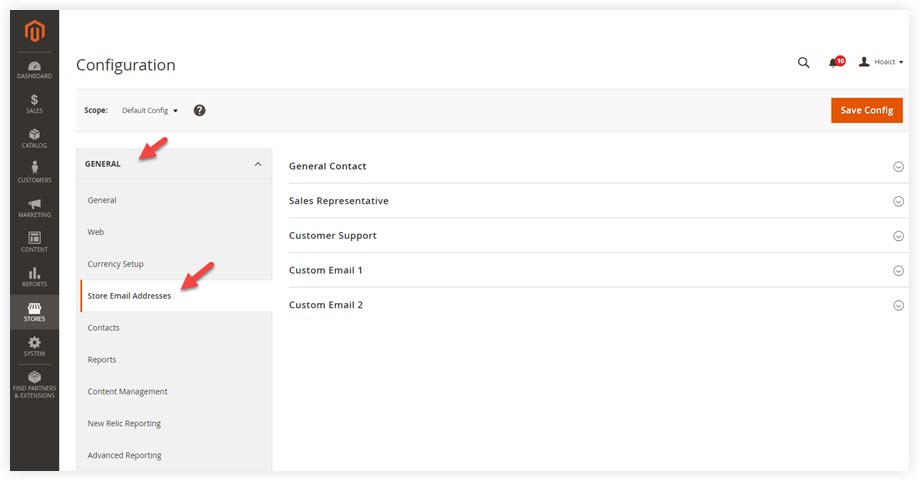
Look at the left panel, span General >> Store Email Addresses:
Open General Contact:
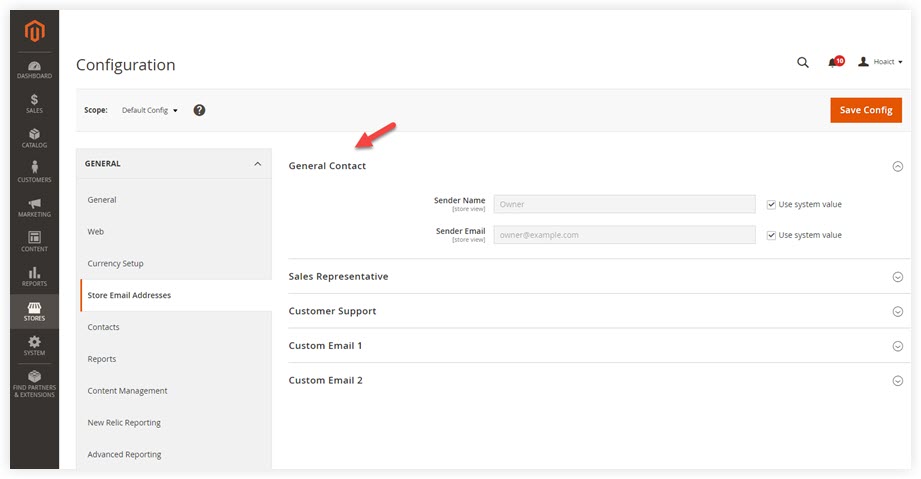
Before configuring, please untick the Use system value checkmarks.
- Sender Name: This is the name of the person who appears as the sender of this email identity. In this case, enter the sender name of the General Contact identity.
- Sender Email: Enter the sender email address associated with this email identity.You can apply the same process for the rest in the email identity list.
After that, click Save Config.
| You may be interested in: How to change Magento 2 Welcome Message Magento Store Information: How to Set Up Magento Admin Panel: A Comprehensive Overview |
Step 3: Update the Sales Email Configuration
Look at the left panel, expand Sales > Sales Emails:
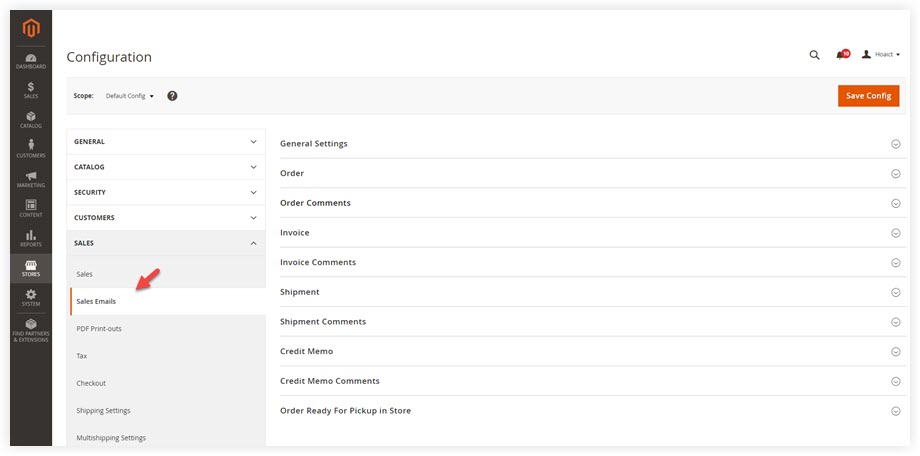
As you can see, there are nine separated sections:
- Order
- Order Comments
- Invoice
- Invoice Comments
- Shipment
- Shipment Comments
- Credit Memo
- Credit Memo Comments
- Order Ready For Pickup in Store
Span Order, make sure the sender in the New Order Confirmation Email Sender field matches the above Store Email Addresses settings.
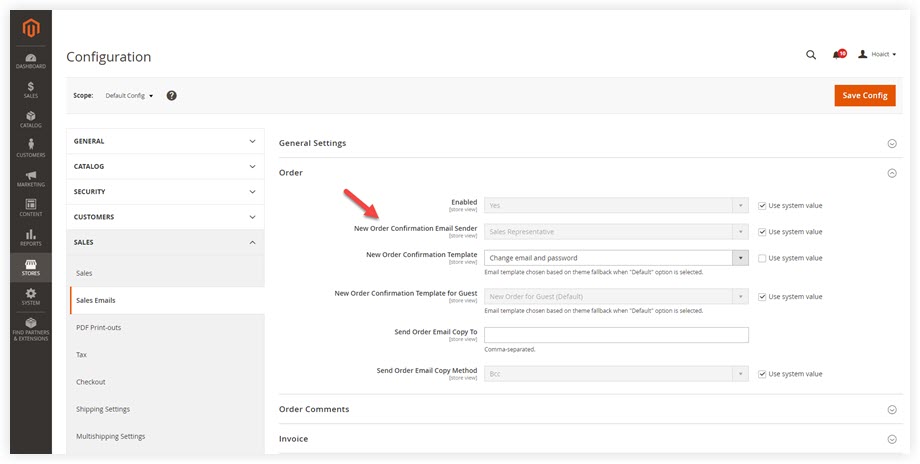
Do the same to any section you want to make sure its configuration is correct. After that, click Save Config.
Beautify Your Magento 2 Email Templates With Magezon Email Builder Extension
Now you can set up the Magento 2 email addresses, great! You are halfway on the road to building credibility and profession. The rest to do now is making eye-catching email templates.
By default, the Magento WYSIWYG editor imposes some limits to create beautiful emails. But with the help of Magento Email Builder from Magezon, this is something in the past. Magento 2 Email Builder is a compelling set of tools for building and designing transactional emails. Its user-friendly editor lets you create any email templates that go inline with your web design and theme. You are also empowered to customize a large number of brilliant pre-built email templates without effort. Give it a try!

Optimize Your Magento Store With Powerful Extensions
Looking for fast, efficient and well-coded extensions to build or optimize your Magento stores for sales boosting? Then visit Magezon website and grab necessary add-ons for yours today!
 Magezon Blog Help Merchants Build Comprehensive eCommerce Websites

