Hi there! You want to motivate customers on your website in high- sales season, don’t you? Take it easy with Magento 2 Countdown Timer extension! In this post, we will show you how to create a countdown timer in Magento 2 in some simple steps.
Table of contents
What is a Countdown Timer?
Countdown timer is an effective method for various events or sales campaigns on the Magento store. Thus, your store can grab a lot of attraction from customers as well as motivate customers to take action in the promotion campaign.
A countdown timer offers customers the benefits they will get, for example, they can save 40% when purchasing on the promotion. Or else, the countdown clock will tell the time left for the occurring event on the store that engages customers to purchase the product. To illustrate, a customer seeing the start or end countdown is acting fast as the opportunity can be missed and those half-priced sneakers can be purchased by someone else.
What Countdown Timer can help?
Countdown Timer can increase conversion rate and boost traffic. After you implement the timer with additional information into your Homepage, category page, search page, and other product list page of the store, a lot of customers will most likely get products at cheaper prices or take action with the offered discount.
How to Create a Countdown Timer in Magento 2
We will introduce how to make a countdown clock with Magezon Countdown Timer extension.
Step 1: Create a new rule
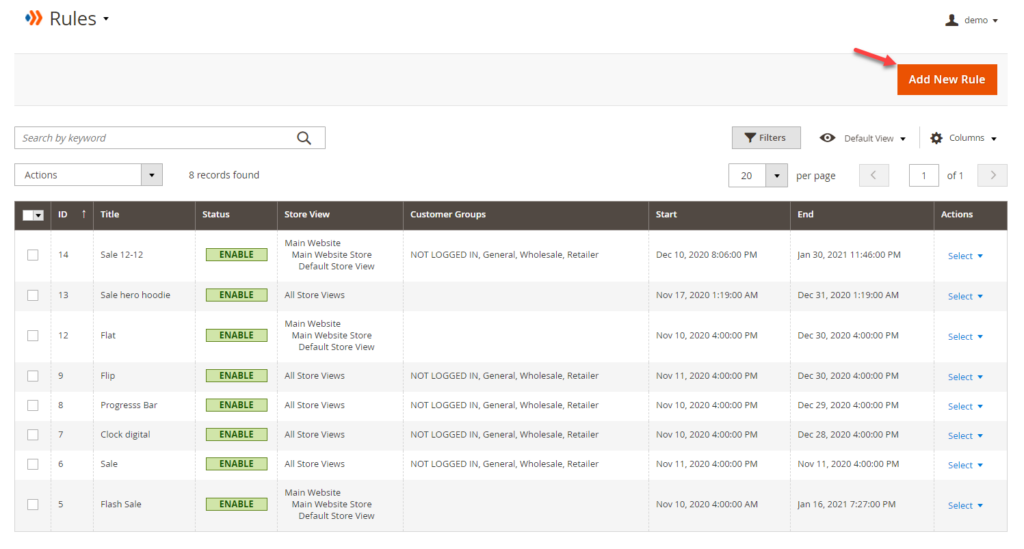
From backend, on the product grid, select “Add New Rule” to create a new Magento 2 Countdown timer.

Step 2: Configure the countdown clock
This step is the key design for your countdown timer. You can build any kind of clock for each item in your shop.
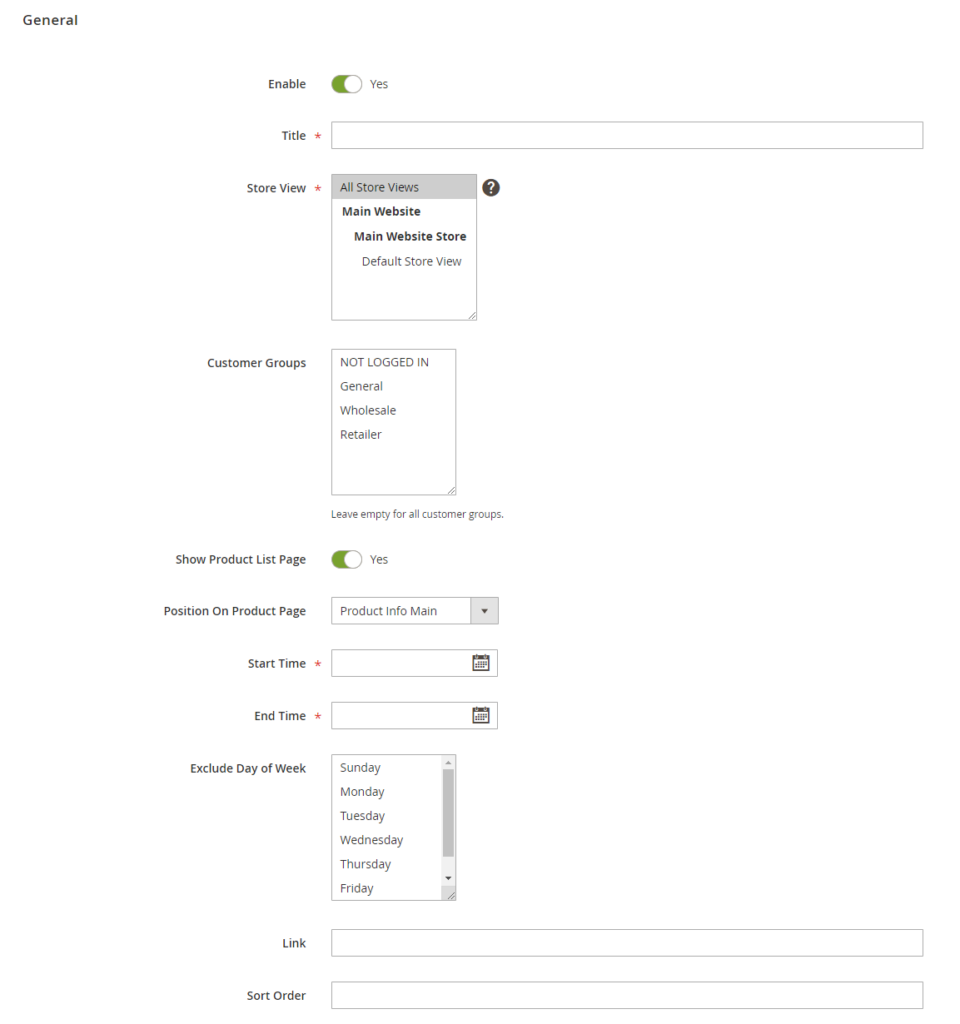
General
- Title: Enter the title for the countdown clock or campaign name
- Enable: Select “yes” to enable this module on the product page
- Store View: Set the store view for the clock
- Customer Groups: Choose the group of customers that you want to display clock
- Show Product List Page: Select “yes” to show the countdown clock on the product list page such as Homepage, Search page, Wishlist page, compare page.
- Position On Product Page: Choose the position to show the countdown clock on the product page
- Start Time: Set the start time for the countdown clock
- End Time: Set the end time for the countdown clock
- Exclude Day of Week: Choose the day of week to inactive the countdown clock
- Link: Insert a link to other landing page or any page you want to navigate to
- Sort Order: Specify countdown timer position if there are several widgets in the same block The first position is 0.

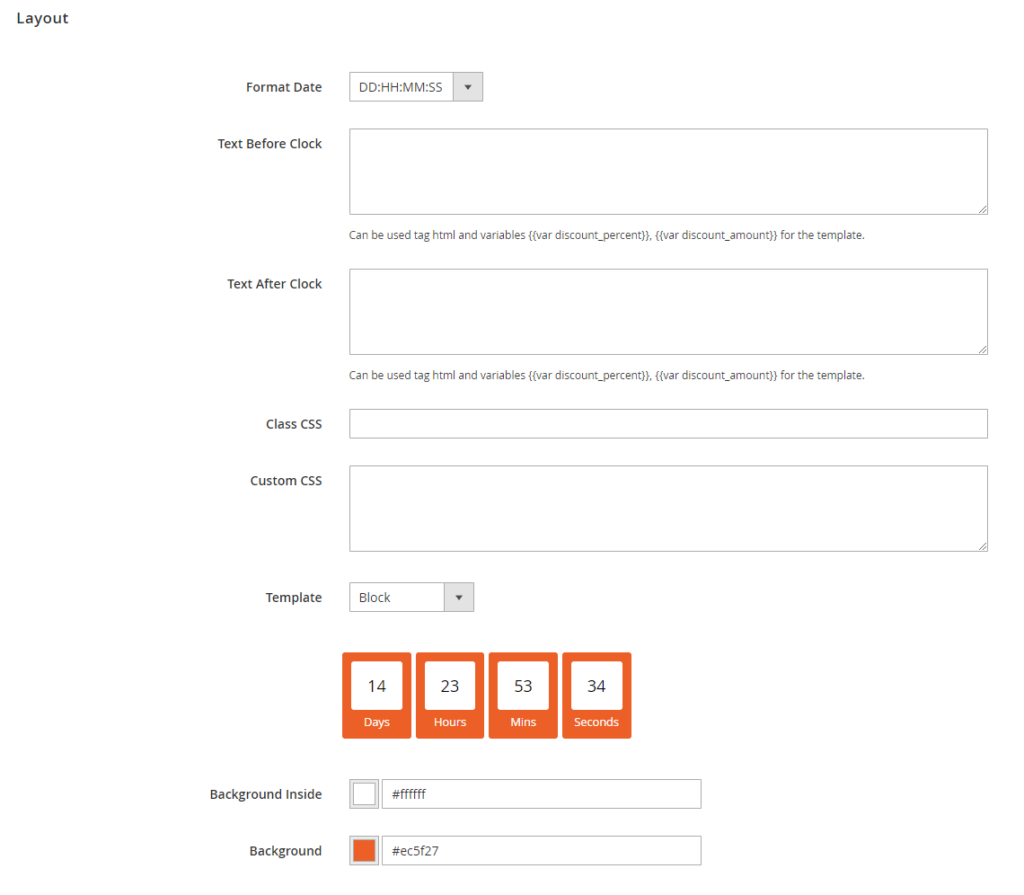
Layout
- Format Date: Choose the format of the clock that suitable for the campaign duration
- Text Before Clock: Add sale message or text before the clock
- Text After Clock: Add text after the clock
- Class CSS: Name the class you want to customize
- Custom CSS: Add all CSS you want to customize for the countdown clock
- Template: Choose the template for the countdown clock
There are 10 types of countdown clocks that can be configured text color and background-color. Thus, you yourself totally can design the clock in a unique style.

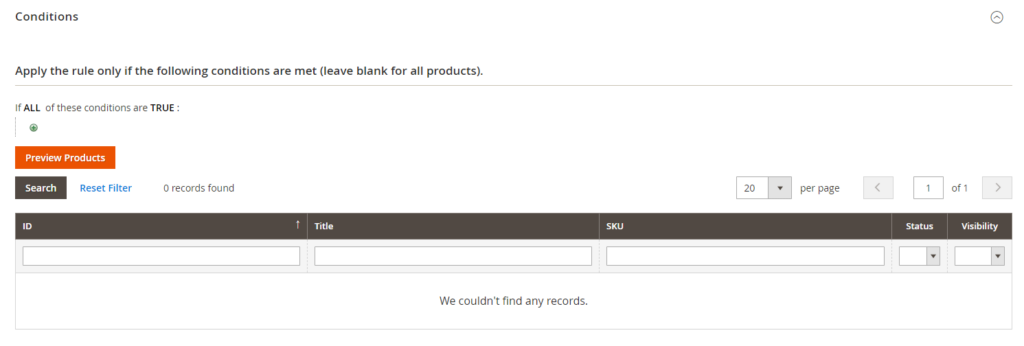
Conditions
In this field, you can apply rules for countdown timer to assign products via SKU, price, category, etc. so that you can save time a lot. Moreover, with preview functionality, you can check whether the product is active with countdown clock or not.

Conclusion
Time is flying away, so remind customers don’t miss out the chance of shopping is a good way to boost sales using Magento 2 Countdown Timer. Feel free to leave us some of your questions or comments.

Optimize Your Magento Store With Powerful Extensions
Looking for fast, efficient and well-coded extensions to build or optimize your Magento stores for sales boosting? Then visit Magezon website and grab necessary add-ons for yours today!
 Magezon Blog Help Merchants Build Comprehensive eCommerce Websites


