 Magezon Blog Help Merchants Build Comprehensive eCommerce Websites


Maybe you’ve heard of Magento 2 Credit Memo but don’t know what exactly it is and how to create this one. Don’t worry, in this post, we’ll let you know what a credit memo is and provide you with detailed instructions on how to create a beautiful Magento 2 Credit Memo using Magento 2 PDF Customizer.
This article will walk you through on how to create and customize a beautiful credit memo without coding skills.
Table of contents
I. What is a credit memo?
A credit memo or a credit note is a commercial document issued by suppliers to buyers in order to reduce the amount or equal to the amount from a previously issued invoice.
This kind of document will be applied when a customer does not receive the products or return the products due to its damage. It is also used to repay the excess in case the money on the bill is overpaid.
II. How to create a beautiful credit memo with Magento 2 PDF Customizer
Are you ready to create a beautiful credit memo with Magento 2 PDF Customizer? Let’s get started!
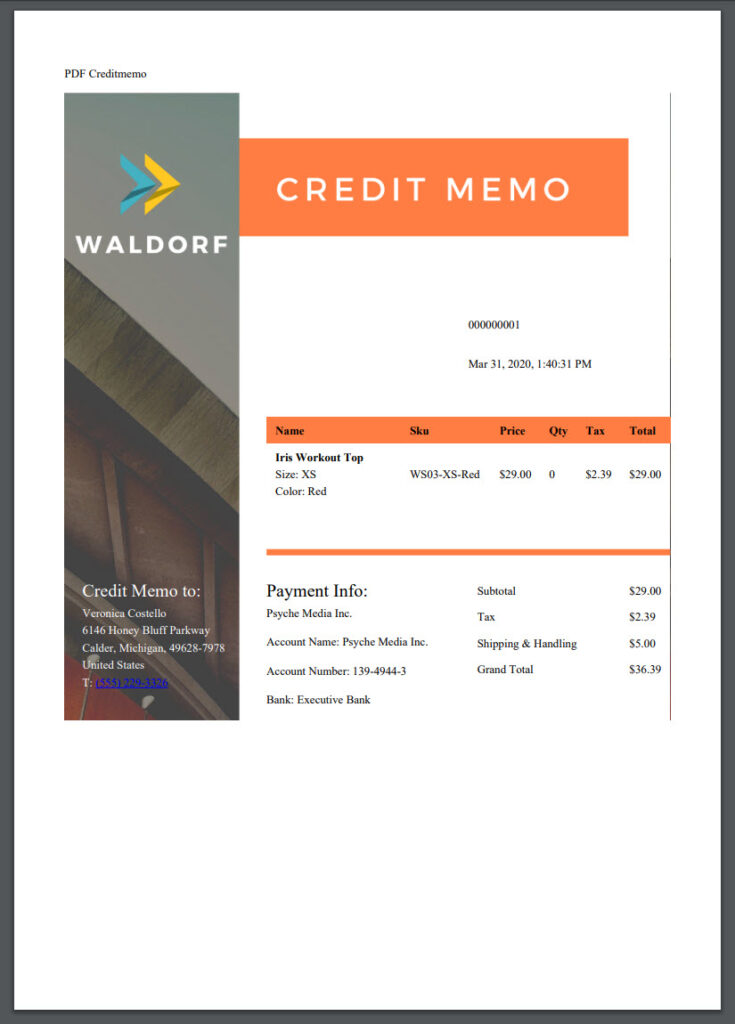
Here is the magento 2 credit memo example that we’ll create in this tutorial:
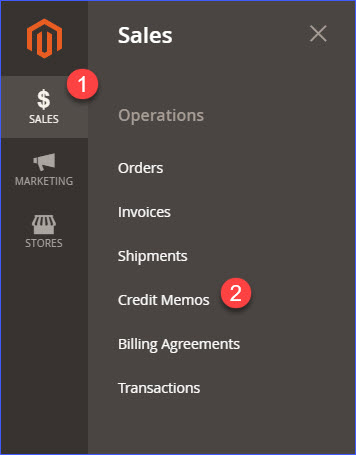
Step 1: Create a new Credit Memo
From the admin panel, follow to this path: Sales >> Credit Memos >> Create New Credit Memos
Step 2: Move to the Magezon PDF Builder section
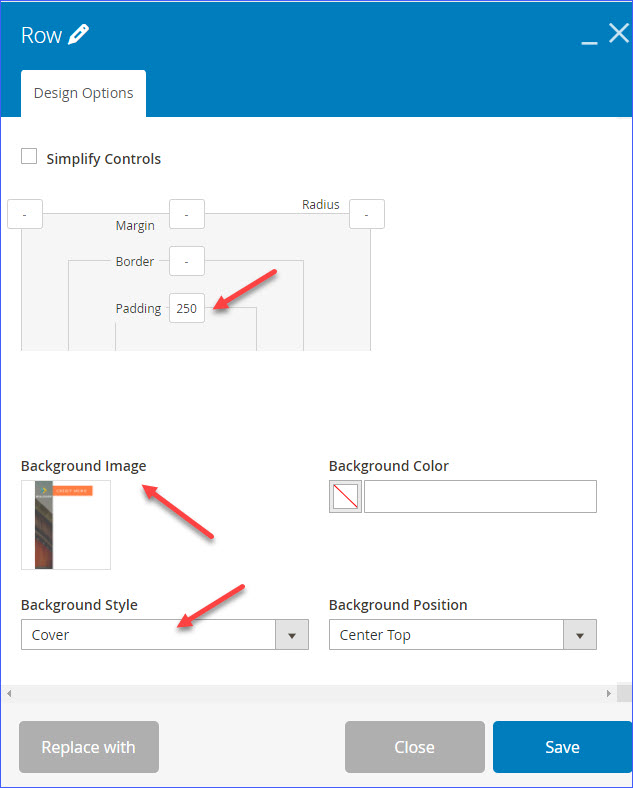
First, add a row, then edit its Design Options.

In the Design Options tab, set top padding to 250 and add background image for the row. Select Background Style as Cover.
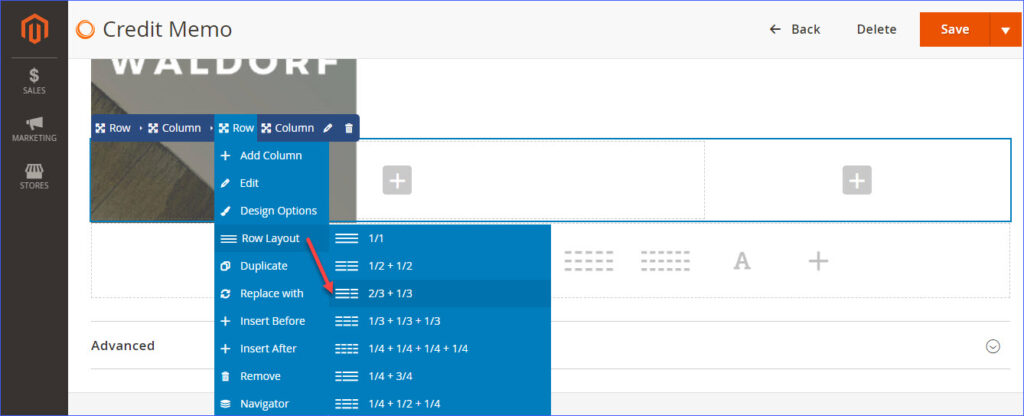
Step 3: Add another row
Next, add another row and edit its layout to ⅔ + ⅓.
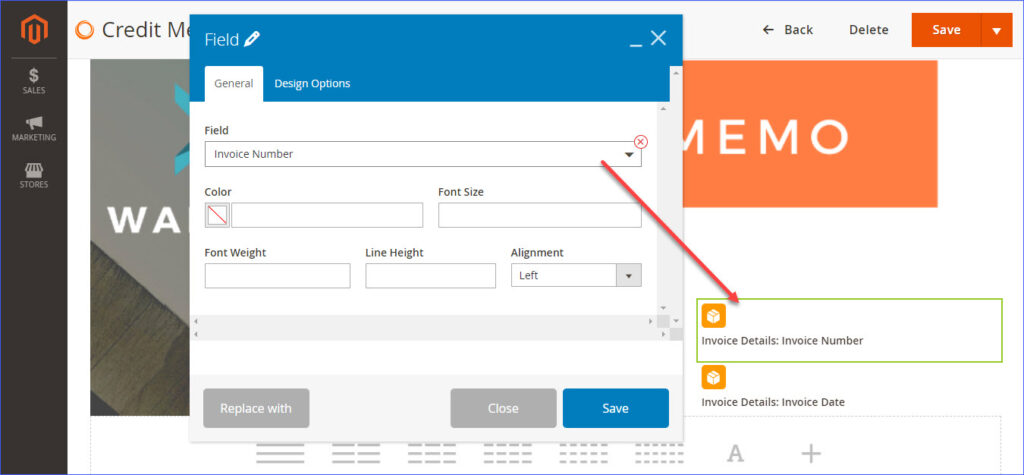
Step 4: Go to add the Field element
Add Field element in the right hand column as the following image
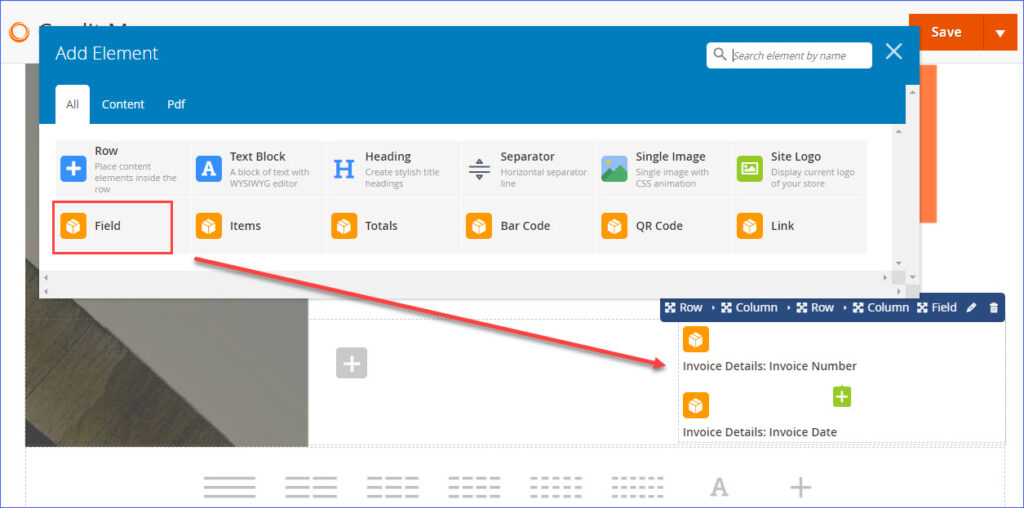
After that, choose a value for the Field. In this guide, we’ll choose Invoice Number and Invoice Date value.
Step 5: Next, go to add a new row
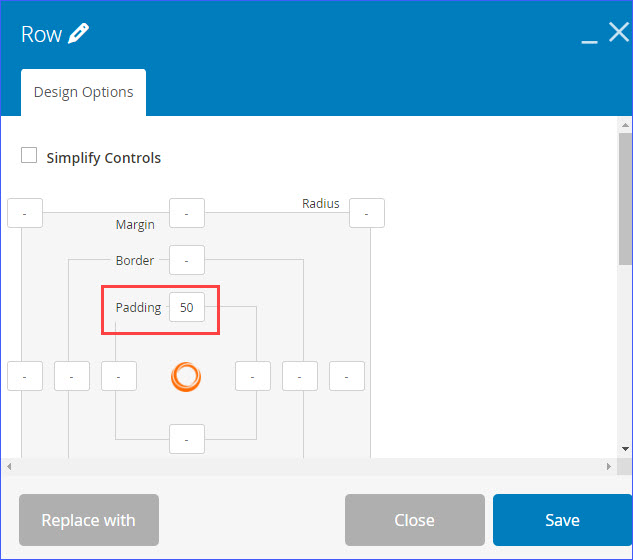
Add a new row and divide it into 2 columns. Then set the width of the left hand column as 4 columns – ⅓, and 8 columns – ⅔ for the rest column.
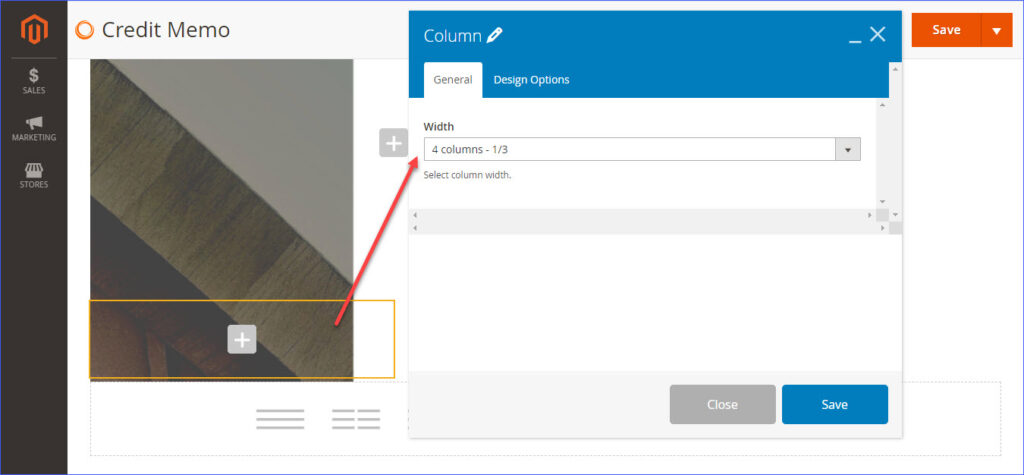
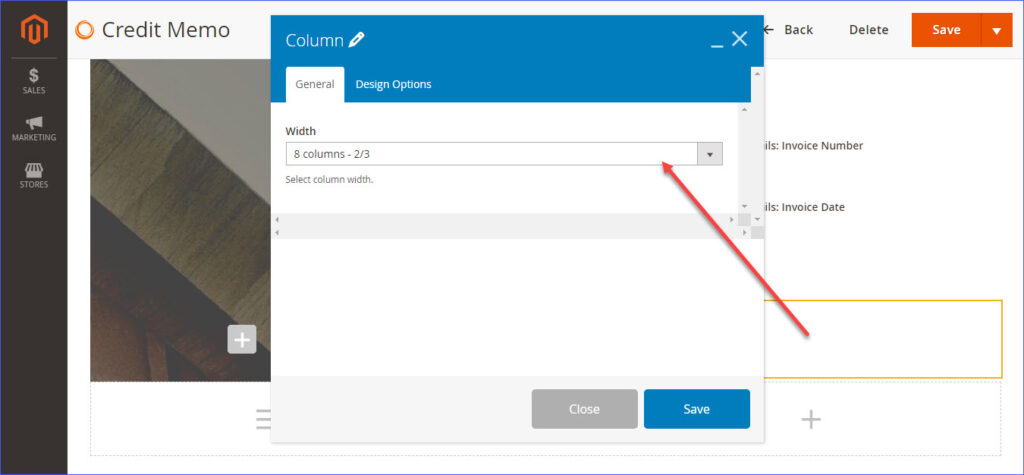
Then set the top padding of the row to 50.
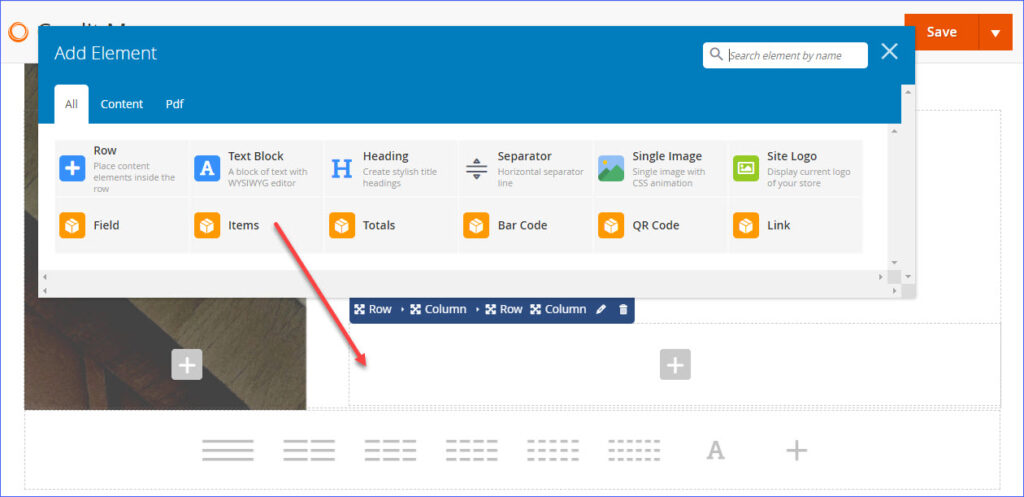
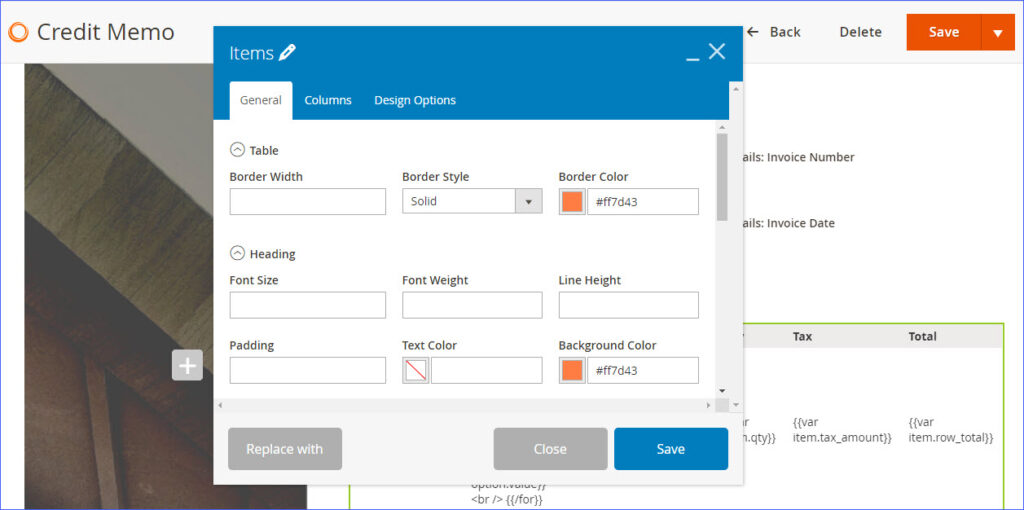
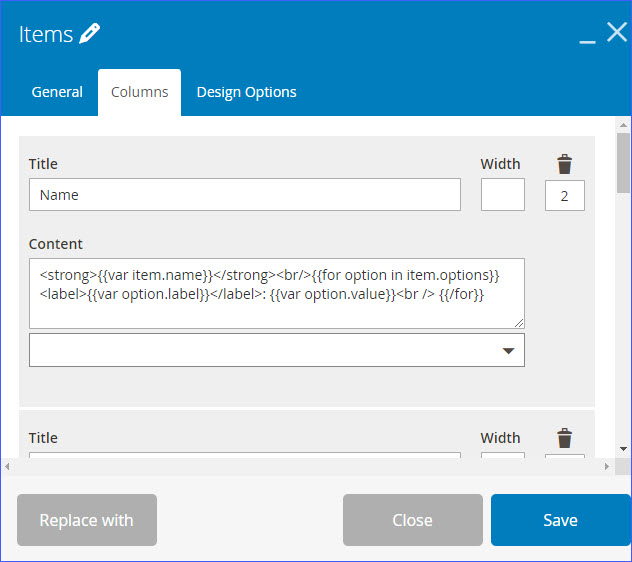
Step 6: Add Items element
Once you’ve divided the column, add Items element in the right column and edit its General tab and Columns tab as the image below
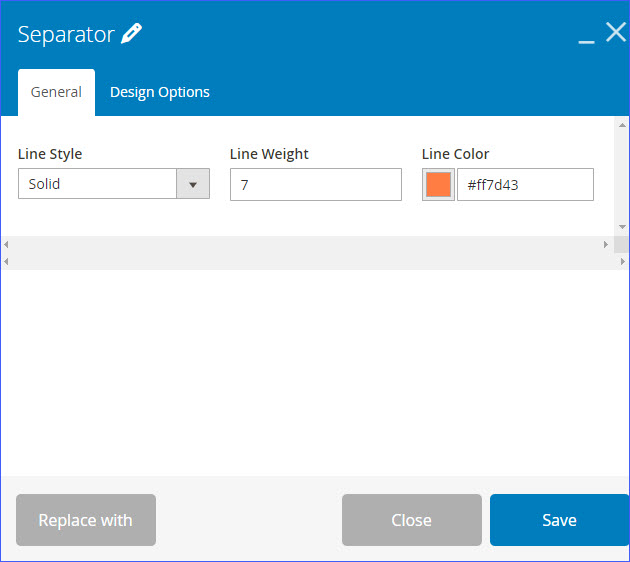
After that, add the Separator element below the Items element and set its top padding to 50 in the Design Options tab, then go to edit it like this in the General tab:
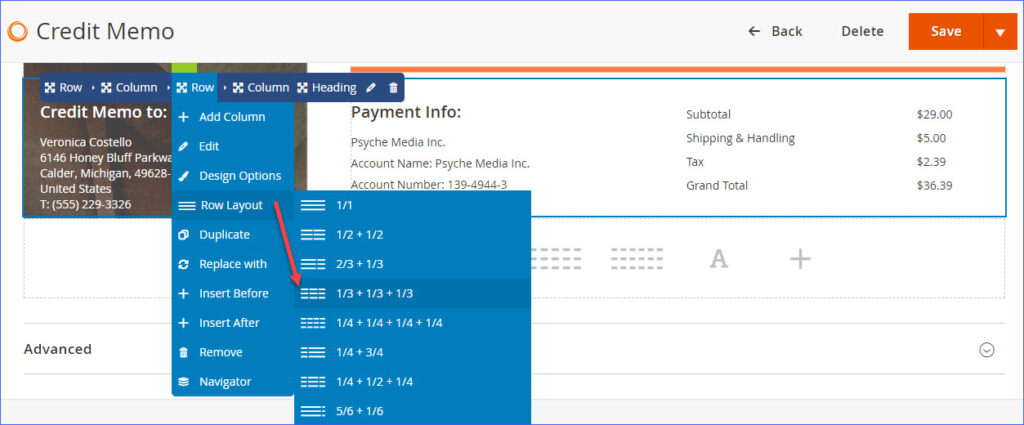
Step 7: Add a new row and divide it into 3 columns
Edit the row layout as the following image
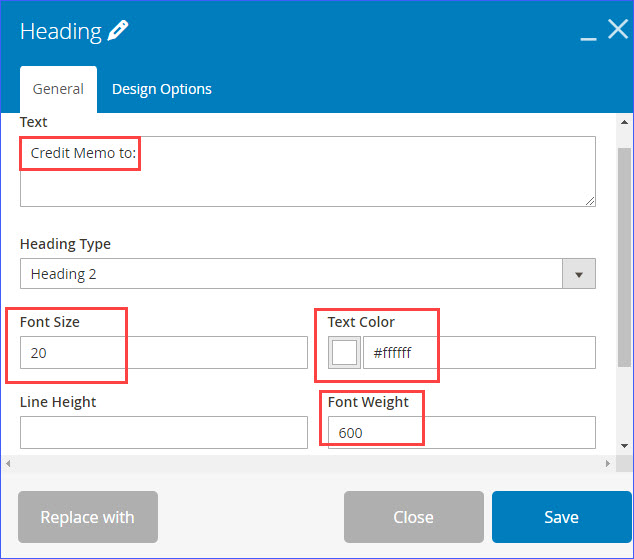
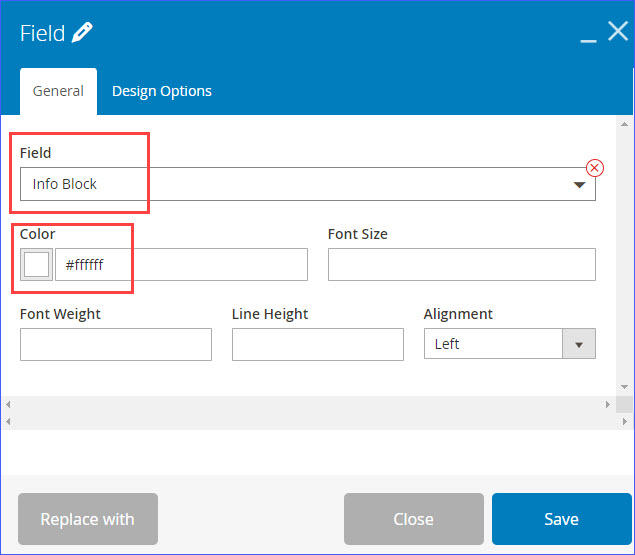
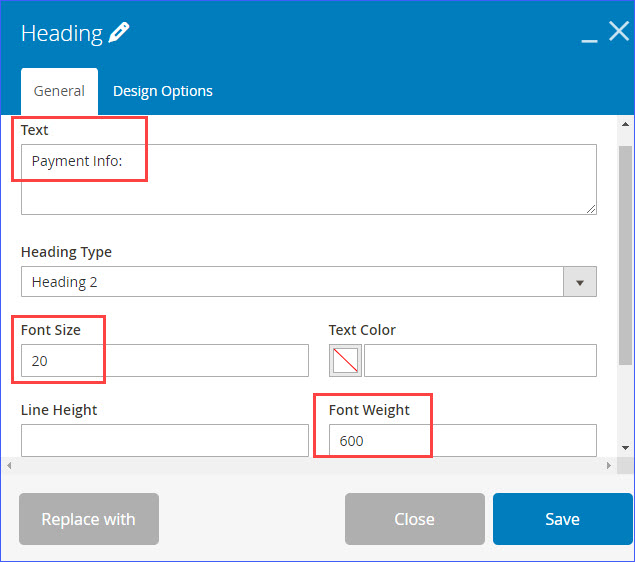
In the left column, add Heading and Field elements.
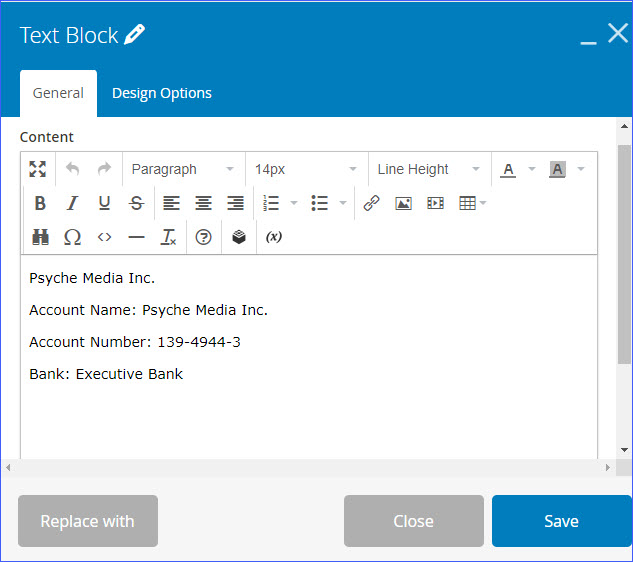
In the middle column, add Heading and Text Block elements.
Finally, in the right column, add Totals element.

Once you’ve completed all these steps, the magento 2 credit memo is created!
Conclusion
We’ve already gone through a step-by-step guide on creating a beautiful credit memo by Magento 2 PDF Customizer. After reading this instruction, we hope you can create your own amazing credit memo with our powerful tool.
Feel free to contact us via email or leave comments below if you are stuck with any problems. Please visit our blog to get more useful knowledge!

Optimize Your Magento Store With Powerful Extensions
Looking for fast, efficient and well-coded extensions to build or optimize your Magento stores for sales boosting? Then visit Magezon website and grab necessary add-ons for yours today!

