 Magezon Blog Help Merchants Build Comprehensive eCommerce Websites

Customer belief and loyalty are formed by a large number of factors including the brand personality. Everyone who runs businesses always wants their customers to remember their products/services and even their trademark. This is an effective way to persuade them to come back and repurchase the products. Considering this scenario, a logo plays a pivotal role like a visual presentation of a brand that makes the first impression on people’s minds.
This tutorial will guide you through Magento 2 change logo with step by step instructions. So no more further ado, let’s get going.
2 Steps to Change Logo in Magento
| You may also like: How to Change the Favicon in Magento 2 Magento Admin Panel: A Comprehensive Overview Magento 2 Scope Config: Everything You Should Know Magento Store Information: A Complete Guide |
Step 1
One of the very first things needs considering when you set up your website is changing its logo. You never want your website to display the logo of the default Magento themes, right?
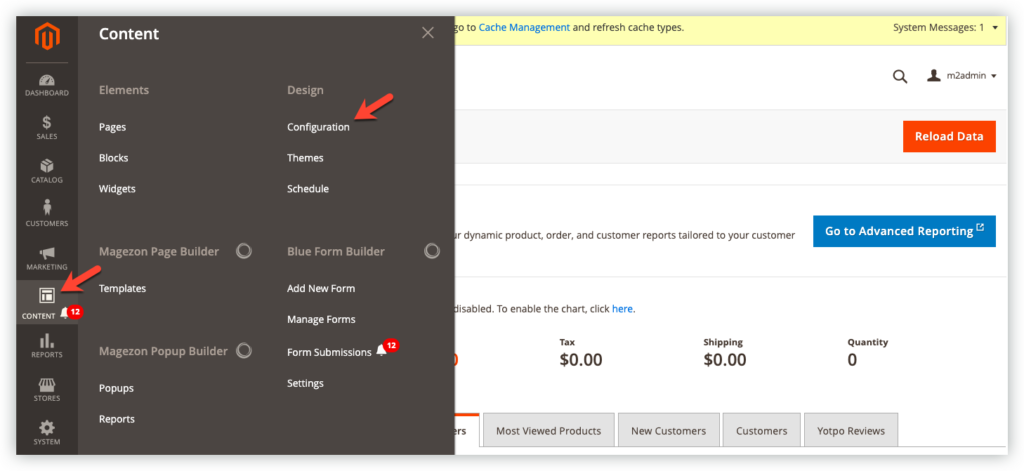
So first, follow the path Content > Configuration:
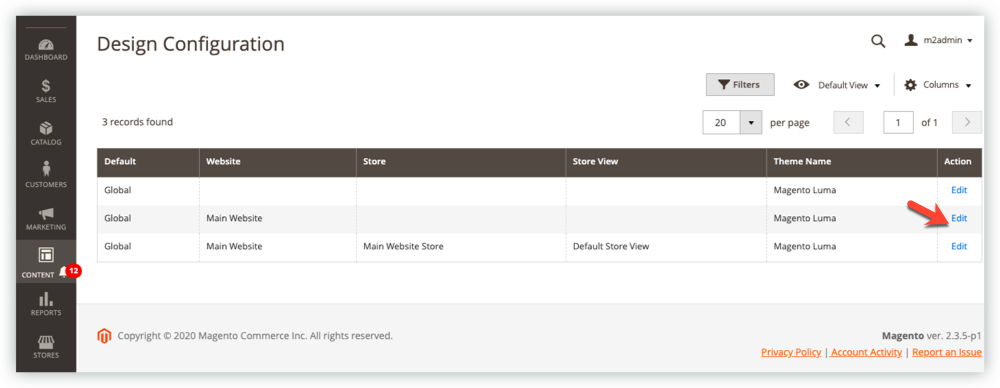
This will lead you to the Design Configuration page. Then choose your desired store view by clicking on the Edit button in the Action column, like that:
Step 2
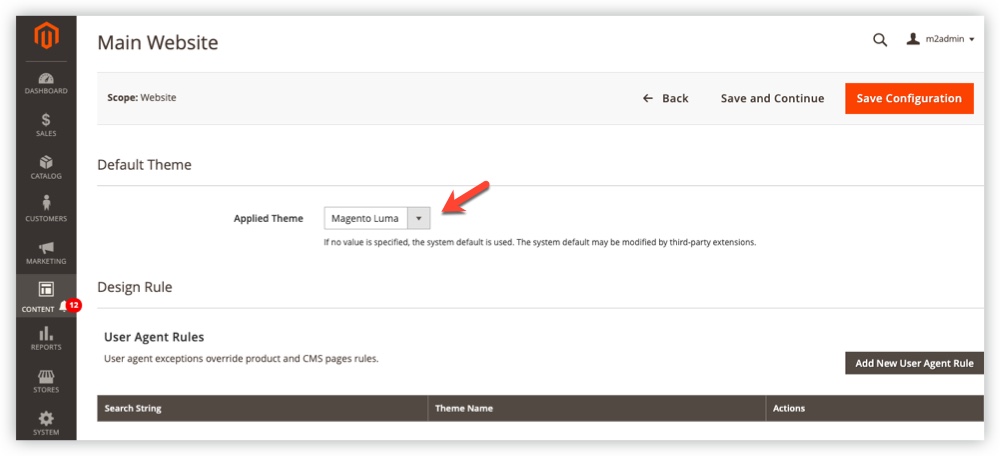
In the Default Theme section, choose one from 2 themes (Magento Blank or Magento Luma) for your store view. If you select no theme, the theme of your web will be considered as Magento Default theme:
Scrolling down and span Header section:
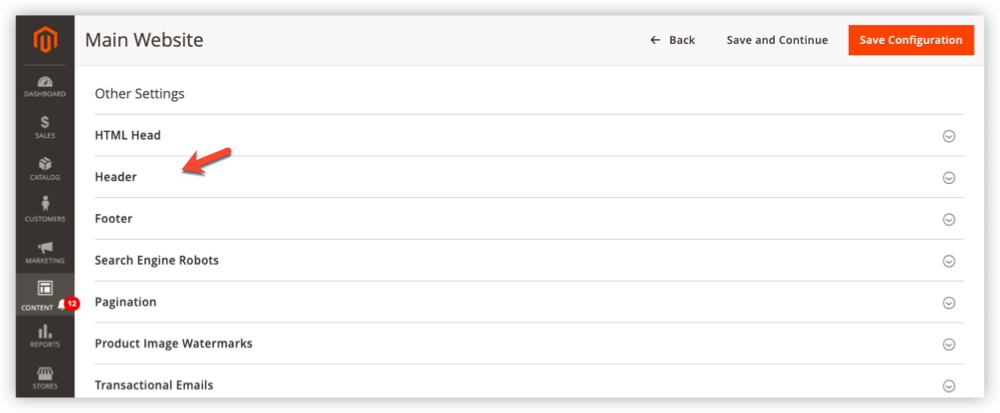
Then configure the following settings:
- Logo Image: Choose Upload or Select from Gallery. Your image should be one of the following file types:
- PNG: this file format ensures that your image will be its highest quality.
- JPEG: your image will get a small file size, which’s extremely good for page load performance.
- GIF: it’s an animated image without sounds.
- Logo Attribute Width: Insert your desired logo width (optional)
- Logo Attribute Height: Insert your desired logo height (optional)
- Welcome Text: Put a welcome sentence for your website header
- Logo Image Alt: It’s optional but for SEO purposes, you should enter an alternative text in case your logo can not be displayed.
Finally, do not forget to hit Save Configuration.
Conclusion
That brings me to the end of this tutorial, hope that you get your mind opened after reading. We’ll come back every week with tons of useful blogs about Magento and E-commerce so turn on your notifications to avoid missing out on any of them. Feel free to leave your questions in the comment section below.
Visit Magezon website if you are looking for feature-rich Magento 2 extensions to optimize your Magento store.

Optimize Your Magento Store With Powerful Extensions
Looking for fast, efficient and well-coded extensions to build or optimize your Magento stores for sales boosting? Then visit Magezon website and grab necessary add-ons for yours today!
