 Magezon Blog Help Merchants Build Comprehensive eCommerce Websites


Normally when you get a new form submission, you will be notified via email. However, I’m sure that it will make you crazy when the notifications are getting stuck in an email inbox full of messages.
By sending notifications to your Slack channels, this will not be a problem any more. Every time a customer submits your form, a message will be automatically posted to Slack to notify your whole team or specific member. And your notifications can be easily searchable on Slack. Besides, you can set a reminder to send the notifications at a specific time.
In this tutorial, we’ll give you a detailed guide on how to connect Slack with Blue Form Builder forms to get Slack notifications for every new submission.
1. Create A Form With Blue Form Builder
After installing Blue Form Builder, you can start creating your form using 35+ elements and a drag & drop interface. Please follow this guide for detailed steps.
2. Connect Your Form With Slack
After creating your form, you should connect it with your Slack account so that whenever you get a new submission, there will be a notification via this platform. To do this, we’ll be using Zapier, an online automation tool that allows connecting your apps and other services. Let’s see how!
Step 1: Integrate Zapier with Blue Form Builder
First, make sure that you have a Zapier account already. If not, you can create one at zapier.com. You can choose the free plan or paid tiers based on how many zaps you’ll be using.
To integrate Zapier with Blue Form Builder, it’s a must to install the Zapier plugin that gives you the ability to connect Blue Form Builder forms with 2000+ web apps.
After installing the plugin, you need to create a Zapier API key that will connect Blue Form Builder with your Zapier account. Please follow these steps to create one.
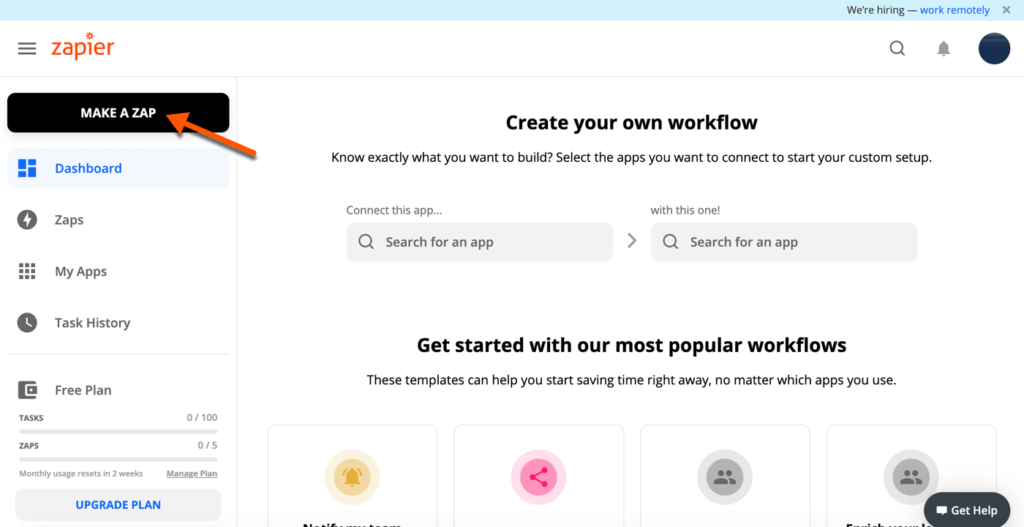
Step 2: Create a zap in Zapier
Log in to your Zapier account, then click MAKE A ZAP button on the upper left corner to create a zap:
And you’ll go to the setup page of the new zap. Click Name your zap on the upper left corner to rename your zap.
In this case, we’ll rename the zap to Get Slack notifications for new Blue Form Builder submissions.

– SET UP TRIGGER:
Trigger is an event that starts a zap. You’ll set up the trigger in the 1. When this happens… section.
+ Select trigger app & event: in the Choose App & Event section, you’ll choose your trigger app and event.
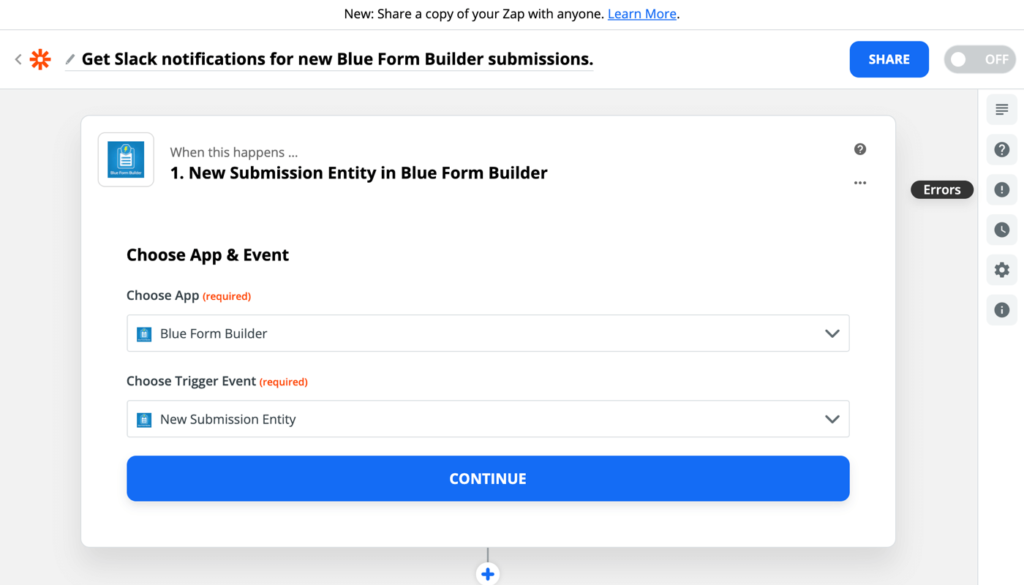
- Choose App: The trigger app you need to select here is Blue Form Builder. In the search box, type Blue Form Builder and click Blue Form Builder from the result list.
- Choose Trigger Event: Blue Form Builder only has 1 trigger (New Submission Entity) and it’s automatically selected.
Click the Continue button to proceed.
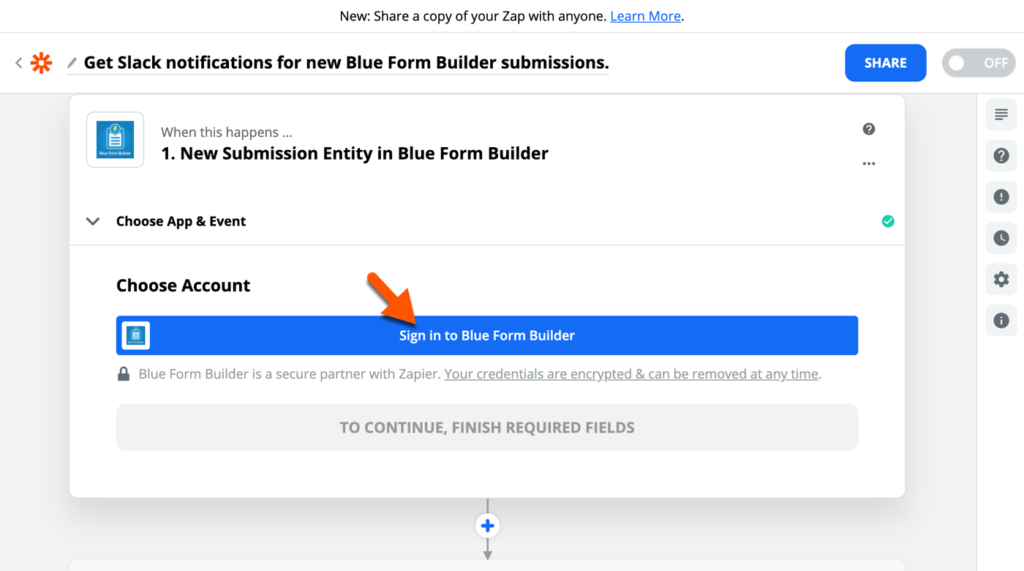
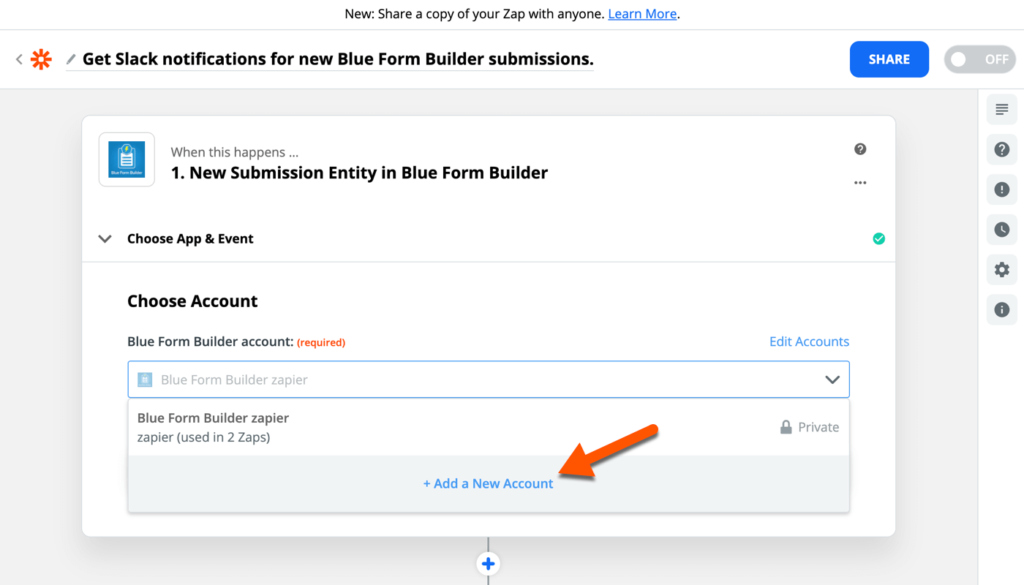
+ Connect Zapier and Blue Form Builder: To connect Zapier and Blue Form Builder on your website, click on the Sign in to Blue Form Builder button:
A new window will show up:
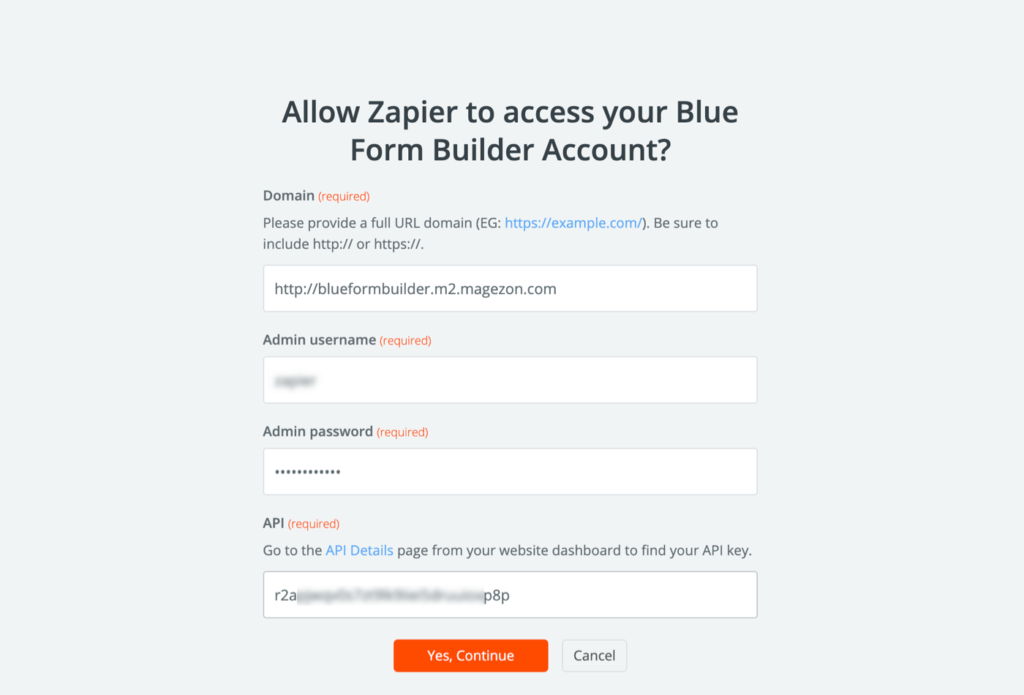
- Domain: enter the full URL of the domain in which Blue Form Builder is installed.
- Admin username: enter admin username.
- Admin password: enter admin password.
- API: enter the access token key here. Then click Yes, Continue button to finish the connection.
Please note that you can add multiple Blue Form Builder accounts by clicking Add a New Account:
Click Continue to proceed.
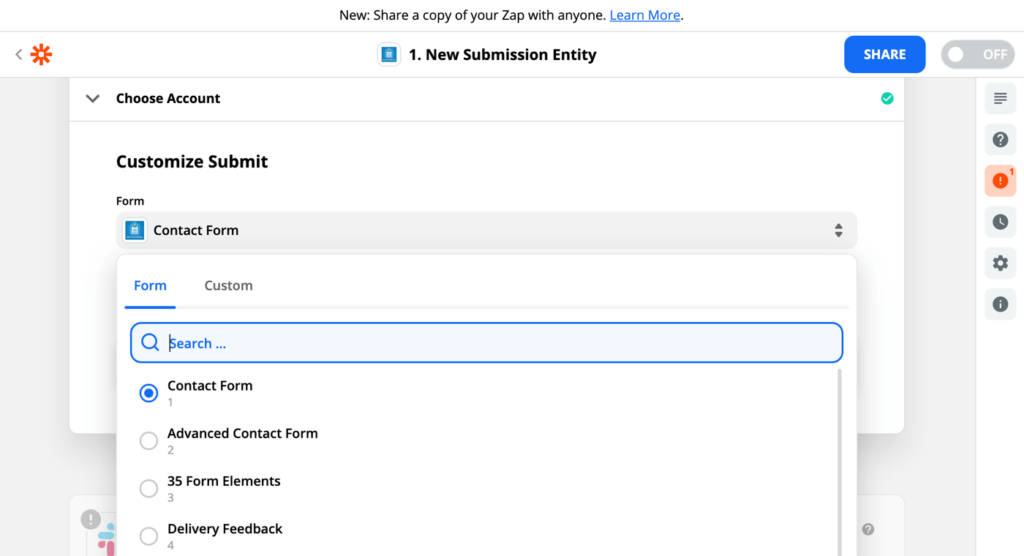
The next step is to choose a form and test the trigger.
+ Select form: Select the form you want to use in this zap, then click Continue.
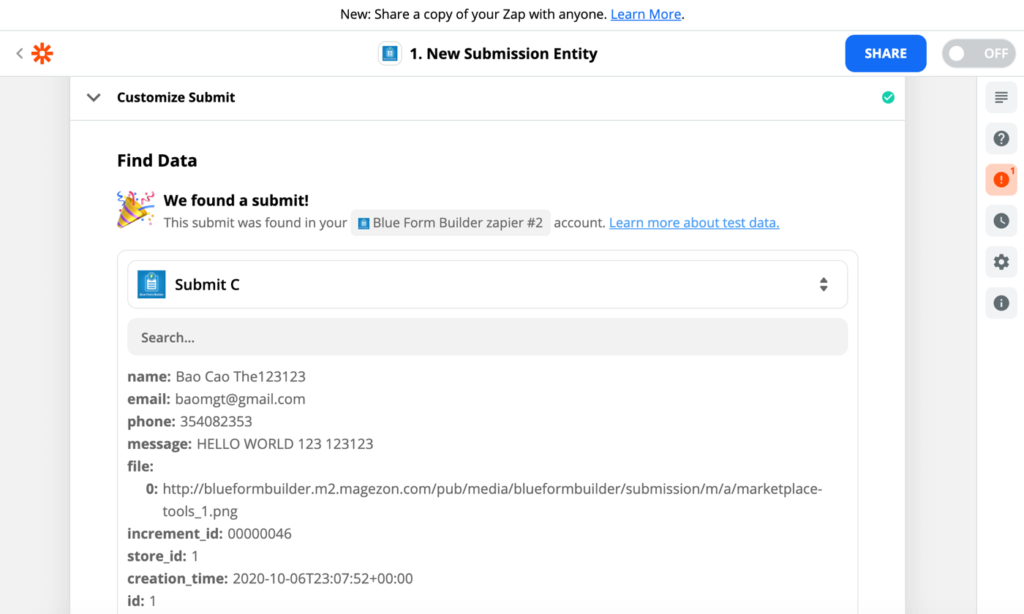
+ Test trigger: In this step, you are able to test your connection using sample submission data pulled in. Please make sure that the form you selected has at least one submission to test. After clicking the Test Trigger button, you should see a submission found with all related data:
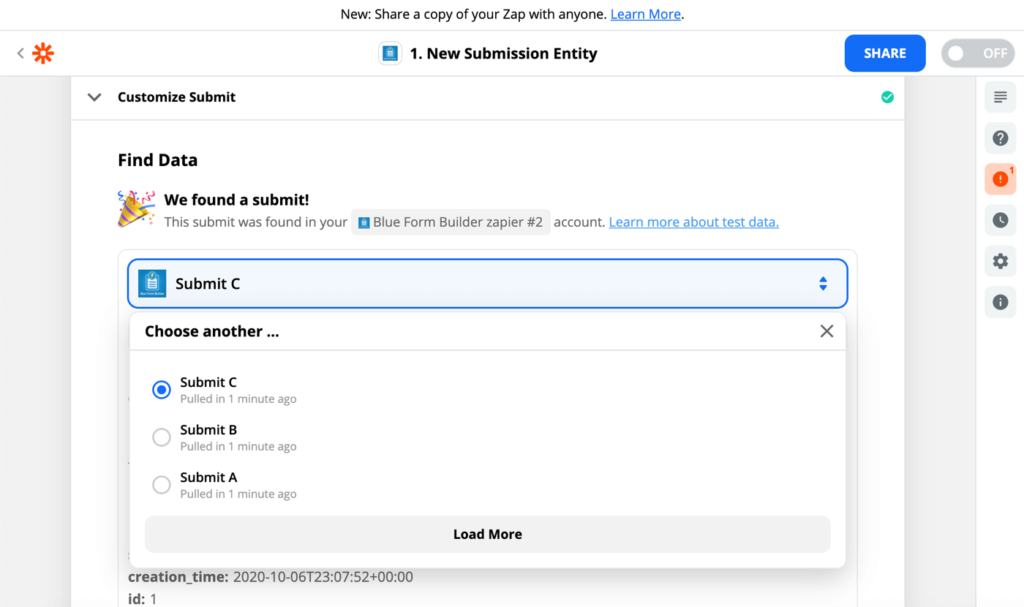
You can choose another submission to test from the drop-down menu that contains the latest submission:
Click the Continue button to proceed.
– SET UP ACTION:
An action is an event that a Zap performs after it is triggered. You will set up action in the 2. Do this… section.
+ Select action app & event: in the Choose App & Event section, choose the app which you want to send your submission data to and the action event also.

- Choose App: select Slack.
- Choose Event: select Send Channel Message to send a notification to your Slack channel. Select Send Direct Message to send a notification to a specific member in your channel. Or if you don’t want to get an immediate notification, choose Add Reminder.
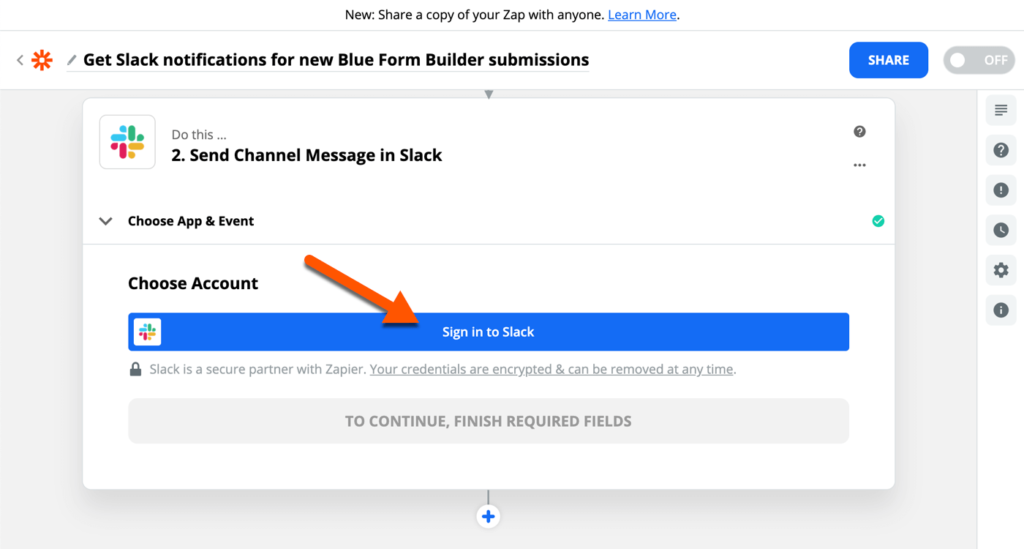
+ Connect Slack accounts: now you need to connect your Zapier account with a Slack account. Log in to your Slack account by clicking on the Sign in to Slack button and allow Zapier to access your Slack account.
Please note that you can add multiple Slack accounts.
+ Customize message:
If you choose Send Channel Message, you need to customize the channel message like this:
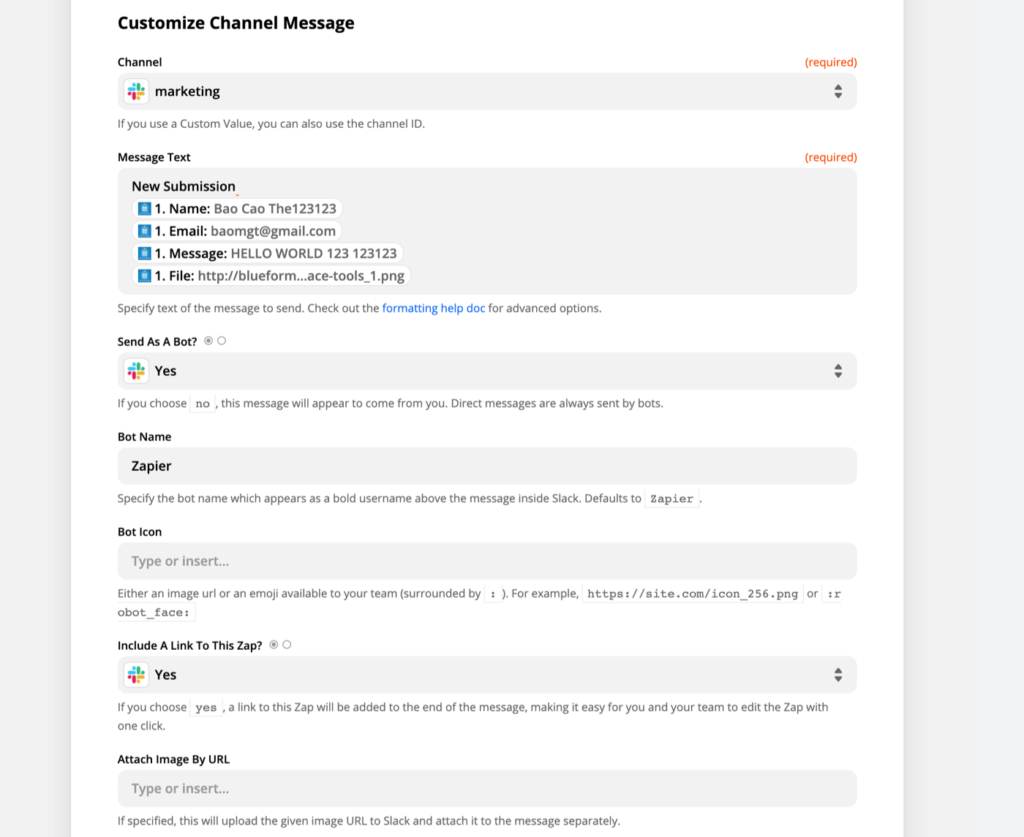
- You should select the channel to which you want to send the notification and the Message Text.
- Besides, there are many optional fields to customize such as Send As A Bot, Bot Name, Scheduled At, File, etc. with a detailed description below each field.
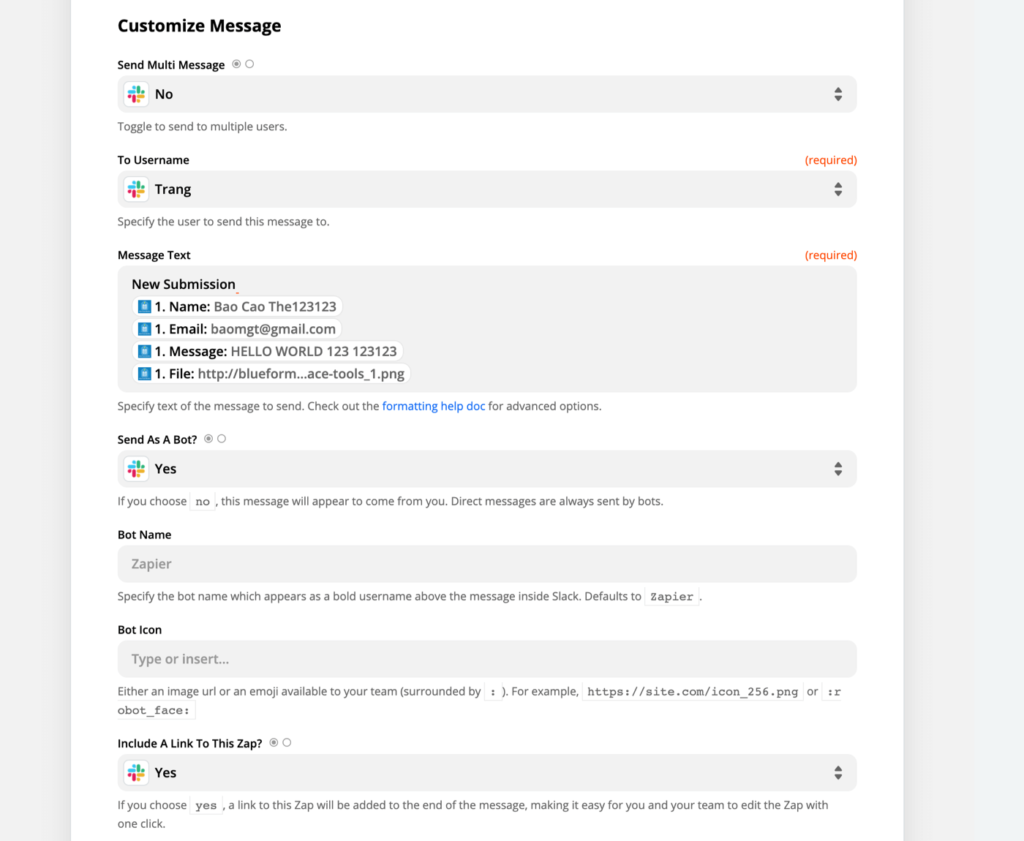
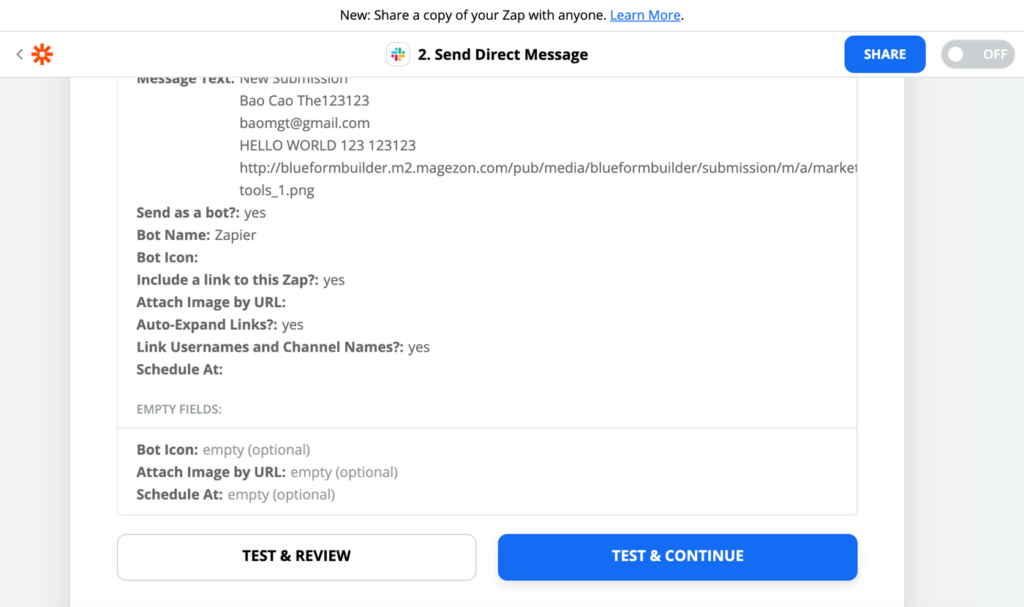
If you choose Send Direct Message, you are required to specify the member(s) who will receive the message as well as Message Text. You can also choose to Send Multi Message or not and customize other options:
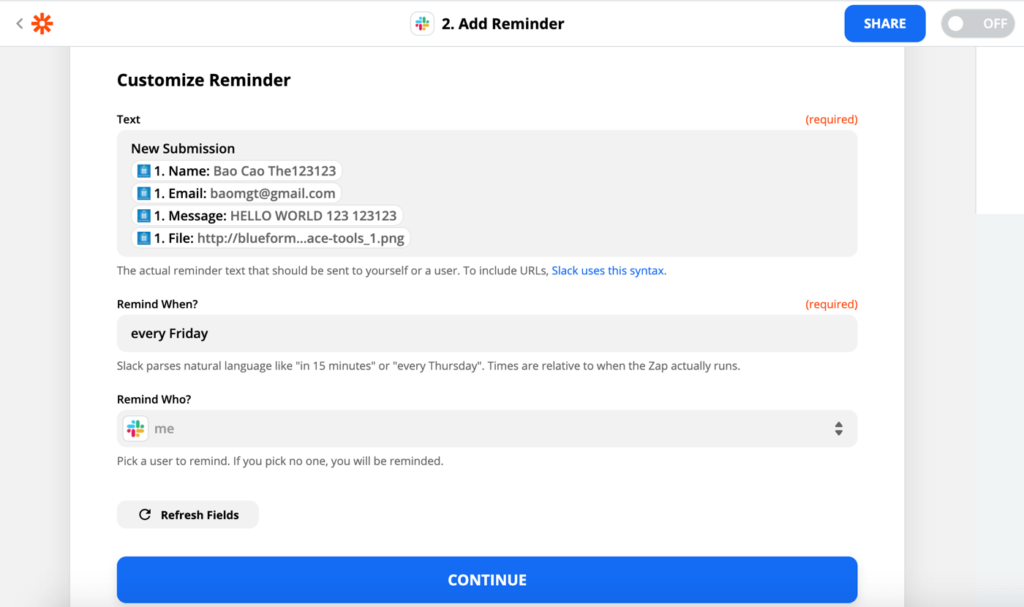
If you select Add Reminder, you should specify a reminder message in Text field, Remind When? and optionally Remind Who?.
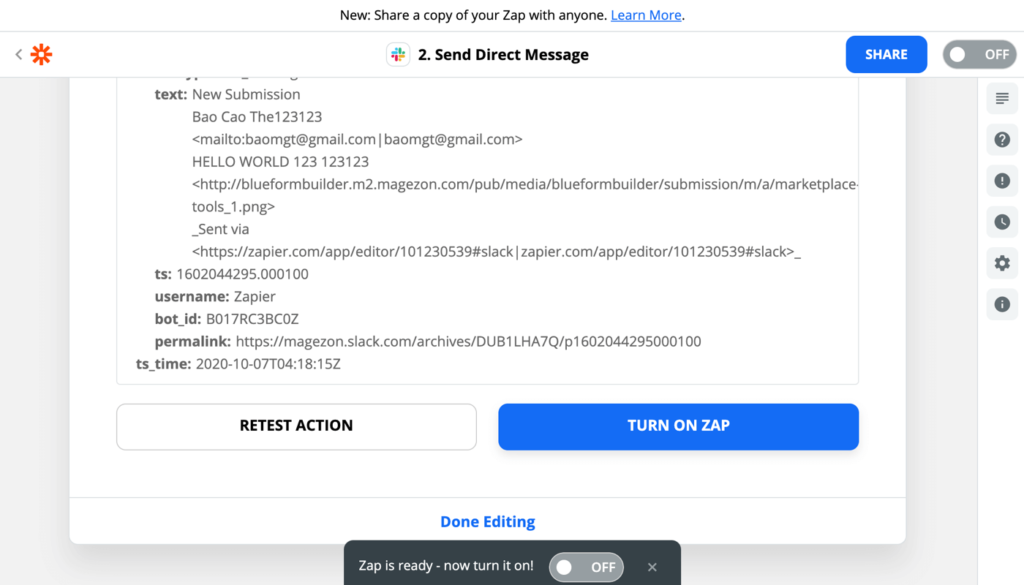
+ Test zap: now you’ll need to test your zap to make sure that it works by clicking the Test & Review or Test & Continue button. Then log in to your Slack account to check whether the notification has been sent or not. If yes, your integration is successful.
You can Retest Action or Turn On Zap right away, then click Done Editing to finish:
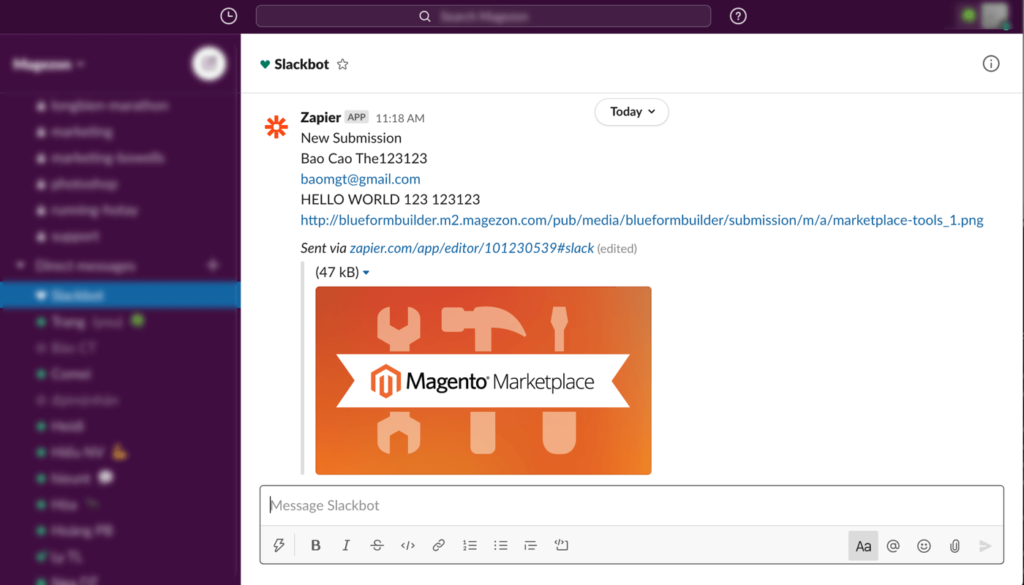
After the zap is turned on, every time you get a new submission from your chosen form, there will be a notification sent to your channel or to a specific member immediately or at a specific time.
Let’s see an example of a notification sent directly to a specific member in Slack:
To Sum Up
So you’ve walked through a step-by-step tutorial on how to get notifications via Slack for new form submissions. Don’t hesitate to leave us a comment below if you have any questions.

Try FREE Blue Form Builder demo today
Create whatever type of Magento form in any style you want just in minutes. Just by drag & drop.


