Want to replace default Magento 2 product tabs with a customizable one?
In today’s article, we’ll look at how to customize product tabs with Magento 2 Single Product Page Builder, an easy-to-use extension that helps you display product pages in any layout you wish.
Table of contents
Add Tabs element
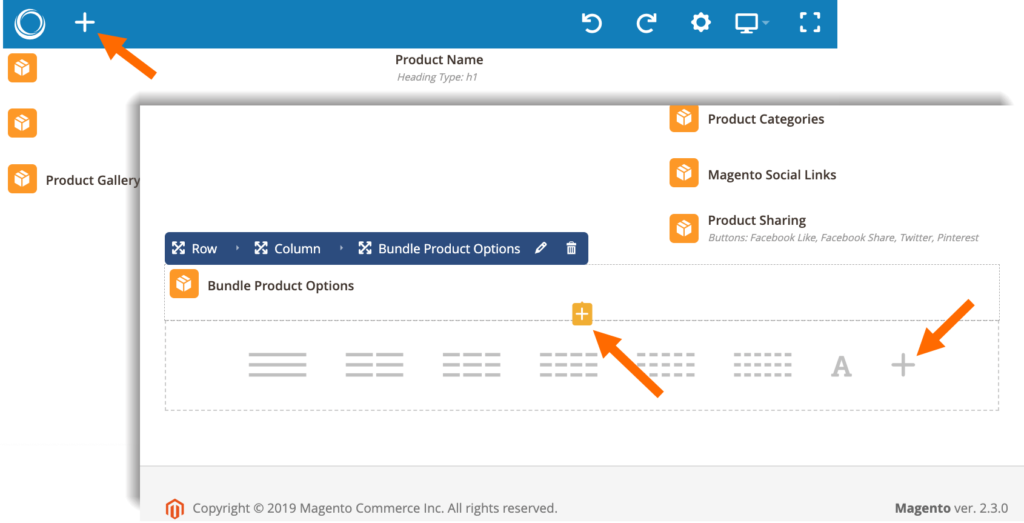
First of all, you need to add Tabs element into the builder section. You can do this by:
- Click the plus icon in the top bar of the builder section.
- Click the plus icon at the bottom of the builder section.
- Or click orange plus icon at the bottom of an element that appears when hovering over the element.
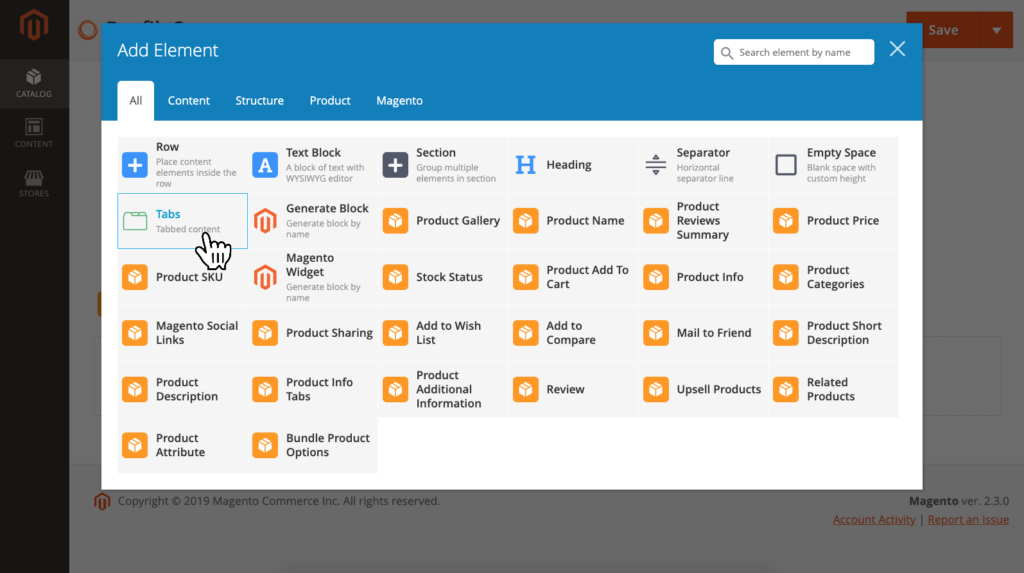
Then a popup with all elements will show up. Find and click Tabs element to add it into the builder sections.
Customize whole tabs
After adding Tabs element, a popup will appear so that you can customize the whole tabs.
General:
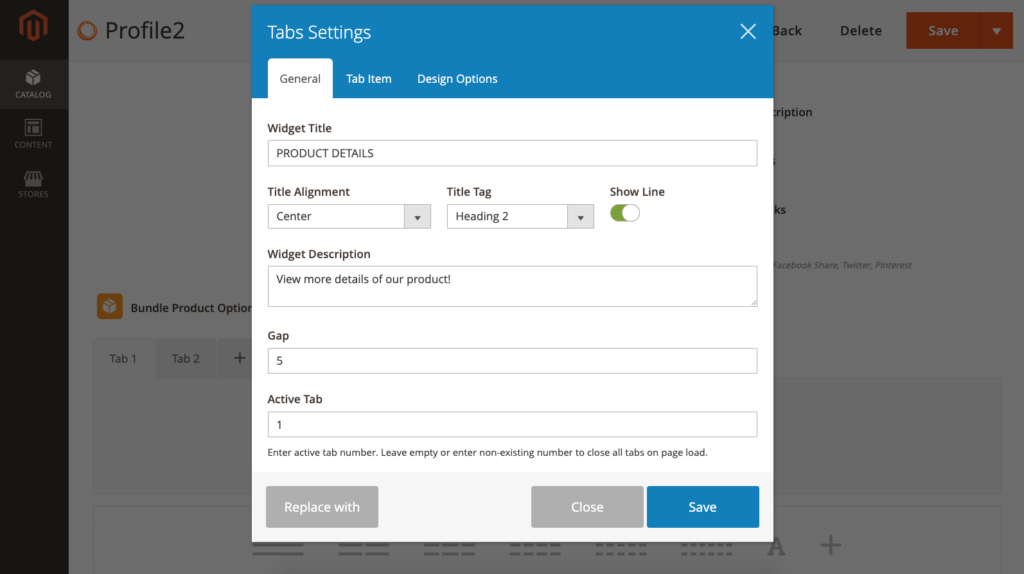
- Widget Title: title of the tabs.
- Title Alignment: alignment of tabs’ title.
- Title Tag: choose heading for tabs’ title.
- Show Line: show the line in title or not.
- Widget Description: description of tabs that appear below the title.
- Gap: distance between tabs’ bar and main content (px).
- Active Tab: the sub tab that will be active on page load.
- Hide Empty Tab: hide sub tabs that have no content.
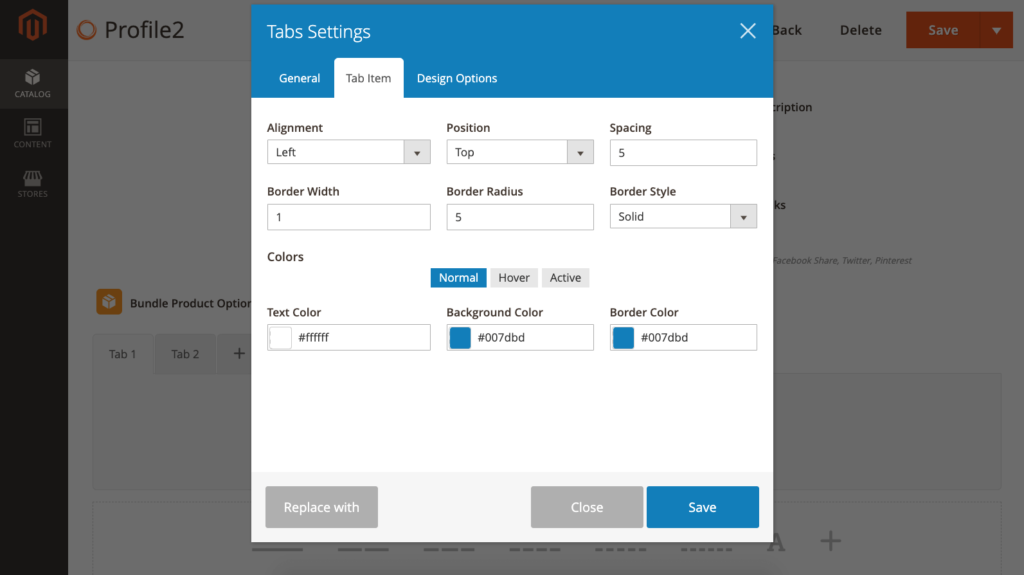
Tab Items:
- Alignment: alignment of tabs’ bar.
- Position: position of tabs’ bar.
- Spacing: distance between sub tabs (px).
- Border Width / Border Radius / Border Style: thickness, roundness and style of the border respectively.
- Border Style: style of border.
- Customize text, background and border color when tabs are Normal (not active), Active, and on Hover.
The tabs you’ve just added will look like this:
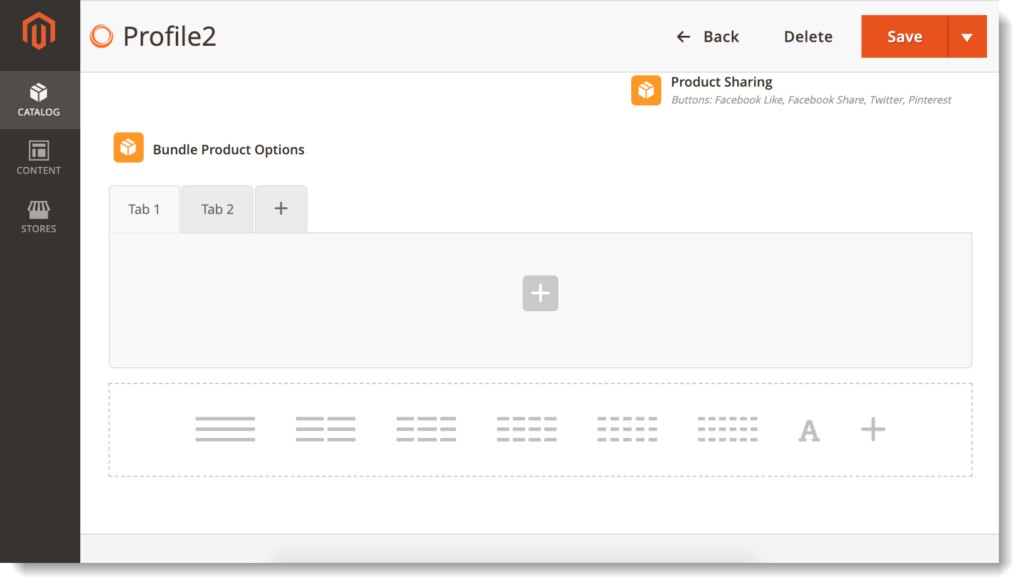
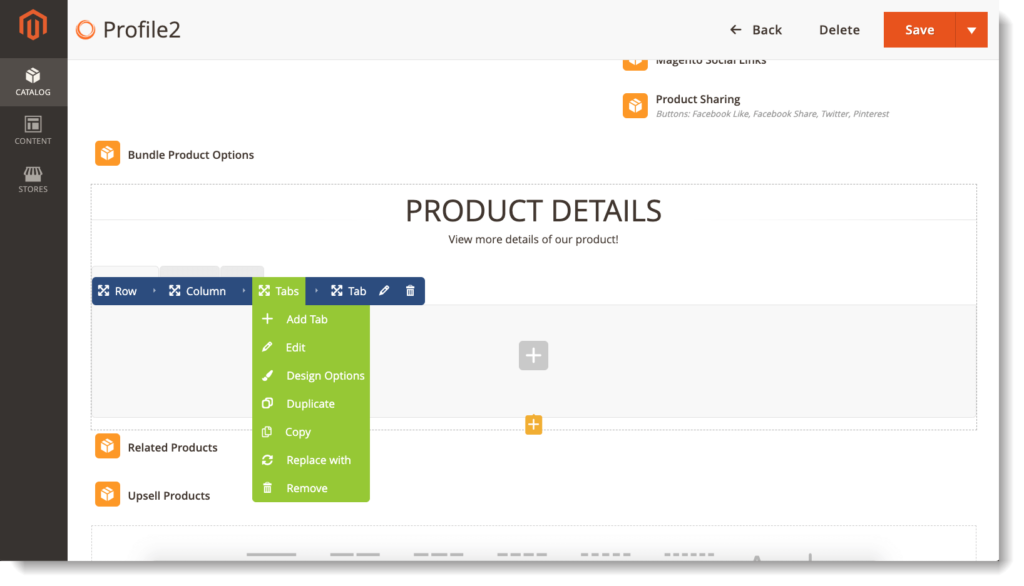
If you want to customize the whole tabs again, hover over the top of the tabs and you’ll see a bar appearing. Hover over Tabs and a dropdown will show up like this:
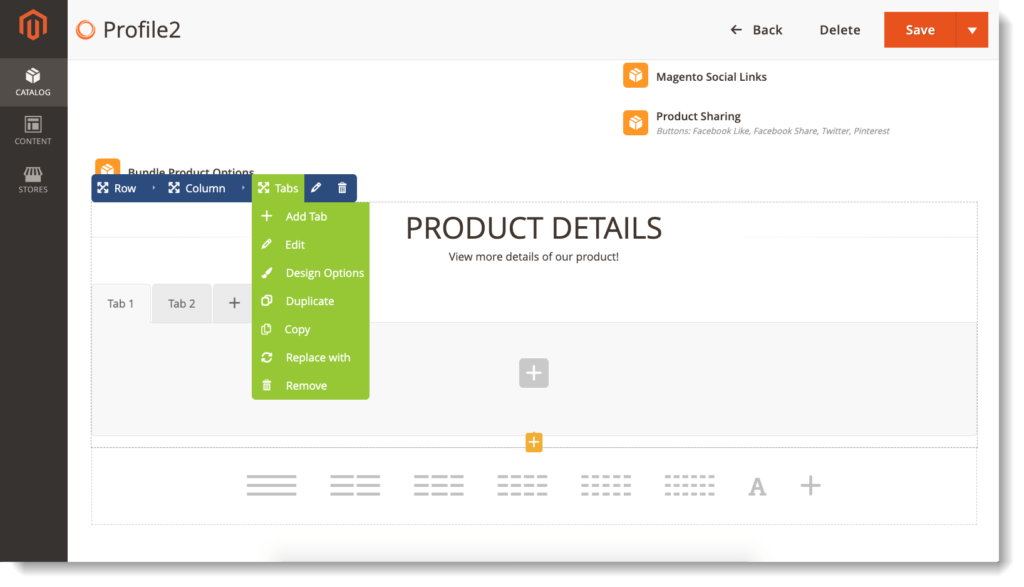
- Add Tab: add another sub tab.
- Edit: click to open the popup for customizing the whole tabs.
- Design Options: click to open Design Options tab in the popup.
- Duplicate: duplicate the whole tabs.
- Copy: copy the whole tabs and paste it in other positions.
- Replace with: replace Tabs element with another one.
- Remove: remove the whole tabs.
Or another way is to hover over a sub tab and a bar will appear. Then hover over the first Tabs with a similar dropdown as above.
Customize sub tabs
Hover over a sub tab to see a bar at the top. You need to hover over the second Tabs to see a drop-down like this:
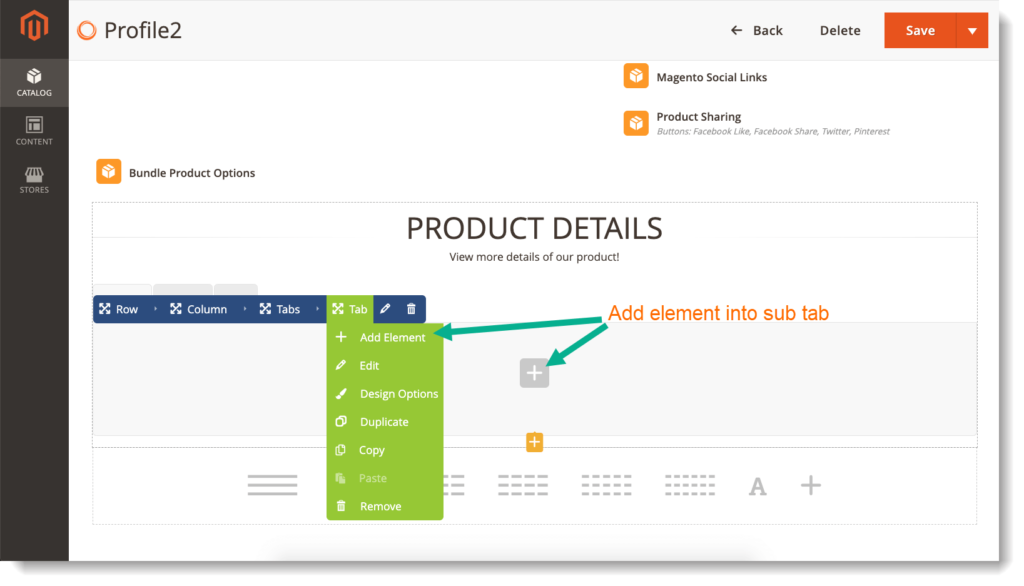
- Add Element: add an element into the sub tab. Another way to do this to click plus icon inside the sub tab.
- Edit: click this or the edit icon next to the second Tabs to open settings popup of the sub tab:
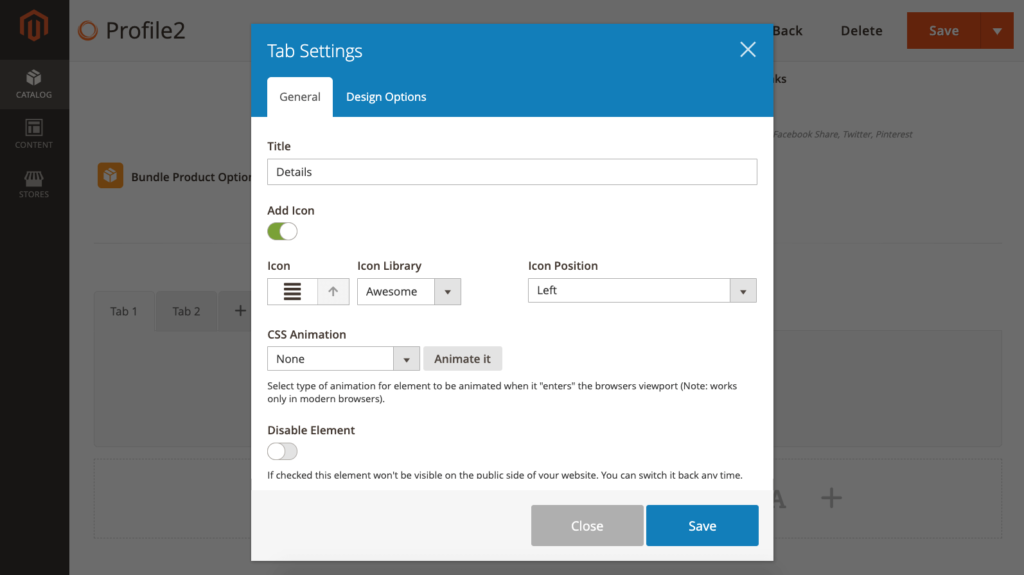
– Title: title of sub tab.
– Add Icon: turn on to add icon next to sub tab’s title:
+ Icon: choose icon.
+ Icon Library: choose the library of icons.
+ Choose the position for icon (on the left or right of the title)
in Icon Position.
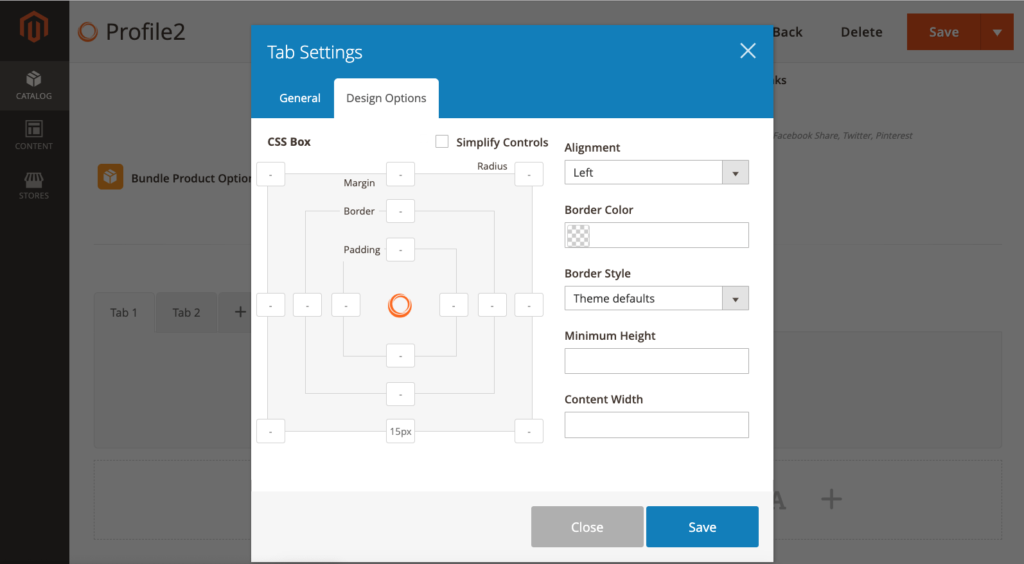
- Design Options: open Design Options tab in the popup.
- Duplicate: duplicate sub tab.
- Remove: remove sub tab.
Do the same to customize other sub tabs.
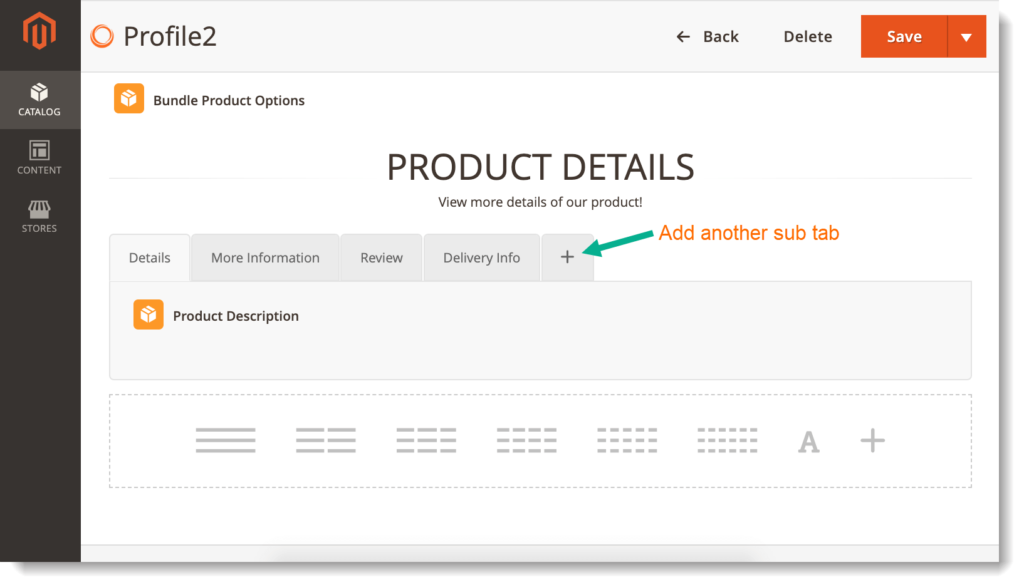
To add another sub tab, click plus icon at the end of the tabs’ bar. You can create as many sub tabs as possible. Use drag & drop to move sub tabs around.
Conclusion
So we’ve given you a complete guide on how to customize Magento 2 product tabs with Single Product Page Builder by Magezon. Don’t hesitate to leave a comment below if you have any questions or need any support.

Optimize Your Magento Store With Powerful Extensions
Looking for fast, efficient and well-coded extensions to build or optimize your Magento stores for sales boosting? Then visit Magezon website and grab necessary add-ons for yours today!
 Magezon Blog Help Merchants Build Comprehensive eCommerce Websites

