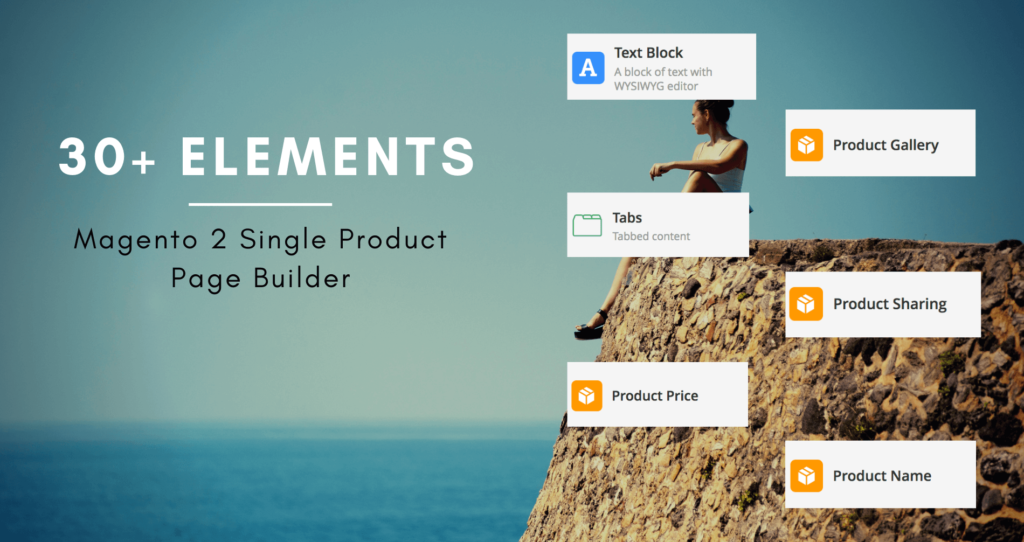
Magento 2 Single Product Page Builder by Magezon gives you full control over product page layout.
Right from the start, the extension is here to help you create stunning Magento 2 product page layouts in next to no time with 30+ drag & drop elements. This article, we’ll give you an ultimate guide on how to use these built-in elements.
Table of contents
Get Started
First of all, you need to install Magento 2 Single Product Page Builder on your website. Please refer to its installation guide for details.
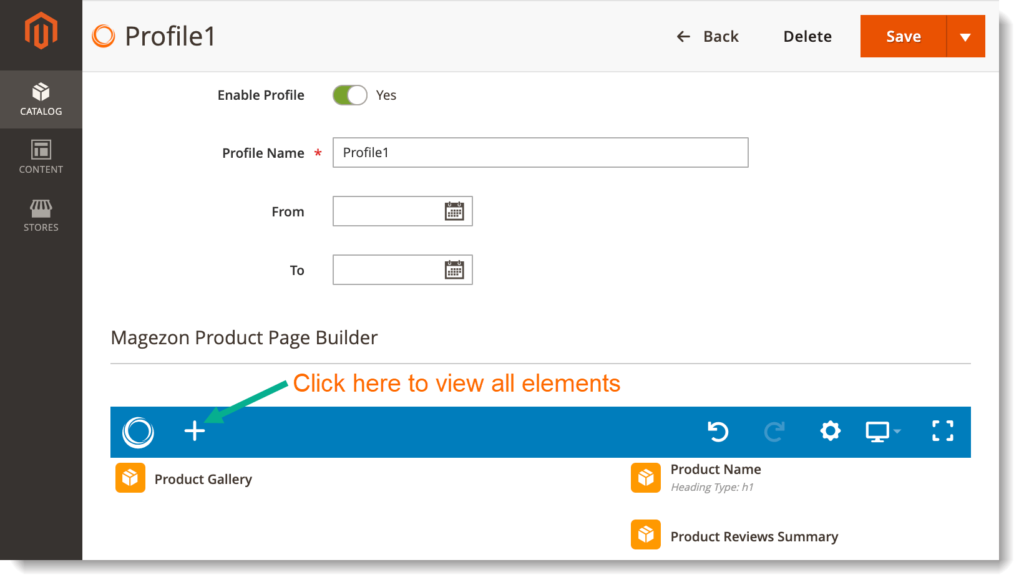
Then, you need to create a profile where you can build a new layout by adding elements into the builder section. After you apply this profile to a product page, these elements will be replaced with relevant data of that product.
How to Add Elements into Builder Section
Click the plus icon in the top bar and a popup containing all elements will appear:
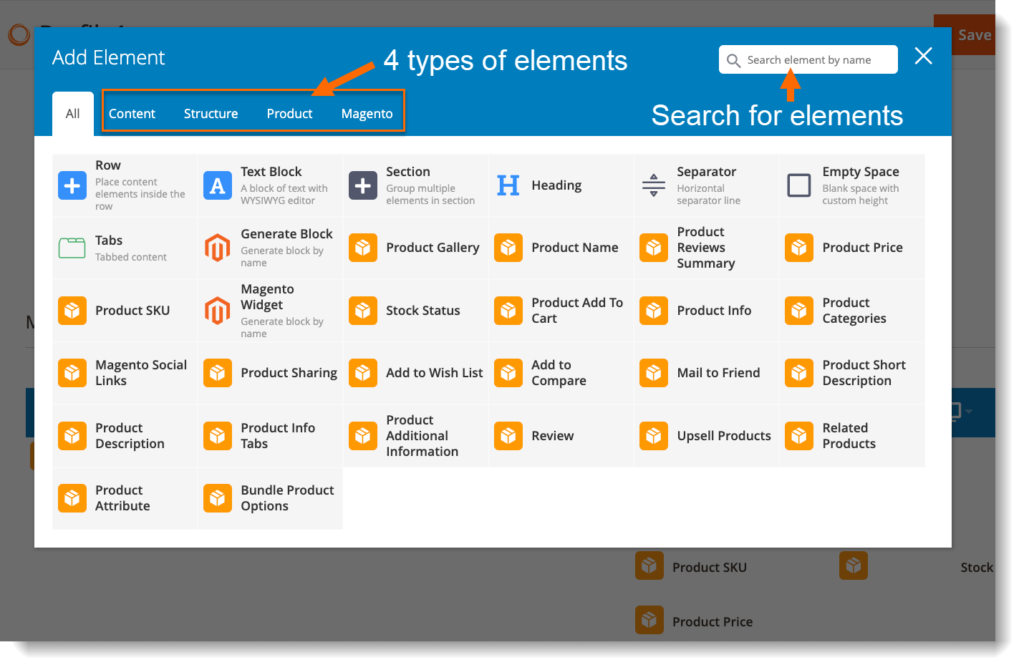
These elements are divided into 4 categories so that you can easily follow. You can search for an element quickly with the search box at the top right corner.
You should pay attention to Product tabs where you can find all product elements.
Click on an element to add it into the builder section.
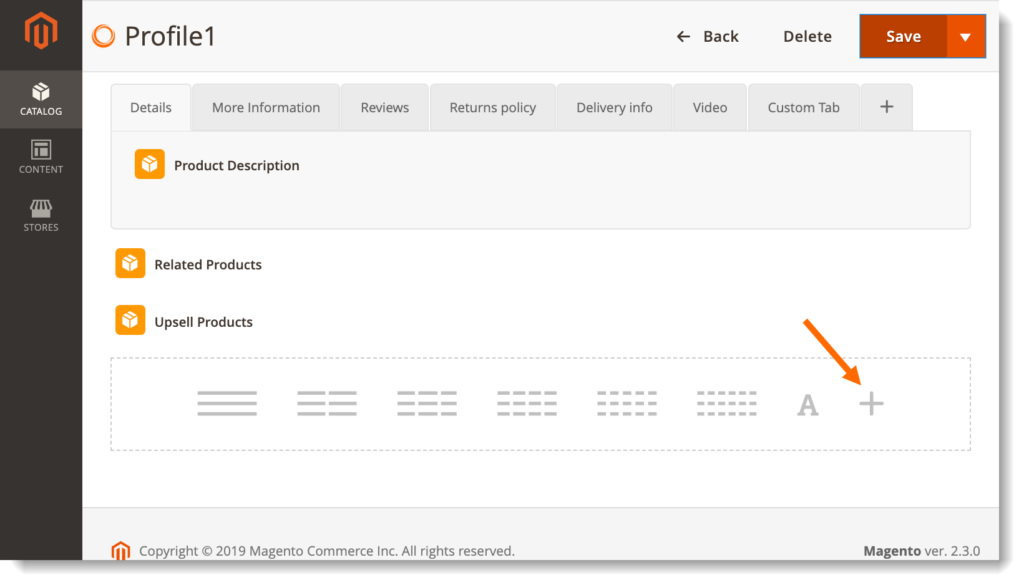
At the bottom of the builder section, you can see the plus icon that also allows you to add elements.
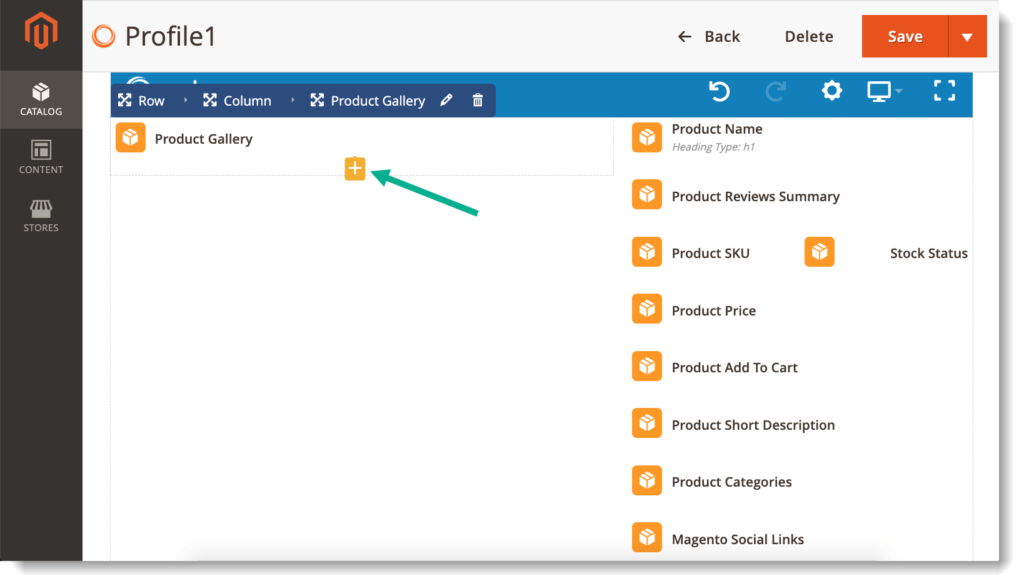
Or when hovering over an element, you can see the plus icon at the bottom that lets you add another element below this element.
How to Customize Elements
After adding an element into the builder, a popup will appear so that you can customize the element.
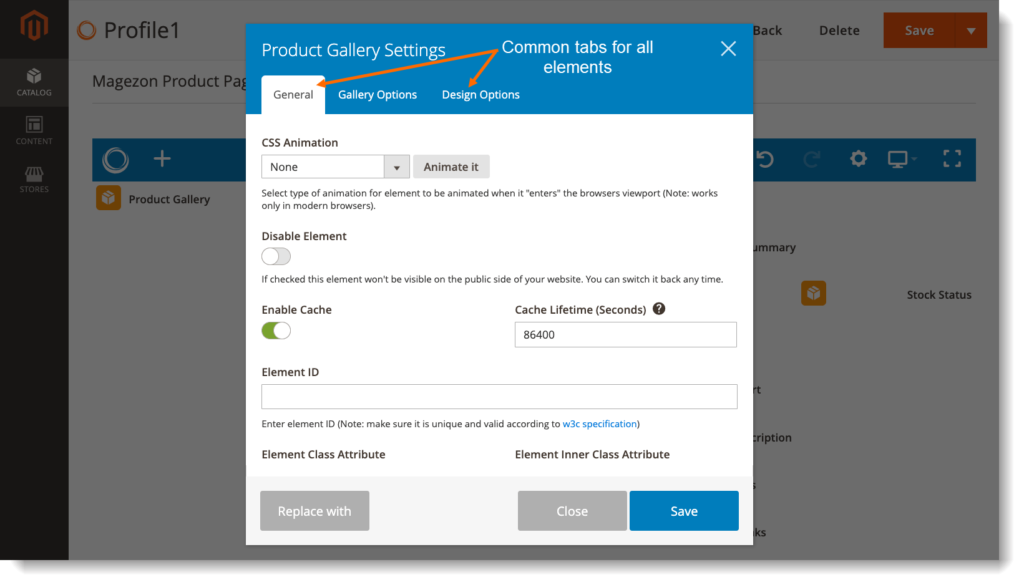
General tab and Design Options tab are the ones that you can see in the popup of all elements.
Some elements such as text block, product gallery, tabs, etc. will have extra options to customize. For example, in the above image, Product Gallery element has extra Gallery Options tab.
Element Controls for Easy Workflow
When hovering over an element, you can see a bar appearing at the top. Normally, the bar includes row, column and element tabs.
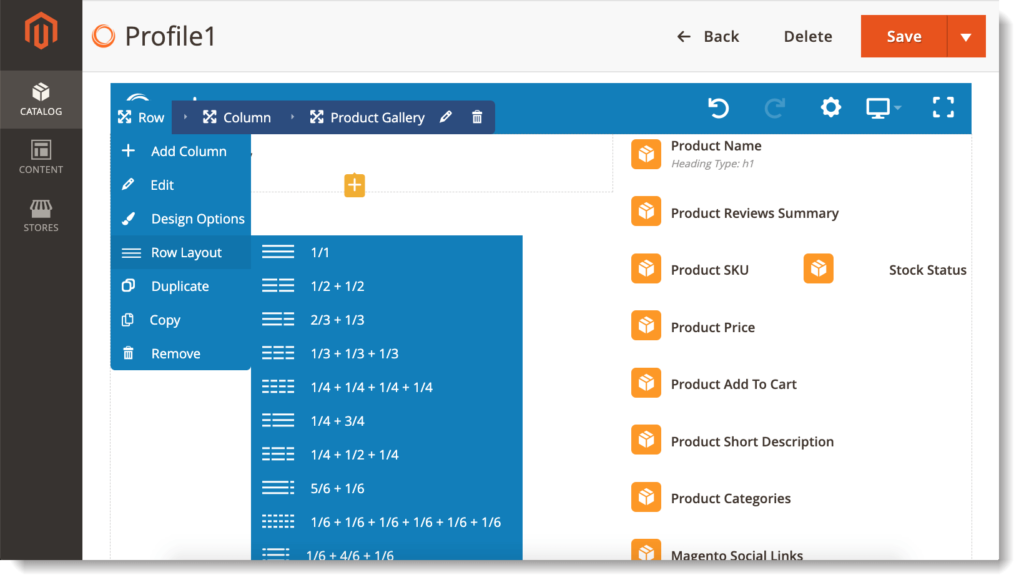
– Row: the row that can contain multiple columns and contains the element. Click the drag & drop icon to move the row. Hover over the Row tab to see its options:
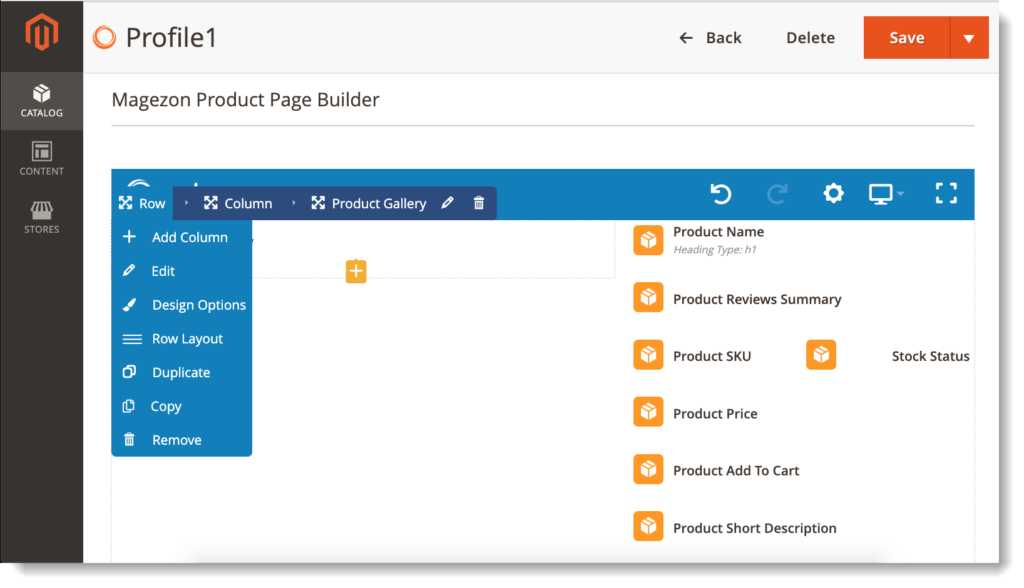
- Add Column: add another column into the row.
- Edit: click to open the popup with its settings.
- Design Options: click to quickly access Design Options tab in the popup.
- Row Layout: divide the row into multiple columns.
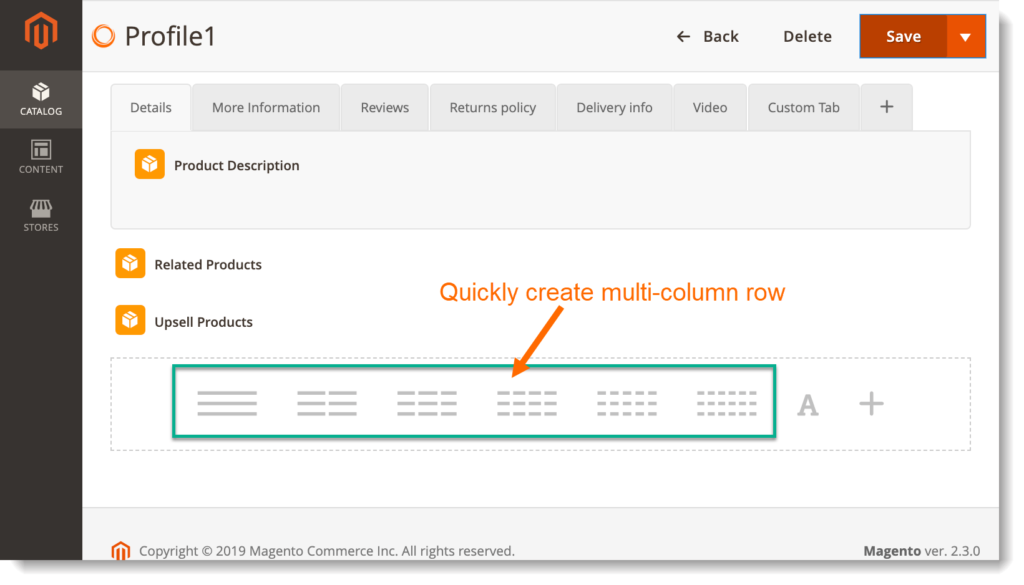
At the bottom of the builder section, you can quickly add a row with multiple columns.
- Duplicate: duplicate the row.
- Copy: copy the row and paste it into another position.
- Remove: delete the row.
– Column: the column that contains the element and lies in the row. Click the drag & drop icon to move the column. Hover over the Column tab and you will see these options:
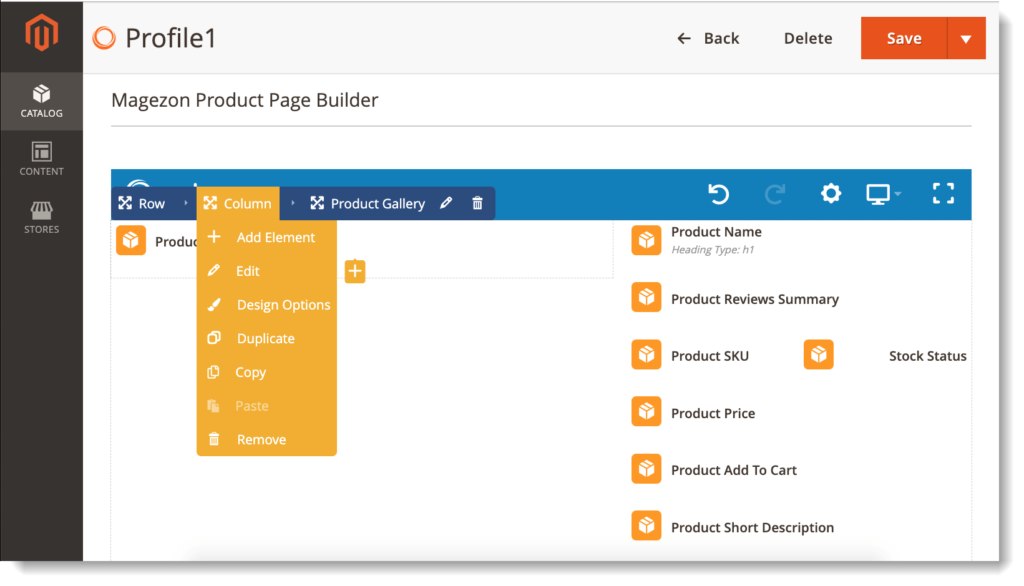
- Add element: add another element into the column.
- Paste: paste an element that you’ve copied into the column.
– [Element name]: Click the drag & drop icon to move the element. Hover over element tab and you can see these options:
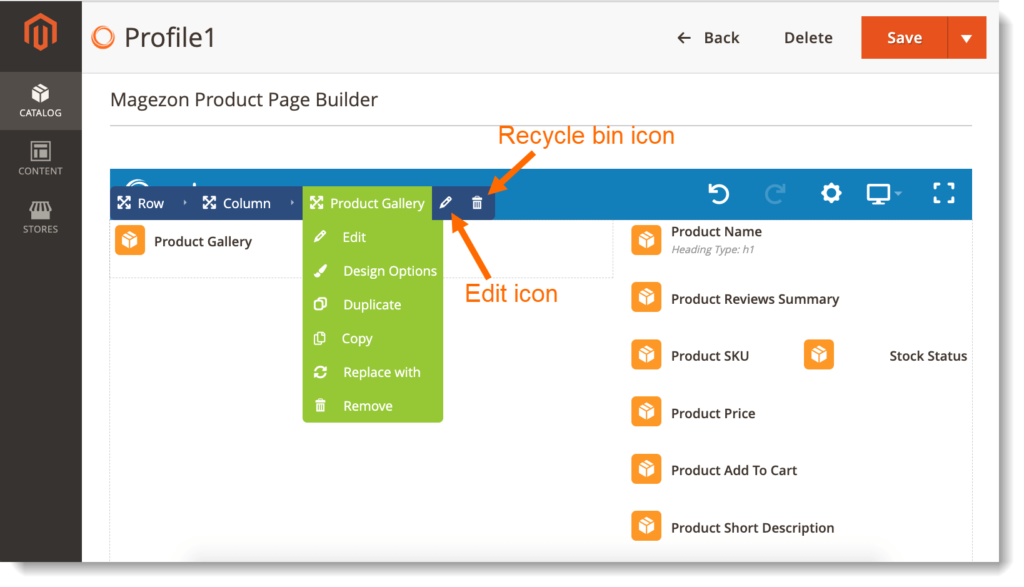
- Replace: replace the element with another one.
- Edit icon: click to edit element settings.
- Recycle Bin icon: remove element.
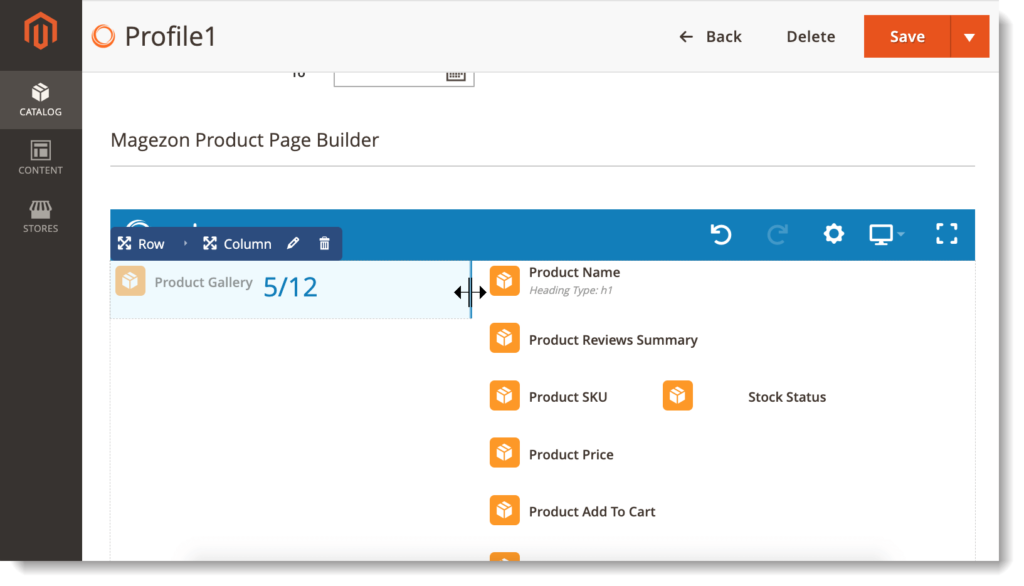
Easy to resize elements like this:
Conclusion
So we’ve walked you through a general overview of 30+ elements of Single Product Page Builder for Magento 2. Don’t hesitate to leave us a comment if you have any questions.

Optimize Your Magento Store With Powerful Extensions
Looking for fast, efficient and well-coded extensions to build or optimize your Magento stores for sales boosting? Then visit Magezon website and grab necessary add-ons for yours today!
 Magezon Blog Help Merchants Build Comprehensive eCommerce Websites

