 Magezon Blog Help Merchants Build Comprehensive eCommerce Websites


Table of contents
1. Allows Remote Shopping Assistance
There are times when online shoppers need help with the purchasing process. Maybe some are too busy to go online and place an order, or others are not familiar with e-commerce sites.
So, how do Magento 2 store owners deal with this situation?
Magento allows remote Shopping Assistance functions in Adobe Commerce version. It is applied to both guests (who haven’t signed up for an account yet) and registered customers. Admins can offer immediate assistance to their customers including:
- Manage the shopping cart
- Create new orders
- Update order status
This article is going to explore this function from Adobe Commerce’s backend as well as shed light on how to configure it.

Optimize Your Magento Store With Powerful Extensions!
Looking for fast, efficient, and well-coded extensions to build or optimize your Magento stores for sales-boosting? Then visit the Magezon website and grab the necessary add-ons for yours today!
2. Manage the Current Shopping Cart
First, customers must log into their account from the storefront to start an assisted shopping session. This way, their account information will be available for administrative purposes.
In case of new visitors, the store admin can create one new account for them.
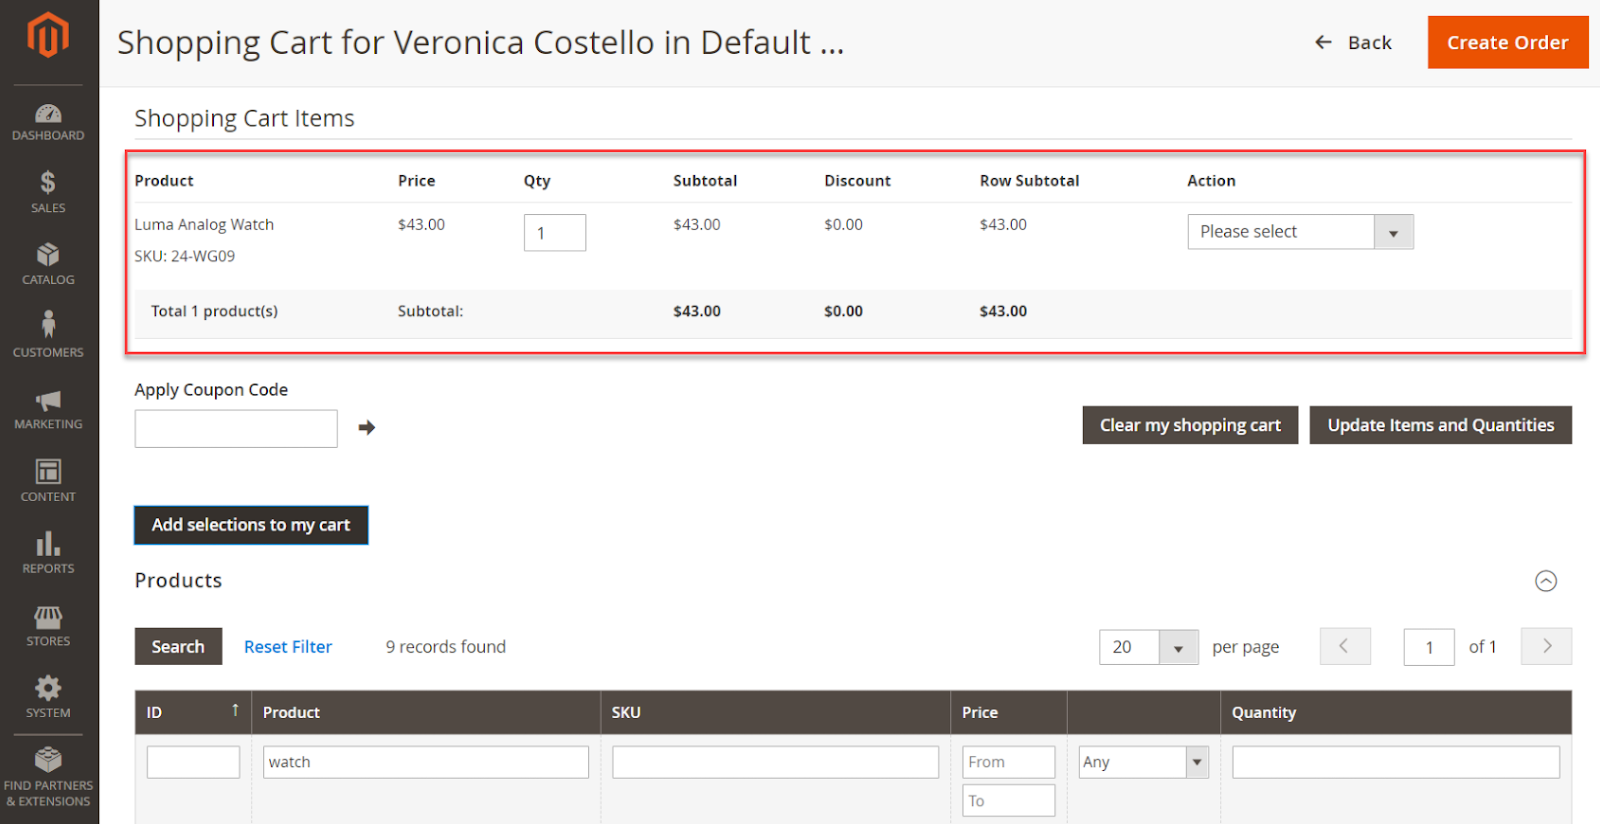
The customer shopping cart will look like the below:
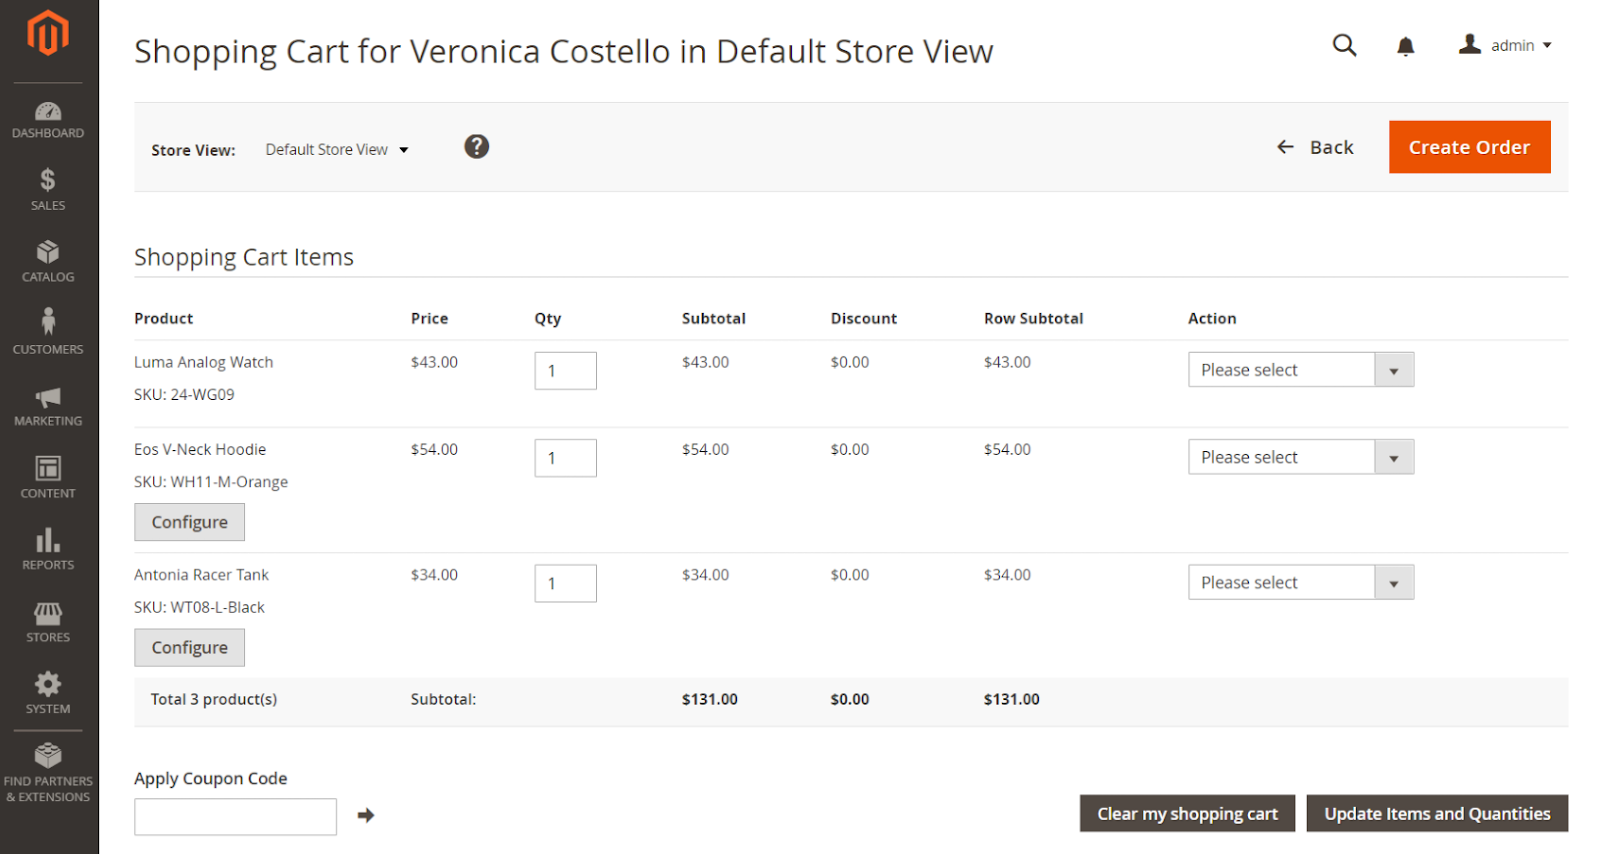
From the shopping cart interface, you can select some actions from the drop-down box such as removing items or moving items to the chosen wishlist. When it comes to controlling buttons, the admin can easily clear the whole current shopping cart and update the number of items or the required quantity of each one. Adding selections to the cart is also a privilege for Magento admin and entering a special coupon code before checkout.
To better assist the customer shopping process, you should follow these steps below:
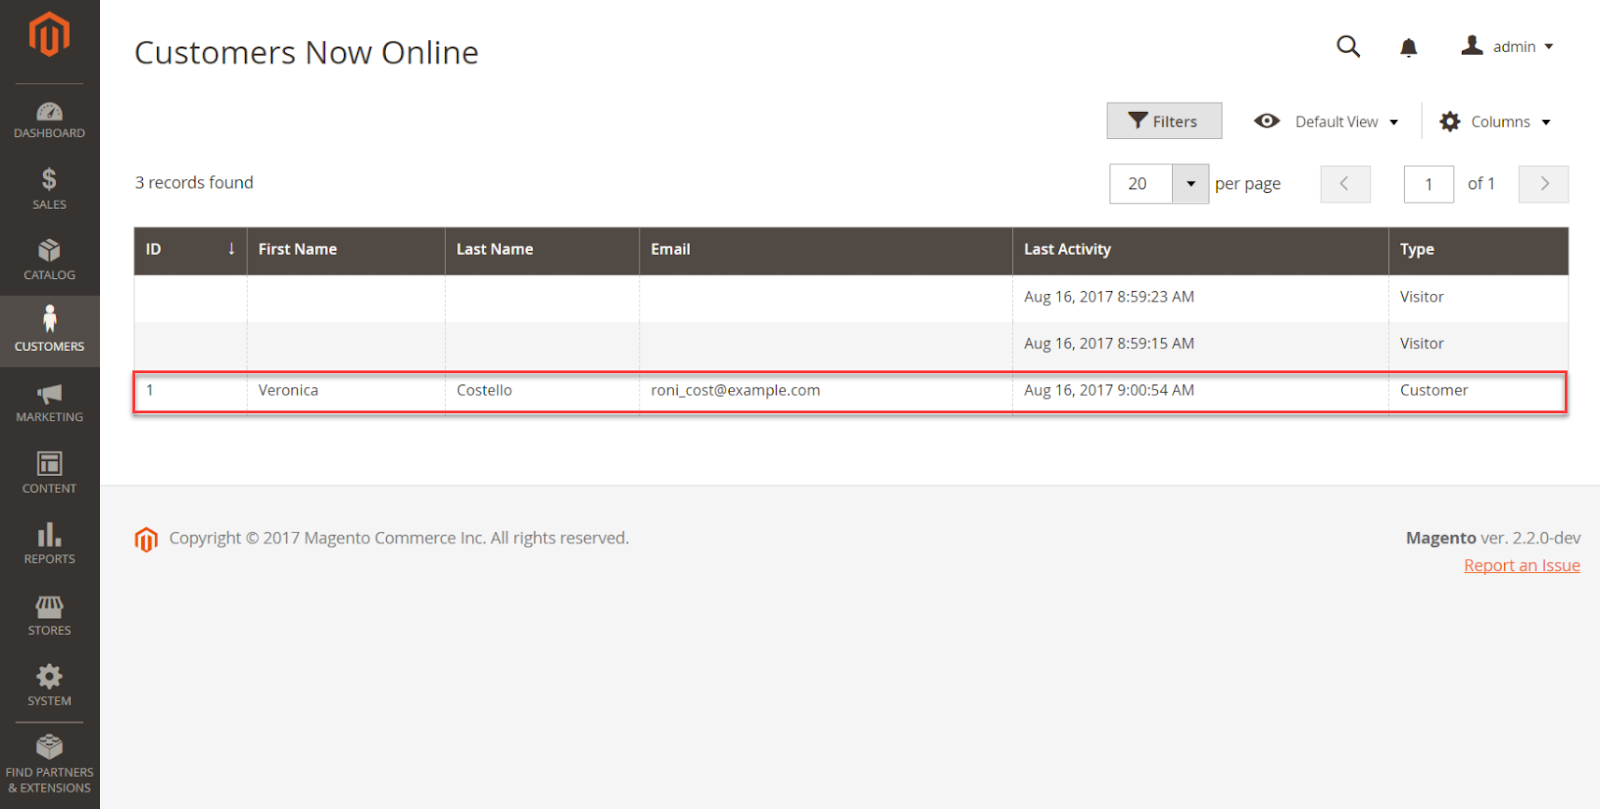
Step 1: Verify if the customer is logged in or not
From the Admin sidebar, navigate to Customers > Now Online.
The grid will show up the list of visitors and customers logging into the store. As can be seen from the screenshot, a customer named Veronica Costello is active at this moment.
Step 2: Offer assisted shopping
From the Admin sidebar, navigate to Customers > All Customers.
Select the one getting assistance from the list then open his/her record in edit mode. (Hit Edit link in Action column).
The profile of an online customer will look like this:
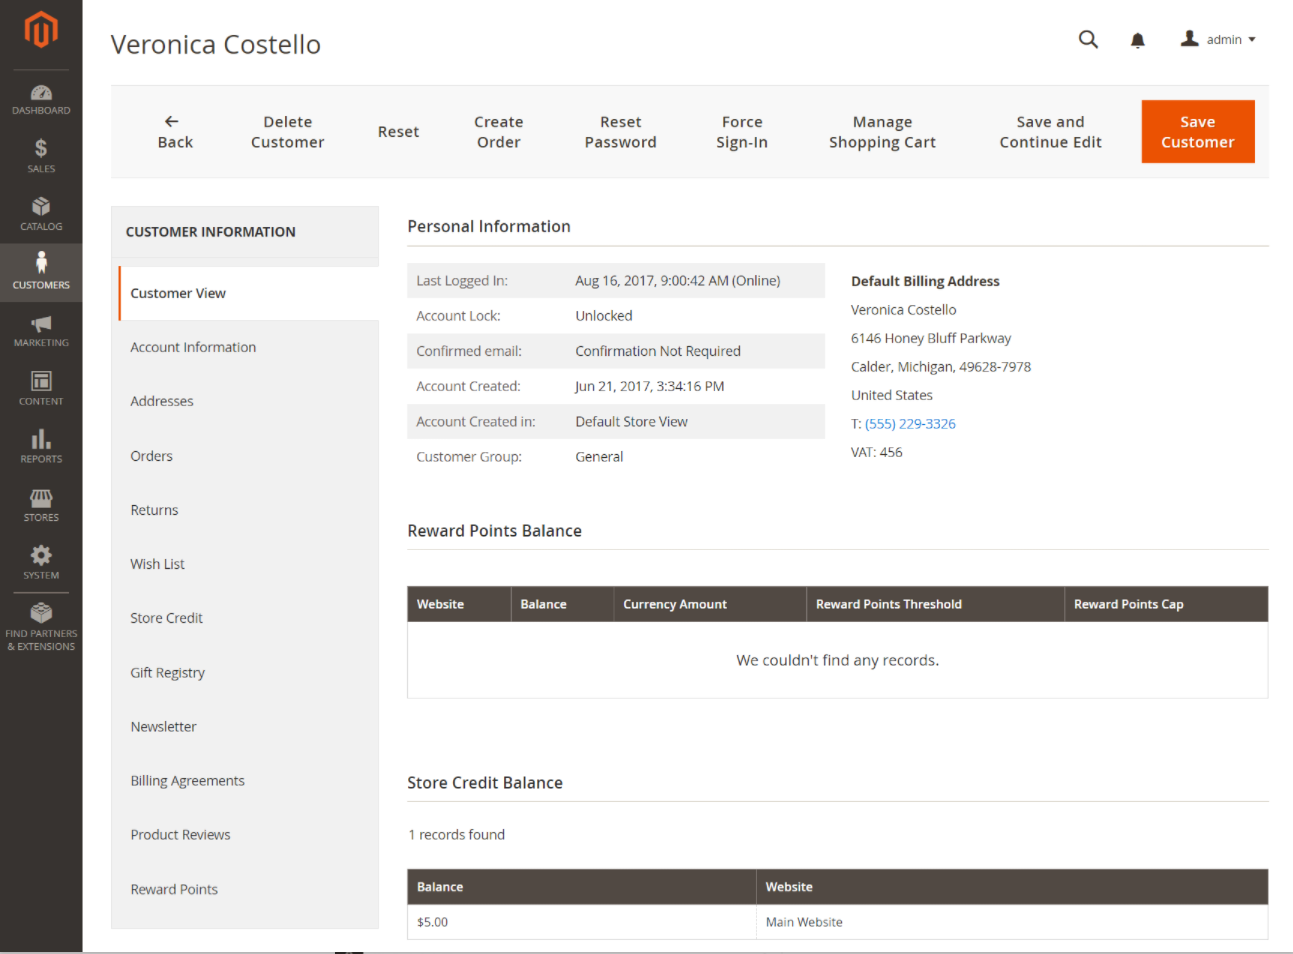
Right below the Personal Information title, the Last Logged In field shows the exact date & time the customer is online.

Hit the Manage Shopping Cart at the top to enter the shopping cart interface and give Costello some assistance.

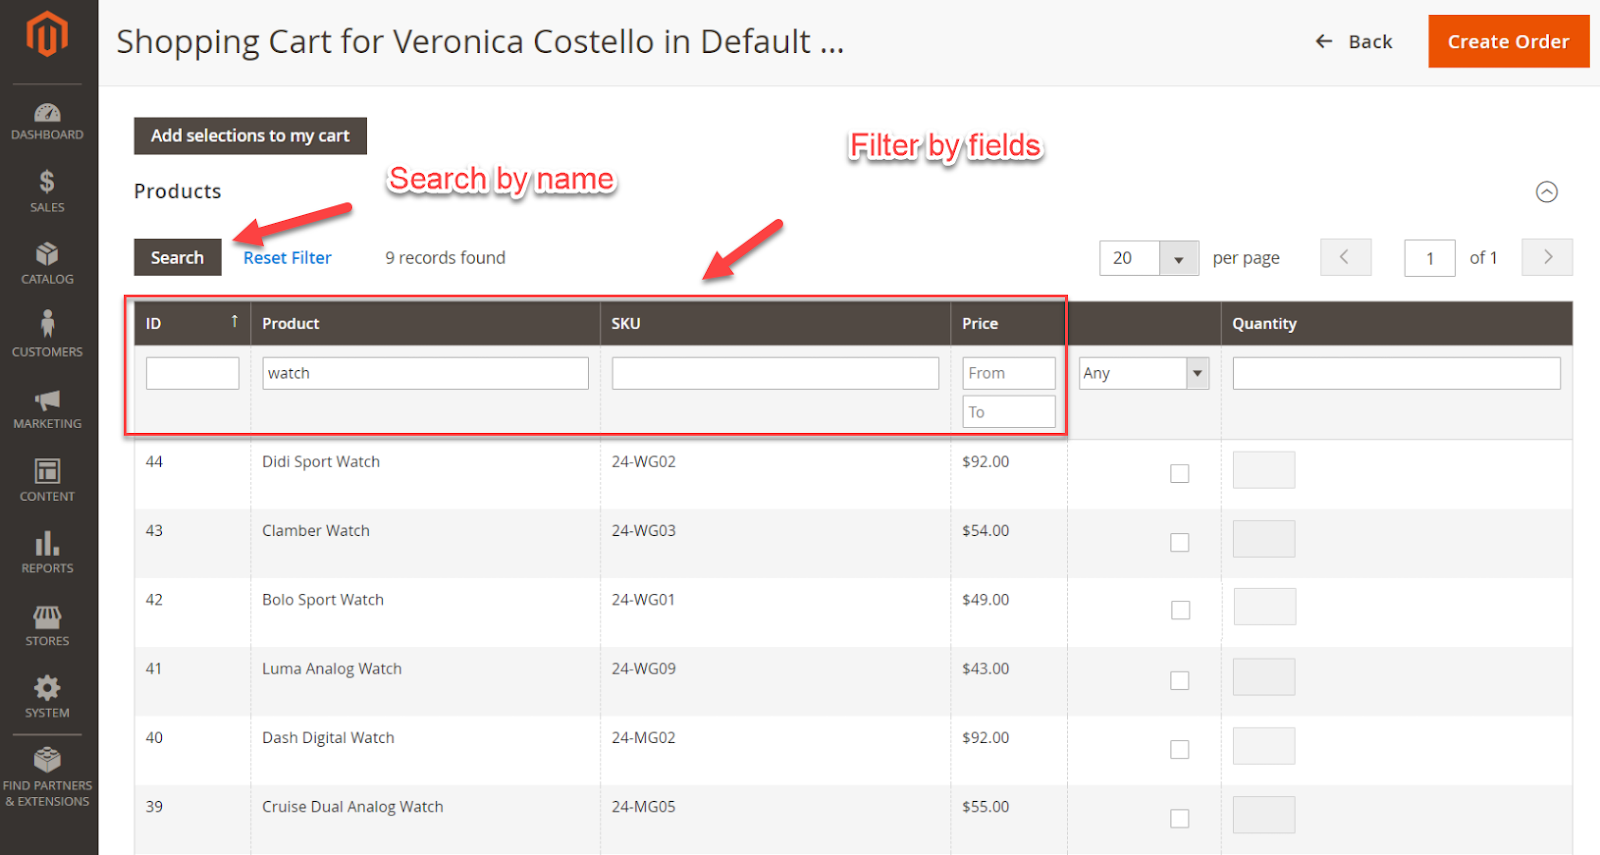
Scenario 1: Help Costello add products to the cart by attribute
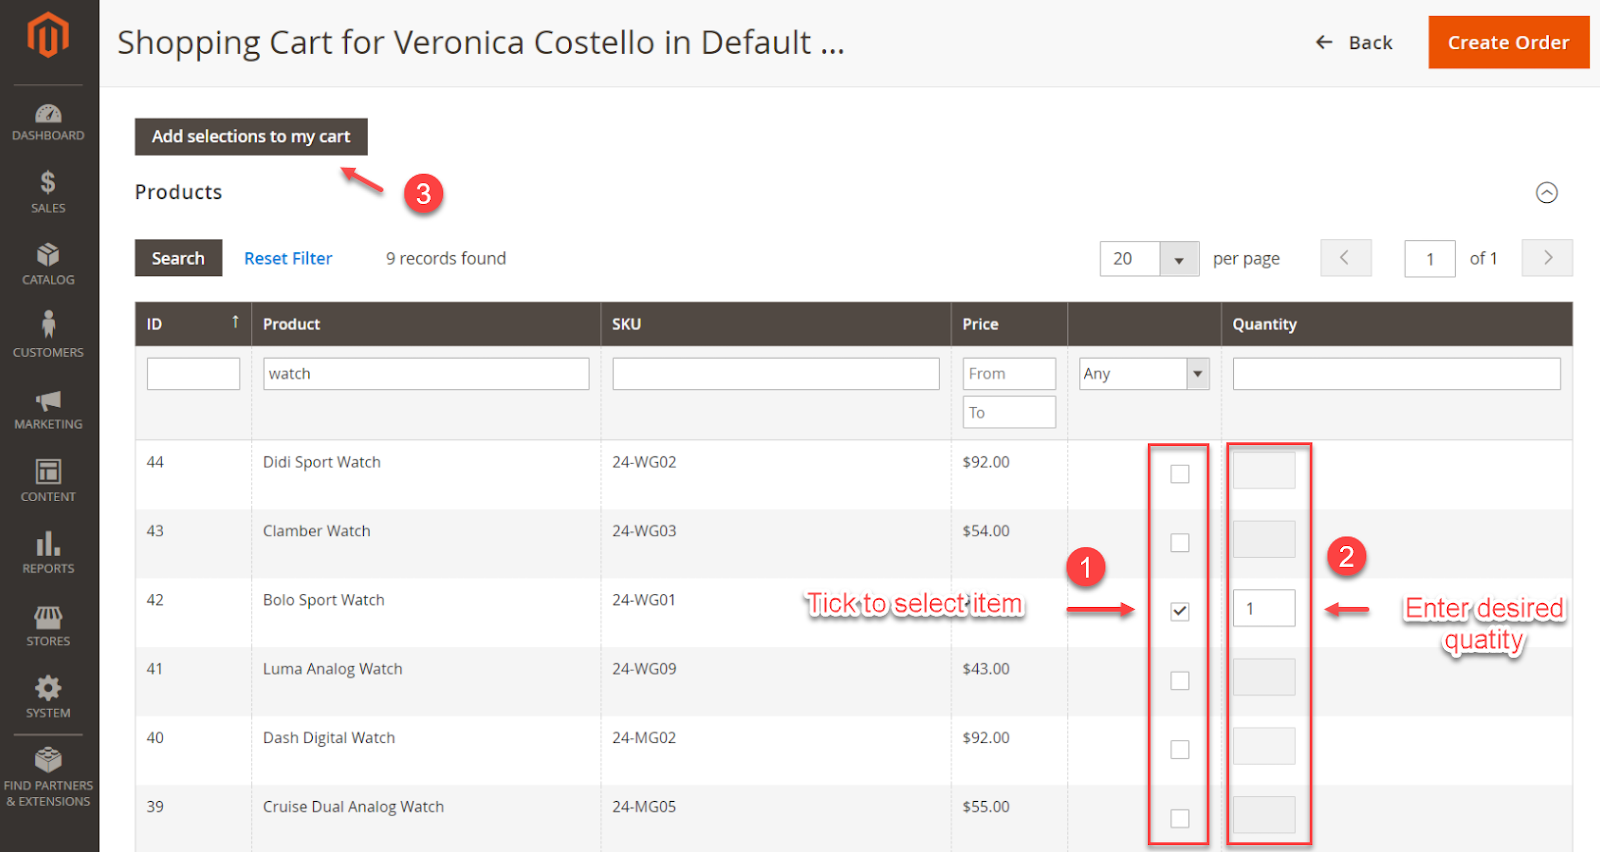
First, expand the Products section to see the product list. To find a product in a hurry, use filters or Search.
To Add a simple product
Tick the checkbox of the desired items. The default value of Product Quantity is set to 1. Edit this number if your customer requires it.
Then, hit Add selection to my cart button on the left above.
After these actions are completed, the item will be listed in the Shopping Cart Items section at the top of the page. Then, the cart is updated.
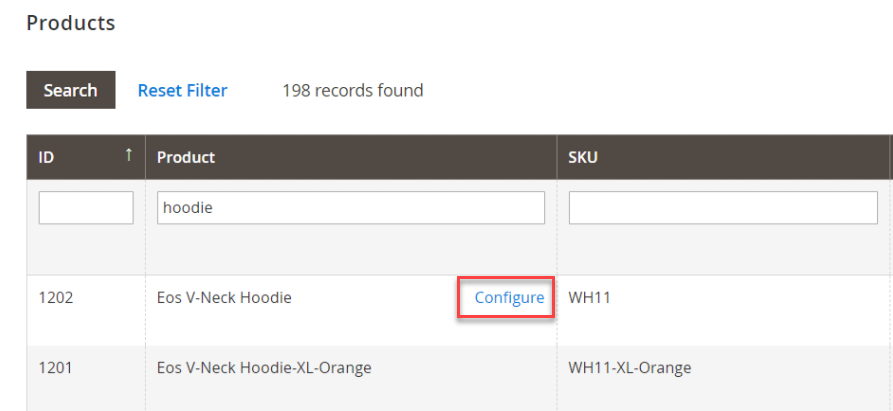
To Add a product with a configuration
We all know that there are 6 product types in Magento, and those that need to be configured before adding to the cart are Bundle, Configurable, and Grouped types.
If the desired product falls into one of these types, there will be a Configure link next to the product name like this
What’s next is to describe the item to be ordered by choosing options from the Associated Products dialog. Confirm by clicking on the OK button.
Your product will then be selected with a checkmark and default quantity set. If you wanna change the quantity, do it. Then, add the product to the cart with Add selections to my cart button.
The item will then be moved to the top page.
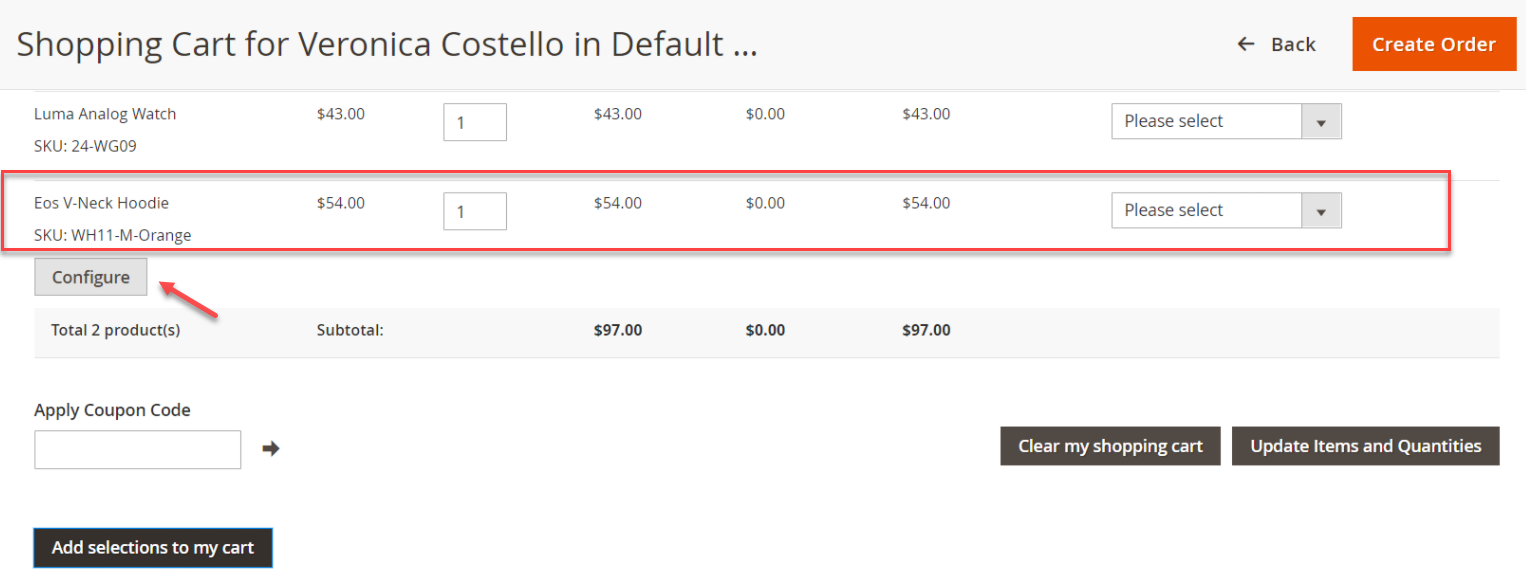
Whenever you want to edit the configurable product added, simply click the Configure button below the item line.
Scenario 2: Help Costello Add Products by SKU
Imagine Costello is a loyal customer, he/she bought items from our e-store thousands of times so he/she knows exactly the SKUs of products he/she usually purchases. In this case, helping Costello to shop is easier & faster than ever, especially when he/she wants to place orders in bulk.
First, expand the Add to Shopping Cart by SKU section.
To Add items by SKU individually
Just enter the SKU number and the quantity of the item. Click Add another if there’s more than one. Then hit the button Add selections to my cart.

To Add items in bulk
To help him/her add a list of SKUs to the cart in a blink of an eye, prepare a list with 2 columns only, SKU and Qty in the header. Remember to form the list in a CSV file.
In the Upload File section, hit Choose File then select prepared CSV file from your directory.

Scenario 3: Transfer item(s) from lists
Costello has been surfing your e-store for so long and he/she made several actions that are recorded. The actions include: Adding items to the wishlist, comparing between products, ordering items, or just viewing products.
Being an admin, you can absolutely do some actions like moving items from the following sections to their cart:
- Wish List
- Products in the Comparison List
- Recently Compared Products
- Recently Viewed Products
- Last Ordered Items
In each section, the number of items is displayed in parentheses after the header.
Expand each section to find desired items. Then, select items by checkbox and enter the Quantity respectively.
If desired items are configurable products, hit the Configure button and set up options. Hit Add selections to my cart.
If you offer a coupon code for a special event, enter a valid code to Apply a discount on his/her checkout.
Finally, adjust the quantity ordered if needed by entering the correct amount. Hit Update Items and Quantities.
Optimize Your Magento Store With Powerful Extensions!
Looking for fast, efficient, and well-coded extensions to build or optimize your Magento stores for sales-boosting? Then visit the Magezon website and grab the necessary add-ons for yours today!
Create New Orders
With the shopping assistance function of Adobe Commerce, helping Costello to create a brand new order isn’t a problem for the admin. The Create New Order form includes all the needed information to complete a normal checkout process, with recorded activities from the customer’s account dashboard.
Let’s follow these steps to do it.
Step 1: Create an Order
Go to the customer shopping profile by this path: Customers >> All Customers >> Find your desired one from the grid >> Edit
From the profile interface, click Create Order

Step 2: Add products to the cart
Choose the right store view where the order is placed first. Then you can add products to the cart from the following sections:
From the customer’s Activities sidebar
Easily move items from the customer’s wish list, recently viewed, compared to ordered items to the cart.
Just expand one of these sections above and tick the checkbox for selected items.
Update changes and the selected ones will successfully be added to the cart.
From Catalog
In the Items Ordered section, click Add Products
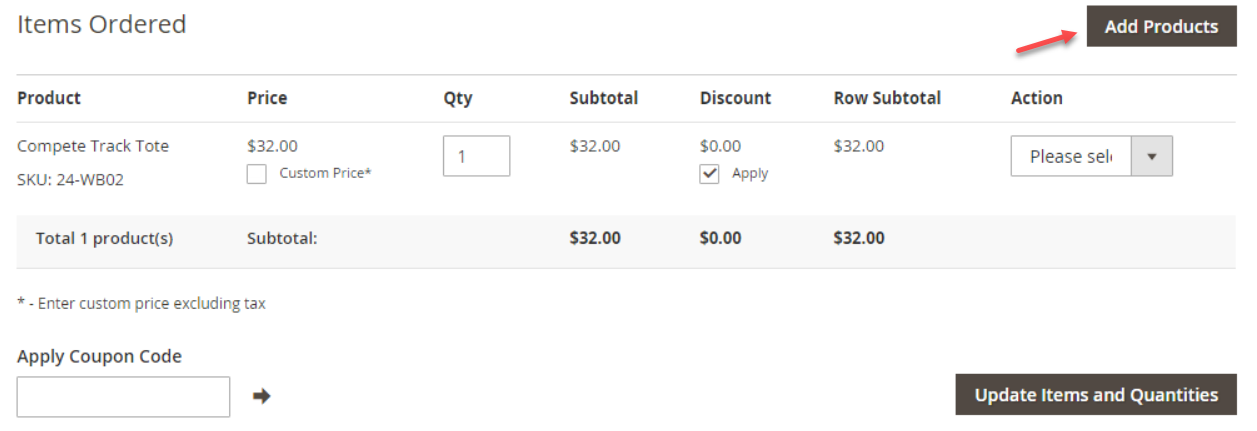
There will appear a list of products like below. Select products by ticking the checkbox and entering Quantity for each one.
If selected products have available options, click Configure to do the setup if needed. Update the cart by clicking Add Selected Product(s) to Order.
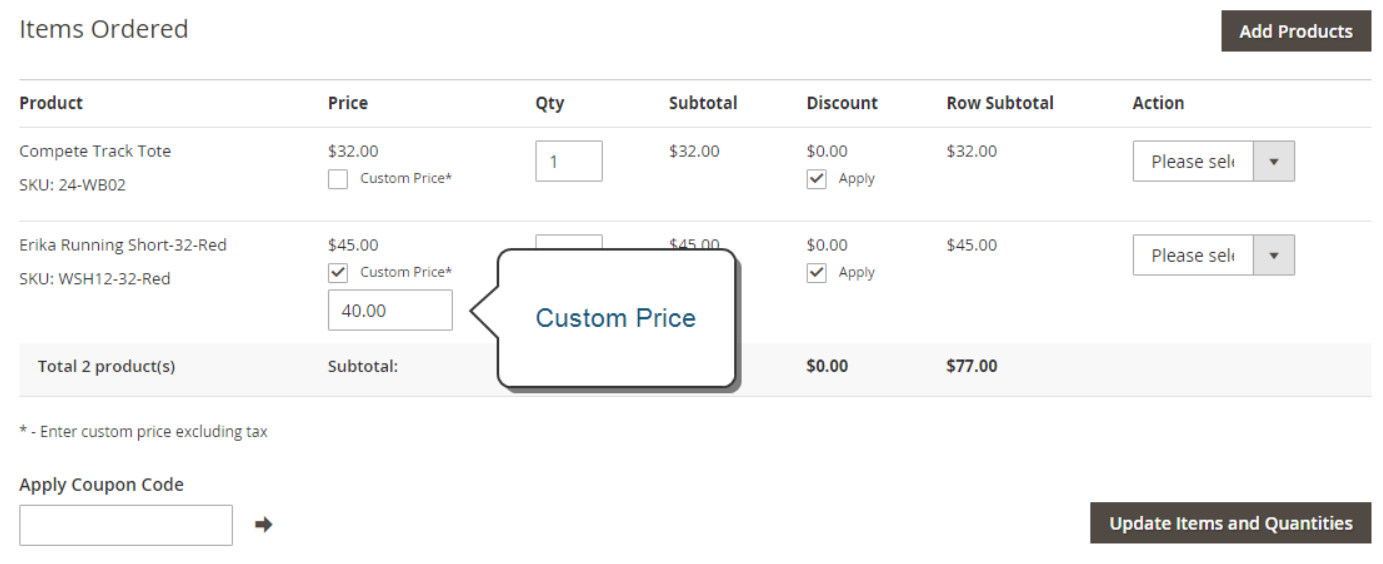
If you want to reward your customer with a bargain price, click the Custom Price checkbox then enter a new price into the box that appears below.
Finally, update the cart totals by hitting Update Items and Quantities.
In case of need, you can also update the following sections:
- Order Currency
- Apply Coupon Codes / Gift Card Code
- Payment Method
- Shipping Method
- Order Comments
Step 3: Submit the Order
Having gone through the steps mentioned above means you’ve almost been there. Thoroughly check the order information and confirm with Costello again to make sure there’s no confusion.
Click Submit Order button. The order is then completely placed and a confirmation message will be sent to the customer.
Order Statuses
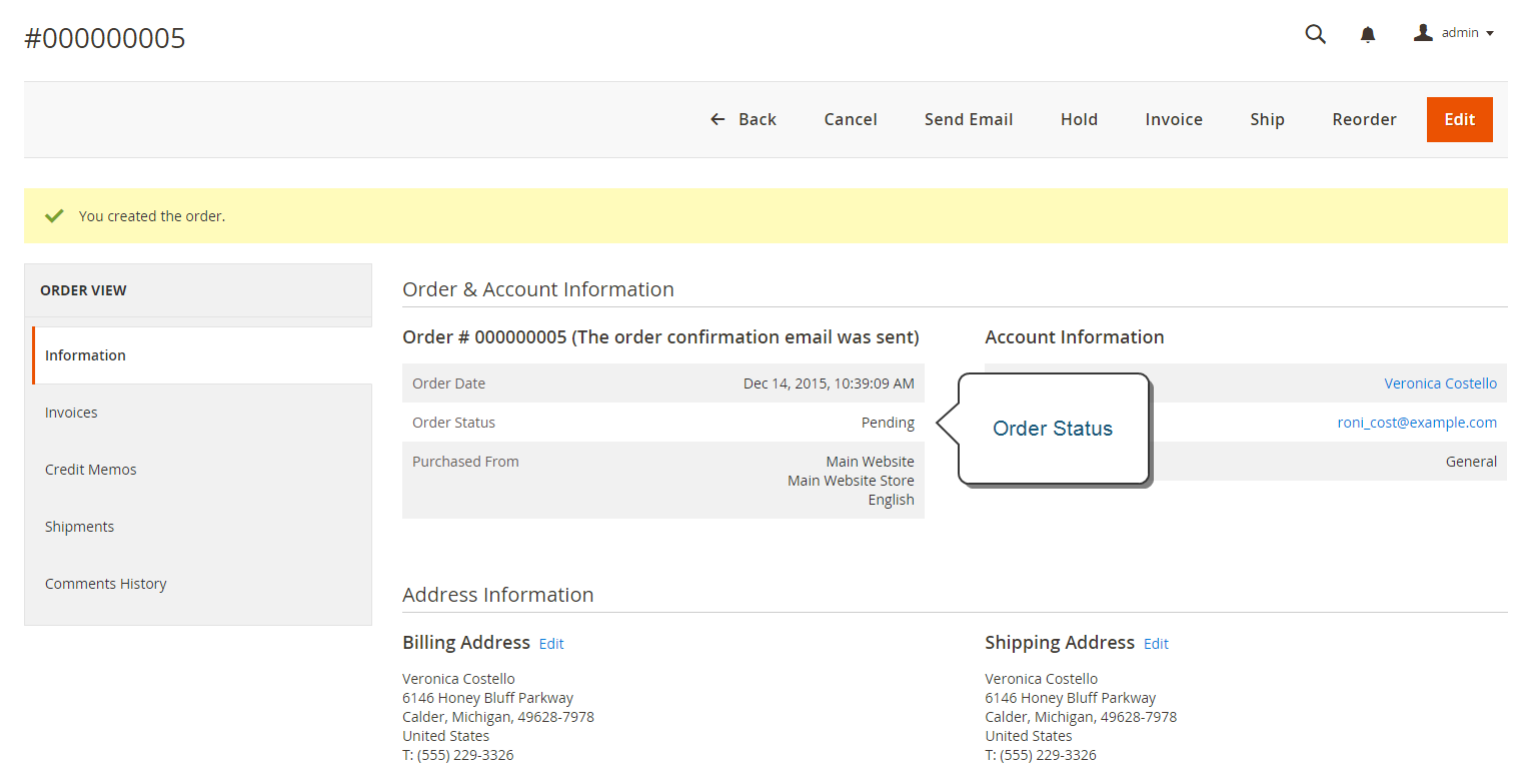
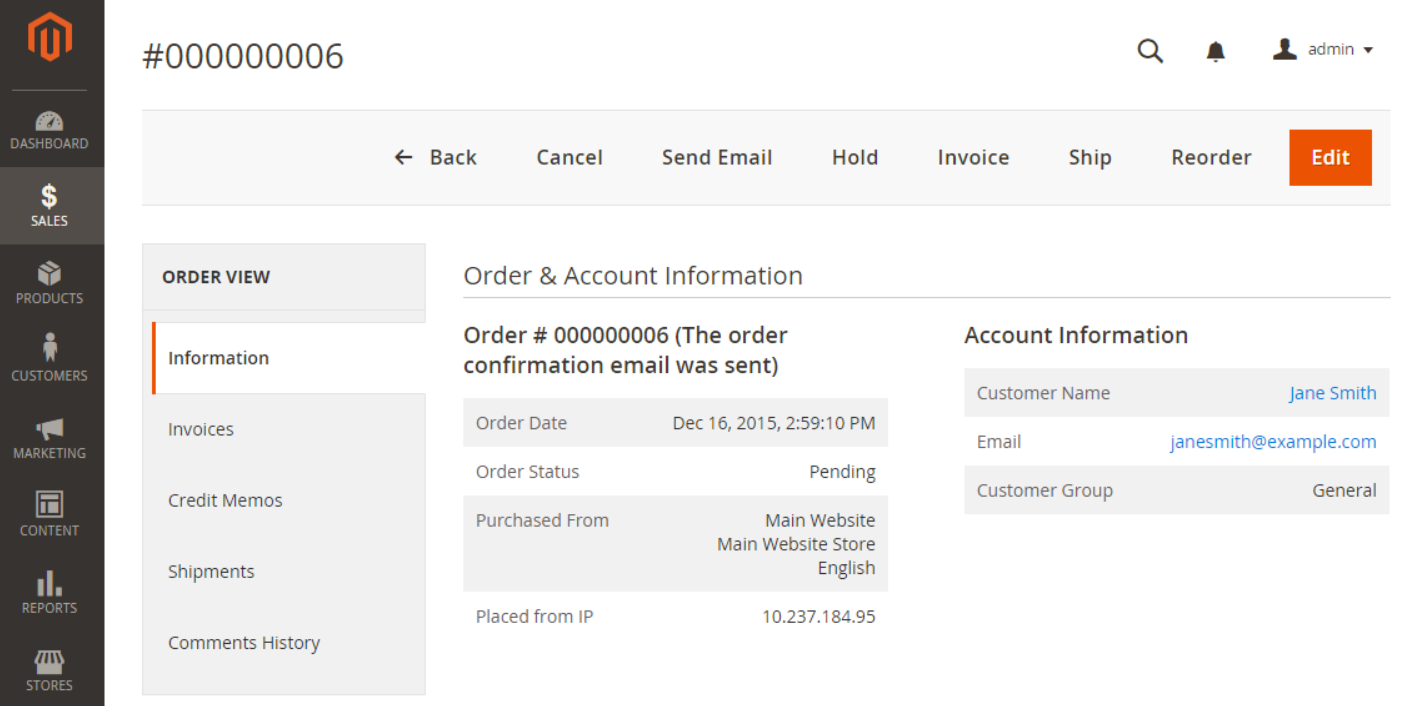
Pending
Once the order is successfully submitted, the status is automatically set to pending if the payment is not received. It’s up to you to edit, place on hold, or cancel it entirely.
The button bar of a pending order will come with the following actions:

The system will automatically generate a new order to replace the current one if you modify the content inside. However, if you change the billing address, the current order status will be kept the same and there’s no new order generated.
Processing
An order is referred to as Processing when:
- The store system receives payment from customers and the invoice is generated. At the same time, the payment action is set to Authorize and Capture.
- The system authorizes an order transaction but has not yet captured the payment. In other words, the payment action is set to Authorize.
The configuration of payment action determines the available actions that can be performed after creating the order.
For Processing status, though you cannot change the substance inside the order, it’s possible to edit the billing & shipping information.
When the customer sets the payment action to be Authorize and Capture, the storage system will automatically generate an invoice after the order is placed. In this case, canceling or voiding the order is impossible, but you can refund your customer using a credit memo instead.
Steps to Void a Processing Order
Being in Processing stage with the payment setting set to Authorize means you can void or cancel the order.
To void the order, follow these steps:
- Navigate to Sales > Operations > Orders from the admin sidebar
- Choose the Order then click View in the Action column
- Hit Void
- Click OK at the prompt
Edit a Pending Order
- From the Admin sidebar, navigate to Sales > Operations > Orders.
- Choose the Order then click View in the Action column
- Click Edit.
- Hit OK to continue editing at the prompt
Update the order as required.
- To apply changes:
Hit Save if you only make changes to the billing & shipping address.
If changes are applied to the order substance, hit Submit Order as you need to reprocess it.
Place an Order on Hold
In some circumstances, customers would like to pick a currently out-of-stock item or prefer a payment method that is not available. You can then place their order on hold for further configurations.
Follow these steps to place the order on hold:
- Navigate to the Orders grid and select the desired Pending order
- Click View in the Action column
- In the Order view mode, click Hold on the button bar
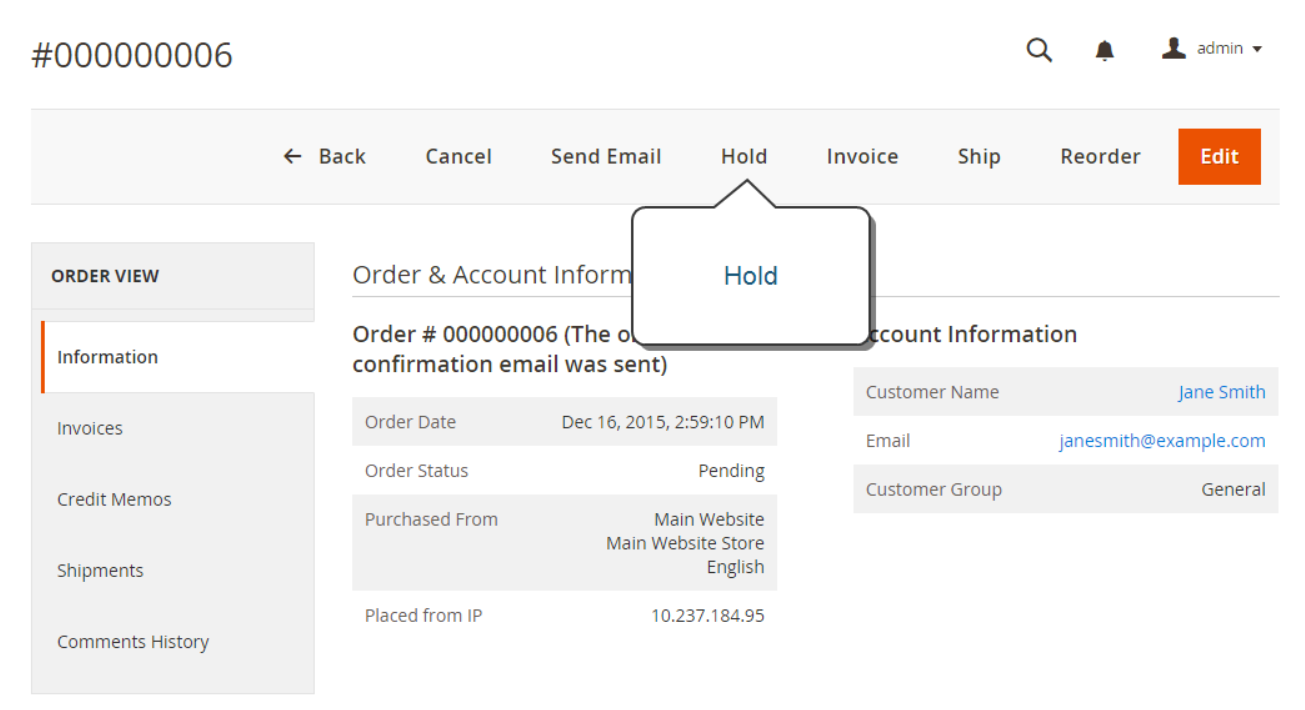
To remove this action, just simply click Unhold.
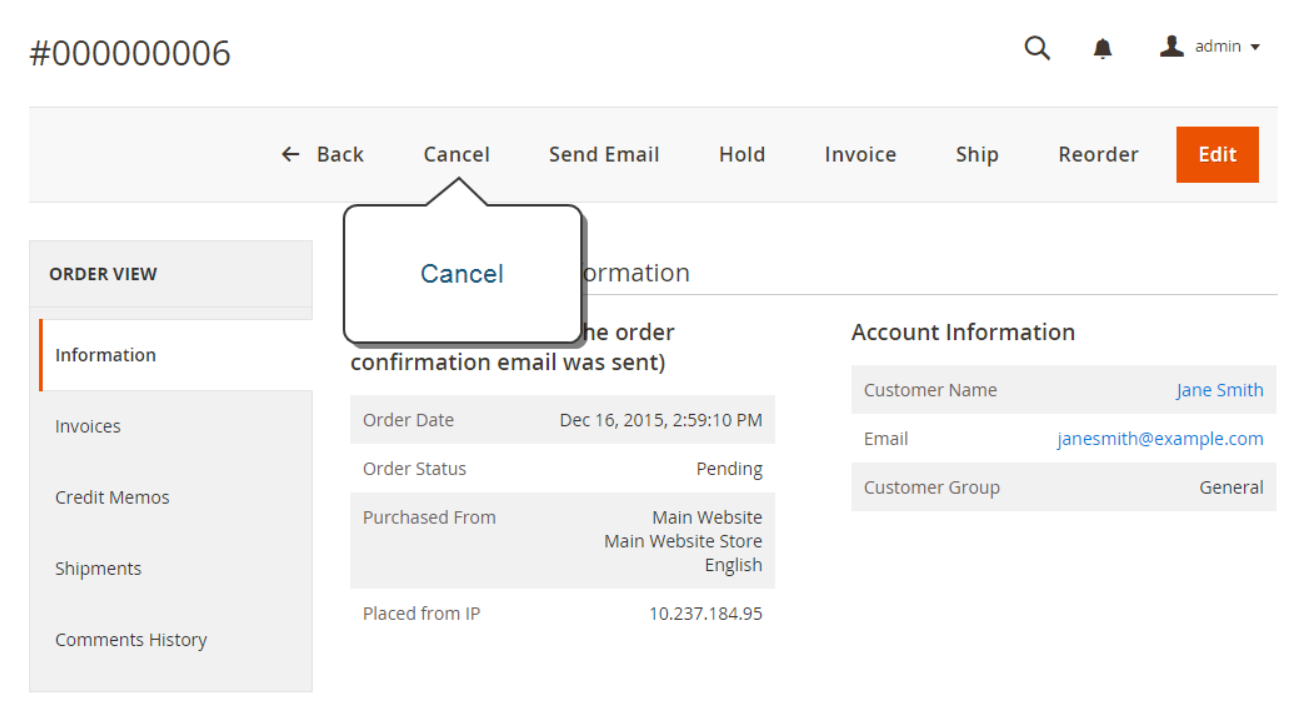
Cancel a Pending Order
Admin can change the order status from Pending to Canceled
- Navigate to the Orders grid and select the desired Pending order
- Click View in the Action column
- In the Order view mode, click Cancel on the button bar
In a Nutshell
As can be seen in the article, shopping assistance is a “cool” function that works for both customers and store administrators. It reduces purchasing time and lets store owners offer fast assistance to low-tech customers. On behalf of customers, admins can easily finish managing the current shopping cart, creating new orders, or changing orders’ status.
You may wonder if the Open Source gets this functionality? Fortunately, from Magento 2.4, it has been made available for Open Source with Login As Customer name. If you have any questions, leave us a comment. For more tutorials, visit our series.
At Magezon, we also provide you with many fast, well-coded yet affordable extensions for your store optimization. Visit our website to opt for the necessary ones!
Optimize Your Magento Store With Powerful Extensions!
Looking for fast, efficient, and well-coded extensions to build or optimize your Magento stores for sales-boosting? Then visit the Magezon website and grab the necessary add-ons for yours today!