 Magezon Blog Help Merchants Build Comprehensive eCommerce Websites

Magento 2 Robots.txt is an SEO technique that any store owner can use to manage their URLs. However, sometimes you want Googlebot to quickly index or not index your website and the specific URL, so what should you do?
The answer is creating a robots.txt file for your Magento website. To help you understand the robots.txt file and create it, I will bring you the following helpful article. Stay tuned!
Table of contents
- What Is Robots.txt in Magento 2?
- How to Configure Magento 2 Robots.txt
- Determine Magento 2 Robots.txt Location
- How to Generate Robots.txt in Magento 2
- Let’s See Magento 2 Custom Instruction Examples
- 1. Allows Full Access To All Directories and Pages
- 2. Disallows Access to All Directories and Pages
- 3. Disallow Bingbot from accessing a Specific Folder
- 4. Disallow Bingbot from Accessing a Webpage
- 5. Disable User Accounts & Checkout Pages
- 6. Disable Duplicate Content
- 7. Disable Catalog & Search Pages
- 8. Disable CMS Directories
- 9. Disable URL Filter Searches
- 10. Block Googlebot From a Folder
- 11. Block Googlebot From a Page
- 12. Common Search Engine Bots
- Bottom Line
What Is Robots.txt in Magento 2?
Robots.txt is a file that allows search engine crawlers to request crawling from the pages or files on your website. This file is mainly used to prevent crawlers from sending too many requests to your site.
This is not a mechanism to hide your webpage from Google. Therefore, to hide a page from Google, you had better use the no index or protect your page with a password.
The robots.txt file is used to moderate crawler traffic to your site and prevent Google from reading a file, depending on the file type:
1. Web Page
Robots.txt file can be used to avoid crawling unimportant or similar pages on the site. However, you should not use this file to keep your website off Google search results. That’s because they can still index any page without crawling it if other pages are pointing to that page. Use no index directive or password protection if you want to keep your site out of search results.
| Traffic Management | Hide from Google |
| Yes | No |
2. Media File
The robots.txt file can manage crawl traffic and prevent image, video, and audio files from appearing in Google search results. However, this file cannot block other pages or users from linking to your image/video/audio files.
| Traffic Management | Hide from Google |
| Yes | Yes |
3. Resource File
You can apply the robots.txt file to block resource files such as images, scripts, or non-critical style files if this activity does not significantly affect your pages without these resource files. However, if Google’s crawlers have difficulty understanding your page without resource files, you should not block them.
| Traffic Management | Hide from Google |
| Yes | Yes |
| You may also like: All About Magento 2 XML Sitemap You Should Know How to Add Canonical URL in Magento 2 What is Pagination? How to Configure Pagination Controls in Magento 2 |
How to Configure Magento 2 Robots.txt
To enable Magento 2 Robots.txt, first of all, you need to allow the Submission to Robots.txt
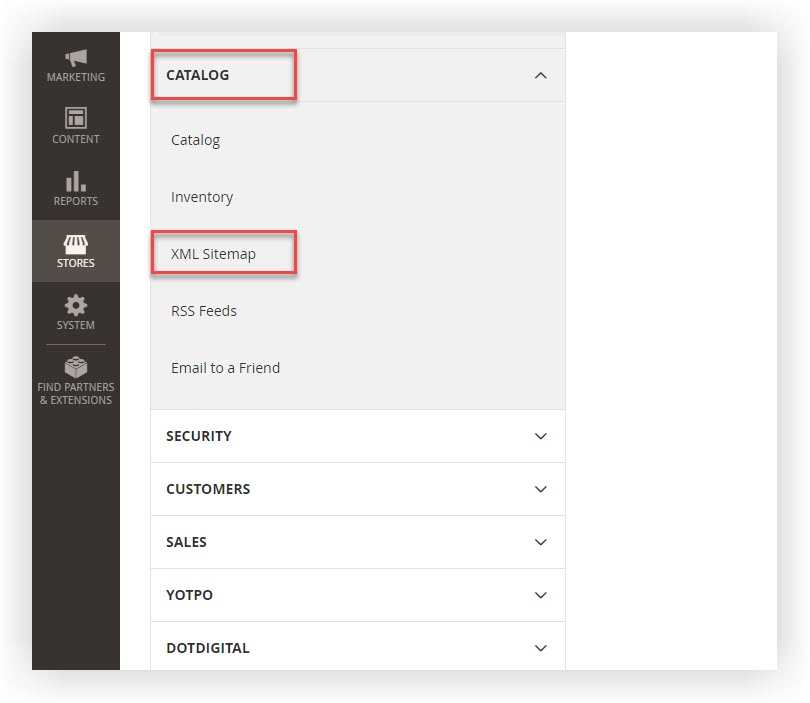
Step 1: Access the admin panel.
Step 2: Go to Stores > Settings > Configuration.

Step 3: Expand Catalog, select XML Sitemap.
Step 4: Expand the Search Engine Submission Settings tab.
Step 5: Turn Enable Submission to Robots.txt into Yes.
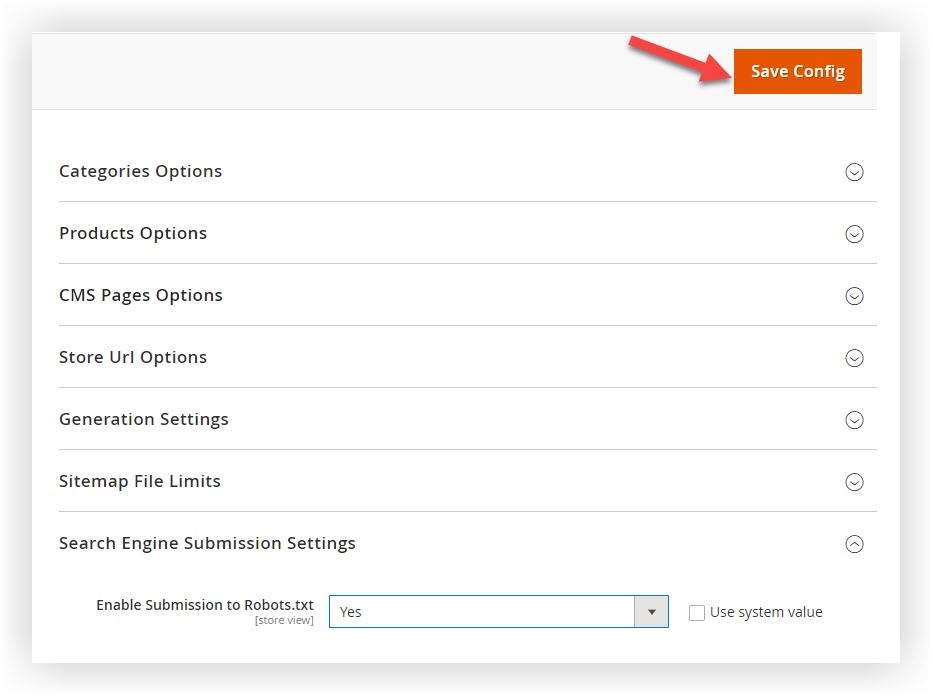
Step 6: Click on Save Config.

Optimize Your Magento Store With Powerful Extensions!
Looking for fast, efficient, and well-coded extensions to build or optimize your Magento stores for sales-boosting? Then visit the Magezon website and grab the necessary add-ons for yours today!
Determine Magento 2 Robots.txt Location
To help you figure out your Magento 2 Robots.txt Location on your website, we guide you through an easy method below:
Go to https://domain.com/robots.txt
You will get an empty page or a 404 error page if you haven’t configured it.
Your mission is to create and configure the robots.txt file.
How to Generate Robots.txt in Magento 2
To create Robots.txt in Magento 2, follow these steps:
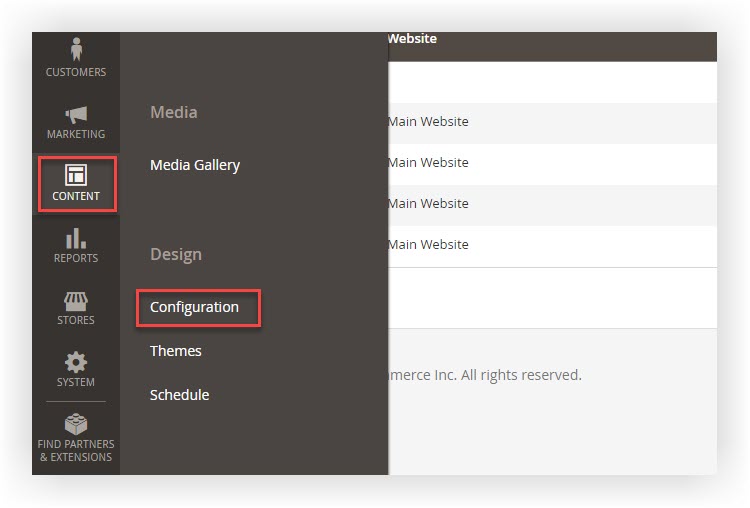
Step 1: Log in to the admin panel.
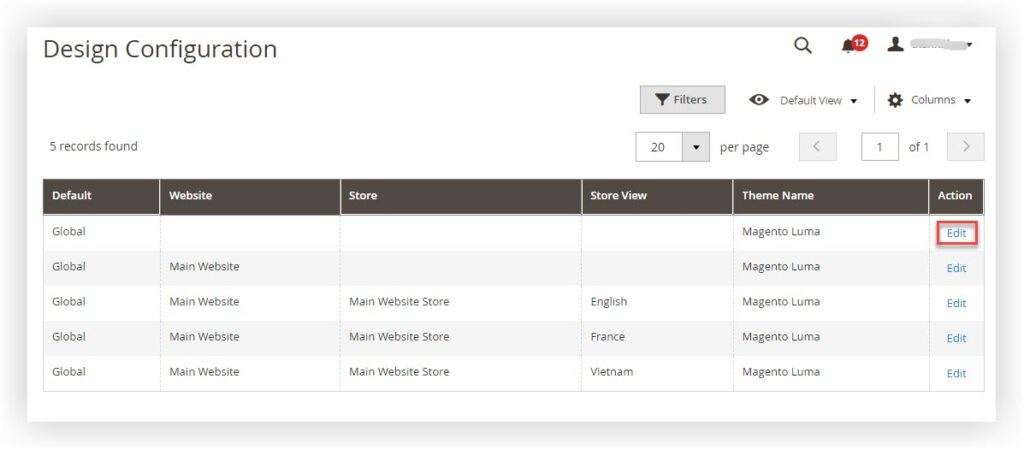
Step 2: Navigate to Content > Design > Configuration.
Step 4: In the grid, click Edit in the link you want to generate.
Step 5: Expand the Search Engine Robots tab.
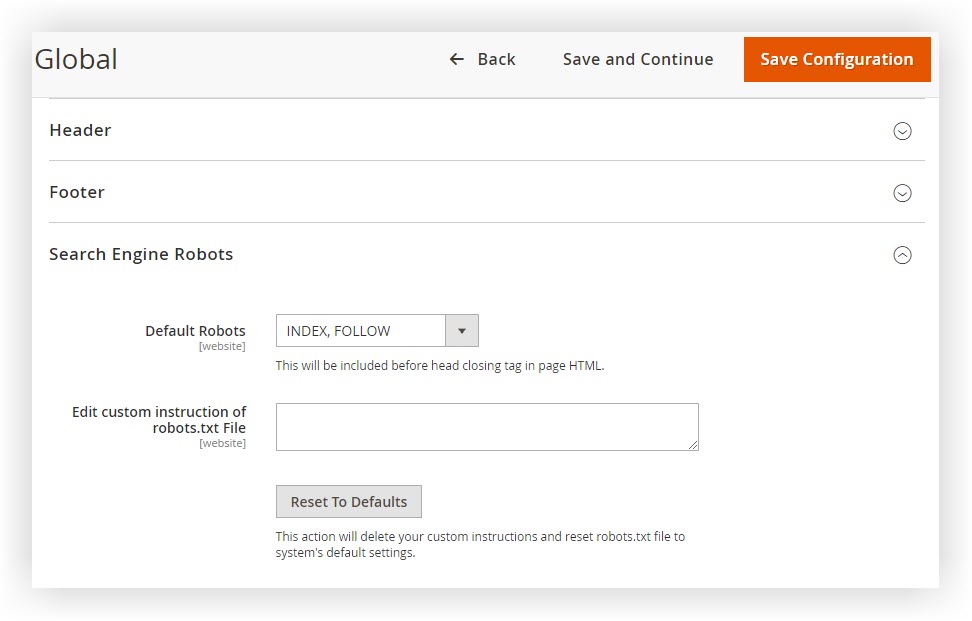
Step 6: In Default Robots, choose one of these options:
- INDEX, FOLLOW: Informs crawlers to index the site and check later for changes.
- NOINDEX, FOLLOW: Informs crawlers not to index the site but check later for changes.
- INDEX, NOFOLLOW: Informs crawlers to index the site but don’t check later for any changes.
- NOINDEX, NOFOLLOW: Informs crawlers not to index the site and check later for any changes.
Step 7: In Edit Custom Instruction of Robots.txt, fill in the file’s custom instructions if necessary. For example, you might want to disallow access to all folders while still developing your store and fill in the custom instruction into the blank. Then, read the instructions examples in the next section.
Step 8: Click Reset To Default to remove all custom instructions. Or click on Save Configuration to be done.
Let’s See Magento 2 Custom Instruction Examples
1. Allows Full Access To All Directories and Pages
User-agent:*
Disallow:
2. Disallows Access to All Directories and Pages
User-agent:*
Disallow: /
3. Disallow Bingbot from accessing a Specific Folder
User-agent: Bingbot

Disallow: /foldername/
4. Disallow Bingbot from Accessing a Webpage
User-agent: Bingbot

Disallow: /foldername/restricted-webpage.html
5. Disable User Accounts & Checkout Pages
1.	Disallow: /checkout/
2.	Disallow: /onestepcheckout/
3.	Disallow: /customer/
4.	Disallow: /customer/account/
5.	Disallow: /customer/account/login/
6. Disable Duplicate Content
1.	Disallow: /tag/
2.	Disallow: /review/
7. Disable Catalog & Search Pages
1.	Disallow: /catalogsearch/
2.	Disallow: /catalog/product_compare/
3.	Disallow: /catalog/category/view/
4.	Disallow: /catalog/product/view/
8. Disable CMS Directories
1.	Disallow: /app/
2.	Disallow: /bin/
3.	Disallow: /dev/
4.	Disallow: /lib/
5.	Disallow: /phpserver/
6.	Disallow: /pub/
9. Disable URL Filter Searches
1.	Disallow: /*?dir*
2.	Disallow: /*?dir=desc
3.	Disallow: /*?dir=asc
4.	Disallow: /*?limit=all
5.	Disallow: /*?mode*
10. Block Googlebot From a Folder
User-agent: Googlebot
Disallow: /subfolder/
11. Block Googlebot From a Page
User-agent: Googlebot
Disallow: /subfolder/page-url.html
12. Common Search Engine Bots
User-agent: Googlebot
User-agent: Googlebot-Image/1.0
User-agent: Googlebot-Video/1.0
User-agent: Bingbot
User-agent: DuckDuckBot
User-agent: YandexBot
User-agent: Baiduspider
User-agent: ia_archiver   #Alexa
User-agent: Slurp   #Yahoo
Bottom Line
I hope this detailed information partly helps you understand and use the Robots.txt file in Magento 2 fluently. If you have any questions or ideas, feel free to leave a comment below. Find out more valuable instructions in Magento 2 Tutorials.
At Magezon, we also provide you with many other fast, well-coded, yet affordable extensions for your store optimization. Visit our website to opt for the necessary ones!
Optimize Your Magento Store With Powerful Extensions!
Looking for fast, efficient, and well-coded extensions to build or optimize your Magento stores for sales-boosting? Then visit the Magezon website and grab the necessary add-ons for yours today!
