
Table of contents
What Is XML Sitemap in Magento 2?
An XML Sitemap is a file that helps you to provide information about the pages, videos, images, and other files on your website and the structure of those data. Search engines like Google read this file to crawl your site more intelligently. Sitemaps provide valuable information and inform Google which pages and files are important on your site.
For a page on your Magento website, XML sitemaps will reveal information about the last update, how often the page was changed, and any alternate language versions of the page.
Who Needs an XML Sitemap?
You might need a sitemap if:
- You have a large website: It may cause Google’s crawlers to skip crawling on some new or updated pages.
- Your site has a large storage of isolated content pages: The better way to avoid Google ignoring your site is by listing those pages in your sitemaps. This makes sure that Google doesn’t skip some of your pages.
- You have a brand new website lacking external links: Googlebot and other web crawlers collect data by following links from one page to another. Therefore, it is difficult for Google to crawl your pages without those links.
- You have diverse media files (videos, images): If you submit an XML sitemap, it will be easier for Google to read your information.
| You may also like: How to Configure Product Listing in Magento 2 What is Pagination? How to Configure Pagination Controls in Magento 2 The Ultimate Guide to Magento 2 Robots.txt |
How to Generate XML Sitemaps in Magento 2
1. Configure Magento 2 XML Sitemaps Settings
Following the below steps to configure Magento 2 XML Sitemap:
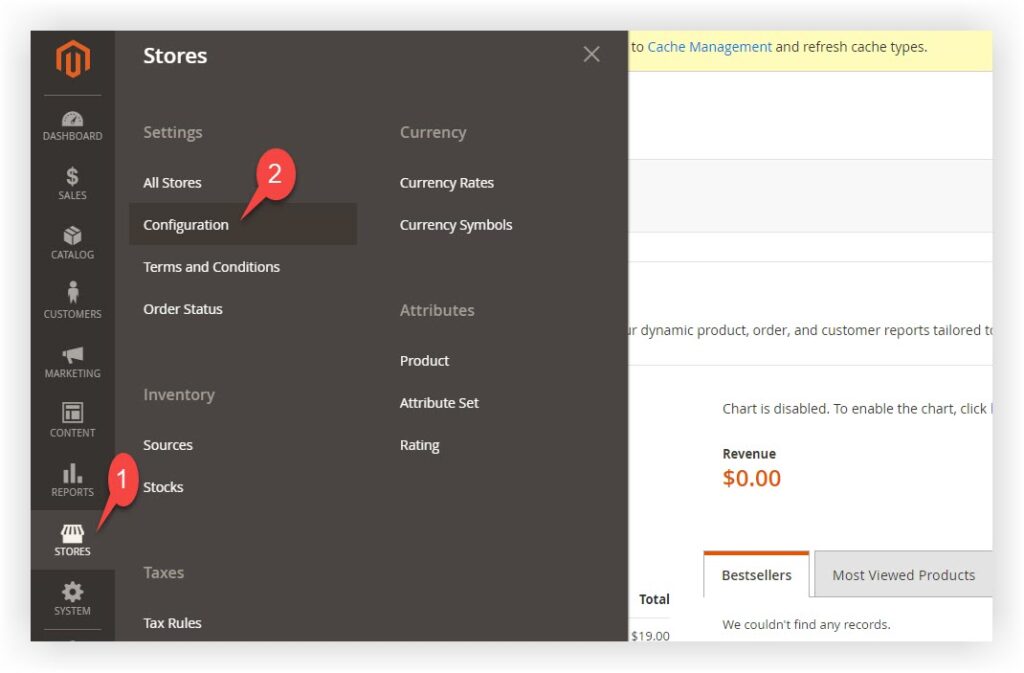
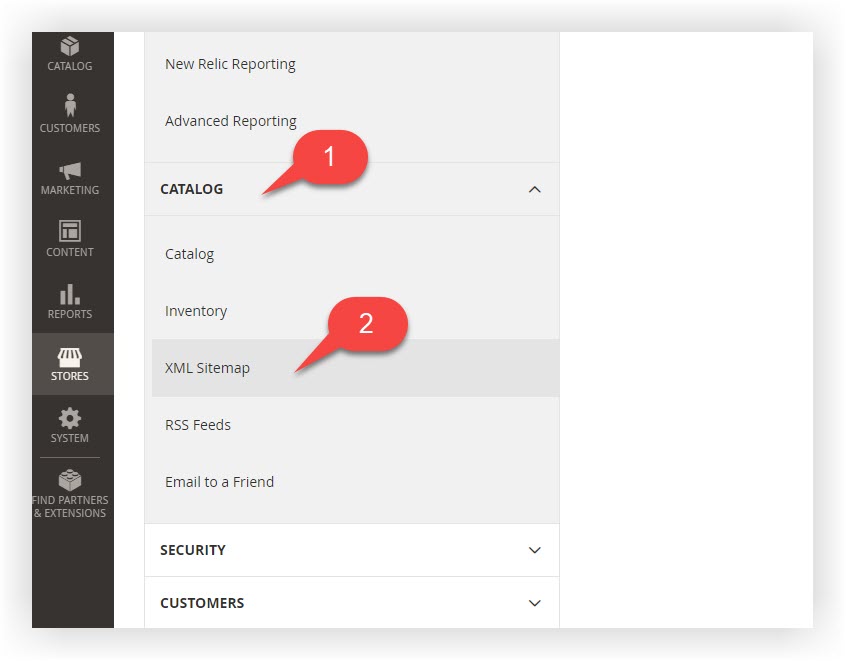
Step 1: Open Stores > Configuration > Catalog > XML Sitemap
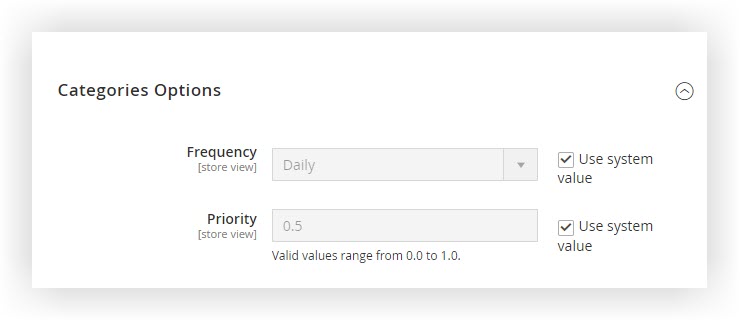
Step 2: Expand Categories Options, complete Frequency, and Priority as you want Categories to be indexed.
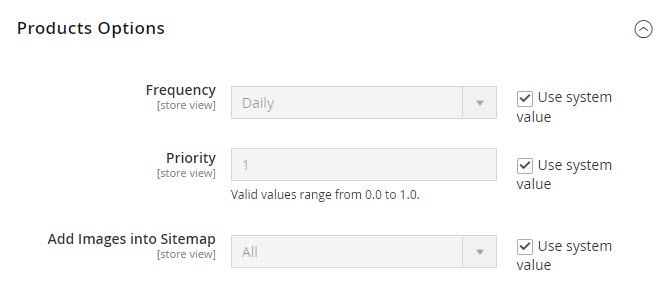
Step 3: Expand Products Options, complete Frequency and Priority for products, and select whether you want to Add Images into Sitemap.
Step 4: Expand CMS Pages Options, complete Frequency and Priority for indexing your CMS Pages in Magento 2.
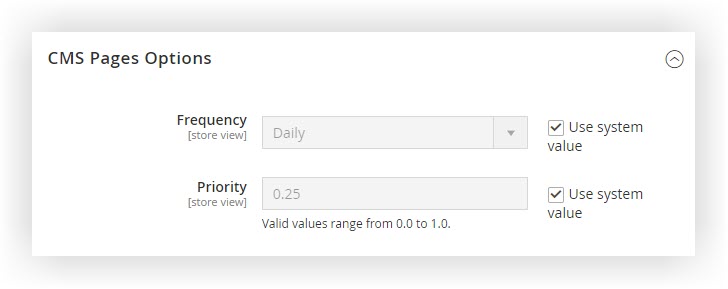
Step 5: Configure General Settings:
Switch Enabled to Yes
- Set up the Frequency and Start Time as you want to update the Magento XML Sitemap
- Fill in the Error Email Recipient with who will be notified if there is any error
- Set Error Email Sender as General Contact (recommended)
- Choose Sitemap Generation Warnings (Default) in Error Email Template to inform about the error (recommended)

Step 6: Set up the Site Map File Limits:
- Inform the maximum number of URLs you want in the Maximum No of URLs Per File.
- Fill in the Maximum File Size of the sitemap size in bytes.
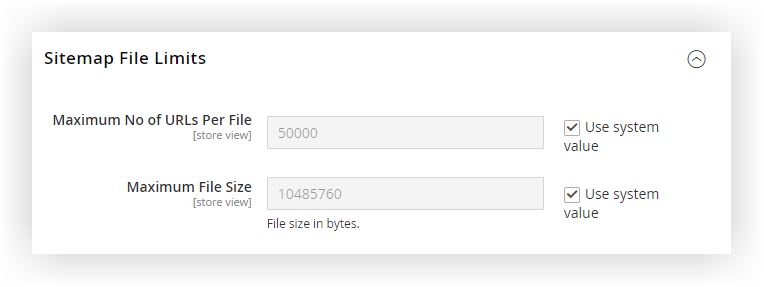
Limit the number of Magento 2 sitemap URLs
Step 7: Enable Submissions to Robots.txt to allow search crawlers how to index your website better.

2. Create XML Sitemap in Magento 2
To generate a sitemap in Magento 2, take the following steps:
Step 1: Navigate to Marketing > SEO & Search > Site Map.
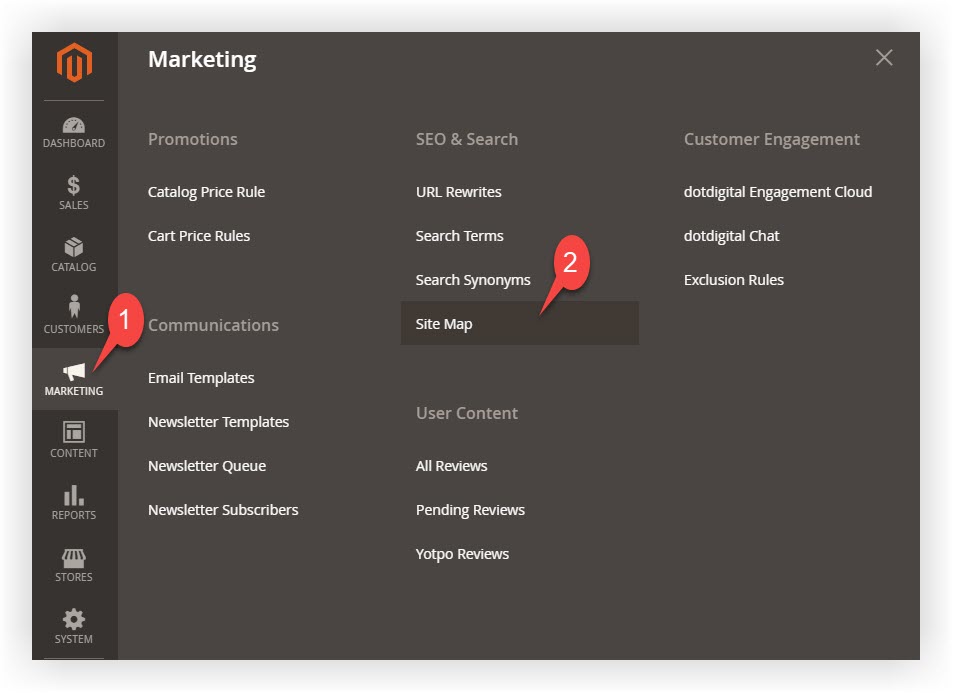
Step 2: Choose an existing sitemap to edit or Add Sitemap button.
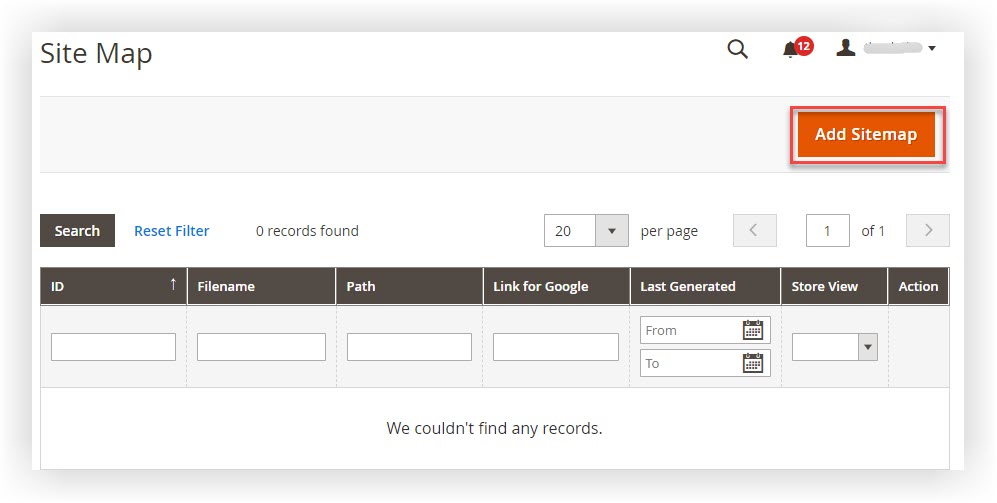
Step 3: Fill in the name of the XML Sitemap in the Filename.
Step 4: Enter the Path where the file will be located.
Step 5: Press the Save & Generate button.
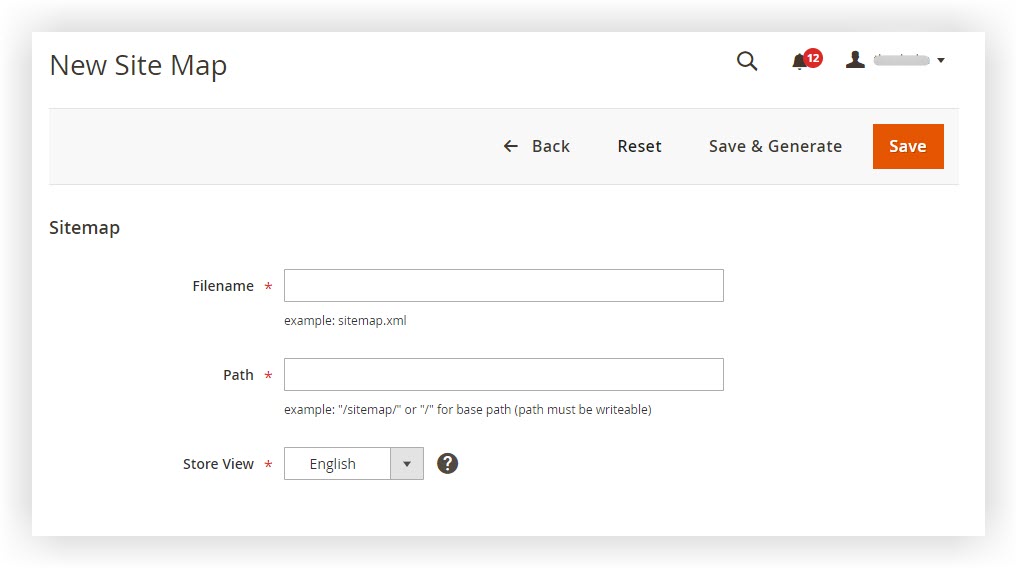
Step 6: Press Generate a link to update XML Sitemap immediately. Or it is updated automatically later.
Bottom Line
That’s the instruction on how to generate XML Sitemap in Magento 2. After reading it, I hope you can easily configure and create XML Sitemap in Magento 2. Please let us know in the comments below if you have any questions or ideas. For more useful Magento tutorials like this, visit here.
At Magezon, we also provide you with many other fast, well-coded, yet affordable extensions for your store optimization. Visit our website to opt for the necessary ones!

Optimize Your Magento Store With Powerful Extensions!
Looking for fast, efficient, and well-coded extensions to build or optimize your Magento stores for sales-boosting? Then visit the Magezon website and grab the necessary add-ons for yours today!
 Magezon Blog Help Merchants Build Comprehensive eCommerce Websites

