Promotional Banner is very essential for e-commerce websites to help with your marketing campaign. Banners attract attention and encourage customers to click on offers, new products, company news, or simply makes an impact on the page.
If you are own a Magento 2 site, you probably know that the platform supports creating to build a simple banner for the website. But for a more complicated banner with various advanced features, such as setting the style of a Banner Block, call-to-action button, or more banner positions, you need a better tool. That’s why we have created Promotion Banner extension for Magento 2. It works perfectly and is very easy to use.
In this article, we will teach you the way to create a promotion banner for Magento 2 with our product from scratch.
4 Steps to Create Promotion Banner in Magento 2
Step 1: Add a new banner
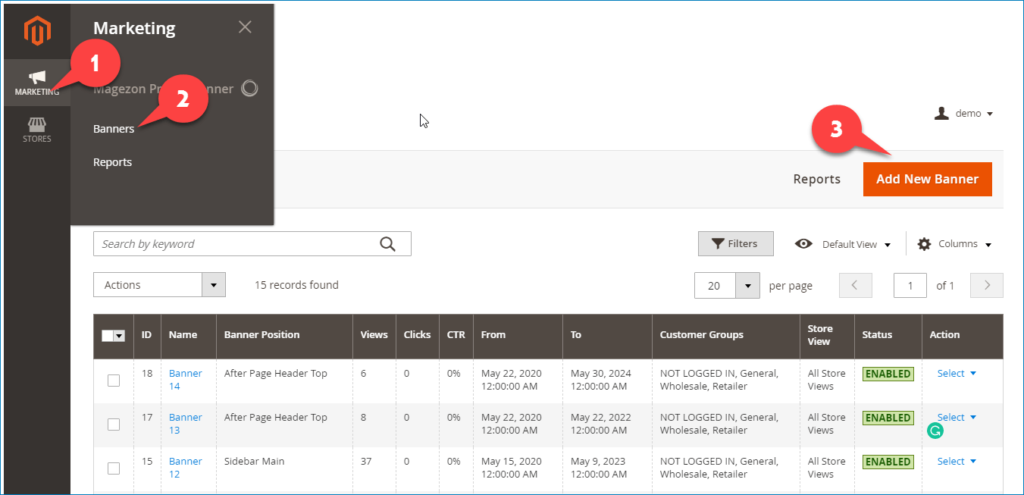
From the backend, you navigate to Marketing –> Banner –> Add New Banner.
Then you will see 5 tabs: Banner Information, What To Display, Display Condition, Advanced, Style.
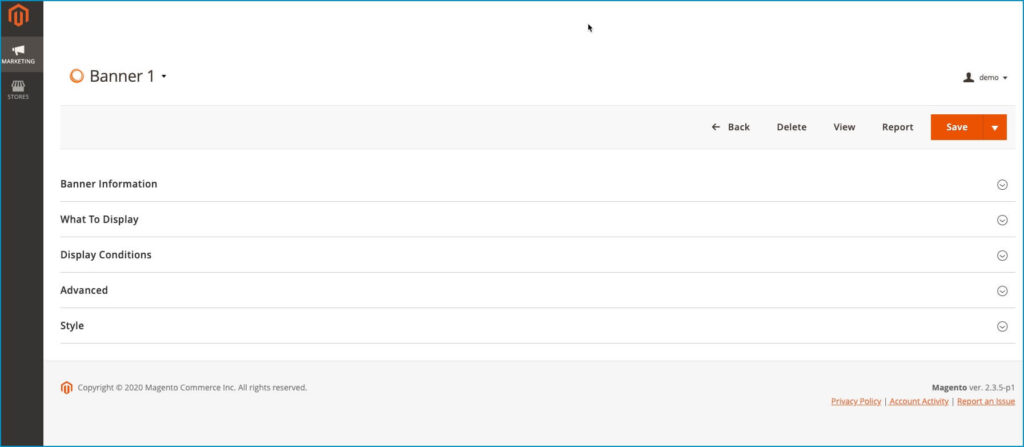
In these 4 main steps, we will cover these tabs in detail.
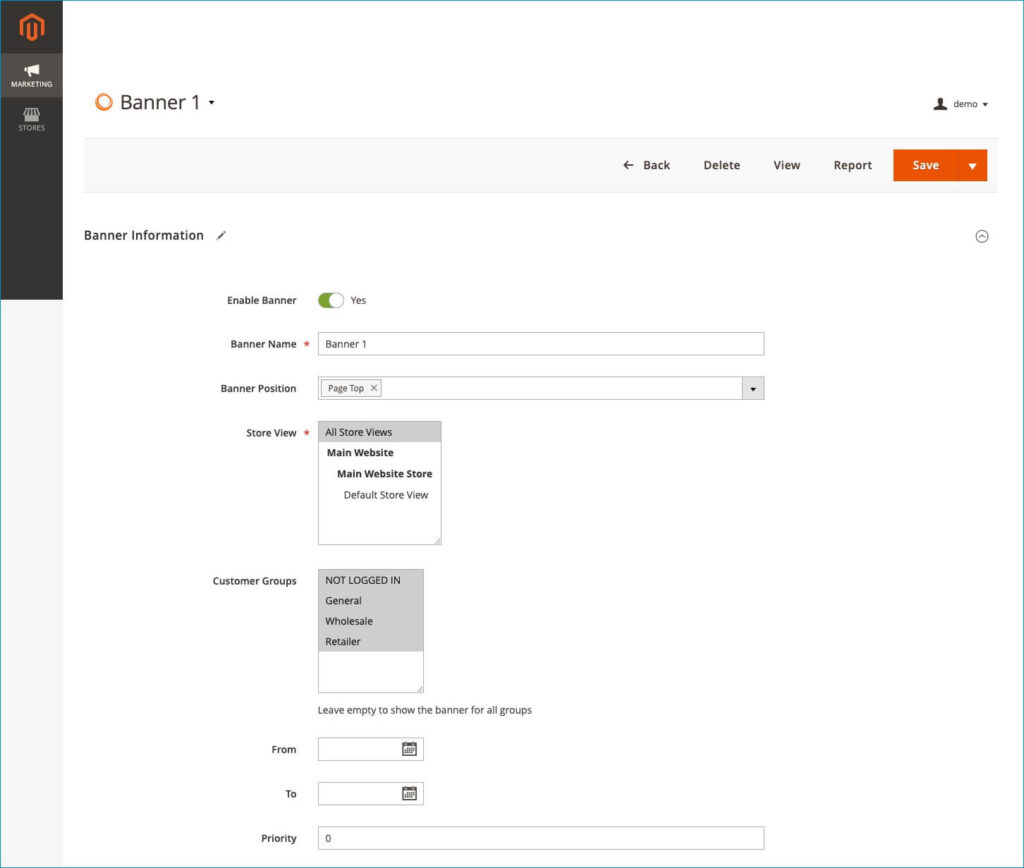
For the Banner Information, fill its information in the Banner Information tab:
For the required information, you have to give a name for your banner and choose the Banner Position, the Store View where the banner will display.
Select the Banner Information tab and enter the required information: you can select Customer Groups and set a Date range to show banners according to your purpose.
Step 2: Create your banner
There are many ways you can design your banner layout. In this tutorial, we will show you a basic banner template and let you get used with the tool.
Here is the example:
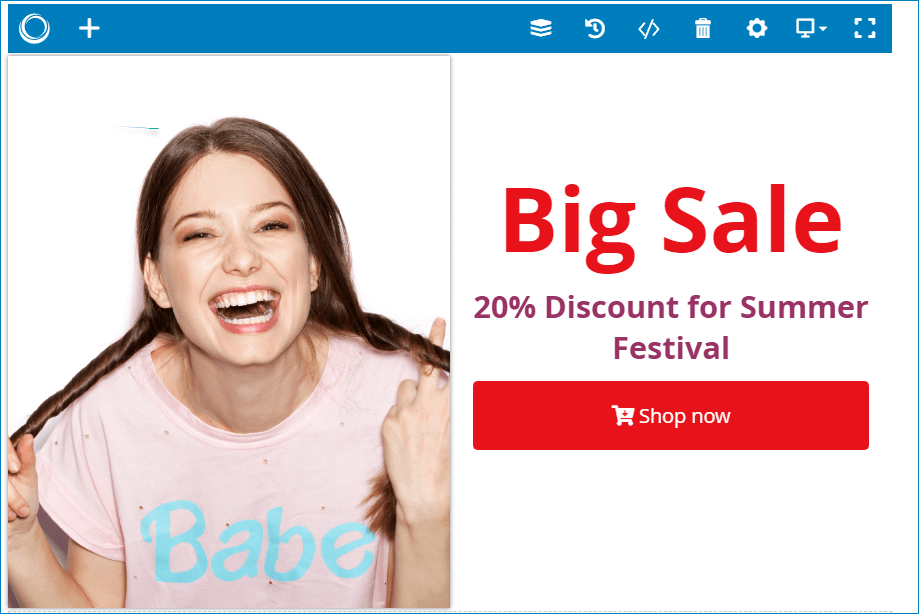
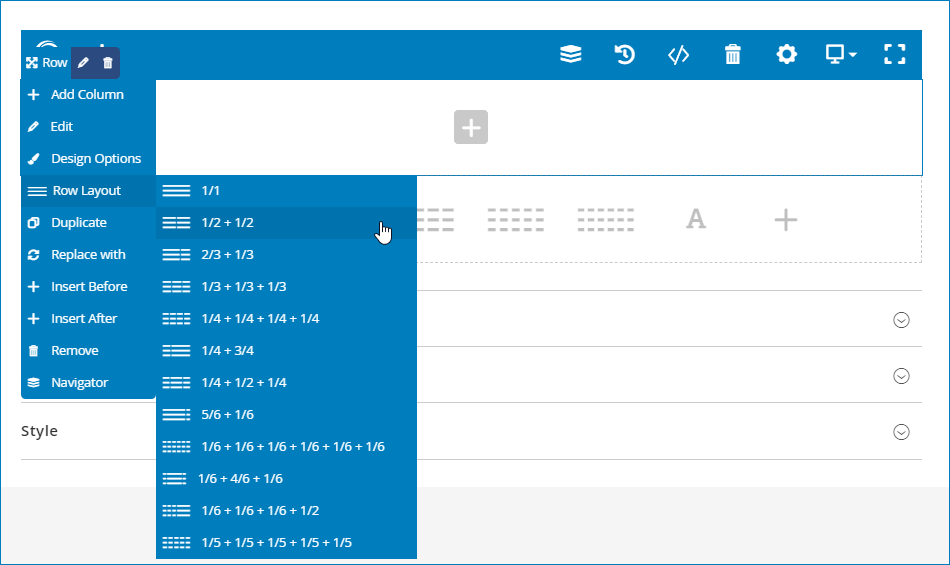
In this case, the banner is created from only one row. Then, we will divide it into 2 columns like the image below. To do so, first, add a row. After that, set Row Layout. We choose ½+½ layout in this case.
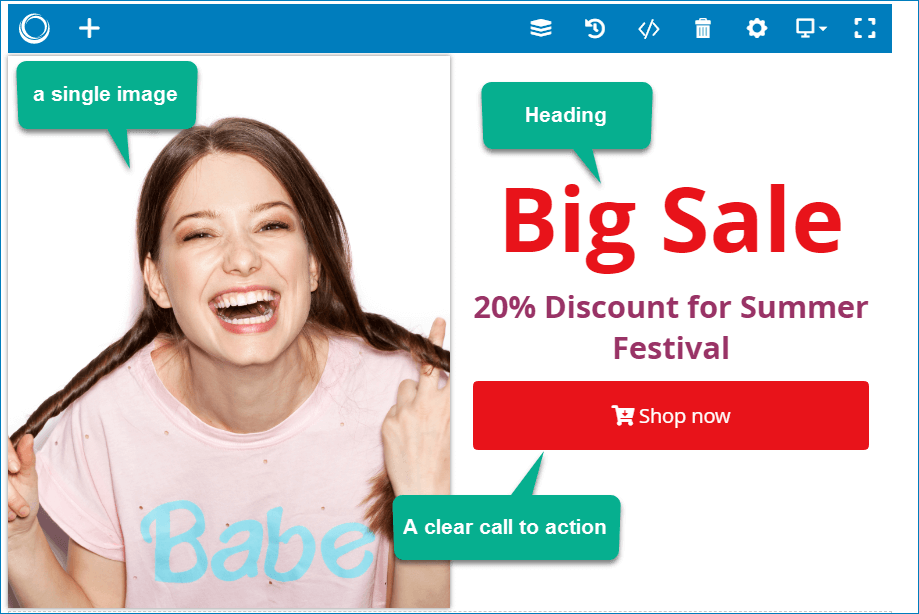
Then add a single image in one column. Keep in mind that you should choose an eye-catching advertising photo so the banner will grab better attention from viewers.
In the other column, create a message that you want to convey by adding elements: Heading, Text block, A clear call to action, etc.
Step 3: Set Display Conditions
Conditions are necessary and practical to use for promotion banners. They help the store owner easily define rules for when the banner should be displayed. You can choose the conditions to display promotion banners on the entire site or any page based on your goal.
We offer a default list of sale rules for you to choose from.

Click into Add Condition to add more specific rules. From there, you can Include/Exclude more sites where you want the banner to display.

Step 4: Set style of Banner Block
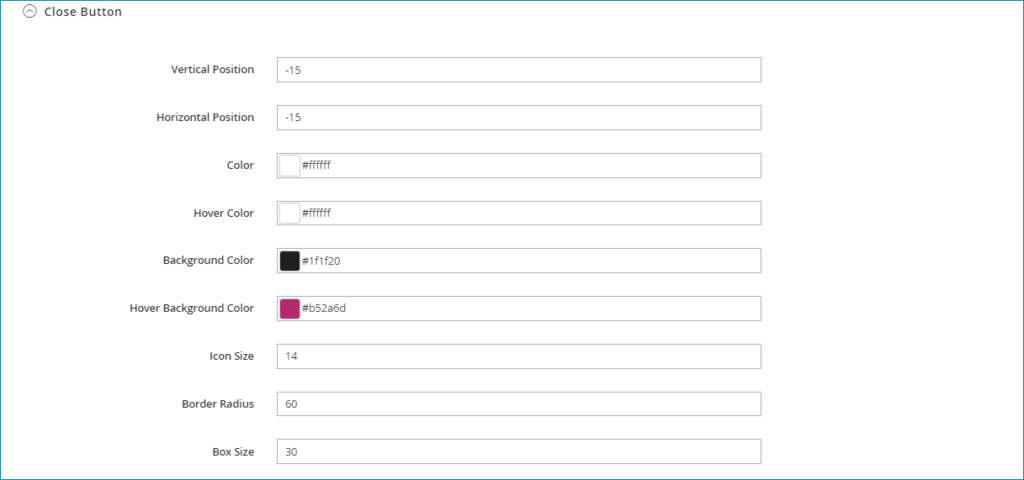
In this step, you can set Style for Banner Block and Close Button.
To set style for banner block, you can enter the width and height of the banner block you want to create. If you leave those fields blank, the size of the banner block will be set as default.

You can set Close Button as image below
Conclusion
In this above article, we showed you how to easily create stunning banners using Magento 2 Promotion Banner. We hope that this article will help you to easily design any promotion banner as your wish. We also write a blog about how to create a newsletter form popup and we think that you want to check out it.
If you have any questions, please don’t hesitate to contact us or leave a comment below and we will discuss your idea as well as your solution.

Optimize Your Magento Store With Powerful Extensions
Looking for fast, efficient and well-coded extensions to build or optimize your Magento stores for sales boosting? Then visit Magezon website and grab necessary add-ons for yours today!
 Magezon Blog Help Merchants Build Comprehensive eCommerce Websites

