
To manage their purchases and order activities on your Magento stores, visitors themselves create an account in the customer registration form on your website. However, there are times when they can’t register for an account from the front end, thereby having you do it for them. In such circumstances, you will create a new Magento 2 customer account directly from the backend.
If you are a Magento merchant looking for a guide to setting up a new Magento 2 account for customers, this blog is meant for you.
Table of contents
Where to Create a New Account From the Admin
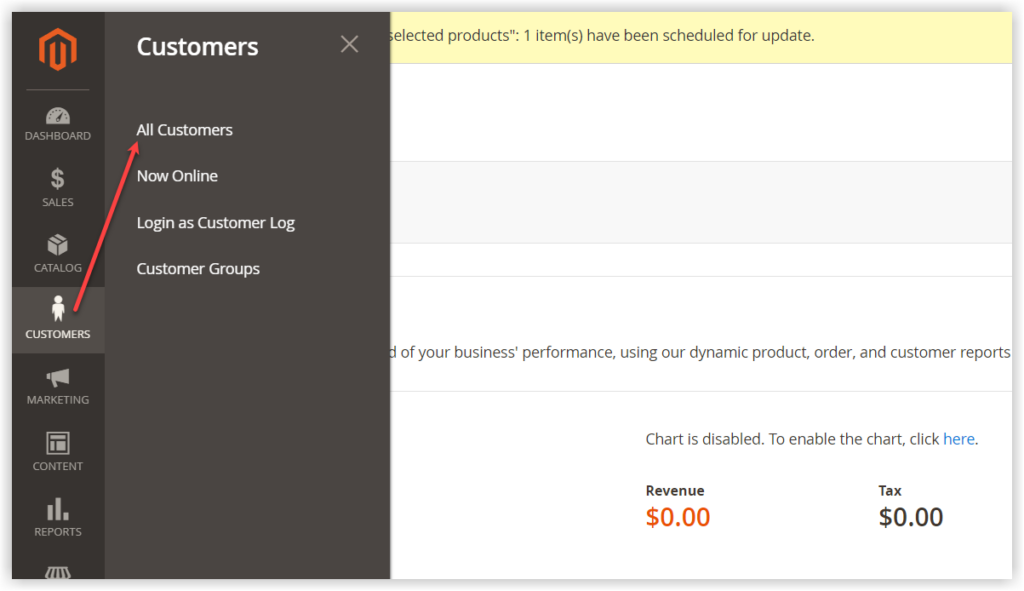
From the admin sidebar, navigate to Customers → All Customers.
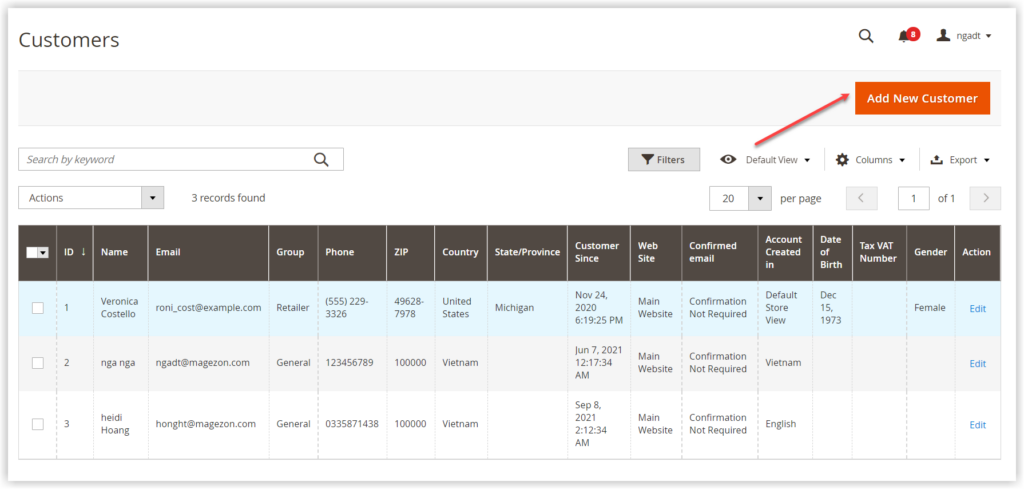
Later on, a page with a custom grid appears. To create a new customer, click Add New Customers.
Here is where to complete the Magento 2 customer account information.
Add the Customer Details
- Associate to Website: If you run several websites, select the site to which a customer account will be applied. They can track and manage their account and order activities on this site.
- Customer Group: Assign this customer to the relevant group. There are three options for you to choose from General, Retail, and Wholesale. To avoid the groups being automatically assigned to a customer based on their VAT ID, unmark the checkbox under the field.
- Name Prefix is the title followed by the customer’s name, such as Ms., Mr., or Dr. Enter the name prefix in this field.
- First Name: Enter the first name of the customer.
- Middle Name/Initial: Enter the middle name or initials of the customer. Initials are the capital letters starting each word of a name. Let me take an example with the name Jane Dong Nga. And the initials will be J.D.N.
- Last Name: Enter the family name of the customer.
- Name Suffix: Enter the name suffix that is attached to the end of the customer’s name.
- Email: Enter the customer’s email address.
- Allow remote shopping assistance: Tick the checkbox if the customer needs assistance from the admin to complete purchases.
- Date of birth: Enter the customer’s date of birth.
- Tax/VAT Number: Fill in the field with the tax or value-added tax number.
- Gender: Select the gender of the customer.
- Send Welcome Email From: Select the store view from which you’ll send the Welcome message to the customer.
Complete the Customer Address Details
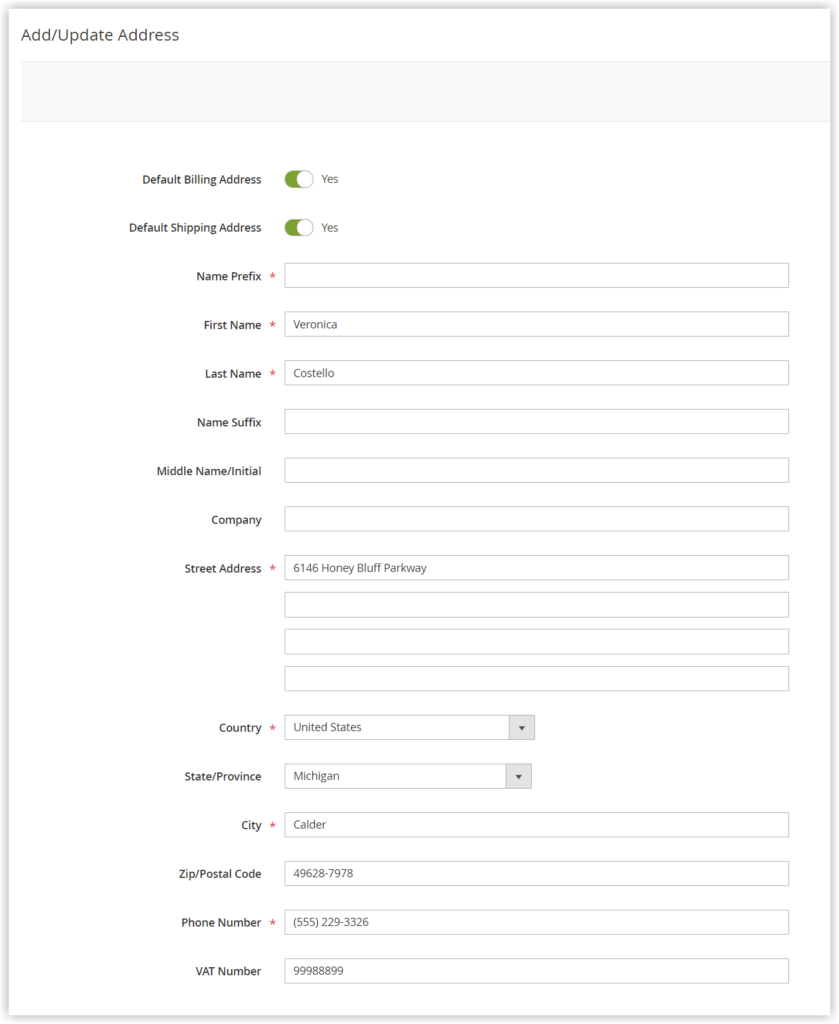
| If you need to effortlessly add extra customer address attribute fields to the Add/Update Address form above, try our Magento 2 Customer Attributes. This extension will not let you down due to its advanced functionalities. |
In the left panel, select Addresses.
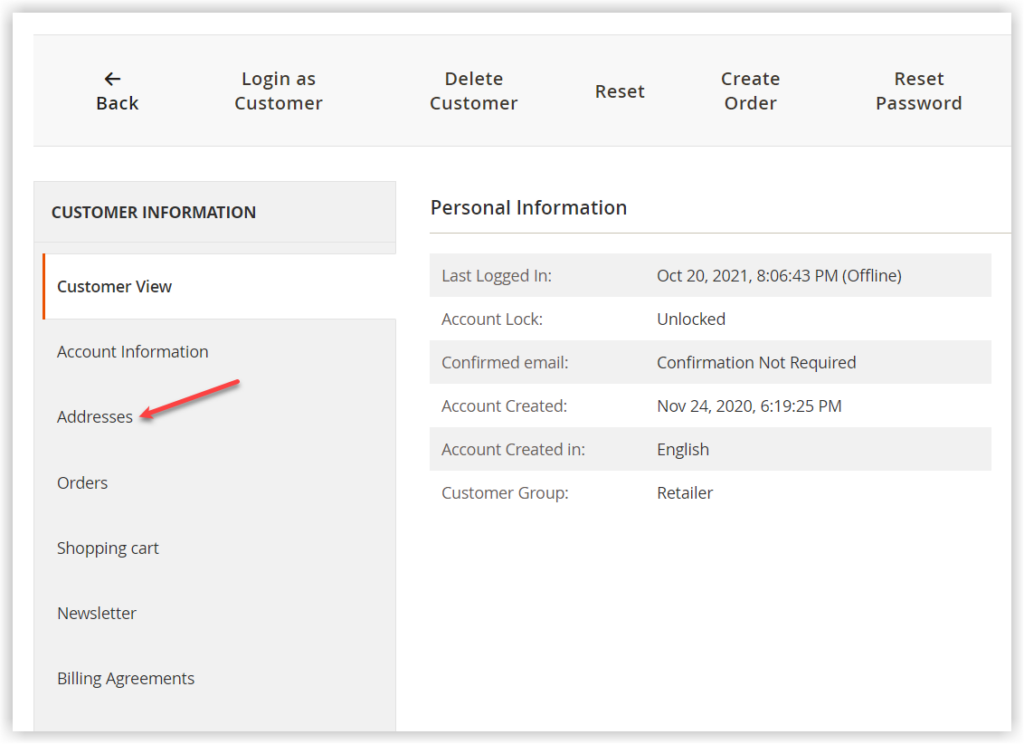
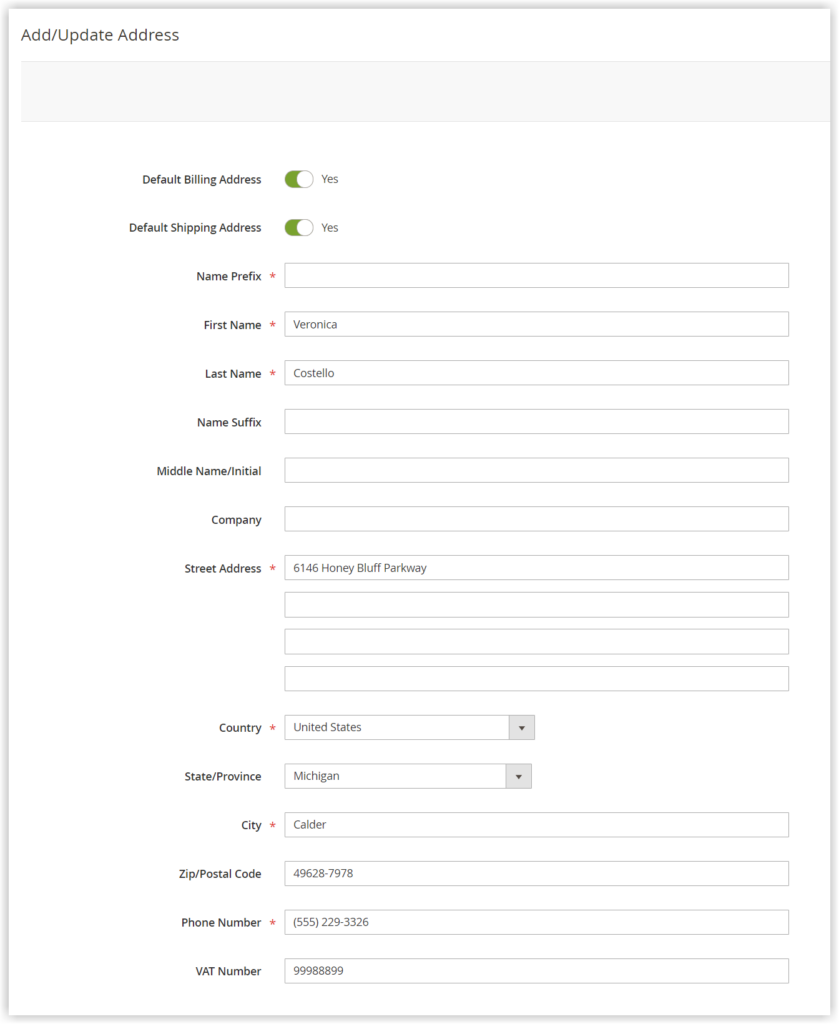
Then click on Add New Addresses. If the address is used for billing and shipping, toggle both the fields: Default Billing Address and Default Shipping Address.
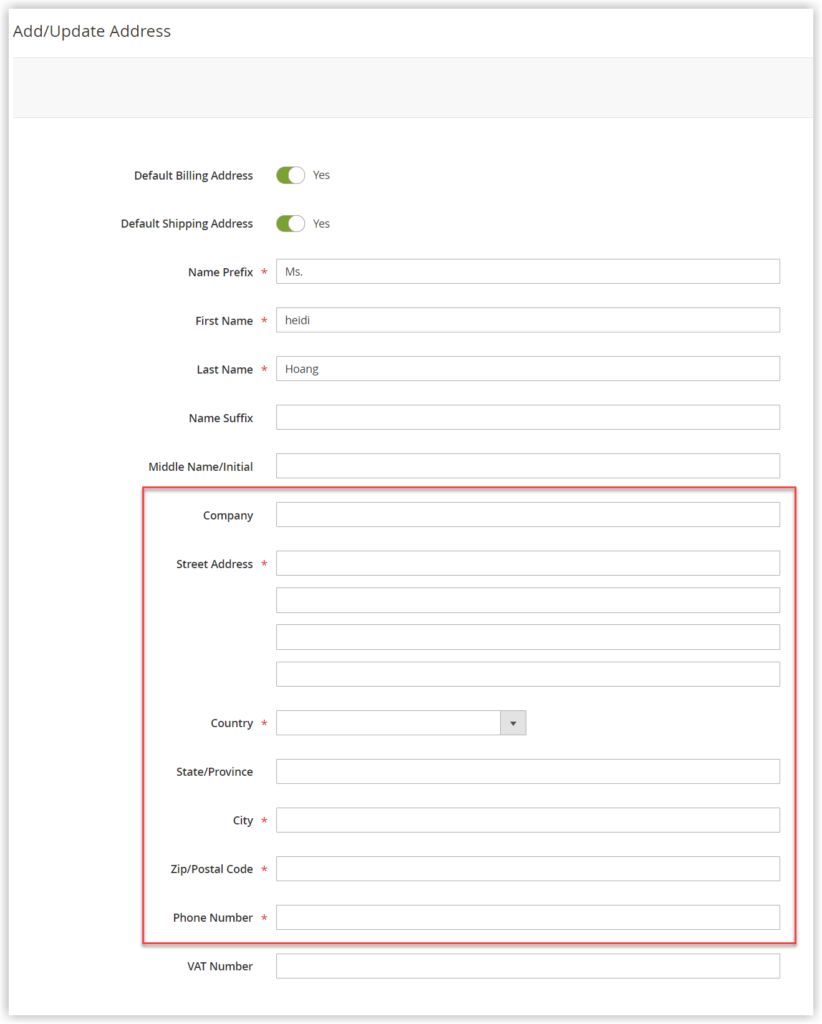
- Company: Enter their company name if necessary.
- Street Address: Enter the customer’s street address. You can change the number of address lines in the Customer Configurations.
- Enter the Country, State/Province, City, and Zip/Postal Code of where the customer’s address is located.
- Phone Number: Enter the phone number of the customer.
4. Reset the Password
In the beginning, passwords are not assigned to Magento 2 customer accounts which are created through the backend. It means the customer has not got their passwords yet. To set the password so that the customer can reset it, follow these steps:
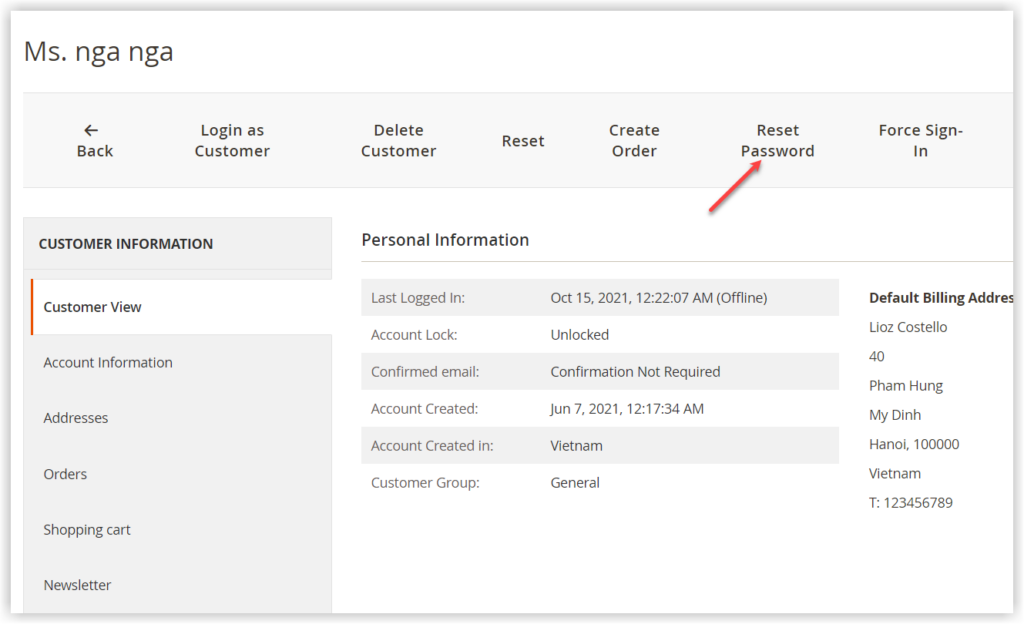
- From the customer grid, find the newly-created customer account.
- In the Action column, click Edit.
- Hit Reset Password in the top bar.
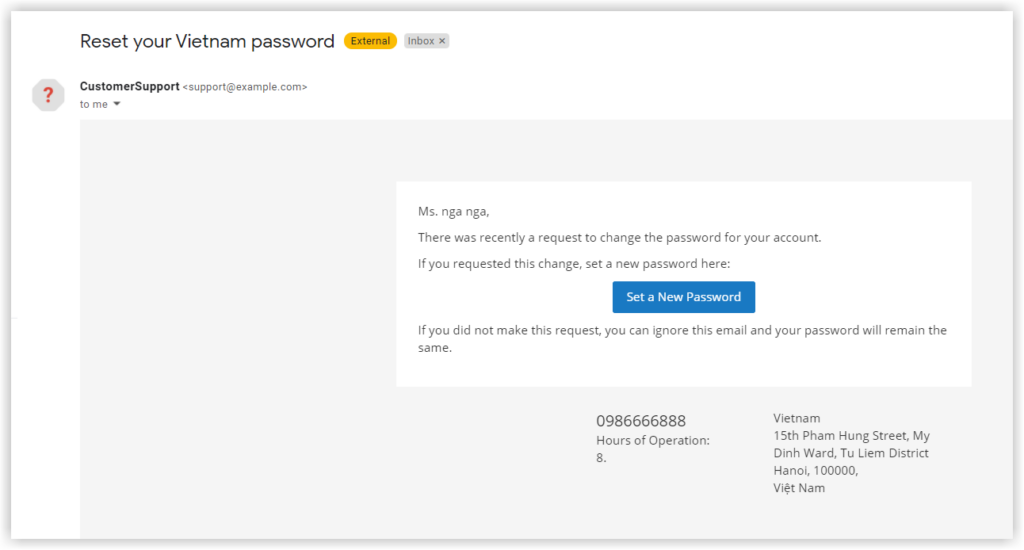
As a result, the customer will later receive an email that allows them to reset their password.
Conclusion
This is all about how an admin like you can create a new Magento 2 customer account. If you follow this instruction from the beginning to the end, I’m sure it’ll be useful to you one way or another. To learn more about Magento 2, visit the Magento 2 tutorials. Ah, if you’re looking for solutions to optimize your Magento store, visit Magezon.

Optimize Your Magento Store With Powerful Extensions!
Looking for fast, efficient, and well-coded extensions to build or optimize your Magento stores for sales-boosting? Then visit the Magezon website and grab the necessary add-ons for yours today!
 Magezon Blog Help Merchants Build Comprehensive eCommerce Websites


