 Magezon Blog Help Merchants Build Comprehensive eCommerce Websites


In the previous blog, we introduced 6 product types in Magento 2. Today, we continue to instruct you on how to create these product types, starting with Magento 2 simple product.
As mentioned before, a simple product is a physical product with a single SKU. Shoppers are not given options to select, such as color, size, or material but quantity. Being part of almost other Magento 2 product types, Simple Product is the most frequently used product. So, learning how to create this product type is so necessary for online merchants.
In this blog, we will show you how.
Table of contents
- Step 1: Select the Product Type
- Step 2: Choose the Attribute Set for the Product
- Step 3: Fill in all Required Fields
- Step 4: Complete Other Details of Magento 2 Simple Product
- Step 5: Complete the Information of Magento 2 Simple Product
- 1. Content
- 2. Configuration
- 3. Product Reviews
- 4. Images and Videos
- 5. Search Engine Optimization
- 6. Related Products, Up-Sells and Cross-Sells
- 7. Customizable Options
- 8. Product in Websites
- 9. Product Salable Quantity
- 10. Design
- 11. Gift Option
- 12. Downloadable Information
- Step 6: Publish Magento 2 Simple Product
- Wrap It up
Step 1: Select the Product Type
After login, take a closer look at the Admin sidebar. Navigate to Catalog → Products.
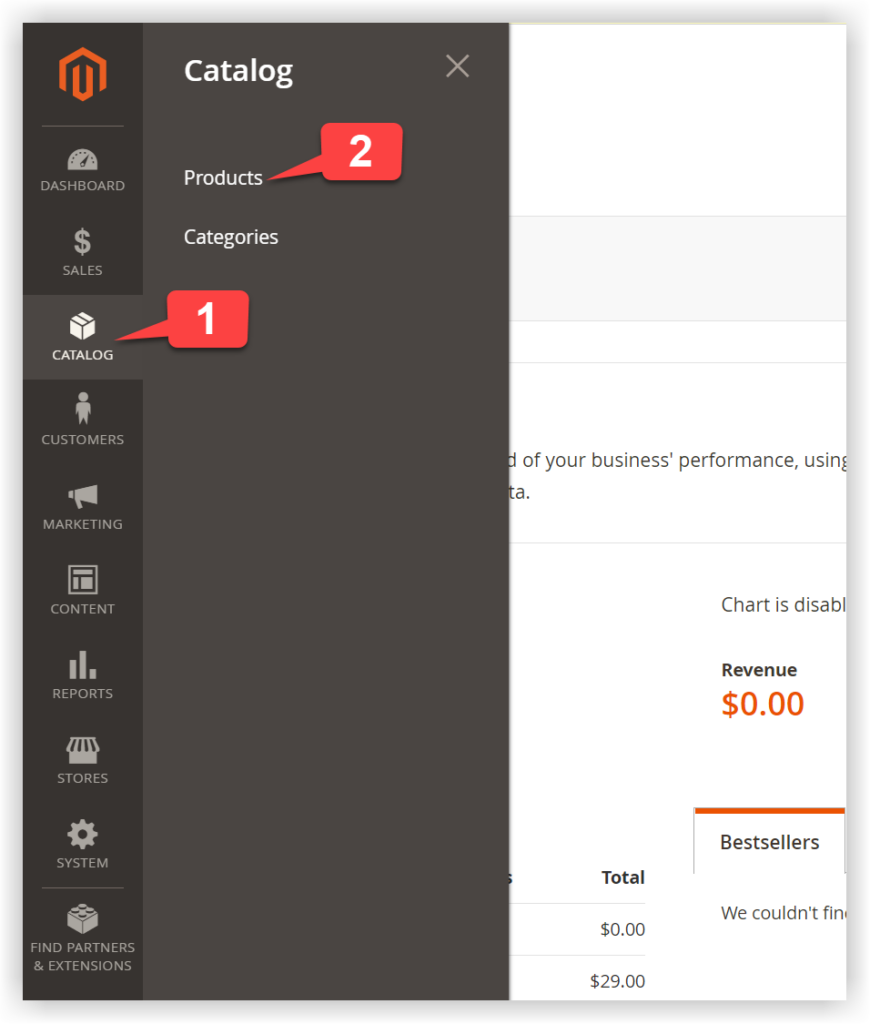
On the upper right corner is the orange menu Add Product with a drop-down list of product types. Choose Simple Product.

And you will be redirected to the page New Product:

1.Enable Product: Decide whether or not to publish this product on the frontend. By default, it’s enabled. In case you have not yet finished the product, toggle No to disable the product.
Step 2: Choose the Attribute Set for the Product
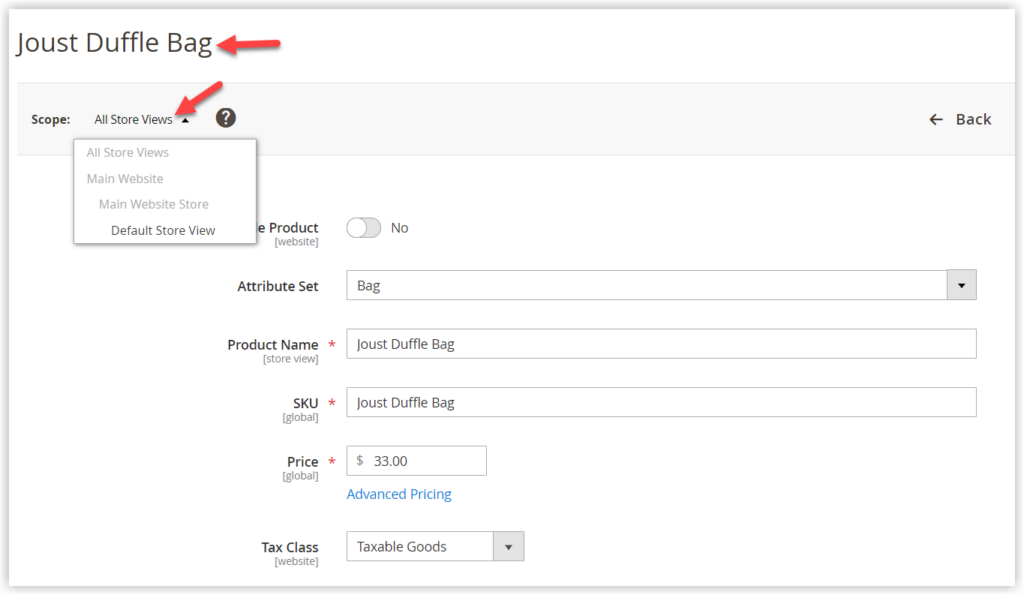
2. Attribute Set: Choose the existing attribute set that demonstrates all the characteristics of the products, such as SKU, size, color, gender, climate, etc. Or you can create a new Magento attribute set. To illustrate, I’ll take a simple product that is a bag named Joust Duffle Bag. In the system, we have already created an attribute set called Bag that consists of all characteristics of a bag.

When we assign Bag as the attribute set to Joust Duffle Bag, some typical product attributes such as bag styles, strap/handle will appear.

Continue with another product, a top named Gobi HeatTec® Tee-XS-Orange. In this case, I will select Top as its attribute set. Let’s see whether or not this tee has the same attributes as the bag.

See? The top doesn’t have attributes such as bag styles or trap/handle. It only features the characteristics that every top has, such as Sleeves, General Styles.
Read more: Easy to Create Magento Product Attributes

Optimize Your Magento Store With Powerful Extensions
Looking for fast, efficient and well-coded extensions to build or optimize your Magento stores for sales boosting? Then visit Magezon website and grab necessary add-ons for yours today!
Step 3: Fill in all Required Fields
3. Product Name: Enter the name of the product.

4. SKU: Use the default SKU based on the product name, or give it another unique name.

5. Price: Set the price for the product.

*Advanced Pricing: This setting enables you to offer your customers special pricing.

- Special Price: Set the discounted price for the product.
- Special Price From…To…: Set up the discount period (the first and last date the special discount is available.)
- Cost: Enter the actual cost of the product.
- Website/Customer Group: In this field, we set up the discounts which are based on the quantity ordered. Choose the customer group and website to which the group price rule applies.
- Minimum Advertised Price (MAP): The suggested retail price for the product by the manufacturer. Manufacturers make a recommendation to the price a product should be sold for.
+ Display Actual Price (MAP): Determines where the customer can see the actual price of the product.

Read the blog Magento 2 Advanced Pricing Explained to learn how to set it up.
Now we’ve completed all required fields to create a Magento 2 simple product. Save this product and continue.
After saving, the product name and scope appear in the workspace like below:
Step 4: Complete Other Details of Magento 2 Simple Product

6. Tax Class: Choose the tax class based on the tax rule you previously created.
NOTE: Tax Class simply determines whether or not to charge tax for the transaction. You can assign tax classes to customer groups, products, and shipping. For example, customers in group A have to pay the tax on a commodity while the ones in group B don’t.

7. Quantity: Enter the quantity of the product that is available.
*Advanced Inventory: To understand more about setting up advanced inventory, please follow this blog.

8. Stock Status: Select In Stock if the product is available. Otherwise, choose Out of Stock. By default, the stock status is In Stock.

9. Weight: Set the weight for the product, which helps calculate shipping costs.

NOTE: The weight unit in the Standard Magento is lbs.
10. Category: Select the category that the product belongs to. Click on the Search box, and a drop-down list will appear. You can type the category name in the box to assign to the product. Then, tick its checkbox to choose that category.

In case you want a new category for the product, click on the black button New Category to start creating. Visit this blog to learn how to create a new product category.

11. Visibility: Choose the position where customers can find the product.

Here are the options to take:
- Not Visible Individually: When you select this option, the product will not appear in your storefront lists. However, it may be a part of another product (Configurable product, for example) as its variation. This option is used if you want to hide all child simple products to avoid duplicate content.
To illustrate, I will take Gobi HeatTec® Tee-XS-Black as an example. When I set Not Visible Individually as its Visibility, this simple product doesn’t appear on search results. Also, the same thing happens when I browse through catalog listings.

And the result is that Gobi HeatTec® Tee-XS-Black is not displayed in both catalog listings and search result pages. However, this simple product is available as a variation of a configurable product named Gobi HeatTec® Tee.

- Search: The product will be shown up on the search result page.
Continue with another option, Search as Visibility.

After configuration, type Gobi HeatTec® Tee-XS-Black on the search box. Then, you will land on the search result page:

As you can see, Gobi HeatTec® Tee-XS-Black is available on the search result page.
- Catalog: The product will display in the catalog listing when you choose Catalog as Visibility.

- Catalog, Search: The product will display on both search results page and catalog listings.
12. Set Product as New From: In Magento 2, this is the way to mark a product as New. Specifically, you can include that product in the new product’s collection within a specific date range.
At Set Product as New, there are two date pickers for two fields, “Set Product as New from” and “Set Product as New to.” Select the date range for the product. Then, hit Save.

13. Country of Manufacture: Select the country that manufactures the product.

Step 5: Complete the Information of Magento 2 Simple Product
1. Content
This section is used to create and modify the product description on the product detail page.
Click on Content to show or hide the text editor that provides you with a set of tools, helping you create dynamic contents with images, tables, links, so on.
NOTE: You can change the height of the text box by dragging its lower-right corner.
Short Description: This section is used to describe the product briefly. In the storefront, it is displayed beside the product image gallery. Use the editor toolbar to format if you want.

And the frontend:

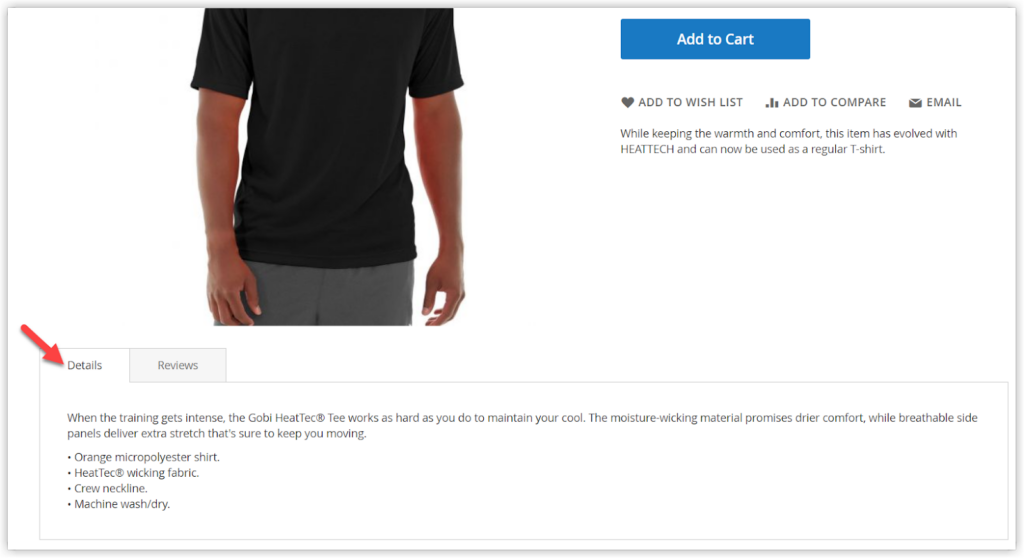
Description: This section enables you to create a detailed description of the product. You can make use of the editor toolbar to edit the product description.

Here is the front-end:
Magezon Page Builder: When you install Magezon Page Builder in your Magento store, you are given +50 elements as a set of advanced tools to build your beautiful website in general and product description in particular, using an intuitive drag & drop interface.
Let me give you an example, our product named Magento 2 Product Page PDF extension. To create the content for this extension, we’ve used Magezon Page Builder. And you can see how great its detail page looks.
Here is the backend:

And let’s see how stunning it is on the front-end:

2. Configuration
This section is only applicable to Configurable products so that you can skip it.

Optimize Your Magento Store With Powerful Extensions
Looking for fast, efficient and well-coded extensions to build or optimize your Magento stores for sales boosting? Then visit Magezon website and grab necessary add-ons for yours today!
3. Product Reviews
This section gives the store owners the ability to manage customer reviews for the product. With such a well-organized grid, they can easily keep track of the exact time and date on which a product was created, review status, customer nickname, what they think about the product (Review), visibility, and so on. Besides, online merchants can edit these pieces of information by clicking Edit in the Action column.


4. Images and Videos
- Expand the Images And Videos section by clicking the icon.
- Upload the image or video from your desktop/laptop by clicking on the camera. Another way is to drag the photo from your devices and drop it on the camera. Besides, you can upload a large number of images, change the image order in the gallery, or delete if needed.

Also, you can manage some settings for an individual image such as alt, role.
For more details, I will instruct you in detail on how to upload & images in the blog “Magento 2 Image Types: Swatch, Base, Small, Thumbnail Images“.

5. Search Engine Optimization

- URL Key: Enter the URL key to determine the address of the product. It is one component of the product URL based on the product name by default. You can use it or change it if you don’t want to use it.
- Meta Title: Type the meta title shown in the bar and tab of the browser window. Or use the default one that is based on the product name.

- Meta Keywords: Enter the product keyword that customers may use to search for products.
- Meta Description: Type the Meta description that helps describe the product page.
6. Related Products, Up-Sells and Cross-Sells

- Related Products are the items shown in addition to the item customers are viewing. Add the related products by clicking on Add Related Products.
- Up-sell Products are more profitable or better quality alternatives to the item a customer is looking at. Click Add Up-Sell Products to include these items on the product detail page.
- Cross-Sell Products are the products shown on the shopping cart before customers click the Checkout button in the Shopping Cart. To add cross-sell products, click on Add Cross-Sell Products.
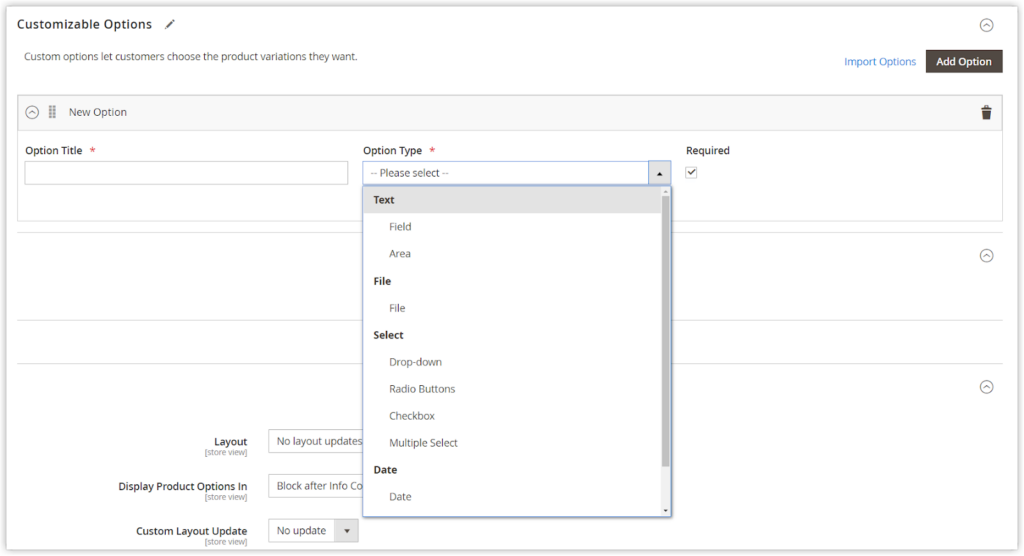
7. Customizable Options
Read the blog: What are Magento 2 Customizable Options? How to Set it Up?
8. Product in Websites
If you control multiple stores, this section lets you set the website where this product is displayed.

9. Product Salable Quantity
Salable Quantity is the total number of available products. The default stock here is 100. So, what is the difference between salable quantity and quantity per source?
Every time a customer places an order, even if the store owner hasn’t yet processed the order, the salable quantity will vary. Meanwhile, quantity per source remains unchanged until the order is shipped.


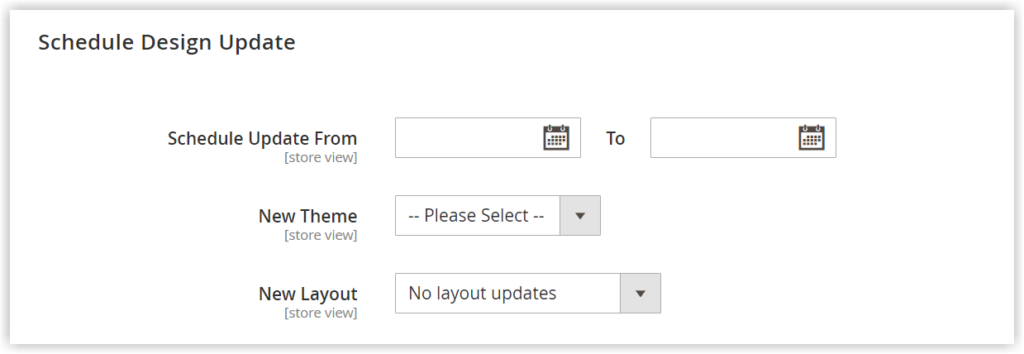
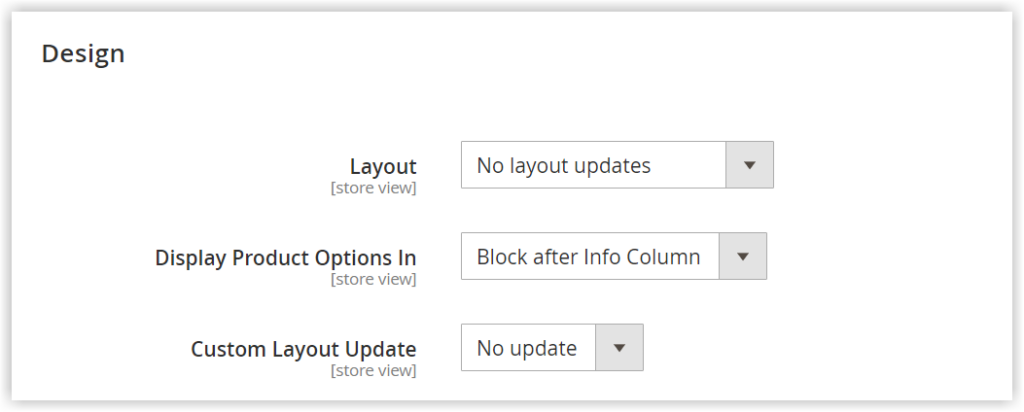
10. Design
These two sections allow you to set the theme and column layout you want to apply to the product page if desired. Besides, it’s possible to set the update schedule.
11. Gift Option
Store owners can configure this option so that your customers can attach a gift message with this product that will be sent to their family and friends during the checkout.

In the front store:

12. Downloadable Information
This section is for downloadable products so you can skip it.

Step 6: Publish Magento 2 Simple Product
- Enable the product by toggling to Yes.

- If you want to publish the product in the catalog and continue to create another product, choose Save & New. In case this product is near-identical to the newly-created product, click Save & Duplicate. Otherwise, select Save & Close to complete.

TIPS: If the frontend doesn’t show the result after configuration, try to clear Magento Cache by navigating System→ Cache management → Flush Magento Cache.

Wrap It up
Hopefully, this blog is helpful to you to create a Magento 2 simple product. Any questions or ideas about this topic? Comment down below to let us know. Learn more about Magento 2 at: Magento 2 Tutorials.
Looking for Magento extensions that boosts your sales to the next level? Then, visit Magezon website and maybe you can find your desired one.
Optimize Your Magento Store With Powerful Extensions
Looking for fast, efficient and well-coded extensions to build or optimize your Magento stores for sales boosting? Then visit Magezon website and grab necessary add-ons for yours today!
