Adding Google Maps to your contact form is an easy way to show customers your business’ locations and addresses. At the same time, you can gain more trust from them. Besides that, when embedding forms in multiple locations, it means that you add Google Maps around your site without embedding code many times.
In today’s article, we’ll walk you through the process of adding Google Maps to a Magento 2 contact form with Blue Form Builder.
Before starting, you need to install Magento 2 Form Builder and create a contact form.
1. Activate Google Maps element
To activate Google Maps form element, you need to:
- Get Google Maps API key.
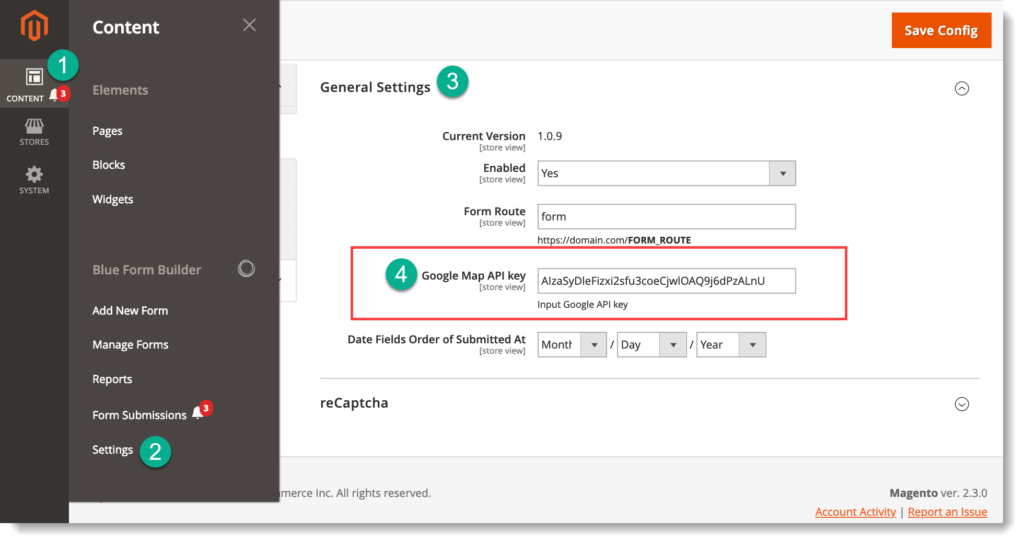
- Go to Content > Blue Form Builder > Settings > General Settings. Then enter the key into ‘Google Map API Key’ field.
2. Add Google Maps to contact form
Now that Google Maps element is activated, open form builder section of your contact form. On the left panel, click SECURITY & OTHER tab and you’ll see Google Maps element.
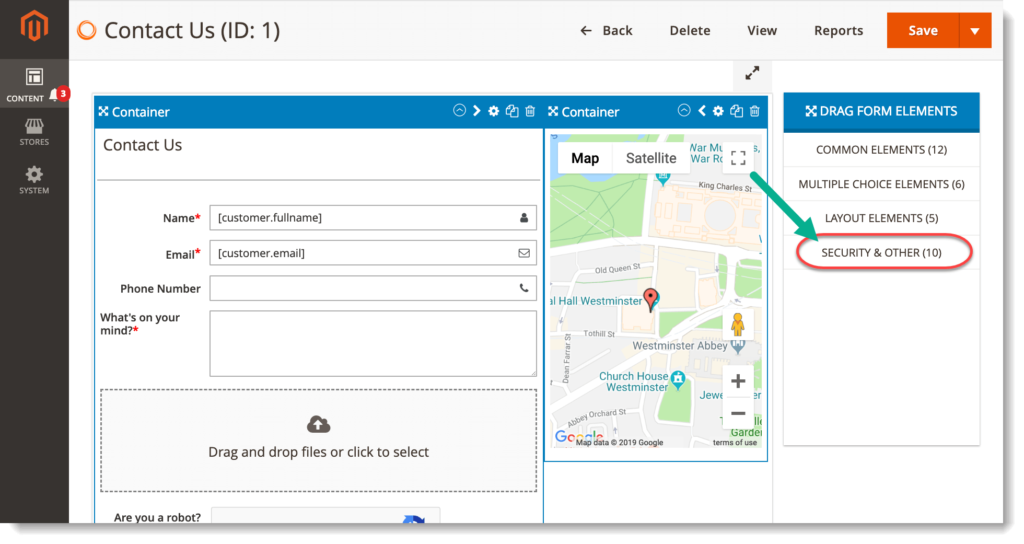
Drag & drop element into the editor on the left.
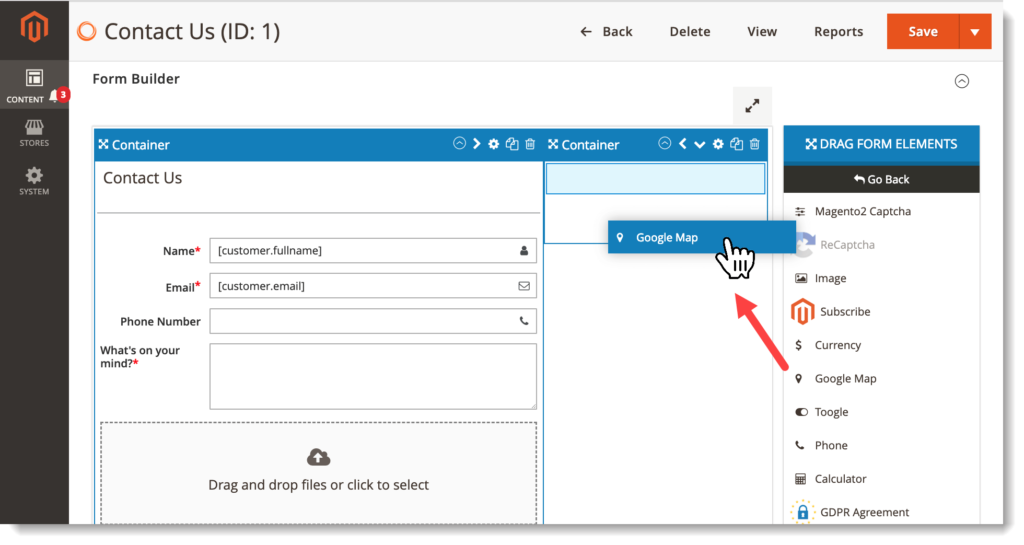
3. Customize Google Maps
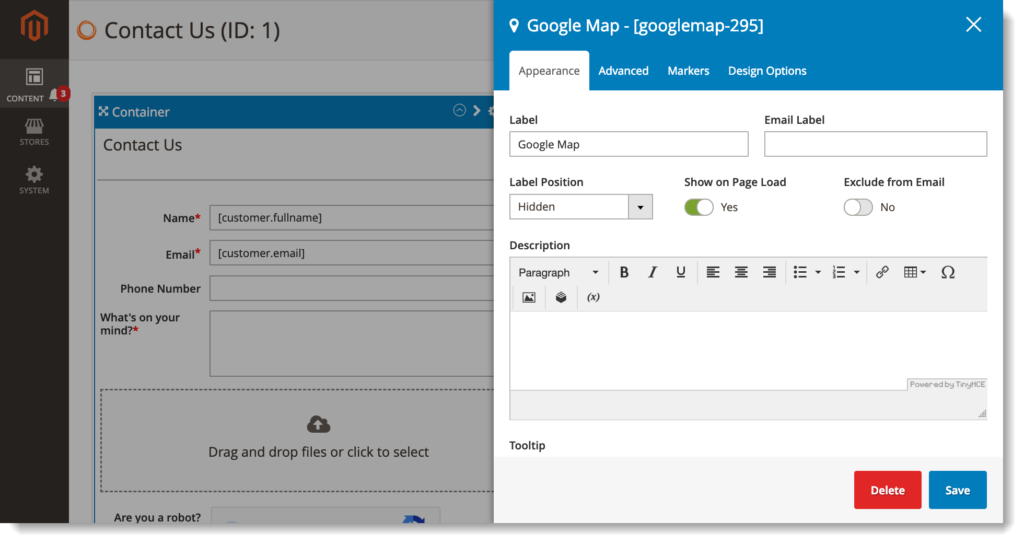
After that, a popup with element settings will appear so that you can customize.
– Appearance tab:
– Advanced tab:
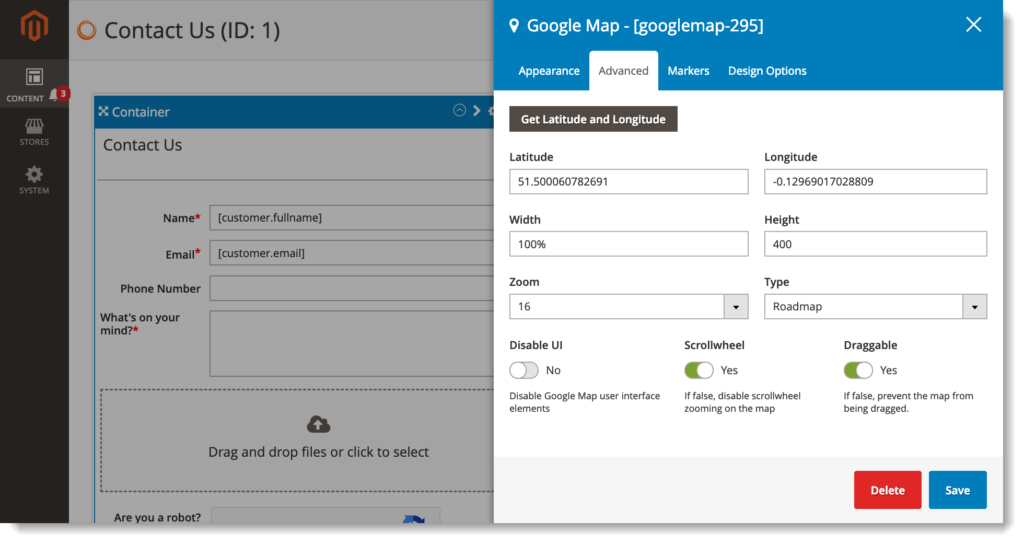
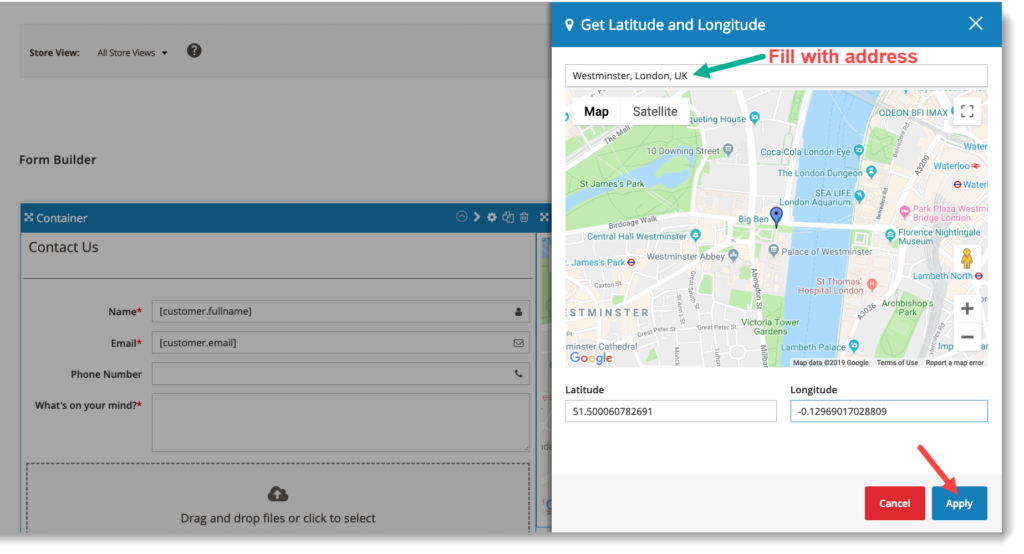
- Latitude / Longitude: enter latitude and longitude of your location. To quickly find them, click Get Latitude and Longitude button at the top. Enter your address at the top field. After clicking Apply button, the Latitude and Longitude fields will be auto filled.
- Width: width of the map (px or %).
- Height: height of the map (px).
- Zoom: zoom level of the map.
- Type: display type of the map including Roadmap, Satellite, Hybrid and Terrain.
- Disable UI: if yes, you will disable Google Maps user interface elements.
- Scrollwheel: if yes, you can use mouse scroll wheel zoom on the map.
- Draggable: if yes, you can drag the map.
– Markers tab:
In this tab, you can enter multiple locations of your business with markers.
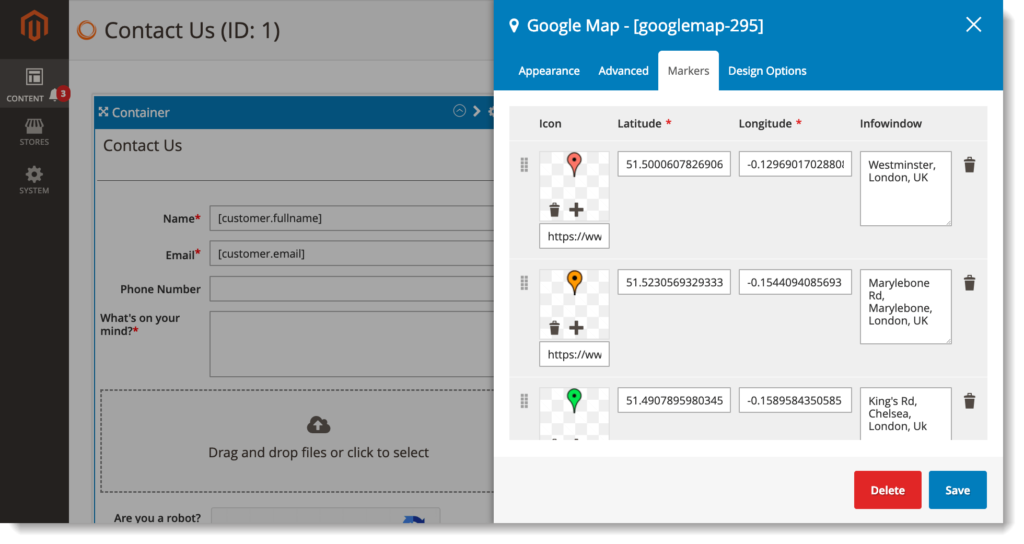
- Icon: icons used for markers.
- Latitude / Longitude of your locations.
- Infowindow: information that will appear in a box when you hover over the marker icon on frontend.
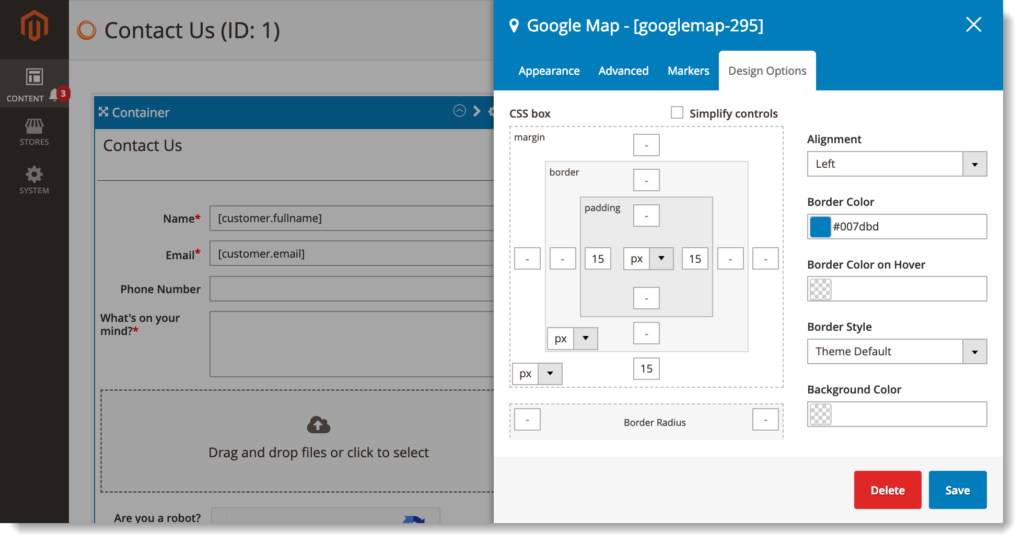
– Design Options tab: style Google Maps element.
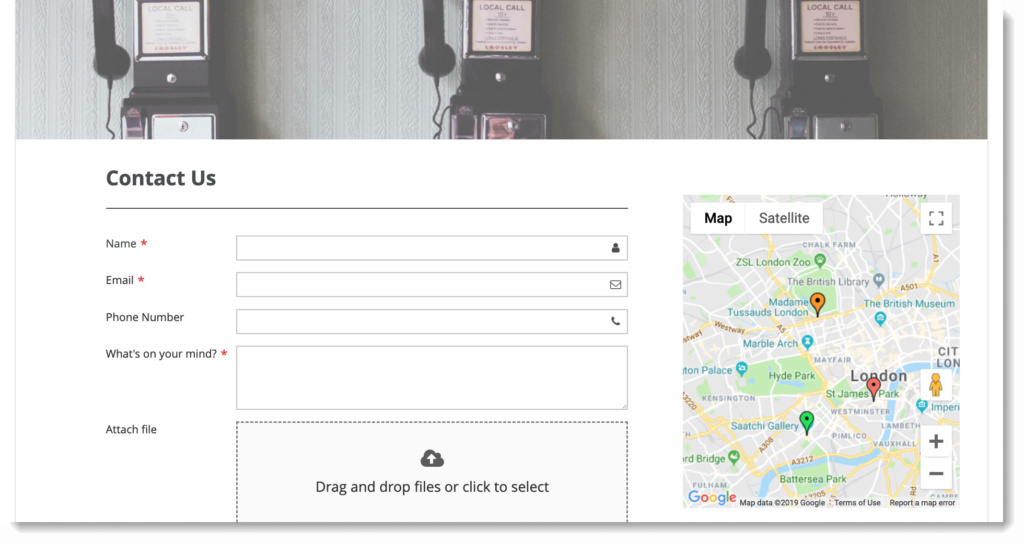
Here is how Google Maps look on frontend:
Conclusion
This article has showed you how to add Google Maps to Magento 2 contact form with Blue Form Builder. If you have any comments, don’t hesitate to leave us one below.

Try FREE Blue Form Builder demo today
Create whatever type of Magento form in any style you want just in minutes. Just by drag & drop.
 Magezon Blog Help Merchants Build Comprehensive eCommerce Websites

