 Magezon Blog Help Merchants Build Comprehensive eCommerce Websites

Creating a contact form for your online business shows many benefits. First, having a contact form will keep your website safe from spam which you will certainly encounter if publishing your email address. Secondly, you can collect the information you want right away without having to write back and forth emails to customers. And lastly, using contact forms is a convenient way for visitors to get in touch with you anytime. In case you are not available for a phone call, your customers can still reach you via a contact form. In case your customers do not use social media, then they can contact you right from your website.
Understanding the importance of a contact form, you might want to create one. In this article, we will specifically show you 5 easy steps to add contact form in Magento 2 with Blue Form Builder:
Now let’s look at each step in more detail.
Table of contents
Step 1: Install Blue Form Builder
First of all, you need to download and install Blue Form Builder on your website. For detailed instructions, please refer to our Installation Guide. It will take you just a few minutes to install our extension.
Step 2: Create your Magento 2 contact form
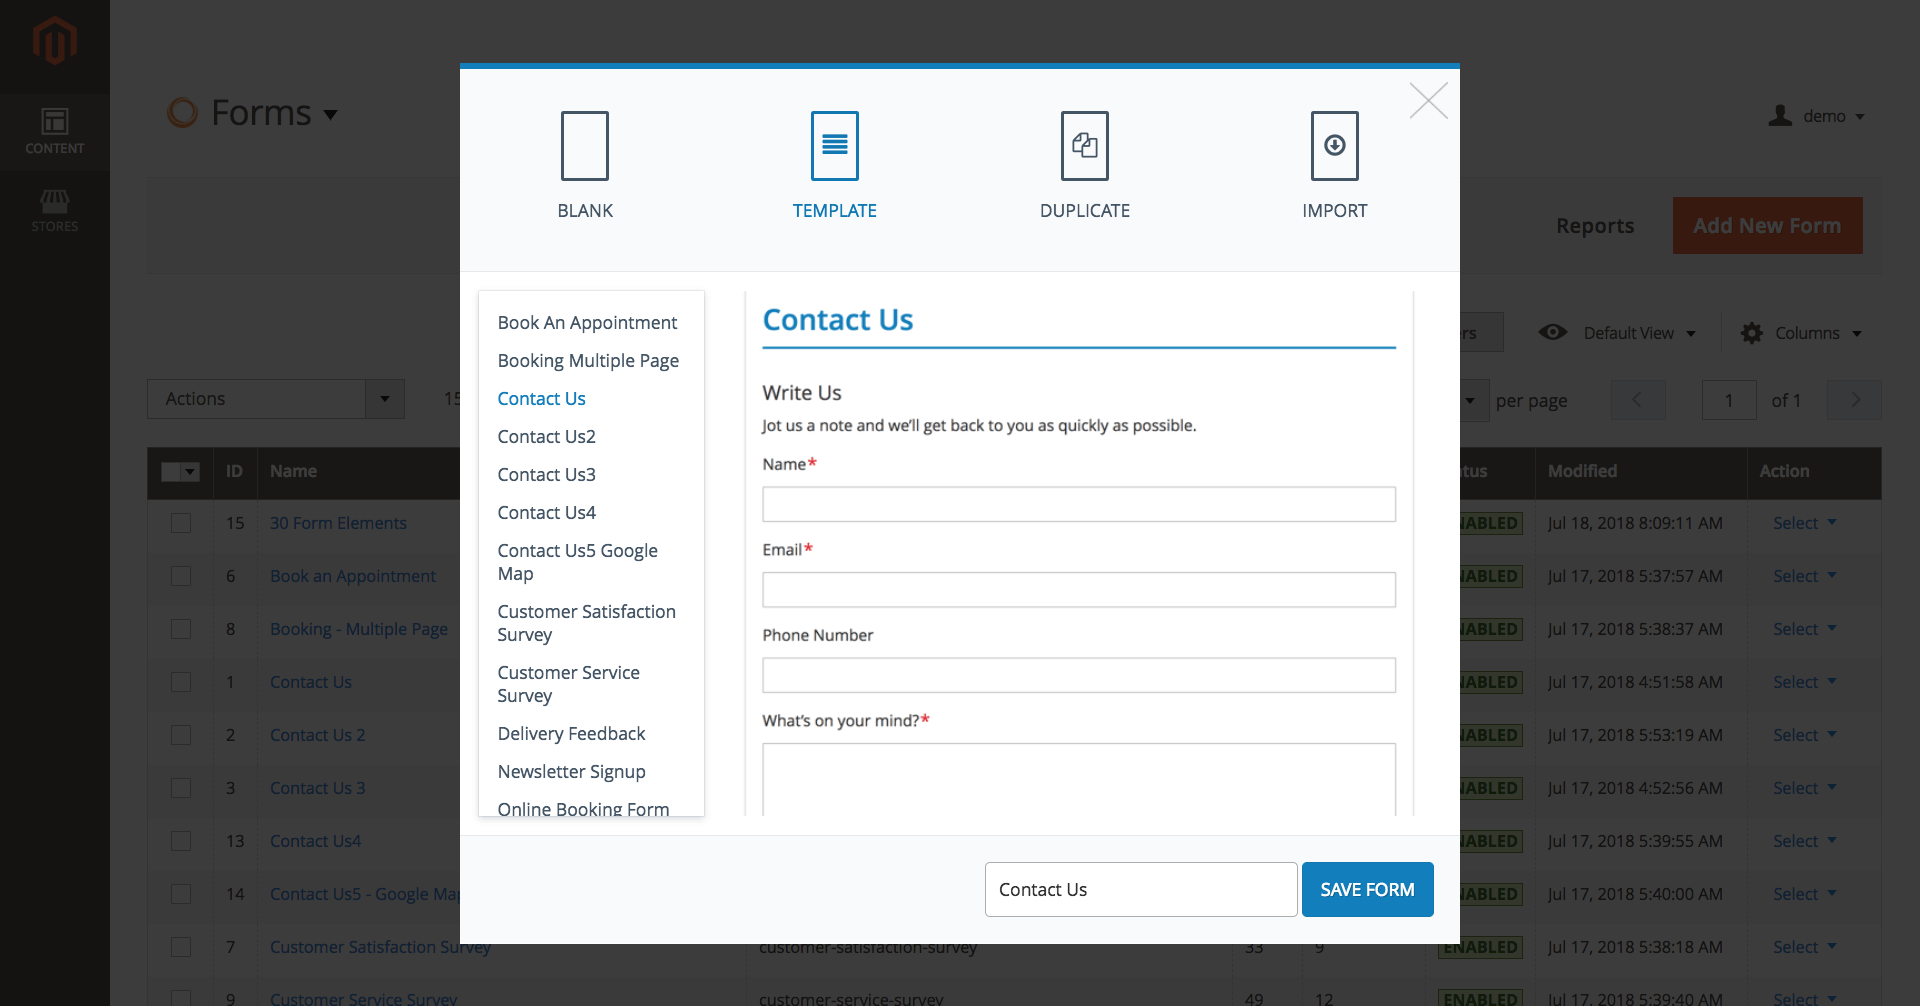
To add contact form in Magento 2, navigate to Content > Blue Form Builder > Add New Form. A popup will be displayed. Then click Template, select Contact Us in the left-hand panel and click Save Form button.
Step 3: Customize contact form (Optional)
After saving the form, you will be redirected to the form settings. You can either keep the form as it is or customize it based on your needs. To make changes, click Form Builder to open the editor area:
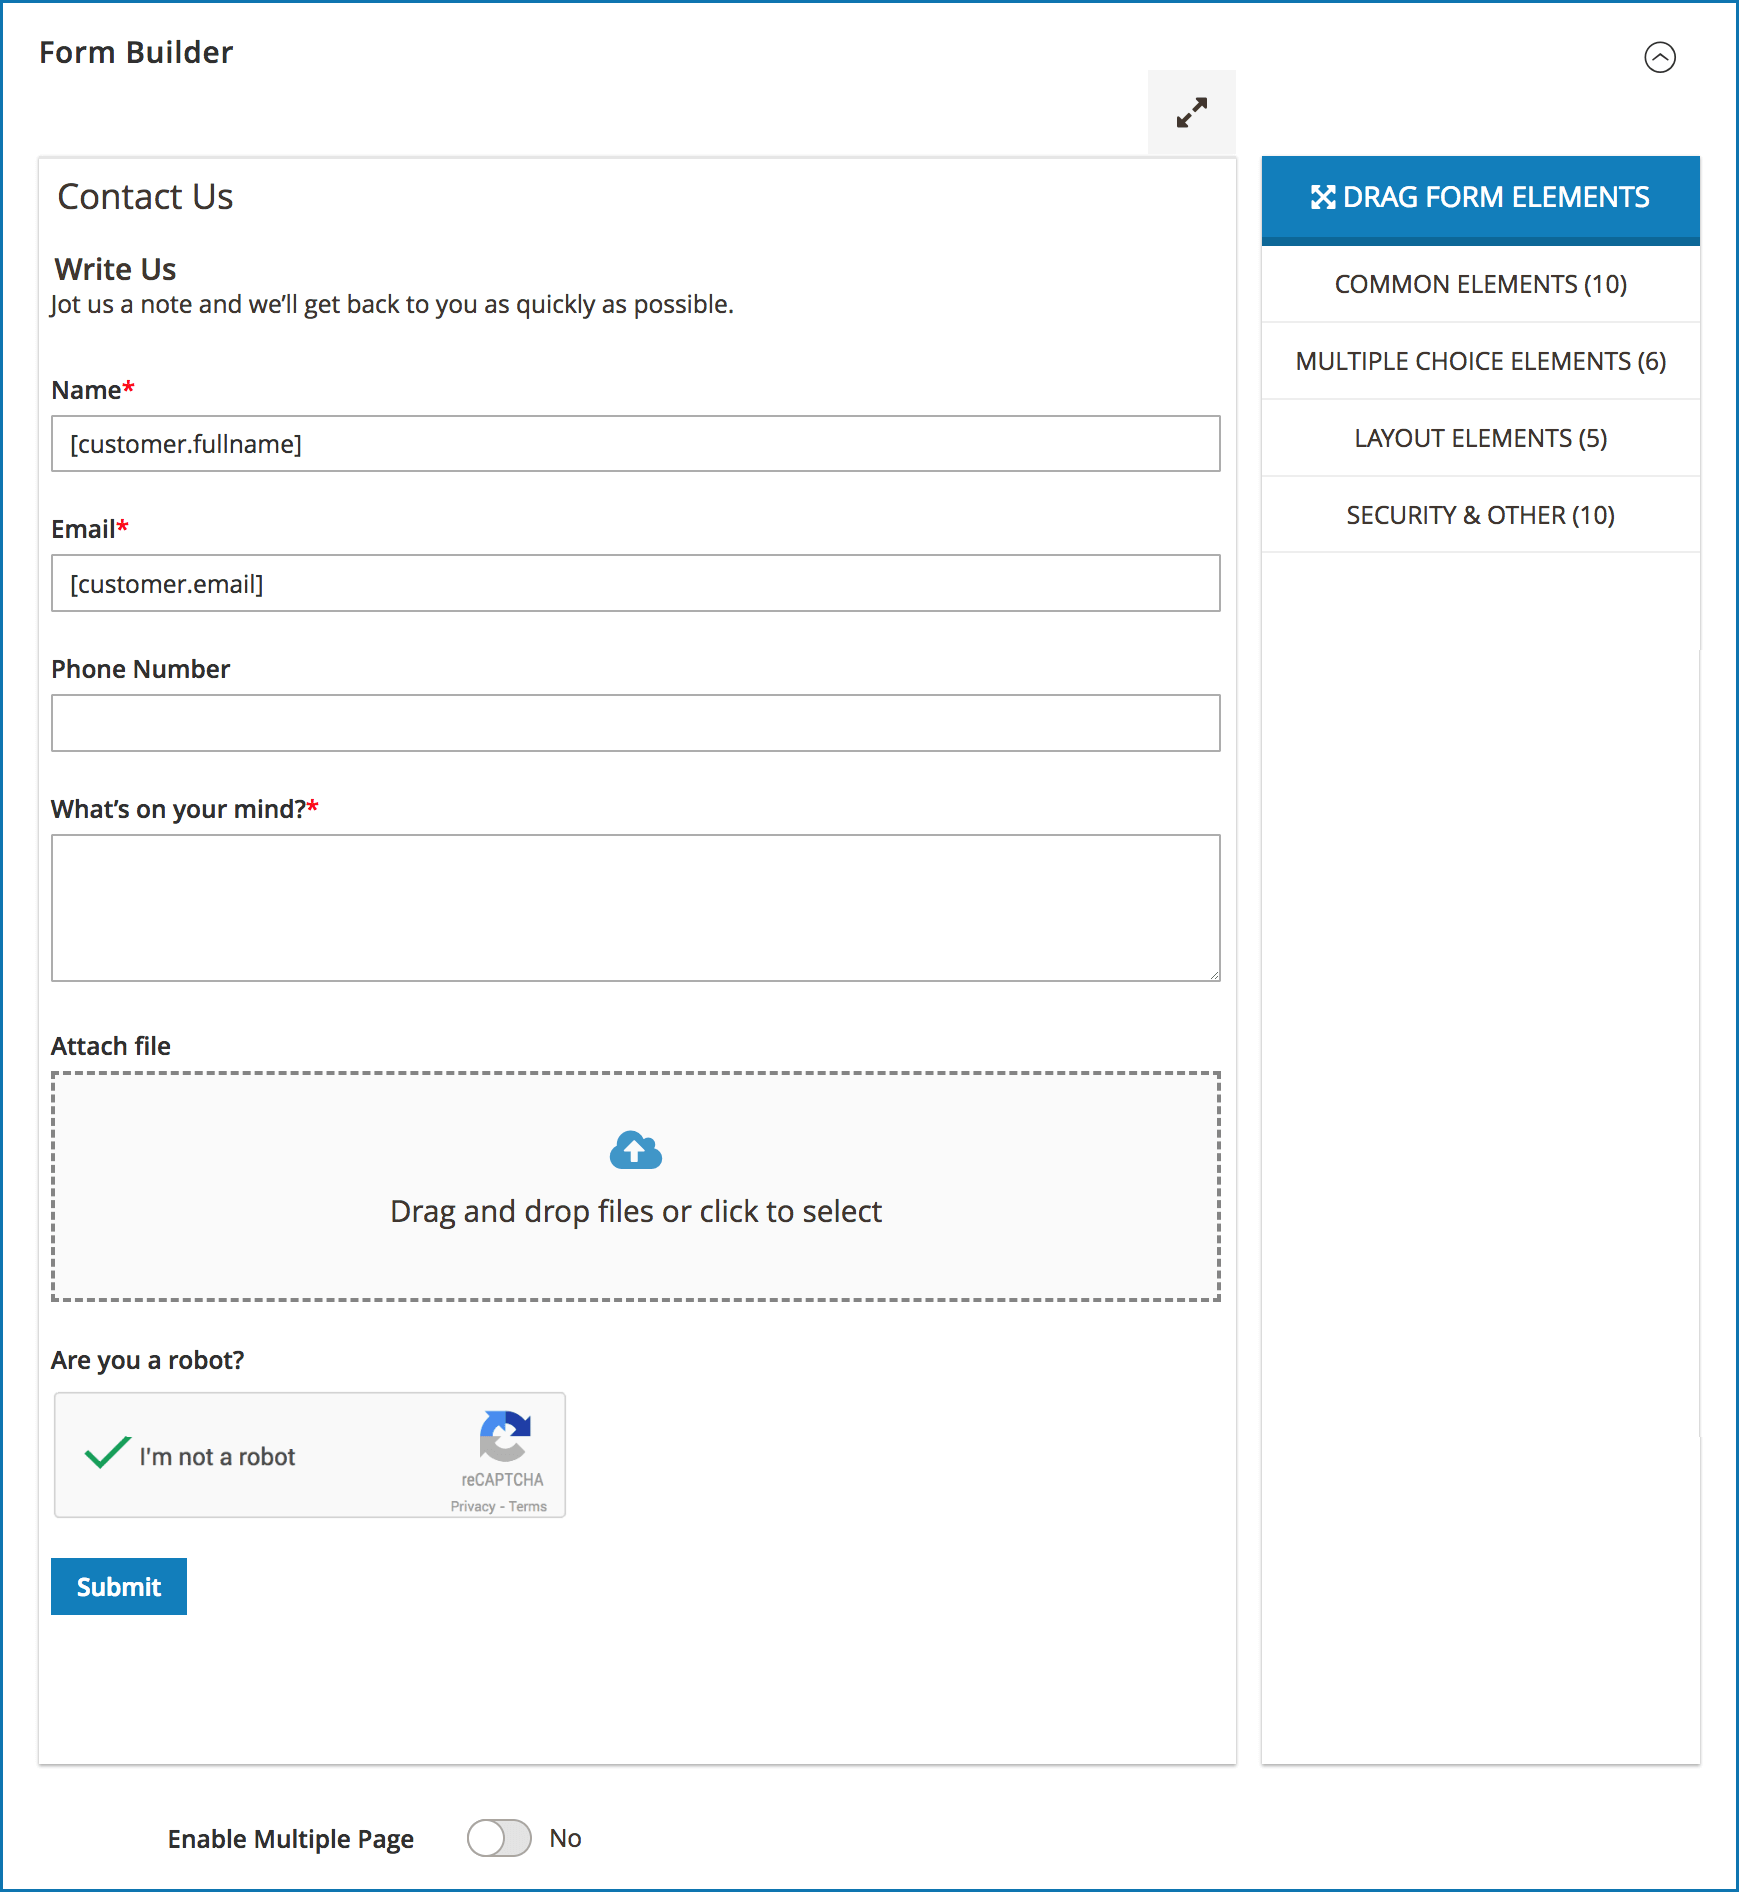
- Insert additional elements: drag them from the right-hand panel into the editor area on the left.
- Remove an element: hover over that element. Then you will see a trash can icon on the right.
- Duplicate an element: hover over that element. Then you will see a duplicate icon on the right.
- Rearrange an element: hover over that element and you will see a drag icon on the left. Move your mouse over the icon. Then click and drag the element to the position you want.
- Change the settings of an element: click on that element and a popup will appear. Remember to click Save button after you make changes.
If your Magento 2 contact form is long or has a lot of elements, you can break it into multiple pages to improve user experience. Just turn on the button Enable Multiple Page.
Remember to enter your site key and secret key by going to Content > Blue Form Builder > Settings > reCaptcha so that Google reCaptcha will work on your form.
Step 4: Configure contact form’s general settings
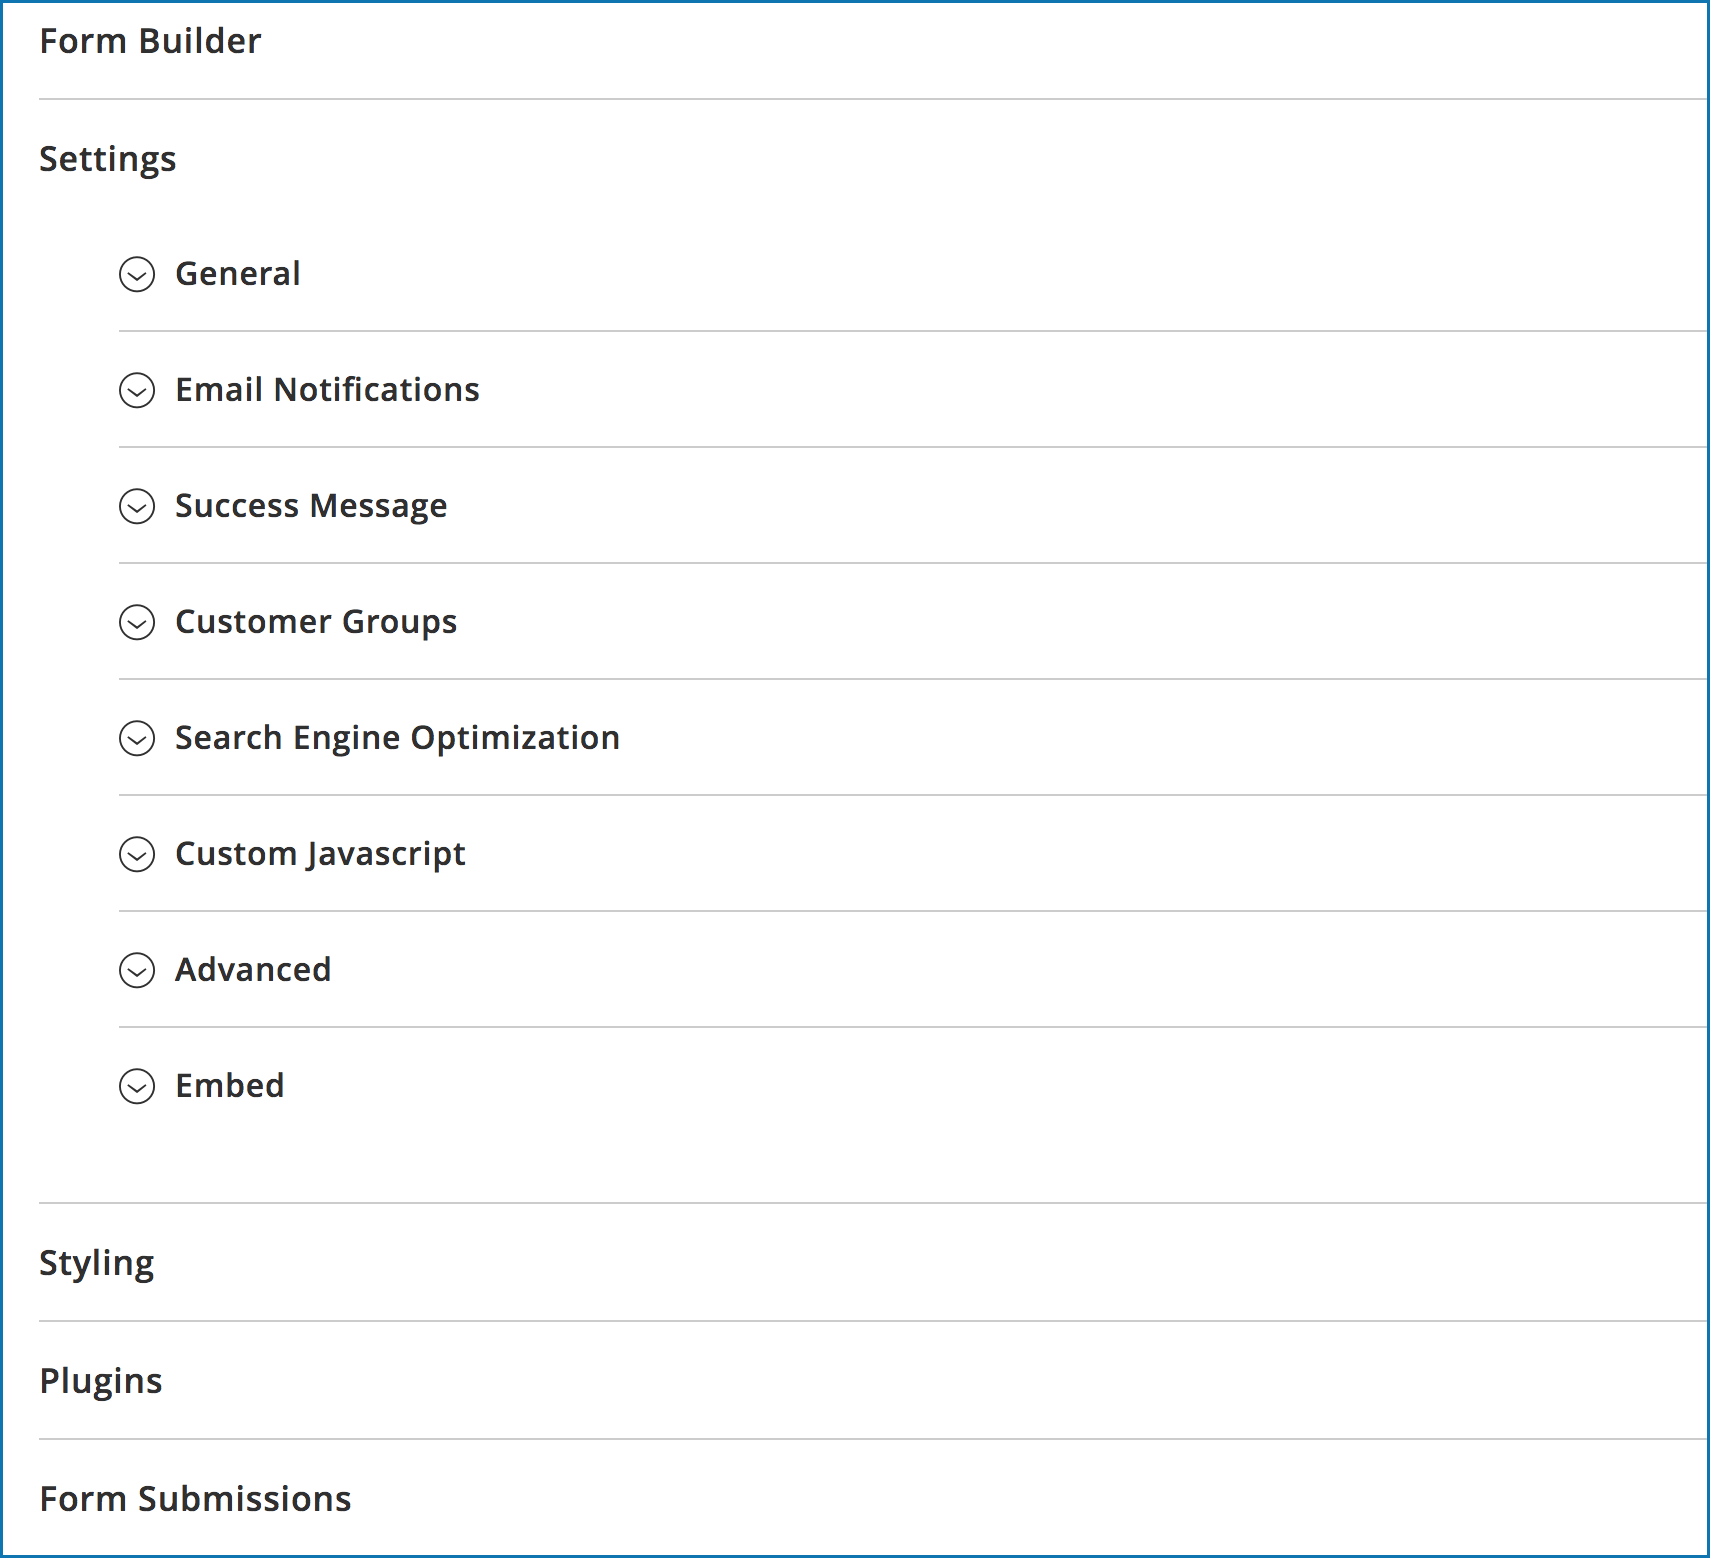
Below the Form Builder section are some other tabs. You can configure the following:
– Settings: include basic settings of the form.
- General: change the form name, enable or disable the form, display the form link on the top link bar of your website, etc.
- Email Notifications: configure the notification emails sent to admins and customers.
- Success Message: configure the message that customers will see after they submit a form successfully on your website.
- Customer Groups: choose which customer groups to apply the form to.
- Search Engine Optimization: create SEO-friendly URL, meta title, meta description and meta keywords for the contact form.
- Advanced: redirect customers to a page after a form is submitted, add submission prefix, export the form, export form submissions, etc.
– Styling: design your form such as width, background, border, color, etc.
– Plugins: in this tab, you will find the plugins that you installed. Configure the plugins if you want a more advanced form.
To learn more about configuring general settings, see our User Guide.
Step 5: Add contact form to a page/block
By default, when you build a contact form, a separate page URL for that form is automatically created. However, you can choose to embed your form anywhere on your website. There are many locations and ways to embed the form, but we will show you the most common and easiest one: add your form to a page/block using embed code.
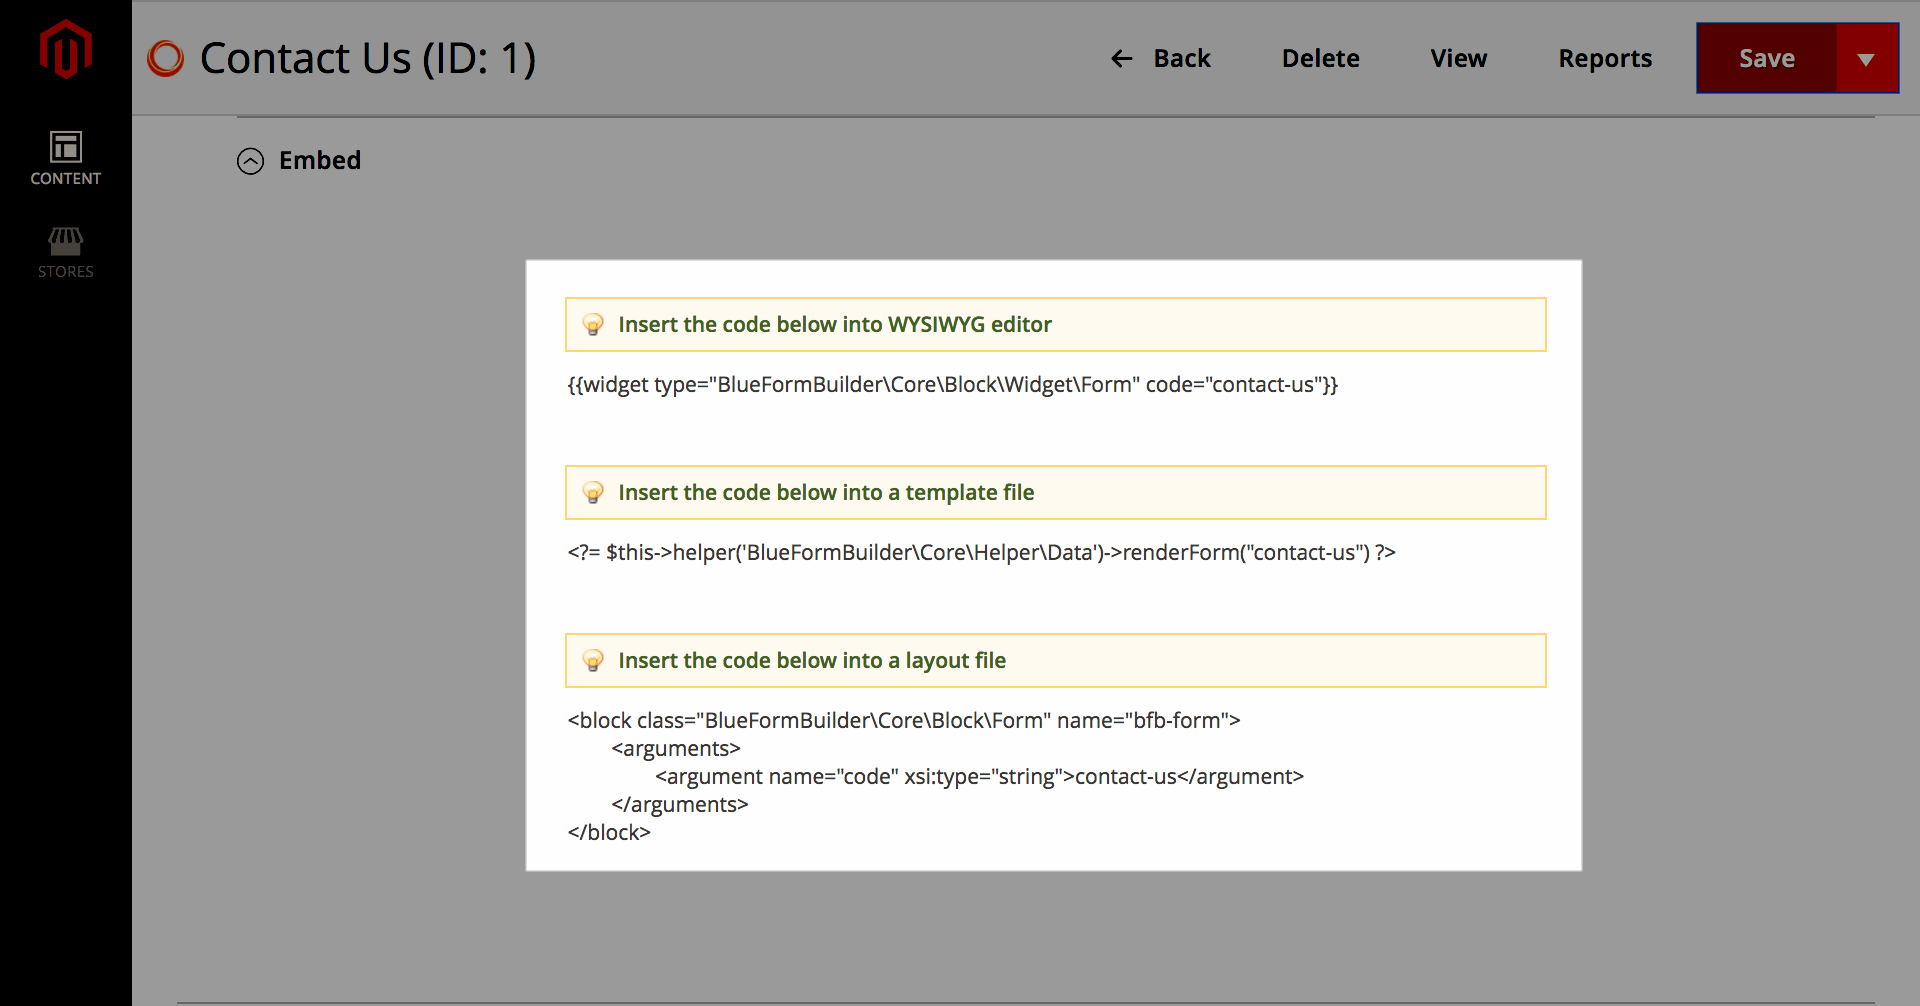
Under the Form Builder section, click Settings > Embed. Here you will see 3 kinds of code. Copy the first one into the WYSIWYG editor of the page/block you want to display the form. After saving, the contact form will appear on that page/block.
Conclusion
In this article, we’ve share with you 5 simple steps to build a Magento 2 contact form using Blue Form Builder. So what do you think? Why not experience yourself and let us know.

Try FREE Blue Form Builder demo today
Create whatever type of Magento form in any style you want just in minutes. Just by drag & drop.


