
As a web owner, sometimes you may want to collect files from customers through an online form. It can be images, PDFs, documents, videos, etc. To do that, you need to give customers the ability to upload files with their form submissions.
With Blue Form Builder, you can do this easily and quickly by adding a file upload field to your form. And in this article, we’ll show you how.
Table of contents
1. Add file upload field to a form
Before getting started, you first need to install Blue Form Builder.
Now suppose that you’re in the process of building a new form, then let’s look at these followings steps:
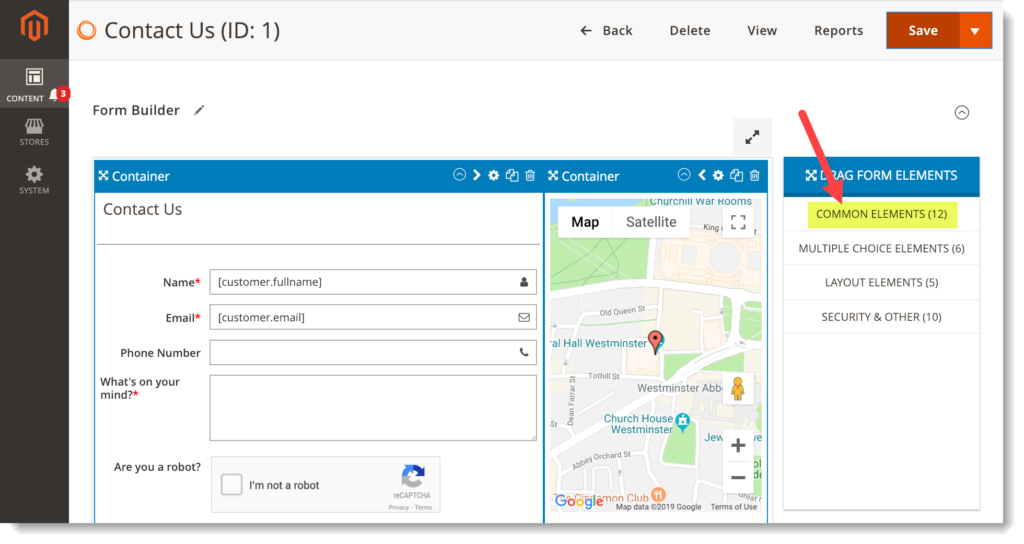
- Step 1: Open COMMON ELEMENTS tab in the right panel to find File Upload element.
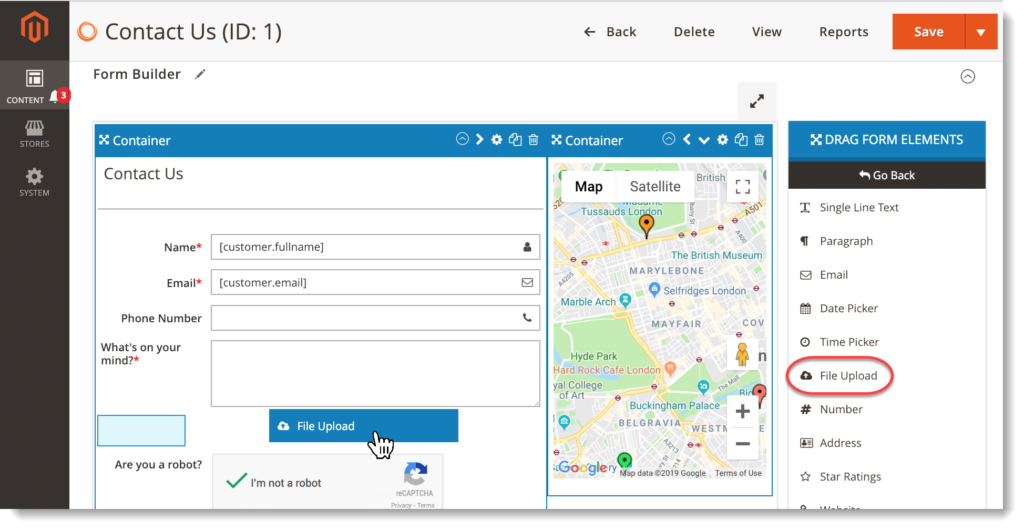
- Step 2: Drag and drop this element into the editor on the left.
2. Customize file upload field
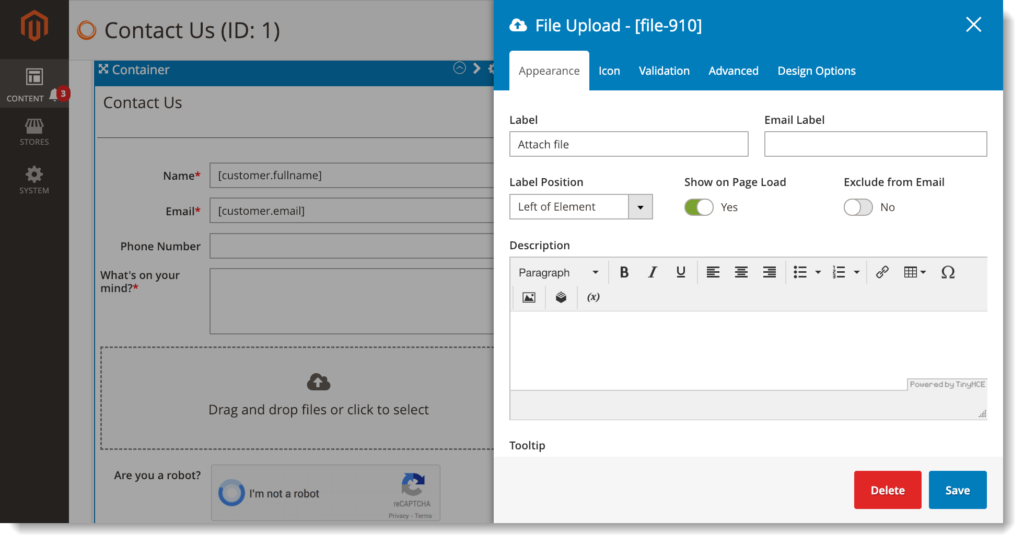
After adding file upload field to the form, there will appear a popup where you can customize it.
a. Appearance
Where you make basic customizations such as element labels, label position, etc.
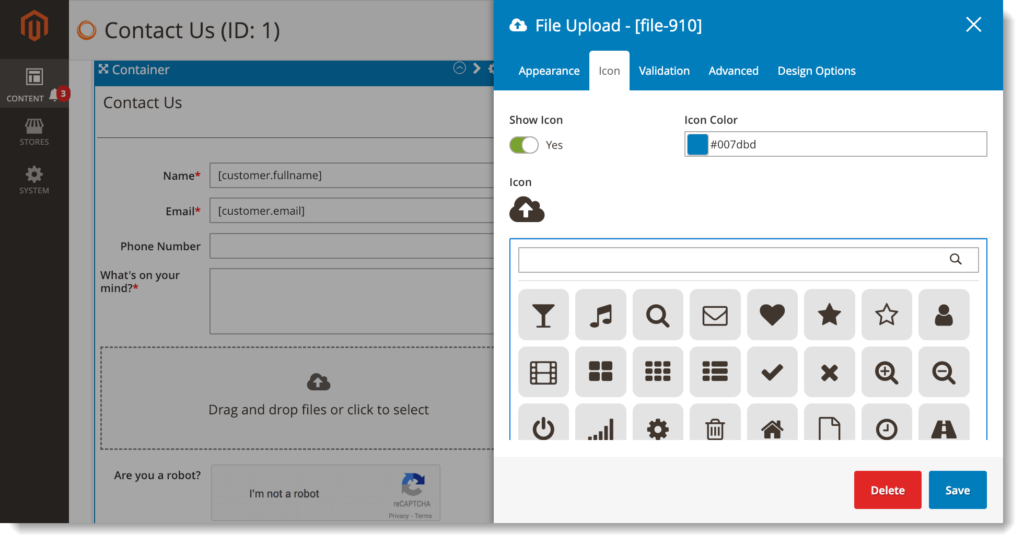
b. Icon
Choose an icon that will appear in the file upload field.
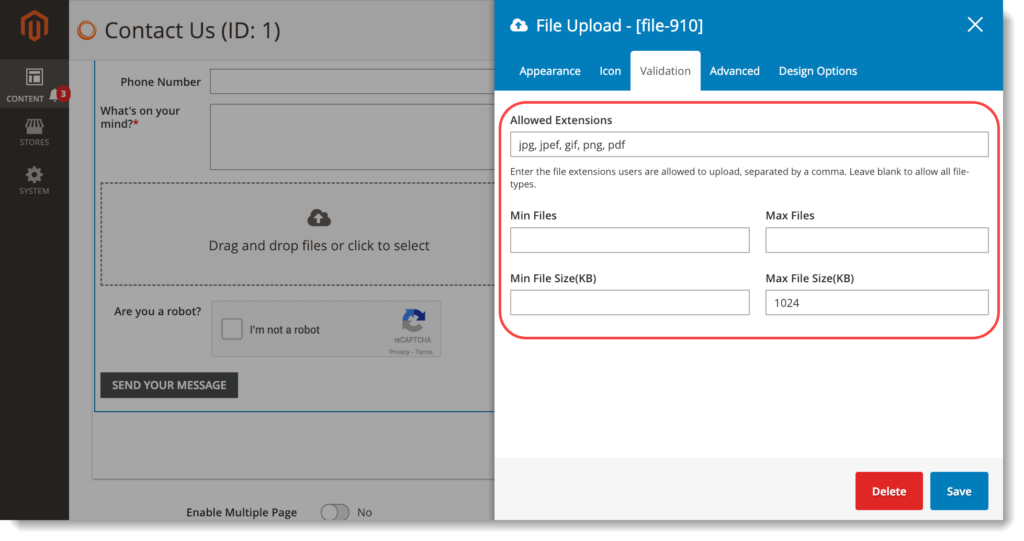
c. Validation
This tab allows you to limit file type, file size and file number that can be uploaded. We advise you to do this for security and storage space saving.
d. Advanced
Where you make some advanced customizations:
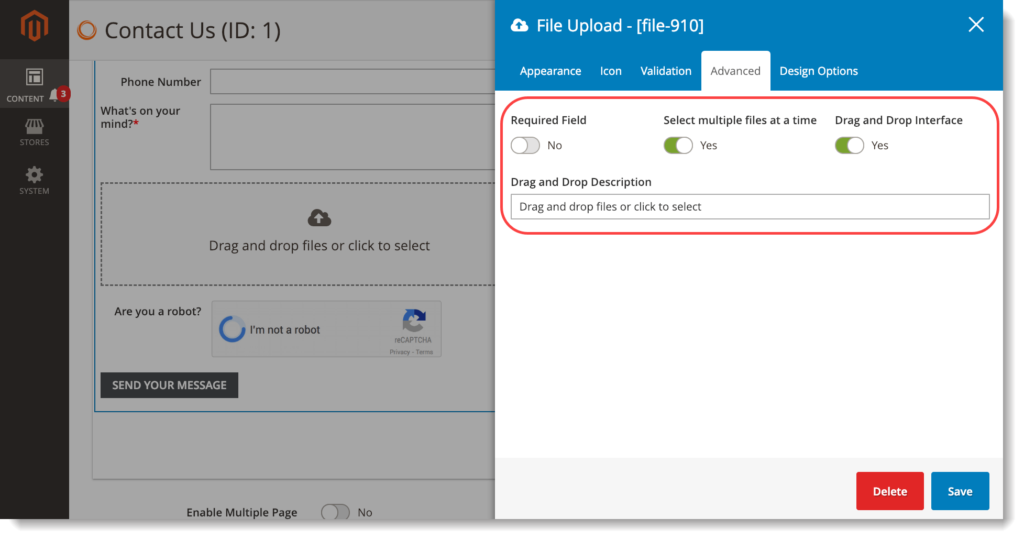
- Required Field: decide whether file upload field is mandatory or not.
- Select multiple files at a time: if Yes, customers can select multiple files at the same time to upload.
- Drag and Drop Interface: if Yes, users can drag and drop files into file upload field.
- Drag and Drop Description: enter the text that will appear inside file upload field to show customers how they can upload files.
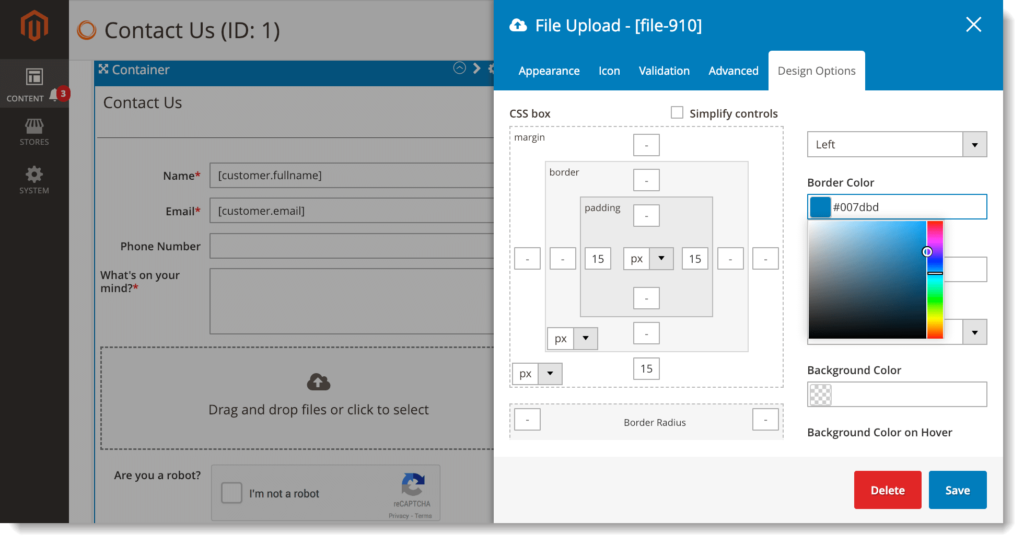
e. Design Options
Where you customize file upload element such as border, background, font, etc.
3. Attach uploaded files to email notifications
Blue Form Builder lets you to include uploaded files to email notifications sent to admins and customers.
To enable this function, you first navigate to Settings > Email Notifications.
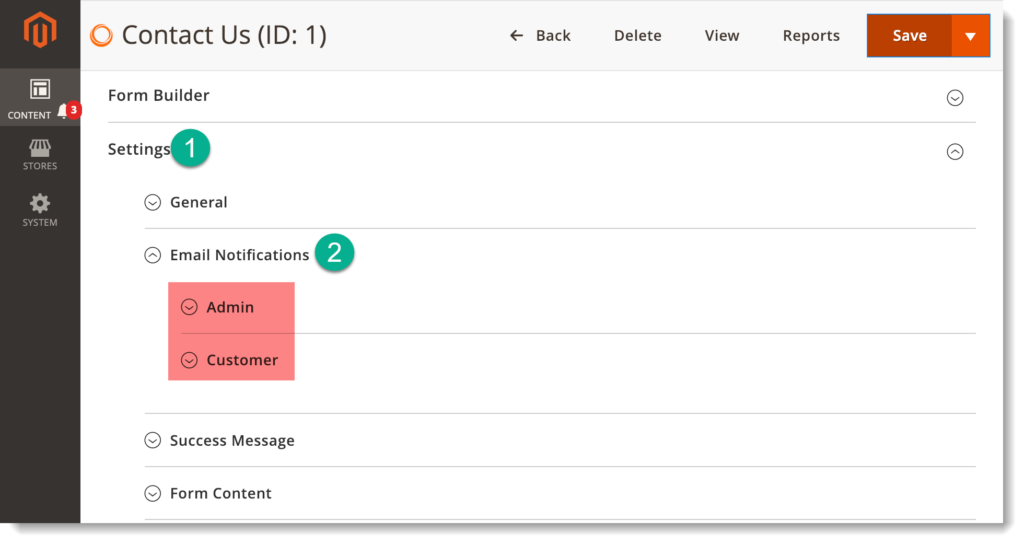
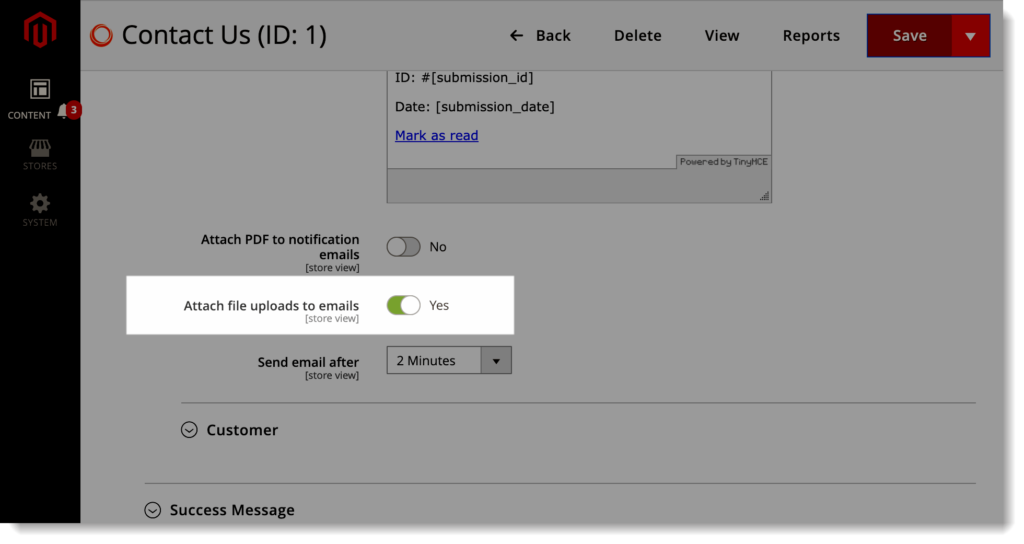
To attach uploaded files to emails notifying admin, open Admin tab. Then slide button “Attach file uploads to emails” to Yes.
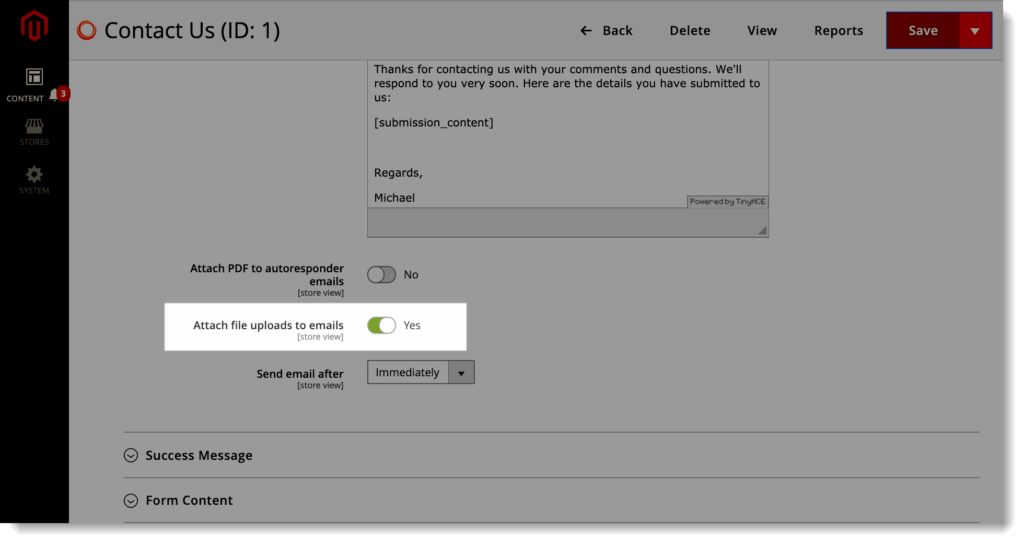
Open Customer tab to attach uploaded files to emails sent to customers. Then slide button “Attach file uploads to emails” to Yes.
Now let’s look at file upload field on frontend:
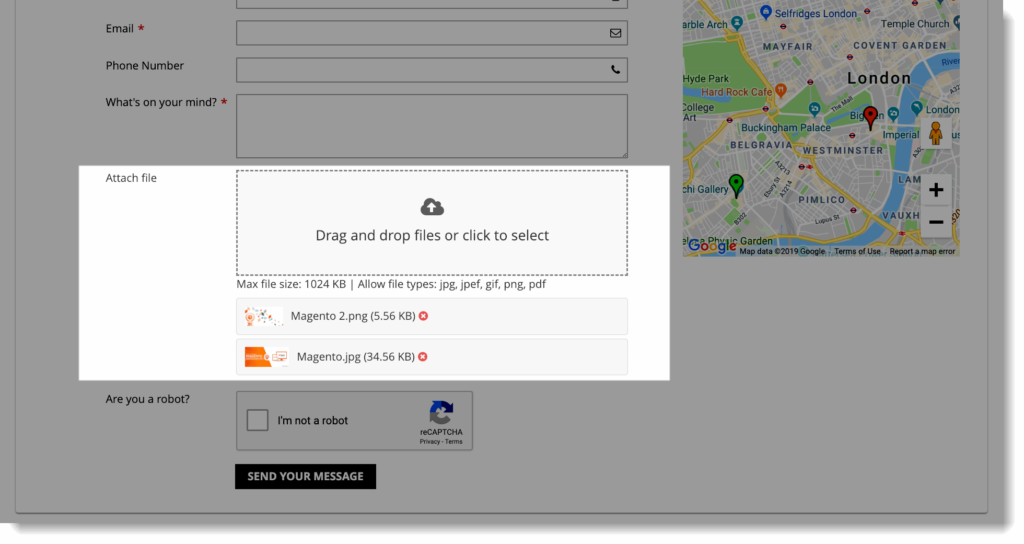
* Note: You can add multiple file upload fields to a Magento 2 form.
Conclusion
In today’s article, we’ve looked at how to add file upload field to a form in Blue Form Builder. By using drag and drop, you can do this with ease in a couple of seconds. Also, you can limit file size, file type and file number as well as attach uploaded files to email notifications. If you have any comment, feel free to leave us one below.

Try FREE Blue Form Builder demo today
Create whatever type of Magento form in any style you want just in minutes. Just by drag & drop.
 Magezon Blog Help Merchants Build Comprehensive eCommerce Websites

