So, you’re halfway to setting up your Magento storefront branding, which includes uploading your logo and changing the welcome message. This blog will continue to give you all knowledge about the Magento 2 demo store notice. What is it? Why do we need it? How to enable/disable it from the backend? And how to change the text of the notice? All of these questions will be answered right below. Let’s get started!
Table of Contents
Why We Need a Demo Notice in Your Stores?
Magento 2 demo store notice is a built-in notification with the default content:” This is a demo store. No orders will be fulfilled.” The message will be displayed whenever you switch your store to the demo mode. It helps you clarify to your customers that your store will not process any orders in the meantime.
The design and style of the demo notice may vary depending on your store theme.
Typically, Magento 2 store owners display the message when:
- The store is under construction
- They want to test their store’s functionality after installing
- They want to test their stores in the demo mode

As we have some clues about Magento 2 demo store notice, let’s see how we can enable/disable it from the backend!
Enable and Disable Magento 2 Demo Store Notice
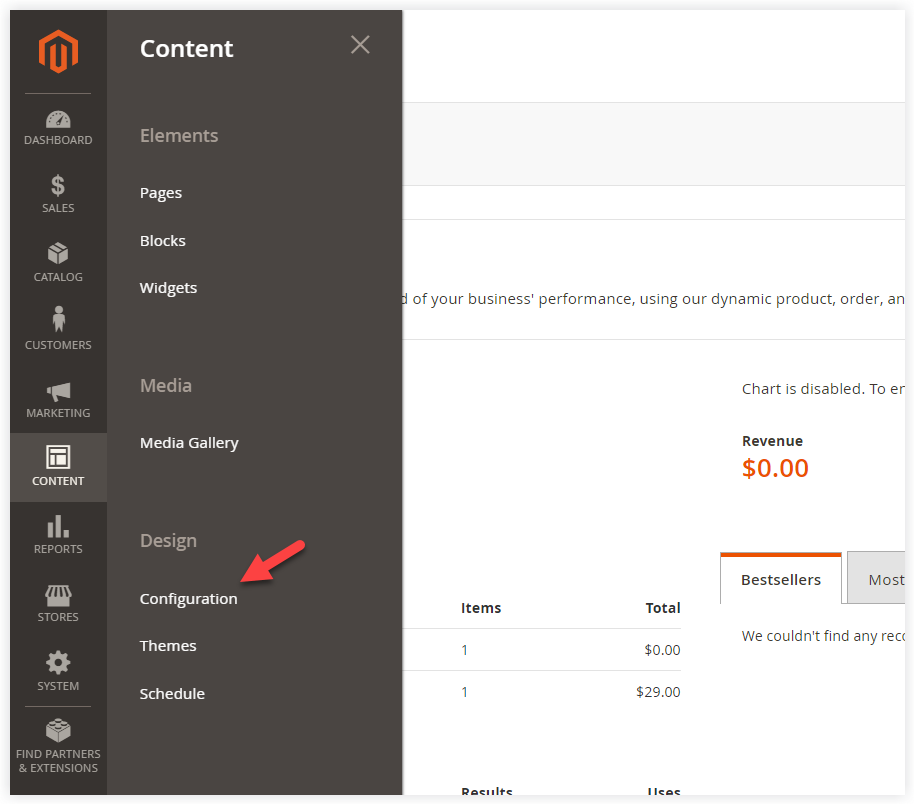
Step 1: Navigate to Content > Design > Configuration
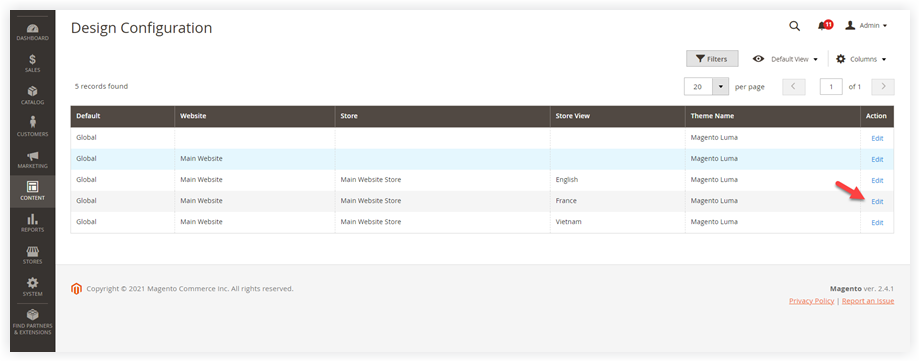
Step 2: Choose the Wanted Store View to Enable and Disable the Magento 2 Demo Store Notice
In the grid, choose a store view you want to apply the settings. For example, I will choose the France store view. Click Edit in the Action column:
Step 3: Span Other Settings > HTML Head
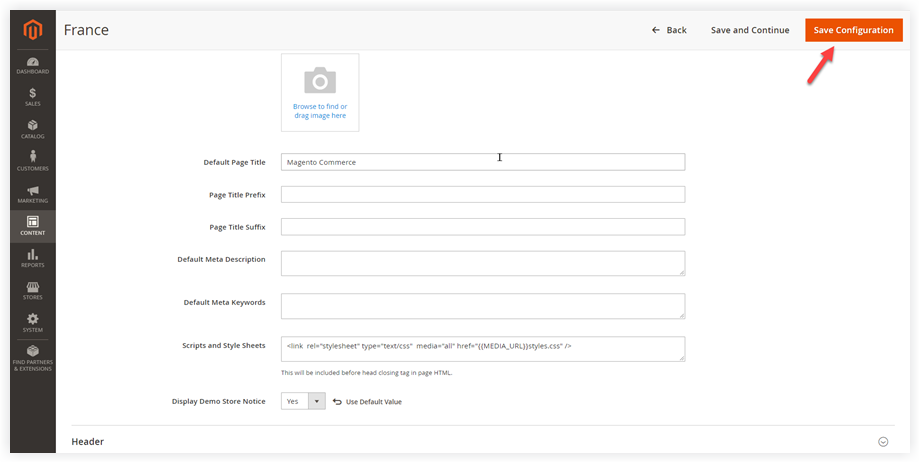
After that, you will navigate to the design config page of the France store view. Span Other Settings >> HTML Head section:
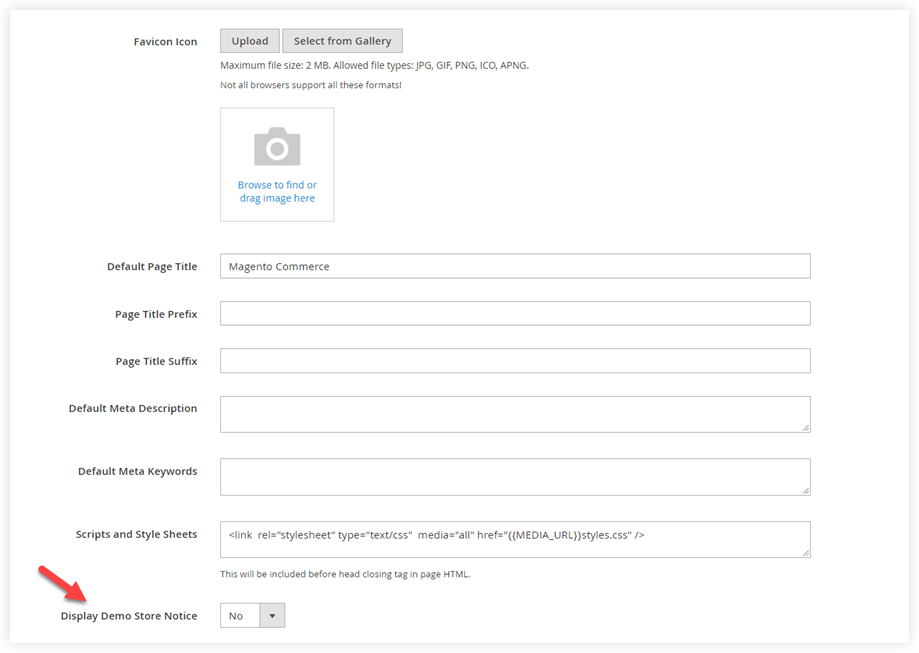
In the field “Display Demo Store Notice,” choose Yes/No to enable/disable it as your preference.
Step 4: Click Save Config
After that, click Save Config in the upper right corner to save your configuration:
Step 5: Refresh Cache
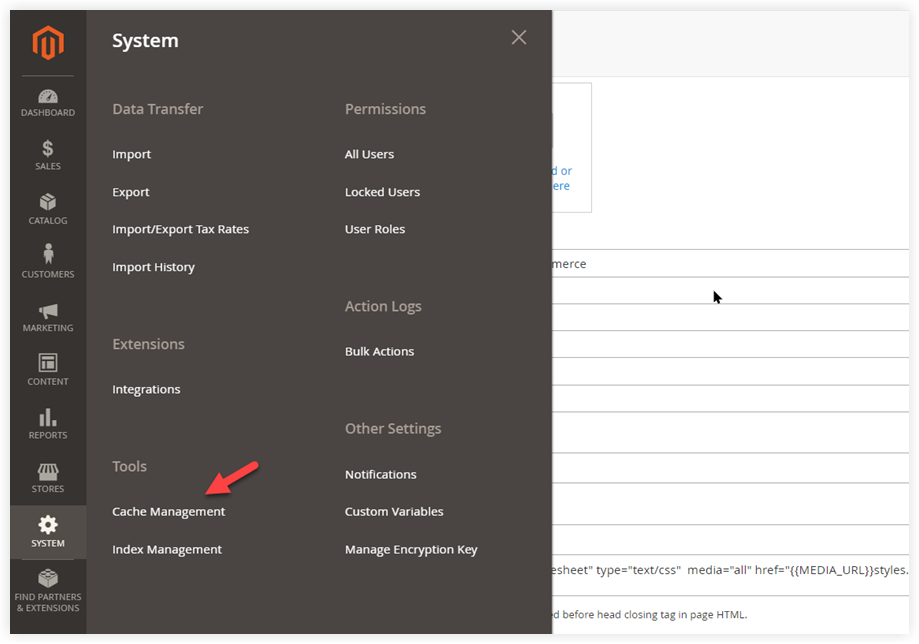
You need to refresh the cache to see the changes. From the admin panel, navigate to System > Tools > Cache Management:
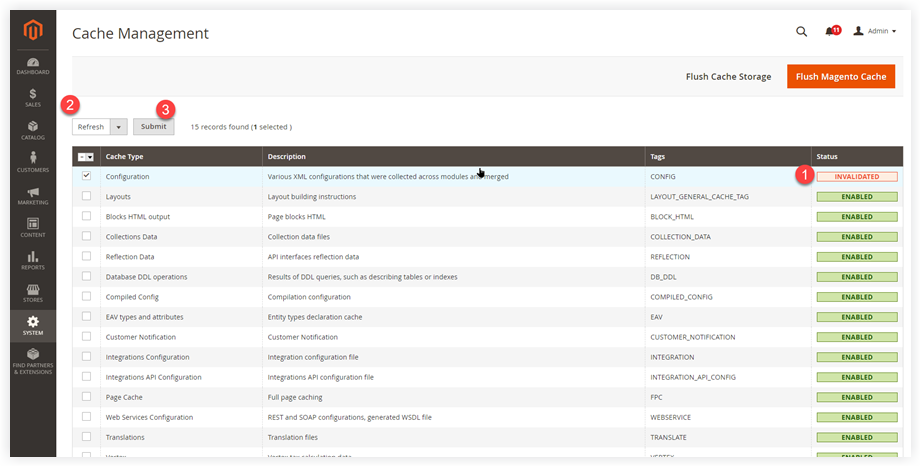
Then, in the cache management grid, tick Configuration. Be sure the action is Refresh and click Submit:
Now, the customers from the storefront will see a demo notice of your store, like this:

That’s it. Now you can tell the way to enable/disable the demo notice. Let’s move on to the section: how to change the text of this message.
Change the Magento 2 Demo Store Notice
Sometimes, you want to customize the demo message to make the most out of them. Changing its content helps you convey your message better as well as improve the communication with your customers.
Magento requires you to manually edit your theme’s file because you can not make configuration from the admin panel. First and foremost, copy file from
vendor/magento/module-theme/view/frontend/templates/html/notices.phtmlThen, put it to:
app/design/frontend/Vendor/YourTheme/Magento_Theme/templates/html/notices.phtmlAfterward, change the notice content “This is a demo store. No orders will be fulfilled.” at line 67 with your prefered message.
Run below command lines to deploy static content:
php bin/magento setup:upgrade
php bin/magento setup:static-content:deploy -f
php bin/magento cache:clean
Fine-tuning Your Magento Store With Magezon Robust Extensions
In a nutshell, I hope you took a firm grasp of Magento 2 demo store notice. In addition to this, there are still many other areas of improvement a Magento 2 store owner should consider.
Visit our website to see the affordable and best-in-class Magento 2 extensions to maximize your revenue.

Optimize Your Magento Store With Powerful Extensions
Looking for fast, efficient and well-coded extensions to build or optimize your Magento stores for sales boosting? Then visit Magezon website and grab necessary add-ons for yours today!
 Magezon Blog Help Merchants Build Comprehensive eCommerce Websites

