Imagine you were performing everyday tasks in your Magento store. Then, you had to leave for an emergency. But the dreadful thing is that you forgot to turn off your device or at least sign out of the admin. Someone else can access your account, putting your store security at risk.
That moment is when you realize the Magento 2 admin session lifetime advantages.
So what is Magento 2 admin session lifetime? How to configure it? This blog will reveal the steps right below!
Table of contents
What Is Session Lifetime?
As the term implies, a session lifetime is a timeframe in which an end-user does not interact with his device. The session ends when the user signs out of his account or closes the browser. Furthermore, the admin will automatically log out when he reaches the limited session duration.
Magento admin session lifetime is another effective way to protect your store from malicious third-parties, along with Magento 2 two-factor authentication (Magento 2FA).
The default time out for a Magento admin session is 9000 seconds (equivalent to fifteen minutes) of keyboard inactivity. Therefore, if you want to either extend or shorten your session to work more conveniently, you have to reset the configuration. Let’s move on to the setting instruction!
| Learn more: How to Disable 2FA in Magento 2.4 Using Command Lines How to Create Magento Admin User With Various Access Levels Magento 2 Website, Store, Store View: What’re the Differences? |
Set up Admin Session Lifetime
Step 1: Access Magento Security Session
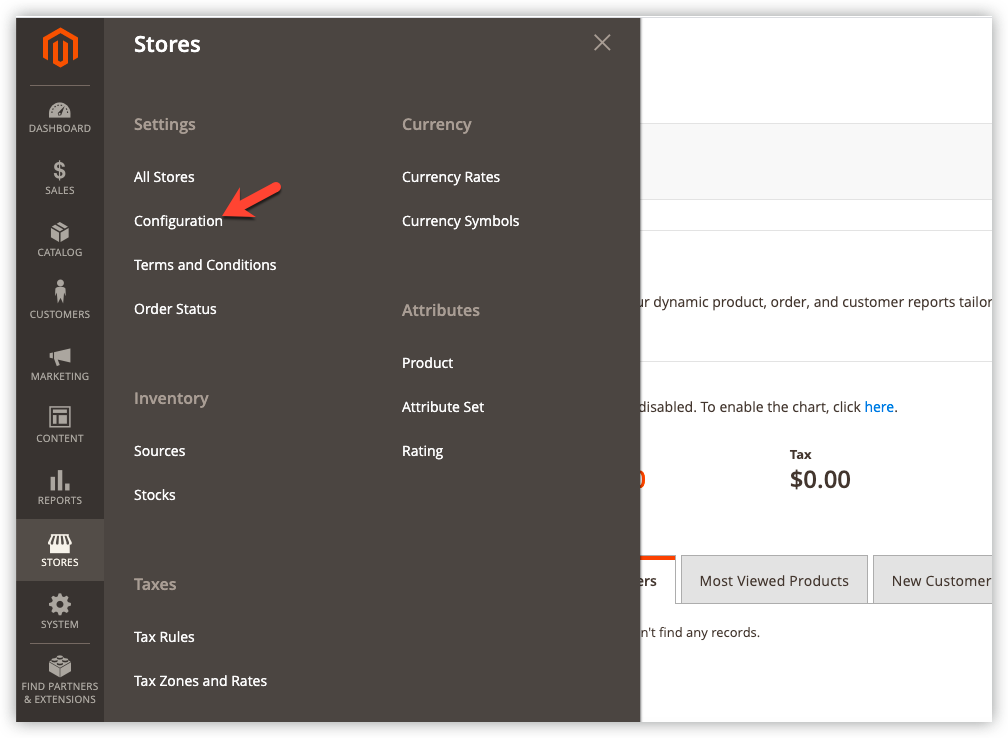
First, sign in to your Magento admin account. In the admin panel, follow Stores > Settings > Configuration:
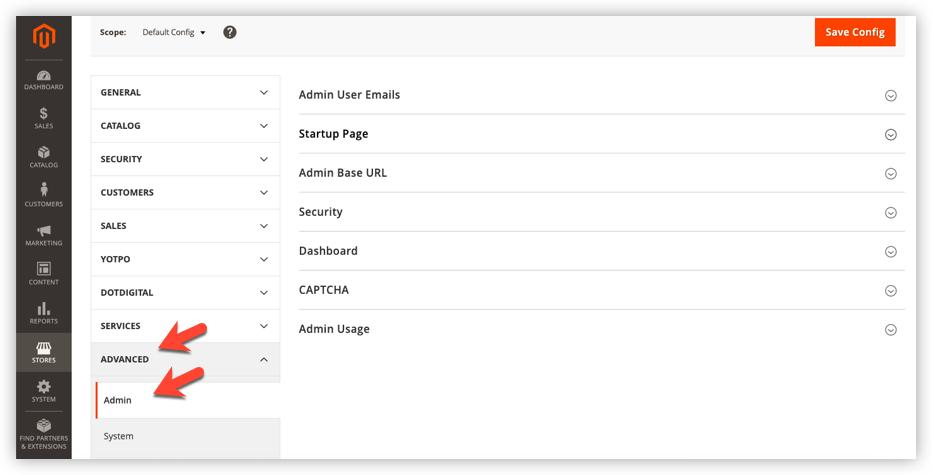
In the left sidebar panel, click Advanced > Admin:
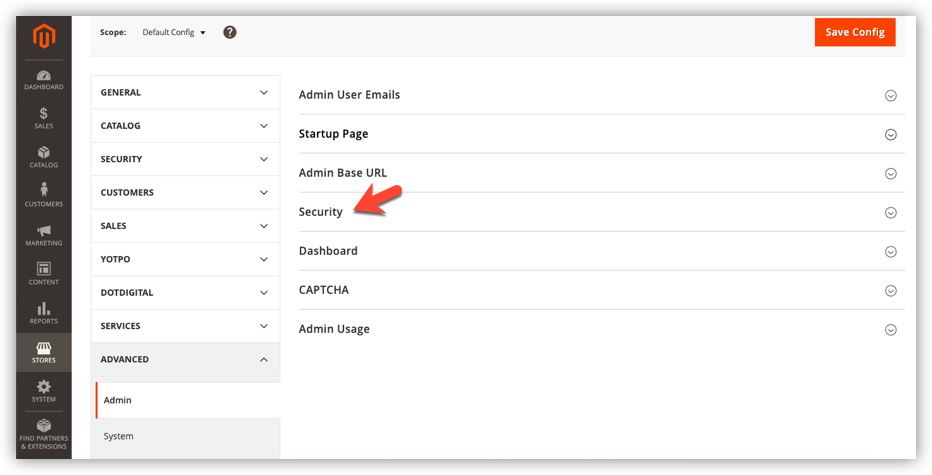
And in this menu, span Security section:
Step 2: Set up Your Desired Magento 2 Admin Session Lifetime
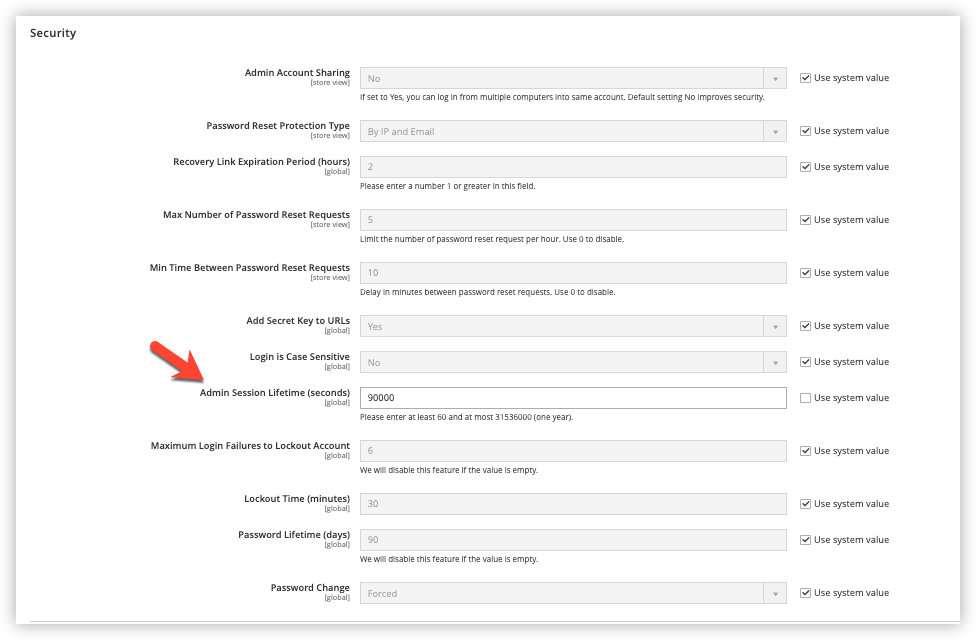
Before starting your configuration, please untick the checkmark Use system value. Enter your admin session lifetime value you want to the field. The acceptable minimum value is 60 (equivalent to 1 minute), and the maximum value is 31536000 (equivalent to 1 year).
Step 3: Click Save and Go to Refresh the Magento Cache
After configuring, click the Save button in the top right corner:
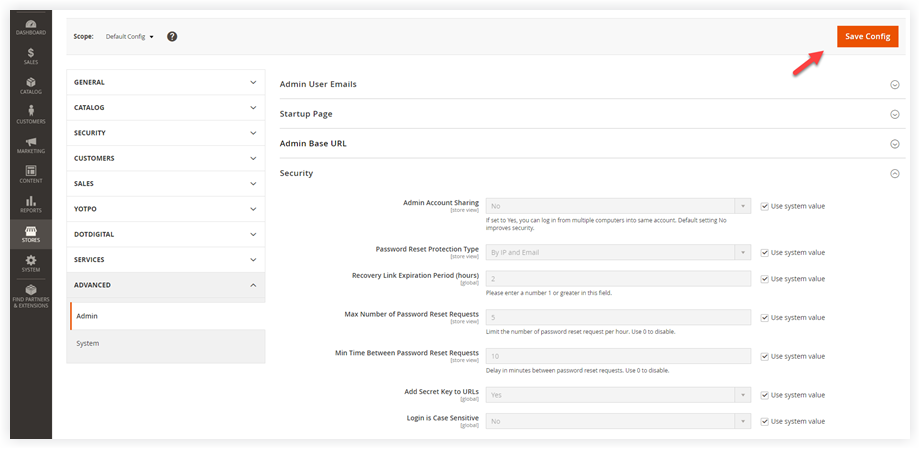
Then, you need to delete the Magento cache. There are 2 ways for you to do it.
Way 1: Refresh cache from the admin panel.
- Navigate to System > Cache Management:
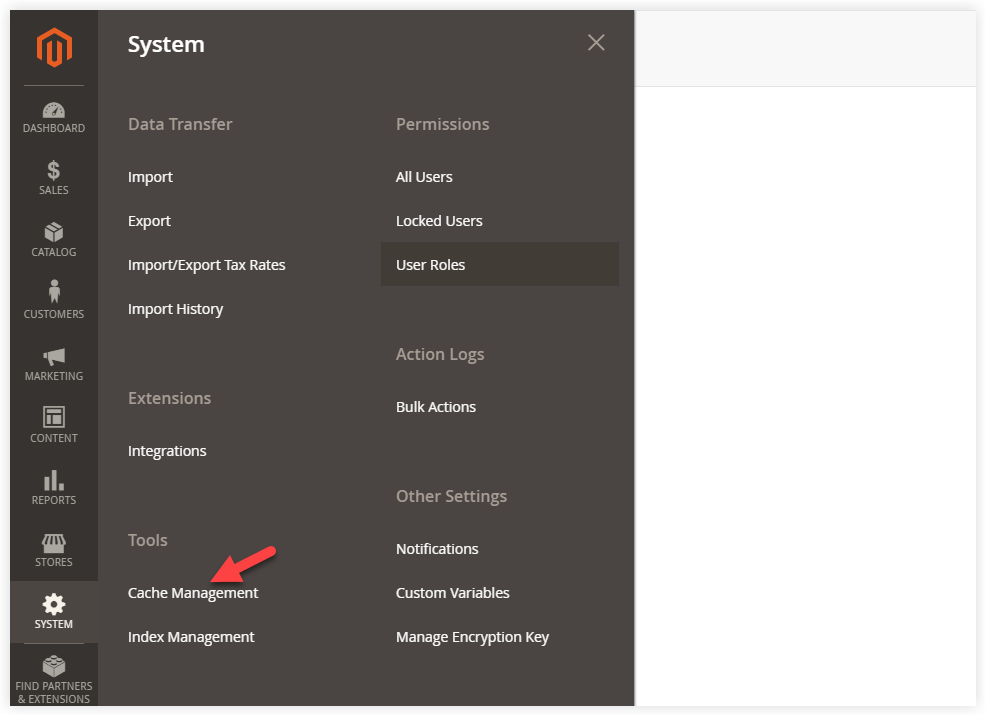
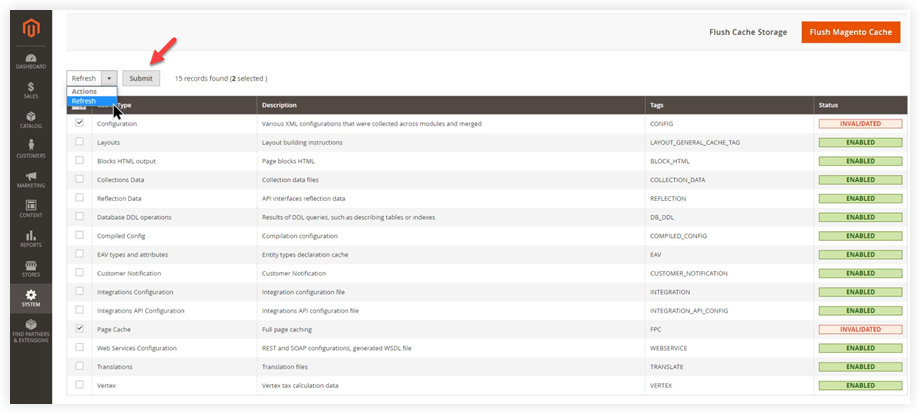
- In the cache management grid, look at the column Cache Type. Tick Configuration and Page Cache:
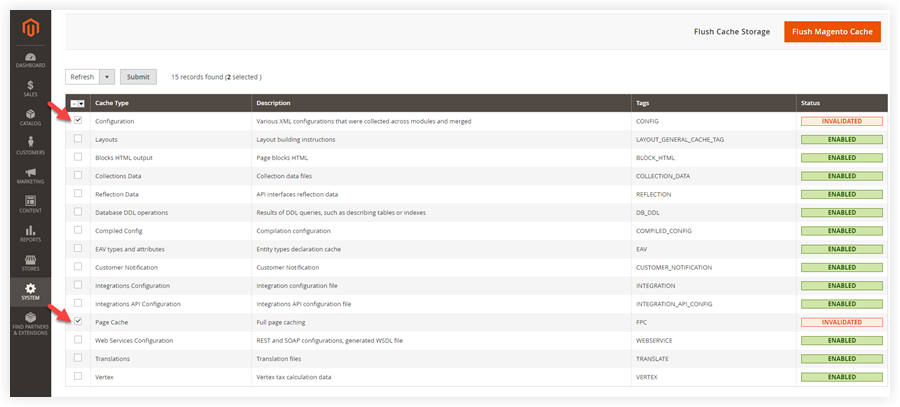
- Select Refresh, and then click Submit:
Way 2: Refresh cache using the following command lines:

Strengthen Your Magento 2 Store With Robust Magezon Extensions
In addition to taking care of your store protection, there are millions of other spots to improve your store workflow. You should visit our best-in-class Magento 2 extensions, use demos and extensions for free, and enjoy our best support service.

Optimize Your Magento Store With Powerful Extensions
Looking for fast, efficient and well-coded extensions to build or optimize your Magento stores for sales boosting? Then visit Magezon website and grab necessary add-ons for yours today!
 Magezon Blog Help Merchants Build Comprehensive eCommerce Websites

