 Magezon Blog Help Merchants Build Comprehensive eCommerce Websites

Dear customers,
We would like to announce a very important update related to Ninja Menus. Ninja Menus has been updated from version 1 to version 2. This update includes an extensive change in both UI and UX along with new functions to optimize menus builder and managing process.
Let’s take a closer look at these changes
1.New builder interface: Magezon Core Builder
7. 8 pre-designed menu templates
1. New Builder Interface: Magezon Core Builder
The biggest change is a completely new builder interface built based on Magezon Core Builder (Magezon Core Builder is the one based on which we developed our builder extensions including Magezon Page Builder, Single Product Page Builder, and Blue Form Builder)
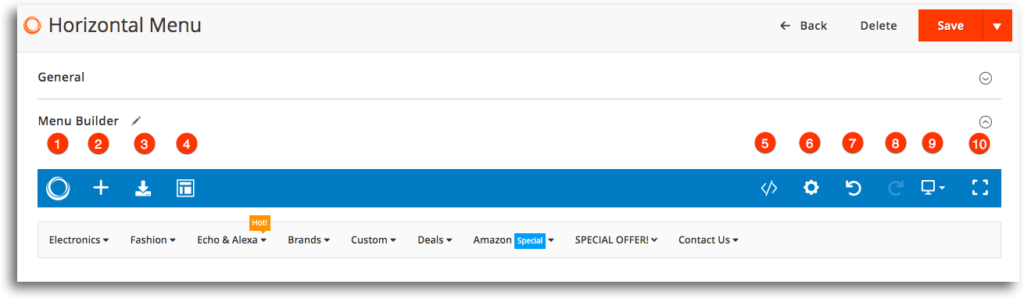
From left to right, we have some buttons with their function like below:
– (1)Magezon Logo drives you to the official Ninja Menus page.
– (2) Plus button lets add a new item into the menu.
– (3)Import button helps easily create the normal type of menu with existing Category list.
– (4)Template button shows the list of 8 common pre-defined menus for you to choose.
– (5)Coding button lets you copy or page lines of code to save time configuring.
– (6)Setting button is useful for developers to customize the menu.
– (7) + (8) Undo and redo whenever you make a mistake.
– (9)Responsive button (with 5 common devices listed) lets you choose the screen mode to configure individually.
– (10)Widen button lets you see the builder in full screen and configure the menu in a bigger viewport.
Then, the builder interface of Ninja Menus 2 now looks like this:
2. Element List
Ninja Menus version 1.0 got 7 elements as follow:
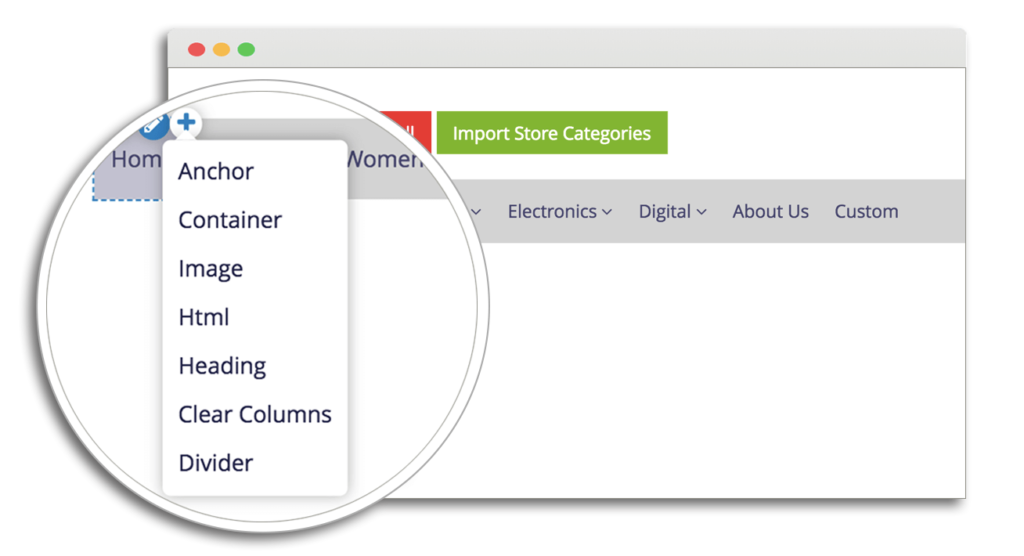
However, in Ninja Menus 2.0, we updated them and make the menu customization faster and easier with 11 elements supported.
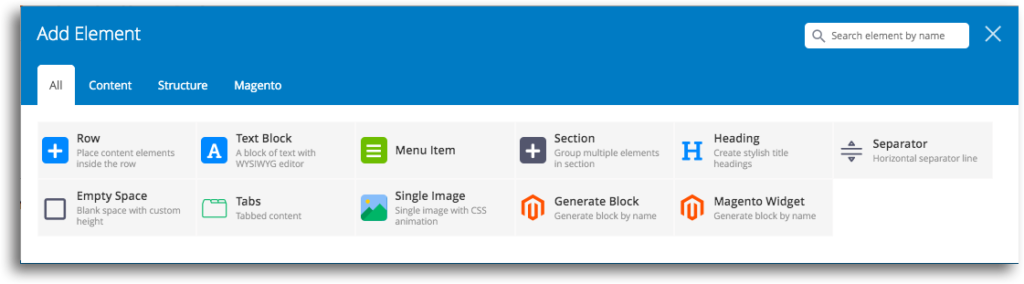
Row, Text Block, Section, Heading, Separator, Empty Space, Tabs, Generate
Block, and Magento Widget are the basic elements that are described carefully in this guide.
Now, come to our specific new updates.
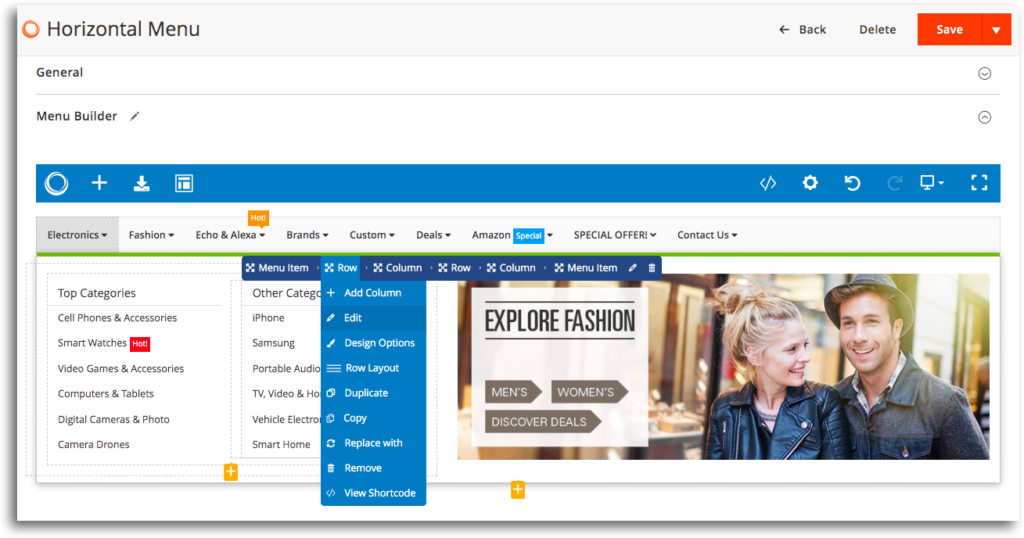
3. Menu item
3.1 New link type supported: Product link
In the previous version, we just support 3 types of link: Custom link, CMS page link, and Category link.
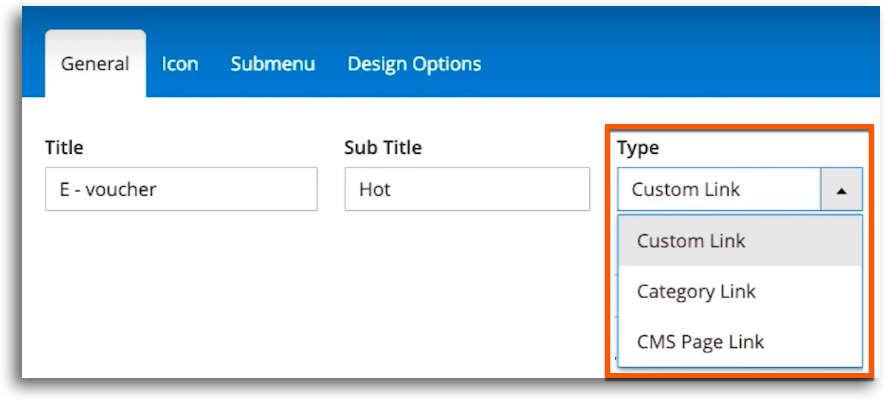
In this new one, we provide you another choice: Product link in order to widen the ability to custom your submenu.
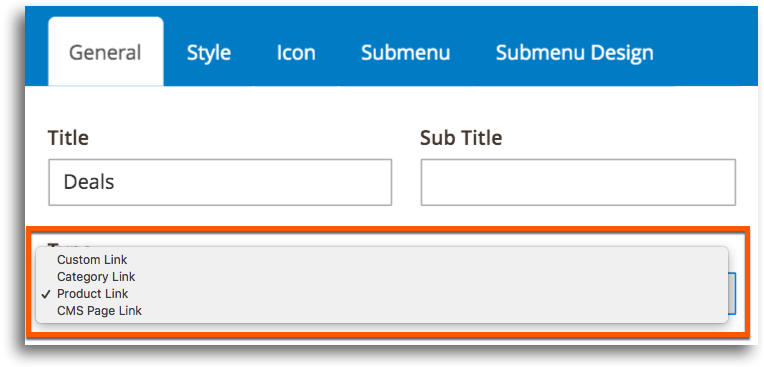
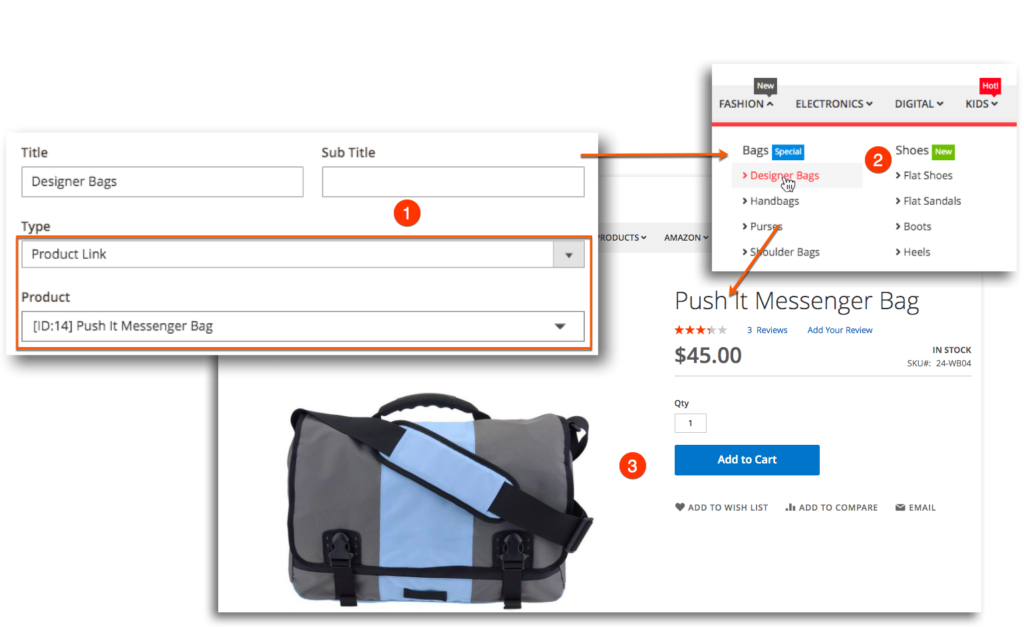
Using this type lets you link the menu item to the desired products directly. As you can see below:
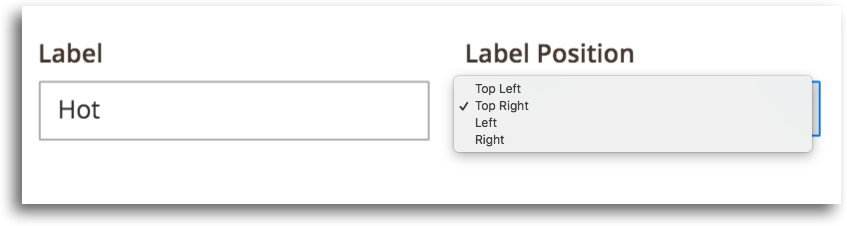
3.2 Label
Now it’s easier to set up some eye-catching labels on the menu items without the help of other extensions
Tons of colorful labels to grab your customers’ attention right from the start (Hot, On Sale, Special, New, Featured, etc) and 4 existing positions.
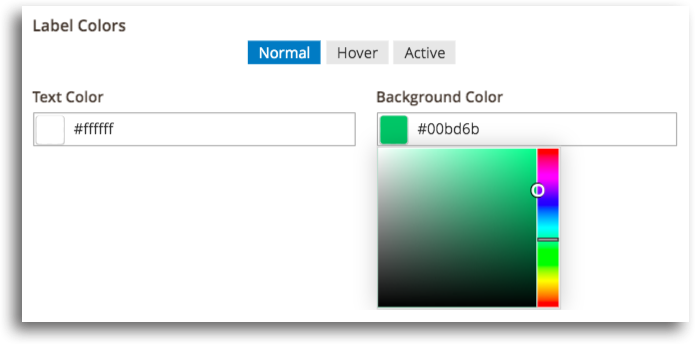
Not all, within the Style Tab, configure the Label’s color easily with the built-in palette
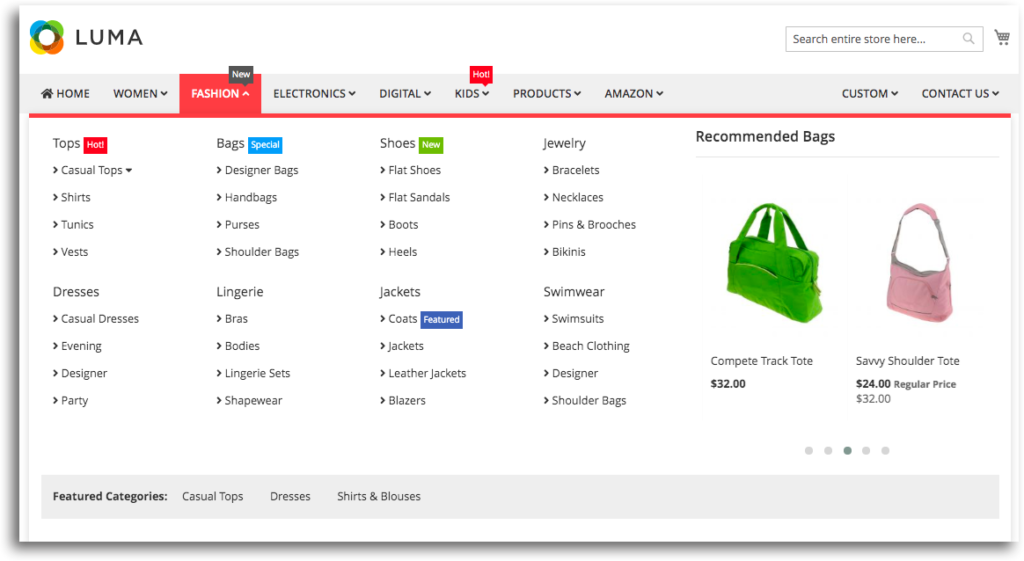
Create attracting labels like below at ease
3.3 Other Options
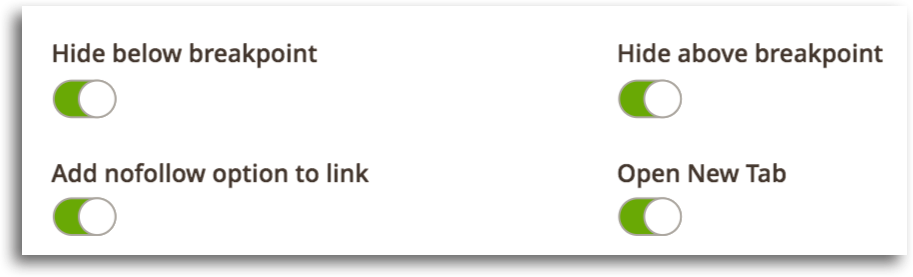
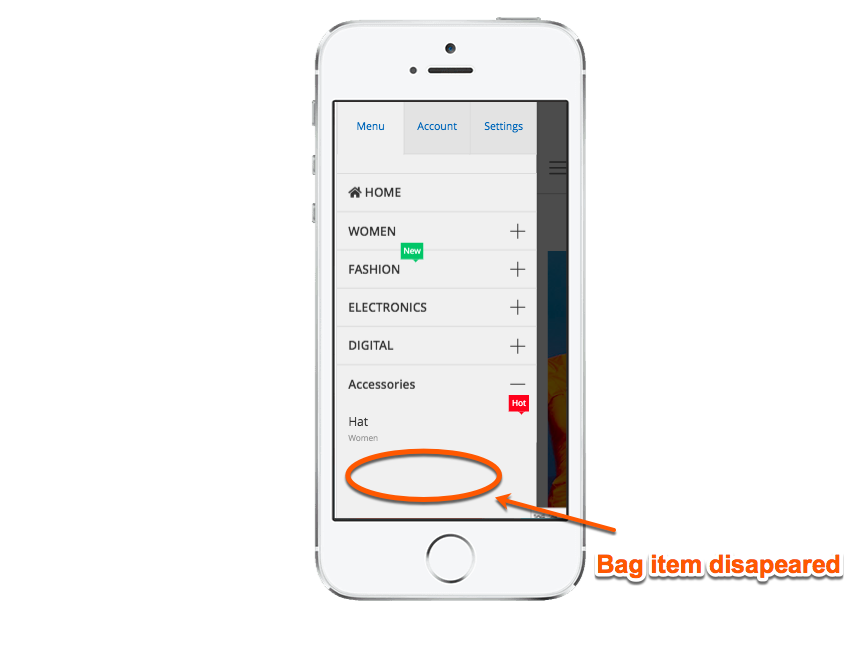
Hide below/ above the breakpoint
The previous version didn’t really get this function. We just had a section to decide the screen size (in pixel) in which the menu will switch to mobile display mode.
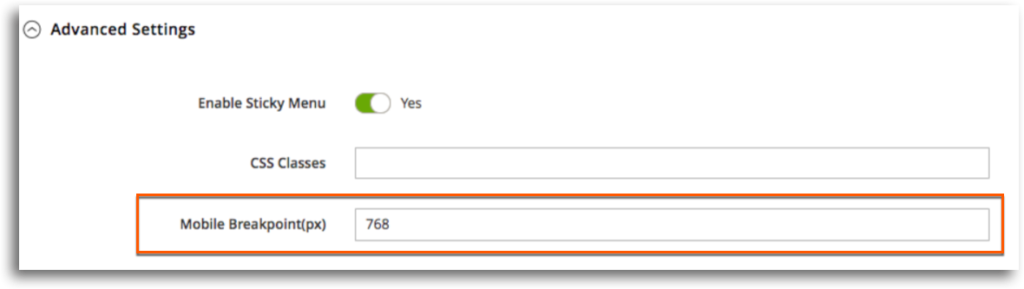
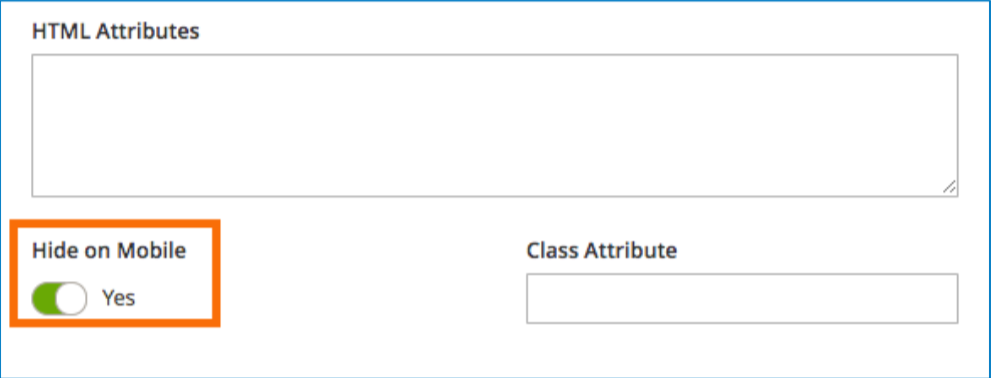
This version comes with buttons also lets you decide whether to display the menu in both modes (Mobile and Desktop)
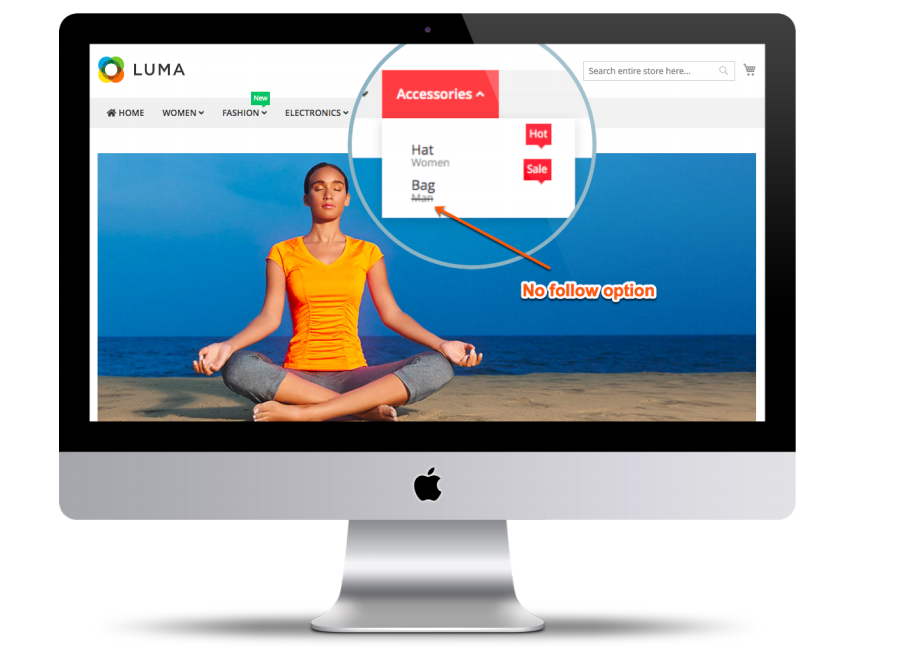
Add no-follow option to link
These on-off buttons let display the links that you want to show they are no-follow.
Open New Tab
Previously, Ninja Menus got this function. However, you have to choose from a drop-down list like this
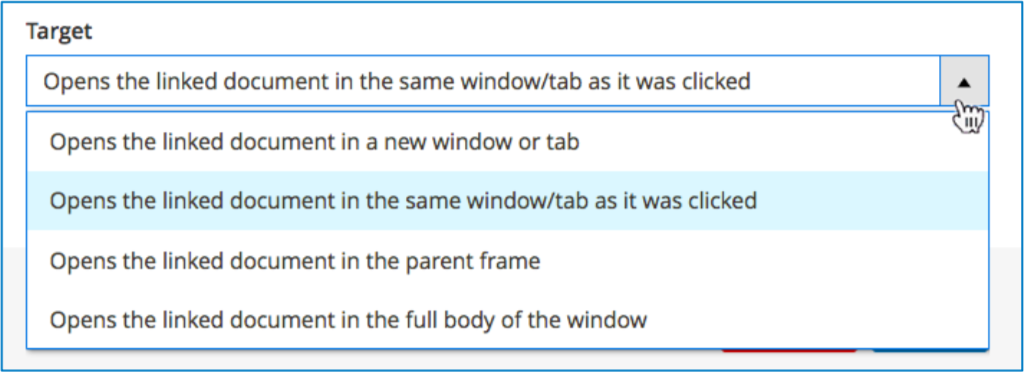
This 2.0 version, we just have a simple on-off button. It’s somehow simpler to use.
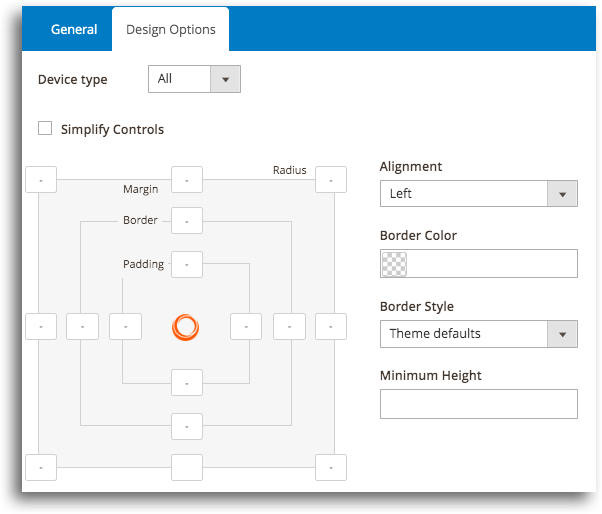
4. Single Image
The previous Image element has a simple interface and less function. It just lets you choose the image source, set the Alternative Text, Title Tag, Width and Height.
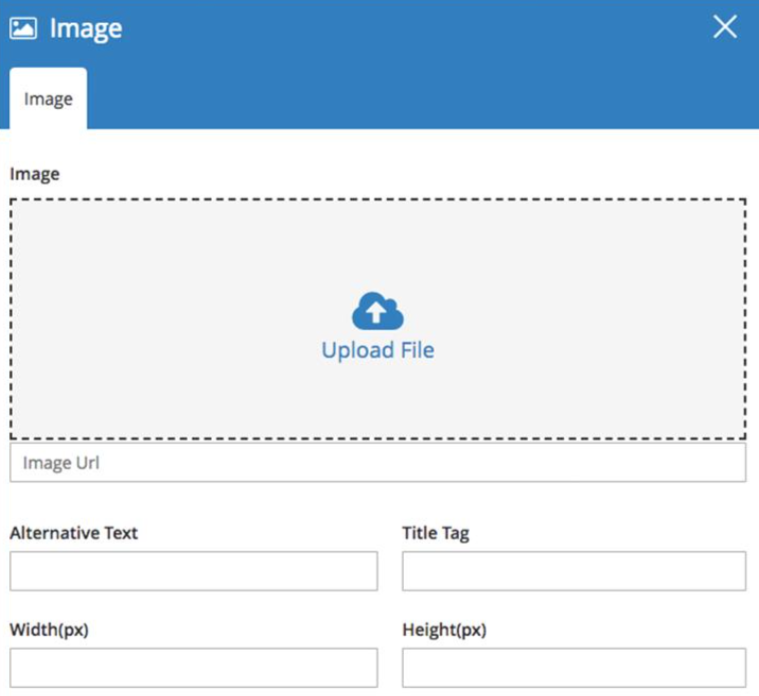
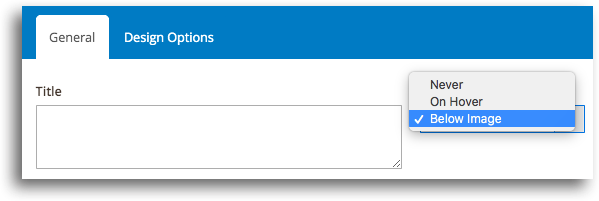
The Single Image element of version 2.0 comes with full option setting. Including 2 separate tabs in the pop up (General and Design Options) with the following Update
In the General Tab
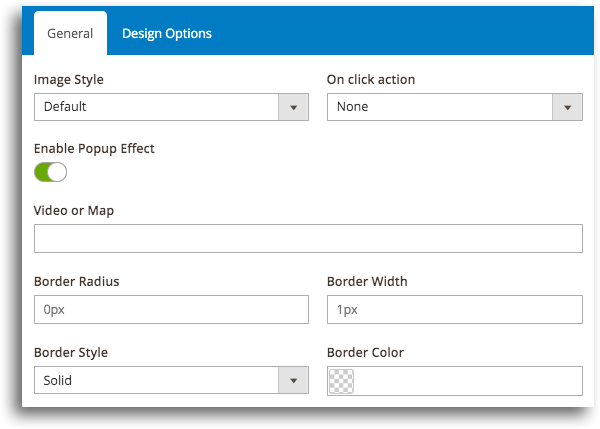
Design Options tab
5. Drill-down menu
While Ninja 1.0 supports 3 common menu types, Ninja 2.0 brings you another one named Drill-down menu.
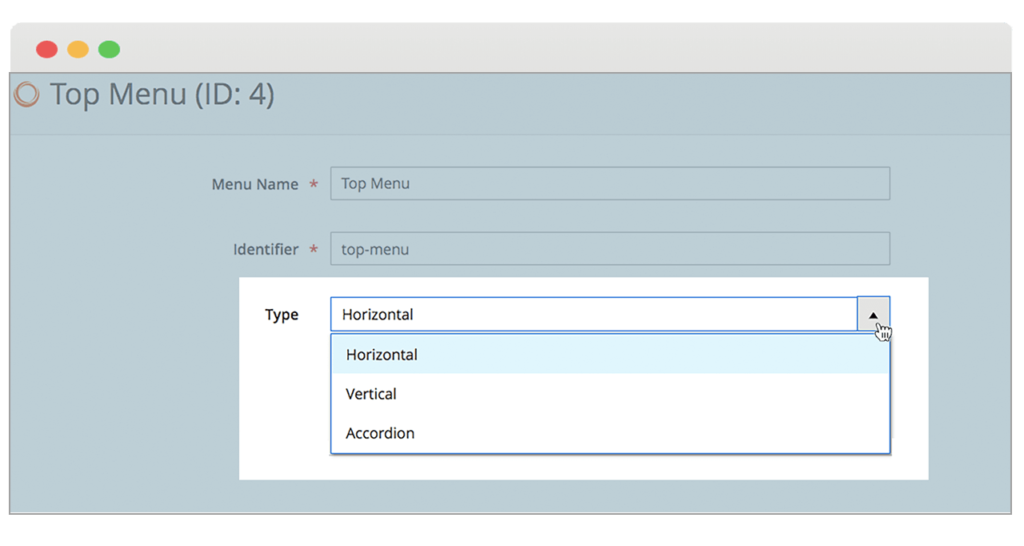
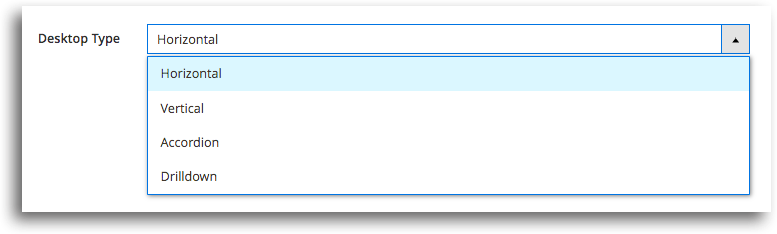
Plus, Ninja 2.0 lets you choose the menu type that will be displayed on the mobile mode (Below the breakpoint) from the list of 2. In Ninja Menus 1.0, everything will automatically turn to Accordion Menu on mobile devices.

6. Create multiple store views and languages
Ninja Menus 2.0 updates the structure of the store view. While in the previous version, each store view gets its own builder interface, the new structure lets you edit all the store views at the same builder. All you need to do is just select a language from the list then edit the text. Click Save after finishing then everything done.
Quickly come through these following images to see the difference:
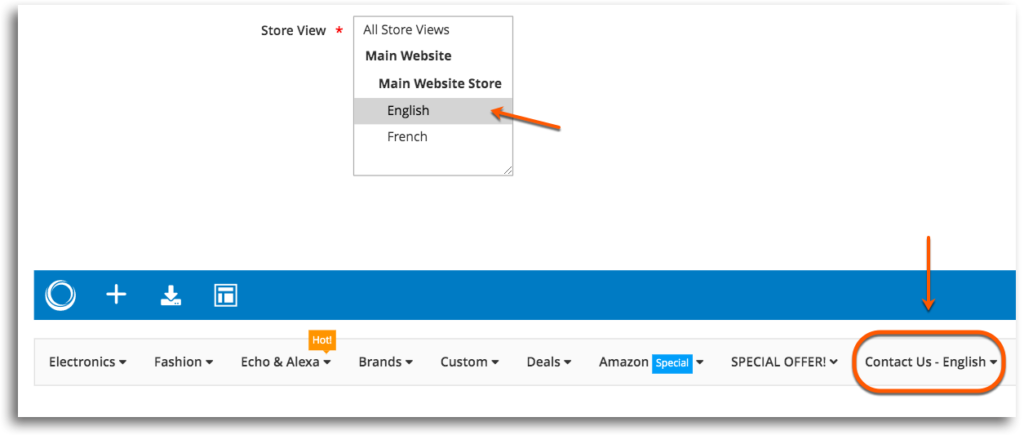
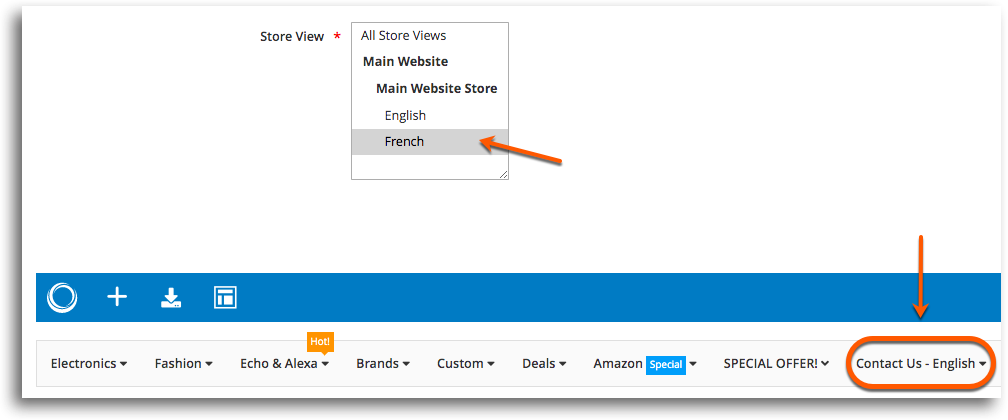
The text doesn’t change when you choose different languages cause it keeps the last editing result. However, after saving, you can see the difference in the storefront.
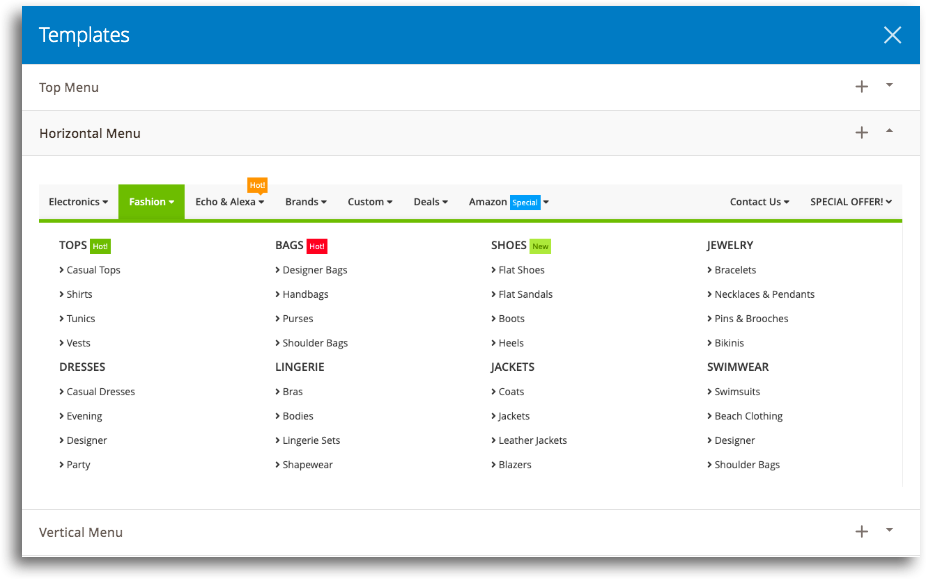
7. 8 pre-designed menu templates
When you get no idea about how to create a menu, it would be hard for you to have a quick start. However, Ninja Menus 2.0 supports 8 common menu templates that help set up a new one at a wink of an eye.
Even Ultimo or Porto menu can be added easily as they are listed on the templates.

Also, preview the look of the menus just by clicking on them. The drop-down shows exactly how it looks on the storefront.
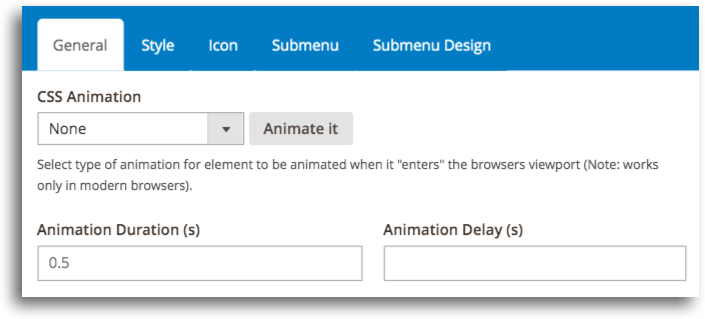
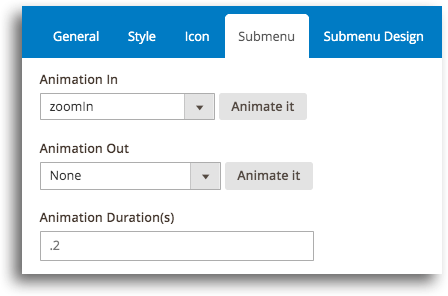
8. Animation effect
In this new update, you can choose the appearing animation for the element. The list of more than 80 Animation effects can help grab more attention. Not all, set the Duration and Delay for them to match your own web design.
In General Tab
In Submenu Tab
We hope that the above updates of Ninja 2 can meet more of your expectations and bring you a better experience. Feel free to contact us if you have questions or need support.


