| What is a Magento 2 mega menu? How the mega menu affects E-commerce? How to create mega menu in Magento 2? 1. If you have coding skill 2. You have no idea about code Final words |
What is a Magento 2 Mega Menu?
To know how to create mega menu in Magento 2 using Ninja Menu extension, we must understand its definition.
A mega menu is a menu type with a drop down interface that appears while hovering over a link or defined area. This dropdown interface usually contains all options, categories of the website. Not all, when talking about mega menu, we all know it’s a “big” one with anchor links, headings, images and be formed in complicated layout.

How the mega menu affects E-commerce?
As we all know, navigation menu is the maps for all the E-commerce website. Thus, it should be the best practices of ergonomics. Unless, it could lead your site with a high bounce rate.
If you get a site with hundred or thousands of products, you should add mega menu to help organise them in your navigation system. It helps you deal with products, categories, icons or even pictures.
Good mega menu has many effects on your site such as:
- It gives you chances of making the profit
- It’s mobile friendly
- It saves you time and gives customers trust
- Satisfy most demanding customers
Read more: 5 Reasons Why You Need a Navigation Menu
How to create mega menu in Magento 2 using Ninja Menus
1. If you have coding skill
In case you want to create a custom Magento Mega Menu, you have to know a little about code. If you are a coder, here you go! Customize it using these following steps in this article.
2. You have no idea about code
A totally new to Magento? Have no coding experience and be afraid of complex things? Don’t know how to create a mega menu in Magento 2? Then use the intuitive drag and drop interface of Ninja Menus, everything done so quickly
Let’s see how:
a. Create a new mega menu in the normal way
Add new menu
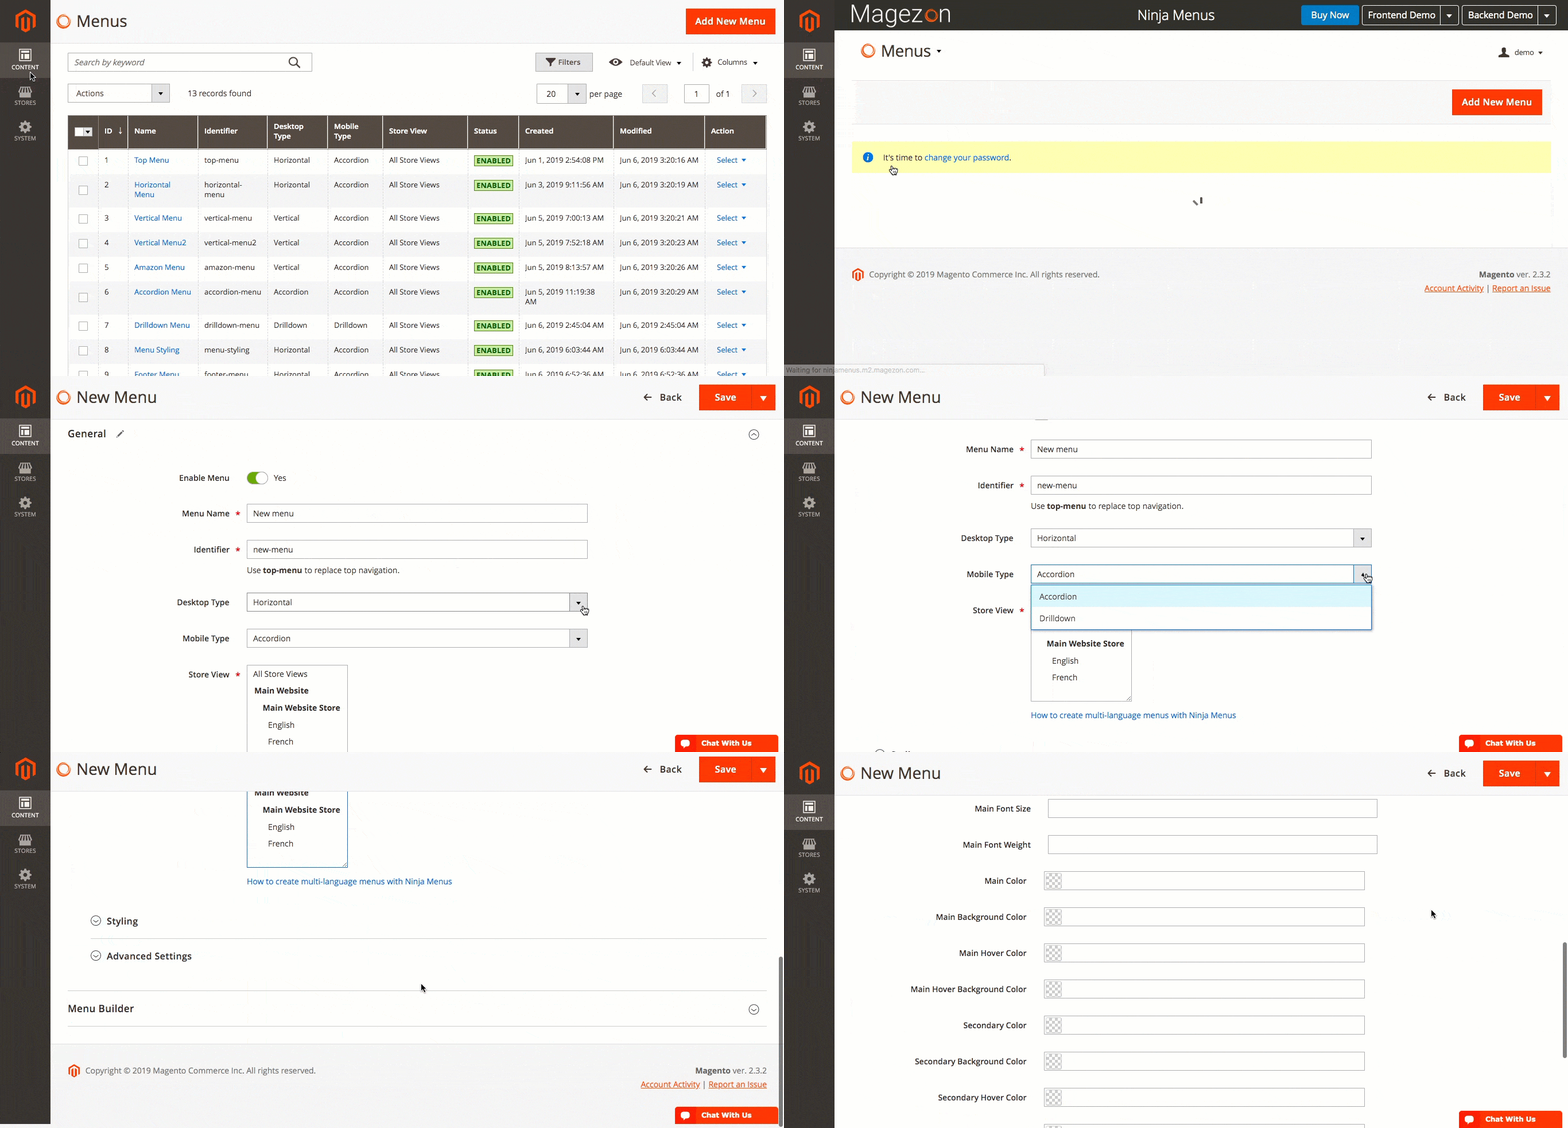
First, from the backend admin of Ninja Menus, navigate: Content > Menus > Add New Menu
Then, set its General Infomation in the General Tab. Configure the Styling Tab with the color palette supported. This is a brand new function updated recently, more about it, read this article.

Configure a simple mega menu
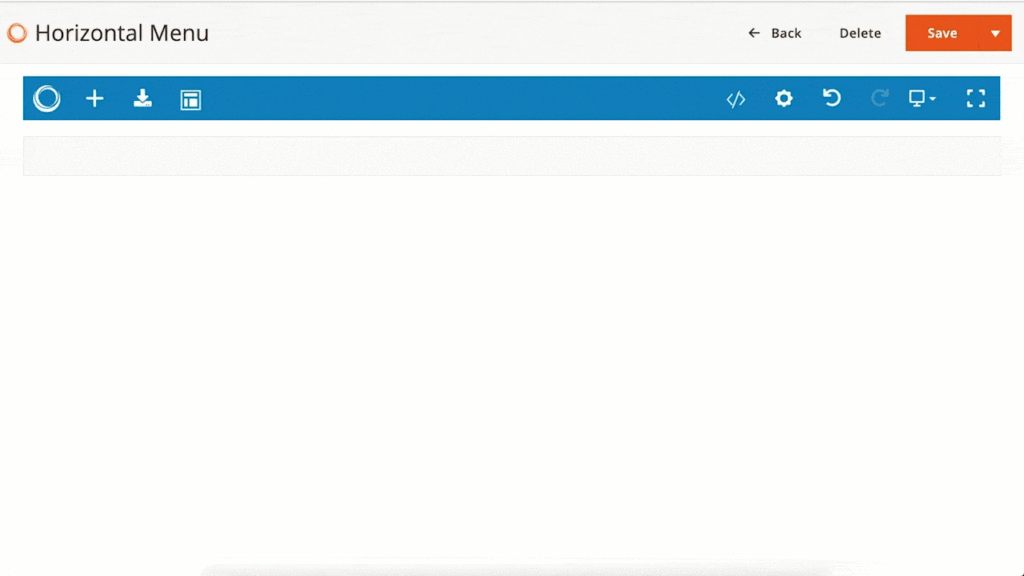
Add Menu Item for the main menu. Hover on the Menu Item, hit “Add Element” then design the submenu.

With the help of drag and drop gesture, you can absolutely configure the menu layout without code. Create as many beautiful menu layouts as you want.

2.2 Use menu templates to create menu at once
If you get no idea where to start, or you just want something typical, our pre-designed templates can help. Though they are pre-designed, believe me, it’s far more than you can imagine.
The menus designed are all very attractive and professional. All you need to is just click all the Template symbol, then select your desired menu.

Final words
Hope this article helps if you are newbies to Magento. With Ninja Menus’ help, the question “How to create mega menu in Magento 2” is not a tough question any more.
Then, why are you still hesitating? Get Ninja Menus today to save more time for your business.

Try Ninja Menus FREE demo today
Quickly create well-designed Magento mega menus like a pro in a short time using intuitive drag-and-drop builder. No coding skills needed required.
 Magezon Blog Help Merchants Build Comprehensive eCommerce Websites


