Magento grouped product is a set of related items that are displayed on the same page. From that set, customers can purchase any item in their desired quantity.
Often, store owners take advantage of group products to present, advertise and sell many kinds of products on one page, along with a good price. Thus, the chance of your customers buying more products will more likely increase. Besides, the product type helps customers find good matches more quickly than browse your website to get each item. This will sure improve customer satisfaction.
Those are the key points about this product type you should keep in mind before learning how to create a Magento 2 grouped product with 7 main steps as below.
Table of contents
- Step 1: Select the Product Type
- Step 2: Select an Attribute Set
- Step 3: Fill in Required Fields
- Step 4: Fill in Optional Fields
- Step 5: Assign Products to the Group
- Step 6: Fill in the Product Details
- Step 7: Publish the Product
- Step 8: Configure the Thumbnails in the Shopping Cart (If Needed)
- That’s How to Create Magento 2 Grouped Products
| Read more: 6 Product Types In Magento 2: A Simple, Clear Explanation Magento Grouped Product vs Bundle Product: Key Differences |
Step 1: Select the Product Type
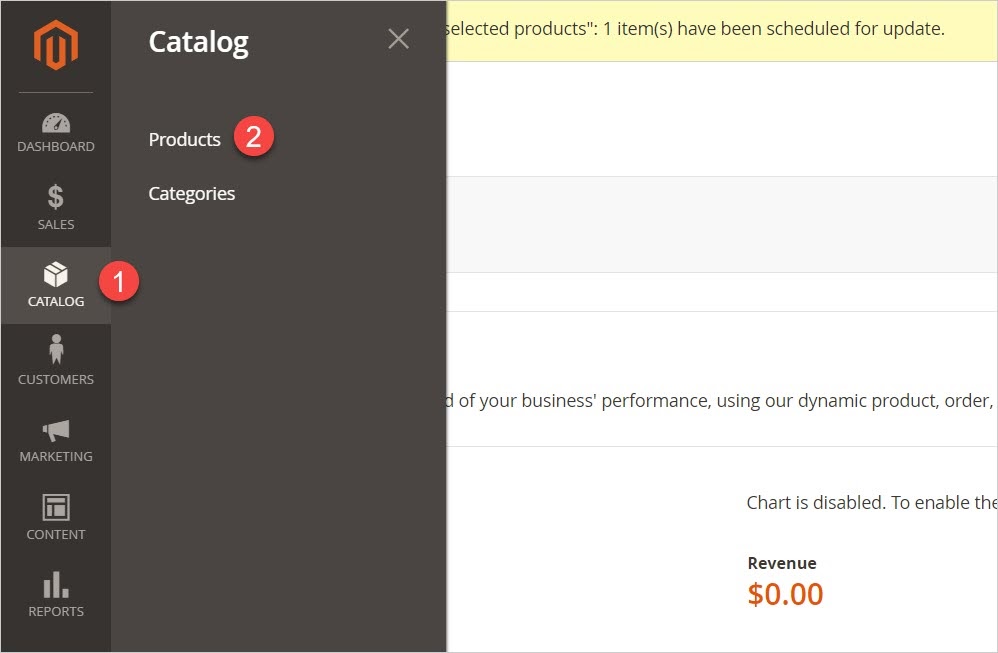
- From the Admin sidebar, go to Catalog. Then Products.
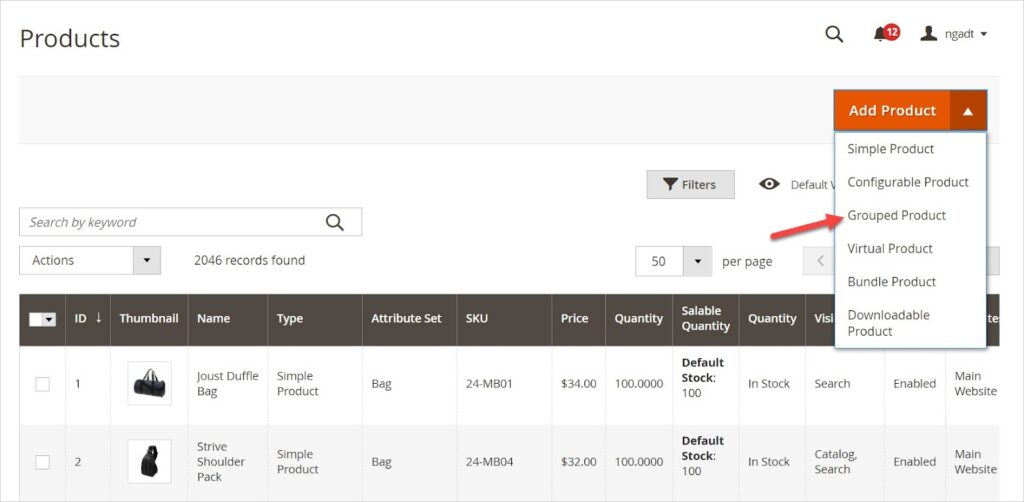
- Next, choose Grouped Product from the Add Product menu.
Step 2: Select an Attribute Set
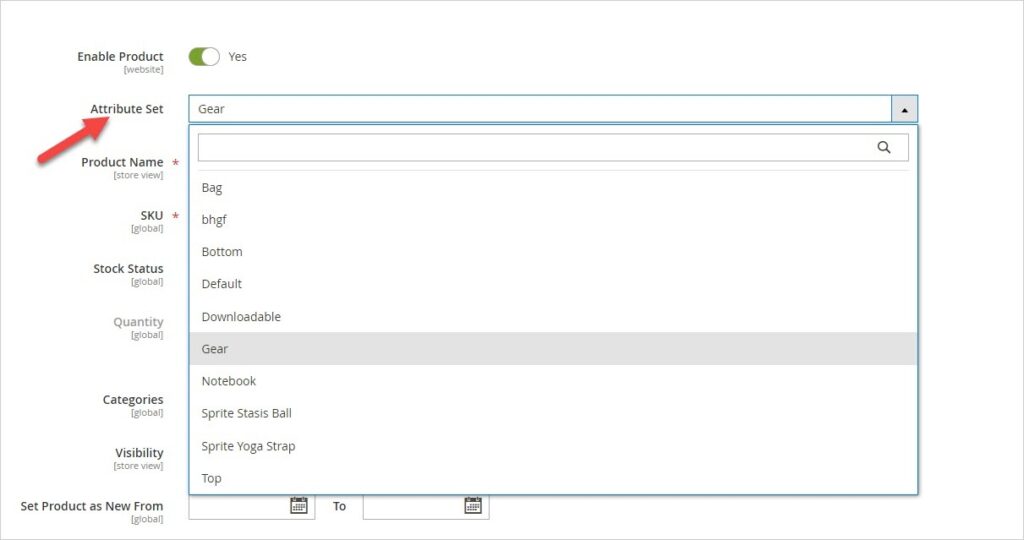
Choose an attribute set for the product from the drop-down list. Or, type your desired one in the Search box. The changes will be updated in some seconds.
Read more: 5 Minutes To Create Magento 2 Attribute Sets
Step 3: Fill in Required Fields
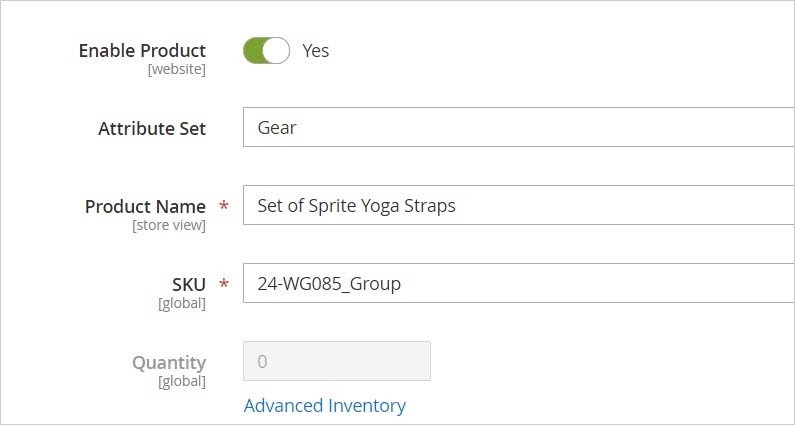
- Product Name: Enter the name of the product
- SKU: Use the default SKU or enter the new one.
- Quantity: You can’t set the quantity for the grouped product because it is based on the quantity of each child product in the group. That is also the reason why the Price field doesn’t appear when you create a grouped product.
- After completing all required fields, toggle Enable Product to No because the product is not yet finished. Hit Save and continue to edit.
Step 4: Fill in Optional Fields
- Stock Status: You can skip this field because the stock availability of the grouped product depends on the one of each child product.
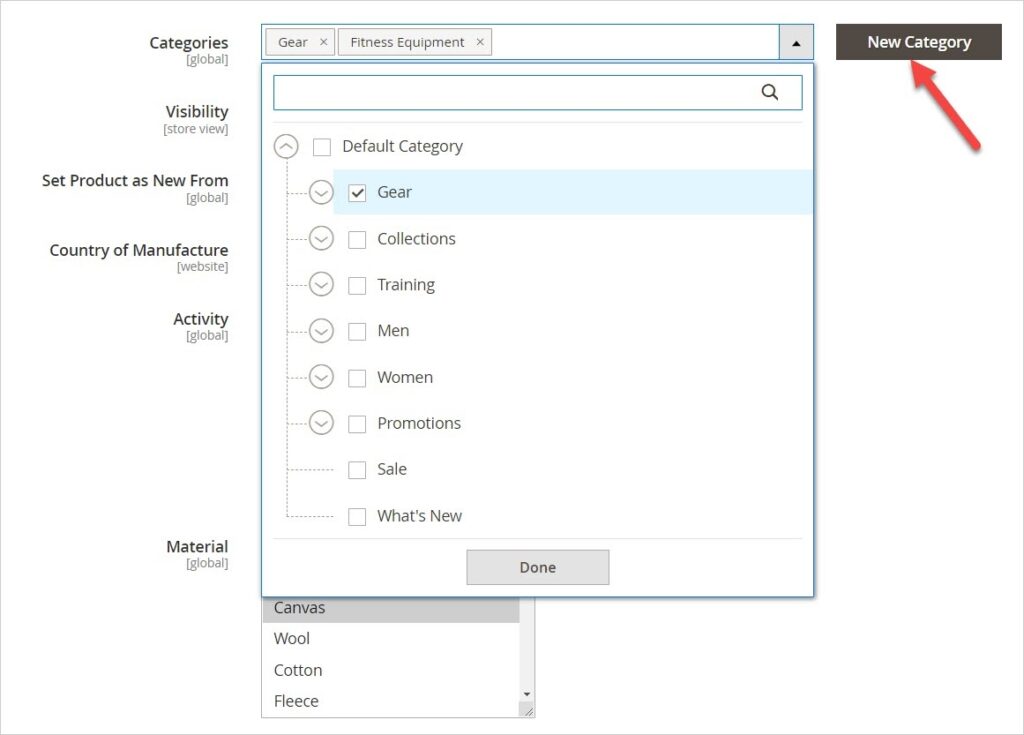
- Categories: Select the category from the drop-down list to assign the product to. If you want a new one, click on the New Category button.
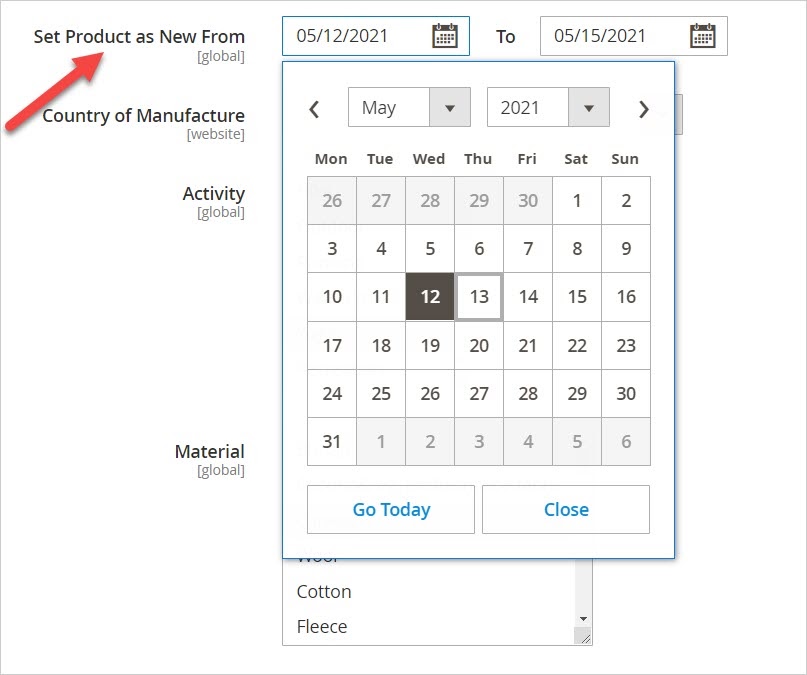
- Set Product as New From… To: Set the product as “New” within a date range (From..to).
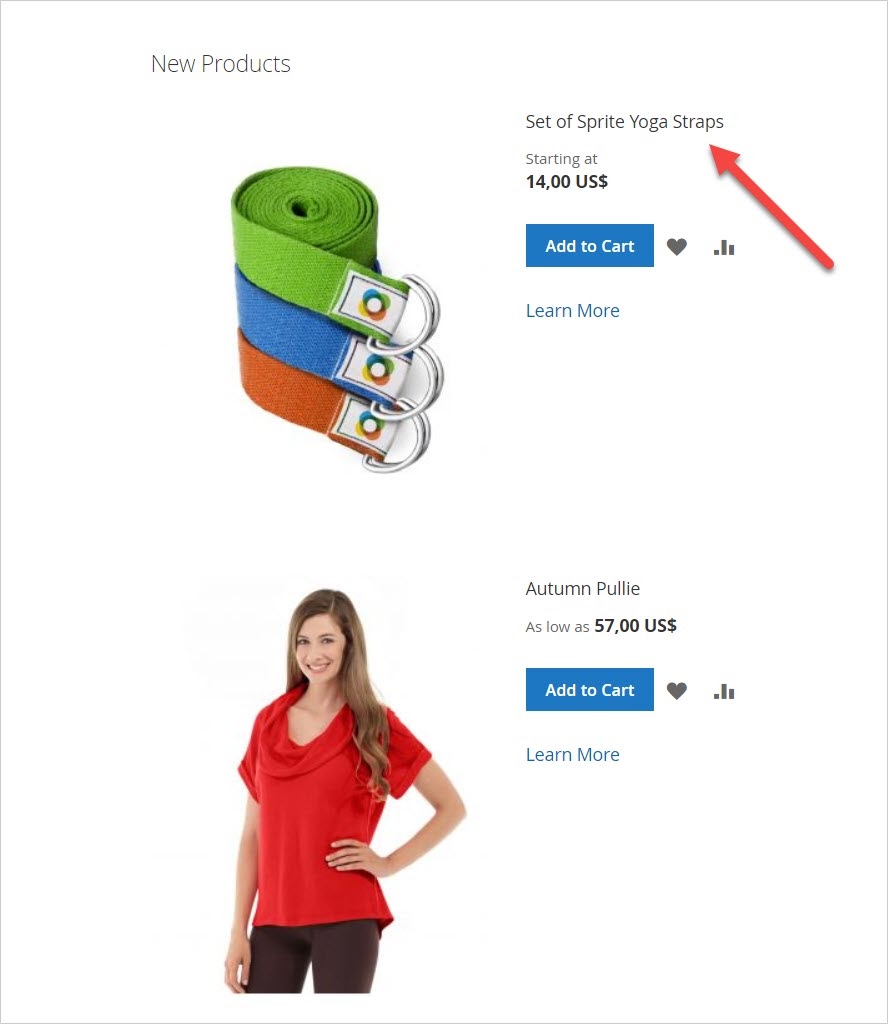
Here is the result in the New Product section of the Homepage:
- Visibility: Choose the position in which you want the product to appear.
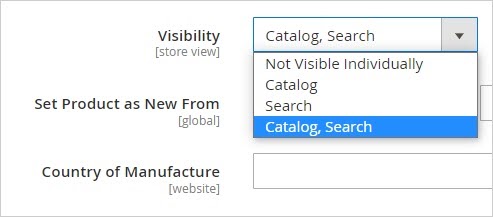
- Not Visible Individually: When you choose this option, customers can’t find the product on the Catalog and Search page. Often, this option will be applied to the product which is a part of other products. (A simple product XX is a child of a grouped product). This helps to hide the duplicate content on your site.
- Catalog: Make the product visible on the Catalog page
- Search: Make the product visible on the Search page.
- Catalog, Search: Enable product visibility in both Catalogs and Search pages.
- Country of Manufacture: Determine where to manufacture the product if needed.

Optimize Your Magento Store With Powerful Extensions
Looking for fast, efficient and well-coded extensions to boost sales for your Magento stores? Then visit Magezon website and grab necessary add-ons to optimize yours today!
Step 5: Assign Products to the Group
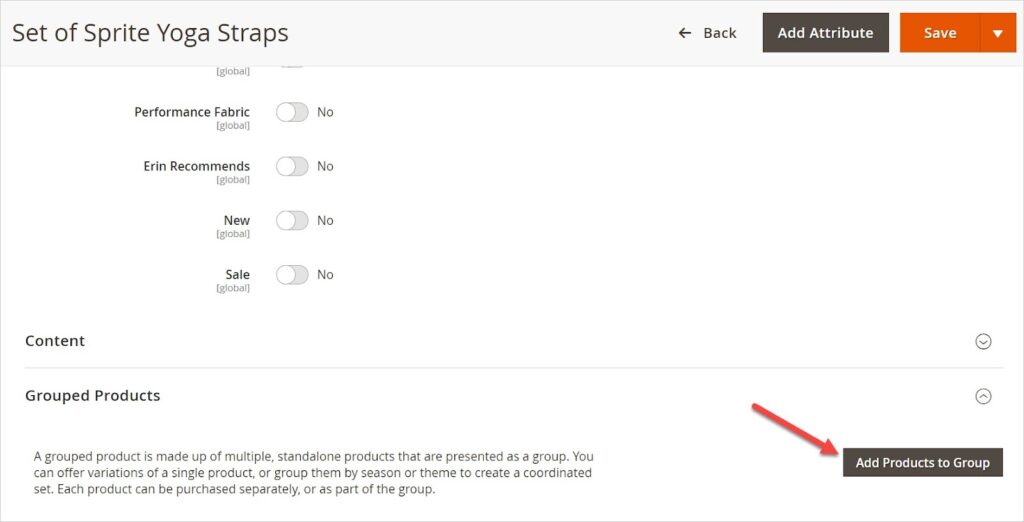
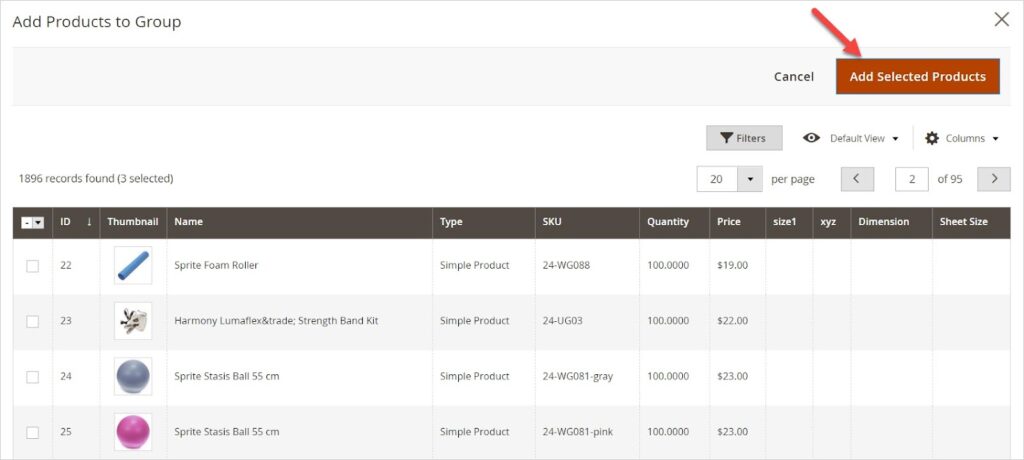
- Scroll down to the section Grouped Products. Then click on the Add Products to Group button to include items in the group.
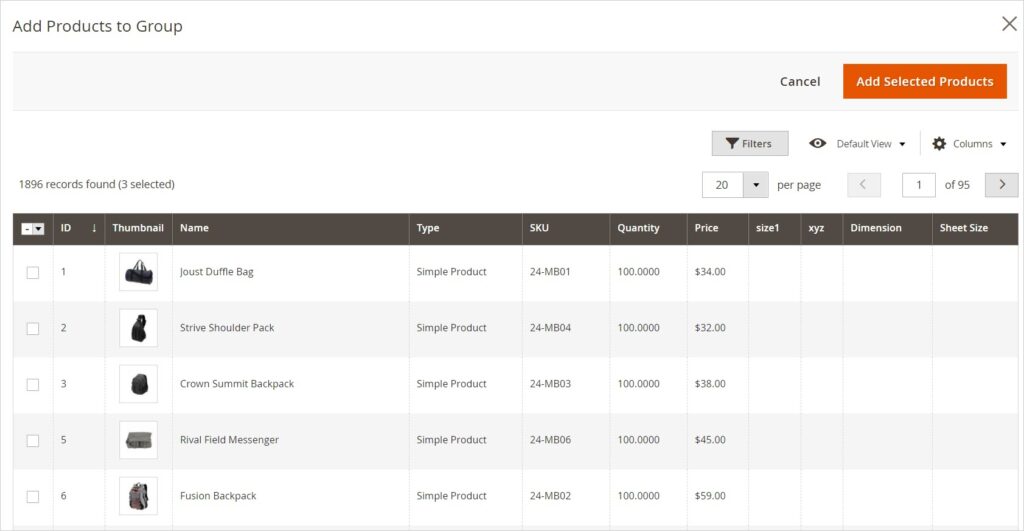
- A product grid appears after that.
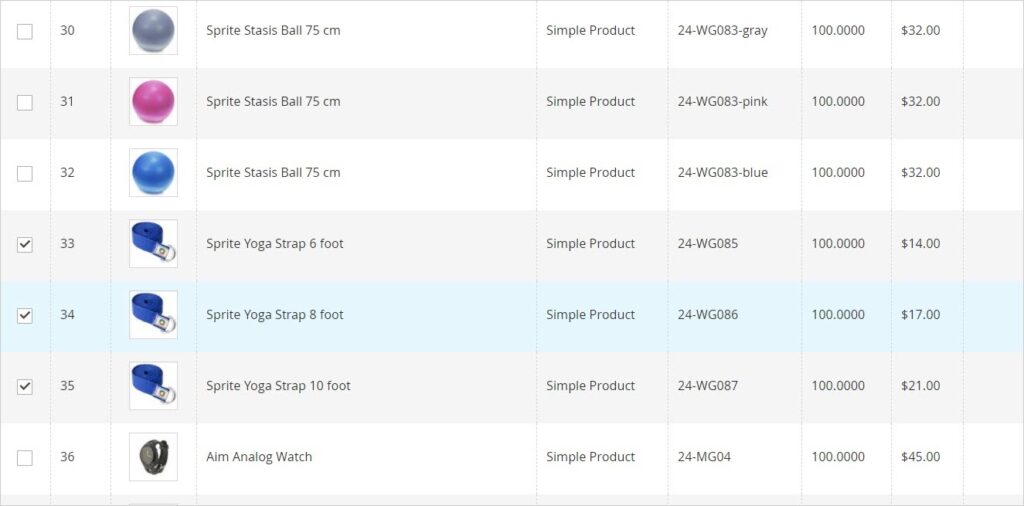
- Tick the checkboxes of the products you want to add to the group.
NOTE: You can use Filter control to find your wanted products.
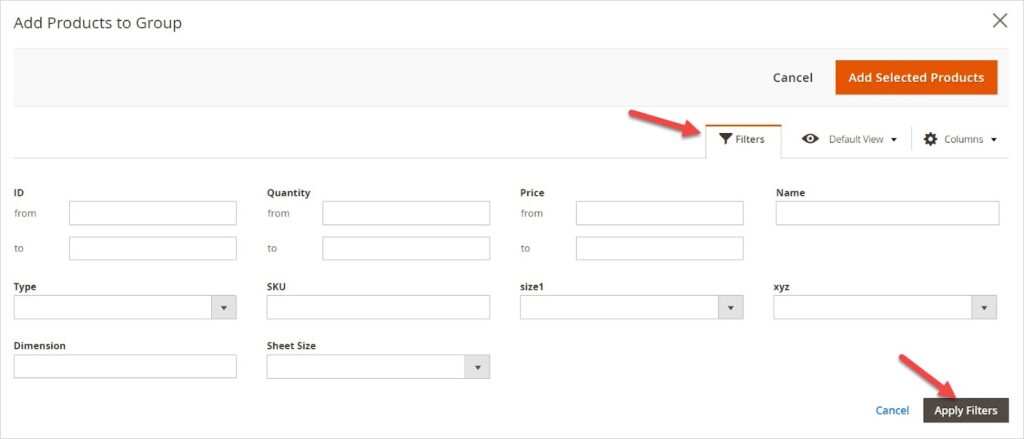
- Click the orange Add Selected Products in the upper-right corner to add the selected products to the group.
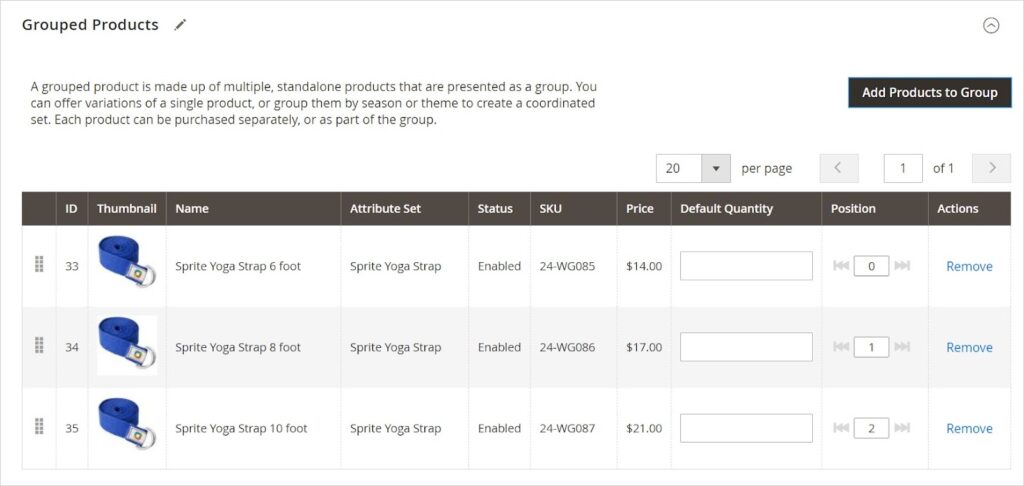
Now, these products are in the Grouped Product section.
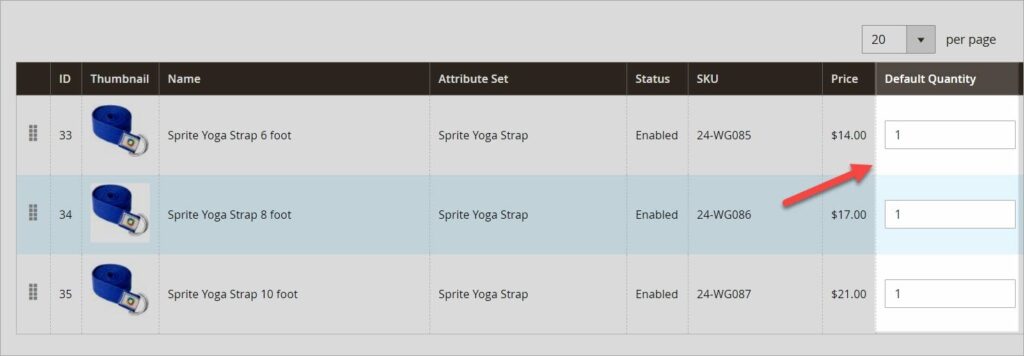
5. Enter the default quantity for each product in the front-end.
- In the backend:
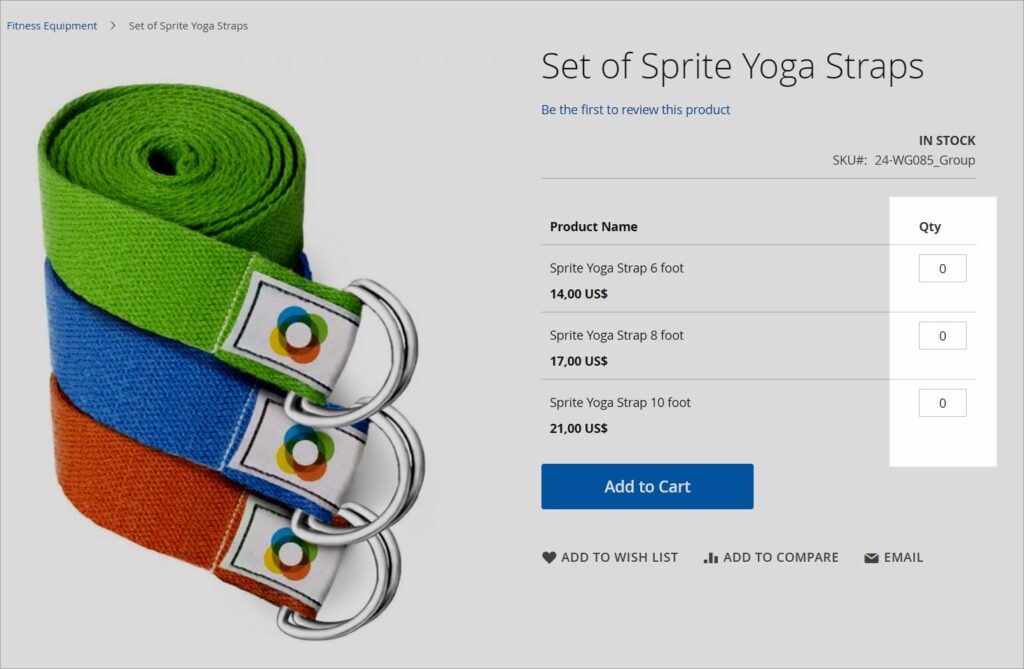
- Here is the result of the front-end:
6. Drag and drop the product to change the order of the product.
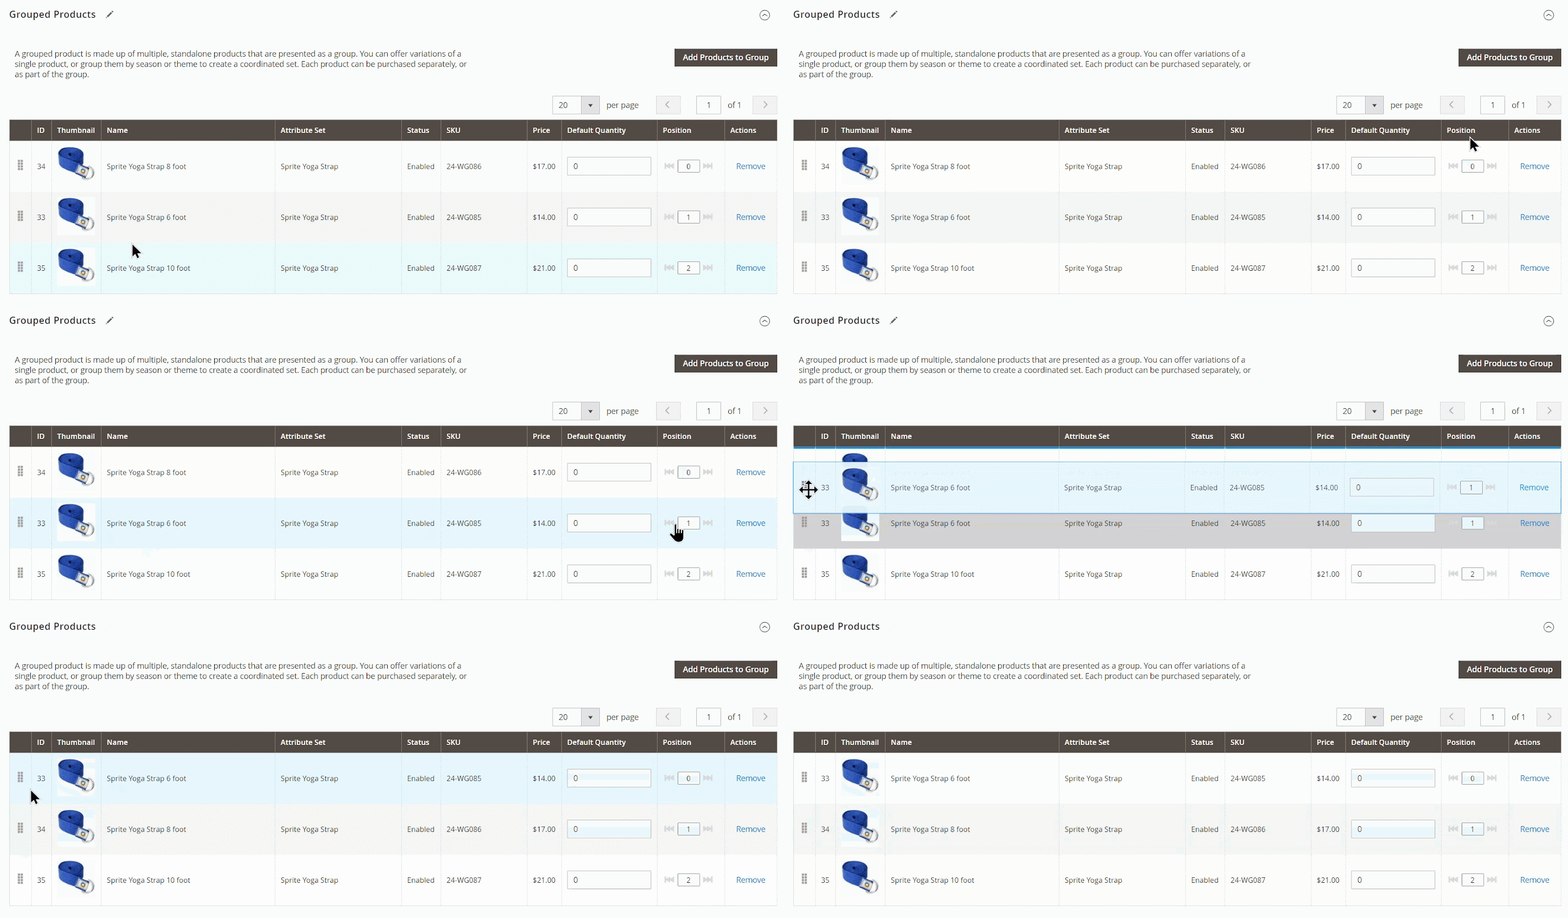
7. Remove the product by clicking on Remove in the Action column.
Step 6: Fill in the Product Details
Comple the information of the following section. You can refer to Step 5 of the blog “How to Create a Magento 2 Simple Product – The Ultimate Guide.”
- Content
- Images and Videos
- Search Engine Optimization
- Related Products, Up-Sells, and Cross-Sells
- Products in Websites
- Design
- Gift Options
Step 7: Publish the Product
- If you’ve finished all sections of this product and everything is okay after checked, toggle Enable Product to Yes.
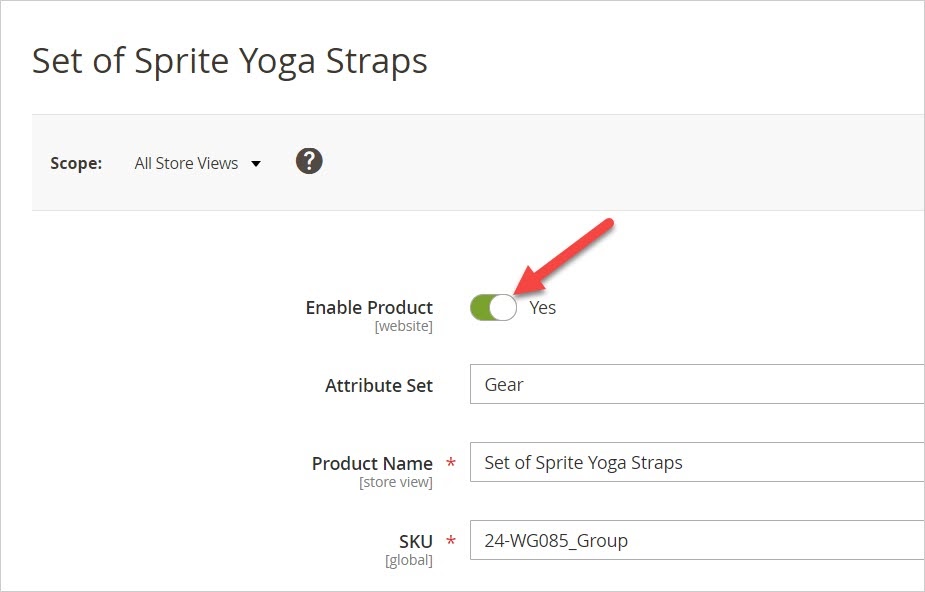
- To save the product, click one of the following:
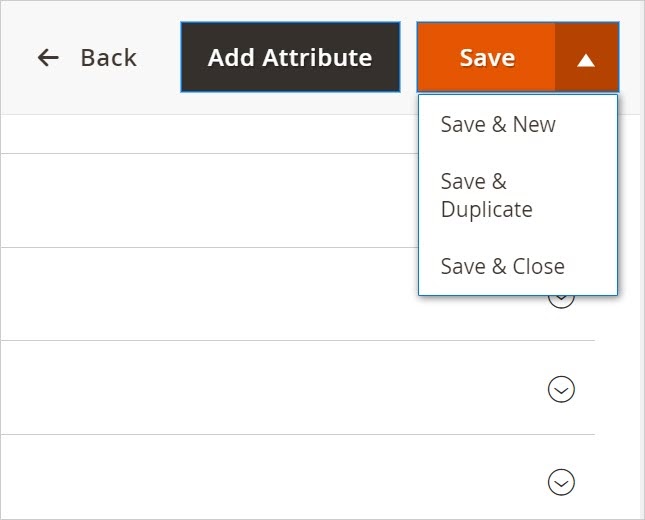
- Save & New: Save the product and continue to create a new one. The page you will be landing on after saving is the New Product page.
- Save & Duplicate: Save the product and duplicate the original product. You will be redirected to the duplicate product. Everything in the product edit page is similar to the original one but SKU and URL key.
- Save & Close: Save the product, and you will be redirected to the product grid.
- To view the product in the front-end, click Customer View from the drop-down menu of your account.
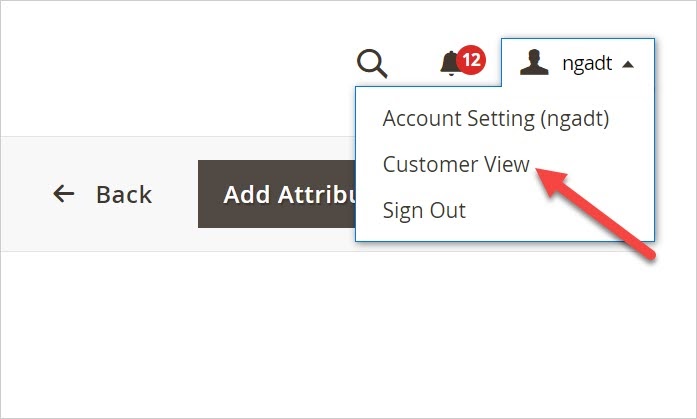
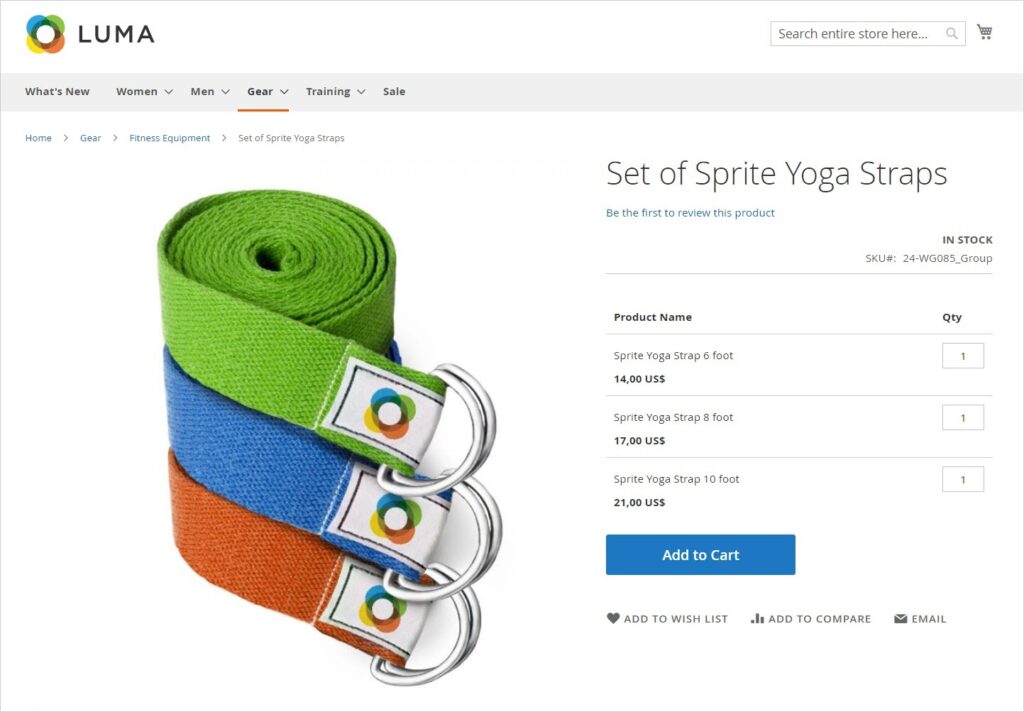
And here is the grouped product:
Step 8: Configure the Thumbnails in the Shopping Cart (If Needed)
In case you need to display the exact image for each child product as a thumbnail in the shopping cart, follow the following steps:
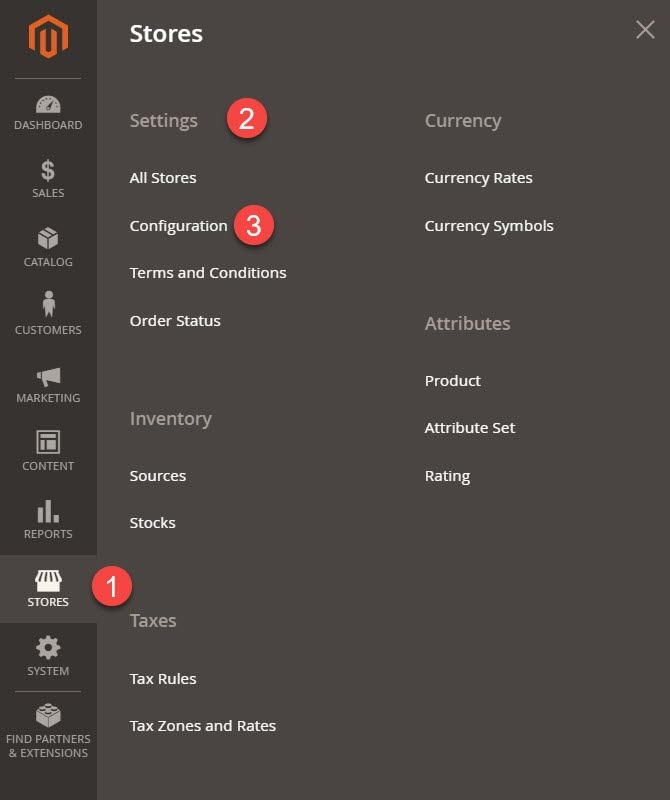
- Go to Stores > Settings > Configuration
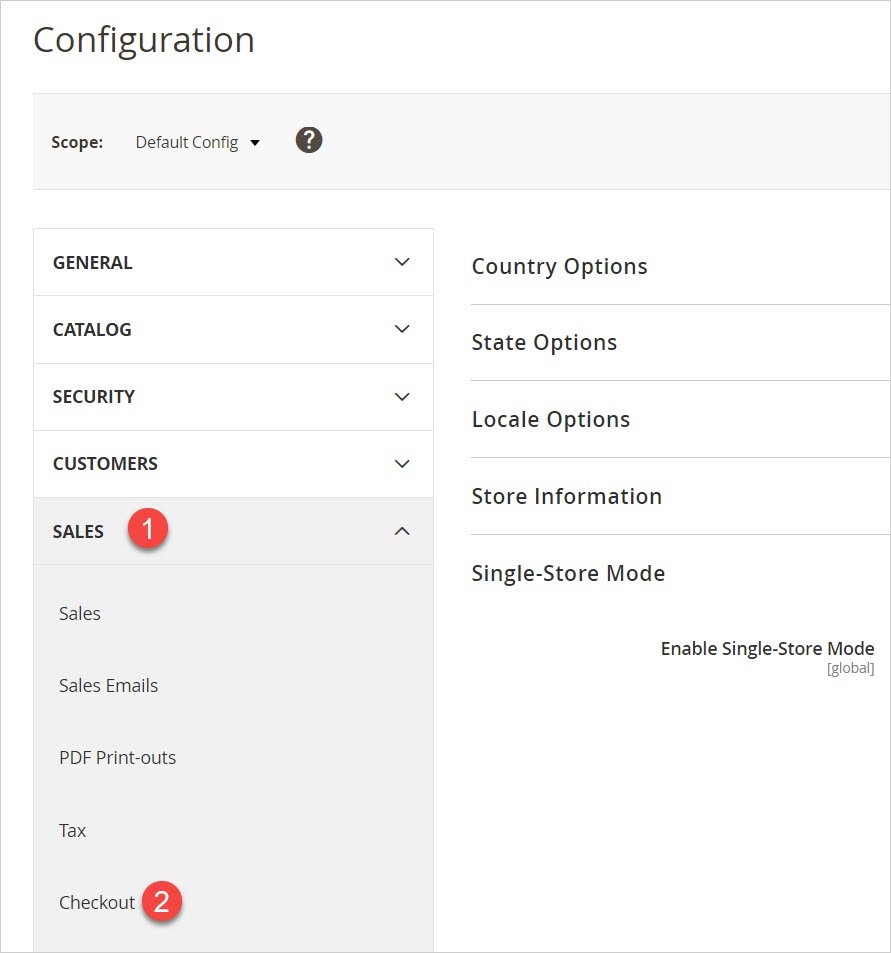
- From the left panel, expand Sales > Checkout.
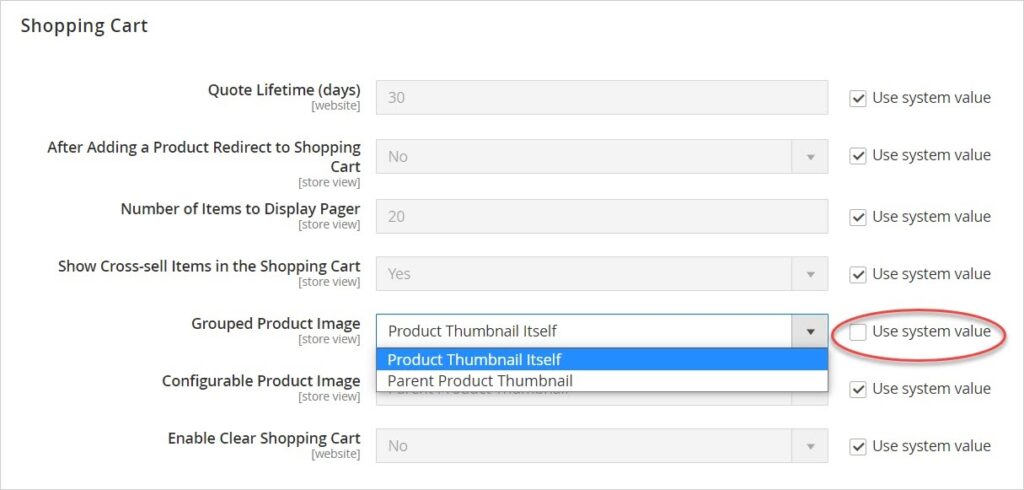
- Expand the Shopping Cart.
- At the Grouped Product Image, untick the checkbox “Use system value”. Then, choose Product Thumnail Itself.
That’s How to Create Magento 2 Grouped Products
To sum up, the main aim of this blog is to help you all understand how to create Magento 2 grouped products with ease. Hope you have a firm grasp of it and apply it to your Magento store to the fullest. Have any questions or ideas about this topic? Do let us know.
And, don’t forget to follow our Magento tutorial series for more useful yet interesting tutorials.
Visit the Magezon website to pick the rich feature and affordable extensions for your Magento store.

Optimize Your Magento Store With Powerful Extensions
Looking for fast, efficient and well-coded extensions to boost sales for your Magento stores? Then visit Magezon website and grab necessary add-ons to optimize yours today!
 Magezon Blog Help Merchants Build Comprehensive eCommerce Websites

