
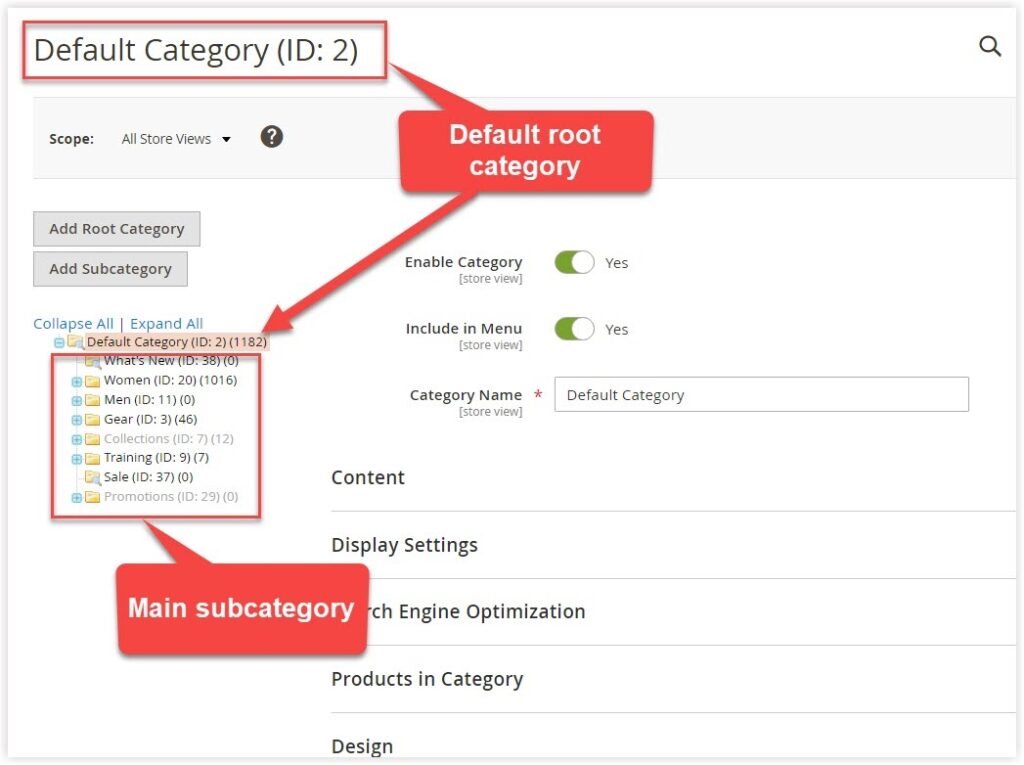
The root category is considered the highest level of the catalog. The main categories in the top navigation of the front store are nested right below the root category. This highest-level category is assigned a name, but it has no URL. That’s why customers can see the main categories and their children but the root category. You can create many root categories for the website with multiple stores. Every store can, however, be applied only one category root at a time.
Below are 3 steps to create a new root category in Magento 2 store.
Table of contents
Step 1: Create a New Root Category
From the Admin sidebar, navigate to Catalog → Categories.
Then, you will be redirected to the Default Category page. The default category itself is a root category and the only one in the current store.
| Read more: How to create a new category in Magento 2 |
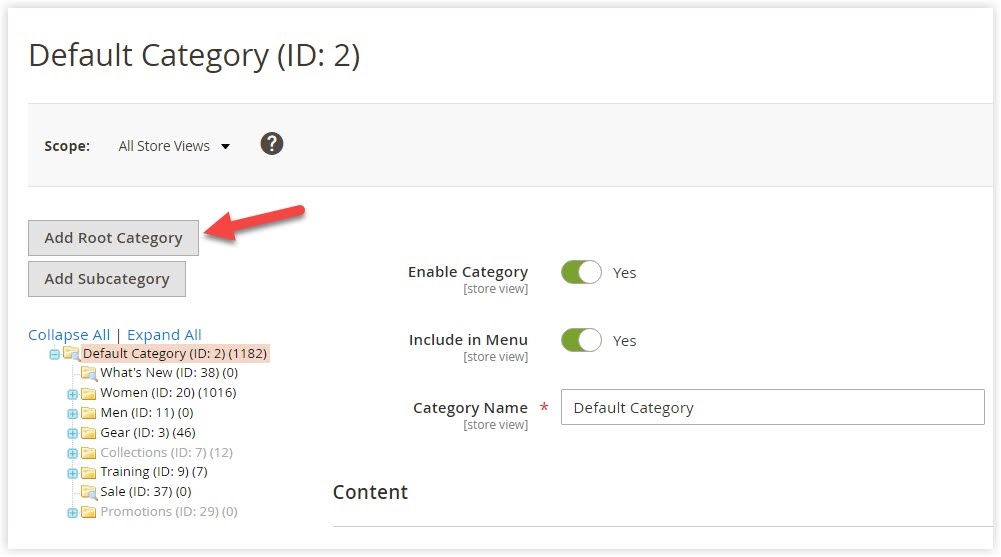
To create a new root category, click on Add Root Category on the left.
Next, a New Category will show up.
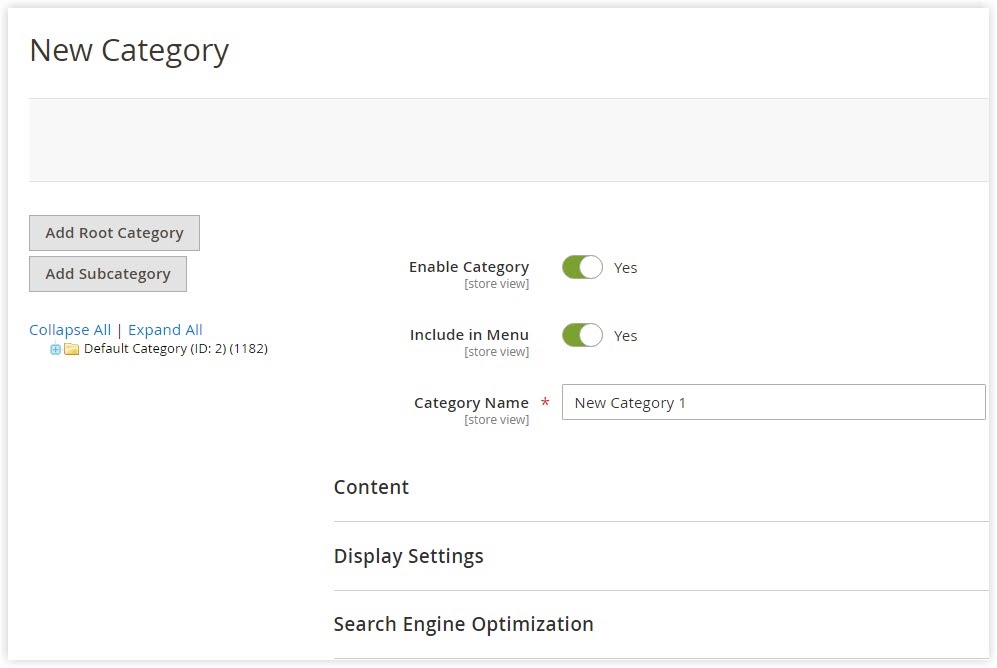
- Remember, the root category doesn’t appear on the front end. The settings of Enable Category and Include in Menu remain unchanged no matter whichever options you take (Yes/No). So, you can skip them.
- Category Name: Choose a name for this category that will be used for all store views by default.
- There are seven other sections on this New Category page: Content, Display Settings, Search Engine Optimization, Design, and Schedule Design Update. These sections’ settings are all used for the front end and are not applied to the root category.
- Product in Category: If the category you desire to copy the existing catalog’s products into this new root category, you can choose them by ticking their checkboxes.
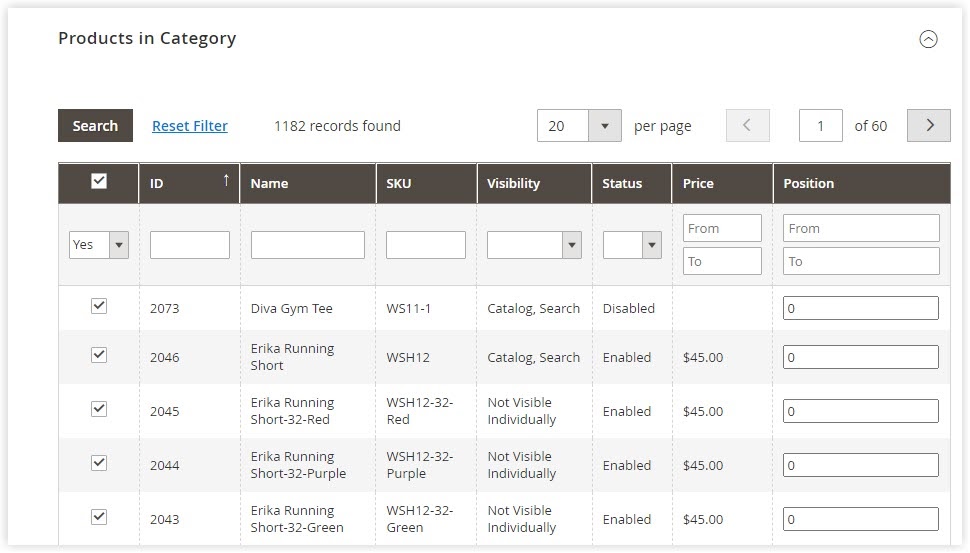
After you’ve finished, hit Save.
And let’s see how it looks in the category tree.
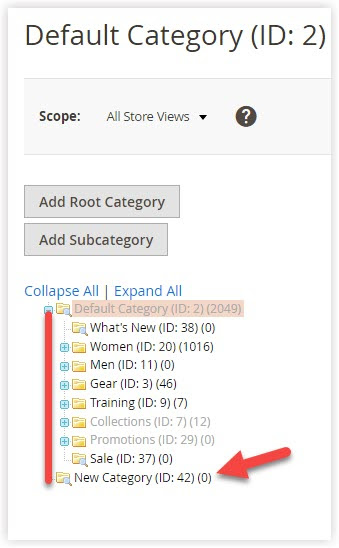
See, the new root category named New Category has the same level as the default category.

Optimize Your Magento Store With Powerful Extensions!
Looking for fast, efficient, and well-coded extensions to boost sales for your Magento stores? Then visit the Magezon website and grab the necessary add-ons to optimize yours today!
Step 2: Add Main Subcategories to the New Root Category
The main subcategories are the primary categories in the front-end menu (or the top navigation). Here are two big steps to follow:
- Choose the newly-created root category as a parent of the main subcategories.
- Click on Add Subcategory and complete all the settings of 7 sections.
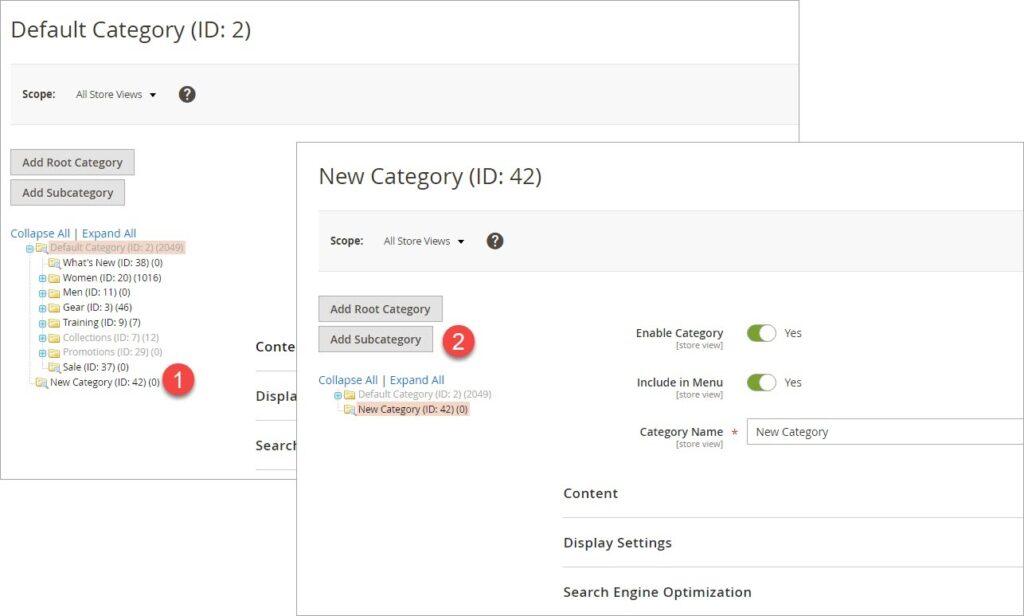
Step 3: Assign the New Root Category to a Certain Store
After building a new catalog structure, you can assign it to any store on your website. Follow these steps:
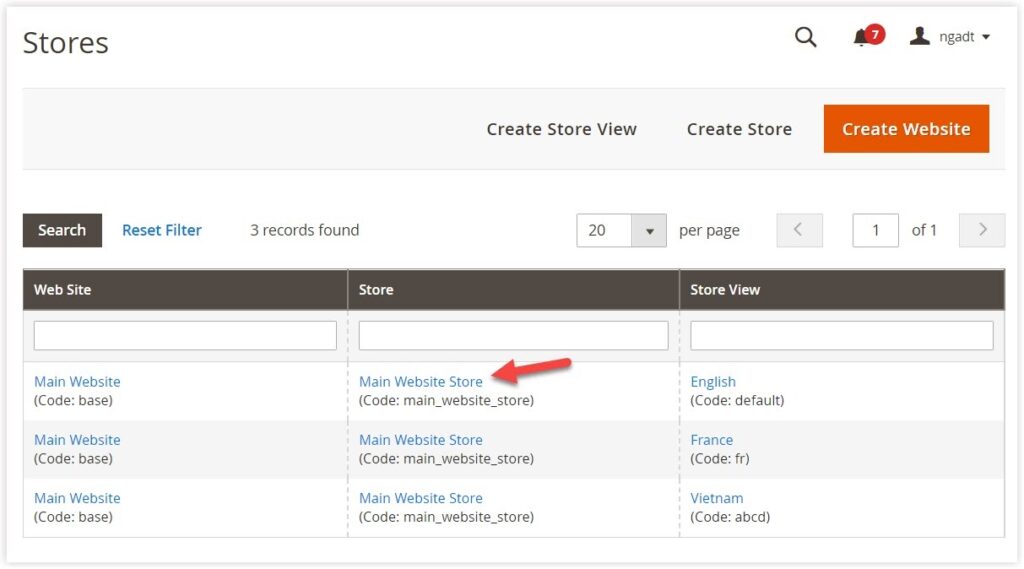
- Go to Store → Settings → All Stores.
- Below is the Stores grid to view and manage all websites, stores, and store views. First, select the store to that you want to assign the new root category.
- You are now landing on the page where category you can set the New Category root category for this store. In the Root Category field, select New Category.
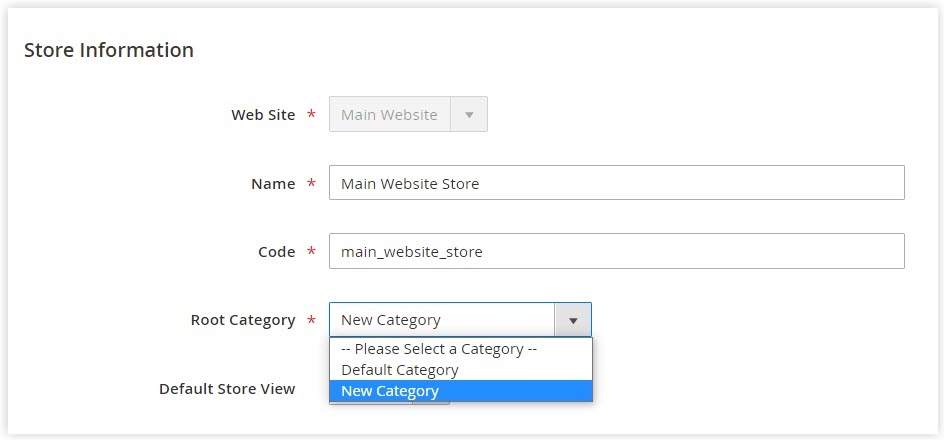
- When finished, click Save Store.
- To ensure that the new catalog is applied to the store, go to Catalog → Products. If all products selected in step 1 appear in the Products grid, it means it works.
Conclusion
Hopefully, this detailed instruction on creating a new root category in Magento 2 can be helpful for you to build a comprehensive catalog. Any questions about it? Feel free to share with us. Follow Magento tutorials to get more knowledge about Magento stores.
Visit the Magezon website if you are looking for advanced extensions for your Magento 2 stores.

Optimize Your Magento Store With Powerful Extensions!
Looking for fast, efficient, and well-coded extensions to boost sales for your Magento stores? Then visit the Magezon website and grab the necessary add-ons to optimize yours today!
 Magezon Blog Help Merchants Build Comprehensive eCommerce Websites

