 Magezon Blog Help Merchants Build Comprehensive eCommerce Websites


Building forms is extremely crucial for your website. However, if no customers fill in, then this brings no benefits. To encourage customers to fill out your forms, one of the most effective ways is to embed them somewhere on your website such as pages, blocks, sidebar, etc. By this way, your users can easily access a form where they already are without wasting time finding the form page.
In this article, we will look into 3 ways to embed forms on your Magento 2 website with Blue Form Builder.
Table of contents
Use Embed Code
Remember that each form created by Blue Form Builder has unique embed code. Using this way, you can insert a form in a specific page/block.
In the backend, navigate to Content > Blue Form Builder > Manage Forms and open the form you want to embed.
Next open Settings > Embed. Here you will see 3 types of code:
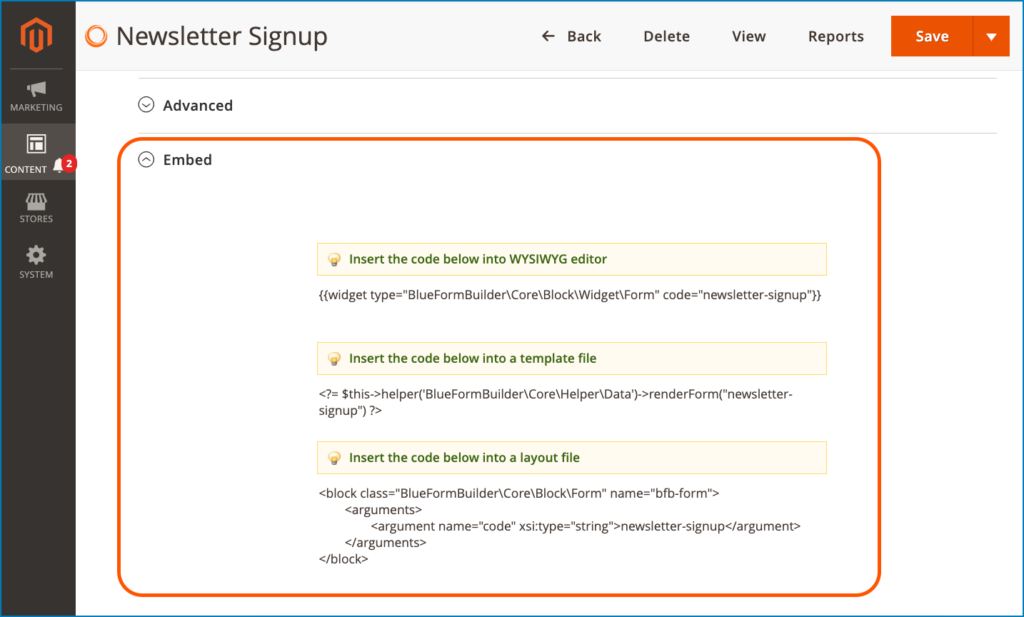
The first one is used to embed into WYSIWYG editor of a page or block. The other two are used for template files and layout files. They are written for those who have coding experience such as developers. In this article, we will focus on the first type of code.
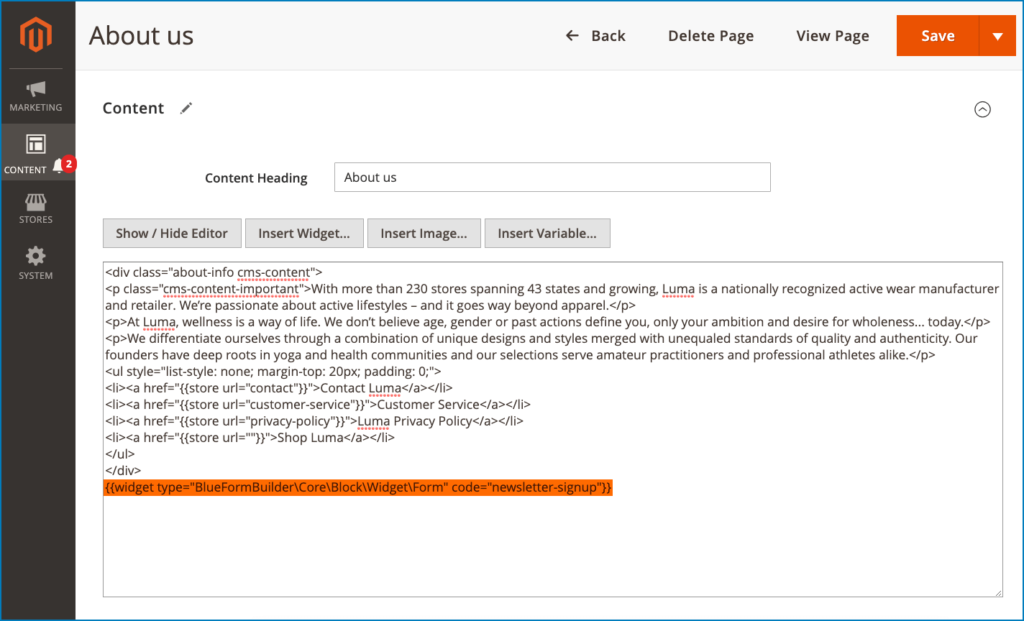
So first, copy the code. Then open the page/block you want to add the form to. Click Show / Hide Editor button to open HTML editor. Then paste the code anywhere you find reasonable within the editor.
Click Show / Hide Editor button again to go back to WYSIWYG editor. You’ll see a widget button like this:
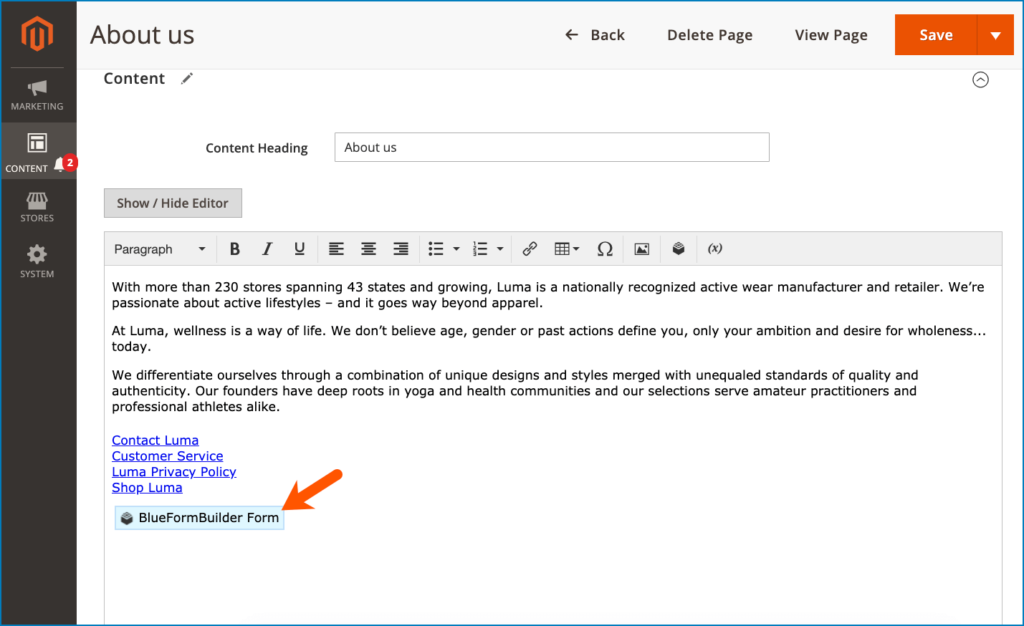
Please note that you can move this widget anywhere within the editor using drag & drop. Click on this widget to view and customize Widget Options:
Insert Widget in WYSIWYG Editor
Open the page/block you want to embed the form. In the WYSIWYG editor, click “Insert Widget” icon:
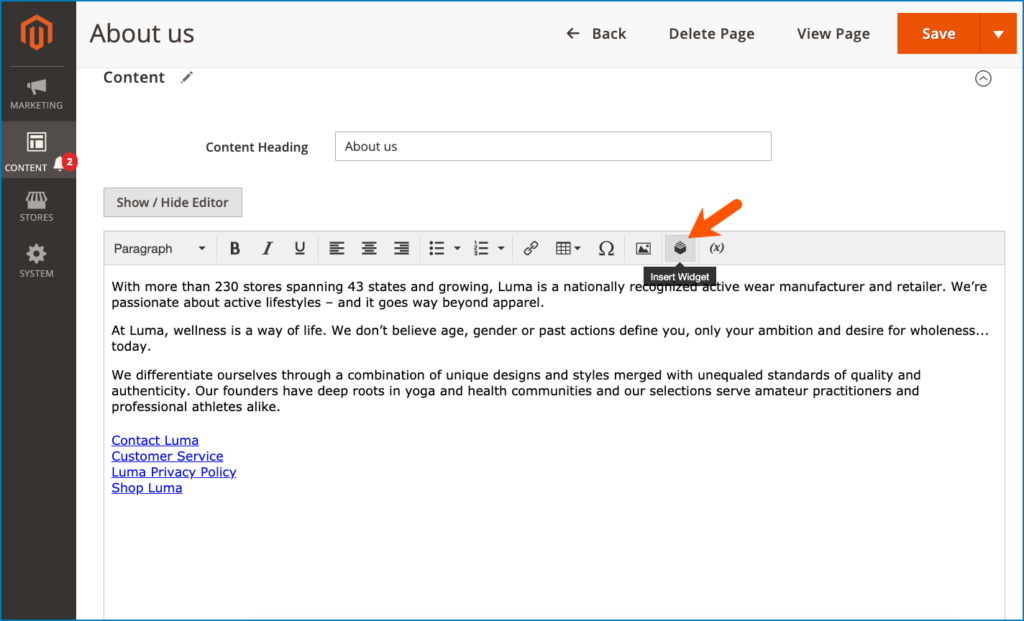
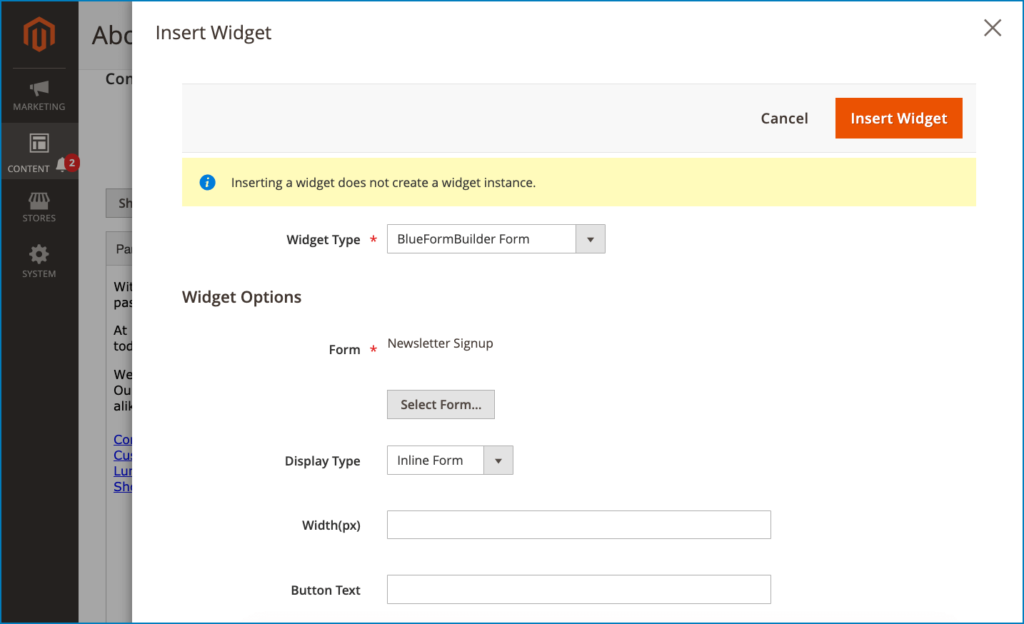
After that, a popup will show up. Choose BlueFormBuilder Form for Widget Type field. Then Widget Options section will appear so that you can choose the embedded form, display type, etc.
After making changes, click Insert Widget button on the top. There will be a widget button appearing in the editor. Move it anywhere you want within the editor to change the form position. Or click on it to open widget options again.
Create Form Widget
By using form widget, you can embed a form in different pages/blocks at the same time with various display positions.
Go to Content > Widgets, and there is an “Add Widget” button above the grid.
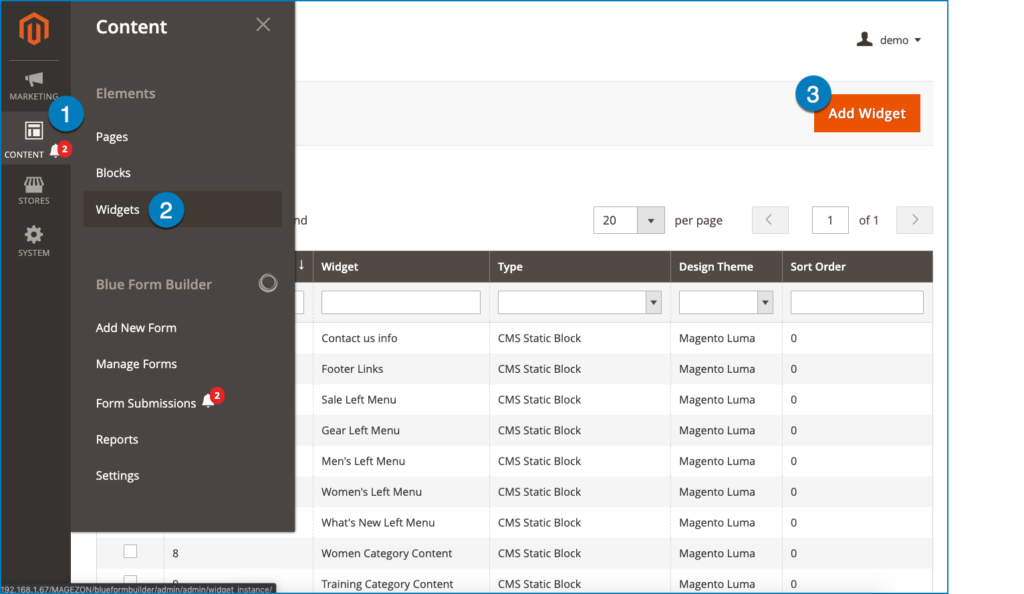
When you click the button, you will see this:
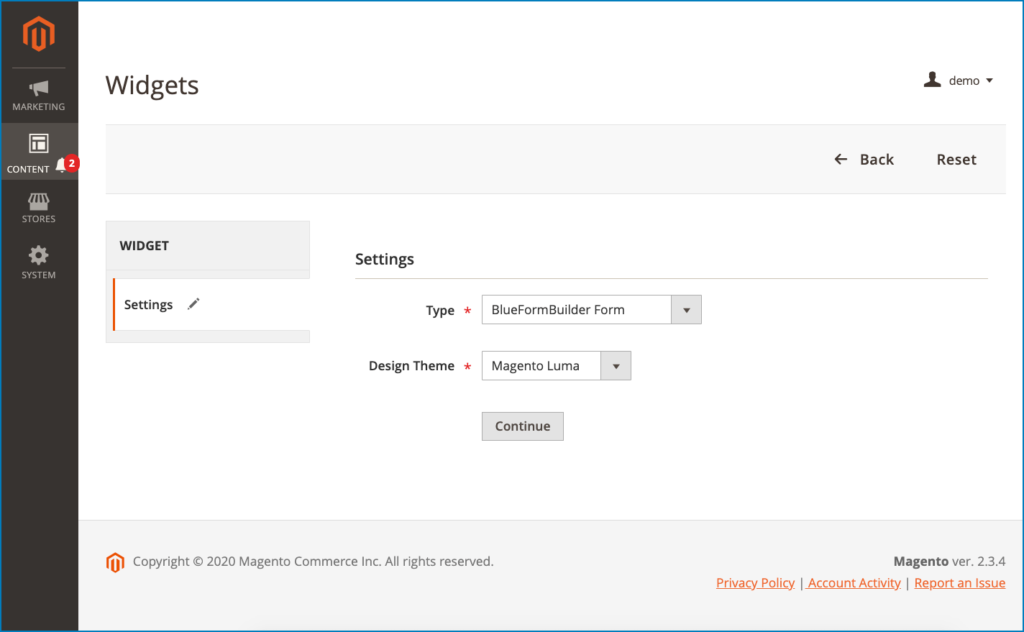
– Type: Choose BlueFormBuilder Form from the drop-down list.
– Design Theme: Choose the theme to apply the embedded form.
After that, click Continue button.
On the left panel, there’re 2 sections: Storefront Properties & Widget Options:
- Storefront Properties: where you specify widget title, store views and sort order.
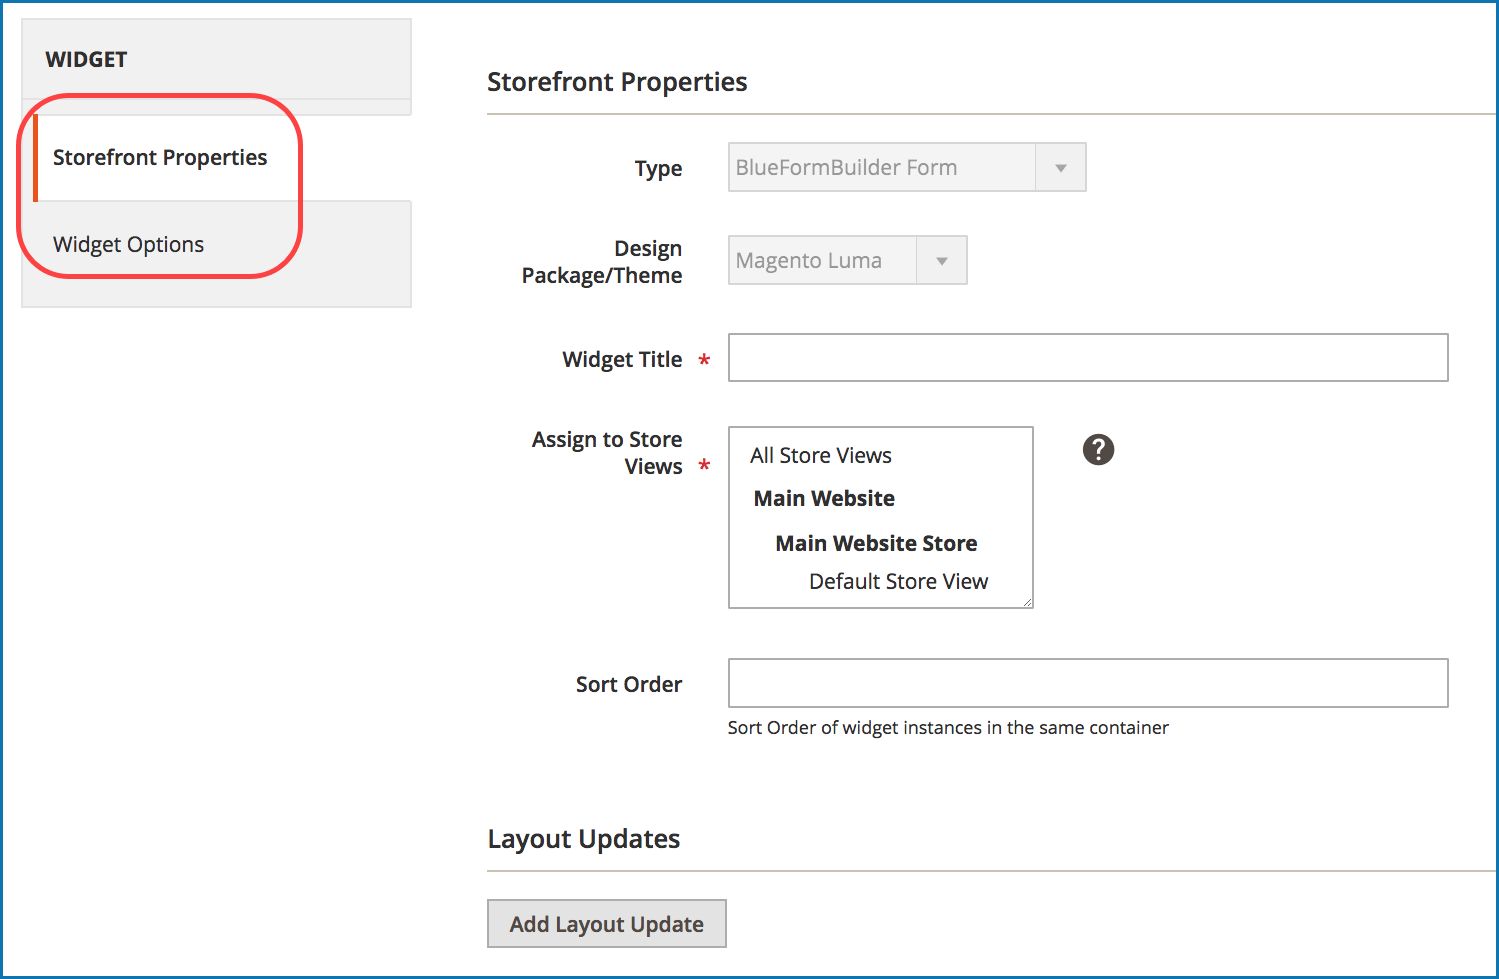
Under this section, you’ll find Layout Updates section in which you decide where to embed the form:
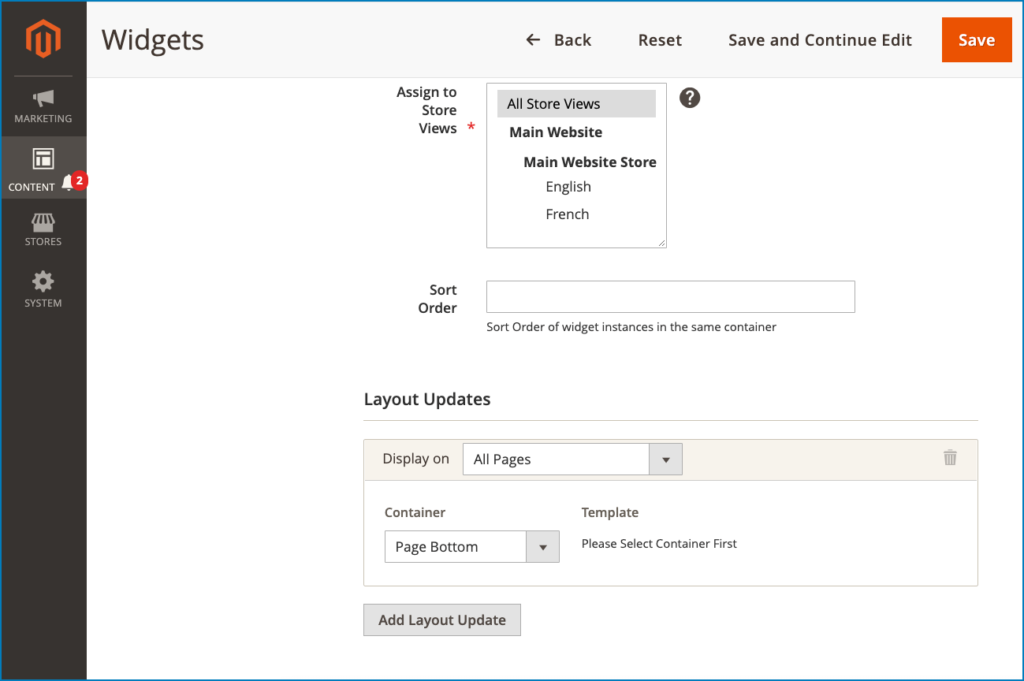
- Widget Options: choose the form you want to embed, form display type, etc.
NOTE: As you can see, no matter which ways are used, you’ll find the same Widget Options for customizing the embedded form:
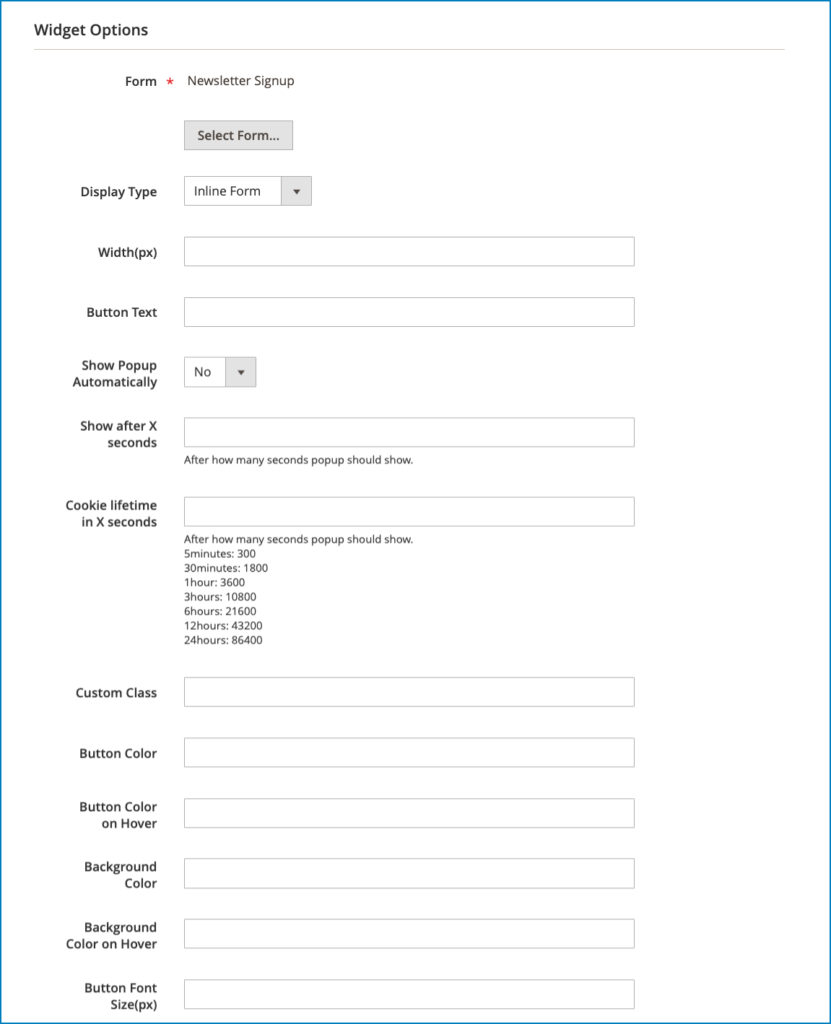
- Click Select Form button to choose the form you want to embed.
- In Display Type, choose from 4 form types including Inline Form, Popup Form, Slide in Form and Link Form.
- Specify form Width in pixel.
- Button Text: enter text inside the button (for popup/slide in form) / enter link text (for link form).
- For popup & slide in form, you can customize: Show Popup Automatically (auto show form in a popup on page load), Show after X seconds (after how many seconds to show the popup after page load), and Cookie lifetime in X seconds (after how many seconds to show the popup again).
- Add Custom Class to customize the form further.
- Customize Button Color, Button Color on Hover, Background Color, Background Color on Hover and Button Font Size (for popup, slide in and link form only).
- If you choose popup/slide in form, you can customize Button Align with 5 options:
– Inline: the button is placed within page content.
– Left: the button is fixed on the left side of the page.
– Bottom Left: the button is fixed at the page bottom and on the left-hand side.
– Right: the button is fixed on the right side of the page.
– Bottom Right: the button is fixed at the page bottom and on the right-hand side.
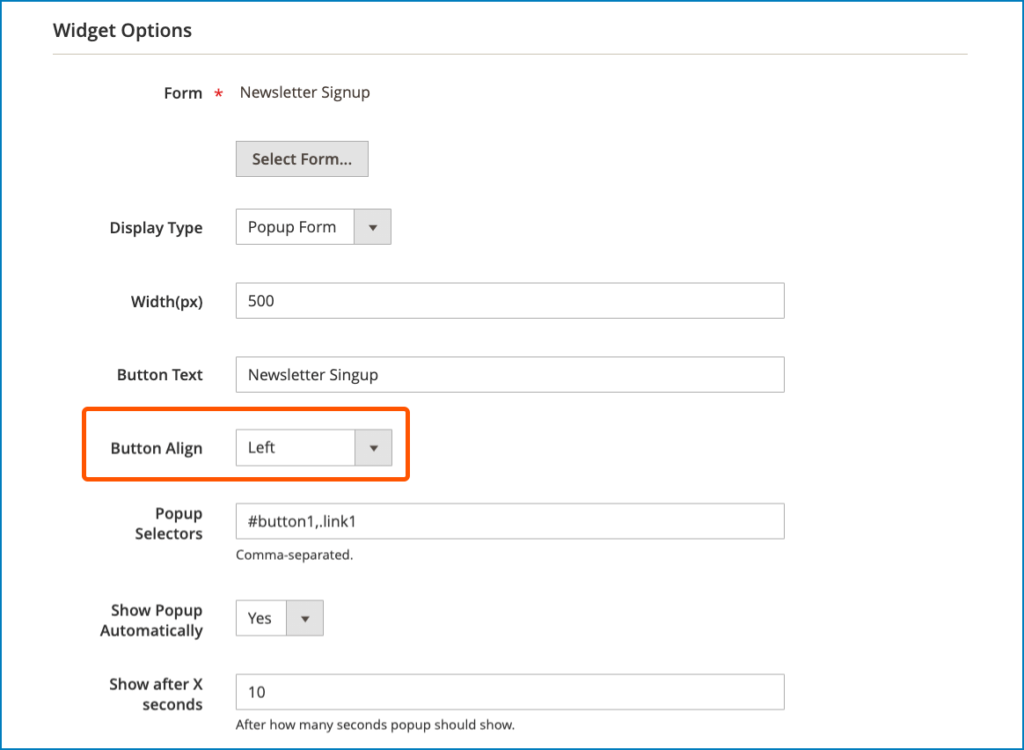
- With popup form, you can also enter Popup Selectors. For details, please view this post.
To Sum Up
In this article, we’ve discussed 3 methods to embed forms on your Magento 2 website using Blue Form Builder. You can insert embed code, use widget icon in the WYSIWYG editor or use form widget.
If you have any questions or need any support, don’t hesitate to leave us a comment. We will try our best to reply to you as soon as possible.

Try FREE Blue Form Builder demo today
Create whatever type of Magento form in any style you want just in minutes. Just by drag & drop.


