Auto-populating form fields is a useful way to save users’ time in filling forms, thus boosting conversion rates. Besides auto-filling form fields with existing data within your website such as email address of logged-in users, product info, page URL, etc., you can decide the data auto-populated by using query strings.
In this article, we’ll focus on how to pre-fill certain form fields using query strings in Blue Form Builder.
Table of contents
What is a Query String?
A query string is part of a URL used to recover information from a database. It is automatically put at the end of a URL and follows a question mark (?) when a user makes a request for specific info.
A query string contains key-value pair(s), each of which includes a key followed by an equals sign (=) and then the value for that key. There may be multiple key-value pairs in a query string separated by ampersands (&).
- A URL with a query string containing one key-value pair looks like this:
http://example.com/jackets?color=black
The bold part in the above URL is a query string in which color is the key and black is the value for the key.
- A URL with the query string containing multiple key-value pairs looks like this:
http://example.com/jackets?color=black&sort=price
Use Query Strings to Auto-Fill Form Fields
Blue Form Builder allows you to use query strings to auto-populate form fields with specific data. For example, you have a form with a field named “Subject”. When users open the form, you want this field to be auto-filled with “Technical Support”.
To do this, you need to add a query string to the URL of the page that contains the form.
For example, the normal URL of the form page is https://example.com/form/contact-us. When customers click the link with a query string added at the end, like this https://example.com/form/contact-us?subject=TechnicalSupport, the form field “Subject” will be auto-populated with “TechnicalSupport”. The query string in this link contains one key-value pair:
- subject: the key for “Subject” field.
- TechnicalSupport: the value for the key that is auto-filled in the field.
Now please follow these steps:
Step 1: Add field key
Suppose that you’ve created a form with the following fields.

We use Single Line Text element to add “Subject” field.
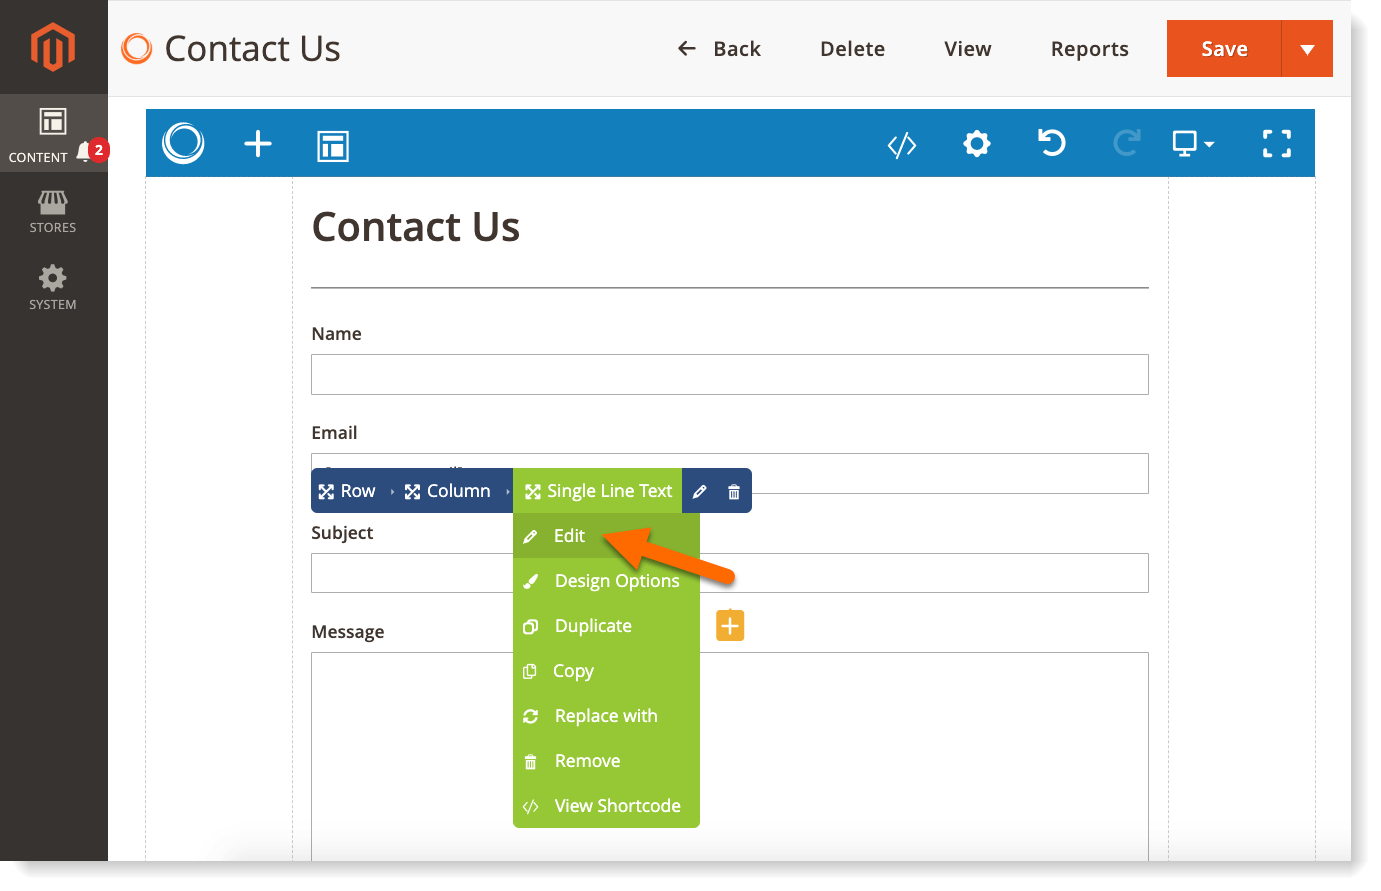
In the backend, hover over the element. Then move the mouse to Single Line Text in the blue bar and click Edit in the drop-down.
Open Appearance tab. Then find Element Name field and enter a key for the element. In this case, we enter “subject”.
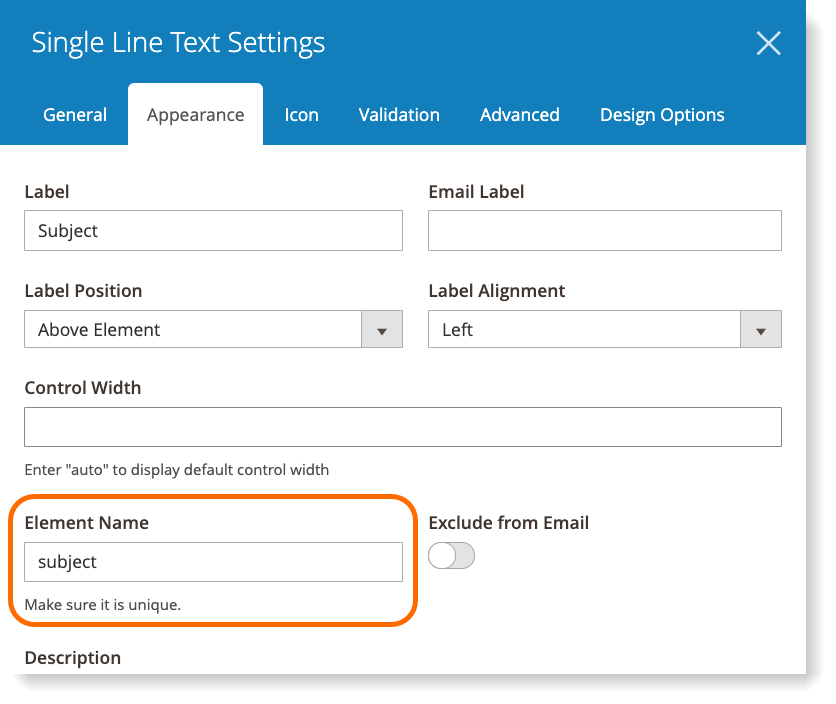
Please note that this key should not include any spaces but use a dash “-” or underscore “_” instead.
Step 2: Add a query string to form URL
Open Settings > Search Engine Optimization where you can add URL Key for the form page. In this example, we enter “contact-us”.
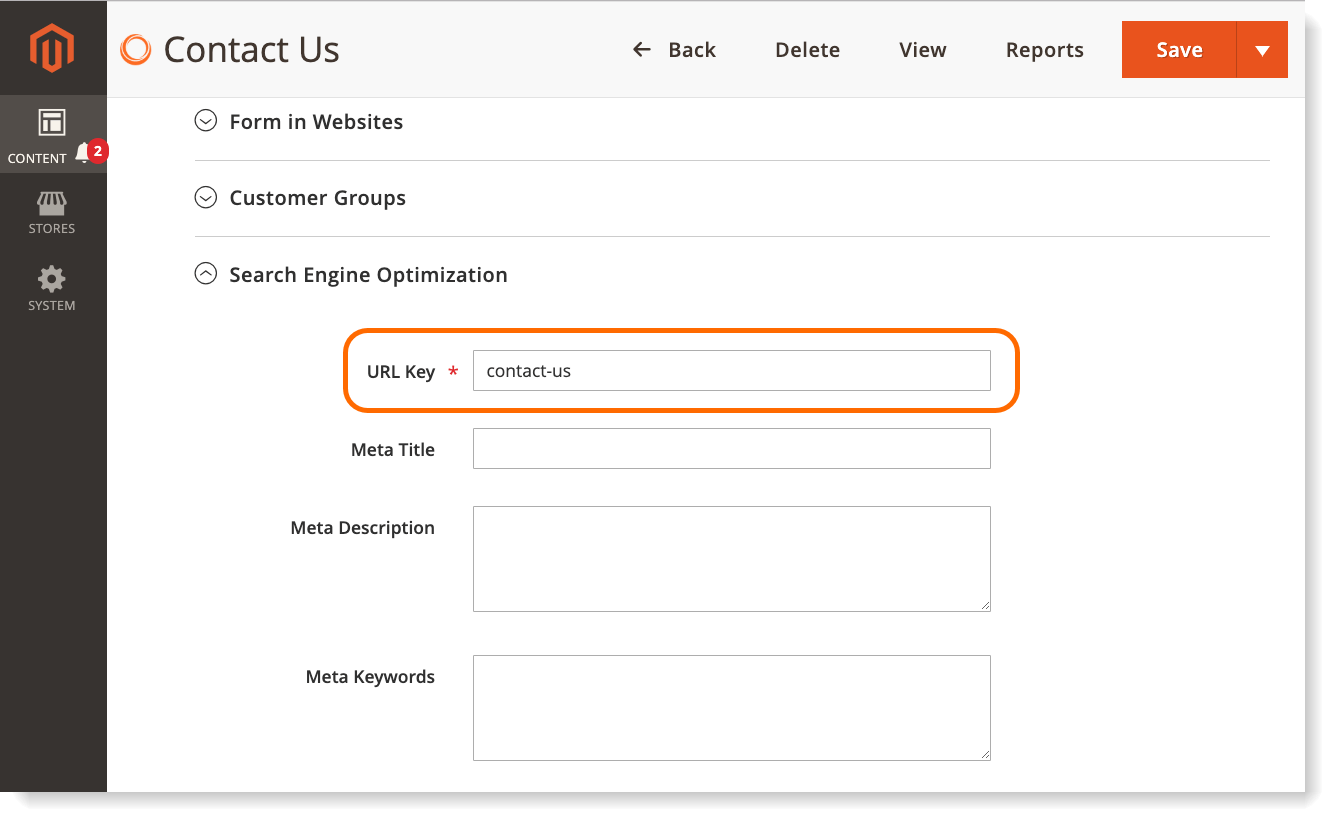
The standard link of the form page is https://example.com/form/contact-us which simply opens the form page without any form field being auto-filled.
To auto fill certain form fields, such as “Subject” in this case, you need to add a query string at the end of the above URL, like this: https://example.com/form/contact-us?subject=TechnicalSupport.
Below are components of this new link:
– Normal link: https://example.com/form/contact-us
– A question mark
– The key that you set for “Subject” field: subject.
– An equals sign
– The text you want “Subject” field to be auto-filled with: TechnicalSupport.
You can insert this modified link wherever you want on your website. This way, when customers click on it, they will navigate to the form page and “Subject” field will be auto-filled with TechnicalSupport value.
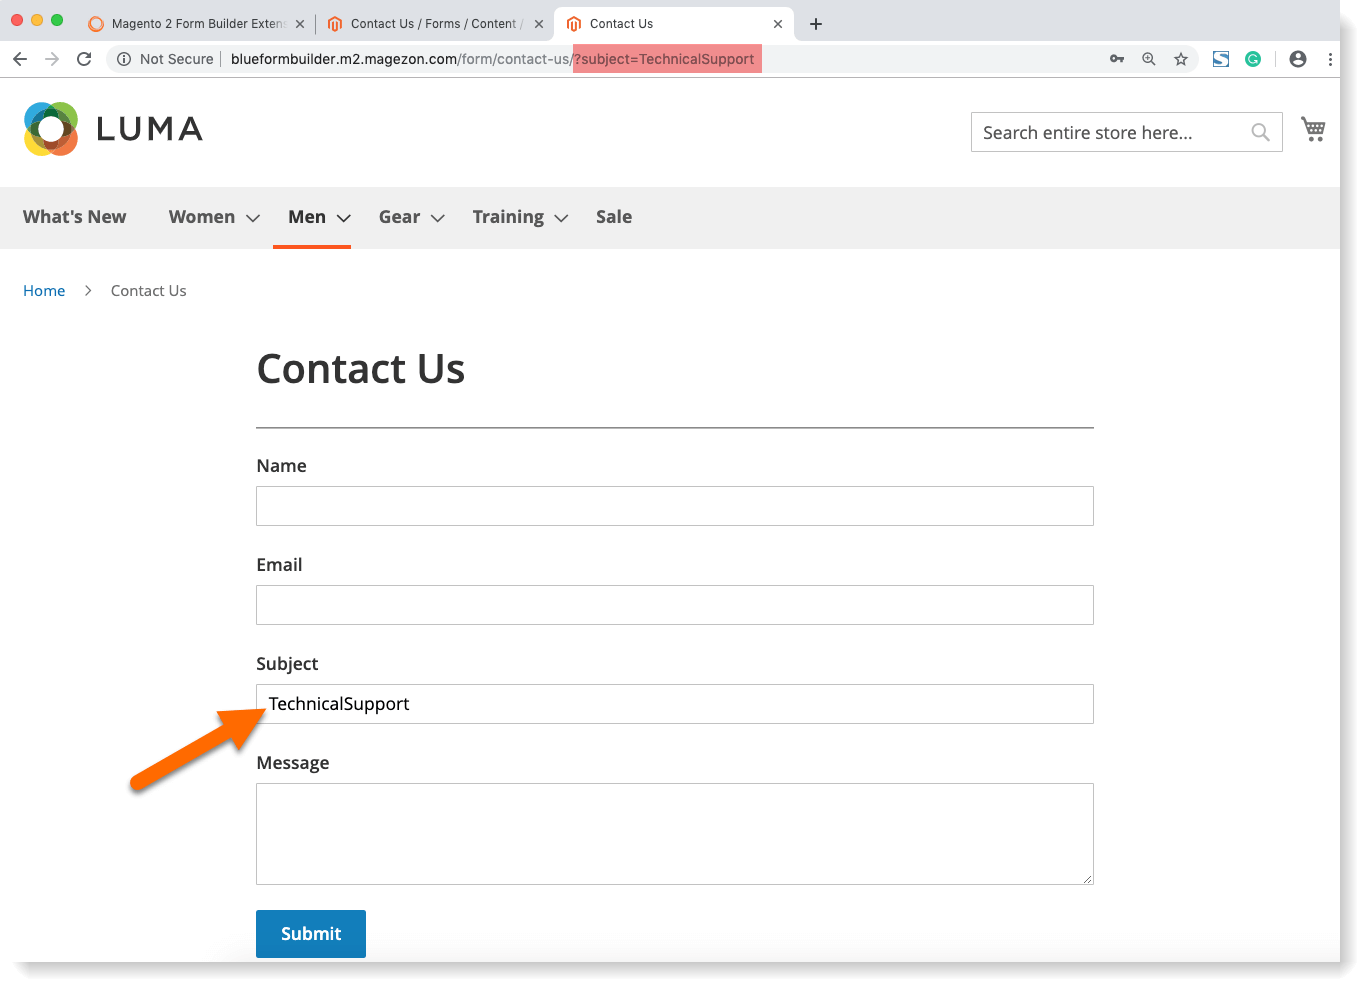
You can auto-populate “Subject” field with any other data by replacing TechnicalSupport after the equals sign with your wanted text.
To add spaces to the text auto-filled in the form field, just put ‘%20‘ anywhere you want a space to appear, like this:
https://example.com/form/contact-us?subject=Technical%20Support.
And the “Subject” field will be pre-filled with Technical Support.
NOTE: To auto-populate two or more form fields with query string, just add ‘&’ between key-value pairs. For example: https://example.com/form/contact-us?subject=Technical%20Support&country=United%20Kingdom.
13 Elements Auto-Filled with Query Strings
Below are 13 elements of Blue Form Builder that can be auto-filled using query strings. Please pay attention to some elements that needs properly formatted query strings.
– Form elements with input text:
- Single Line Text: ?last-name=Cruise
- Paragraph: ?message=Pre-sale%20Support
- Email: [email protected]
- Number: ?guest-number=5
- Website: ?website=https://magezon.com
- Currency: ?120
– Single choice / Multiple choice fields: query string values must match the values of each option. With multiple choice fields, you need to separate options in the query string by commas.
- Select: ?favourite-food=salad
- Multiple Select: ?favourite-drinks=coke,orange%20juice
- Radio List: ?destination=Japan
- Checkbox List: ?favourite-cities=London,%20Amsterdam,%20Tokyo
– Yes/No element: query string values must contain 1 (yes) or 0 (no):
- Toggle: ?do-you-like-the-event=1 (the toggle is auto turned on).
– Other elements:
- Date Picker: query strings must contain a date value in the format you set in backend. For example, you choose dd/mm/yy format for date picker, so the query string will look something like this: ?date-of-event=20/10/2019
- Star Ratings: query strings must contain a number that corresponds to the number of stars. For example: ?service-ratings=4 (4 stars are selected).
To Sum Up
That’s all about this tutorial for Blue Form Builder. Hope that it can help you on auto filling certain form fields with your wanted data by using query strings.

Try FREE Blue Form Builder demo today
Create whatever type of Magento form in any style you want just in minutes. Just by drag & drop.
| Optimize your forms with these expert best practices: How to Design Web Forms That Users Complete Without Hesitation 15+ UX Guidelines to Create Sign-up Forms That Convert (2023) |
 Magezon Blog Help Merchants Build Comprehensive eCommerce Websites

