Typically a website menu is placed in the header across the site to let visitors access the most useful pages quickly. However, it can appear in other positions such as sidebars, footers, etc. based on the purpose of website owners.
With Ninja Menus for Magento 2, you can create your own menu and add it to various positions on your website. Let’s see how!
Create a Menu
The first step is to create and design a menu. Ninja Menus supports 4 types of menu including Horizontal, Vertical, Drilldown, and Accordion. Based on your desired location, you can choose an appropriate menu type.
To create a menu, we have a couple of tutorial articles that you can check as follows:
- How to create mega menu
- How to customize your menus
- How to set a submenu in multiple positions
- 5 common types of menu you can create
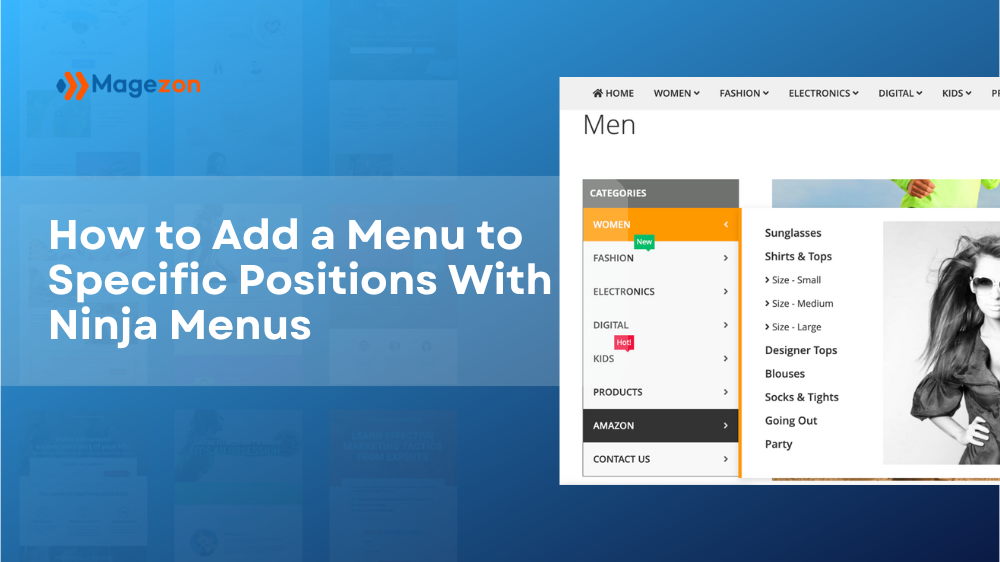
For example, you want to create a vertical menu and display it in the main sidebar of non-anchor category pages.
In the backend, select the Vertical menu for Desktop Type:
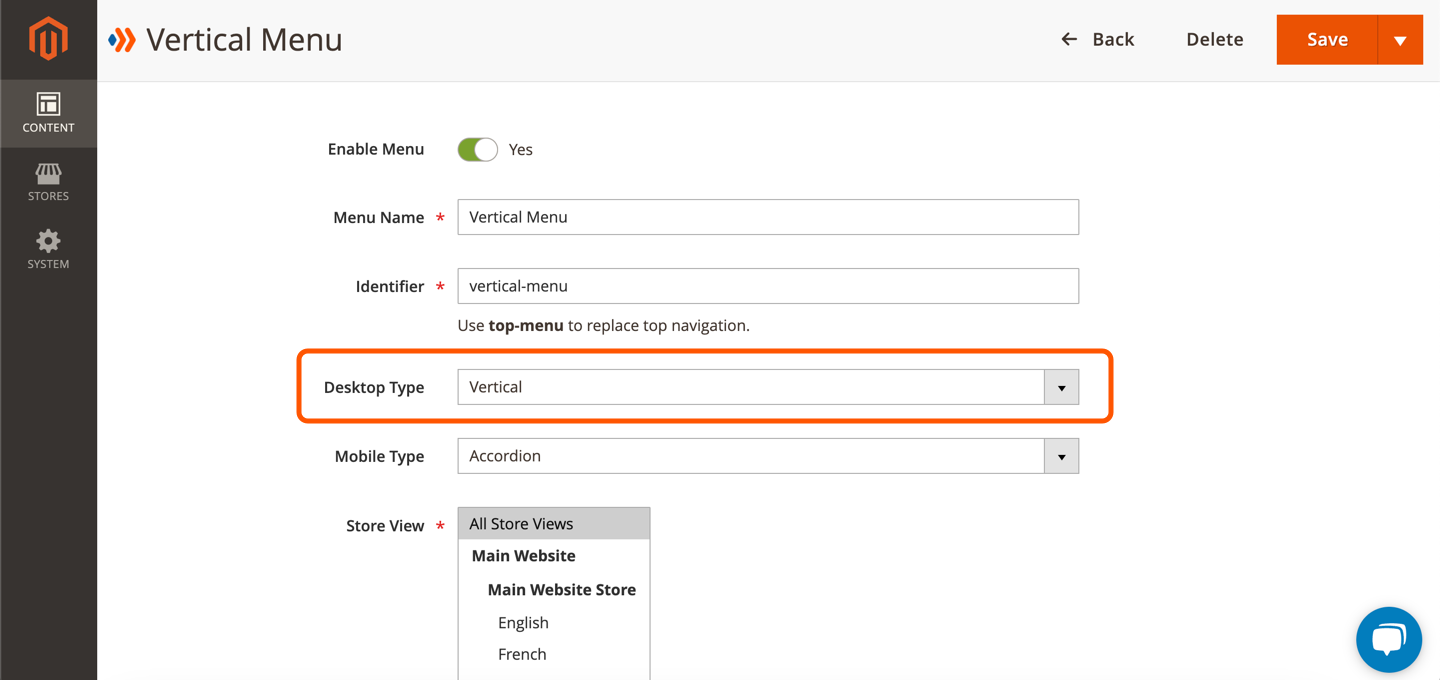
Tip: You can select another menu type for mobiles.
The menu created in the backend looks like this:
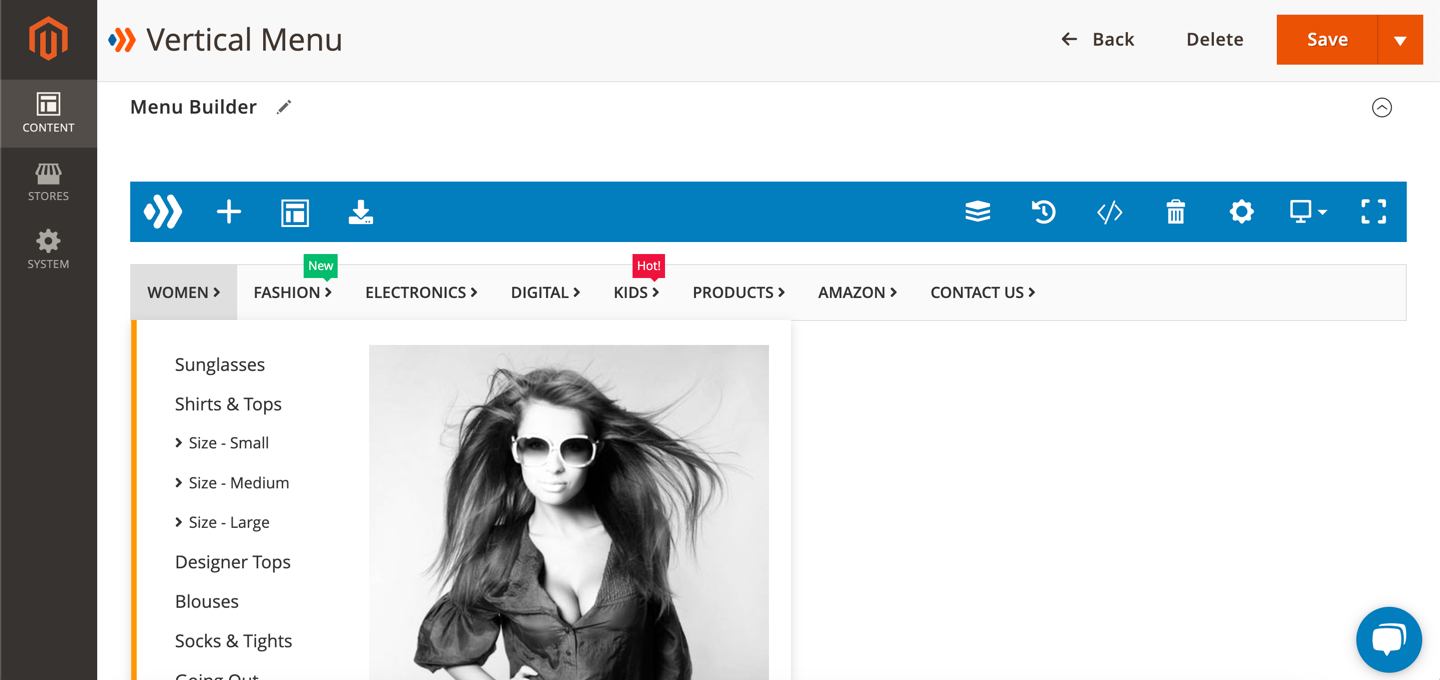
Note: The menu builder interface does not provide a visual preview for Vertical, Accordion, and Drilldown menu types.
Add Menu to Specific Position
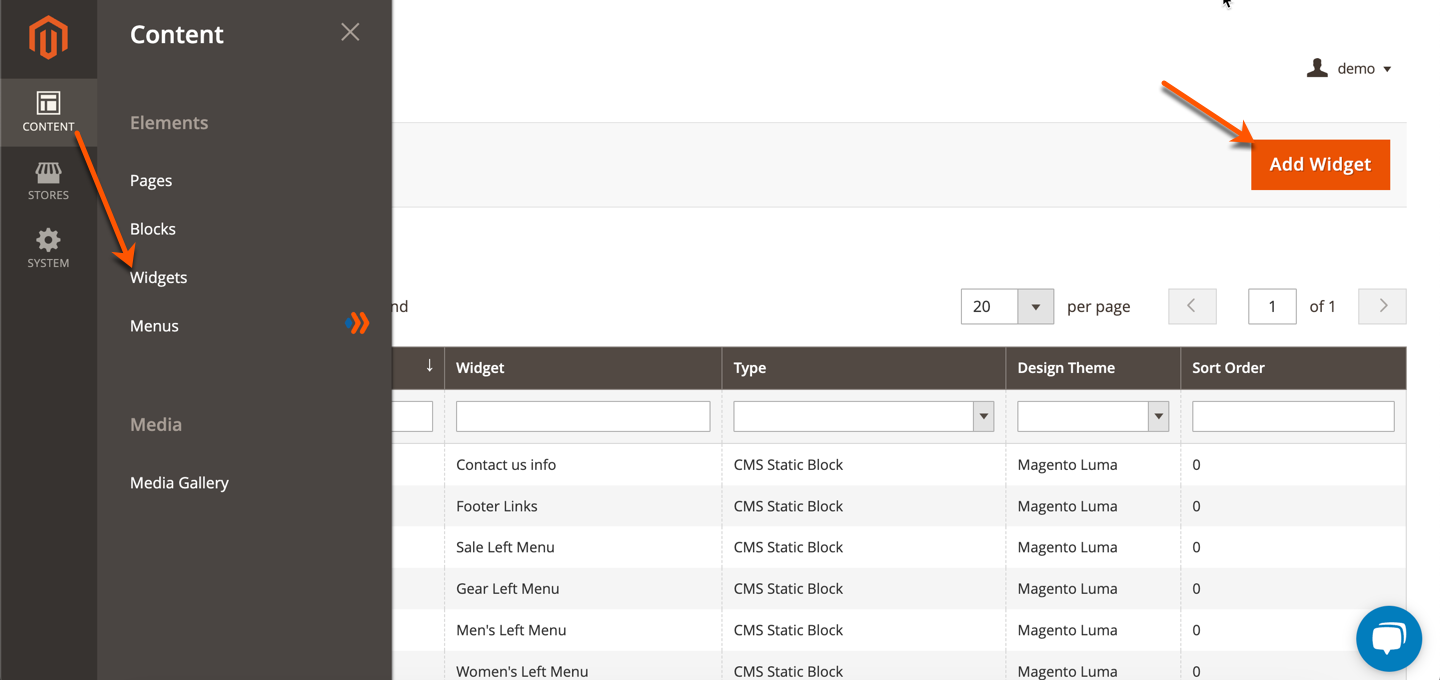
To insert a menu into a specific position on your site, you should use widgets. Navigate to Content > Elements > Widgets and click Add Widget to create a new widget.
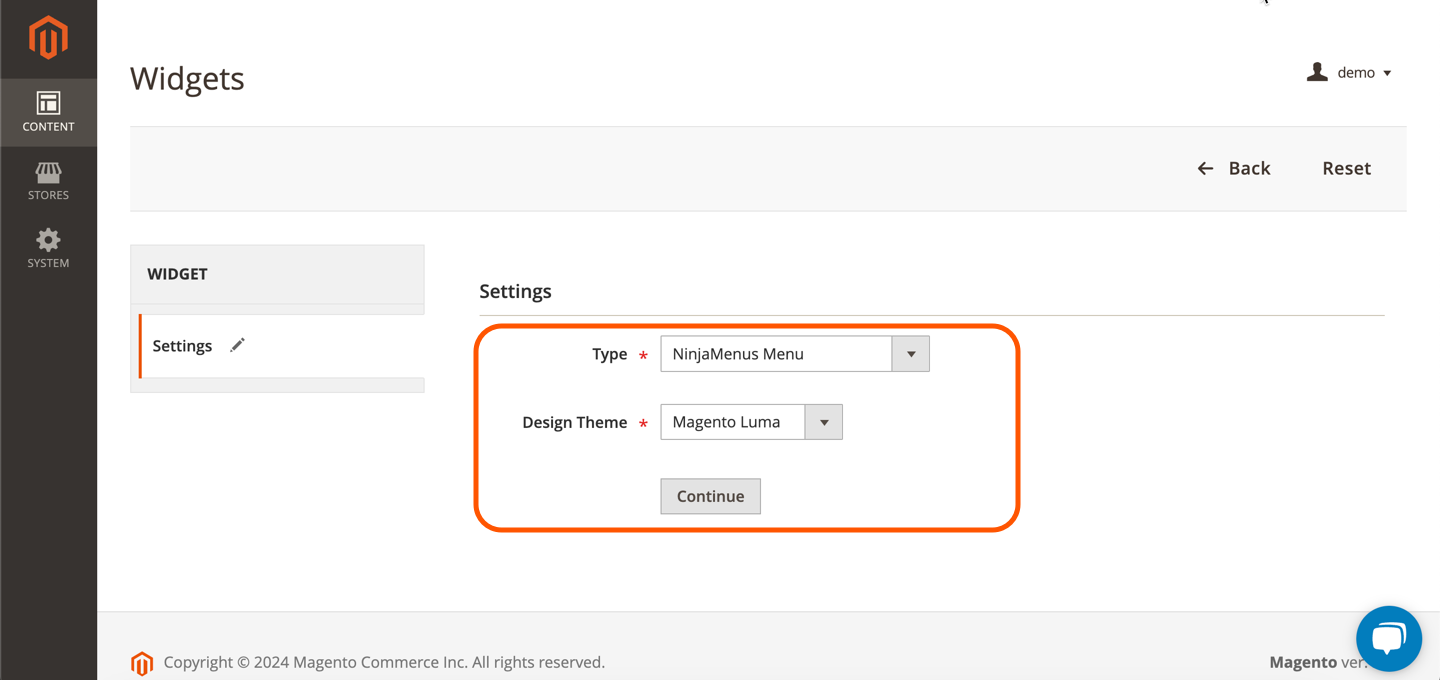
In the Settings section, select NinjaMenus Menu type and choose your current theme. Click Continue to continue customizing the widget.
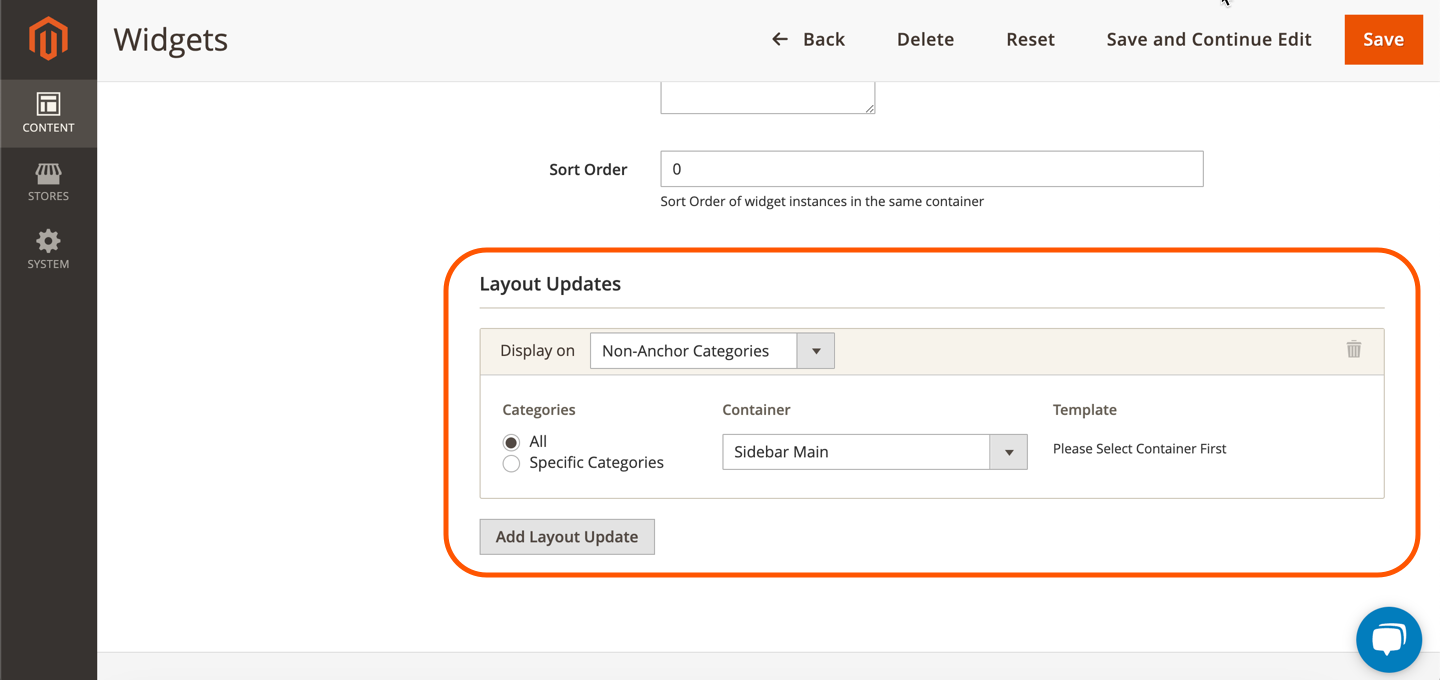
After completing the Widget Title, Assign to Store Views, and Sort Order fields in the Storefront Properties section, scroll to the Layout Updates section. Here choose the pages and the location within the pages where you want to display the menu.
In this example, select Non-Anchor Categories for Display on field and Sidebar Main for Container field. Choose All to apply to all non-anchor category pages.
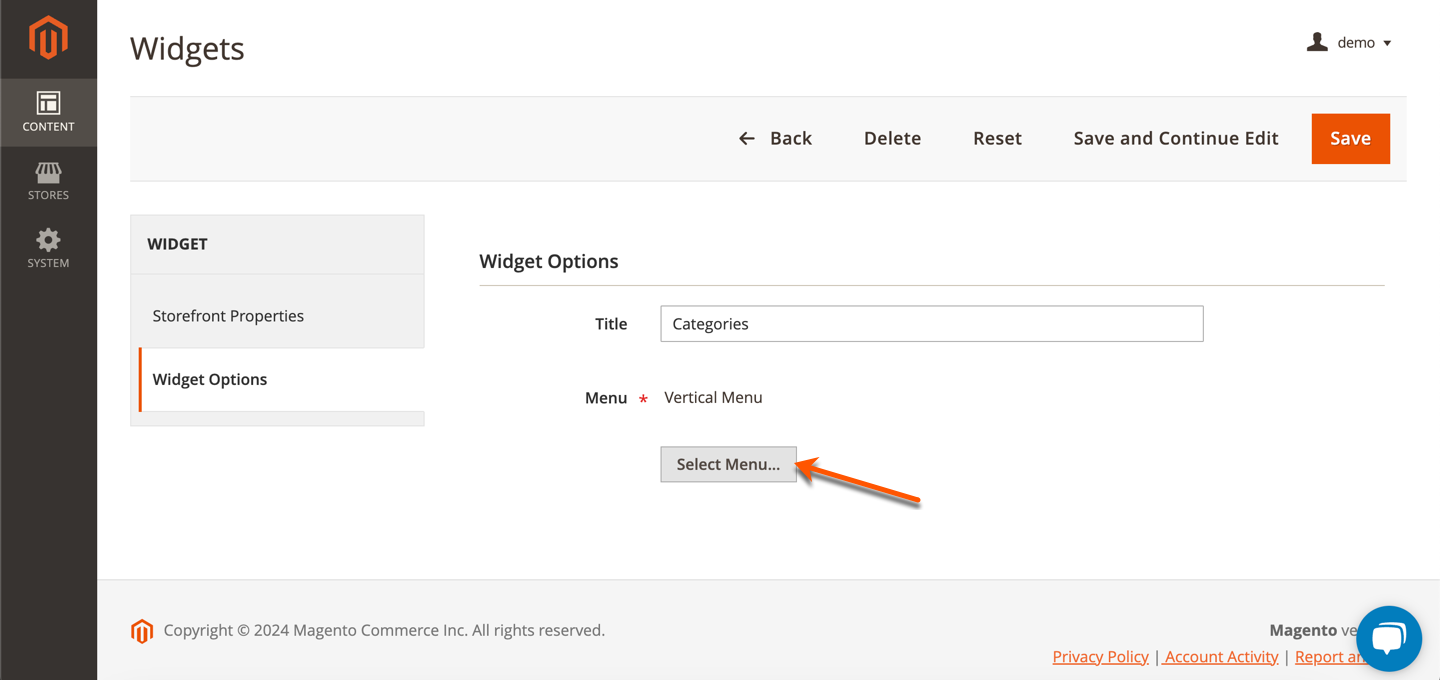
After this step, open Widget Options. Click the Select Menu button to select a menu.
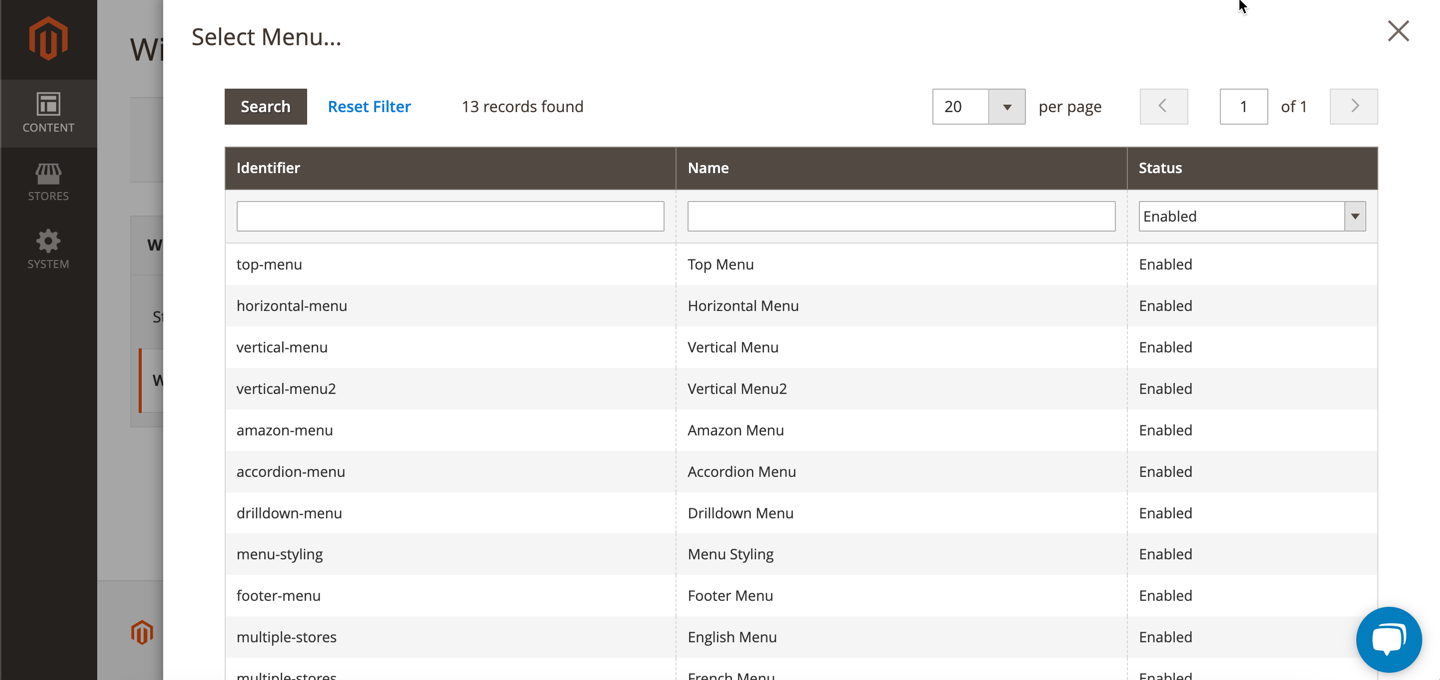
Remember to save the widget after making changes.
On the storefront, the menu will appear like this:
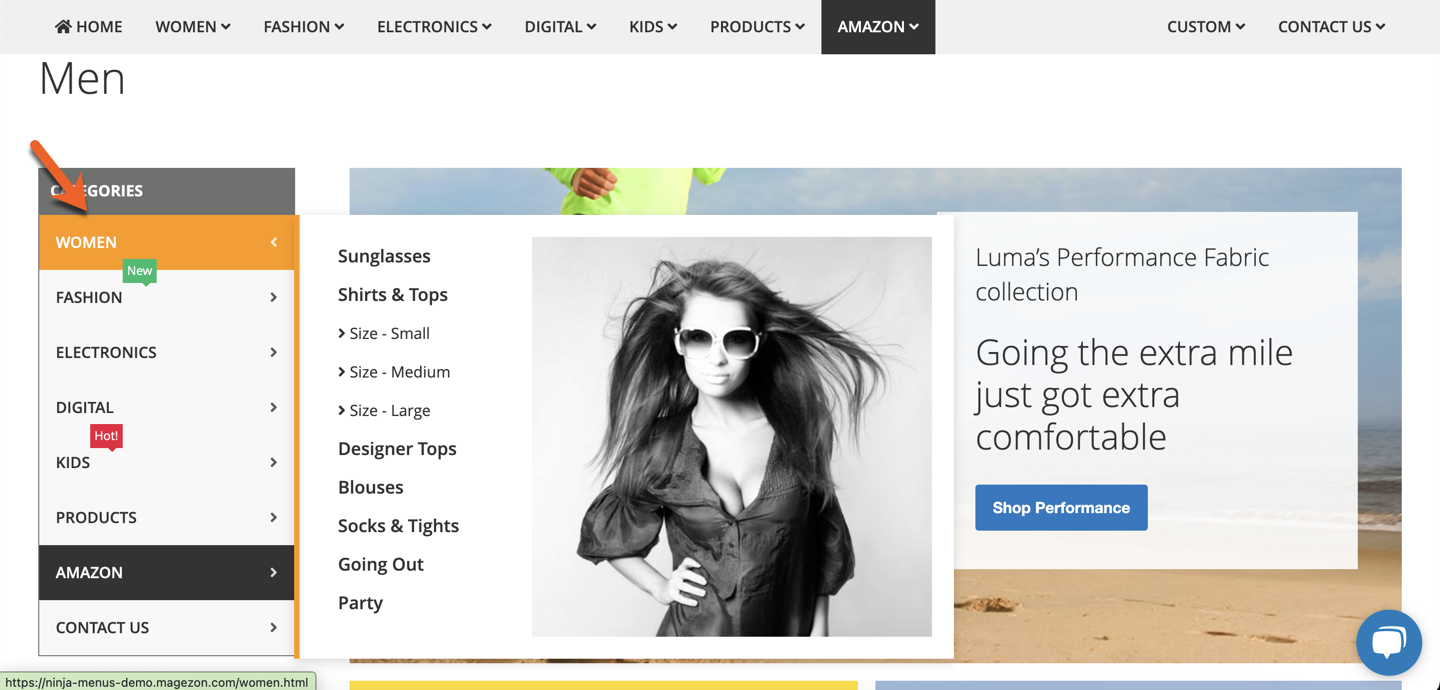
To Sum Up
If you have any questions, don’t hesitate to contact us via [email protected]. Ninja Menus is an easy-to-use and powerful mega menu extension that you must have for your website. Purchase it now (if you haven’t) to make your life easier.
 Magezon Blog Help Merchants Build Comprehensive eCommerce Websites

