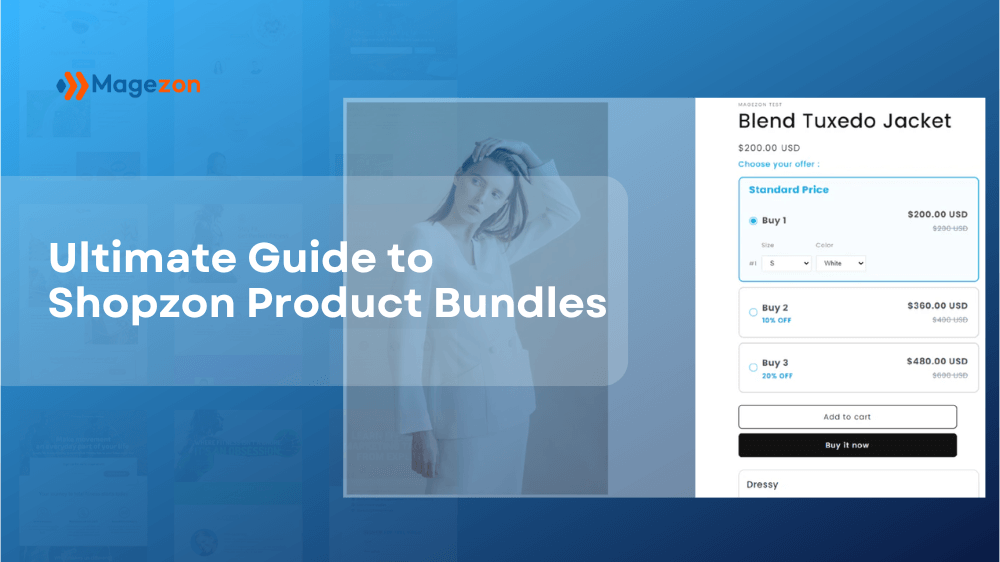
Shopzon Product Bundles is a Shopify app that allows you to create product bundles with special discounts. By selling bundles on your online store, you can encourage customers to purchase more, thus increasing your average order value.
Creating bundles with Shopzon Product Bundles is easy with various custom options and visual preview. Besides, the app offers 3 customizable templates for a bundle’s look and feel. Once you create and publish your bundles on your store, you can track their statistics like views, clicks, and revenues.
In this post, I will walk you through a step-by-step guide on how to use this app, from installing and creating bundles to tracking statistics. So let’s keep reading!
Table of contents
Install App
1. Install App
The first step is to install Shopzon Product Bundles on your online store. Please go to the app page on Shopify App Store and click Install.
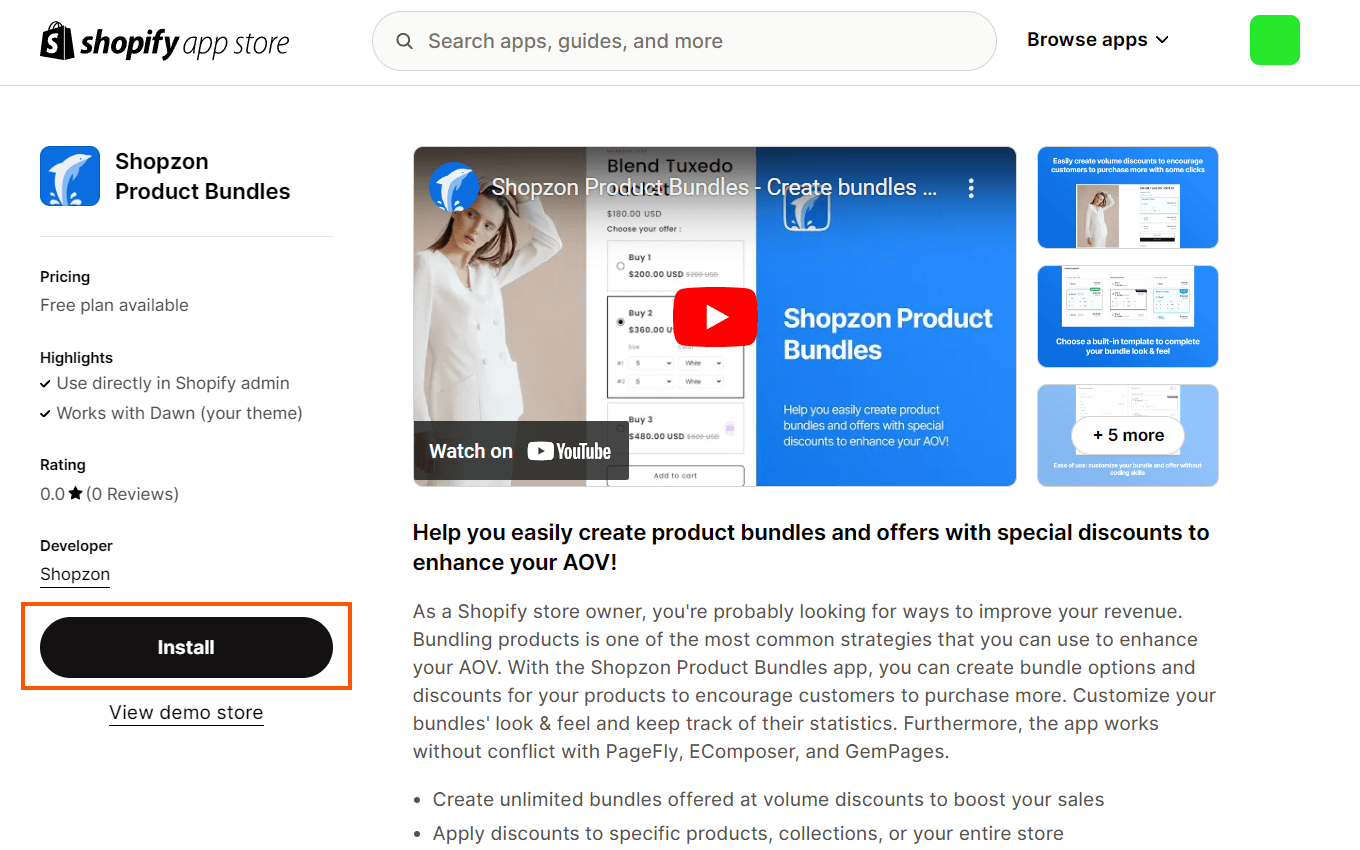
After that, you will be redirected to your Shopify admin with a confirmation modal before installation.
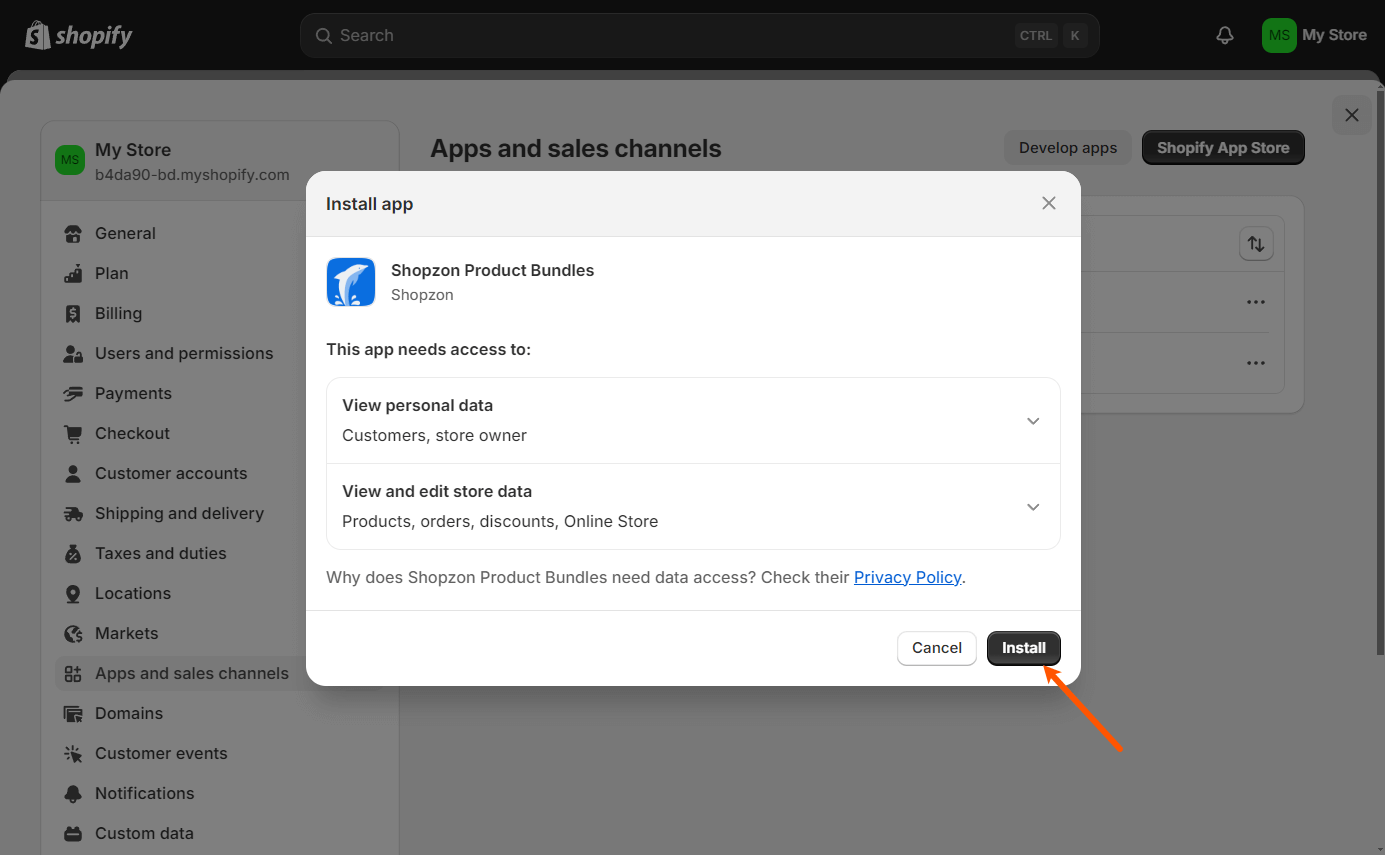
Click Install and you’re required to activate the app embed block in the theme editor.
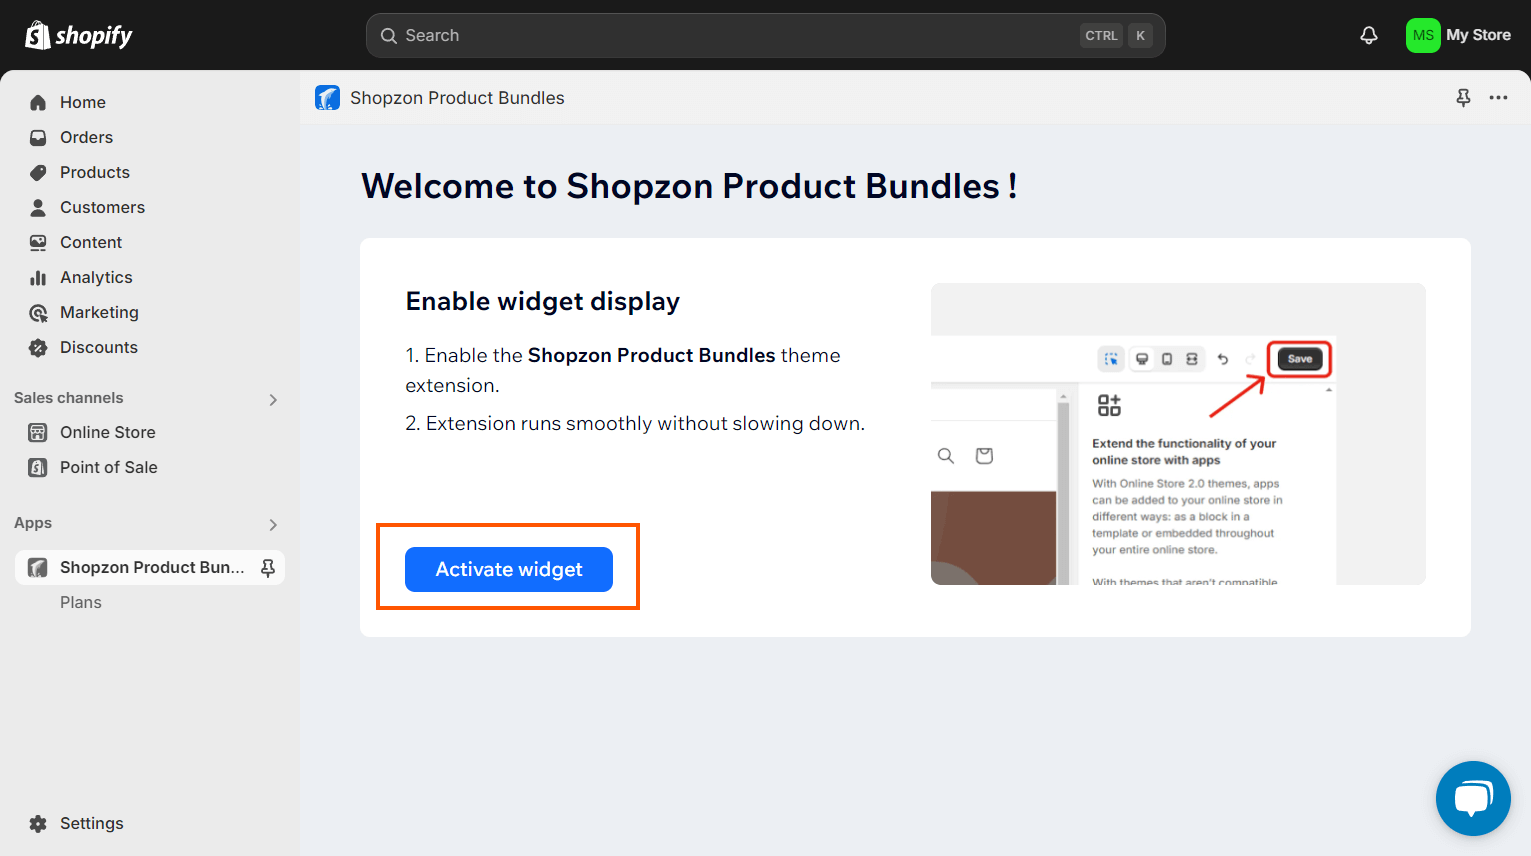
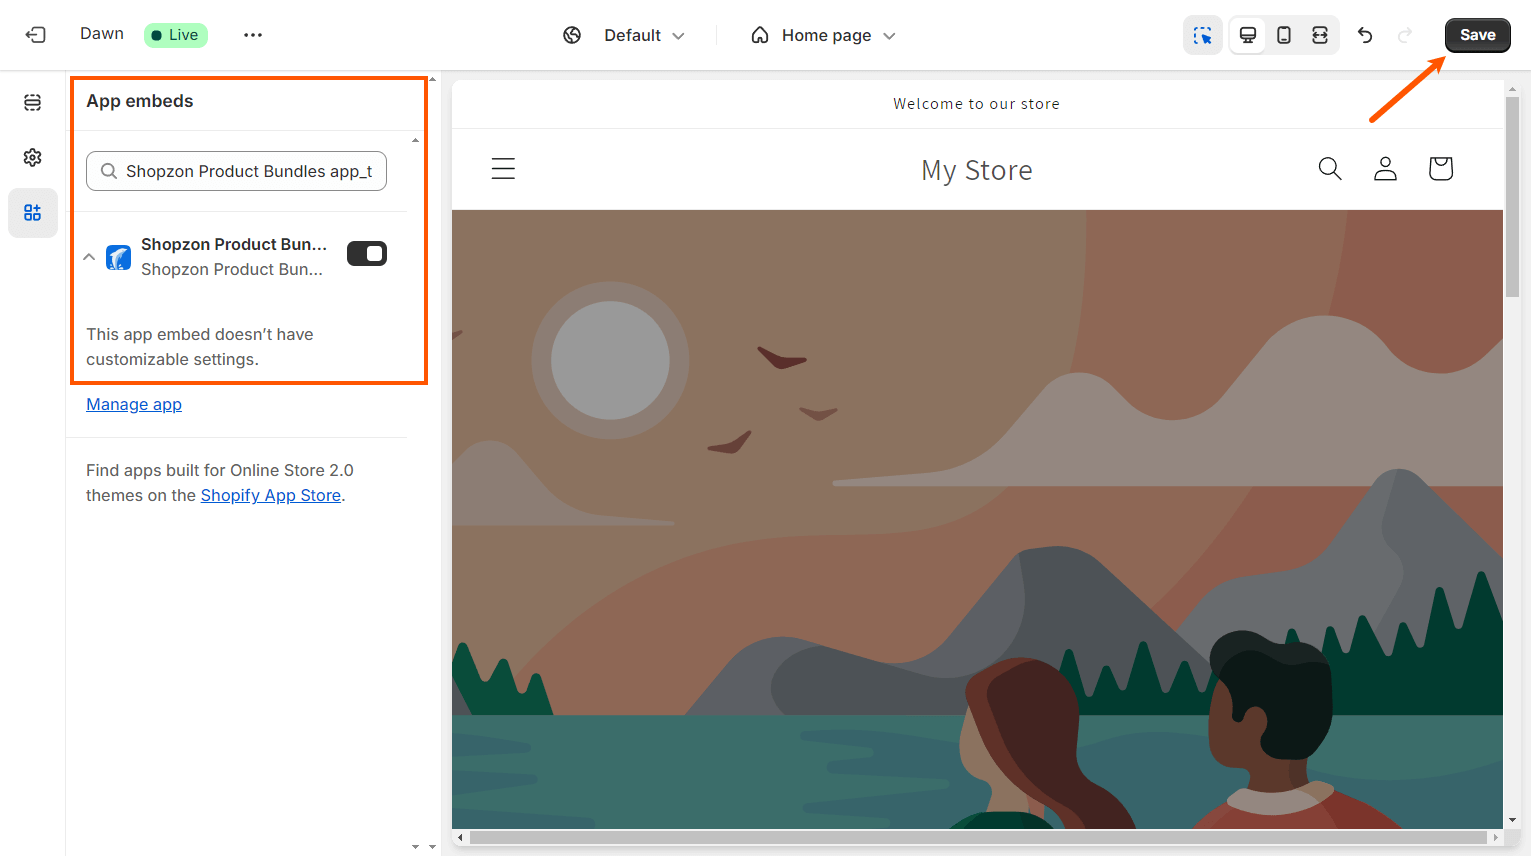
Clicking the Activate widget button will open the App embeds section in the theme editor in a new tab. The app embed block of Shopzon Product Bundles is automatically activated. Click Save to save the change.
Now when you open the app in your Shopify admin, you can see 5 sections in the left side navigation:
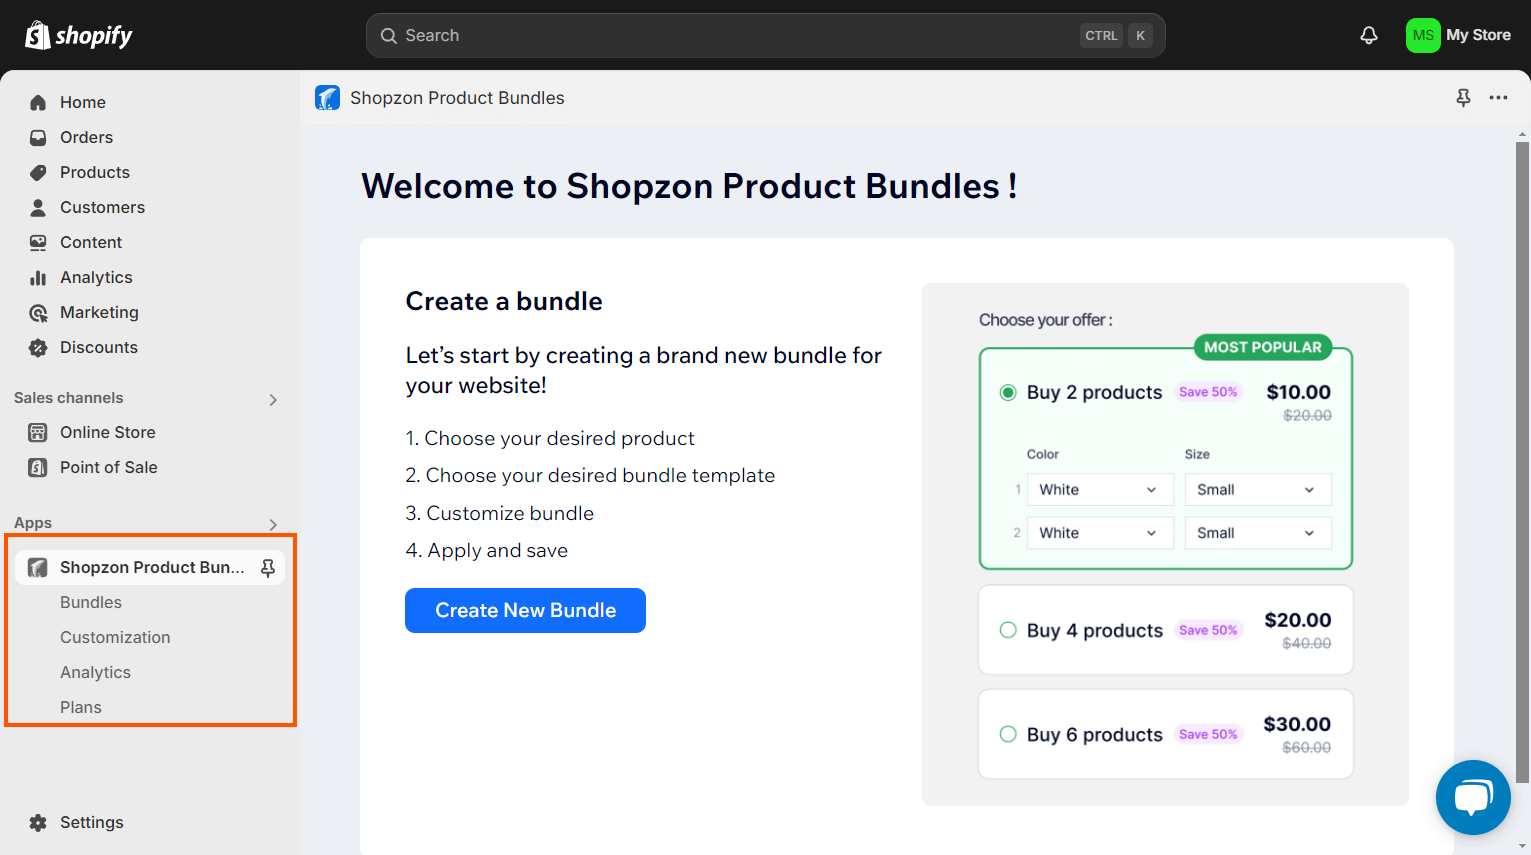
- Shopzon Product Bundles: app dashboard that displays summary information for your bundles.
- Bundles: create and manage all of your bundles.
- Customization: customize the appearance of bundle templates
- Analytics: display statistics related to your bundles.
- Plans: view your current plan and upgrade to the Pro plan if you’re using the Free one.
2. App Dashboard
The app dashboard starts with a welcome that shows a quick guide to create bundles.
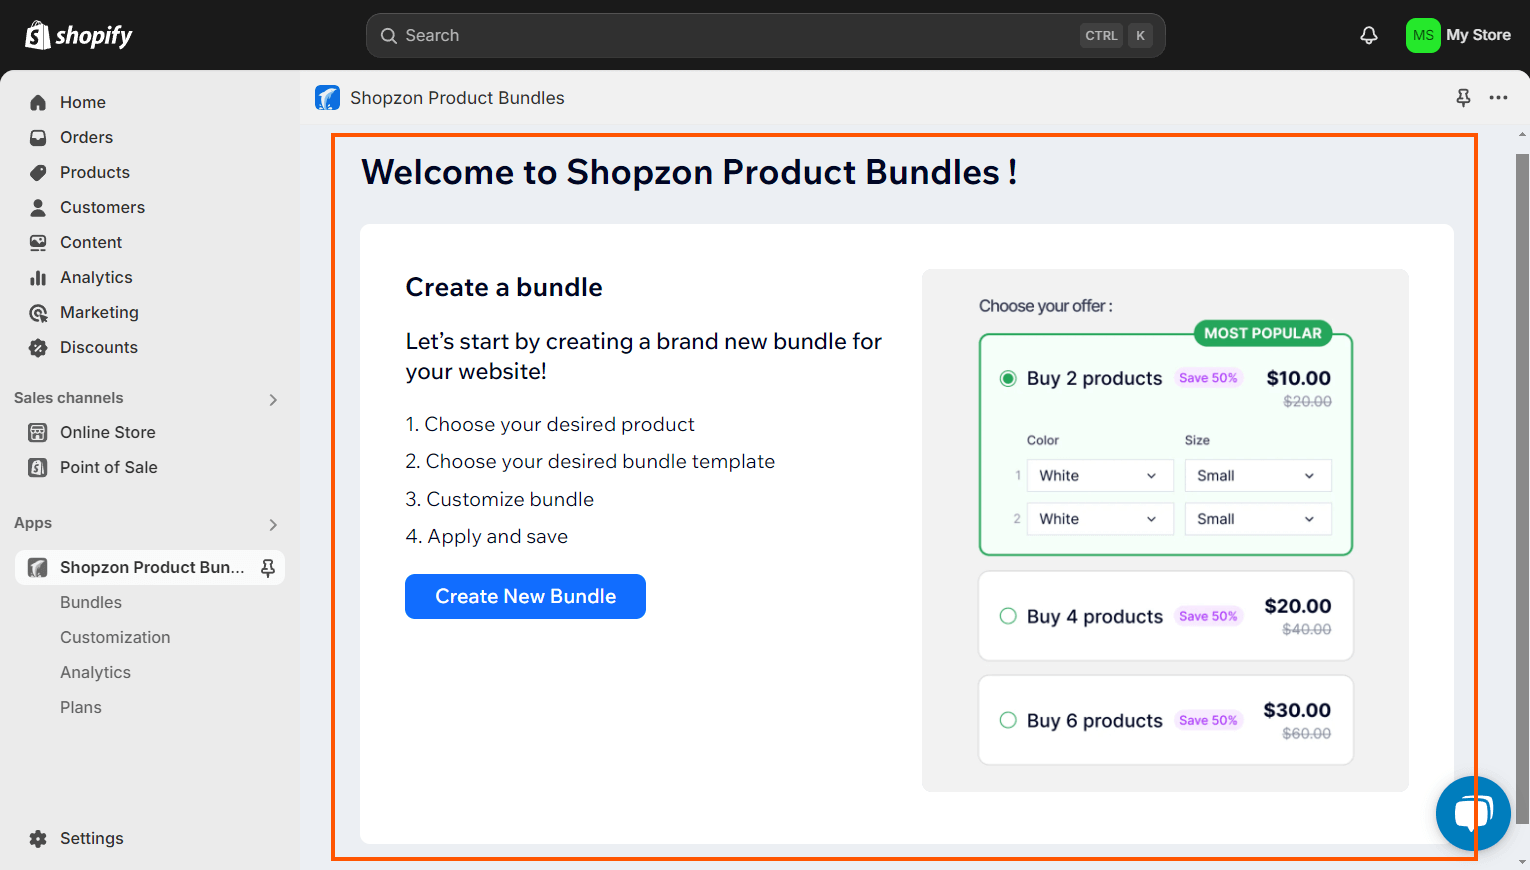
Click Create New Bundle to create your first bundle.
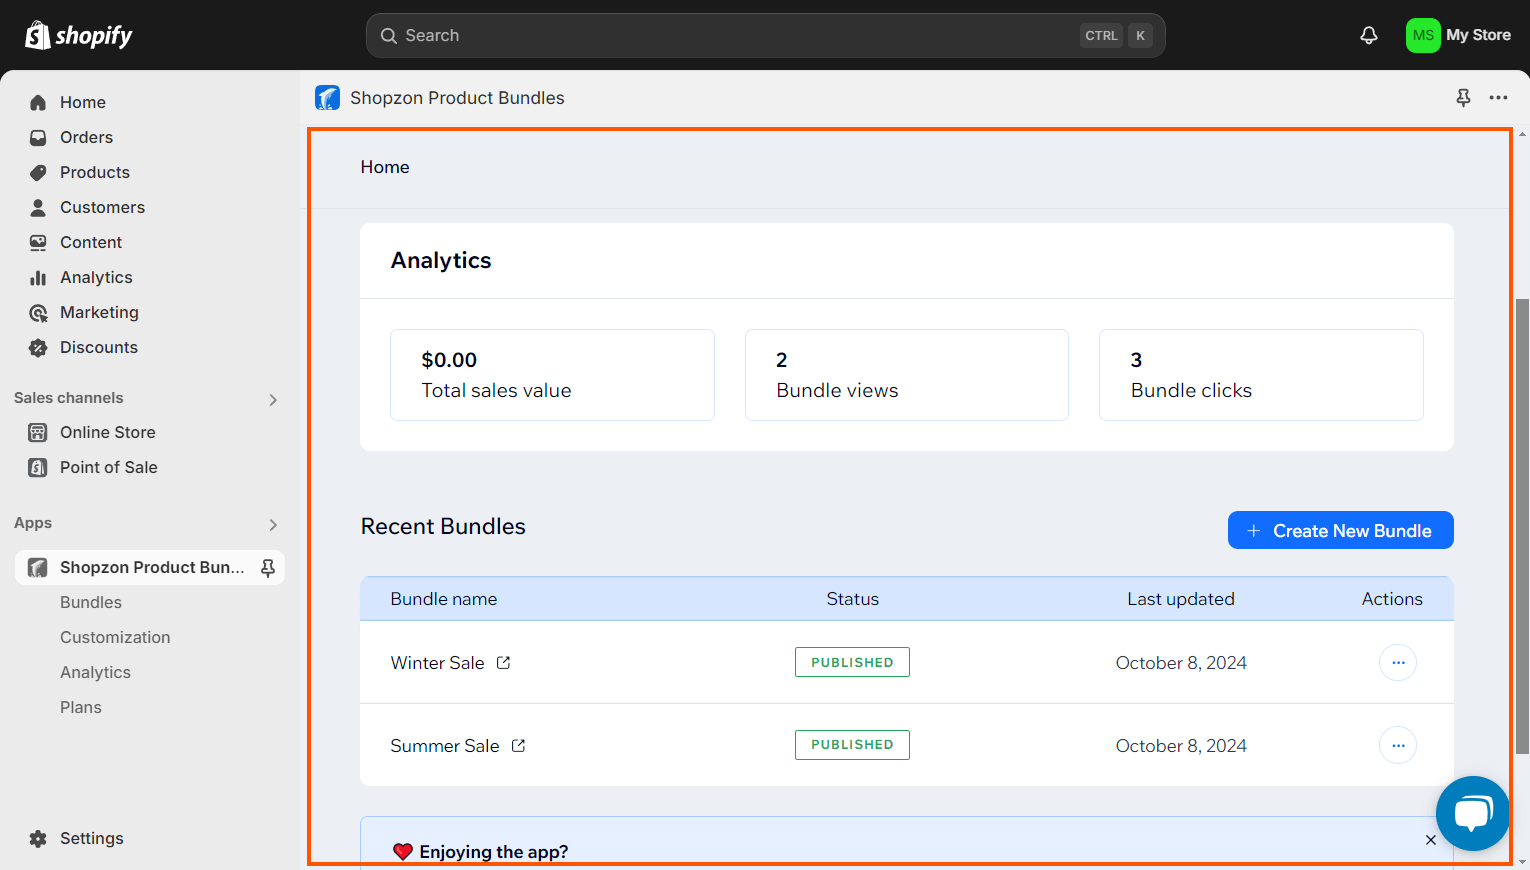
Once bundles are created, the dashboard provides an overview of bundle analytics and recent bundles.
3. Plans
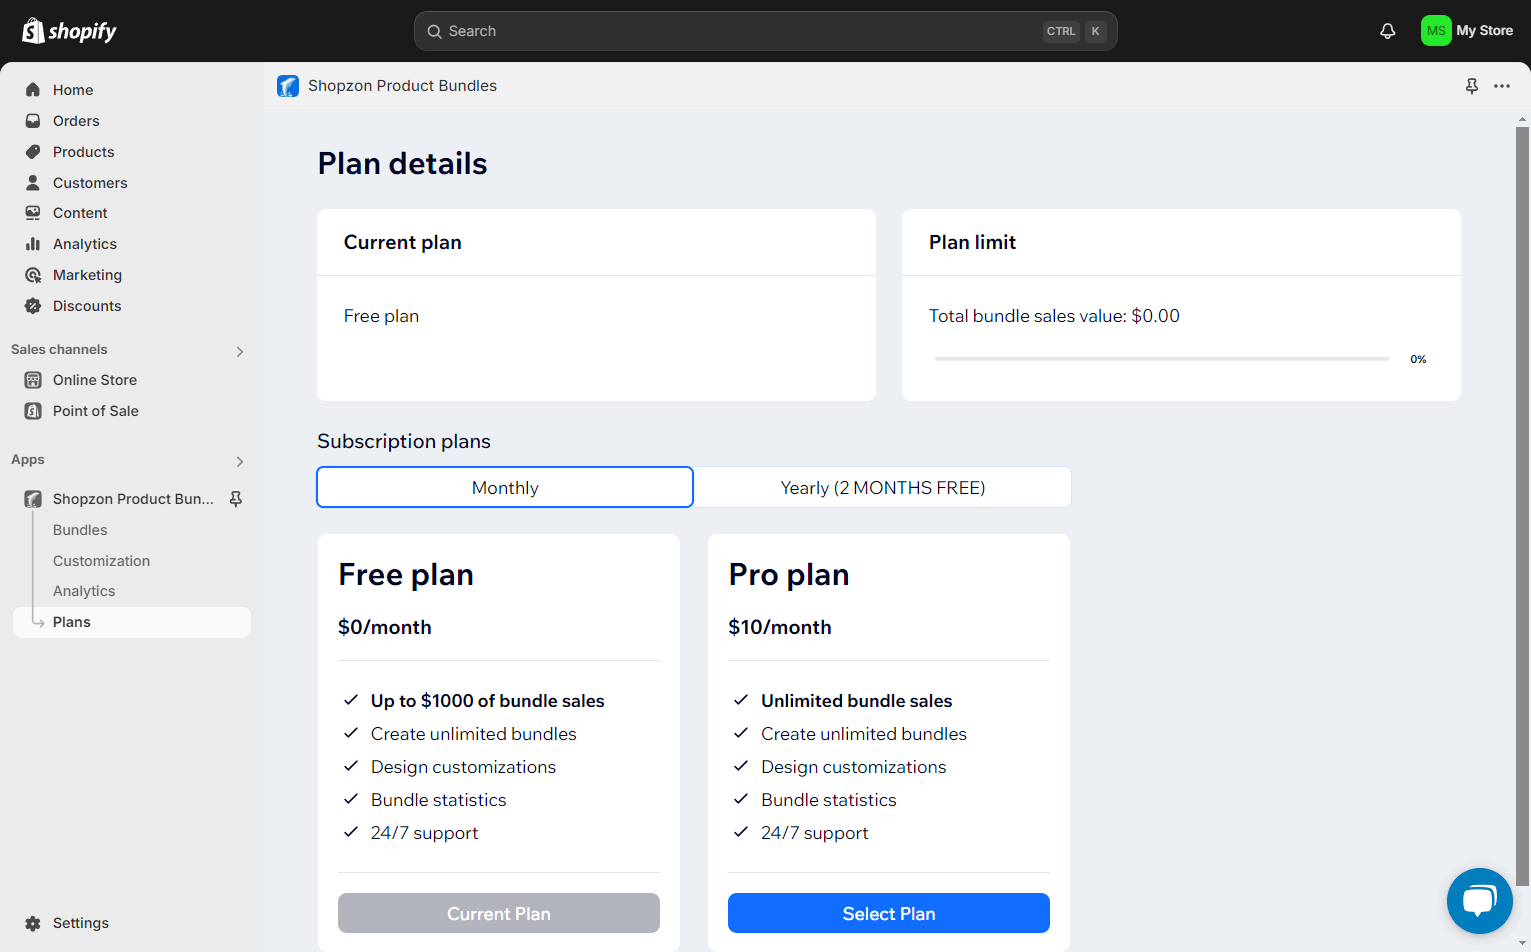
Shopzon Product Bundles app offers 2 plans: Free (up to $1000 of bundle sales) and Pro (unlimited bundle sales with 2 months free). Go to the Plans page to check your current plan or upgrade to the Pro.
Create a Bundle
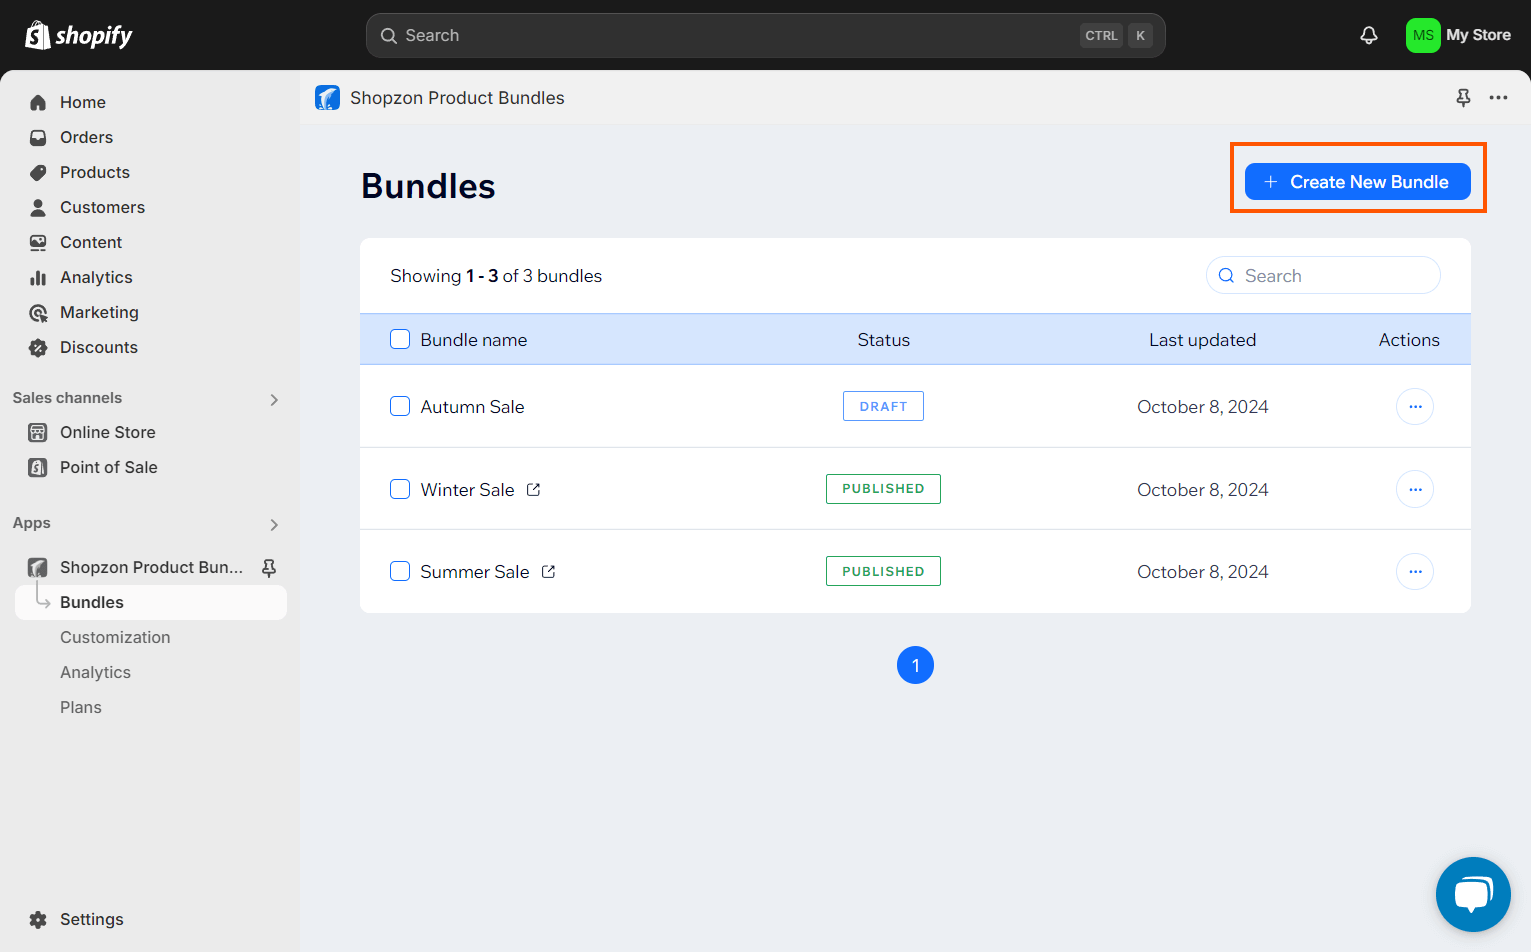
To create a bundle, navigate to the Bundles page, then click the Create New Bundle button.
Note:
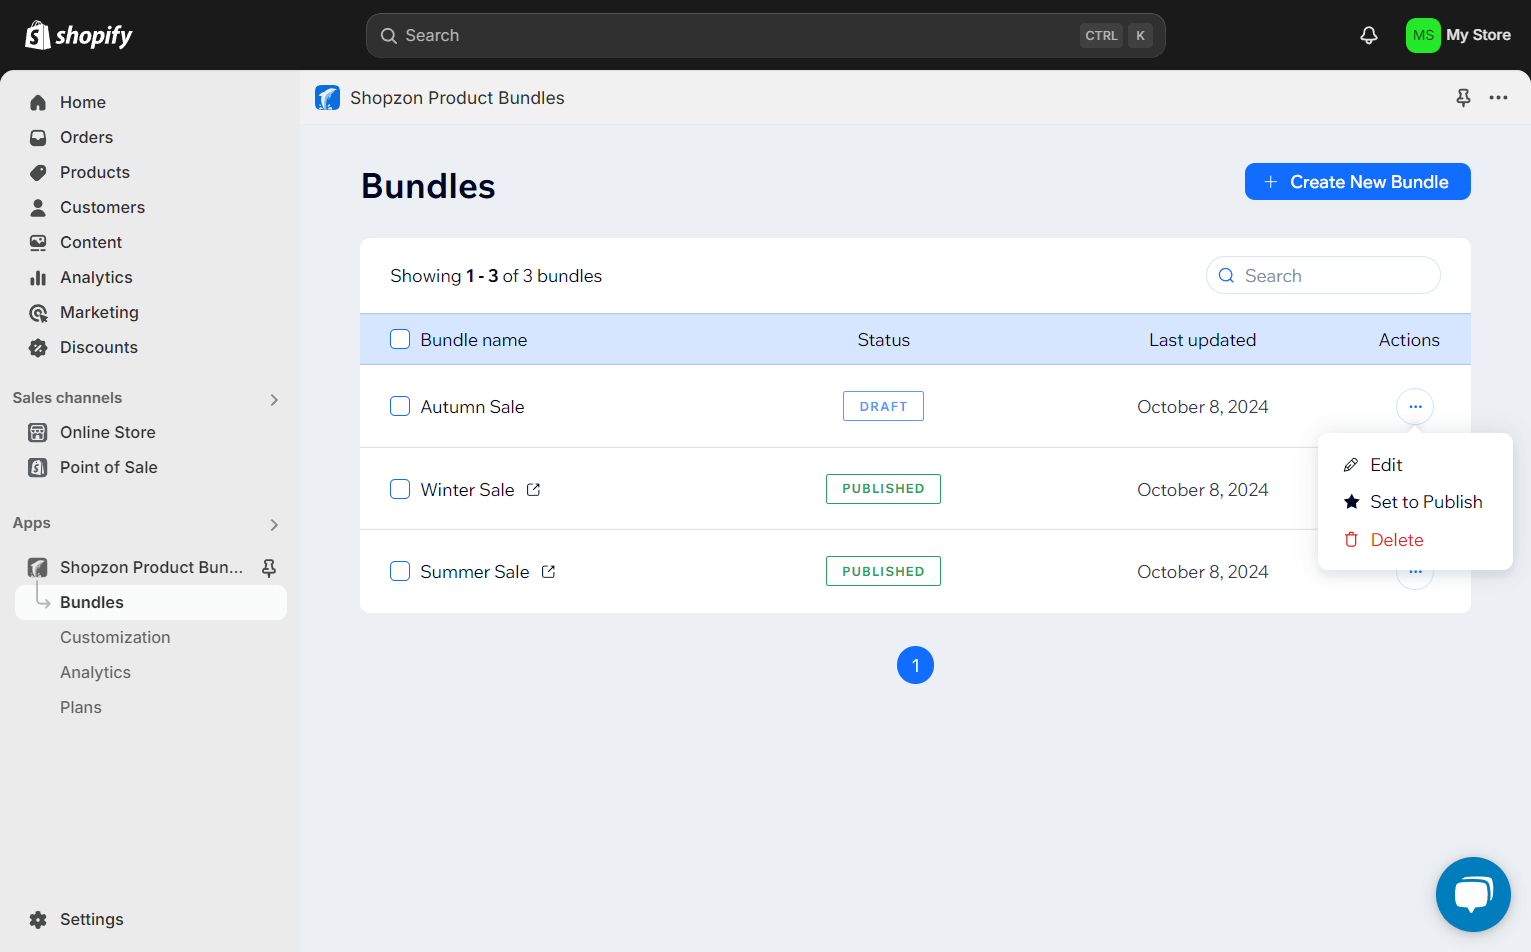
- All of your bundles are managed in a grid with details including bundle name, status, last updated date, and actions (Edit, Delete, Set to Publish/Set to Draft).
- Search for a bundle using the search box.
- If a bundle is published, click the icon next to the bundle name to view it on the storefront.
1. Choose Products
The first thing you need to do is to choose products that a bundle is applied to.
- Bundle name: Enter the name of your bundle.
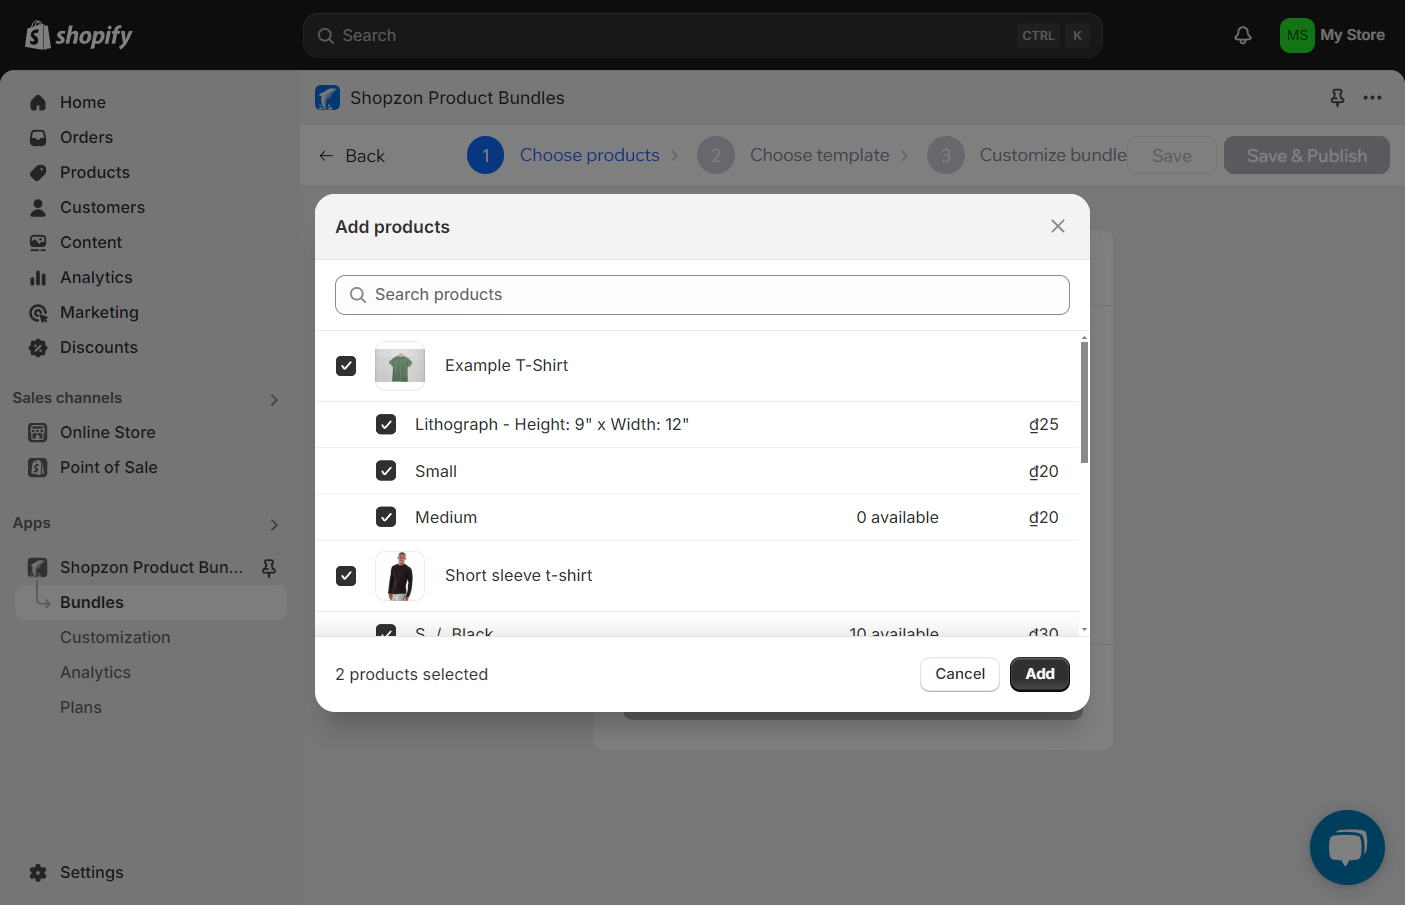
- Apply bundle to: Select which products you want to apply the bundle to. If you choose Products, select specific products from the Choose products field. Choose All products will apply the bundle to all products. Choose Collections to apply the bundles to products of specific collections.
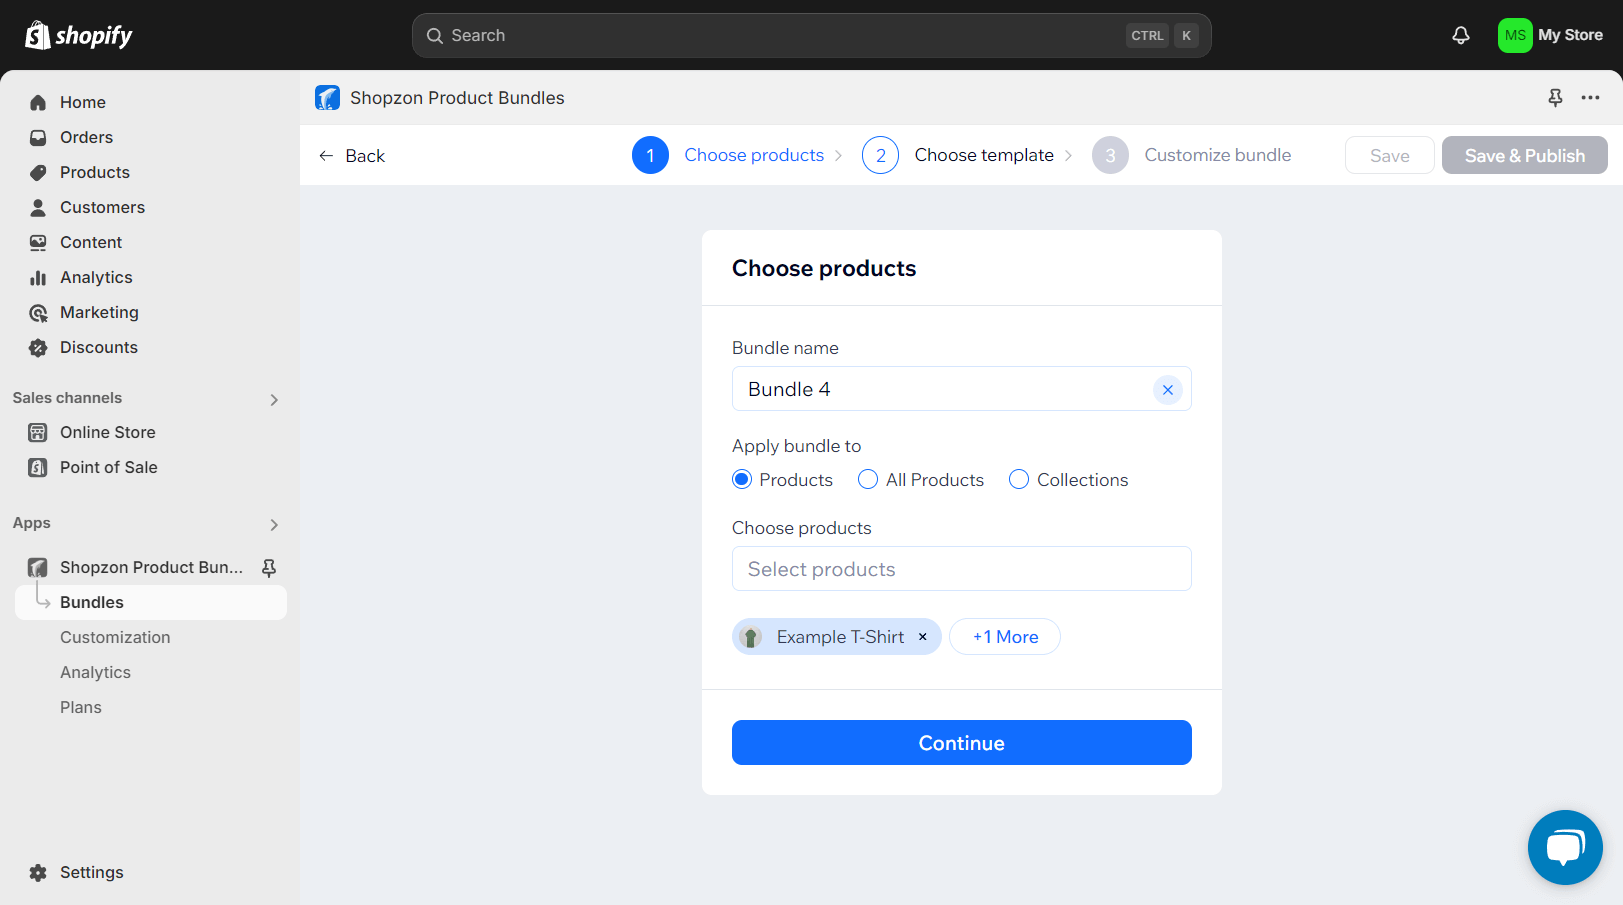
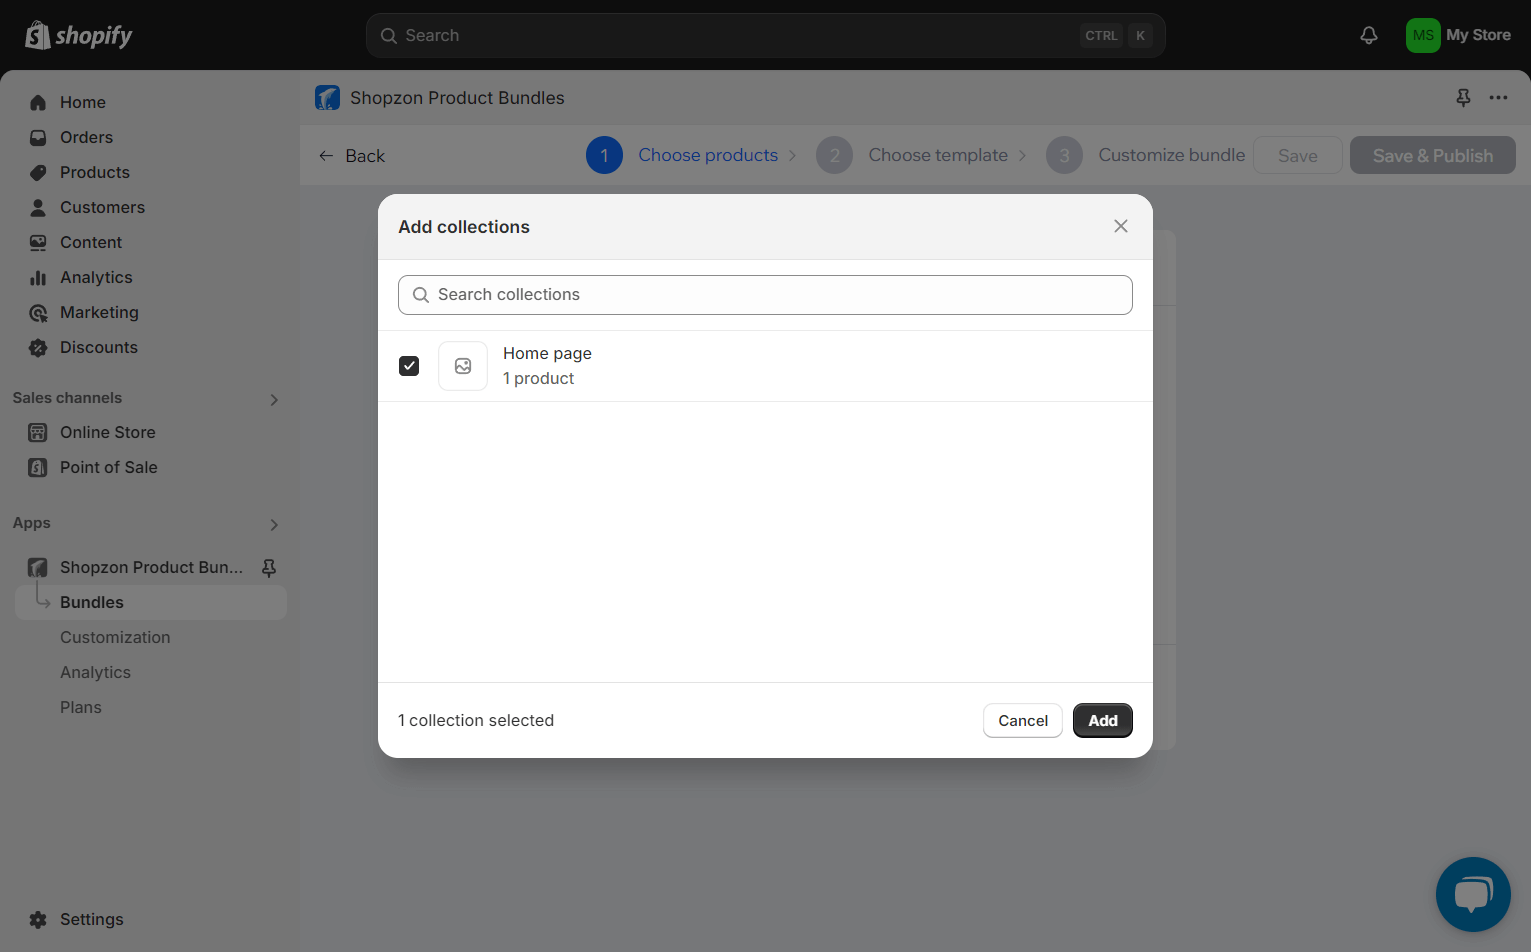
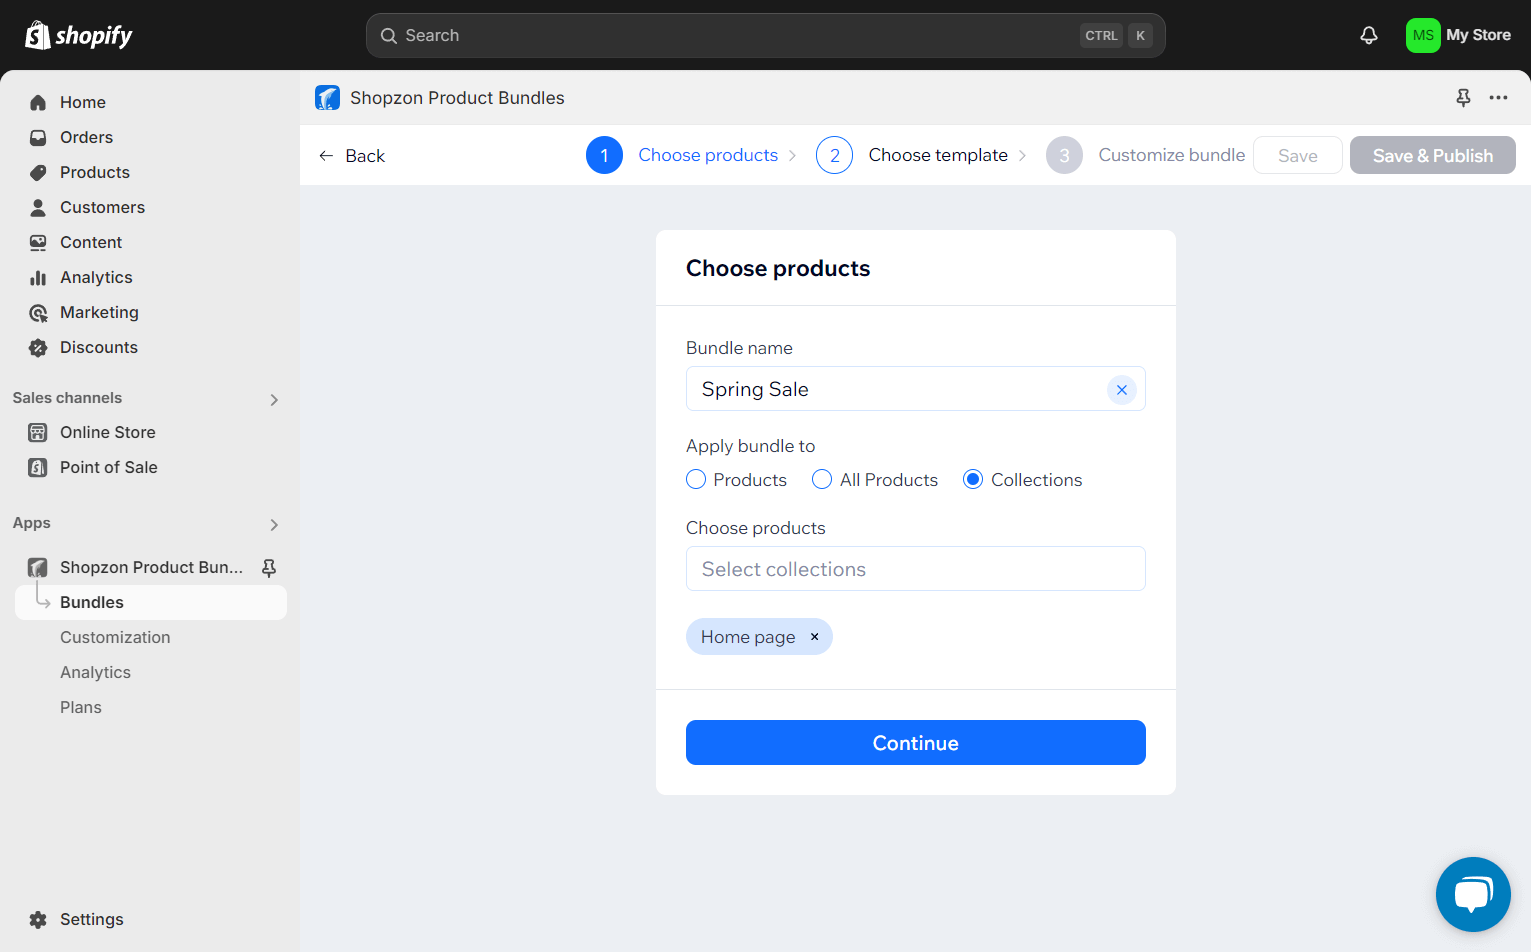
- Click Continue to select a template.
2. Choose Template
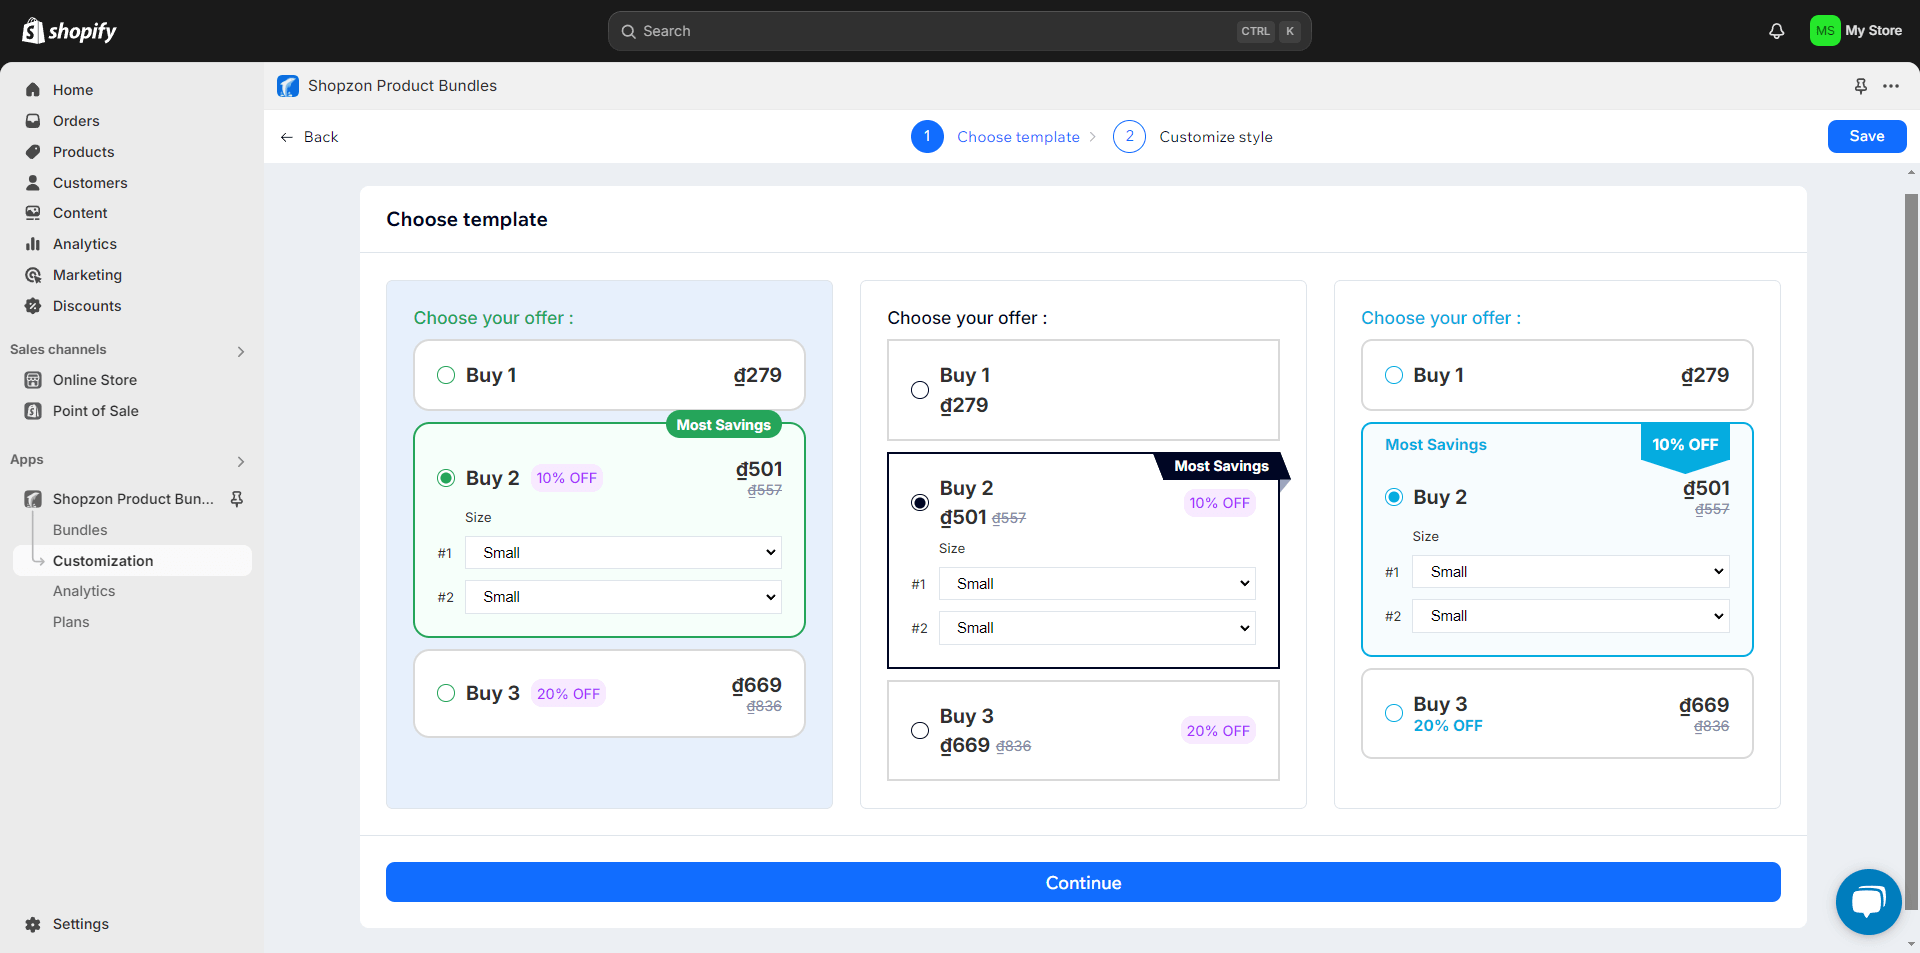
Choose a design template you want to use for a bundle. You can customize the look and feel of a template on the Customization page. Click Continue to move to the next step.
3. Customize Bundle
You will find 2 sections: Customize bundle for adjusting custom bundle options and Preview for previewing the bundle and any changes in real time.
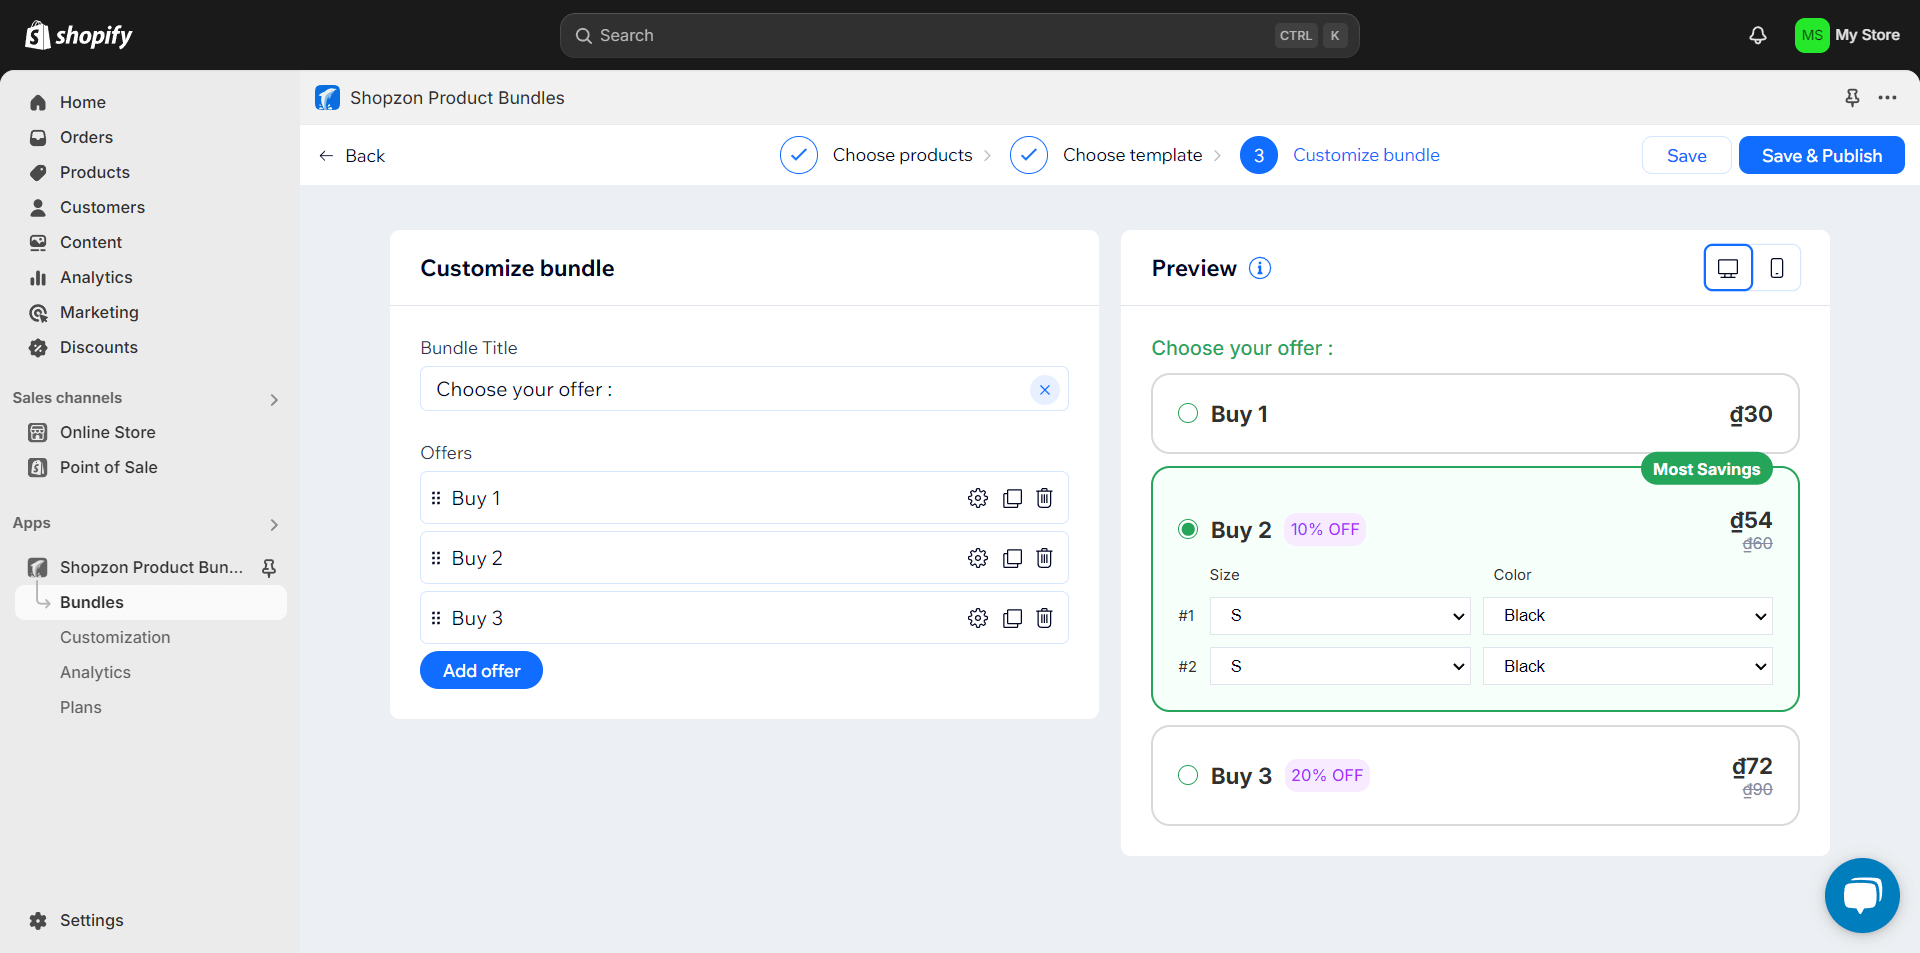
3.1. Customize bundle
– Enter the Bundle Title.
– Add as many Offers as you want with the Add offer button. Each offer comes with its settings:
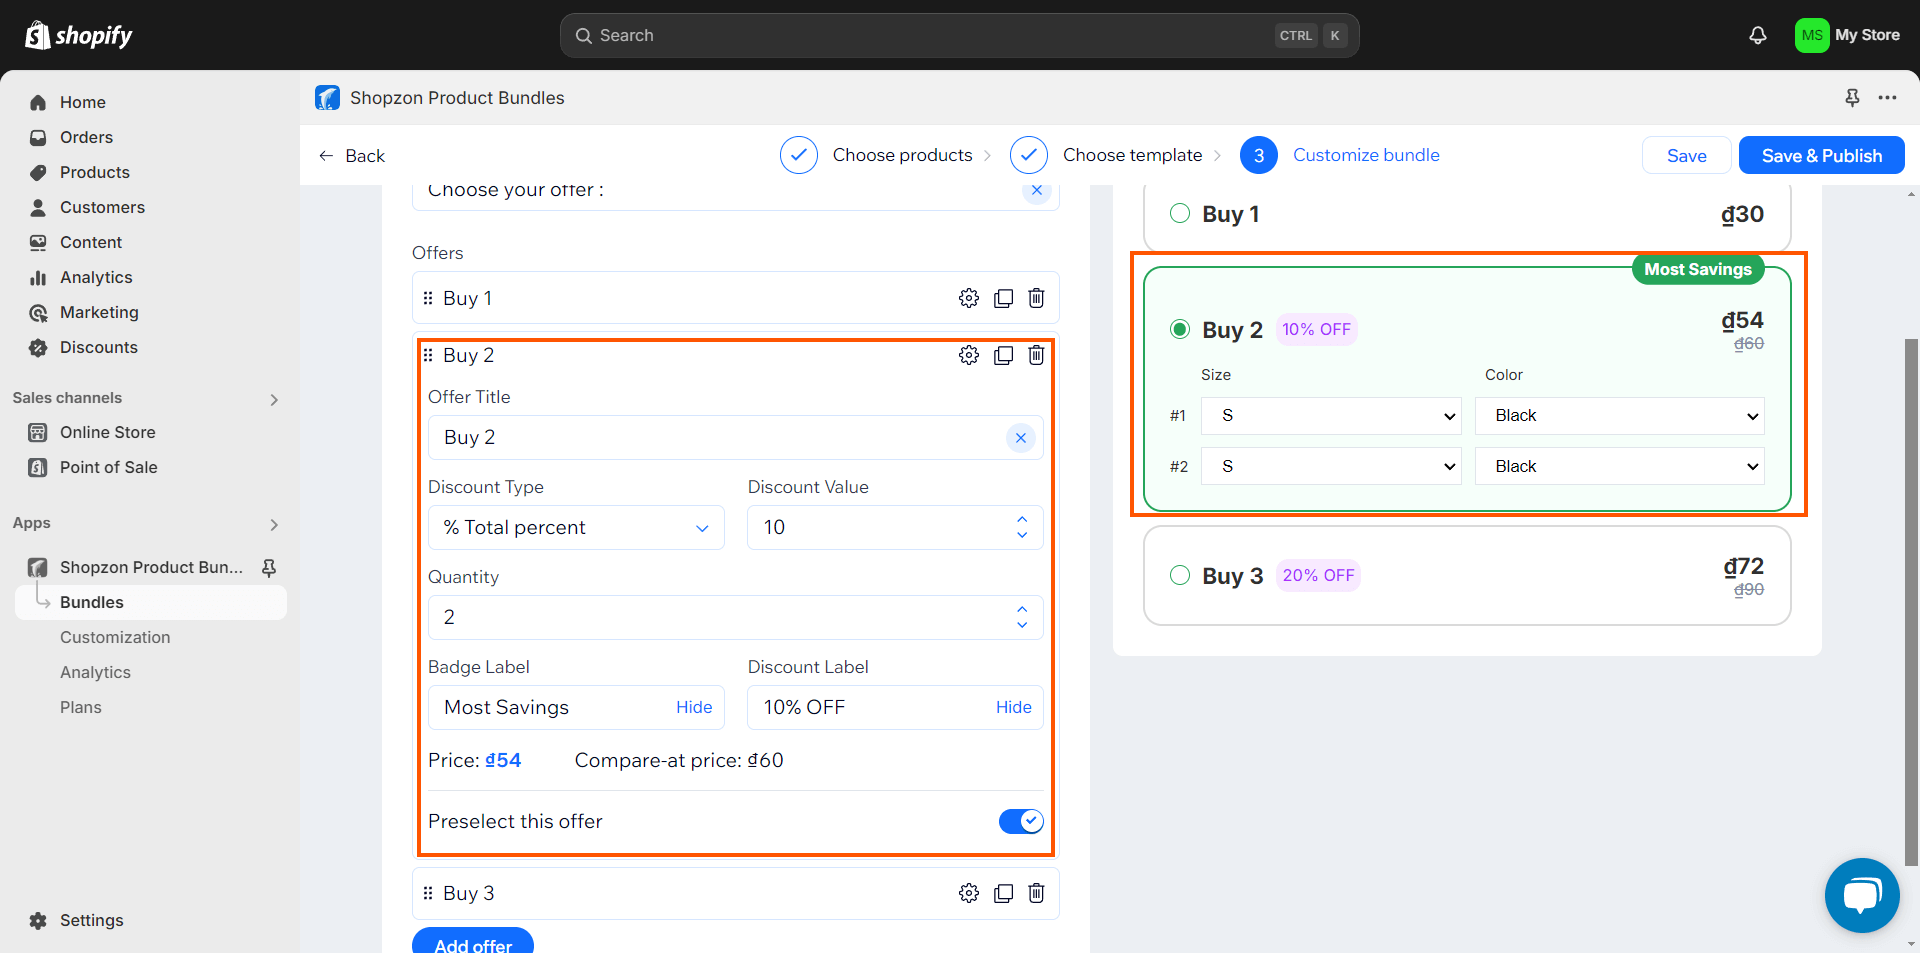
- Drag icon: use it to change the position of an offer by dragging & dropping.
- Settings icon: click it to expand/collapse the offer settings.
- Duplicate icon: use it to duplicate an offer.
- Trash icon: click on it to delete an offer.
- Offer Title: Enter the offer title.
- Discount Type: select a discount type – fixed or percentage discount.
- Discount Value: enter the discount value (in percentage or currency unit) based on the discount type.
- Quantity: enter the number of products a customer needs to purchase to get the discount offer.
- Badge Label: enter a badge label for the offer that can be shown or hidden.
- Discount Label: enter a label for the discount that can be shown or hidden.
- Price: display the original price.
- Compare-at price: display the discount price automatically calculated based on the Price and Discount Value.
- Preselect this offer: Enable to make this offer to be automatically selected on the storefront.
3.2. Preview
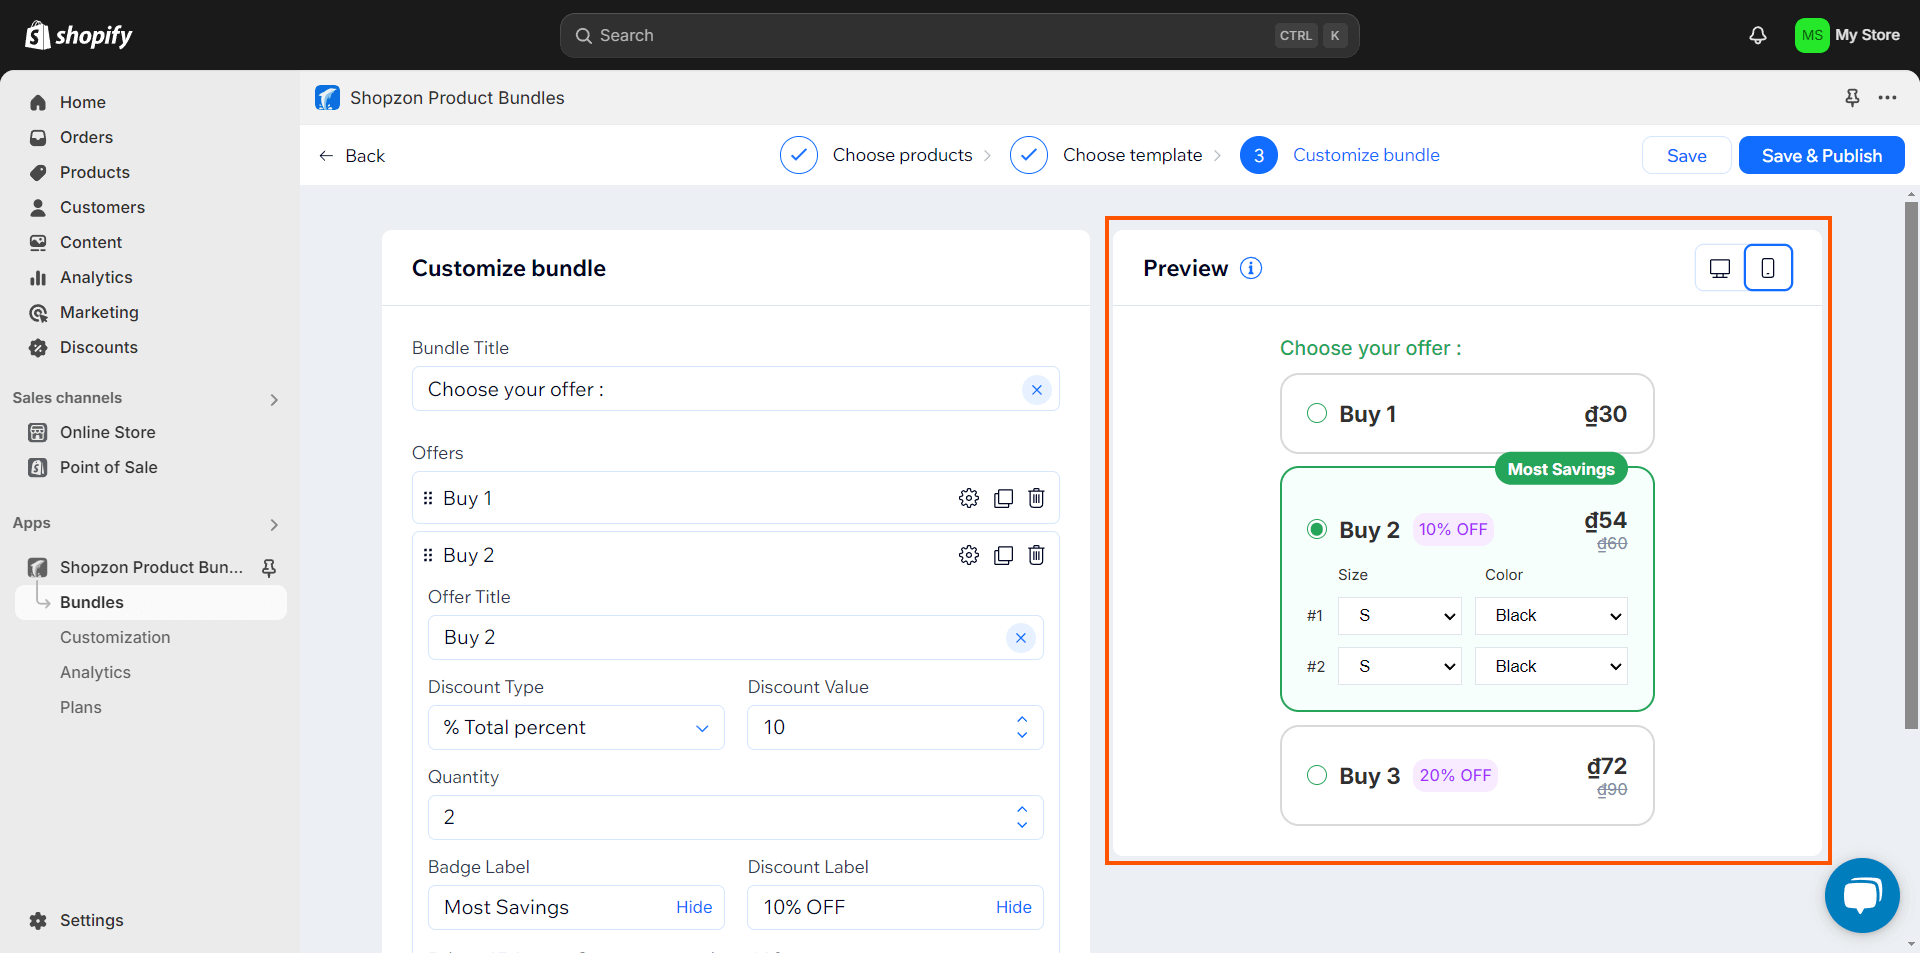
The section allows you to preview the bundle to see how it will look on the storefront. The data in this section is called from one of the products to which the bundle is applied.
Every change you make in the Custom bundle section is applied and displayed in real time in the Preview section. You can switch between desktop and mobile to preview the bundle on each device.
4. Save Bundle
After you customize the bundle, choose to save it as a draft or save & publish it on the storefront.
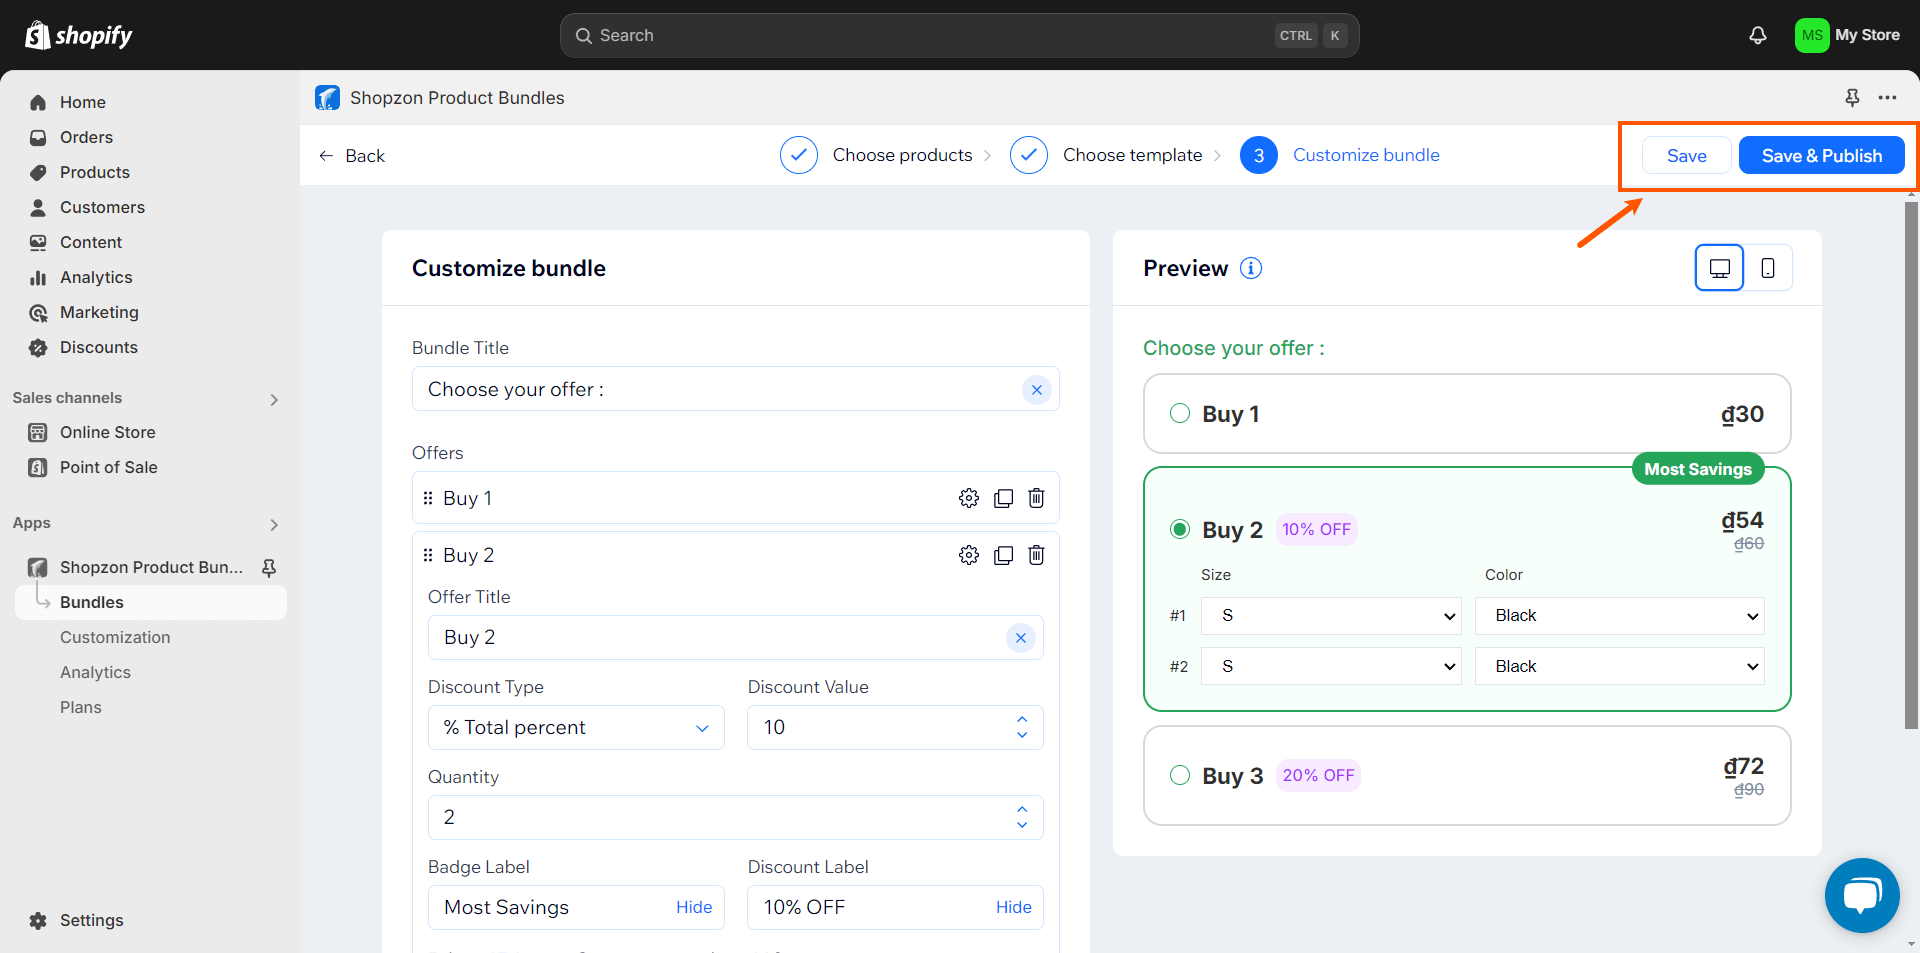
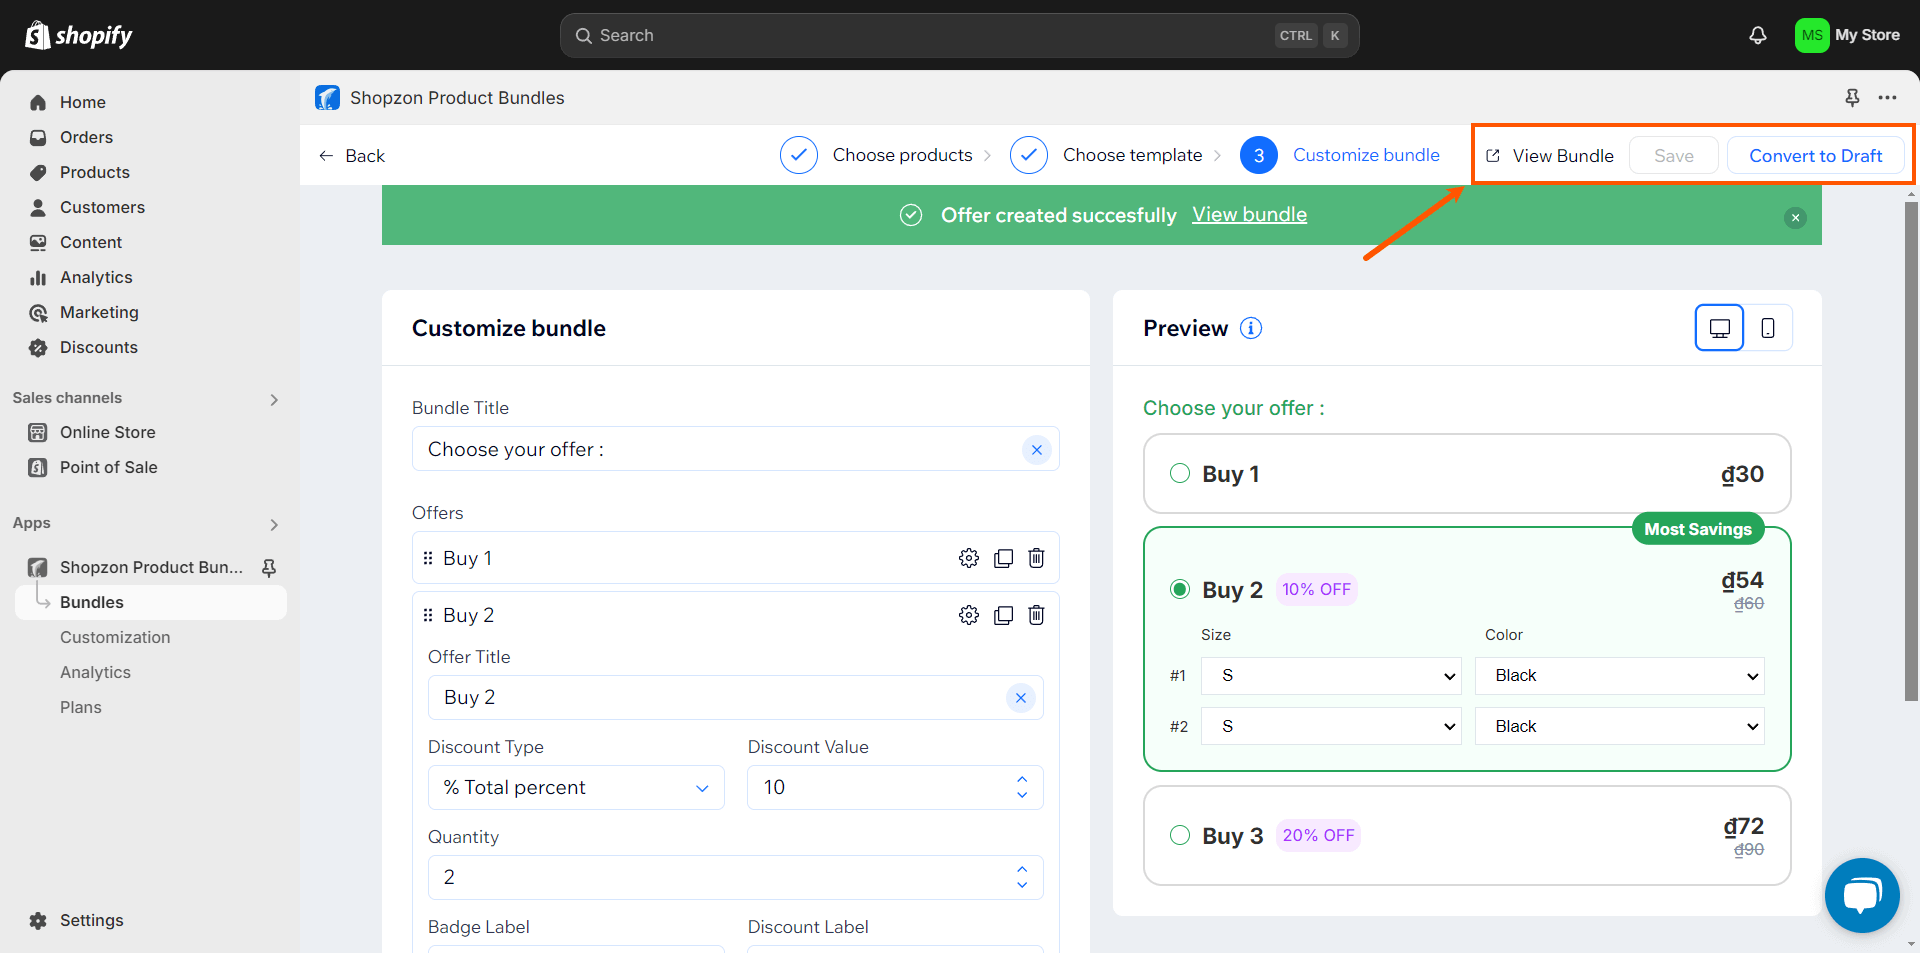
If you publish the bundle, click View Bundle to go to the storefront and view the bundle. Click Convert to Draft to set the bundle to draft.
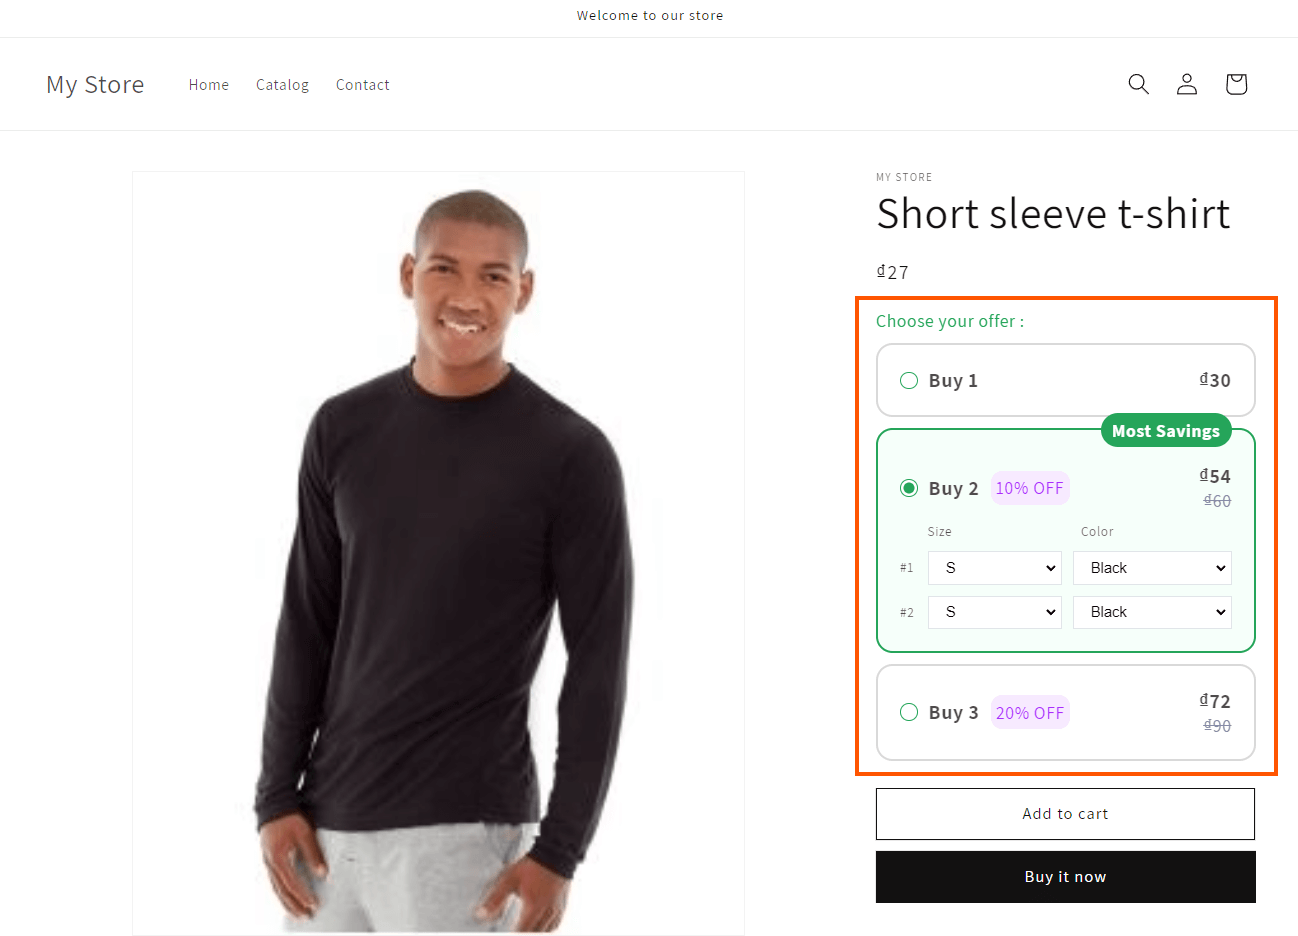
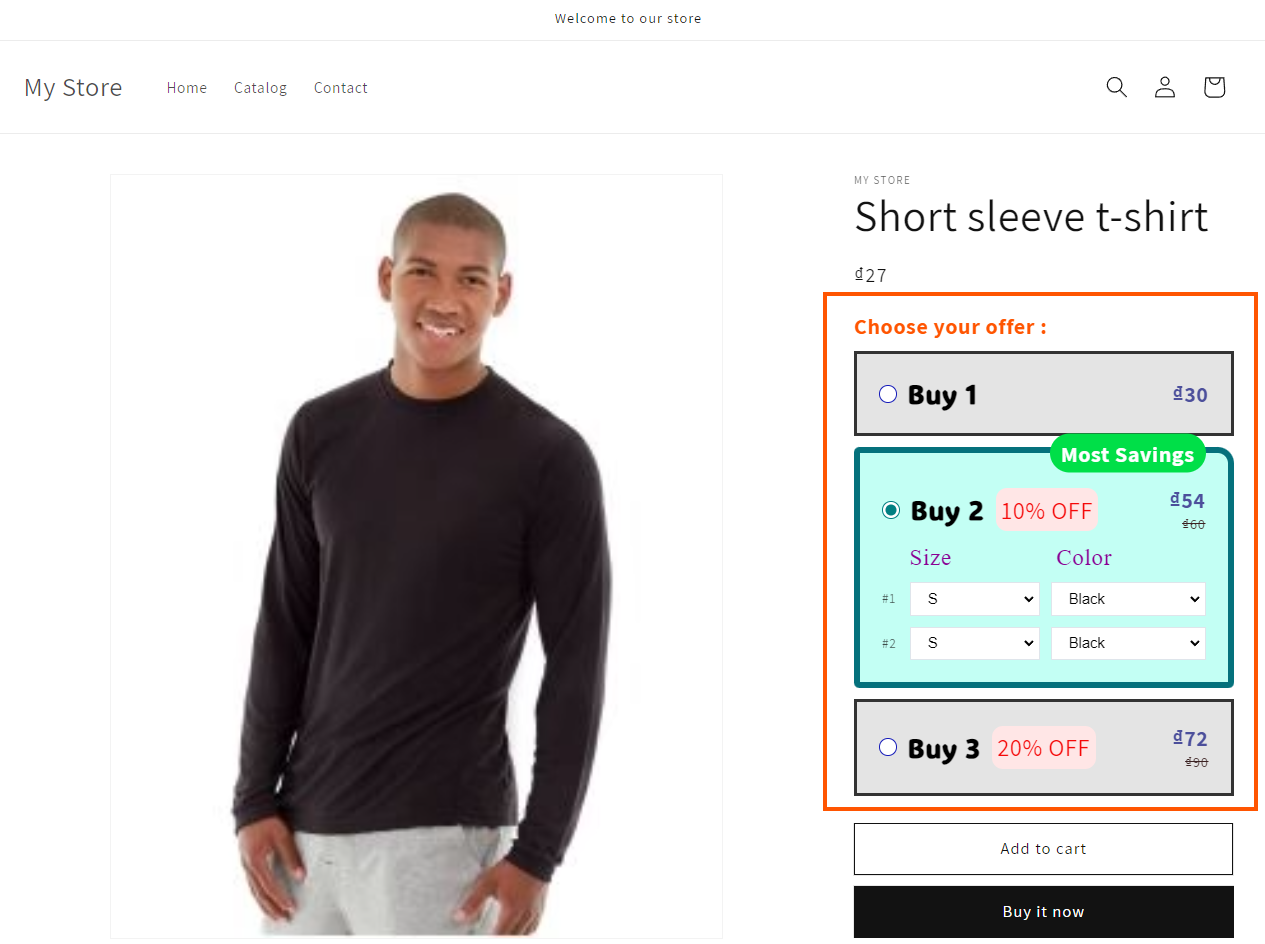
Let’s see how the bundle looks on the storefront.
Customize Templates
The app provides 3 bundle templates, and you can customize the appearance of each template to match your store’s look and feel.
1. Choose Template
On the Customization page, you first need to select a template to customize and click Continue to move to the Customize style step.
2. Customize Style
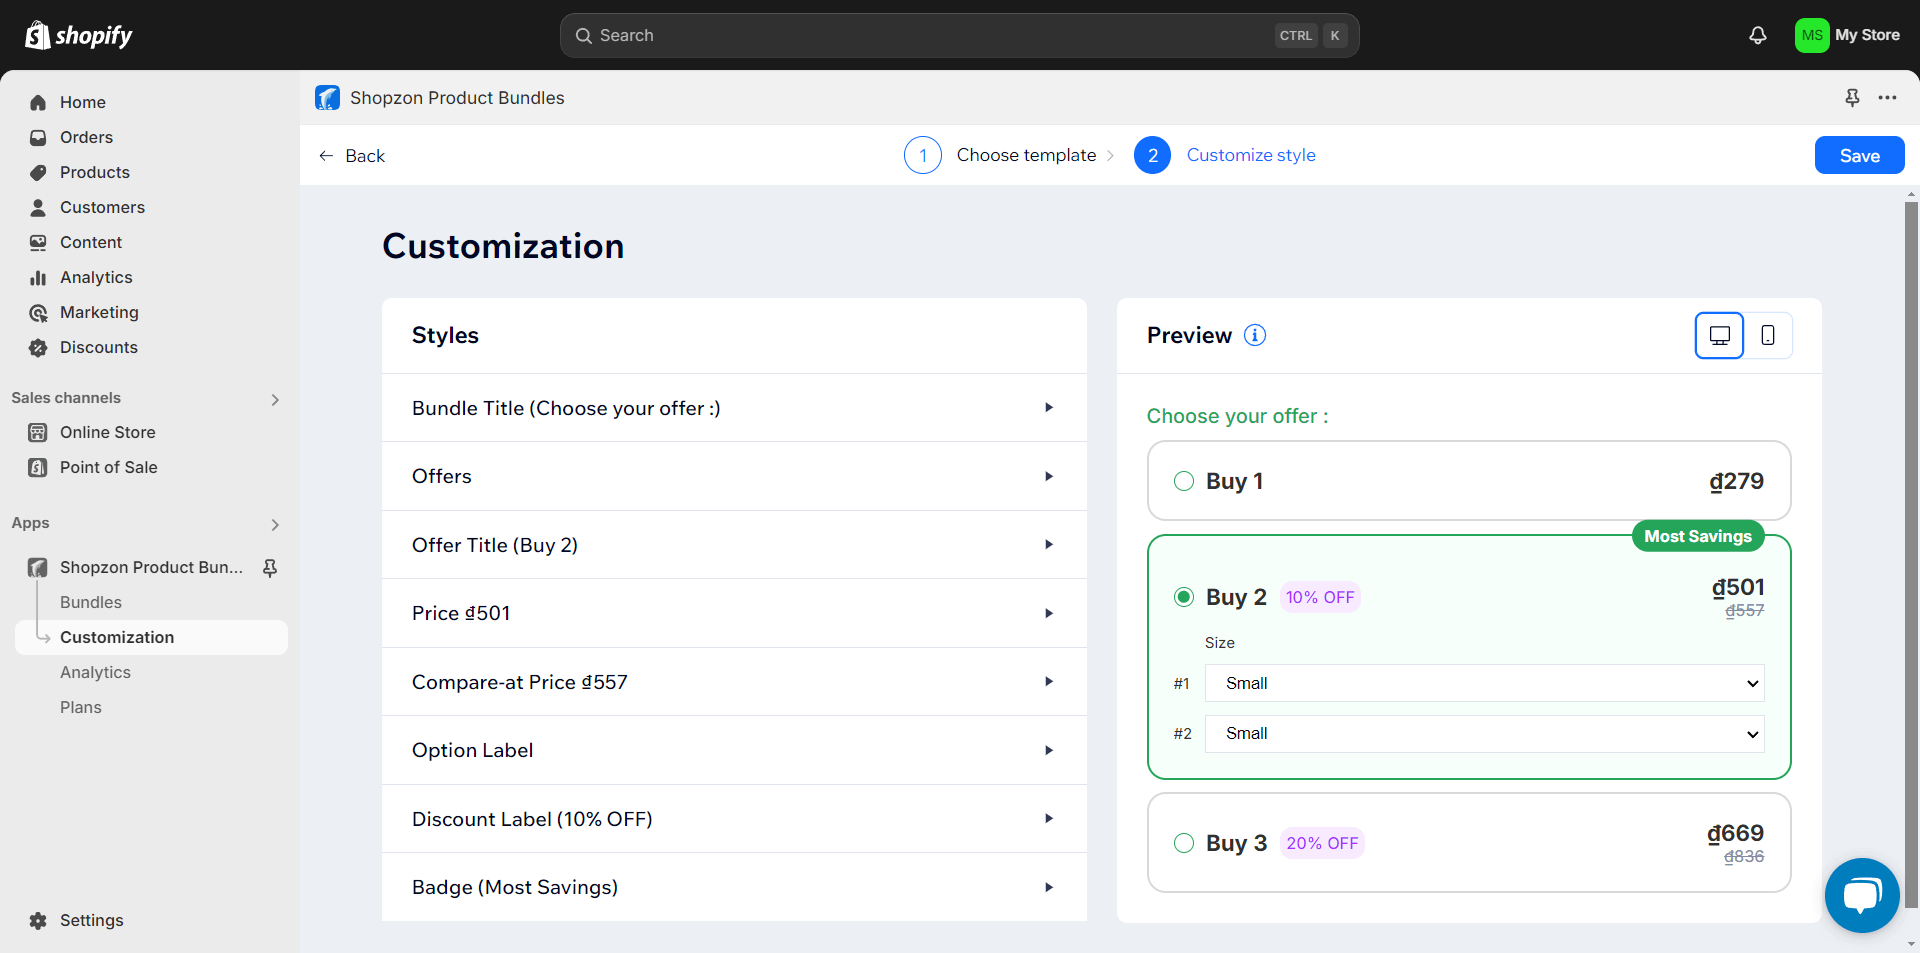
Adjust the template style in the Styles section and preview it in the Preview section.
2.1. Styles
– Bundle Title:
- Adjust Font Family, Font Weight, Font Size, and Color.
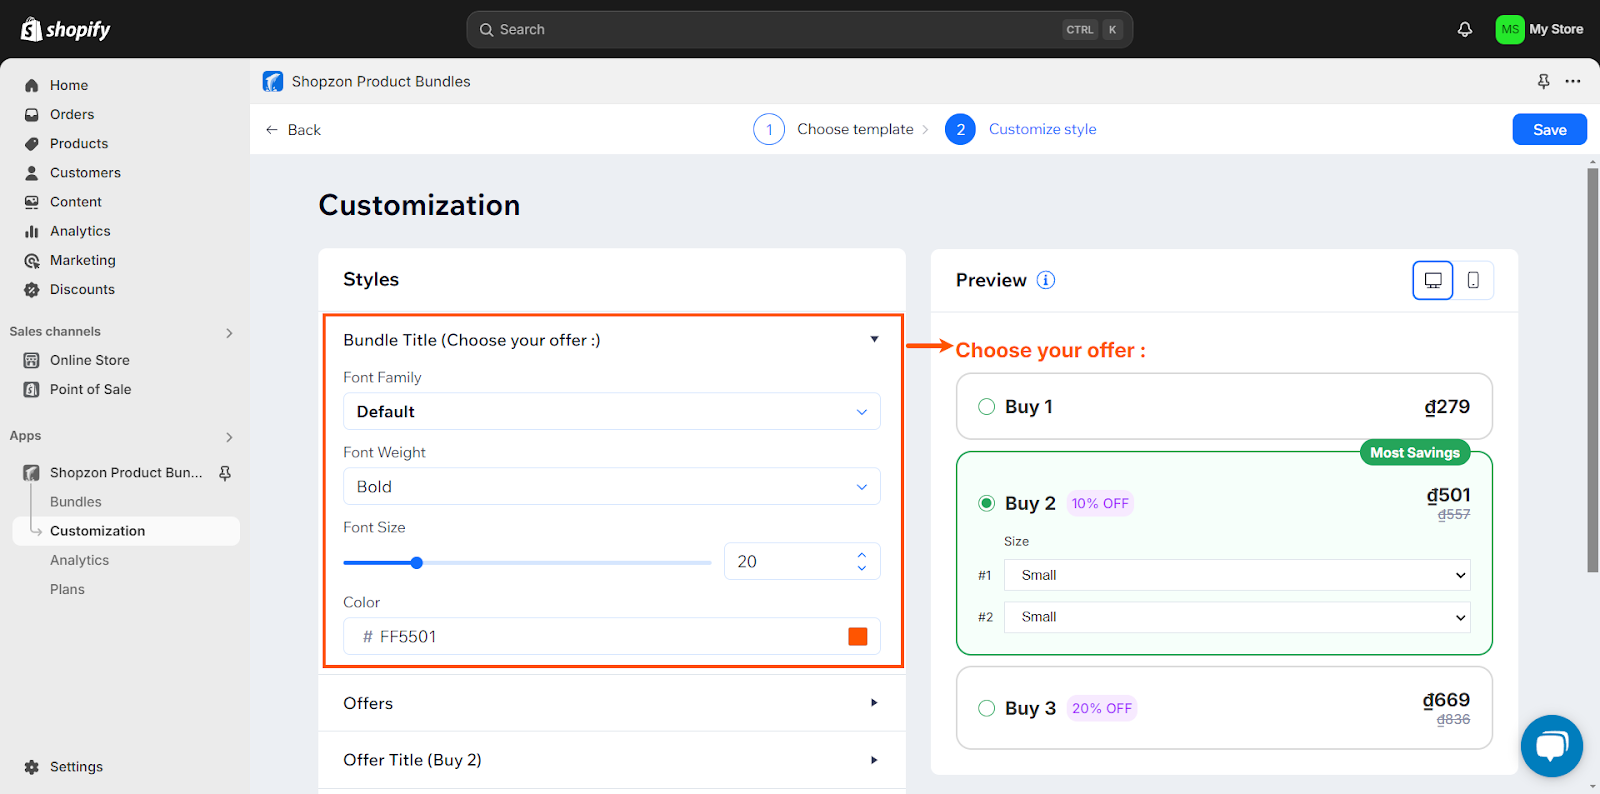
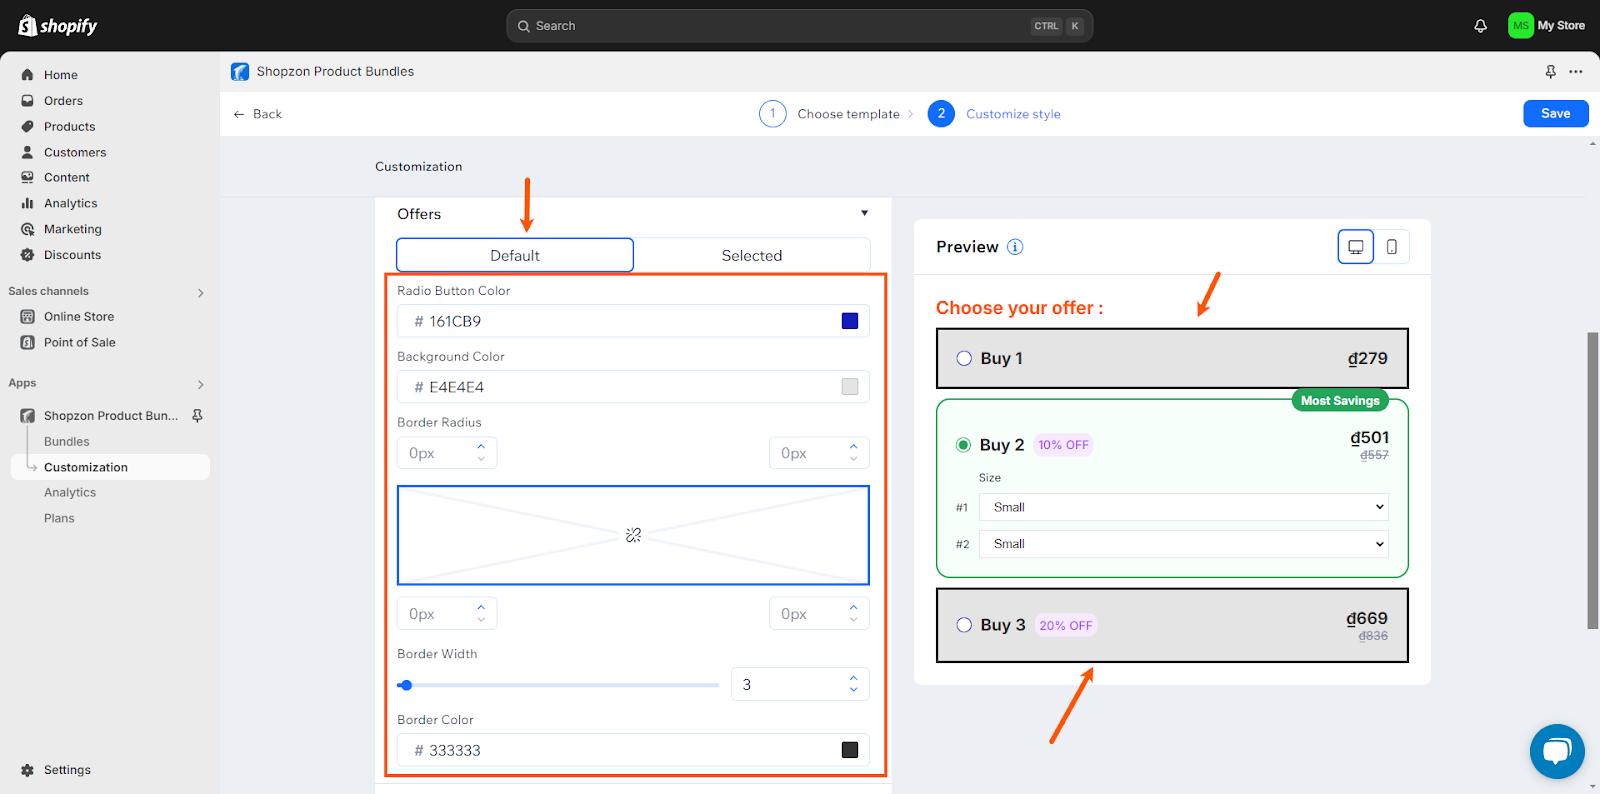
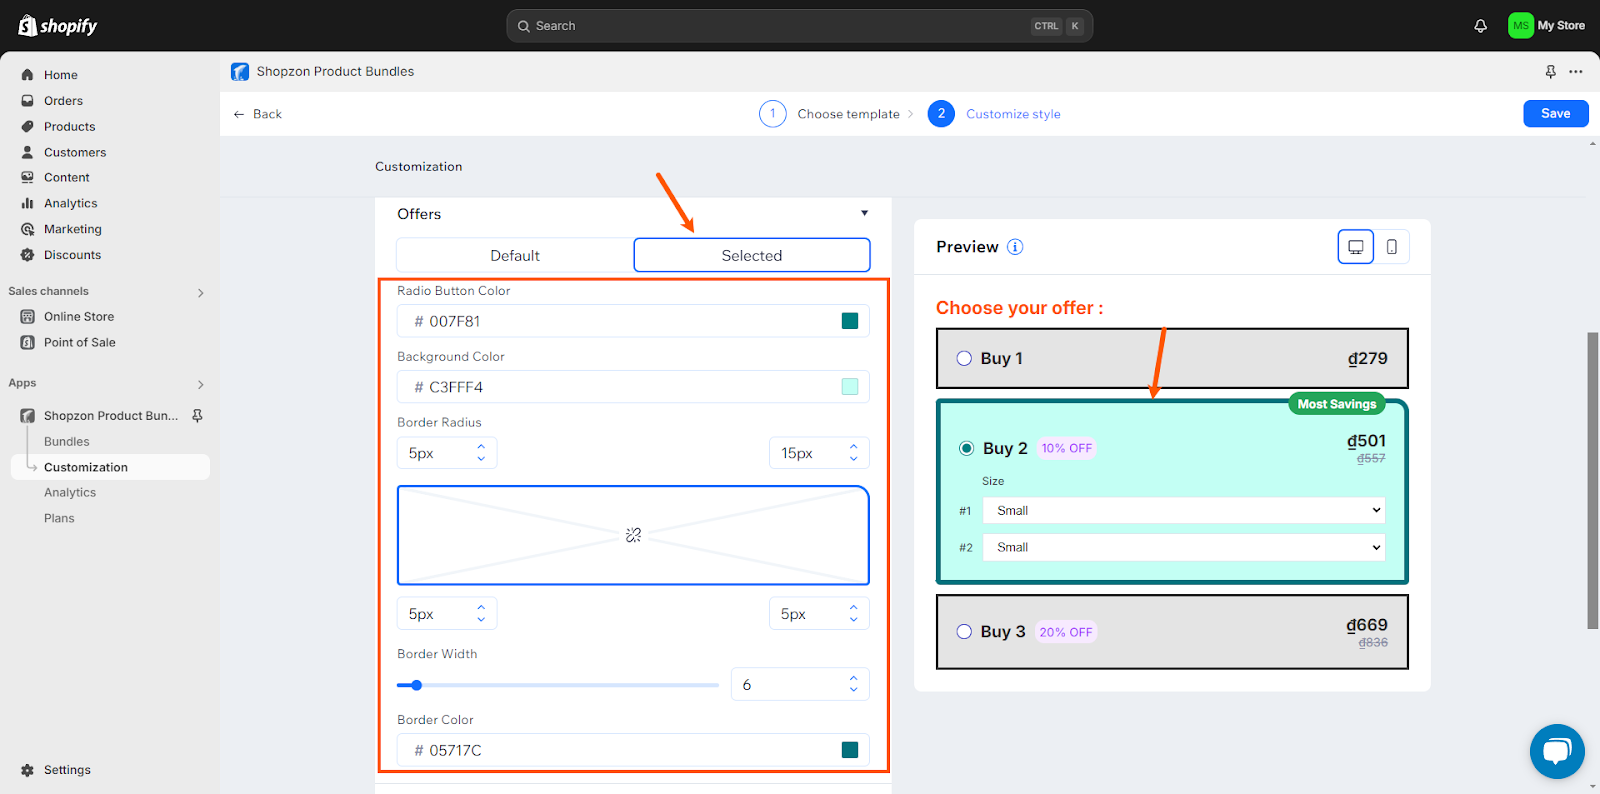
– Offers: Customize the appearance of non-selected offers in the Default tab and the selected one in the Selected tab.
- Radio Button Color: change the color of the radio button.
- Adjust the Background Color, Border Radius, Border Width, and Border Color of the offer.
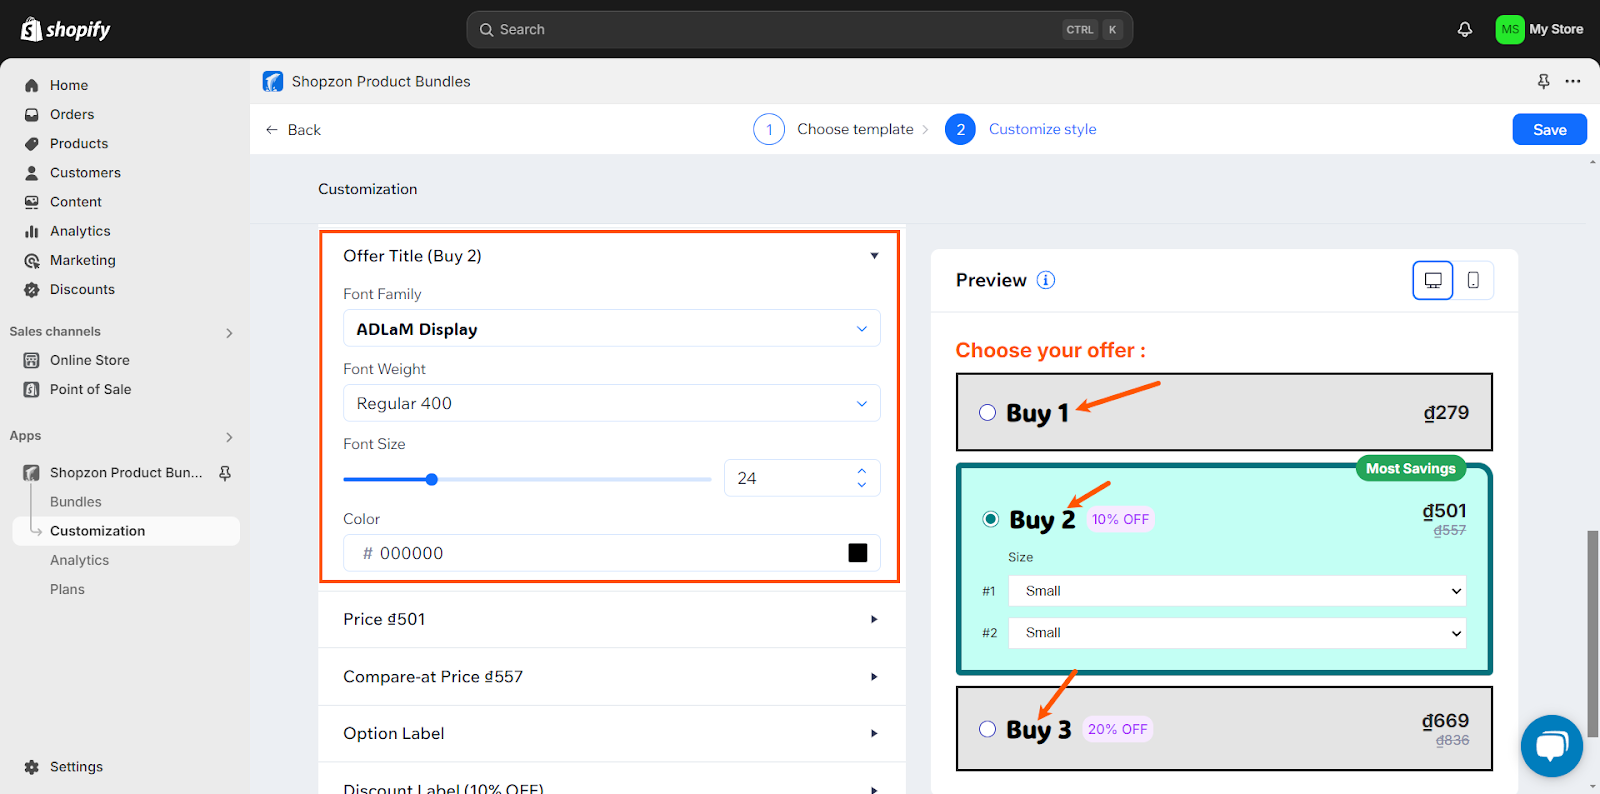
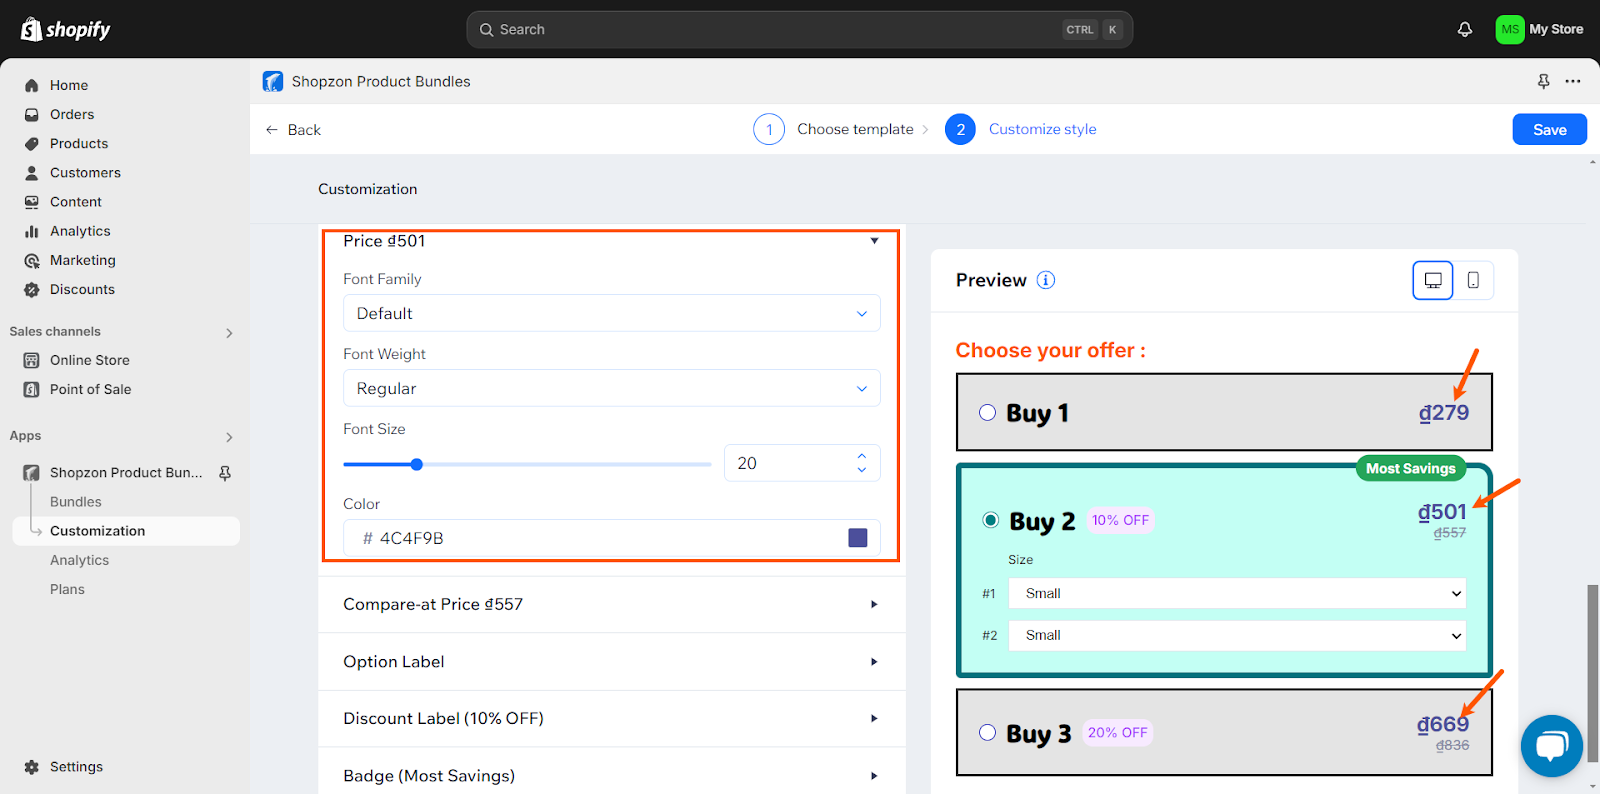
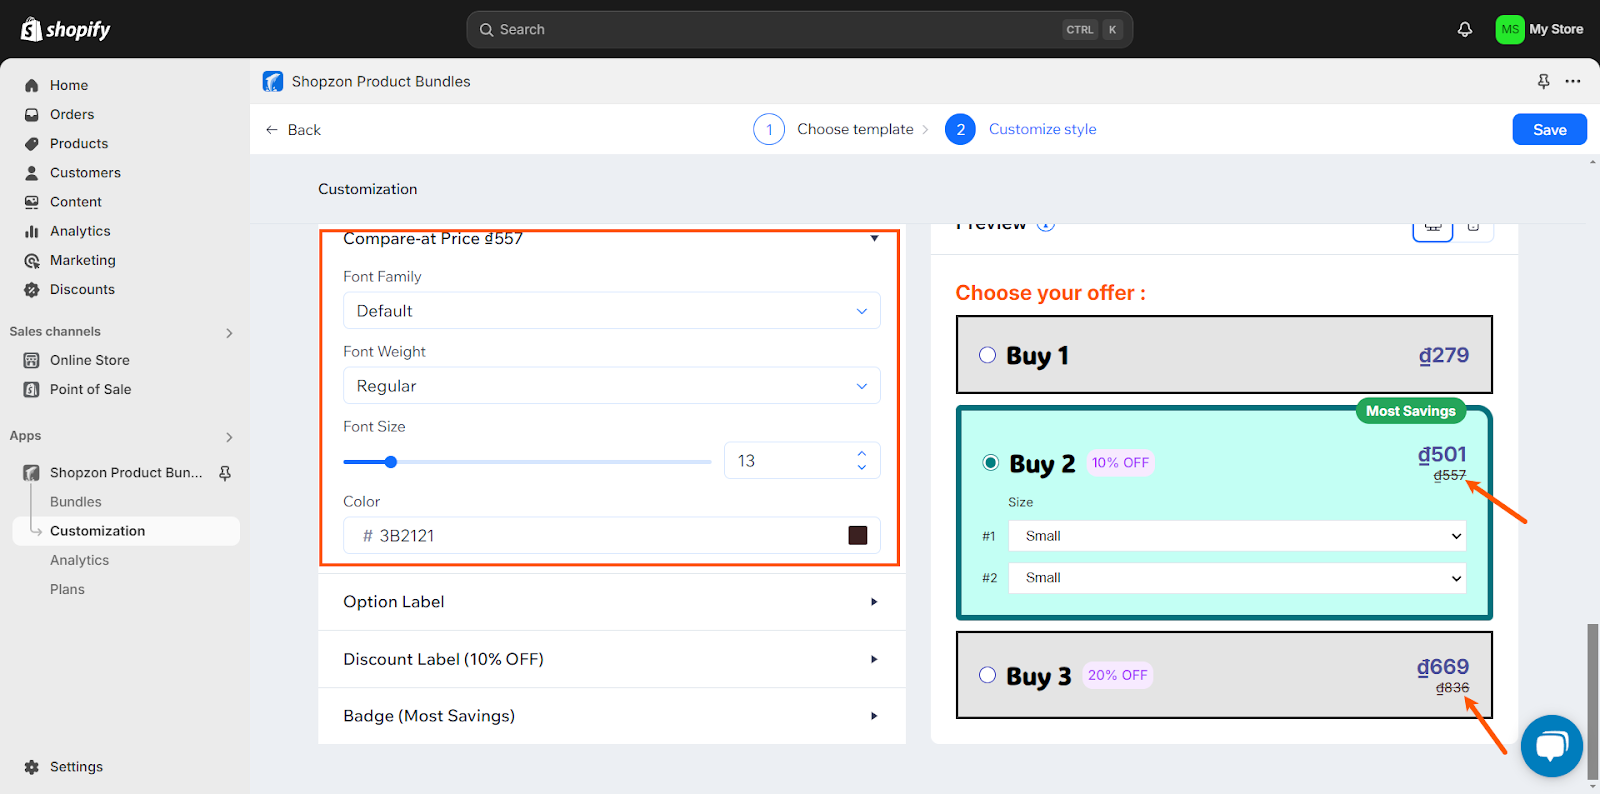
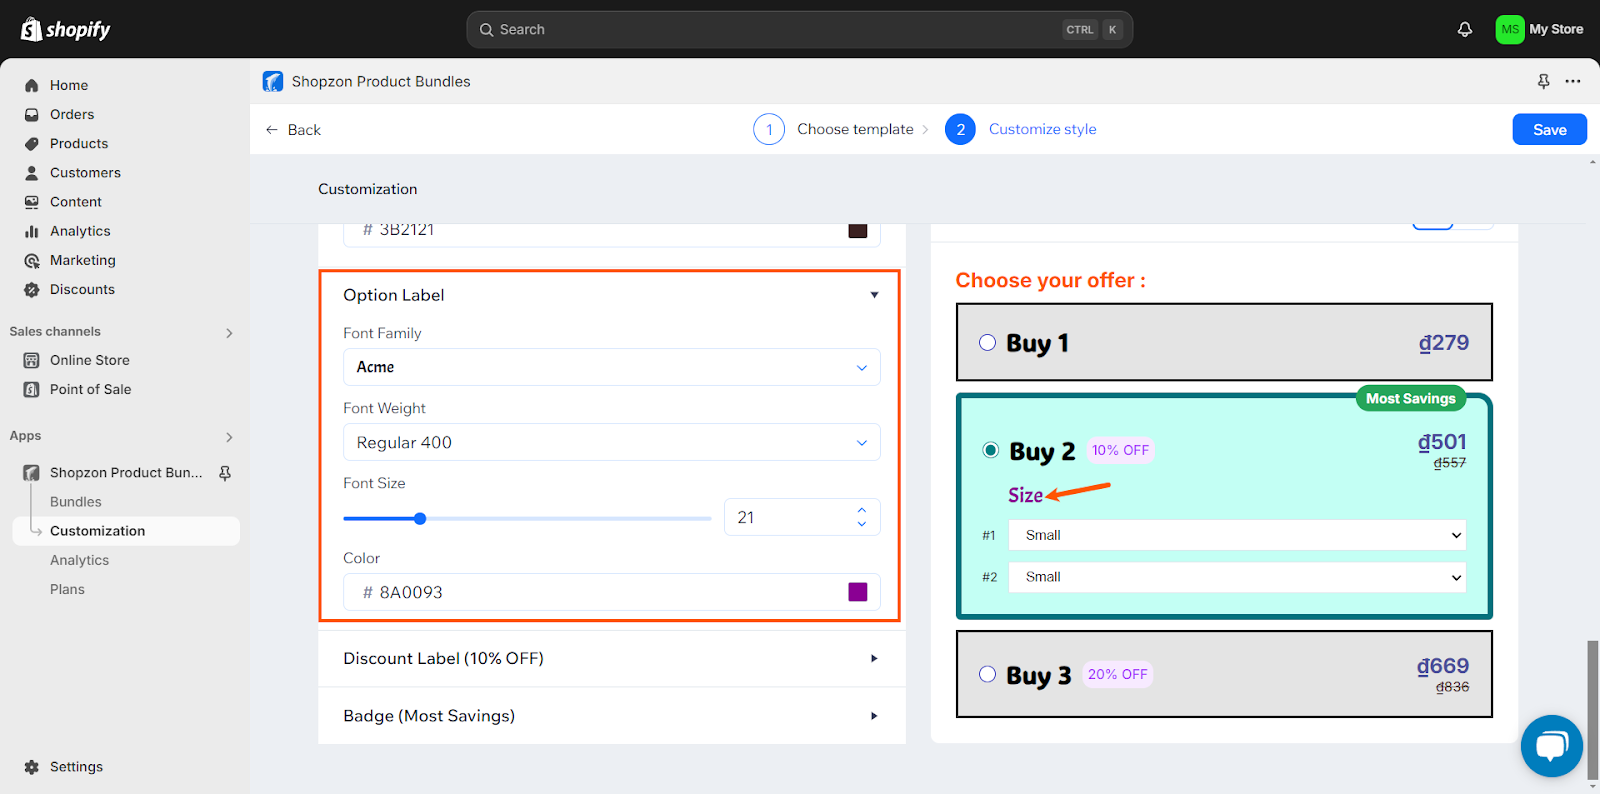
– Offer Title / Price / Compare-at Price / Option Label:
- Adjust Font Family, Font Weight, Font Size, and Color.
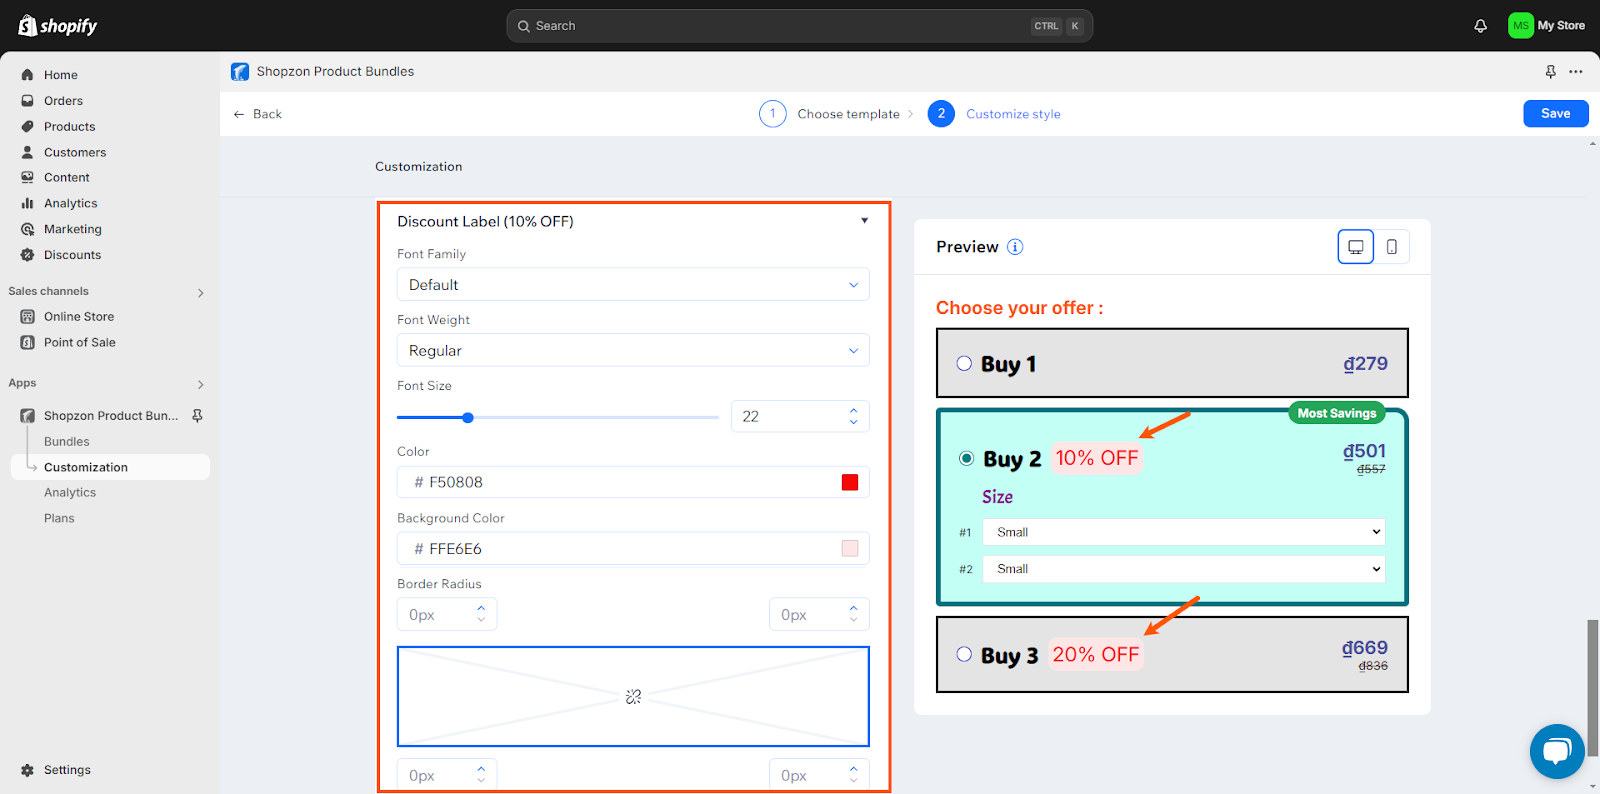
– Discount Label:
- Adjust Font Family, Font Weight, Font Size, Color, Background Color, and Border Radius.
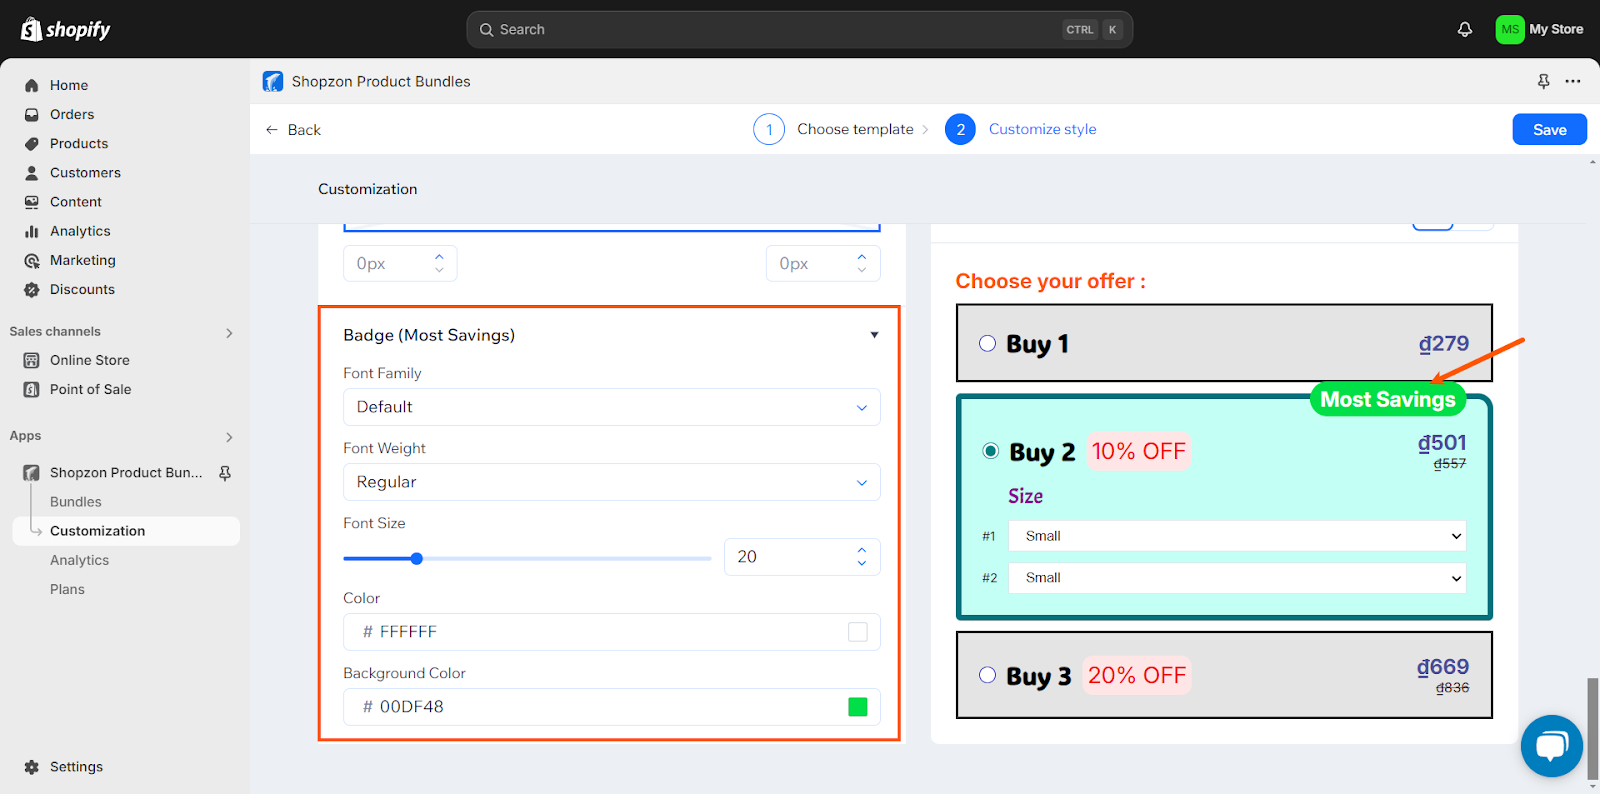
– Badge:
- Adjust Font Family, Font Weight, Font Size, Color, and Background Color.
2.2. Preview
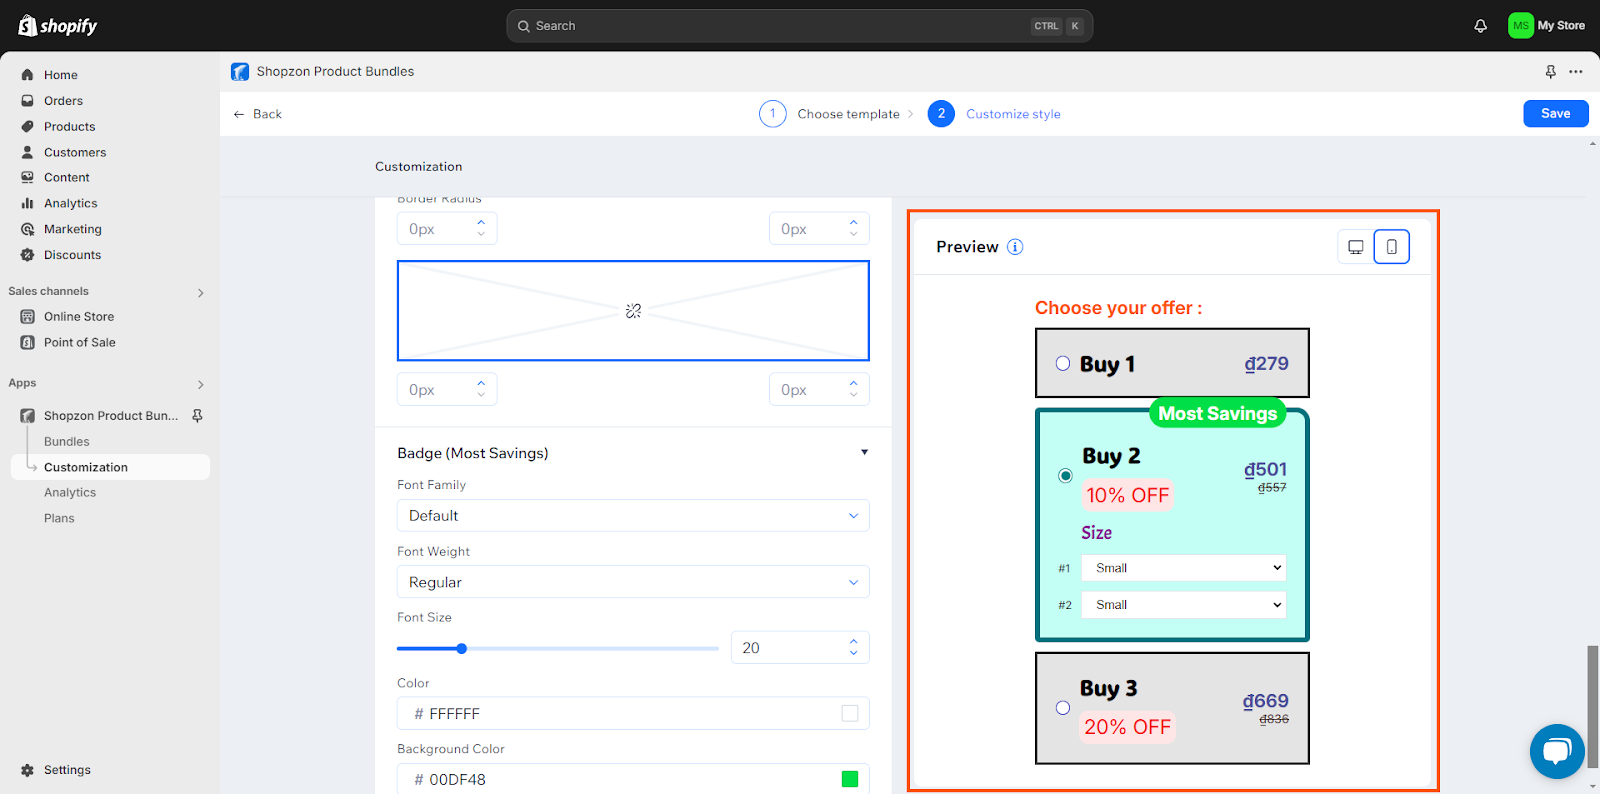
This section allows you to preview the bundle template’s appearance. The data to preview is sample one.
Every change you make in the Custom bundle is applied and displayed in real time in the Preview section. You can switch between desktop and mobile to preview the bundle on each device.
Click Save to save your changes.
View Bundle Analytics
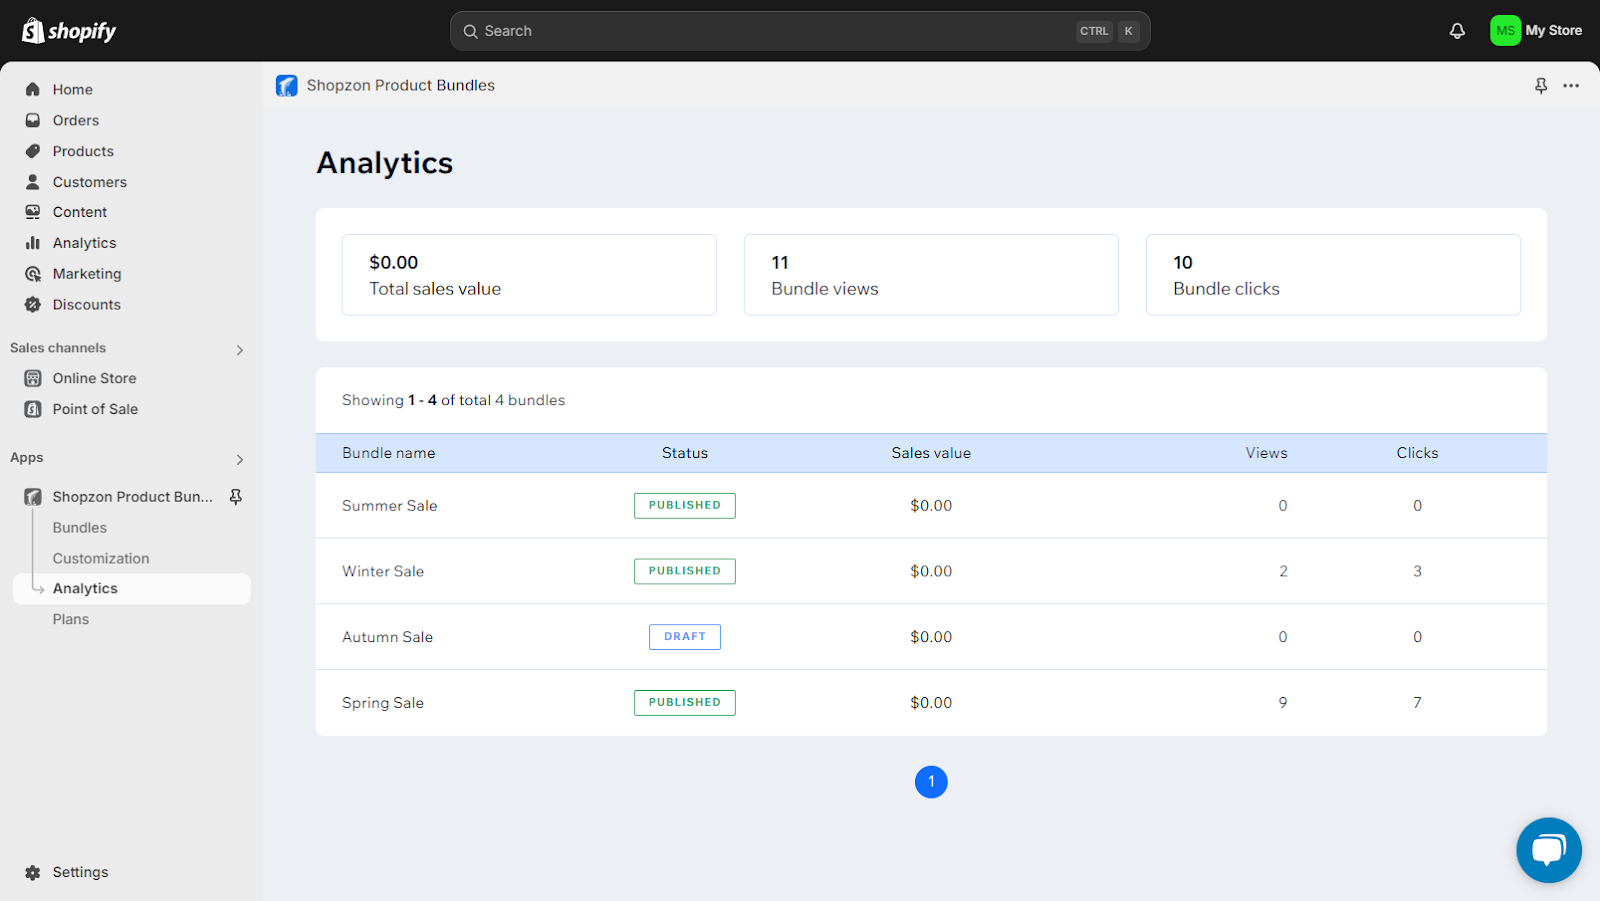
Once you create and publish to see bundles on your storefront, go to the Analytics page to track bundle statistics.
You can see the total sales value, views, and clicks of all bundles and each bundle.
To Sum Up
This blog post has provided you with a detailed guide on how to use the Shopzon Product Bundle app to create bundles, customize template design, and keep track of bundle statistics. If you need any support, don’t hesitate to contact us via [email protected].
 Magezon Blog Help Merchants Build Comprehensive eCommerce Websites

