Newsletter signup form is a great way to keep customers up-to-date with your business.
In the first part, we’ve looked at the importance of newsletter signup form as well as how to create this kind of form with Magento 2 Blue Form Builder.
In today’s article, we’ll focus on the second part with the following content:
Insert form at page footer or as popup
1. At page footer
This is the most common position to insert a newsletter signup.
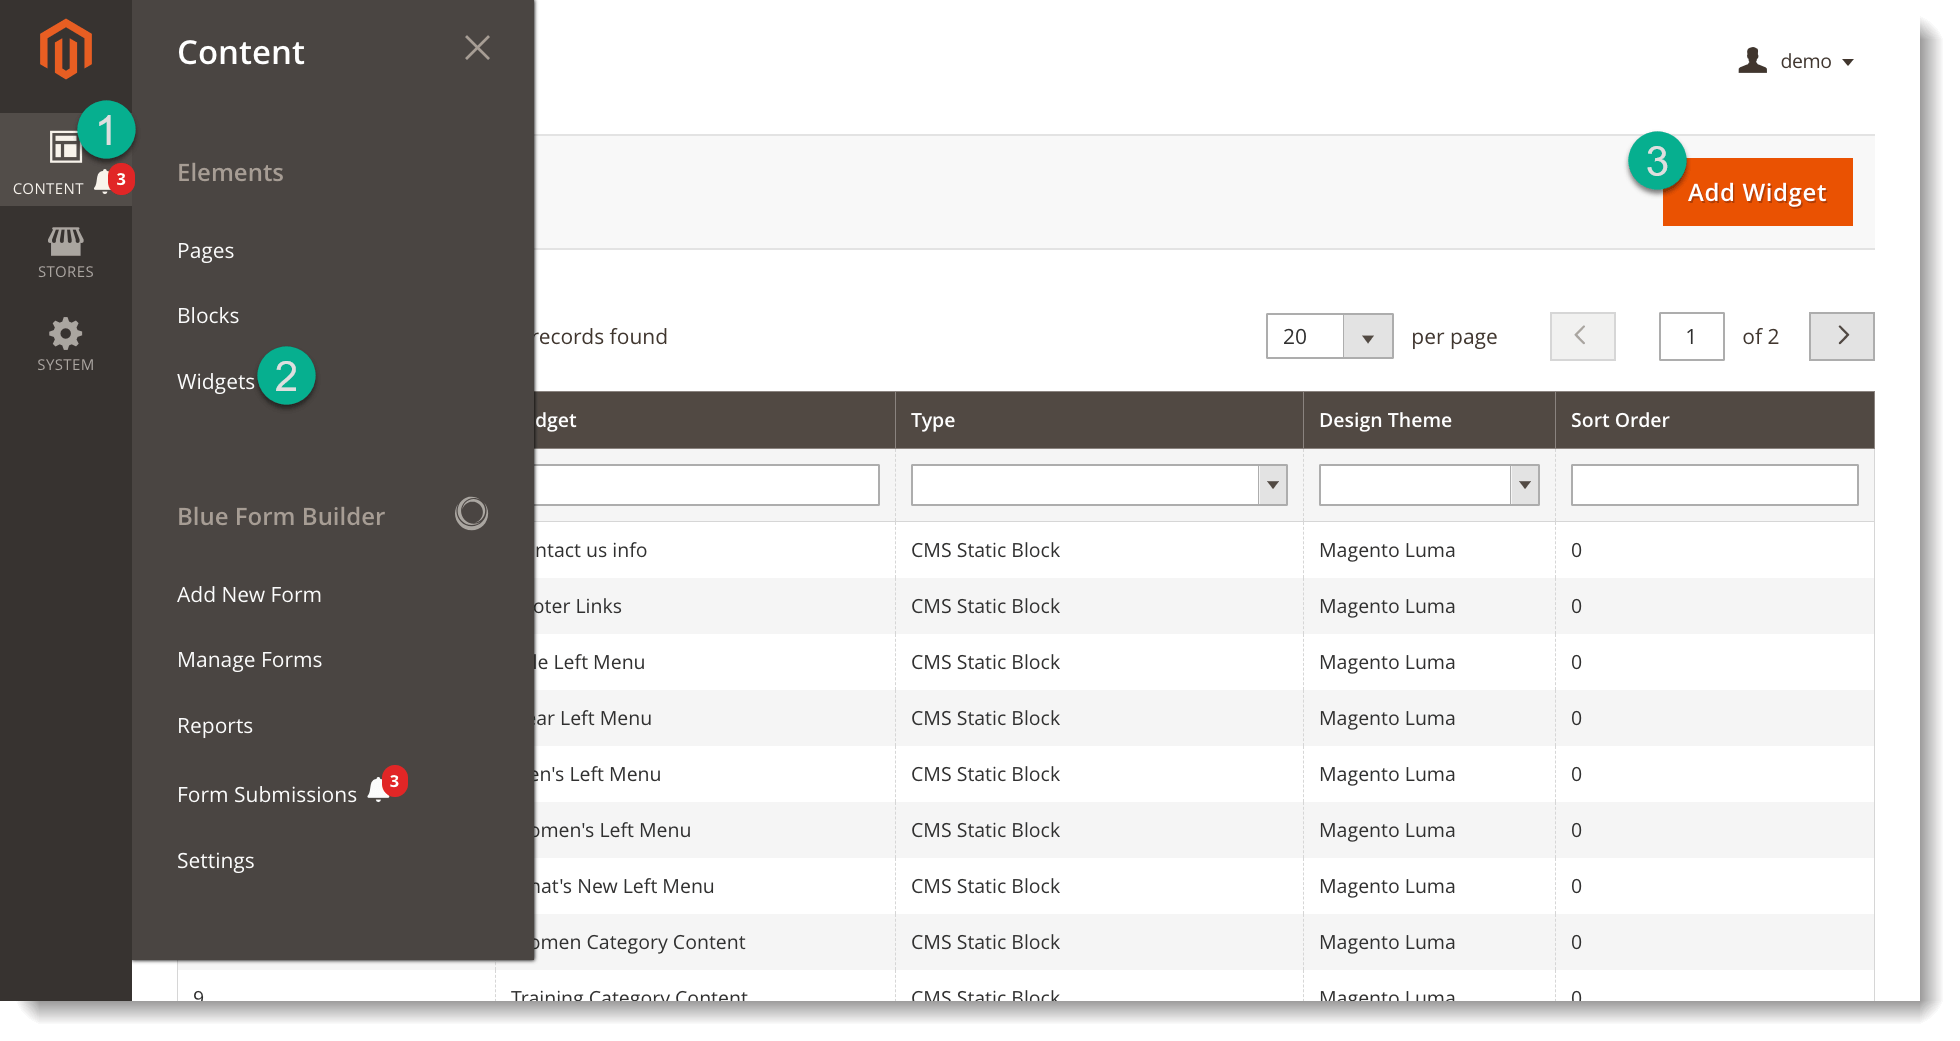
– First, navigate to Content > Blue Form Builder > Widgets. Then on the upper right corner, click Add Widget button.
– You will land on this page:
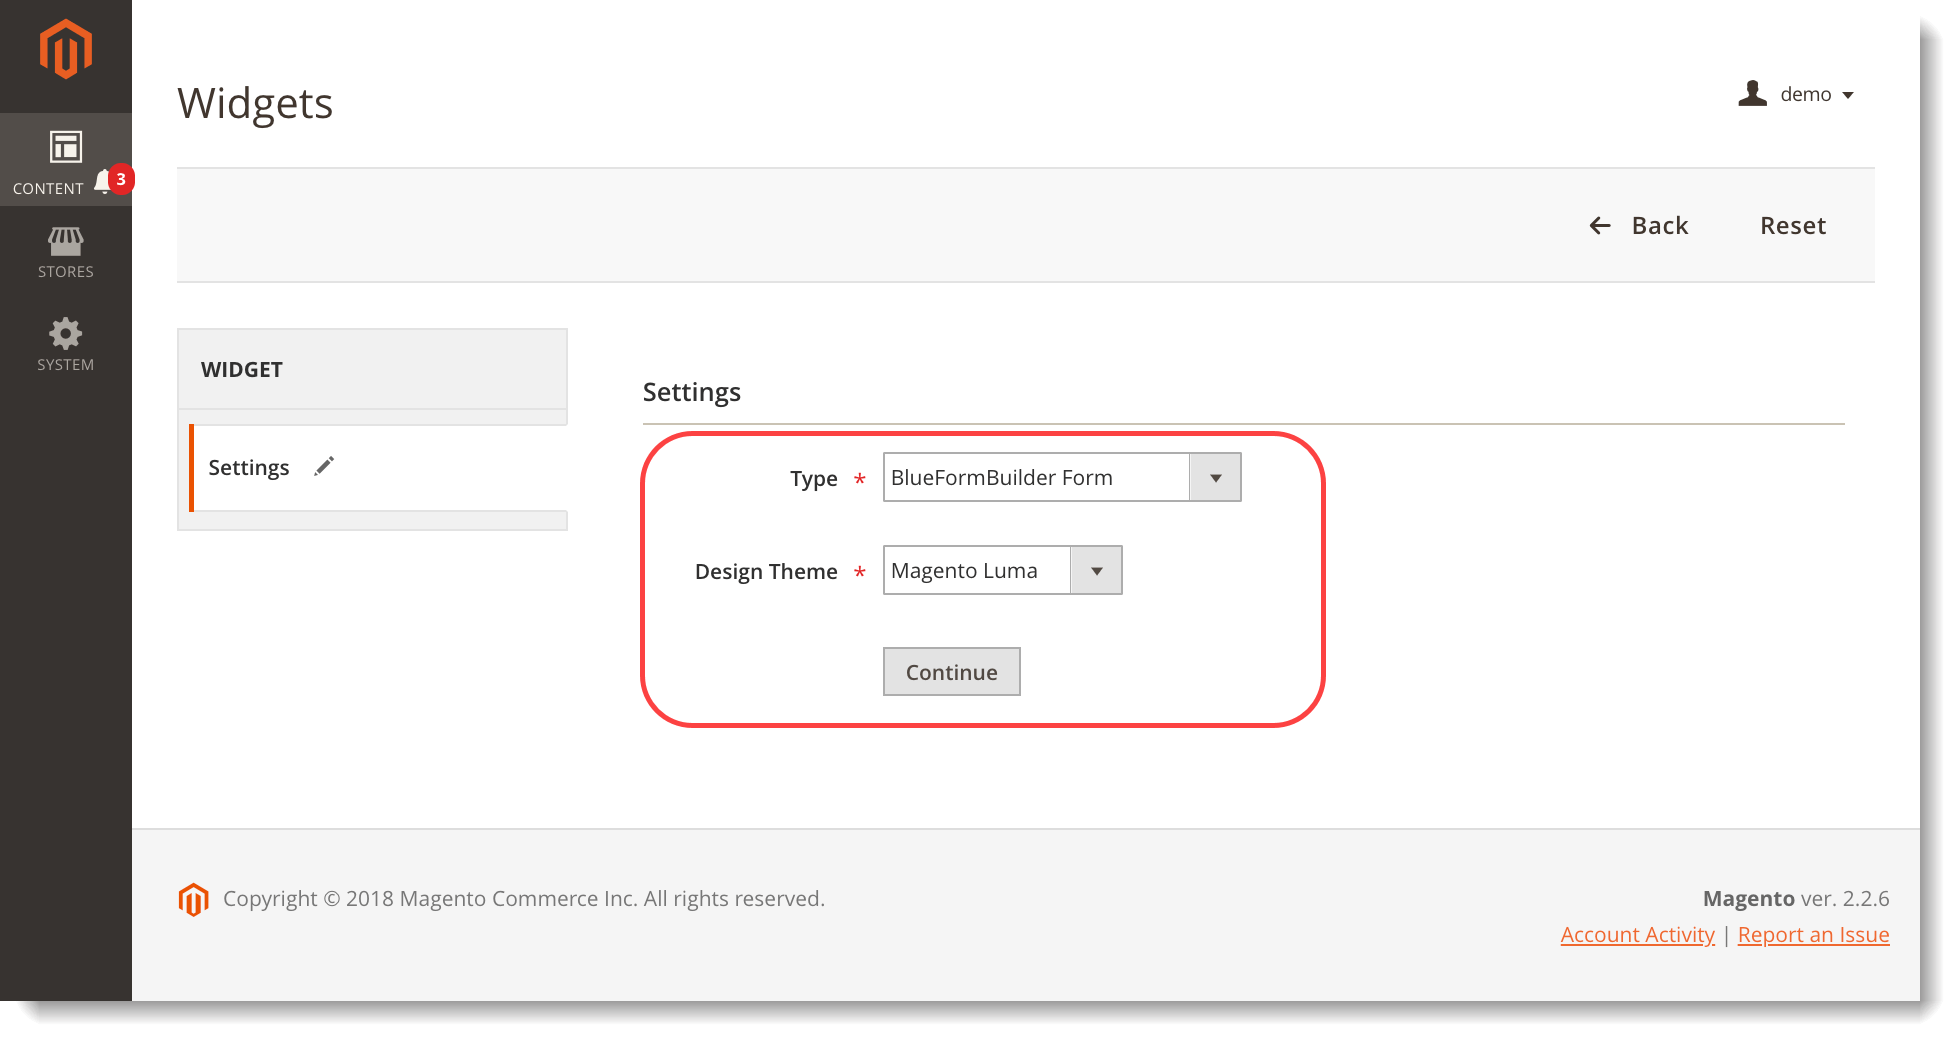
- In Type field, choose BlueFormBuilder form.
- In Design Theme, choose the theme of your website.
- Click Continue to move to this page:
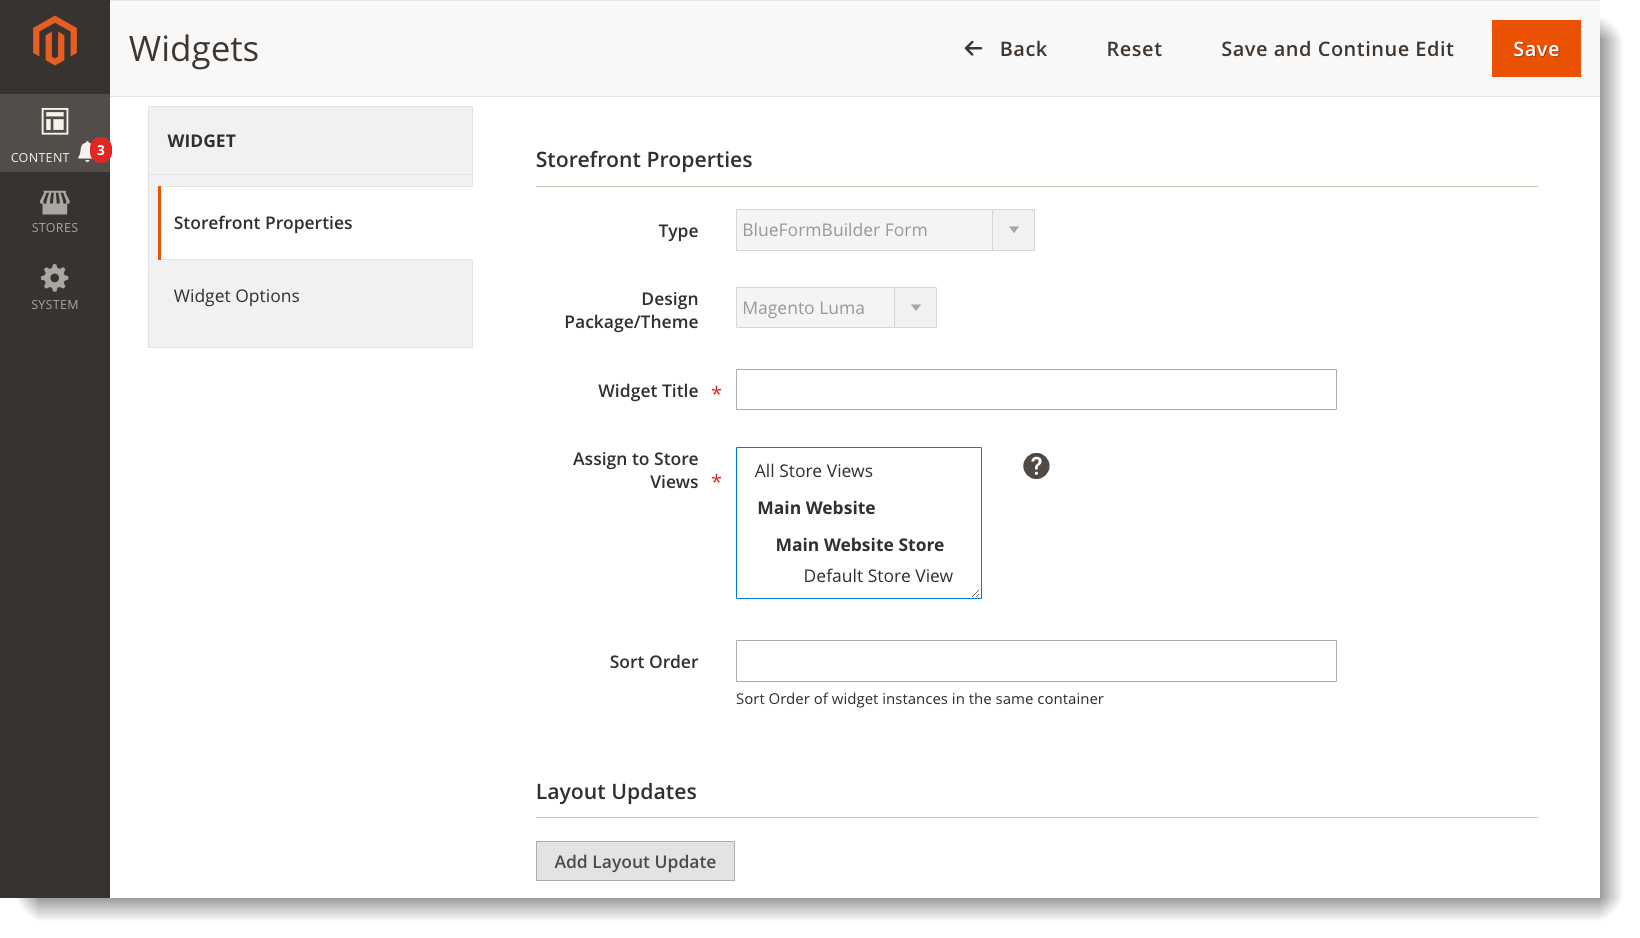
– There are 2 parts: Storefront Properties and Widget Options
Storefront Properties
– Let’s look at the first section:
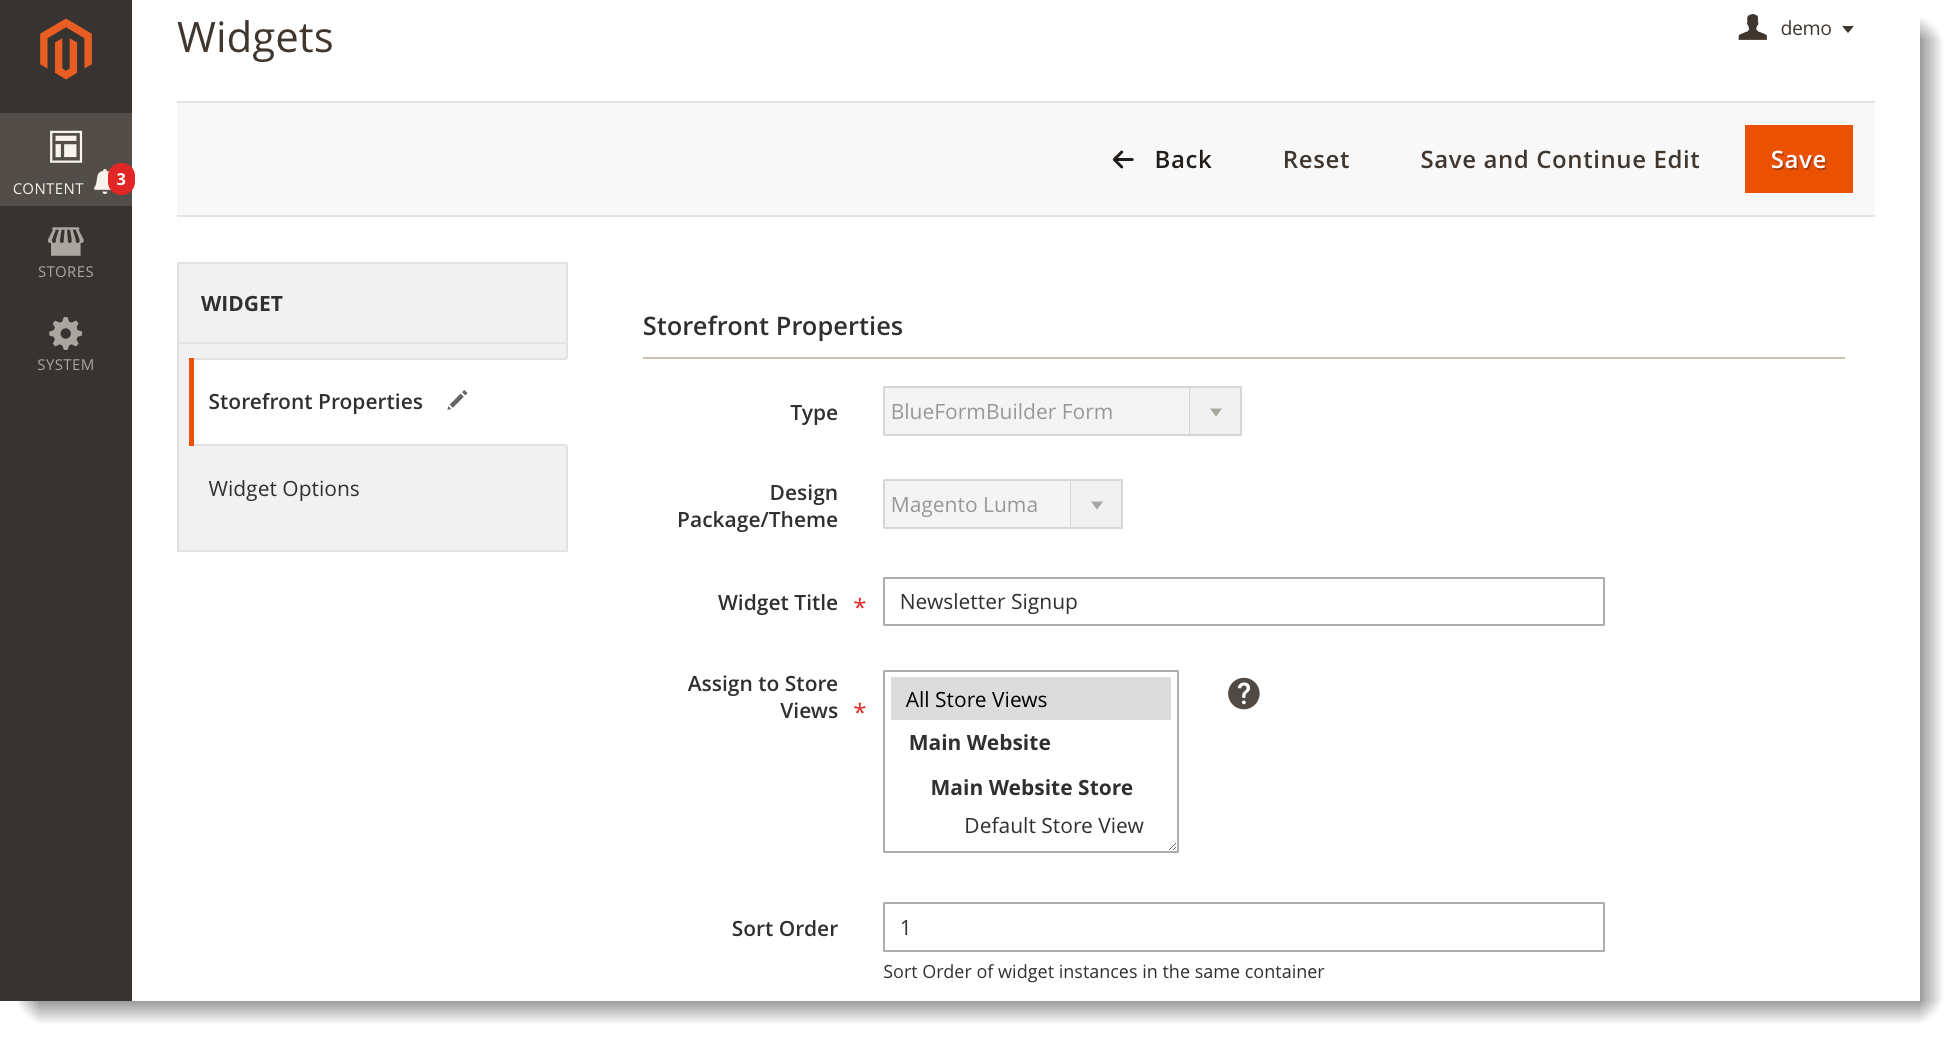
- Widget Title: enter widget title.
- Assign to Store Views: choose store views to insert the form.
- Sort order: enter a number so that if there are 2 or more forms in the same position, the one with smaller number will come first.
– In the second section Layout Updates, you will choose pages and position to insert newsletter signup form.
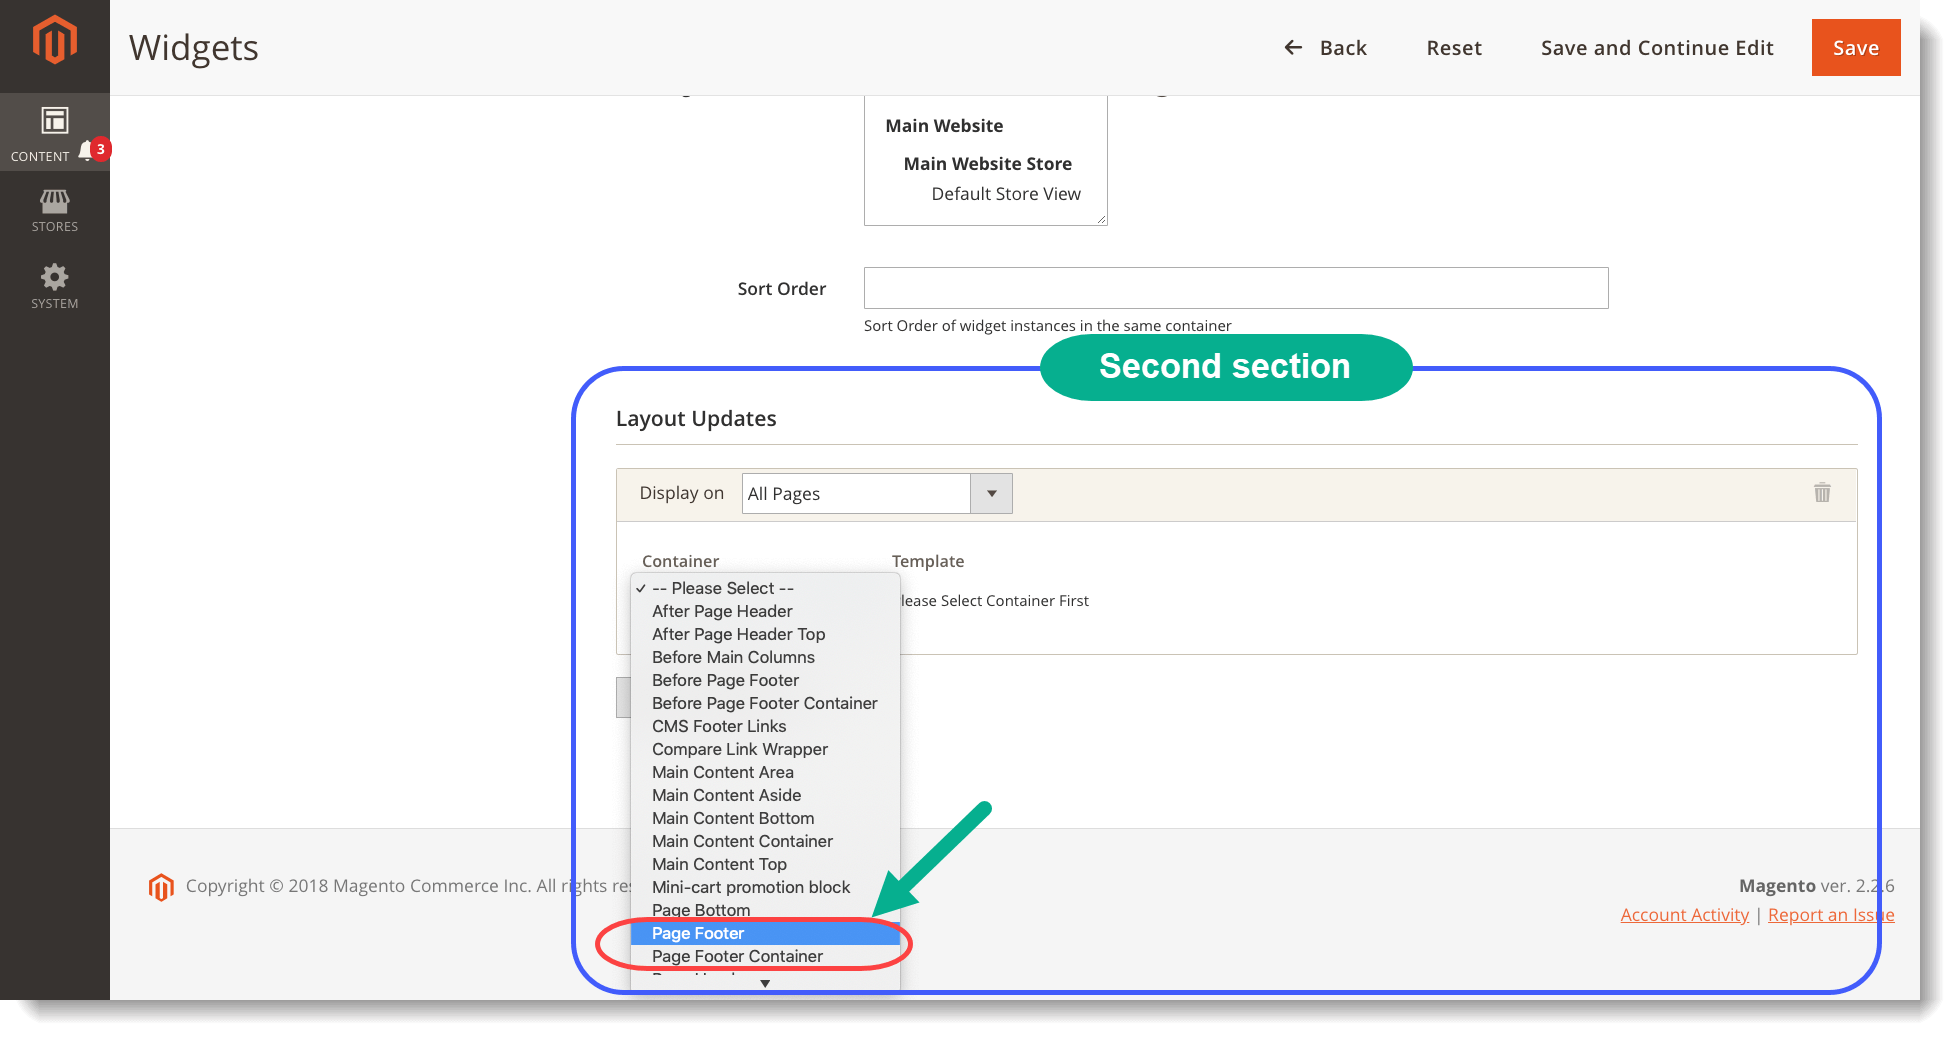
- Display on: choose page to insert form. With this kind of form, we often choose All Pages.
- Container: choose position. In this case, we choose Page Footer or Page Footer Container.
Widget Options
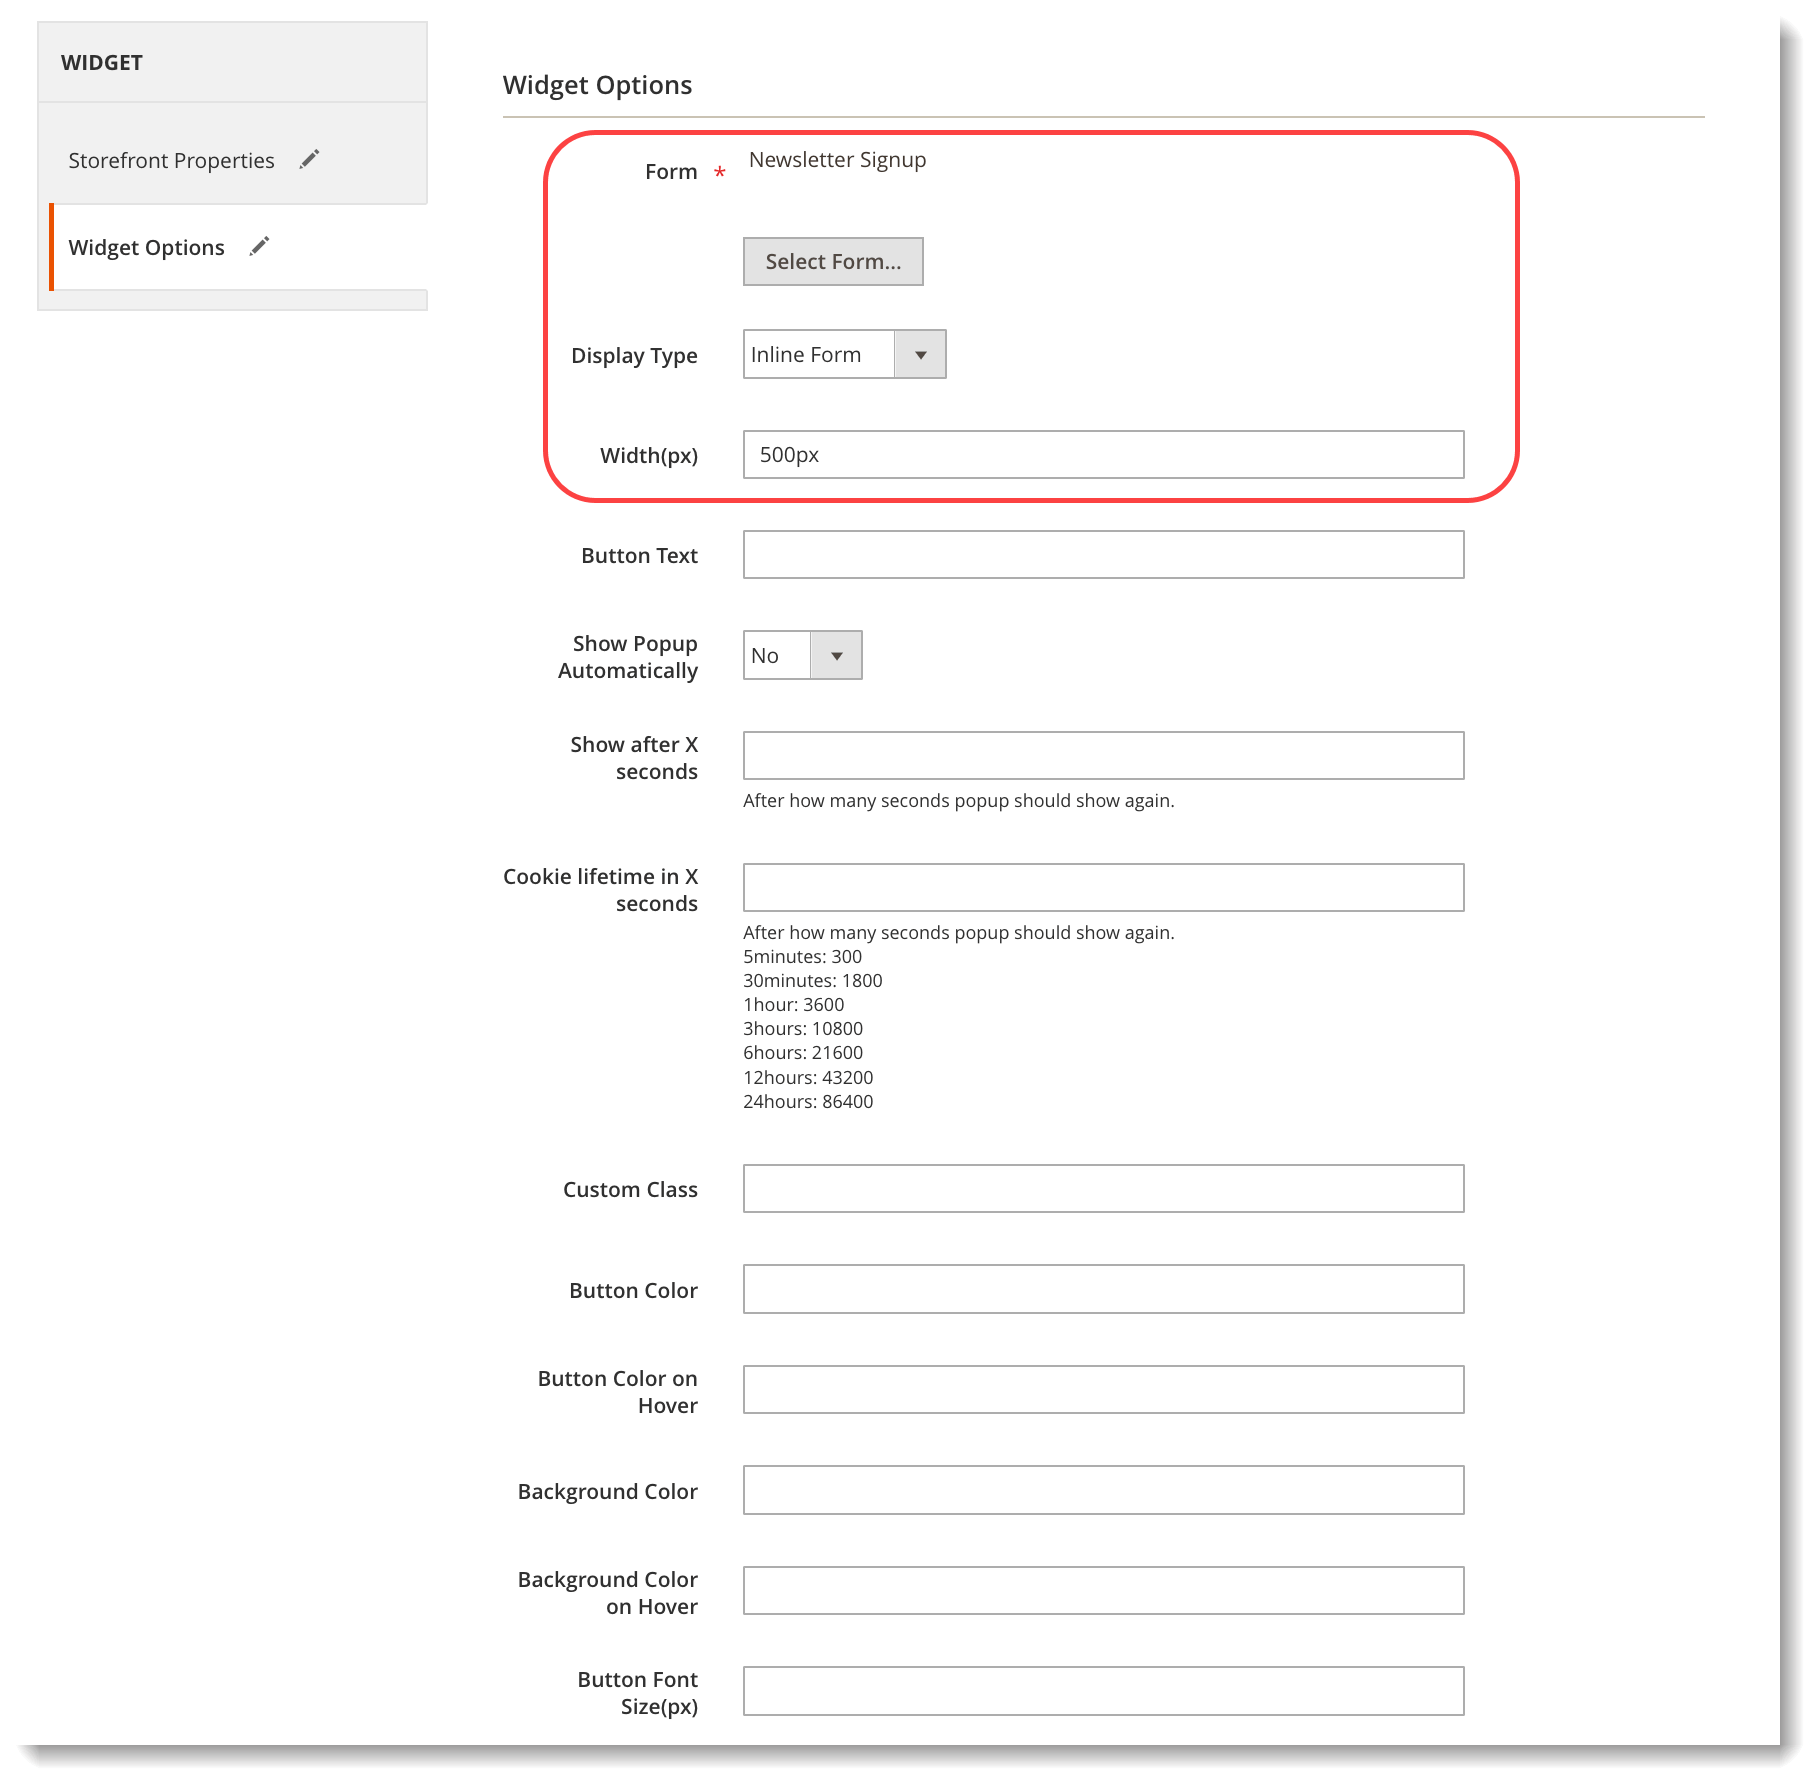
In this section, you just need to pay attention to these settings:
- Click Select Form to select Newsletter Signup form.
- In Display Type field, there are 4 types of forms in a drop-down list. For newsletter signup form, we choose Inline Form.
- Width: the form width.
Remember to save after finishing.
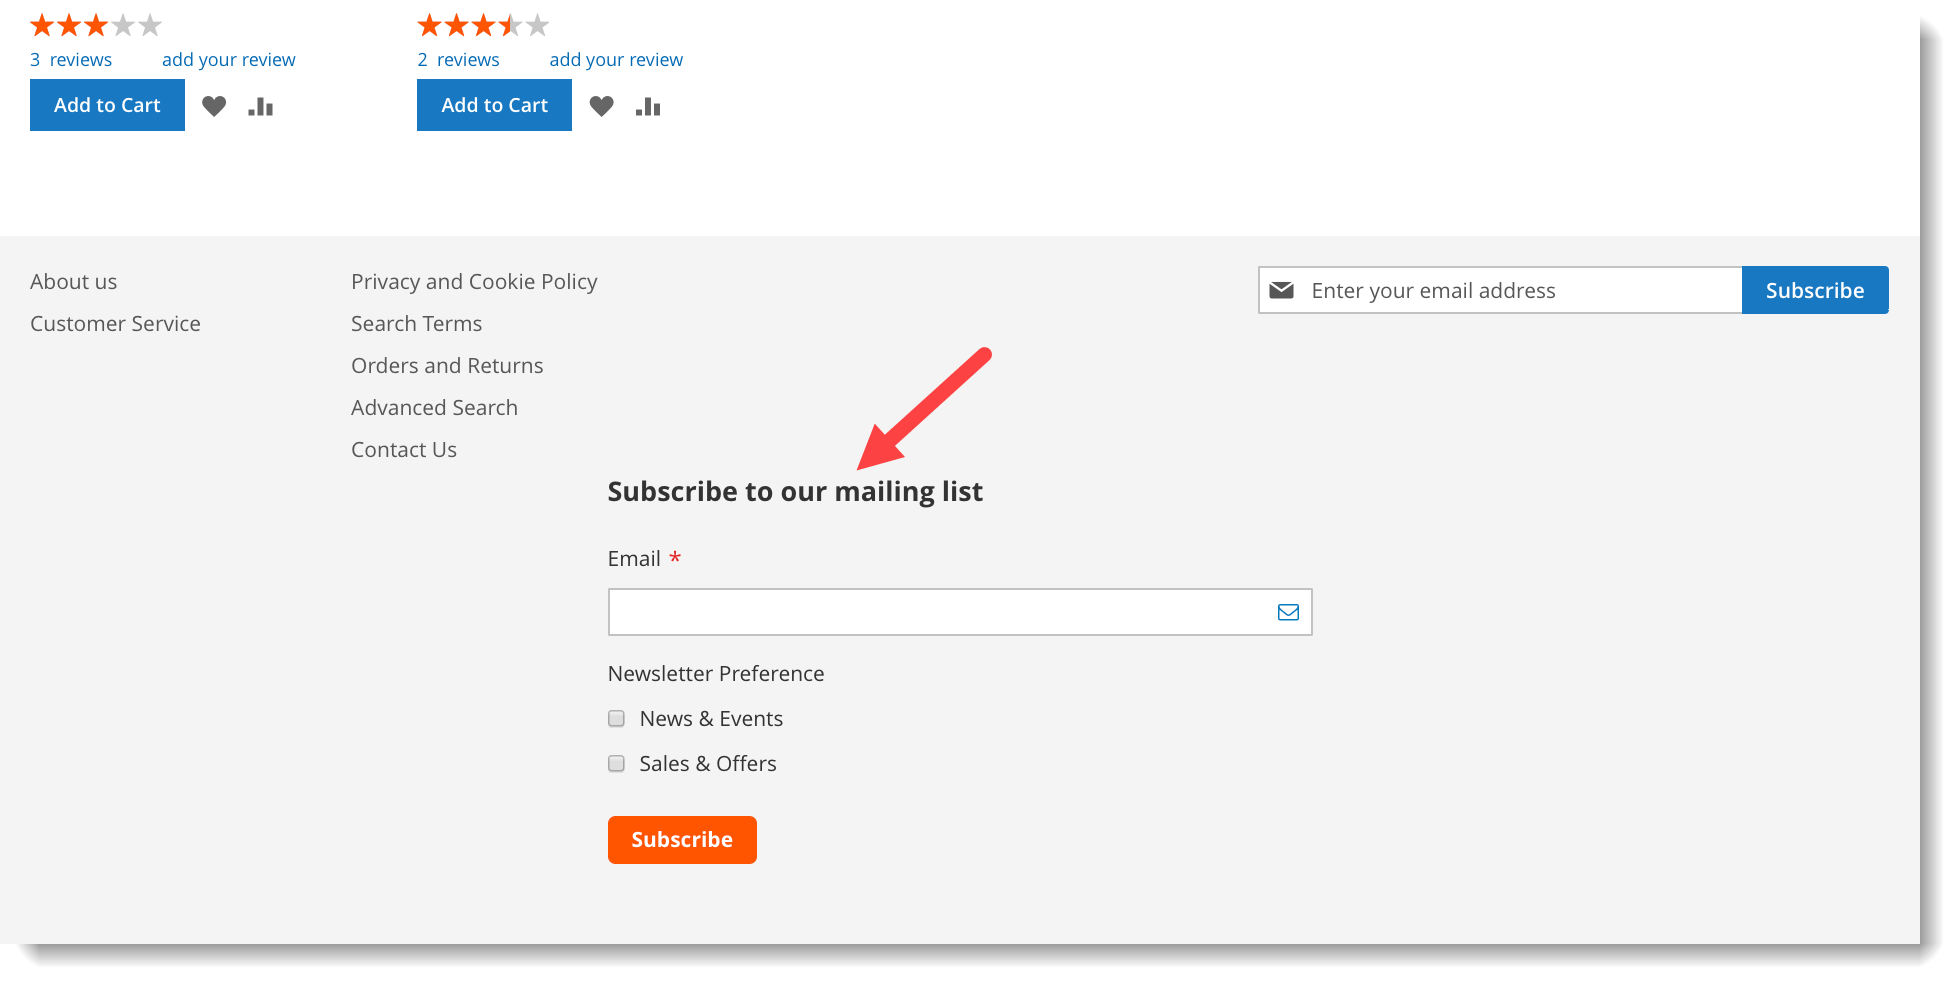
Now let’s see how it looks on frontend:
– If you choose Page Footer:
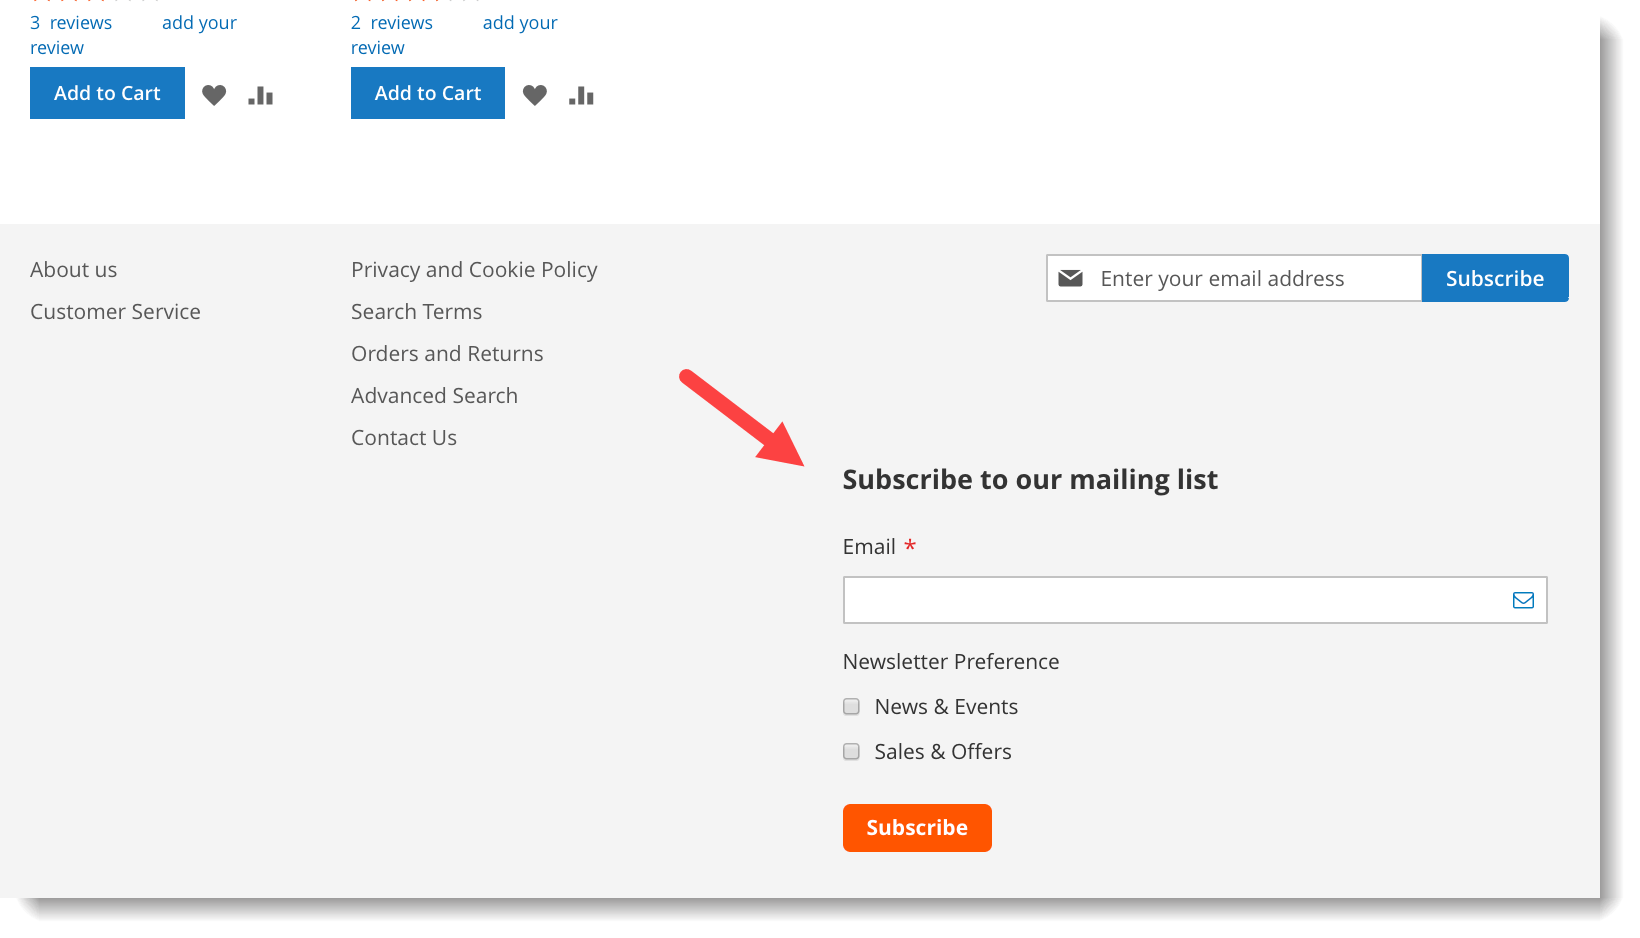
– If you choose Page Footer Container:
2. As popup
Basically, it is the same as inserting form at page footer. But here are the differences:
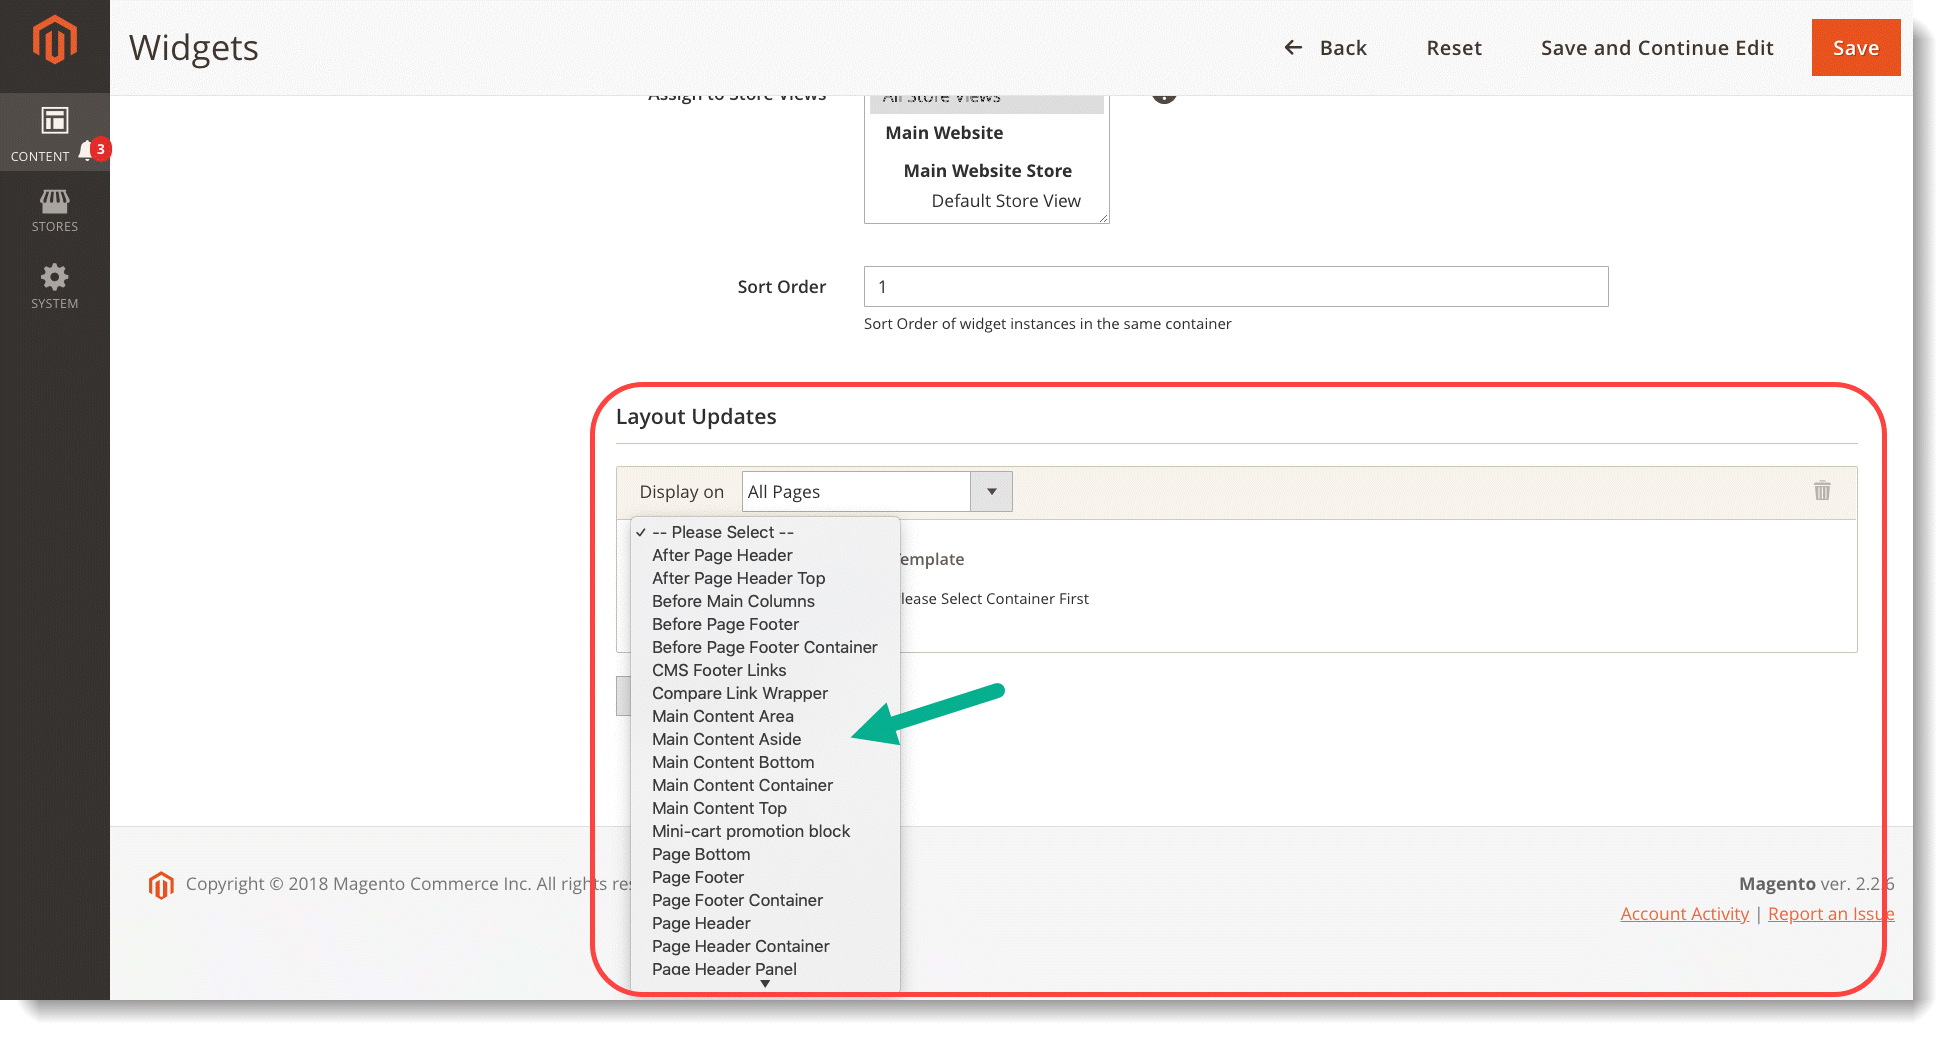
– In Layout Updates section of Storefront Properties part, choose any position for Container field (see the below image):
– In Widget Options, choose Popup Form for Display Type field:
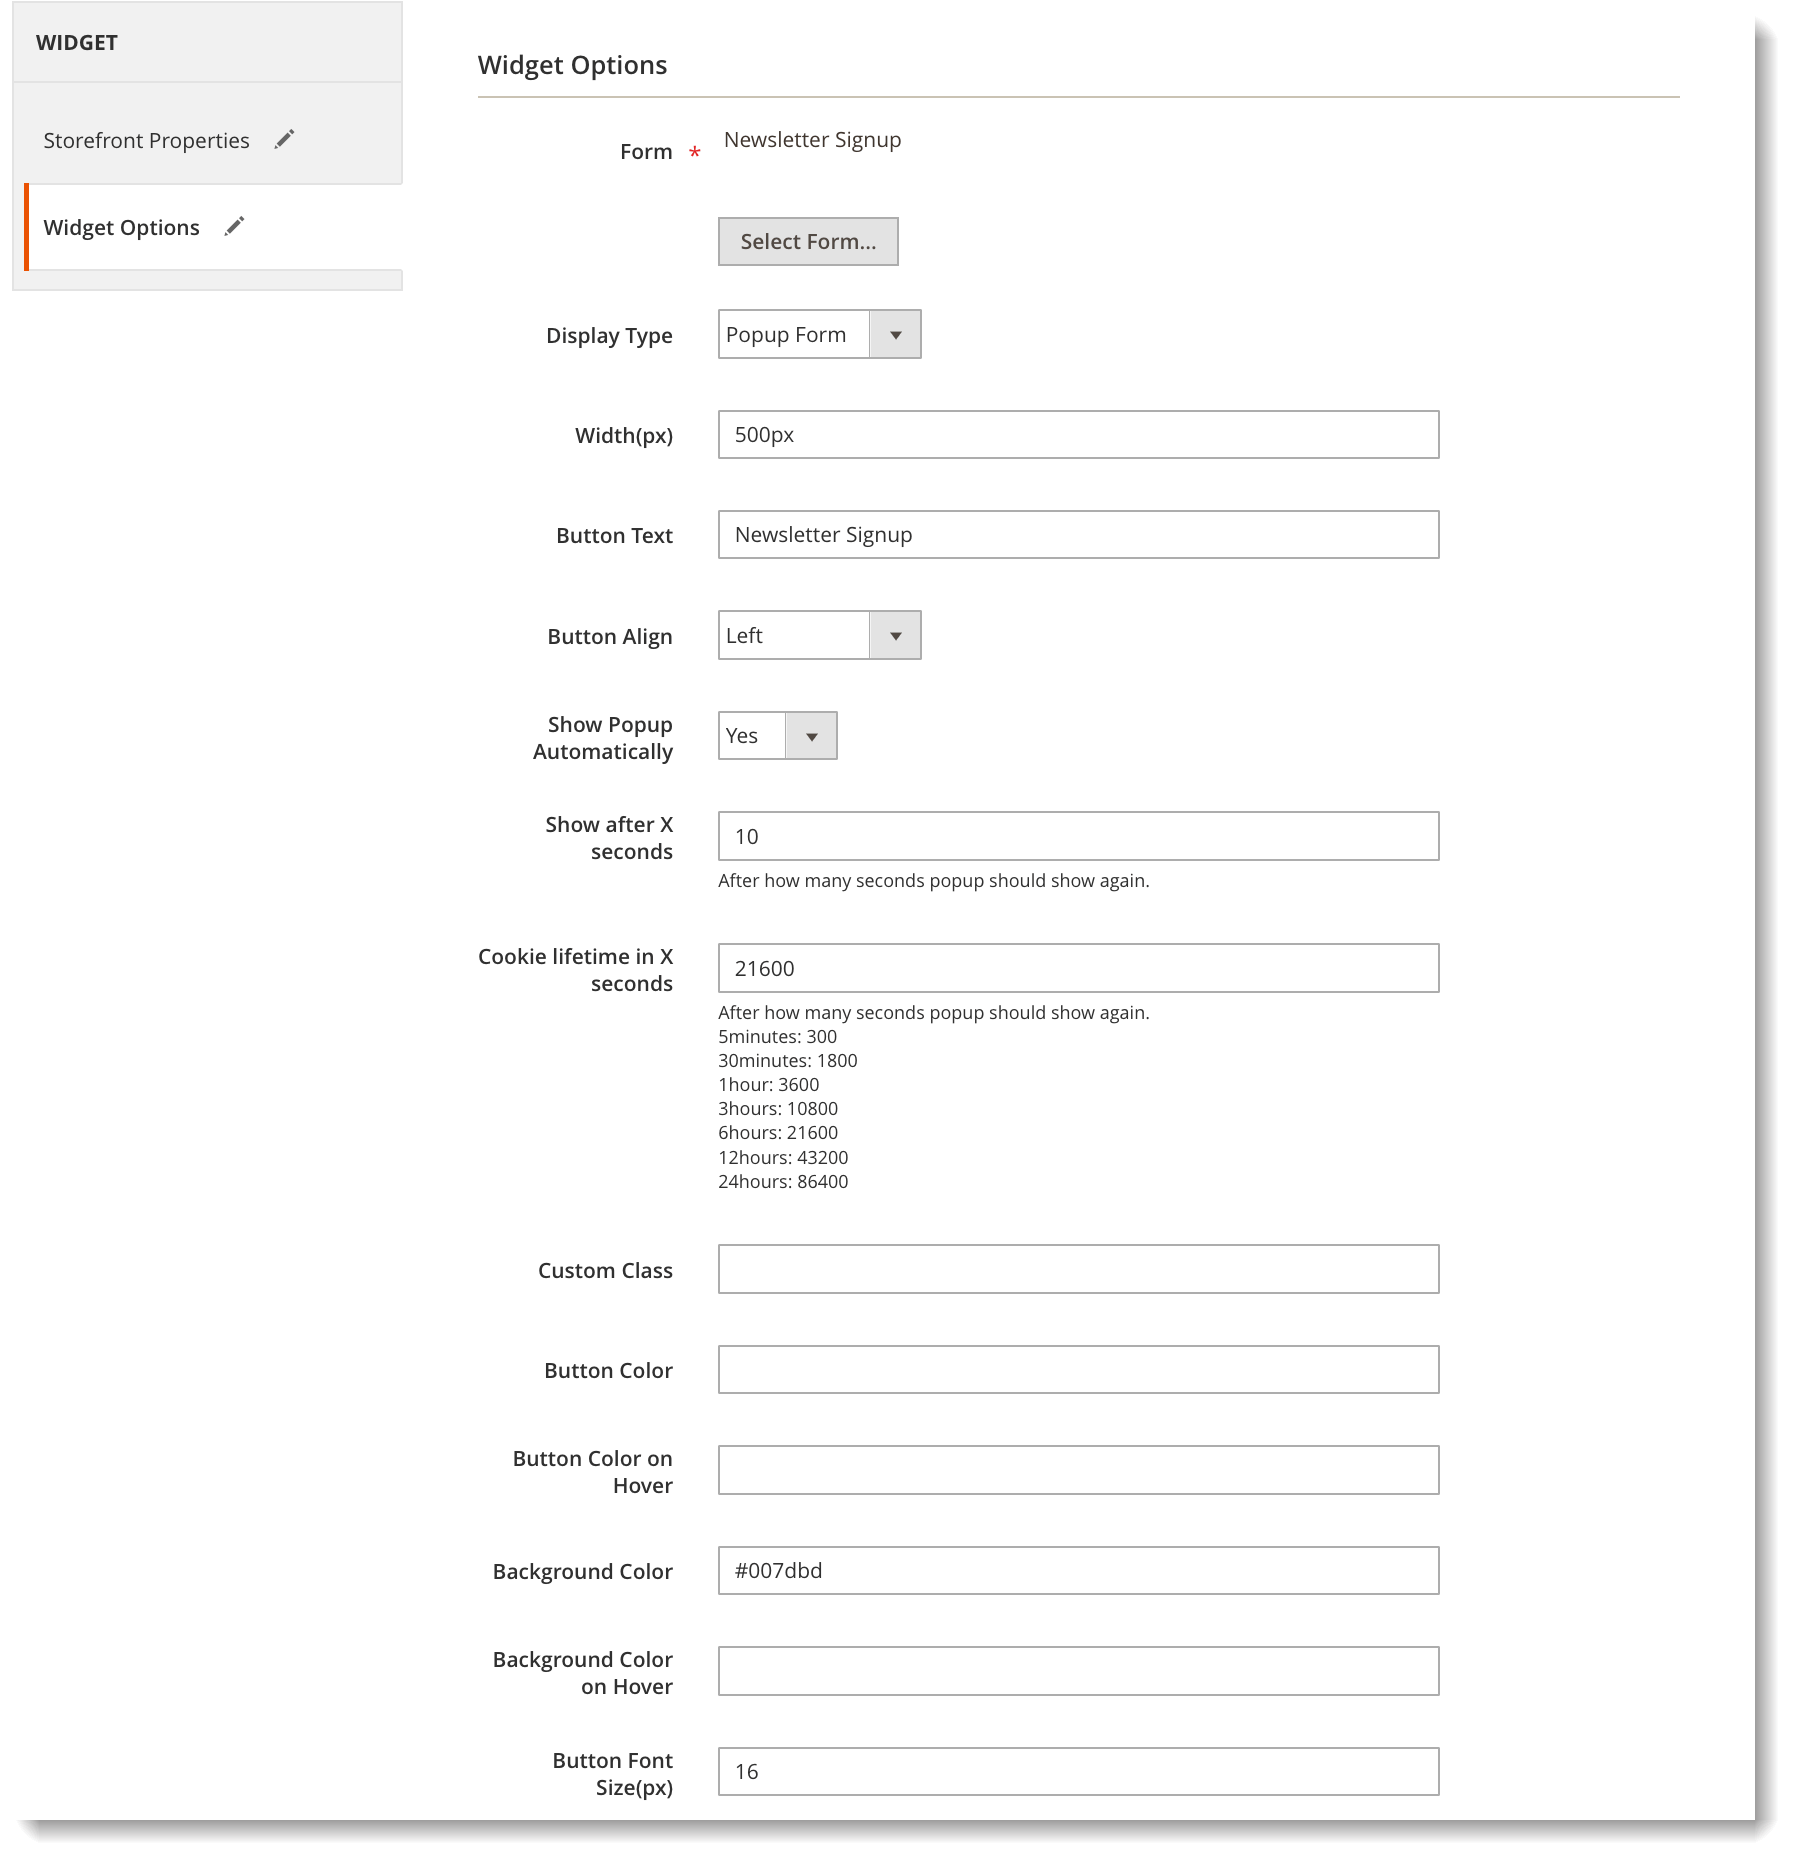
Then configure other settings:
- Width: the form width.
- Button Text: the text inside the popup button.
- Button Align: where to insert the button.
- Show Popup Automatically: if enabling this function, the form will auto pop up without customers clicking the button.
- Show after X seconds: after how many seconds the form will auto pop up.
- Cookie lifetime in X seconds: after how many seconds the form will auto pop up again.
Other configurations include Custom Class, Button Color, Button Color on Hover, Background Color, Background Color on Hover, Button Font Size(px).
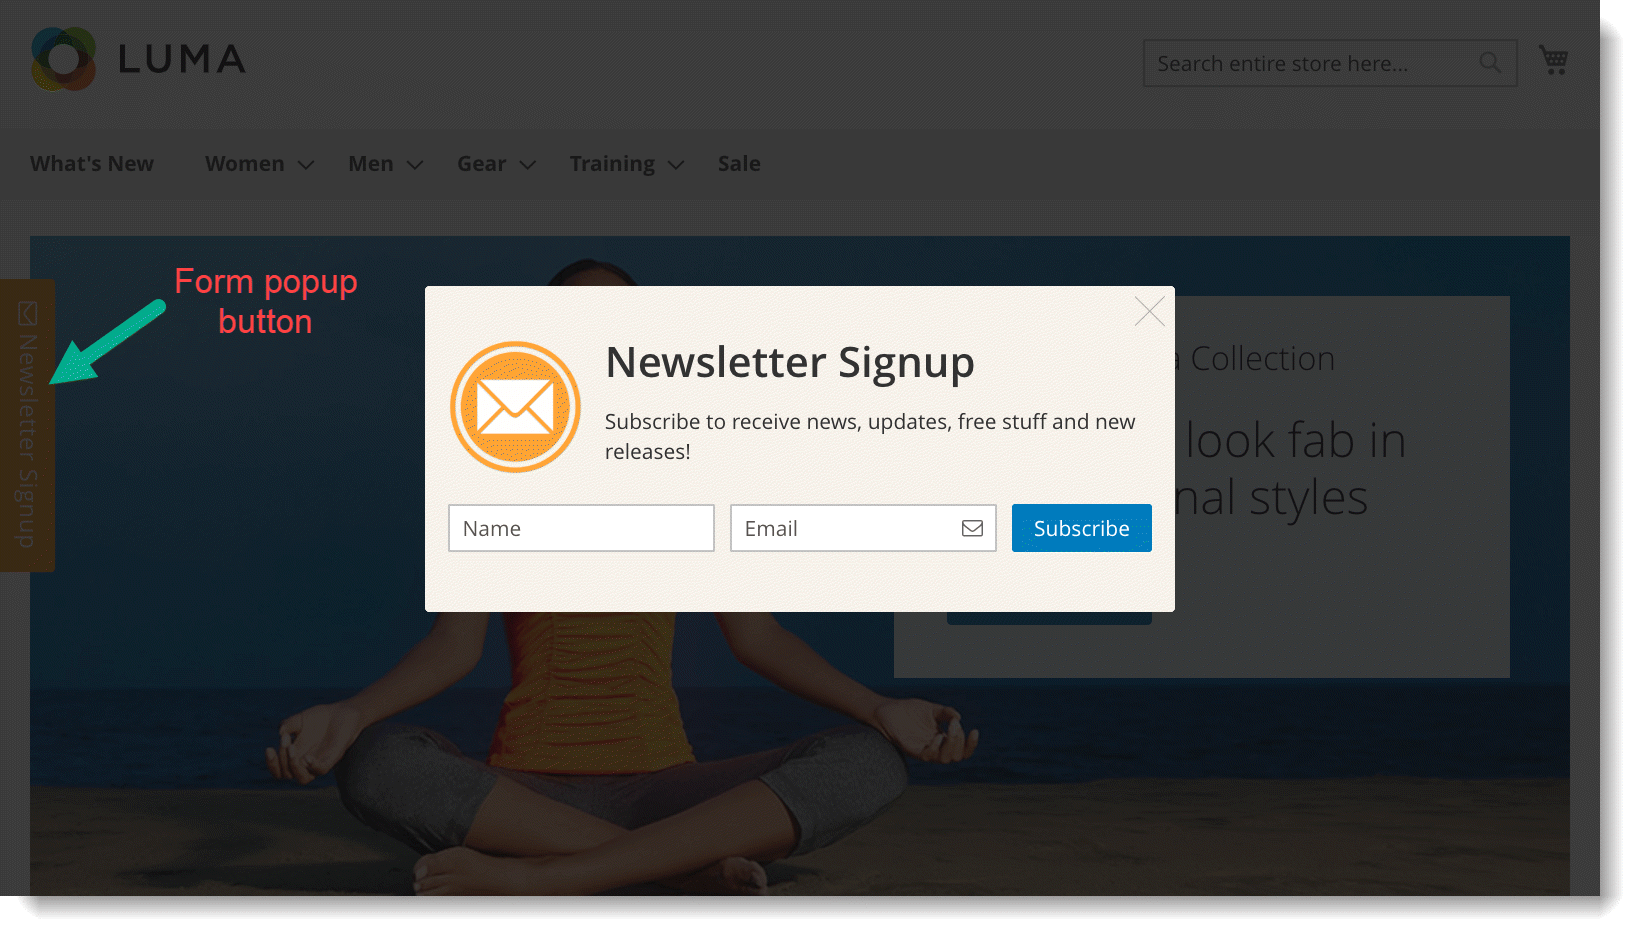
Here is how the form looks on frontend store:
Import email list to 3rd-party services
Now that you have collected customers’ email, you might want to create an email list and import it into email marketing services such as MailChimp.
To do that, you can follow these steps:
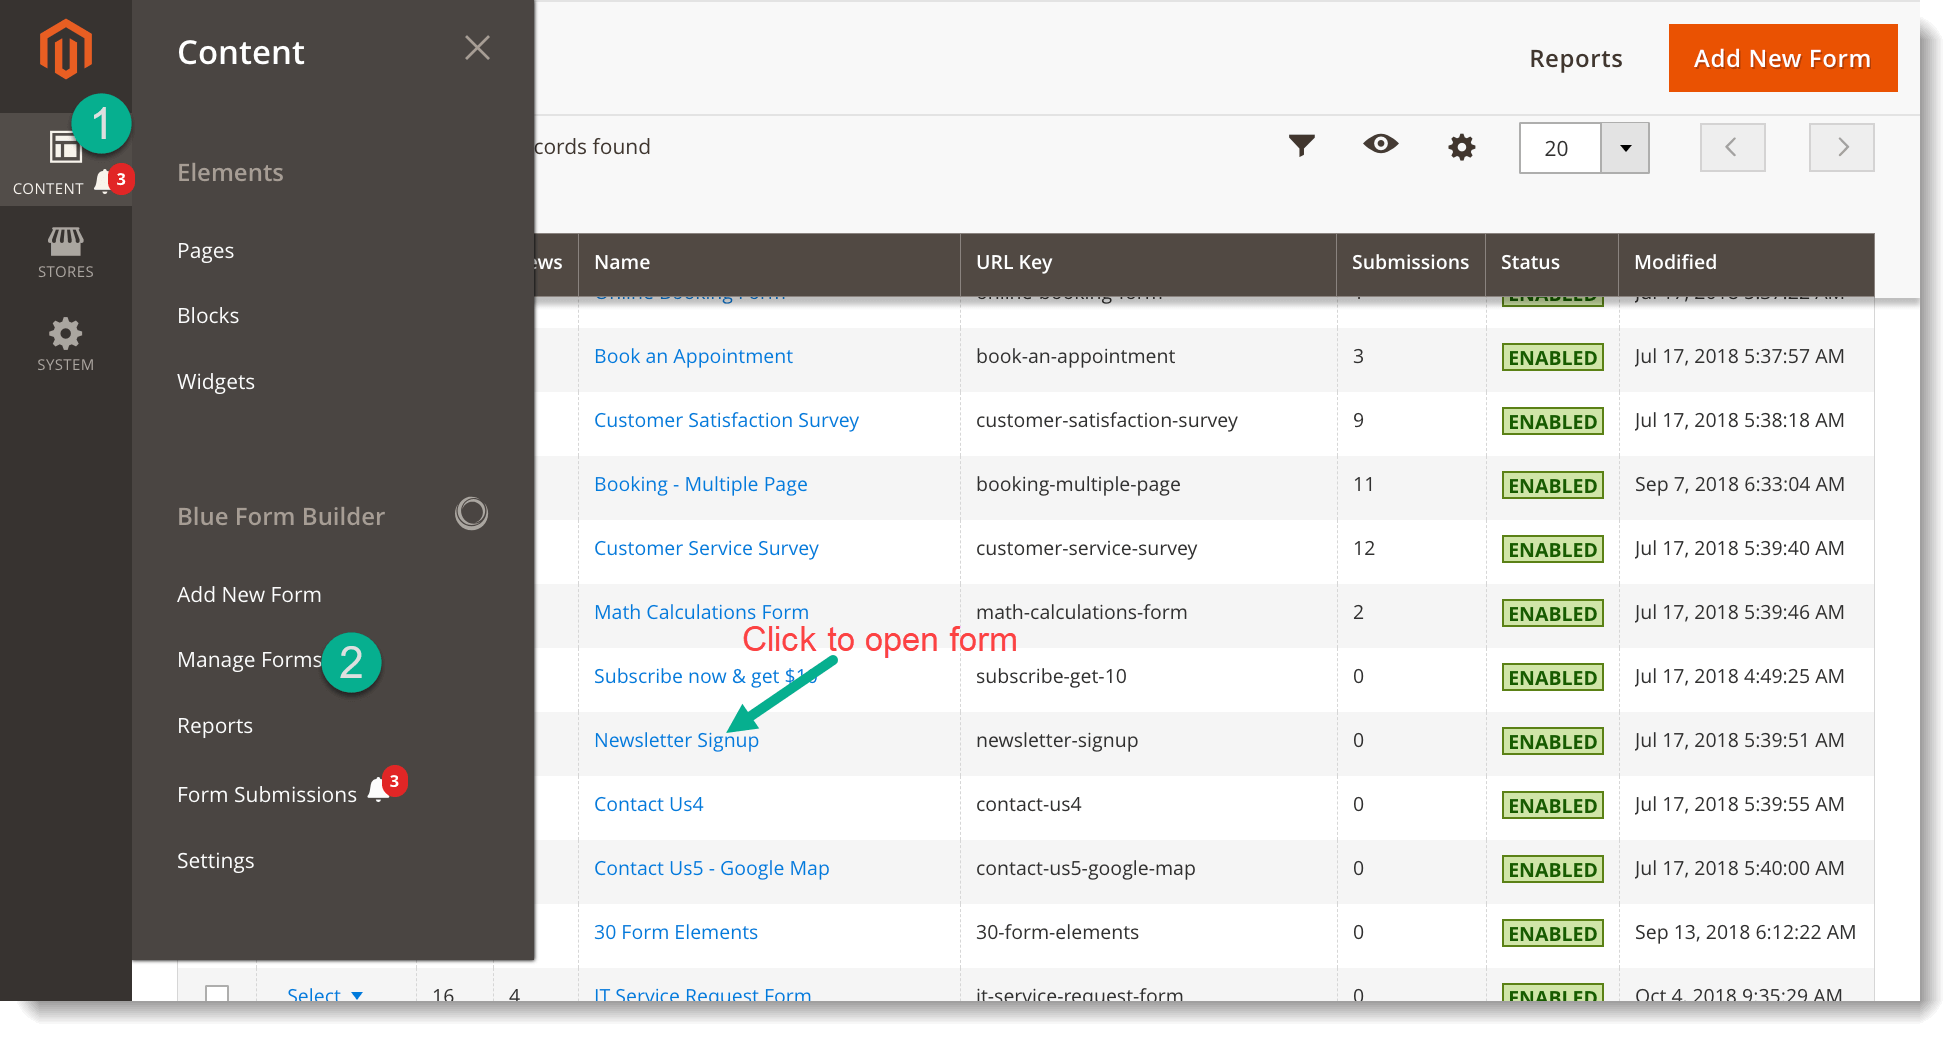
– Go to Content > Blue Form Builder > Manage Forms. Find and open newsletter signup form in the grid.
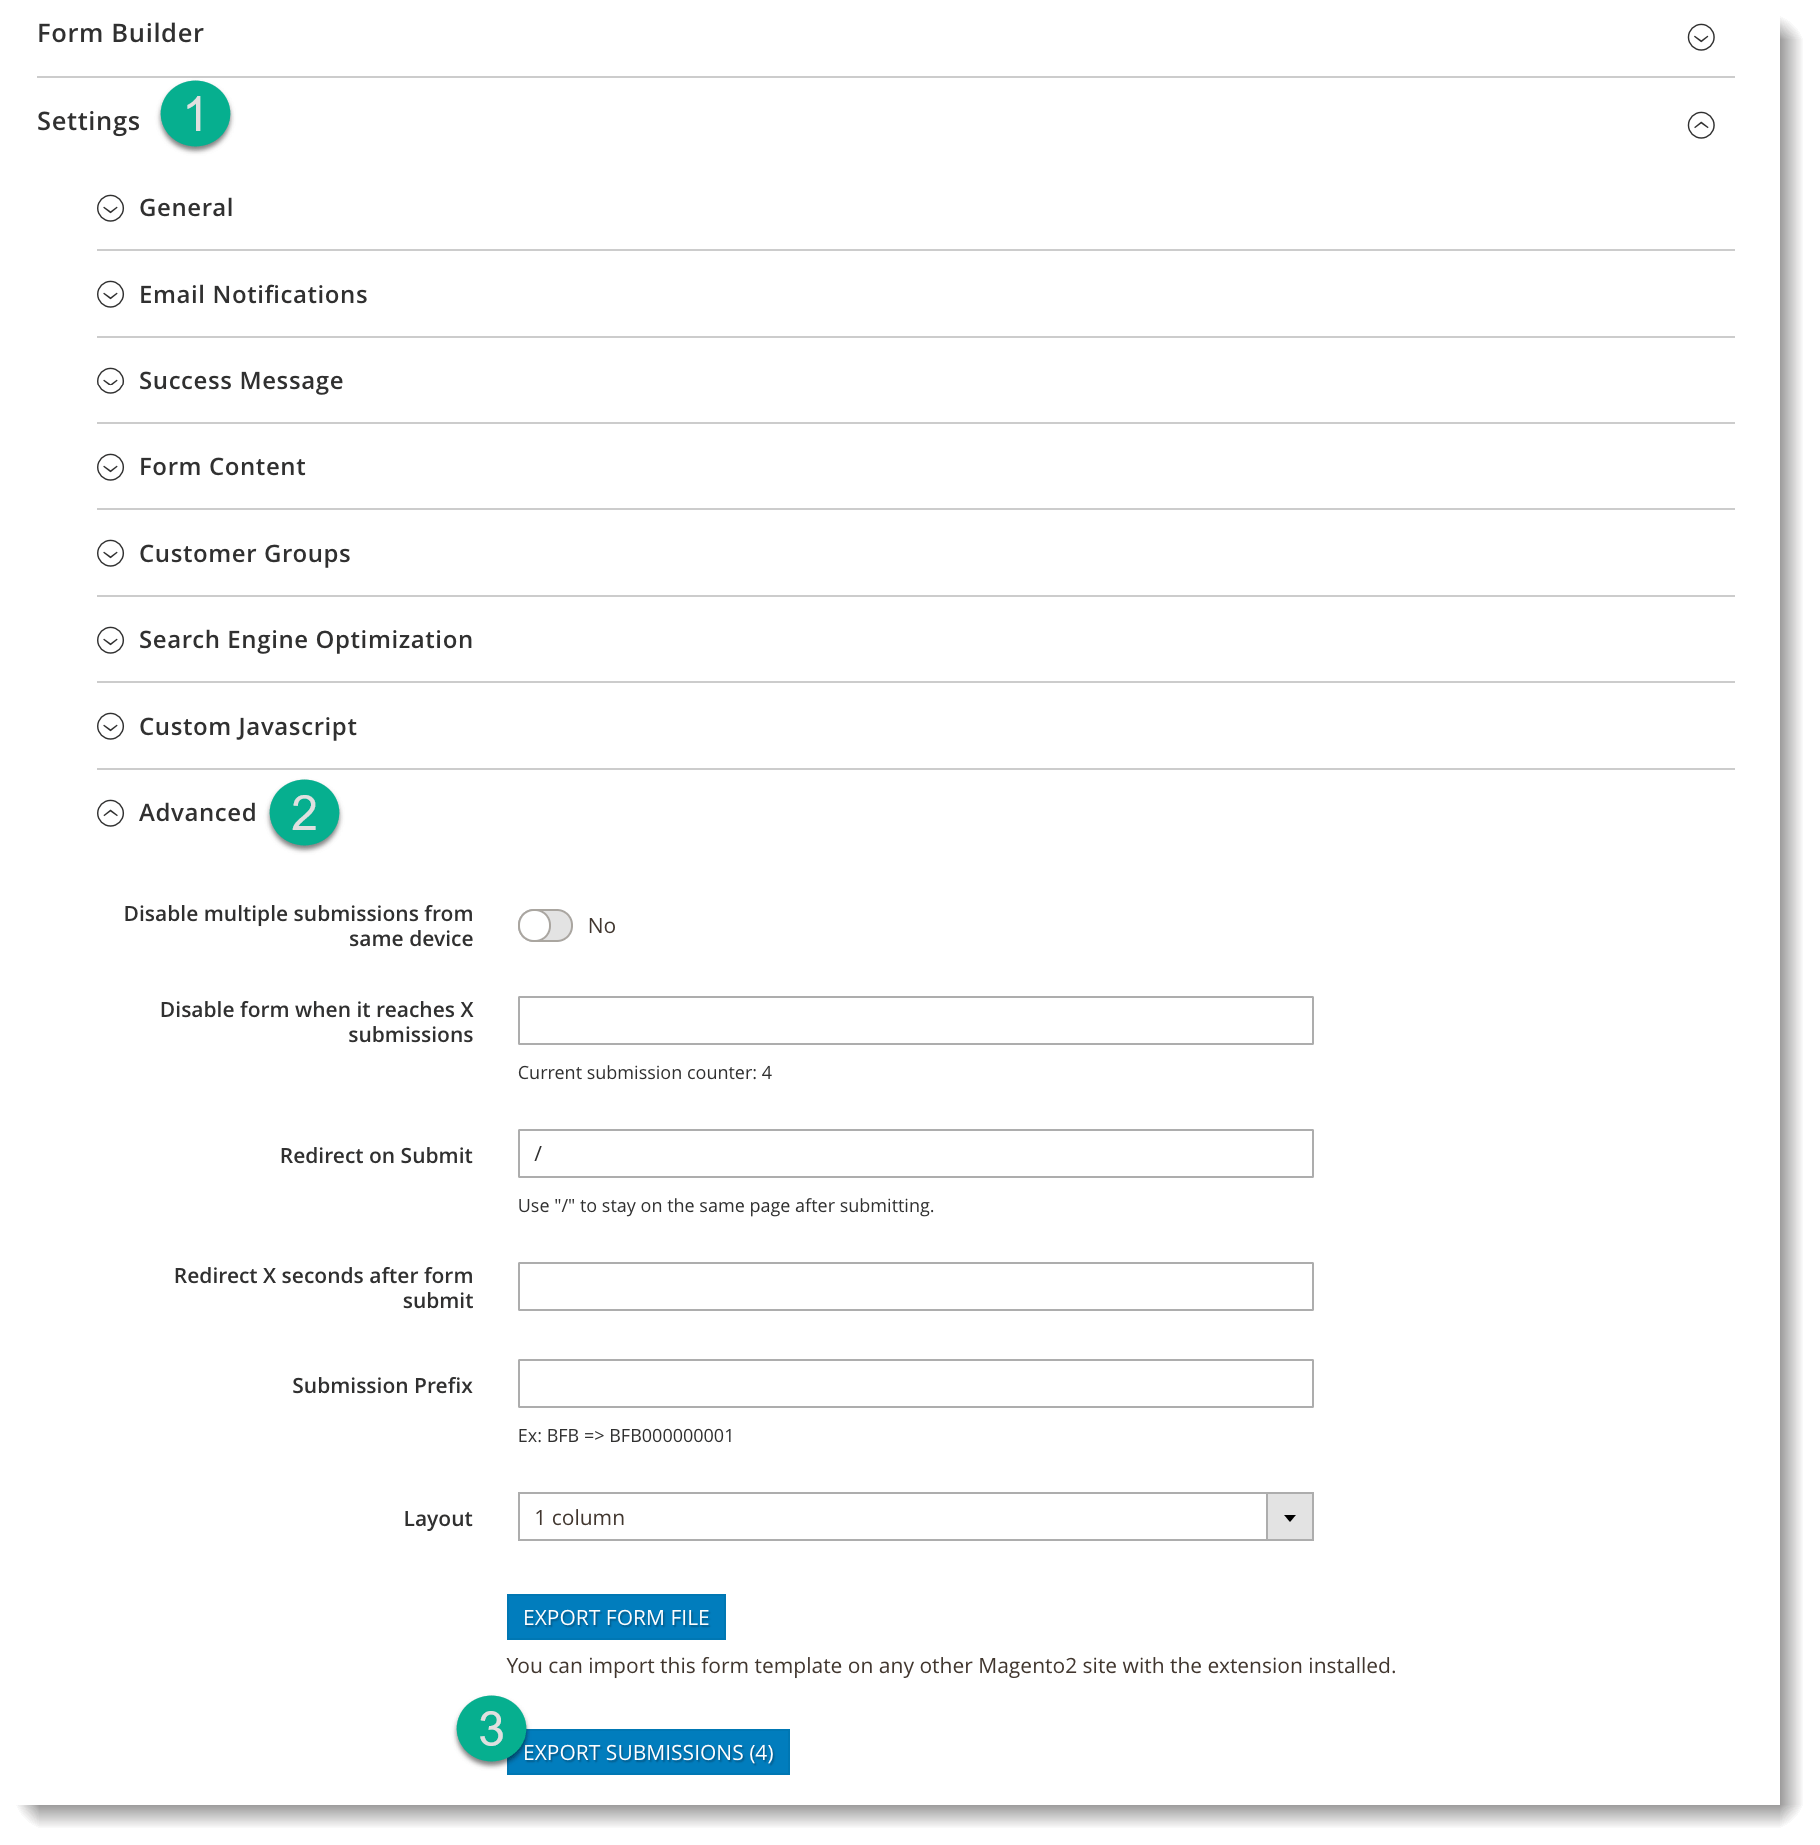
– Open Settings > Advanced. You will see the EXPORT SUBMISSIONS button at the bottom. All the submissions will be listed in a CSV file
If you are using MailChimp, you can install our MailChimp plugin so that all submitted emails will be automatically added to your email marketing lists.
Conclusion
In this article, we’ve showed you how to add newsletter signup form at page footer and import submitted emails to email marketing services such as MailChimp in Blue Form Builder. If you have questions or need support, feel free to leave us a comment below.

Try FREE Blue Form Builder demo today
Create whatever type of Magento form in any style you want just in minutes. Just by drag & drop.
 Magezon Blog Help Merchants Build Comprehensive eCommerce Websites

