When Magento store owners want to offer customers extra options on the detail page of a product, Magento 2 custom options should be the first choice.
This way, online merchants like you don’t have to rely on the product attributes. Instead, you only need to add their wished options right on the product edit page, particularly in the Customizable Options section. These additional options are usually displayed below the product description. They may be optional or required, depending on your business purposes.
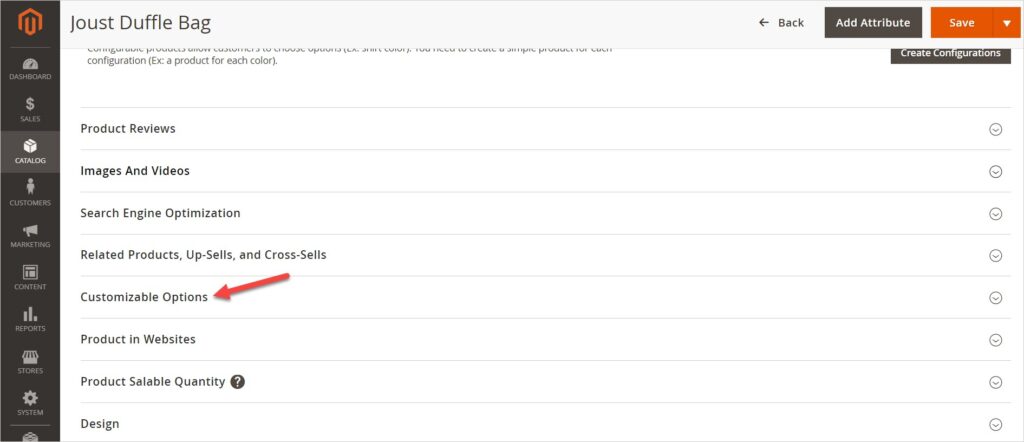
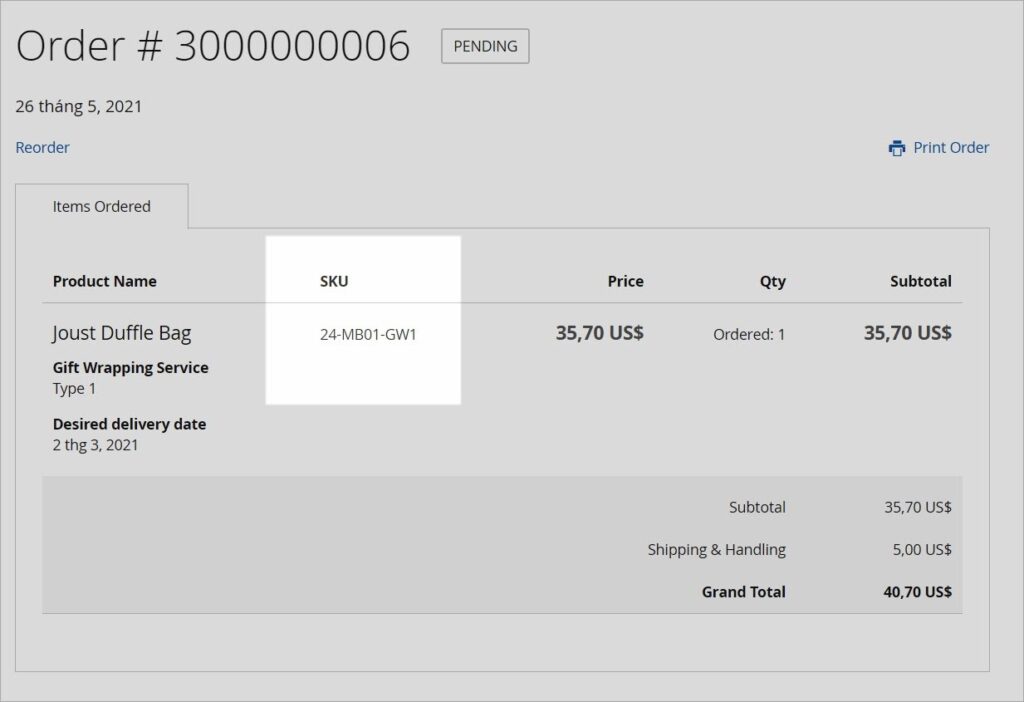
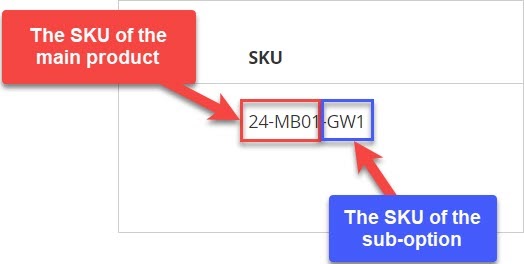
Note that we can set the SKU of these extra options in the backend. However, their SKUs are simply a suffix added to the SKU of the main product. So, we can’t use the SKUs of these extra options to track the inventory. The custom option (customizable options) really works if your inventory is small and simple. However, if you have a large and complex inventory, you should use Magento 2 configurable products instead. Ok, let me give a concrete example of what I mean above.
| You may also like: Magento 2 Simple Product with Custom Options vs. Configurable Product Magento Attribute Input Types: Explanation + Examples |
Table of contents
Example of Magento 2 Custom Options
One of our outstanding Magento 2 extensions is Magezon Page Builder, a downloadable product at $169. As you can see below, the product has several extra options for customers to select. When your customers take any option among them, a markup is automatically applied to the price of the base product.
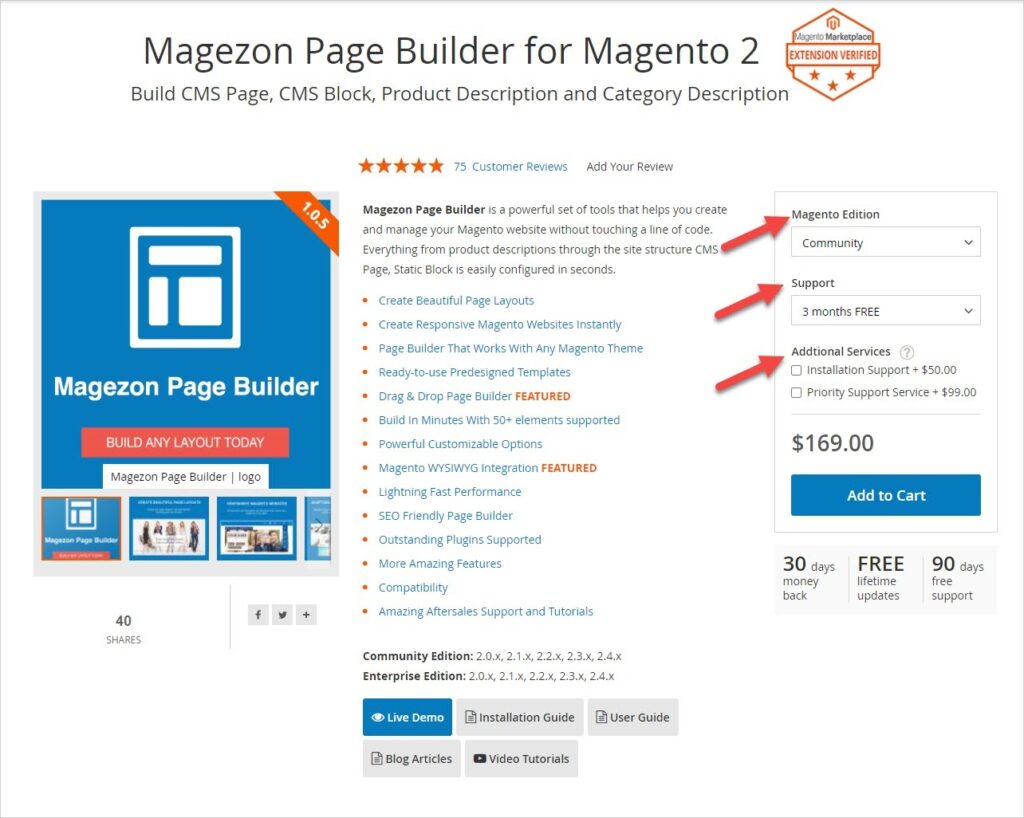
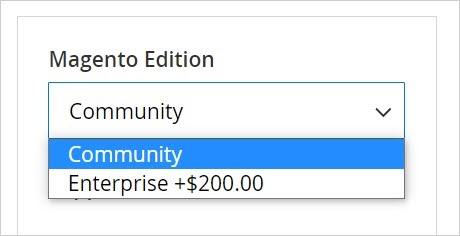
Below are extra options for our product Magezon Page Builder. NOTE: We call Magento Edition, Support and Additional Service as extra options, and their values as sub-options. So, please keep that in mind.
- Magento Edition:
- Support:

- Additional service:
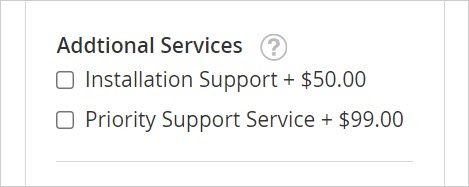
One thing is, you can choose the type of data that can be entered and the format of the field: Text, File, Select, Date. For example, the input type of the option “Additional Service” above is Checkbox.
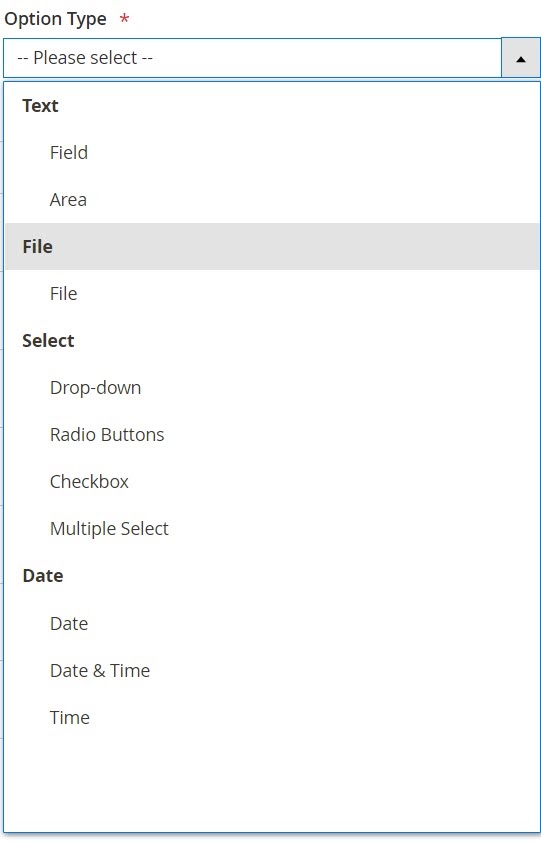
- Text: Allow you to create a text box in which customers can enter the text. When you set these input types, there appears a field named Max Characters that limit the characters entered in the box.
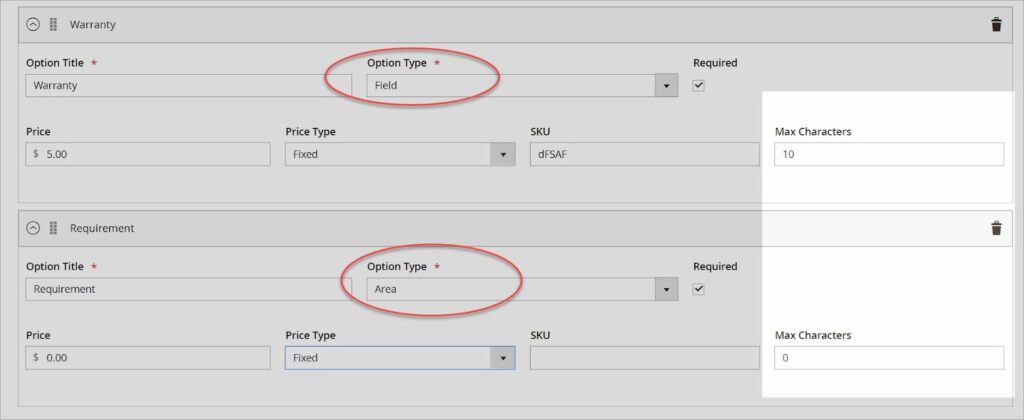
- Text Field: It’s a one-line field that lets shoppers enter texts.

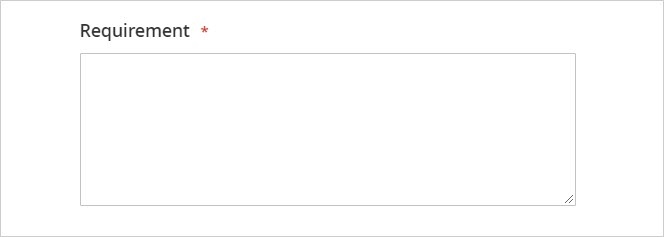
- Text Area: It’s a multi-line field that allows text entry, a short paragraph as usual.
- File: Enables customers to upload a file from their devices. You must set the compatible file extension. You can decide whether to set the maximum image size.


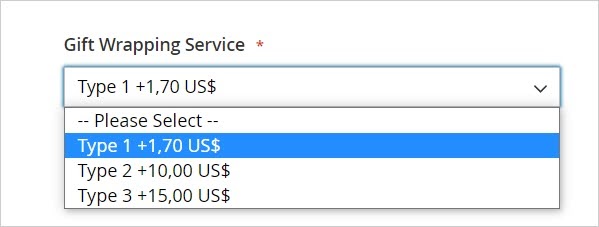
- Select: Let you create a list of options for customers to select. Select has four input types: Drop-down, Radio Button, Checkbox, Multiple Select. In the backend, they all have the same format like below:
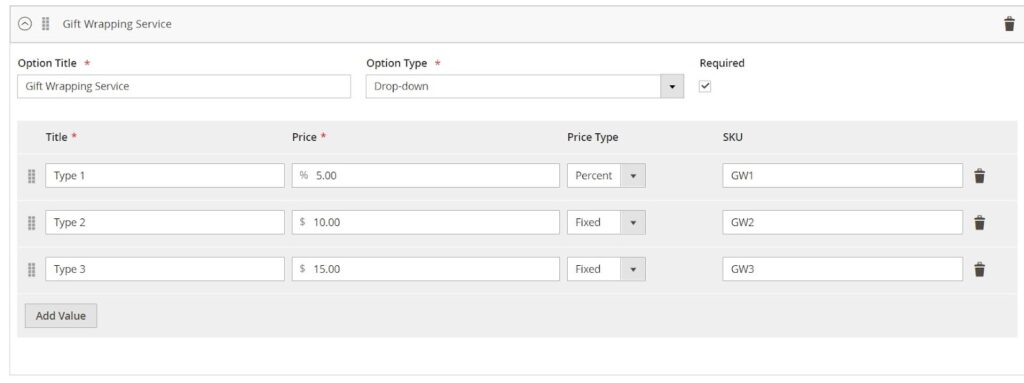
- Drop-down: This option allows customers to select ONLY one option from the drop-down list.
- Radio Button: Like the drop-down input type, the Radio button enables shoppers to take ONLY one from a set of options.

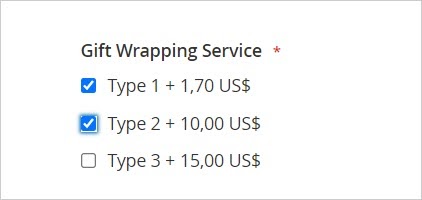
- Checkbox: With this input type, customers can choose more than one option by ticking the checkbox.
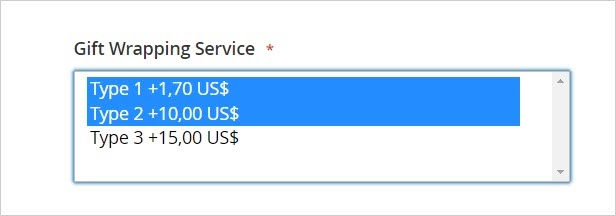
- Multiple select: Allows customers to select various options from a drop-down list at a time. (Press and hold the Ctrl key to select many items at a time).
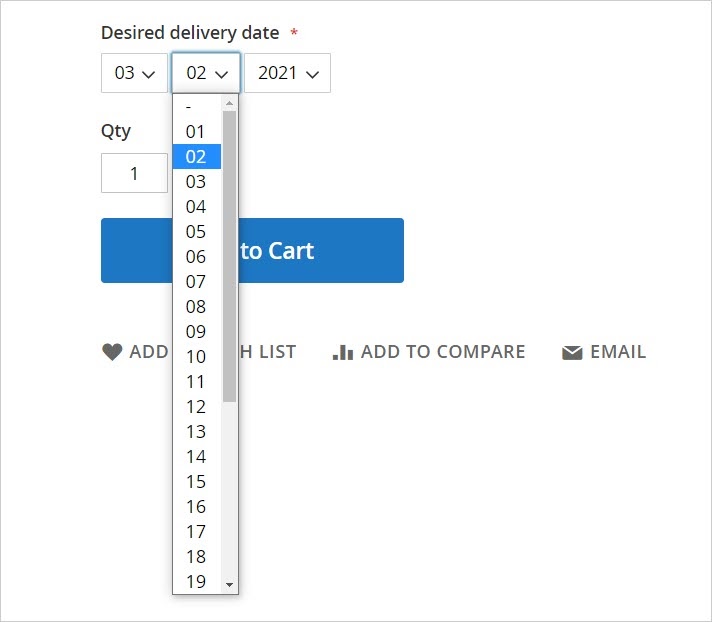
- Date: With Date, you can allow customers to select the date, time or both of them from a drop-down date picker. Also, there are three input types in this group: Date, Time, Date & Time with the same back-end format like below:

Now you know what Magento 2 custom options are. Let’s move on to the next part: How to set it up.

Optimize Your Magento Store With Powerful Extensions
Looking for fast, efficient and well-coded extensions to boost sales for your Magento stores? Then visit Magezon website and grab necessary add-ons to optimize yours today!
How to Configure Custom Options in Magento 2
To set up Magento 2 Custom Options, do the following steps:
- From the admin sidebar, go to Catalog → Products.
- Then you’ll be redirected to the product grid. Select the product to set up the custom options.
- After completing the required settings, scroll down and expand the Customizable Options section.
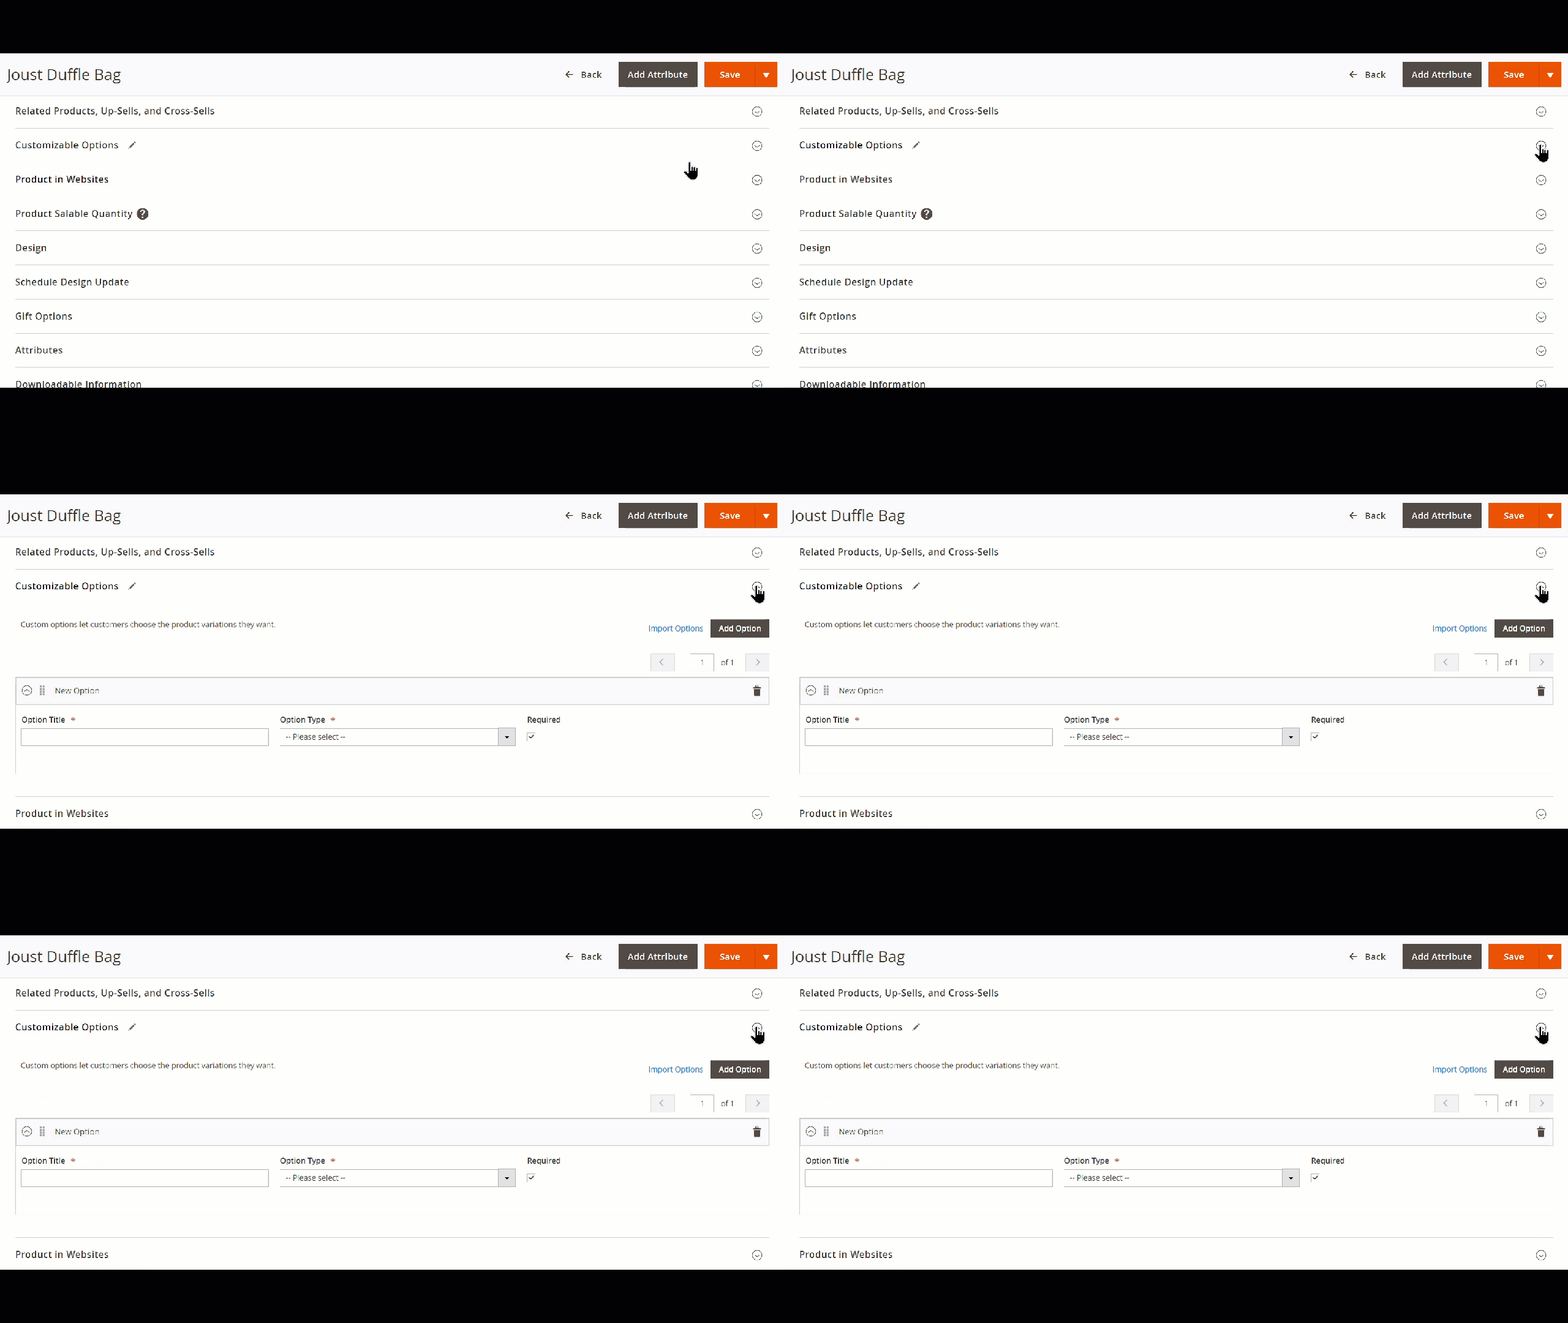
- Click on the Add Option button.

- An expandable table New Option appears:

Do the following steps:
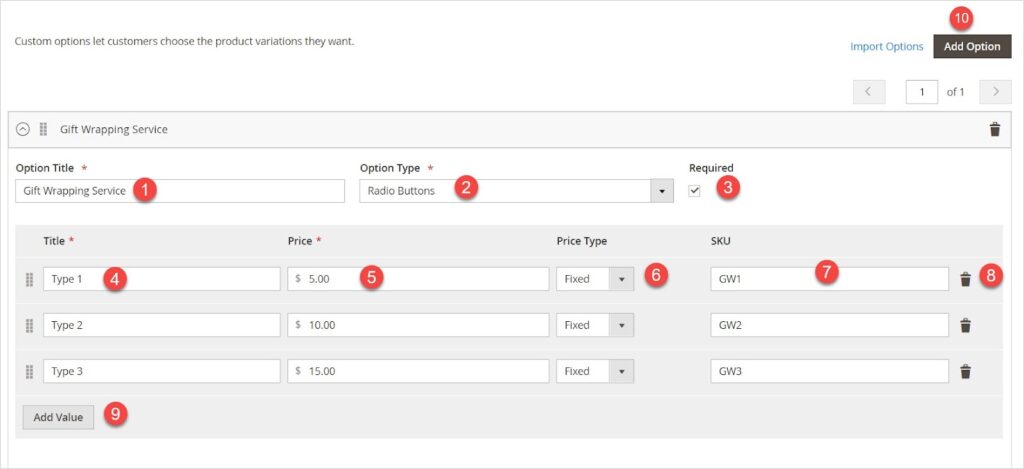
(1) Enter Gift Wrapping Service in Option Title.
(2) Choose Radio Buttons as the option type.
(3) Tick Required to require customers to purchase the option.
After you choose the option type, a selection of sub-options appear:
(4) Enter Type 1 in the first row of the first column.
(5) Enter 5 as the price of Type 1.
(6) Select the type of price: Fixed price ($) & Percentage (%, the percentage of the main product price).
(7) Enter the SKU of the sub-option. The sub-option SKU is a suffix that is added to the main product SKU. Let me show you the SKU of the product on the order detail page.
(8) Remove the sub-option by clicking the trash bin icon (if needed).
(9) Add the sub-option by clicking the Add Value button.
(10) Add the option by hitting the Add Option button.
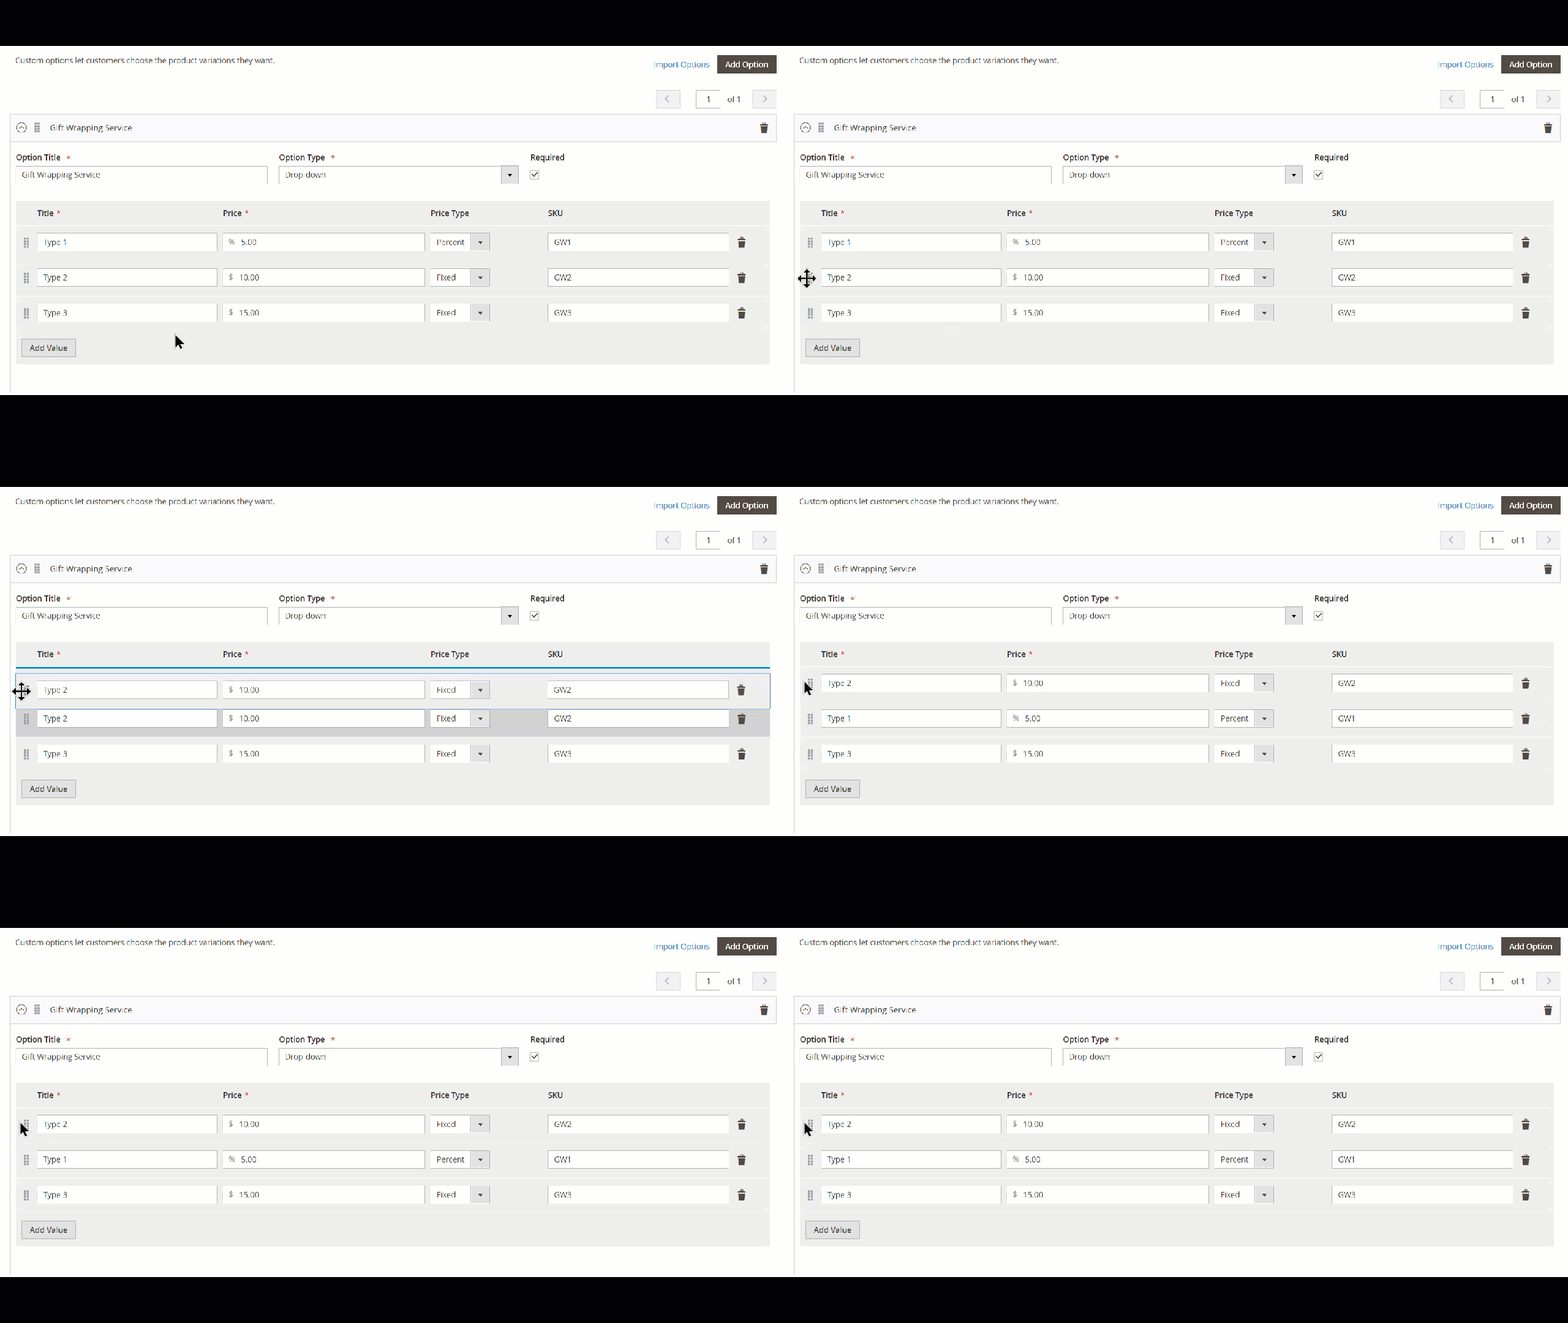
To change the position of the sub-options, drag and drop the icon like below:
Apply the same steps to the next option. After finished, hit Save.
To Wrap it up
I hope this blog post helped you understand more about Magento 2 custom options and how to configure them. Any questions or ideas about it? Why not share it with us? Next time, I will continue resolving the confusion about custom options in Magento 2. So, stay tuned.
And, don’t forget to follow the Magezon Tutorial series at Magezon Blog to expand your knowledge of Magento.
—————————————-
If you are looking for a well-coded and rich-feature extension for your Magento store, please visit our website to pick one.

Optimize Your Magento Store With Powerful Extensions
Looking for fast, efficient and well-coded extensions to boost sales for your Magento stores? Then visit Magezon website and grab necessary add-ons to optimize yours today!
 Magezon Blog Help Merchants Build Comprehensive eCommerce Websites

