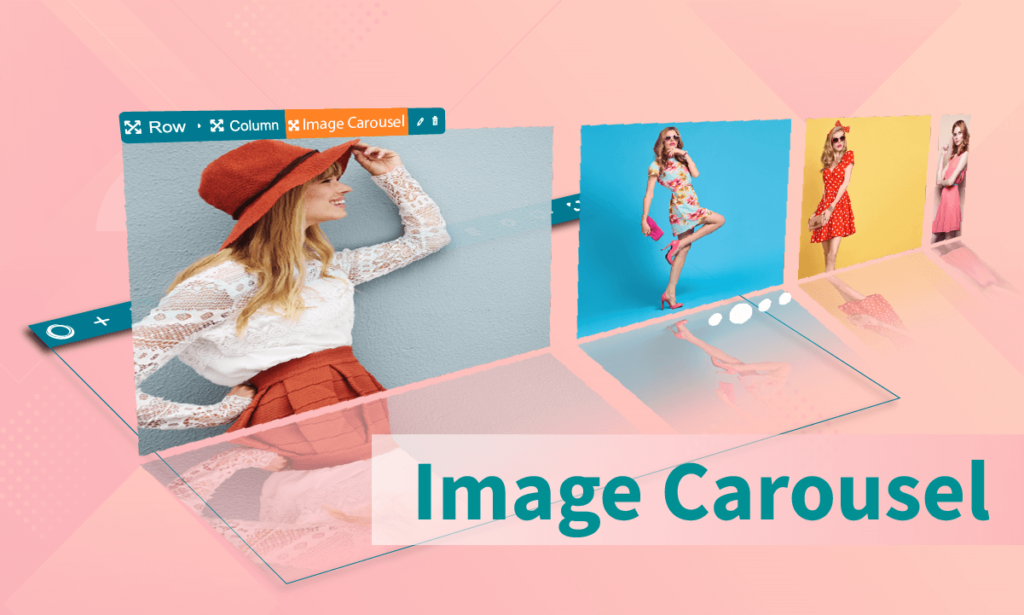
In Magezon Page Builder, Image Carousel is known as the powerful tool which allows you to display dozens of gorgeous images on your page. Often, you take advantage of this element to create banners or autoplay sliders. But do you really know well how to make a stunning image carousel with Magezon Page Builder, particularly a product slider? If the answer is no, this blog post is definitely for you.
To illustrate, we will show you an example of the Image Carousel element in our restaurant landing page. Please go over the section “Restaurant Menu” before getting to the point.
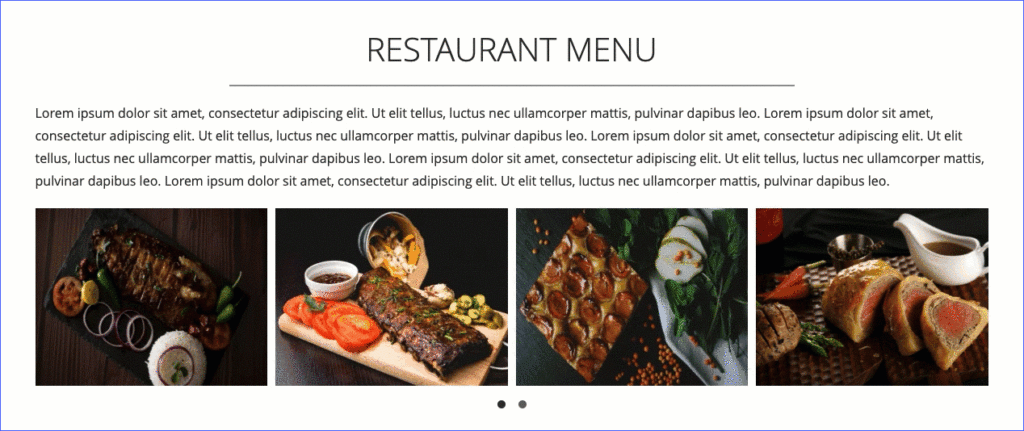
Bear in mind, in this tutorial, we will focus on 3 tabs only in the Image Carousel settings. It is because they own the key features which make your page carousel stunning. So, what are they?
- Images
- Image
- Carousel Options
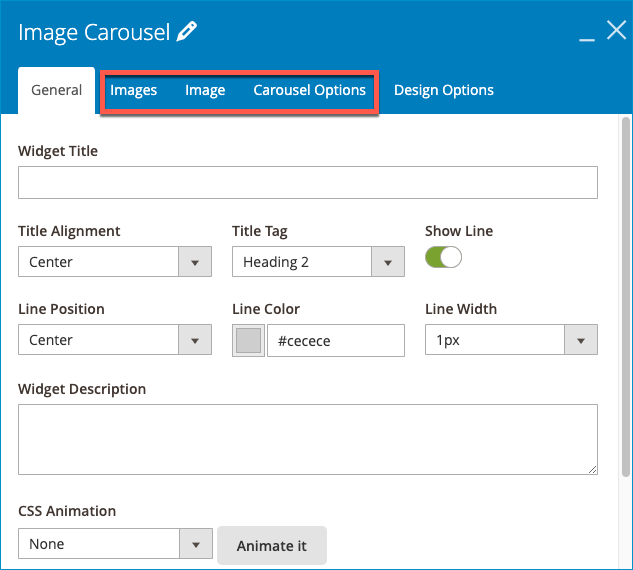
Without any more delay, now let’s go into details!
Table of contents
1. Images Tab
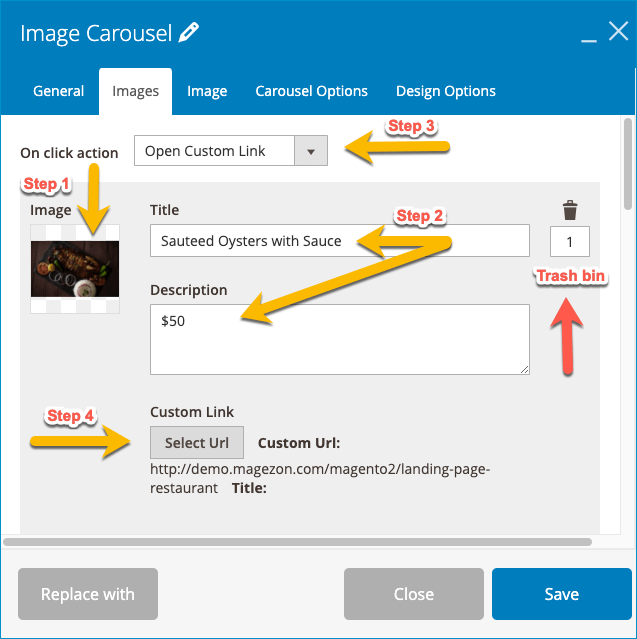
Step 1: Upload the relevant Image. Alternatively, you can select the image from your media gallery if you have already uploaded it.
Step 2: Type Title as the dish name and Description as its price.
Step 3: In this case, we use the link for each dish so that clients can know well about that dish. To do it, choose Open Custom Link on the On Click Action field.
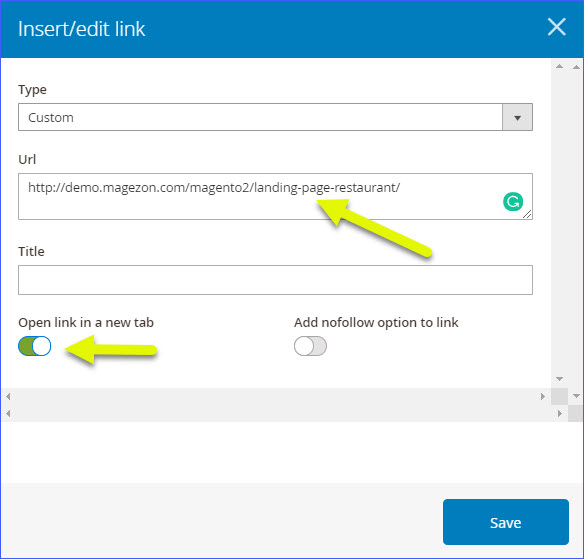
Step 4: Click Select URL. Copy and paste the link of the dish on the URL bar. Plus, select the Open link in a new tab.
Here is the back-end setting of the Images tab:
And below is Insert/edit link in Select Url (Step 4):
Note:
- Beautiful images can be found on photo stocks such as Unplash.com, Behance.net.
- To resize images for better UX and SEO, use Snagit software and Tinypng.net.
- Trash bin: By clicking this icon, you can remove the entire image. Besides, right below the trash bin is a blank bar. You can change the order of the image by filling the desired number in it.
2. Image Tab
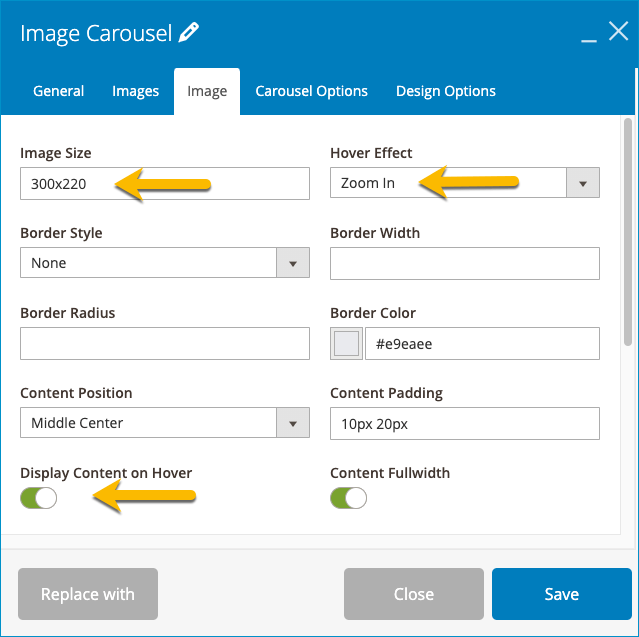
On Image tab, put your focus on Image Size, Hover Effect, Display Content on Hover. Let me show you why these factors contribute to your stunning image carousel.
- Image Size: Our Image Size setting is 300×220. This means all selected images are cropped to the same size to ensure the image quality on display.
- Hover Effect: Zoom in effect, in particular, will highlight the dish on hover by enlarging its image.
- Display Content on Hover: Content here is the name and price of the dish. Only when customers hover over the dish will the content appear. The sole purpose is that it can not cover the image.
Below is the Image Setting:
3. Carousel Options
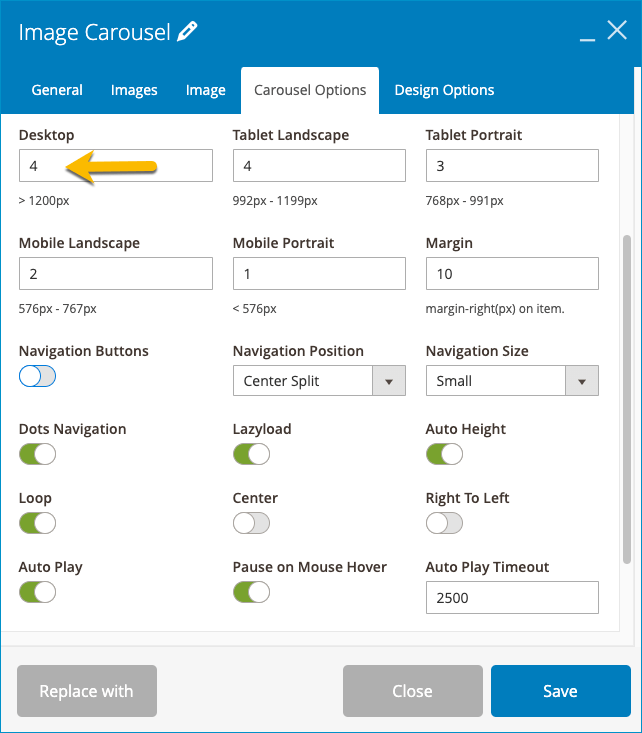
Step 1: Fill the number of the displayed images as you want.
Step 2: Then, choose the following fields:
- Dots Navigation: Toggle on to give users better control of the slider
- Loop: It repeats the image slider, which creates a lively effect.
- Autoplay – Autoplay Timeout (2500): Instead of switching to another image manually, choose Autoplay slider with a reasonable Auto Timeout at 2500.
- Pause on Mouse Hover: This feature enables us to stop the slider from running when hovering over a dish. Much more convenient, right?
- Lazyload: Lazyload ensures that images will not be loaded until users scroll down to them, which accordingly increases load speed and UX.
And here is the setting of the last tab, Carousel Options:
You may also be interested in learning other Magezon Page Builder:
Get to Know CSS Icon Box in Magento 2 Page Builder Open Source
Magento 2 Page Builder Accordion: Benefits and Configurations
Time to Get to Work
After the detailed tutorial on how to make a stunning image carousel with Magezon Page Builder Magento 2.3, you sure are ready to take action, right? We are really honored to see it with the help of Magezon Page Builder.

Try FREE Magezon Page Builder demo today
Easily create beautiful, engaging Magento website in any style whenever you want without relying on developers or designers. Just by drag & drop.
 Magezon Blog Help Merchants Build Comprehensive eCommerce Websites

